¶ 1. Filament Cutter
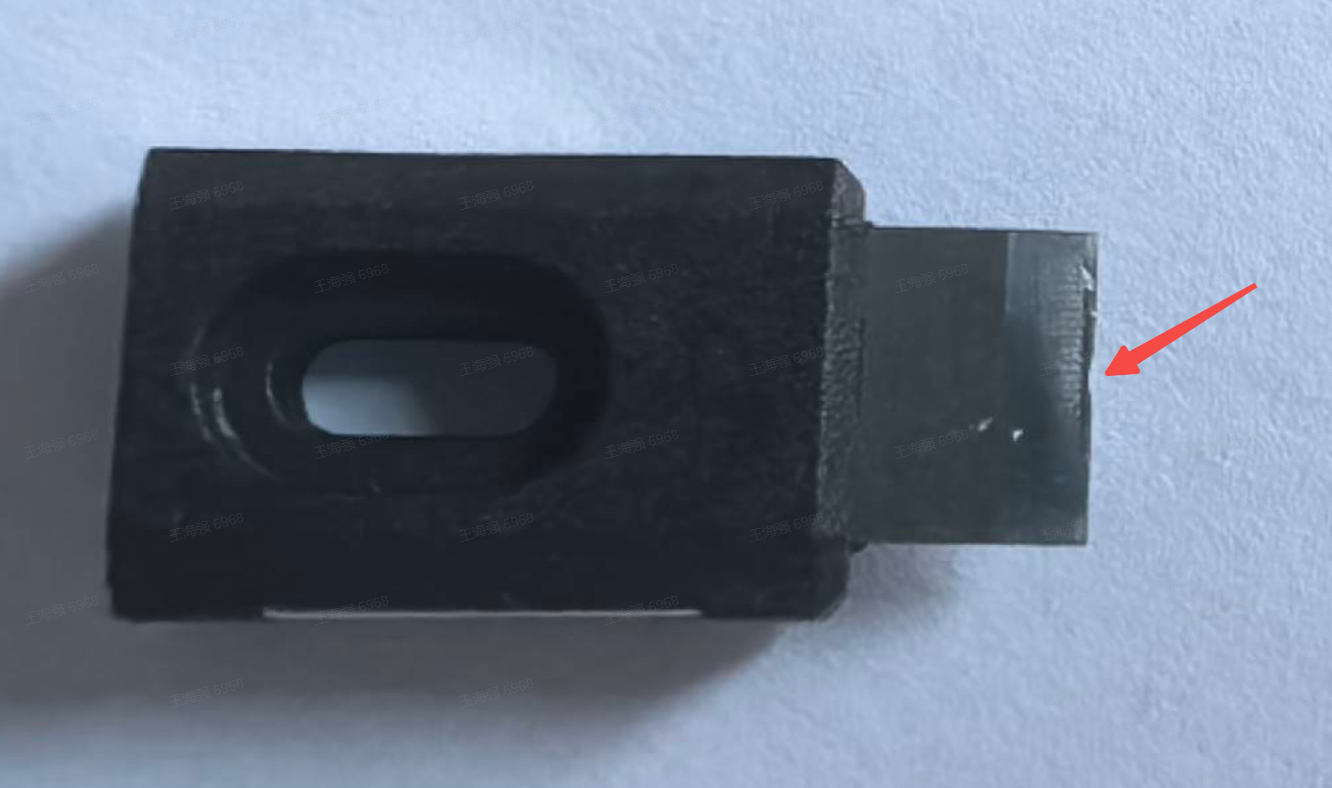
To cut the filament during replacing. After frequent cutting, the cutter's blade may become dull, eventually failing to cut the filament properly. Regular check and replacement is needed.
¶ 1.1 When to Maintain
For PLA/ABS/PETG/PC filaments, inspect after printing 5 rolls of filament.
For fiber-reinforced filaments, inspect immediately after printing 1 roll if frequent cutting occurs.
¶ 1.2 How to Maintain
Follow the cutter replacement procedure, remove the cutter. Replace it if the cutter worn.
Replace K2 Cutter
¶ 2. Input Shaping
K2 Input Shaping includes filament cutter position calibration, and input shaping. After extended use, the belts may loosen, affecting print quality and the cutter position. Regular input shaping is needed.
¶ 2.1 When to Maintain
Operate it once per month.
¶ 2.2 How to Maintain
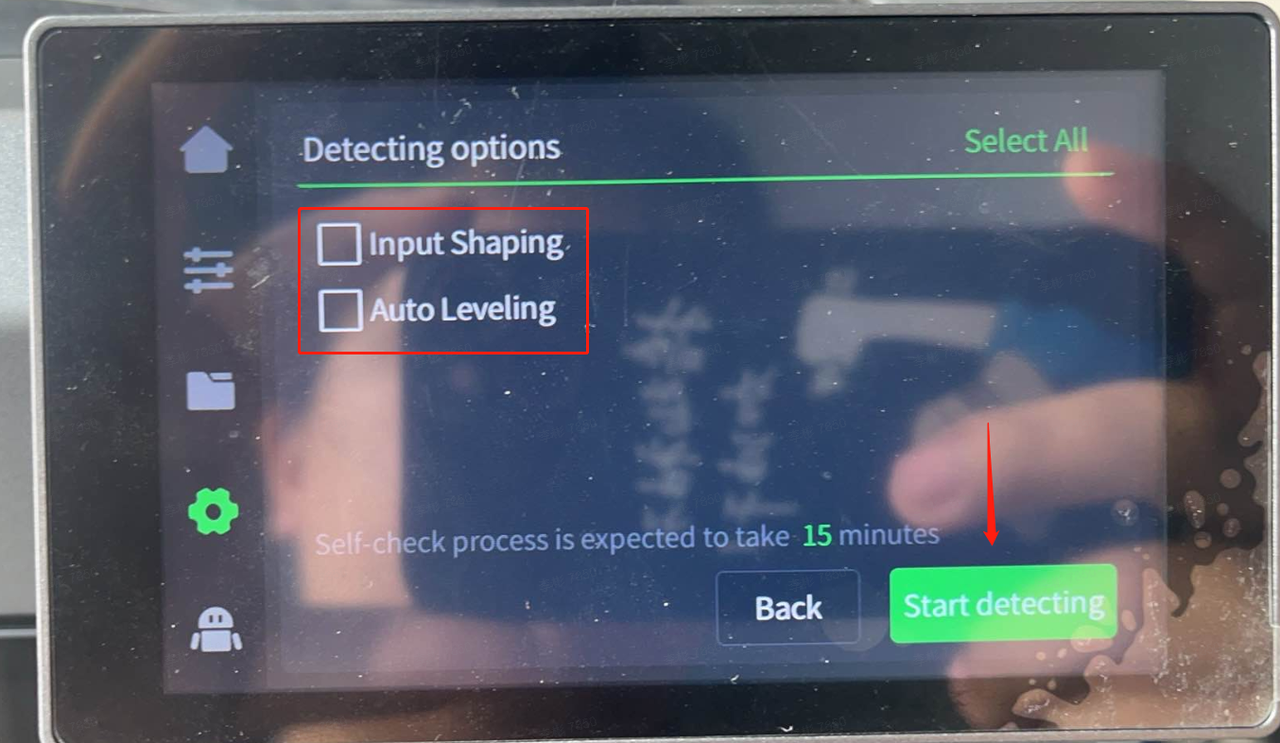
Ensure NO FILAMENT is loaded, as it may affect cutter position calibration.
Go to Settings - Detecting options - Tick "Input Shaping" then click "Start detecting"
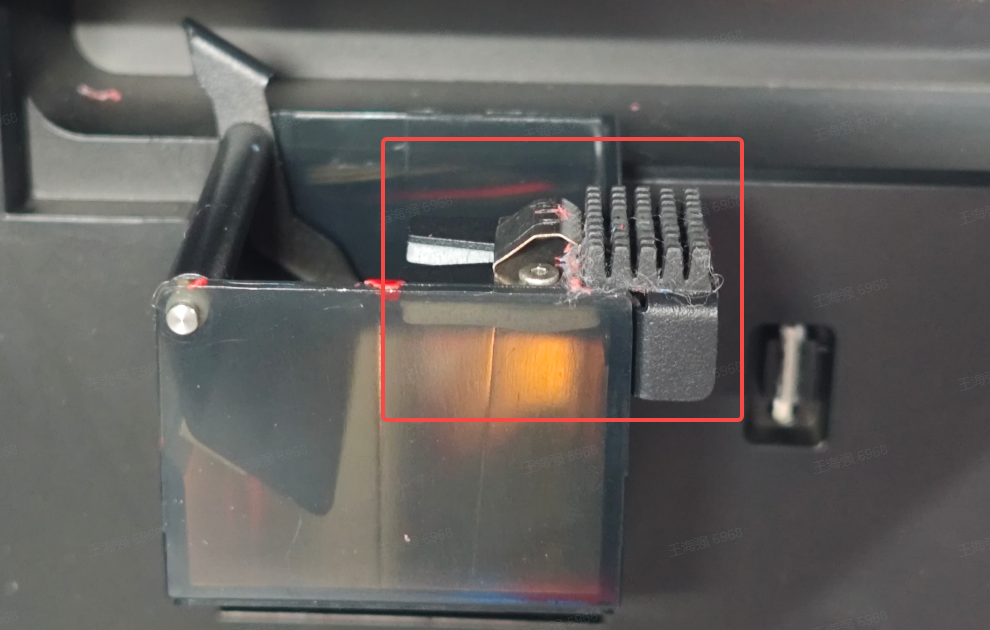
¶ 3. Nozzle Wiper
Keep the nozzle clean after filament flushing to keep it clear.
¶ 3.1 When to Maintain
Check the wiper‘s metal dome per day to ensure it moves freely.
Inspect the silicone adhesive tape weekly.
¶ 3.2 How to Maintain
If the metal dome is severely deformed, replace the entire nozzle wiper. Replace K2 Nozzle Wiper
Clean debris off the silicone adhesive tape. If heavily worn, replace it. (No need to replace wole nozzle wiper module)
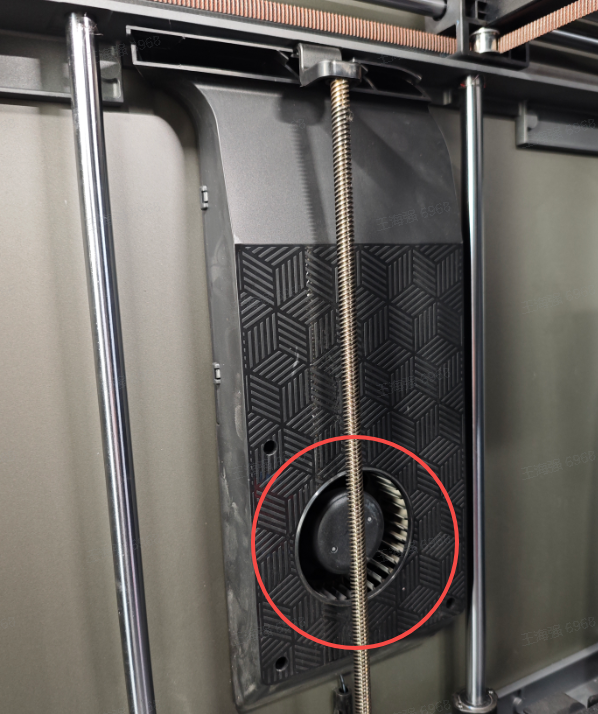
¶ 4. Fans
Regularly check the extruder motor cooling fan, model fan, heat break fan, and auxiliary fans for dust/debris accumulation. Clean promptly to ensure proper operation.
Extruder Motor Cooling Fan

Model Fan (the back of the extruder)
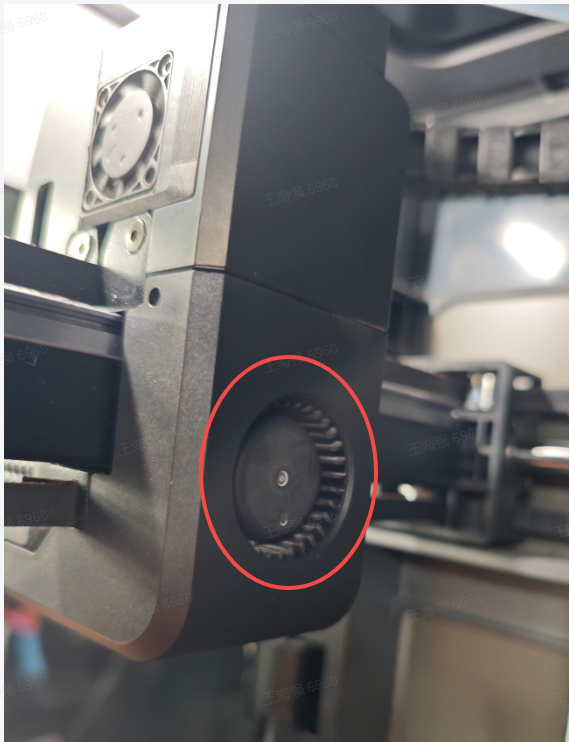
Heat Break Fan (the left side of the extruder, inside the front cover)
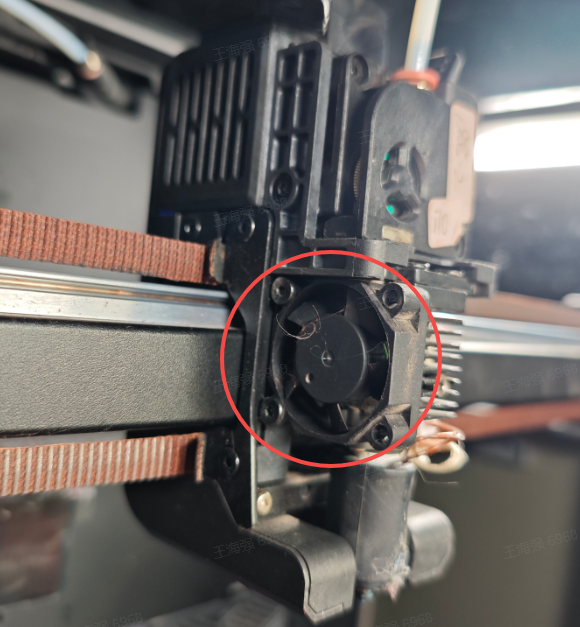
Auxiliary Fans (the both sides of the chamber)
¶ 4.1 When to Maintain
Check weekly for dust and debris.
¶ 4.2 How to Maintain
With the printer powered off, use tools to clear dust/debris from the fans.
¶ 5. Air Filter Cartridge

The activated carbon air filter cartridge filters particles generated during printing and should be replaced periodically.
¶ 5.1 When to Maintain
If printing 8 hours per day, replace it every 3 months.
If printing frequently, replace it every month.
¶ 5.2 How to Maintain
Open one side of the air filter cover plate, take out and replace.
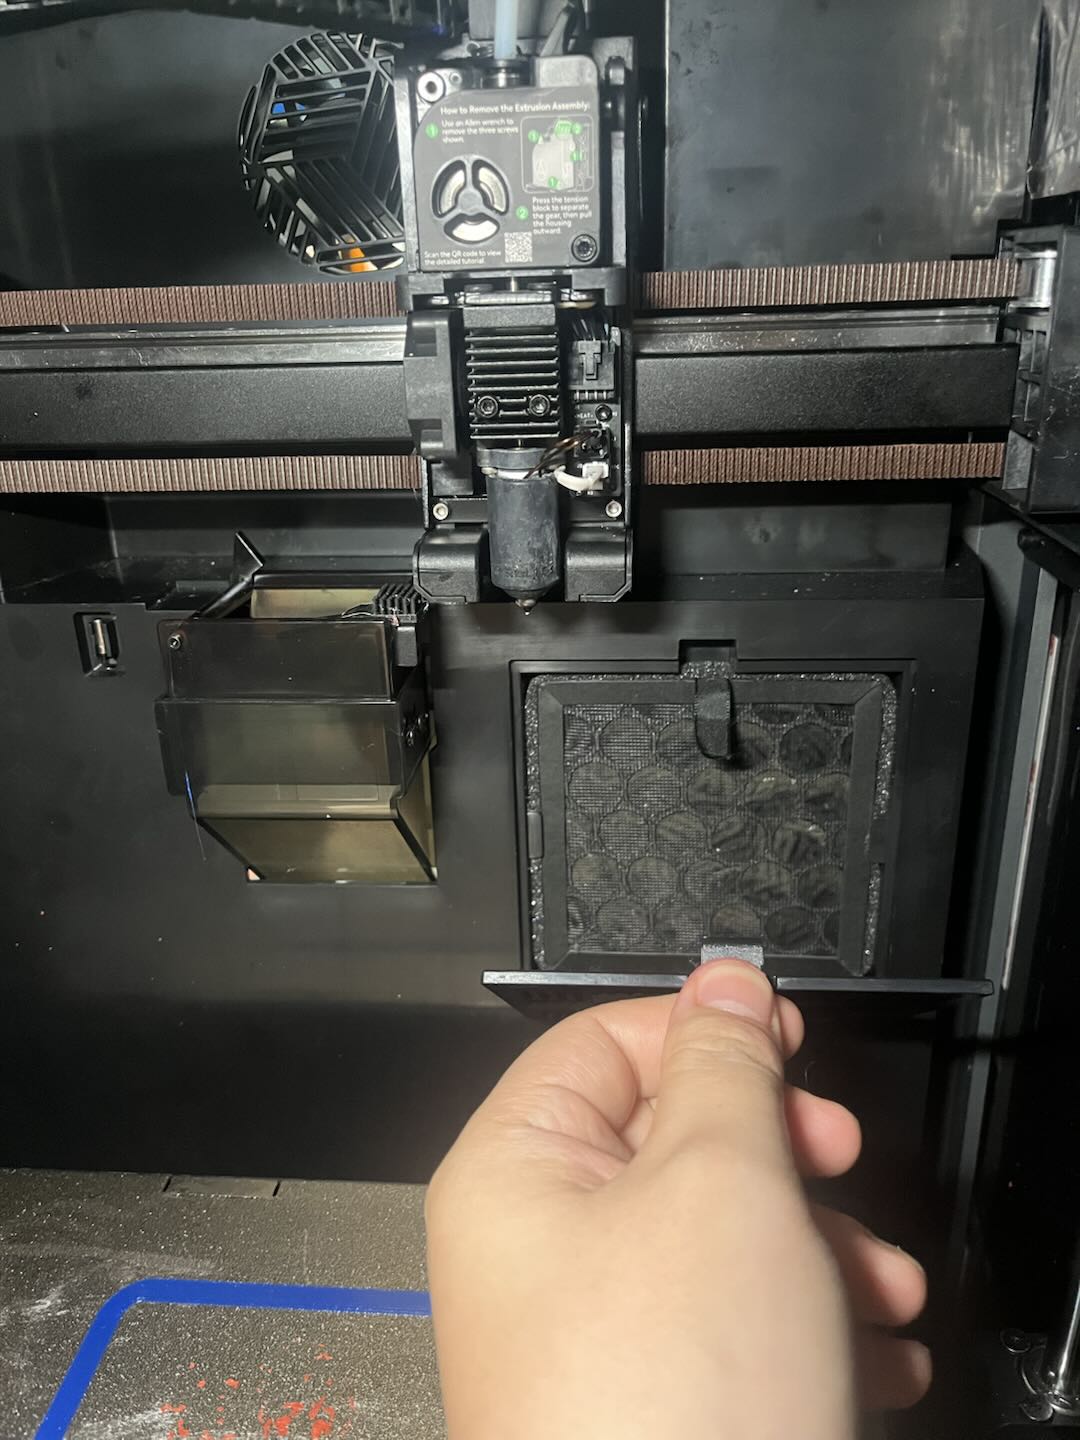
Open the side air filter covers and remove/replace the cartridge.
¶ 6. X-axis Guide Rails
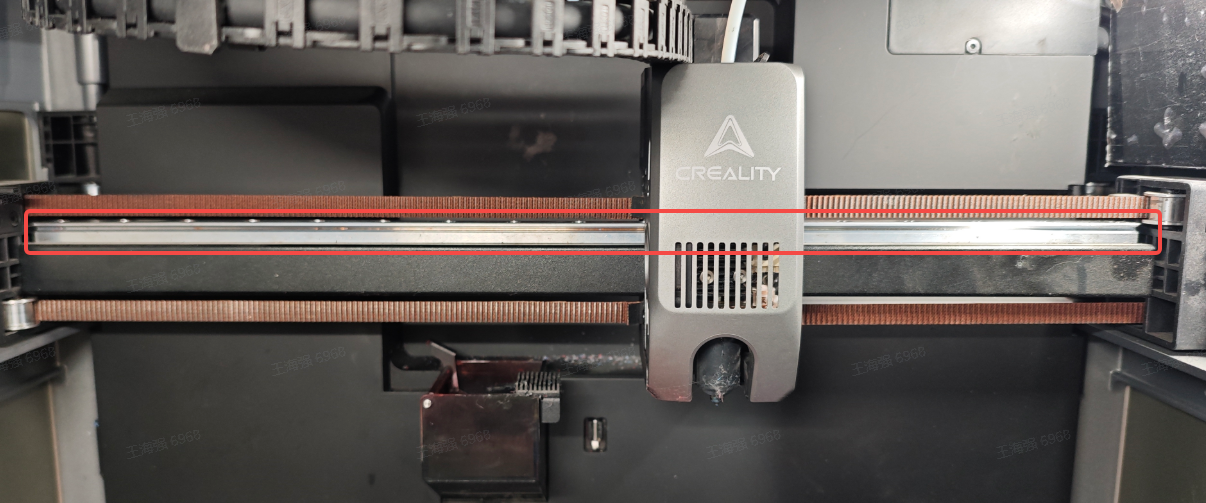
The guide rails need to be checked regularly for depletion of lubricating oil, dust or filament debris accumulation, etc. Regular cleaning and lubrication is required.
¶ 6.1 When to Maintain
Check monthly for dust or debris accumulation.
¶ 6.2 How to Maintain
Use dirt-free cloth to clean the rails' surface and apply thinner coat of metal anti-rust oil.
¶ 7. Y-axis and Z-axis Optical Shafts
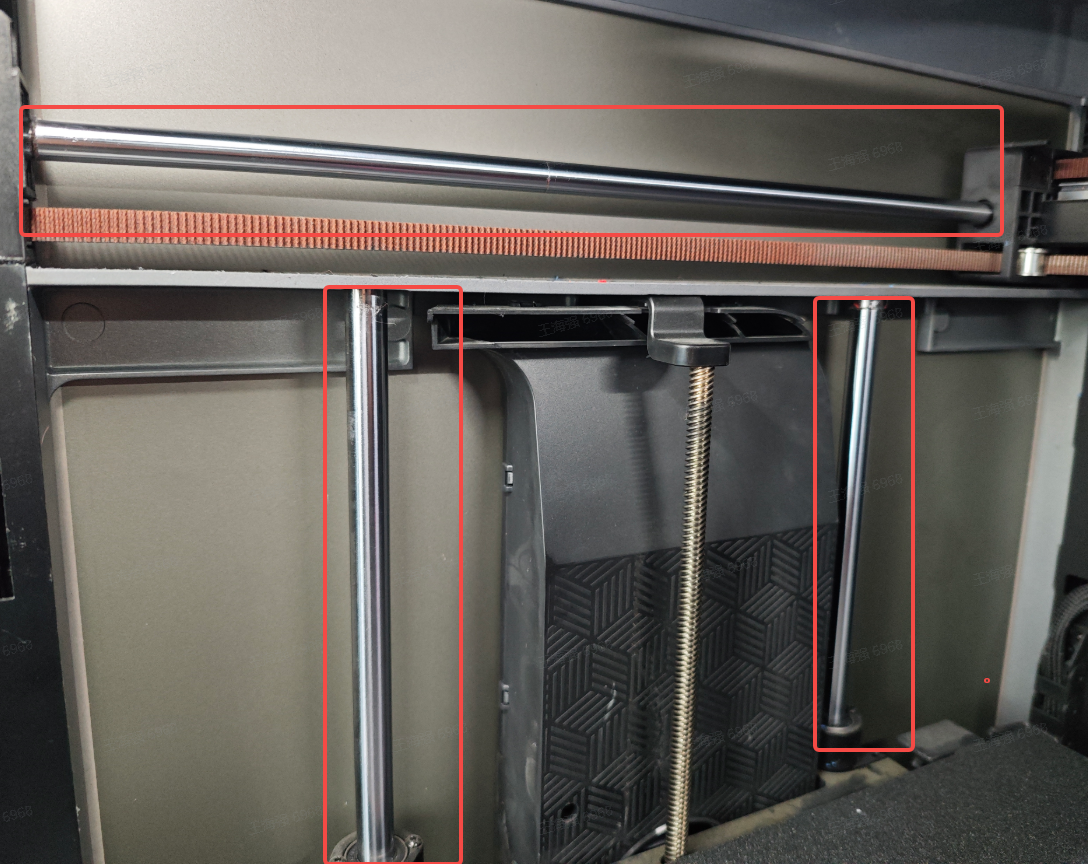
The Y-axis optical shafts and Z-axis optical shafts are pre-greased before leaving the factory. To prevent corrosion and to extend its service life, we suggested periodic maintenance.
¶ 7.1 When to Maintain
Check and maintain them every 3 months. If frequently printing volatile materials like ABS or ASA, maintain them every 5 days.
¶ 7.2 How to Maintain
Use a dirt-free cloth to clean the optical shafts' surface and apply grease.
¶ 8. Z-axis Lead Screws

K2 has two lead screws on the left and right side responsible for the up/down motion of the hot bed. Regular cleaning and lubrication is needed to ensure service life.
¶ 8.1 When to Maintain
Check and maintain every 3 months. If frequently printing volatile materials like ABS or ASA, maintain it every 5 days.
¶ 8.2 How to Maintain
Use a dirt-free cloth to clean the lead screw surfaces and apply grease.
¶ Other Parts that require maintenance
Parts that may need replacement during printer use.
- Nozzle: Replace K2 Nozzle
- Hotend: Replace K2 Hotend
- Extruder front cover: Replace K2 Extruder Front Cover
- Extruder filament cutter: Replace K2 Cutter
- Nozzle wiper assembly: Replace K2 nozzle wiper
- K2 Plus PTFE tube: Replace K2 PTFE tube
- CFS PTFE tube: Replace CFS Hub PTFE tube
¶ Friendly reminder
If you still haven't resolved the issue after following the steps in this document, or if you encounter any difficulties during the process, you can click the right corner of the wiki page online support to contact our after-sales team for more help.