¶ 1.Principle
The core logic of laser engraving on glass is not to "shave off" the material like engraving wood, but to trigger the thermal stress cracking inside or on the surface of the glass via a high-energy beam, forming tiny fracture points to present patterns. If you see a three-dimensional pattern inside crystal or glass while the surface remains intact and smooth, this is laser internal engraving.
Differences Between the Carving Methods for Square Glass and Spherical Glass ——
The core difference between the two lies in the different refraction of light when the laser penetrates the surface:
Square (flat) glass features a flat surface, so the refraction path of the incident laser is fixed and predictable, with a highly precise focal position. Therefore, a unified set of parameters applied globally is sufficient to easily complete the engraving process.
Spherical glass (curved surface) has a curved surface, which causes the incident and refraction angles of the laser at different positions to change continuously, making the focal point prone to shift. Therefore, it is necessary to use internal engraving oil to match the refractive index.
¶ 2.Preparations Before Carving
Before starting the carving, please prepare the following items and materials in advance
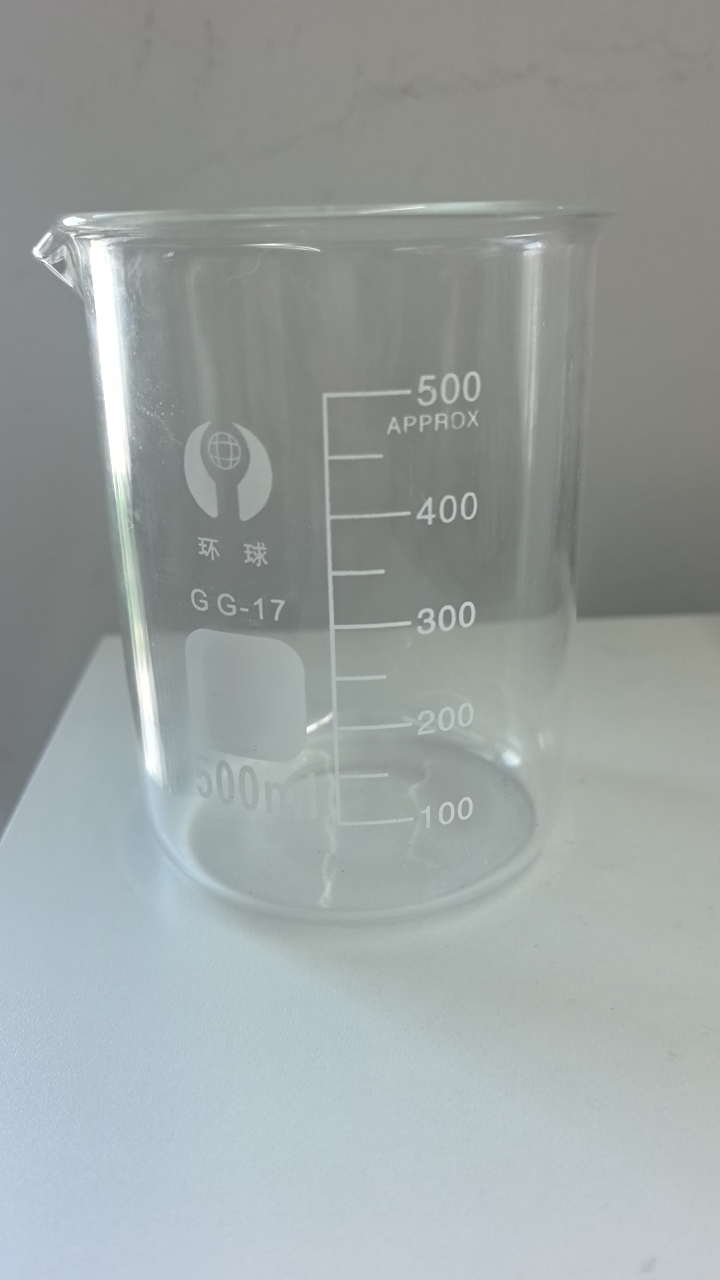
Container: The diameter and height shall be larger than the crystal ball
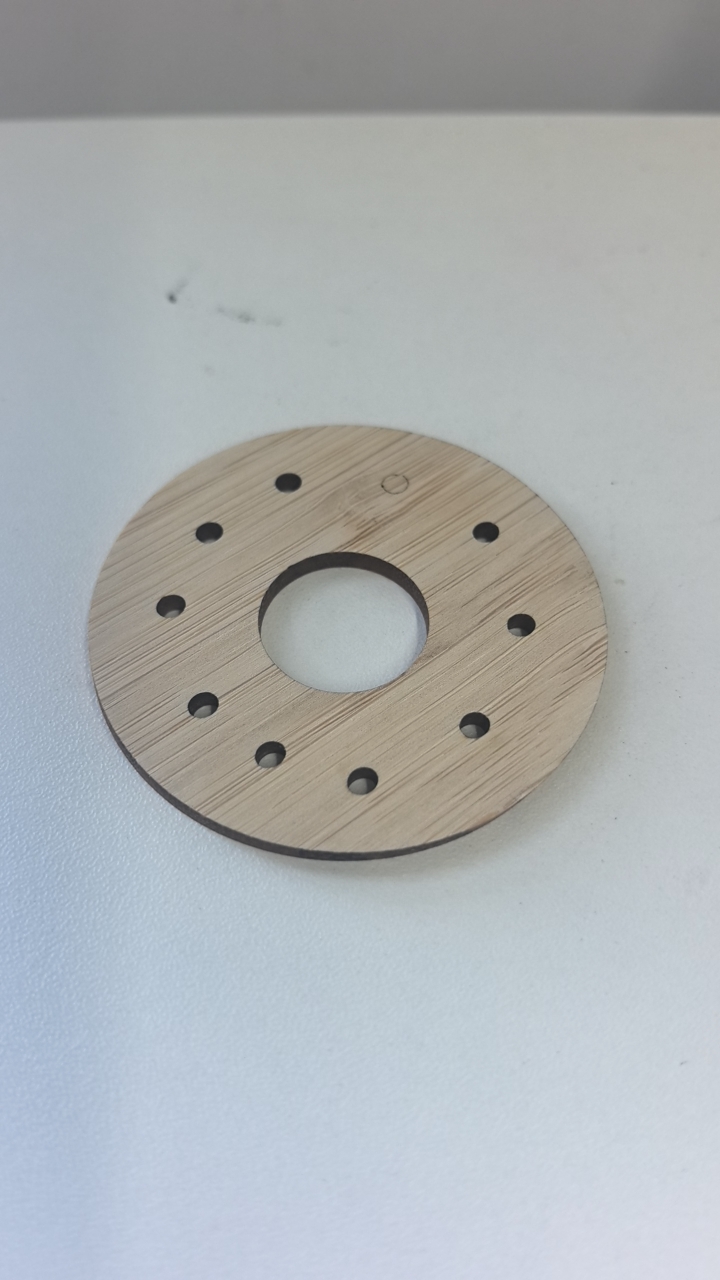
Base: Used to fix the crystal ball inside the container
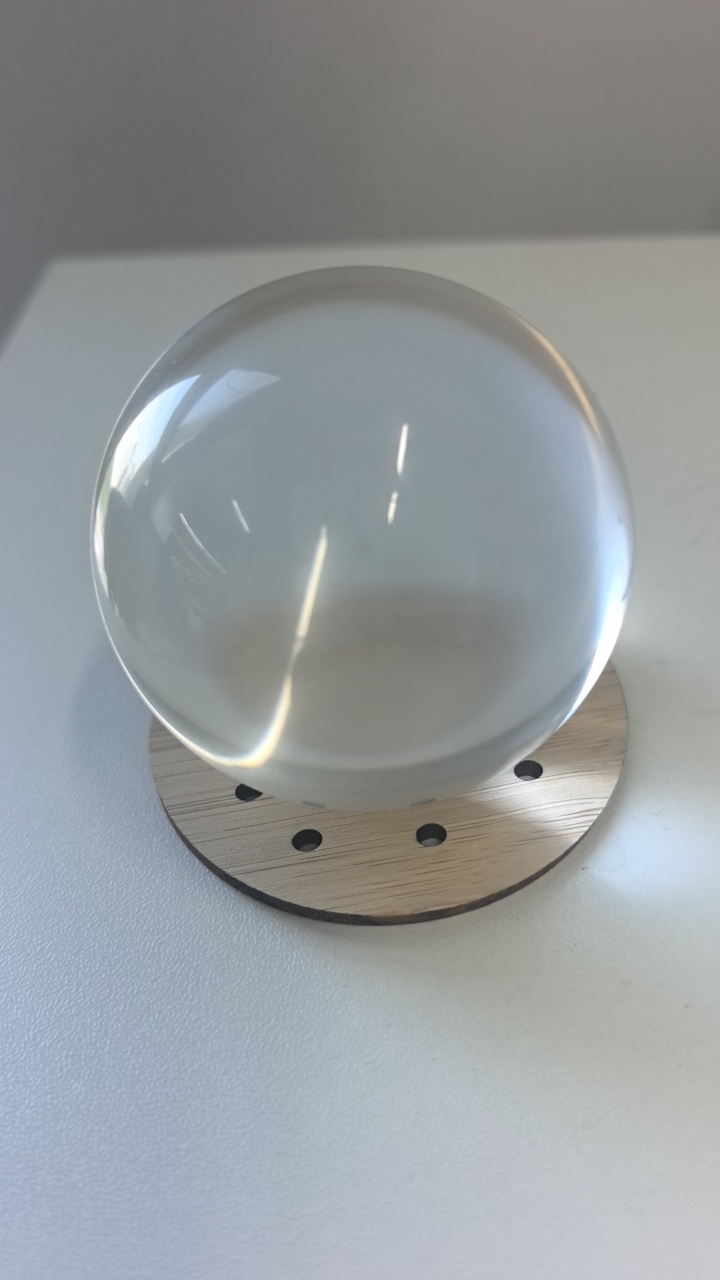
Crystal Ball: Must be a regular sphere with no impurities inside
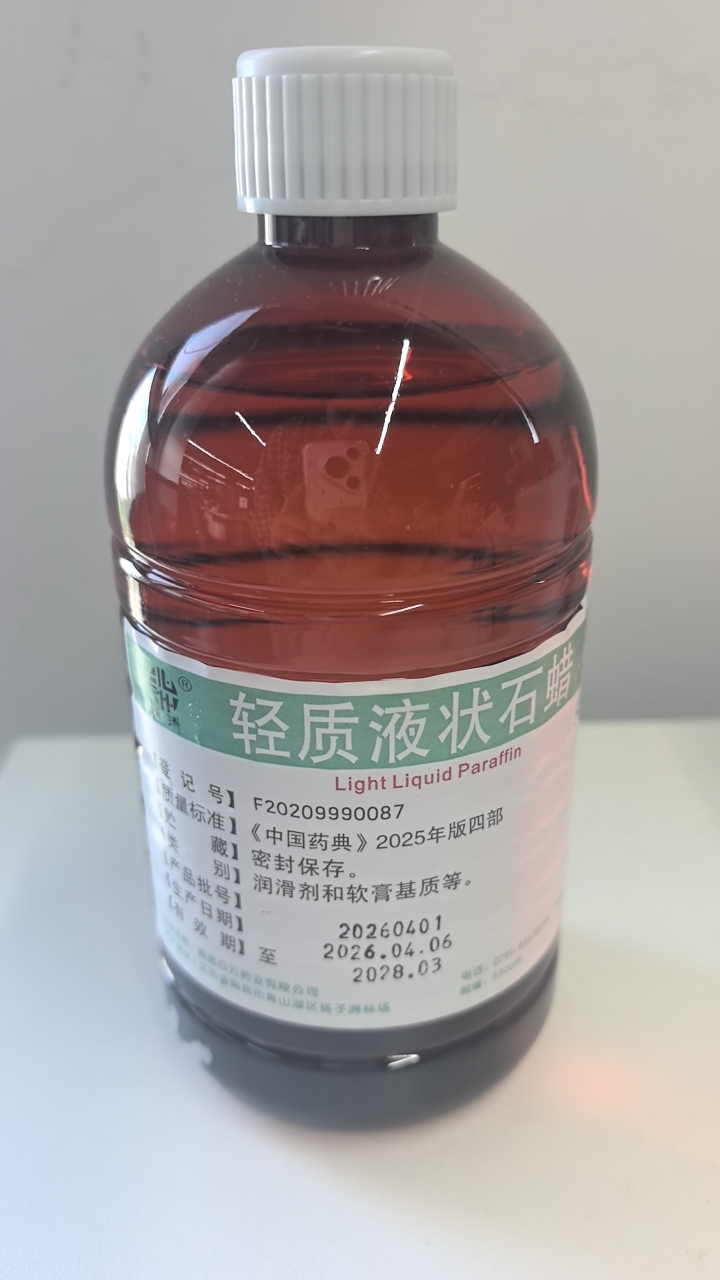
Engraving oil: A clean, transparent liquid, such as liquid paraffin oil
|
|
|
|
¶ 3.Operating Procedures
¶ Step 1: Material Assembly and Placement
¶ (1) Take out the crystal ball and clean its surface
Note: Please remember to wear gloves to avoid leaving fingerprints or other marks on the surface of the crystal ball, as this may affect the quality of the internal engraving.
¶ (2) Measure the diameter of the crystal ball and select an appropriate container
Check the diameter and height of the container to ensure it can accommodate the crystal ball and its base, and that the overall dimensions fall within the engraving range of the engraving machine. The bottom of the container must be flat; do not select containers with uneven or textured bottoms. An uneven bottom may affect the stability of the crystal ball inside the container, potentially causing displacement during the internal engraving process.
Note: The diameter of the container must be larger than that of the crystal ball, and its height must be greater than the total height of the crystal ball and its base. This ensures that the engraving oil can completely submerge the crystal ball without overflowing the container.
¶ (3) Prepare a suitable base to fix the crystal ball (DIY base)
The base is used to secure the crystal ball inside the container to prevent it from moving during the engraving process, which would otherwise affect the internal engraving result. You can use 3mm-thick linden wood boards as the material for the base to fix the crystal ball. Other materials that meet the thickness requirement and can be cut by UV laser are also applicable for making the base.
Note: The following is the design drawing of the fixed base for the crystal ball, which can be directly downloaded and used.
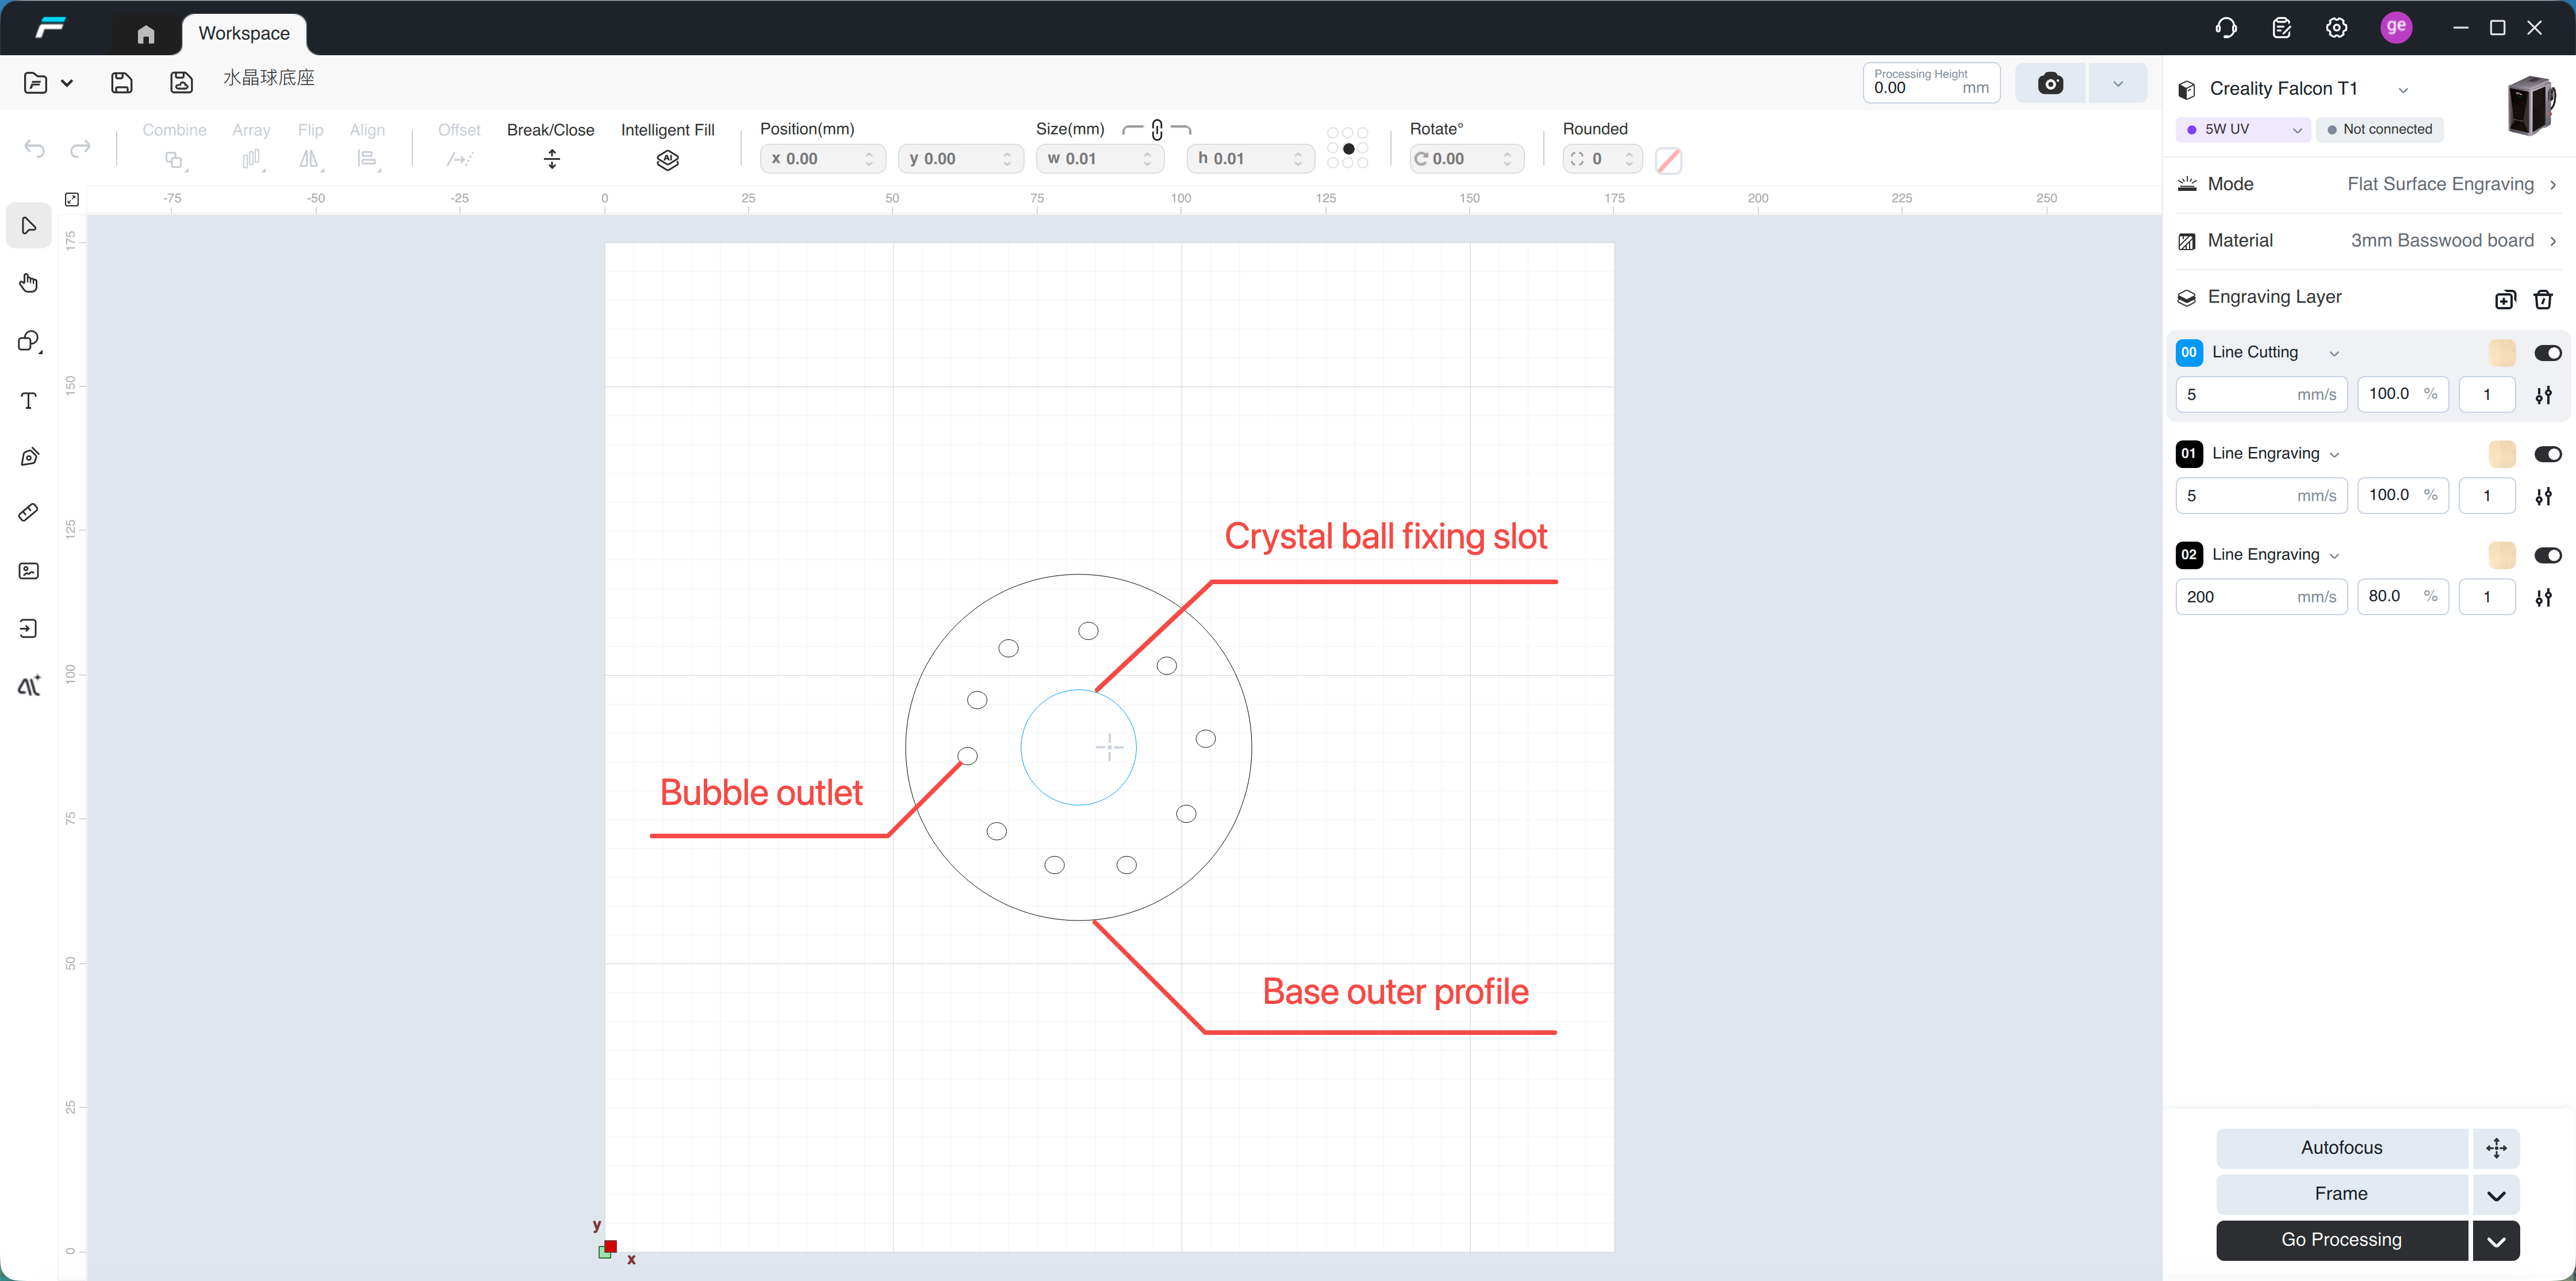 |
Crystal Ball Base Size Adjustment Guide ——
To ensure engraving stability and optical path accuracy, and prevent displacement of the crystal ball or pattern distortion, please make the following adjustments according to the dimensions of the container and the crystal ball:
Outer contour of the base (adapted to the container)
Dimension requirements: The outer contour shall be slightly smaller than the inner diameter of the container, and ideally fit closely against it.
Function: Fix the base to prevent shaking, reduce the interference of liquid volume and bubbles, and ensure the crystal ball is centered.
Central opening on the base (for fitting a crystal ball)
Dimension Requirements: The diameter of the opening shall be 50% of the diameter of the crystal ball.
80mm Crystal Ball —— Central Hole Drilled 40mm
60mm Crystal Ball —— Central Hole 30mm
Function: To precisely support the sphere. An overly small opening will easily cause the sphere to shake, while an overly large opening will fail to fix the sphere or even make it touch the bottom, both of which will lead to focal shift.
Note: Small holes can be added to the edge of the base to connect a metal handle or thread a rope through as a carrying handle. After carving is completed, this makes it easy to quickly lift and remove the crystal ball and base from the container.
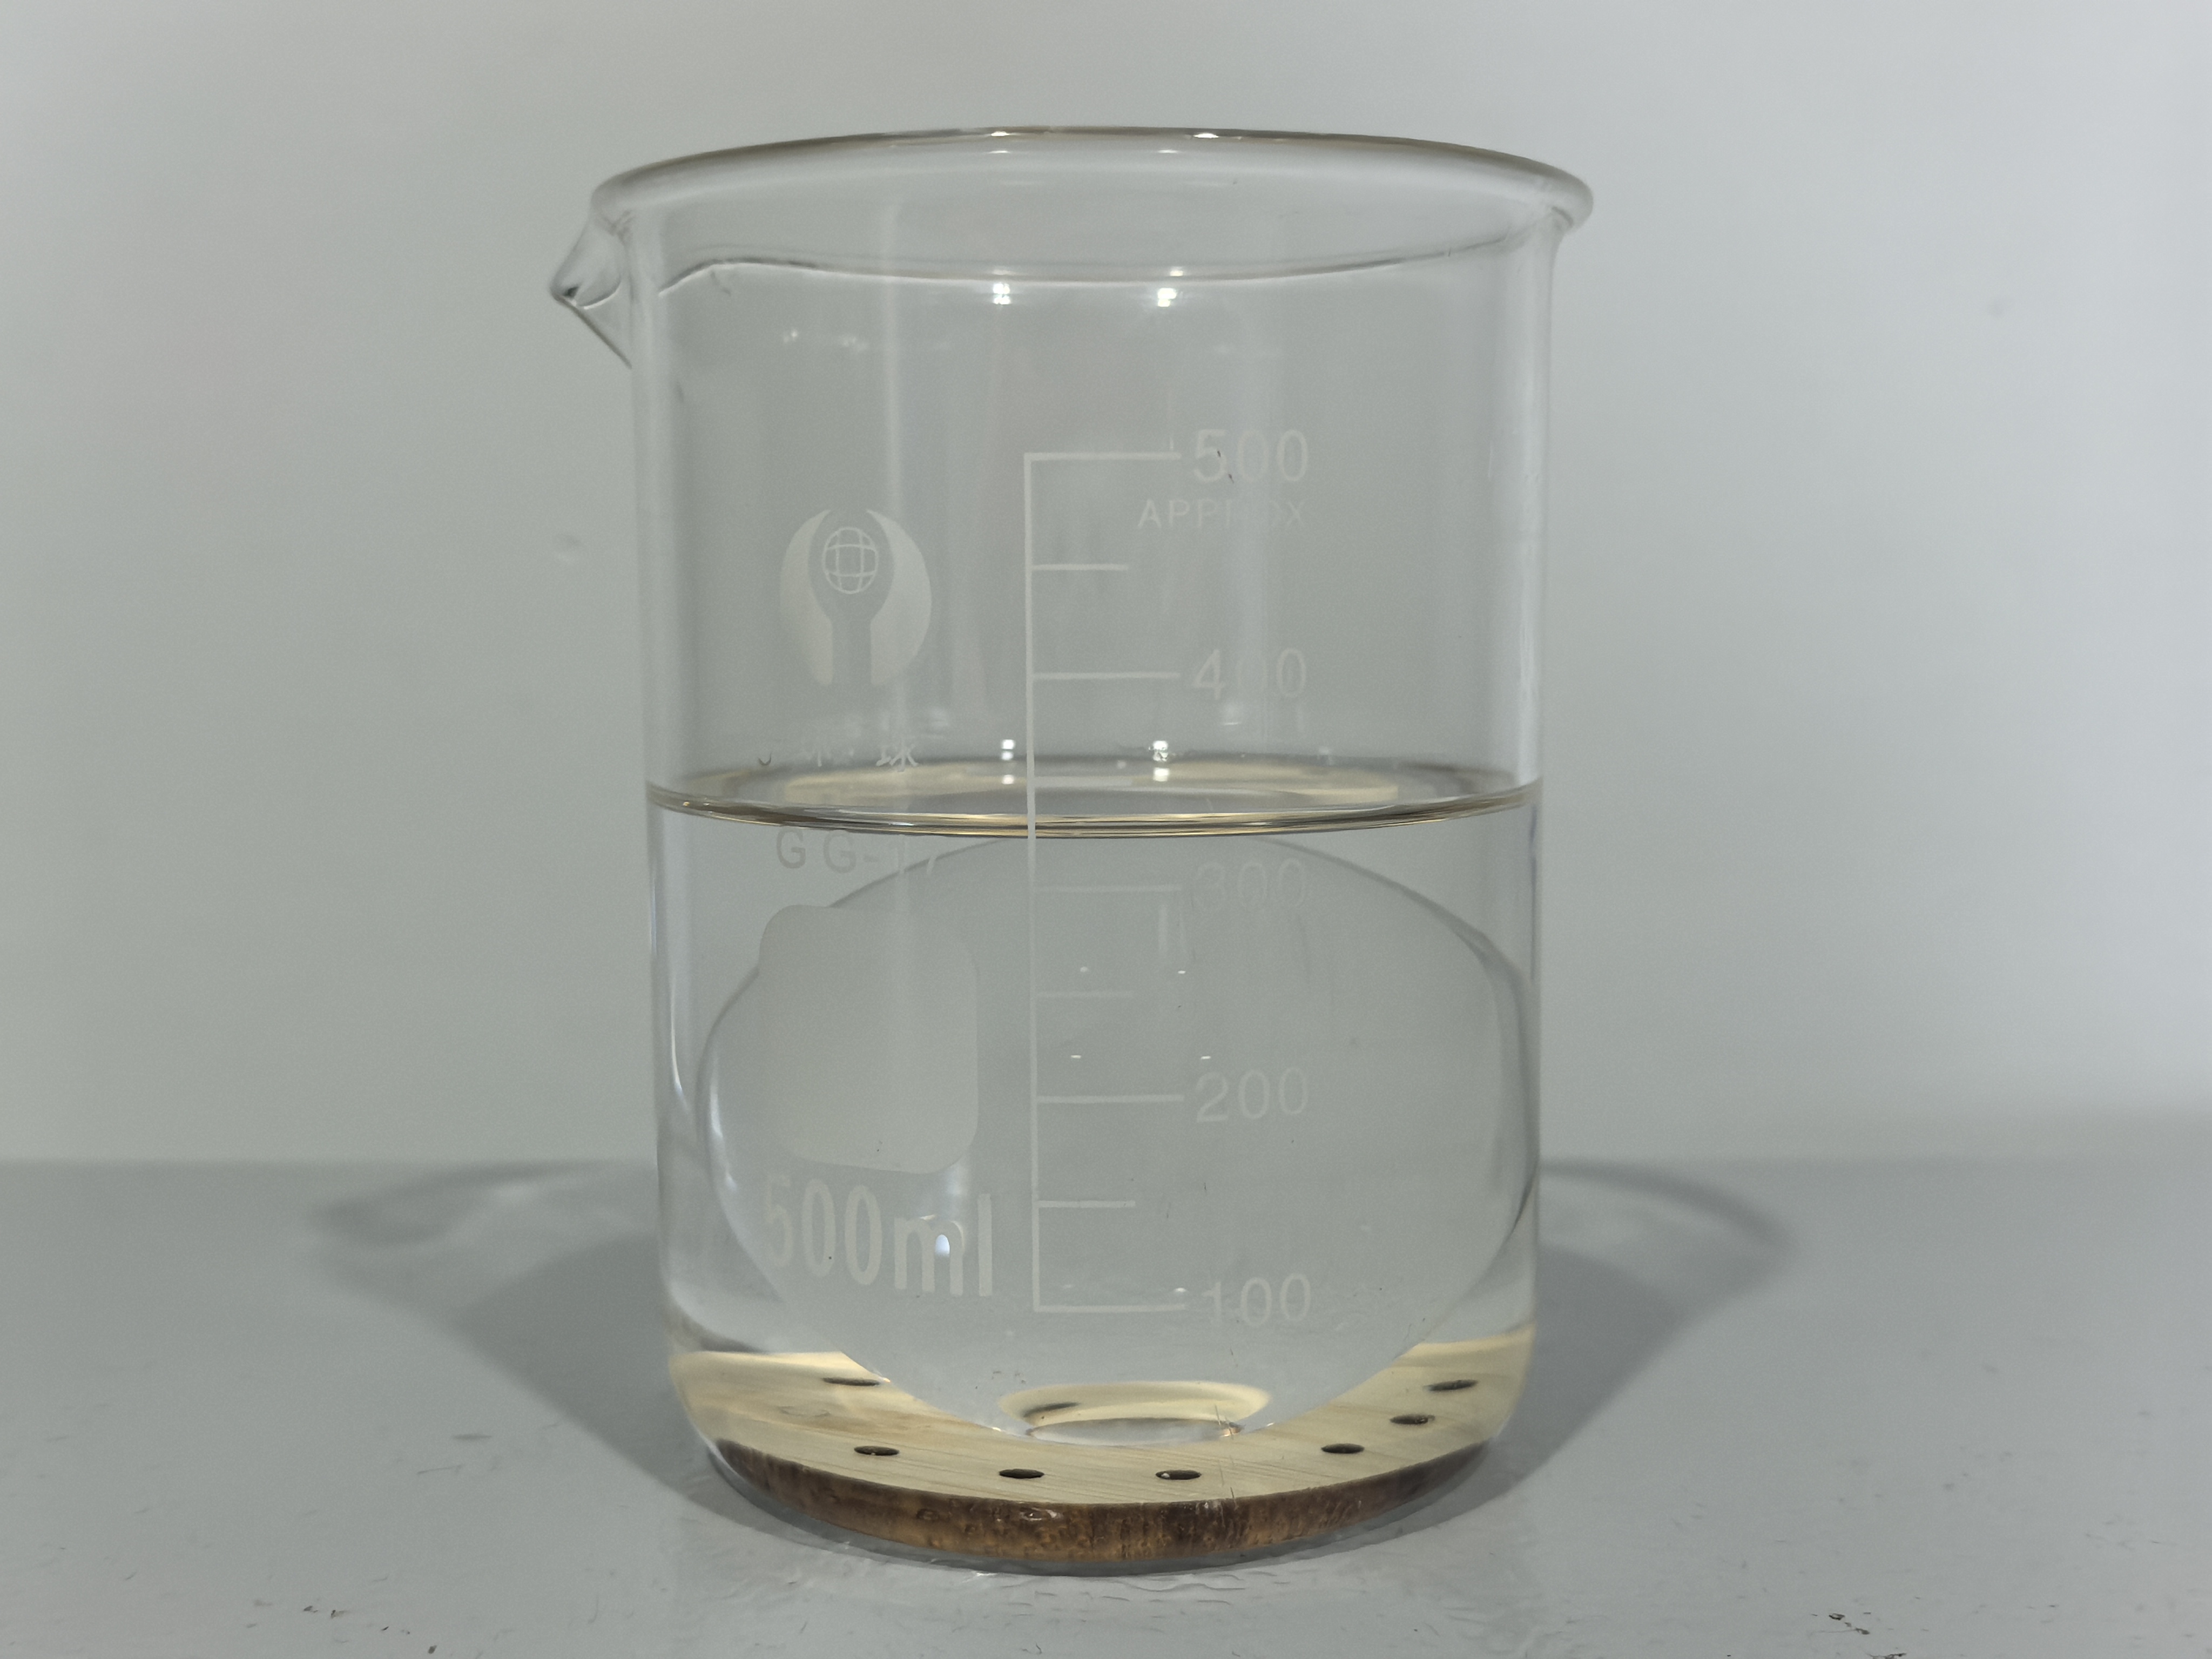
¶ (4) Pour the internally carved oil into the container
Ensure that the crystal ball is just fully immersed in the internal engraving oil, with the liquid level flush with the top of the crystal ball; either too high or too low a level will lead to errors.
 |
Selection of Oil for Internal Carving:
The engraving oil shall feature high light transmittance, non-toxicity, harmlessness and easy cleaning as well as a refractive index close to that of glass:
Glycerol (refractive index: 1.473): High safety profile.
Liquid paraffin (refractive index: 1.467–1.478): It features stable performance and is easy to handle.
Benzyl alcohol (refractive index: 1.538): Its refractive index is closer to that of high-refractive-index glass, but it is slightly toxic and requires careful handling.
¶ Step 2: Equipment Debugging and Model Preparation
¶ (1) Install the laser module and the field lens
Install the 5W UV laser module and the purple UV internal engraving f-theta lens properly, and ensure that the installation is firm and the connection is normal. You can refer to Operation Guide for Laser Module Replacement Operation Guide for F-theta Lens Replacement
¶ (2) Calibration
Complete the following three calibrations in sequence:(1) Laser module calibration;(2) Autofocus calibration (skippable);(3) Field lens calibration. Click to view calibration guide
¶ (3) Install the internal engraving bracket
Detailed Assembly Guide for Internal Engraving Stand: https://wiki.creality.com/zh/laser-engraver/falcon-t1/internal-engraving-stand-t1
¶ (4) Software Preparation
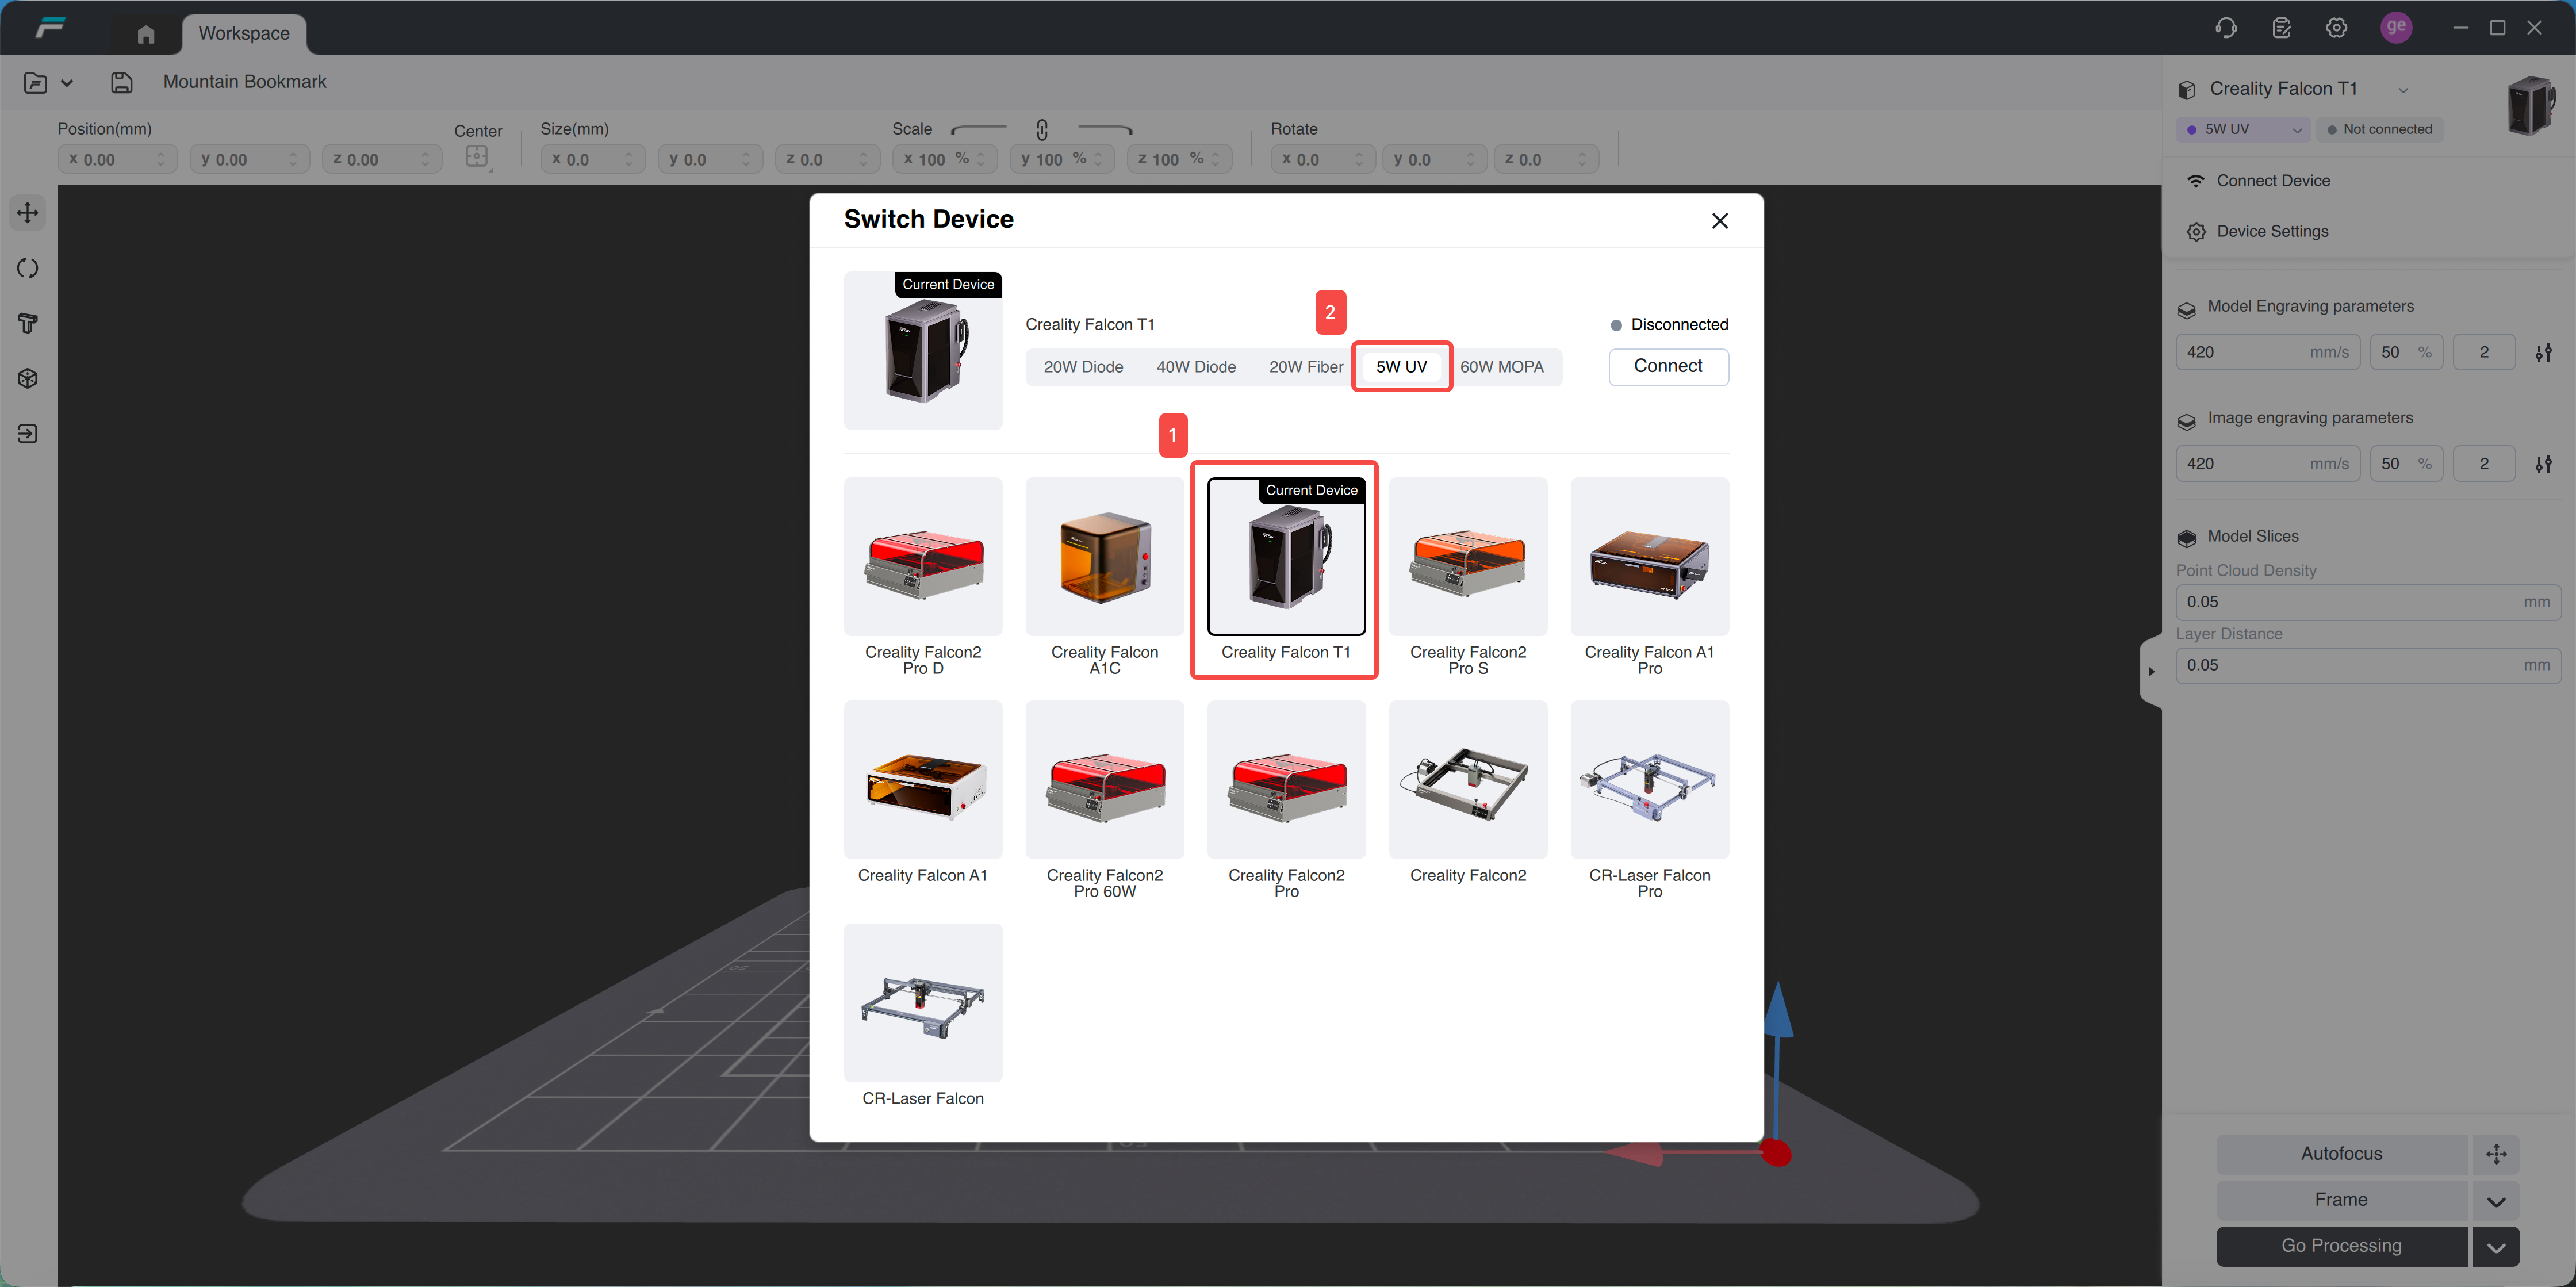
Open the FDS software, connect the device, confirm that the device is [Creality Falcon T1], and select [5W UV] for the light source
 |
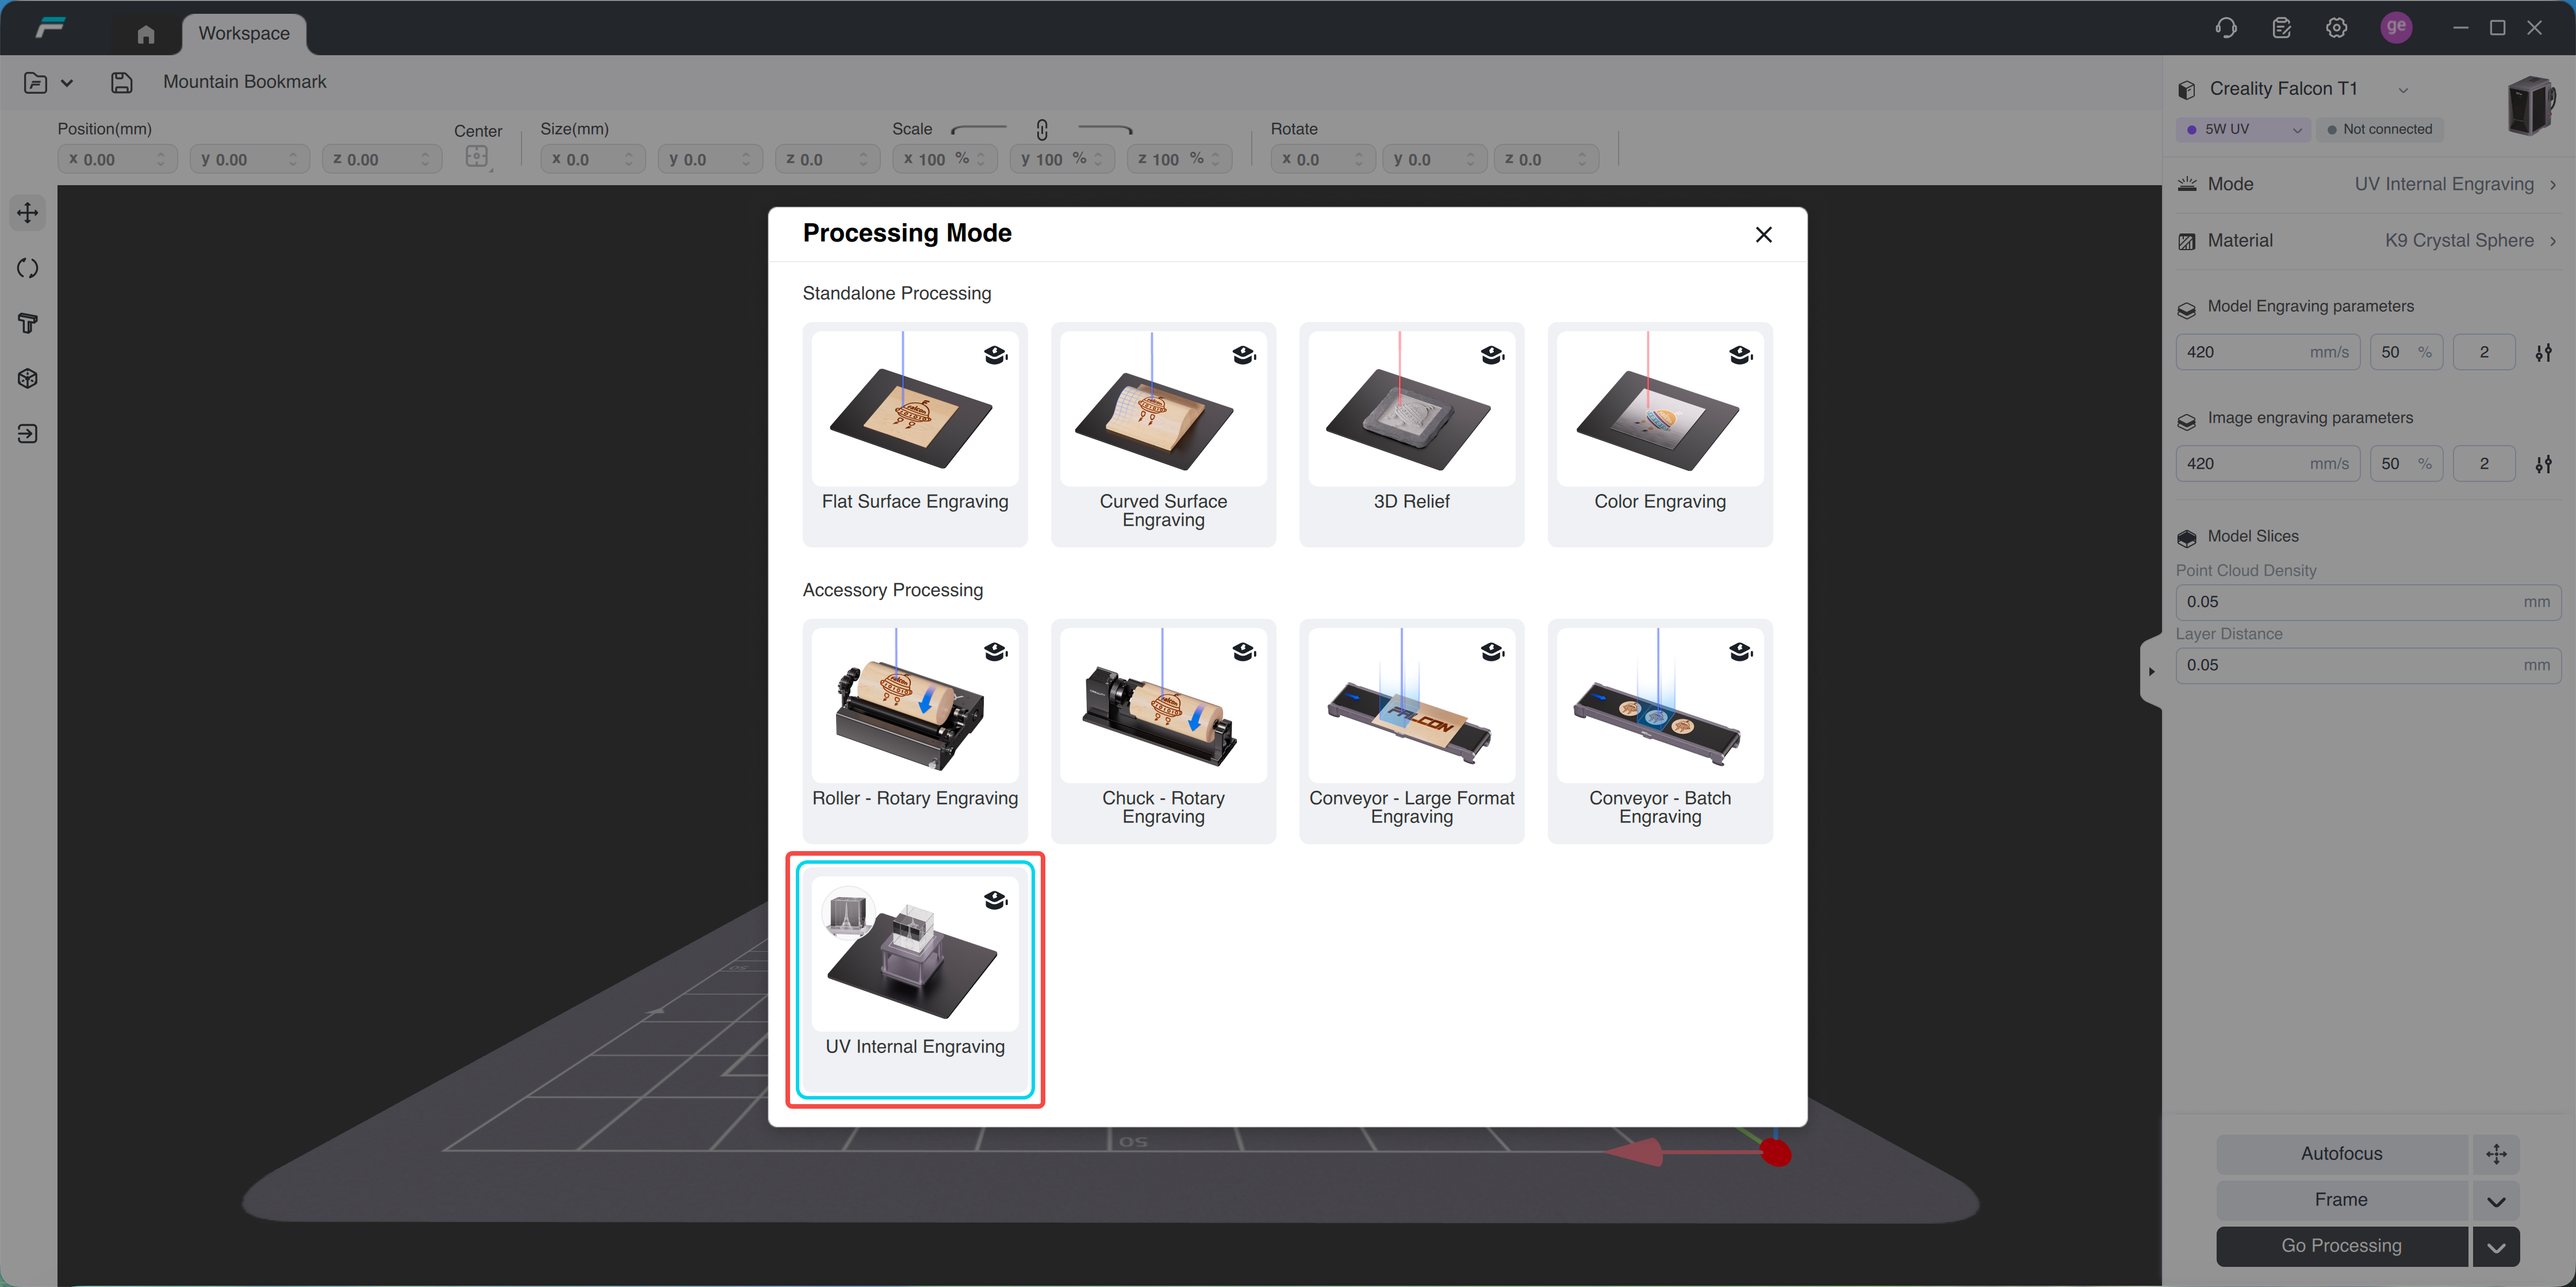
Click [Processing Mode] and select the [UV Innernal Engraving] mode
 |
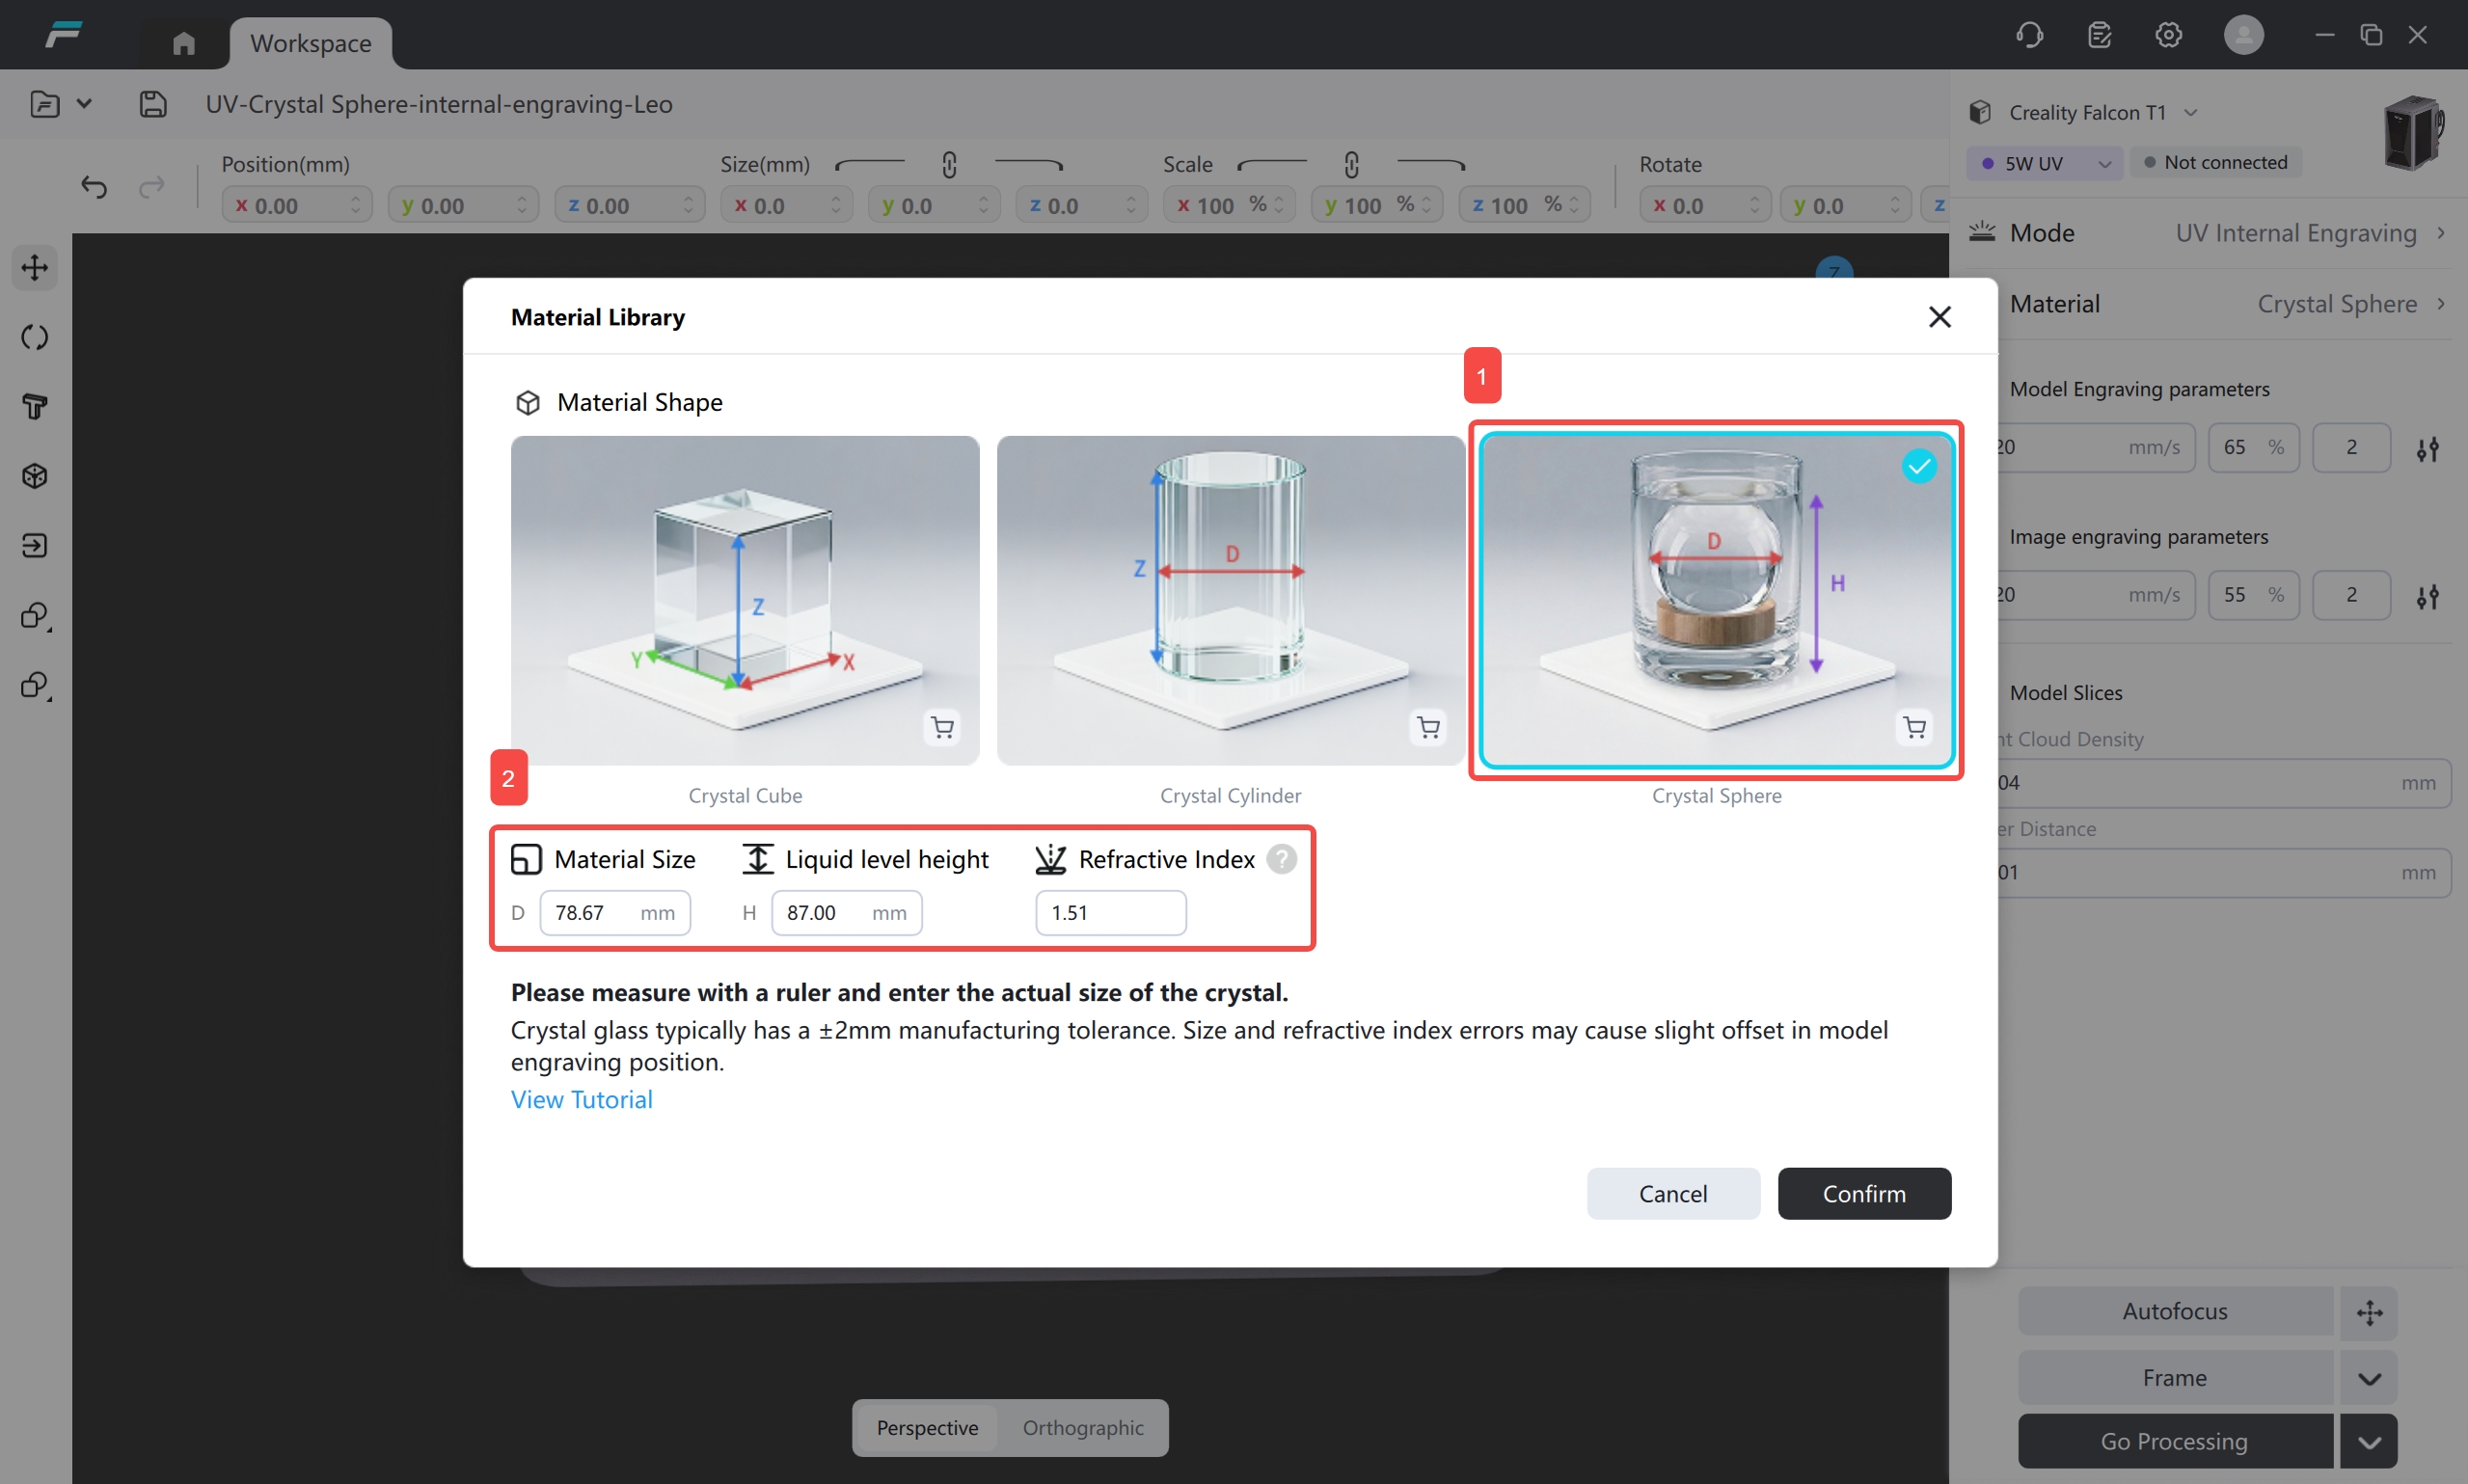
Click the [Material] tab to select the consumable shape, enter the dimensional parameters according to the actual specifications of the crystal, measure the liquid level height and then input the corresponding parameters, after which the crystal can be placed in the center.
 |
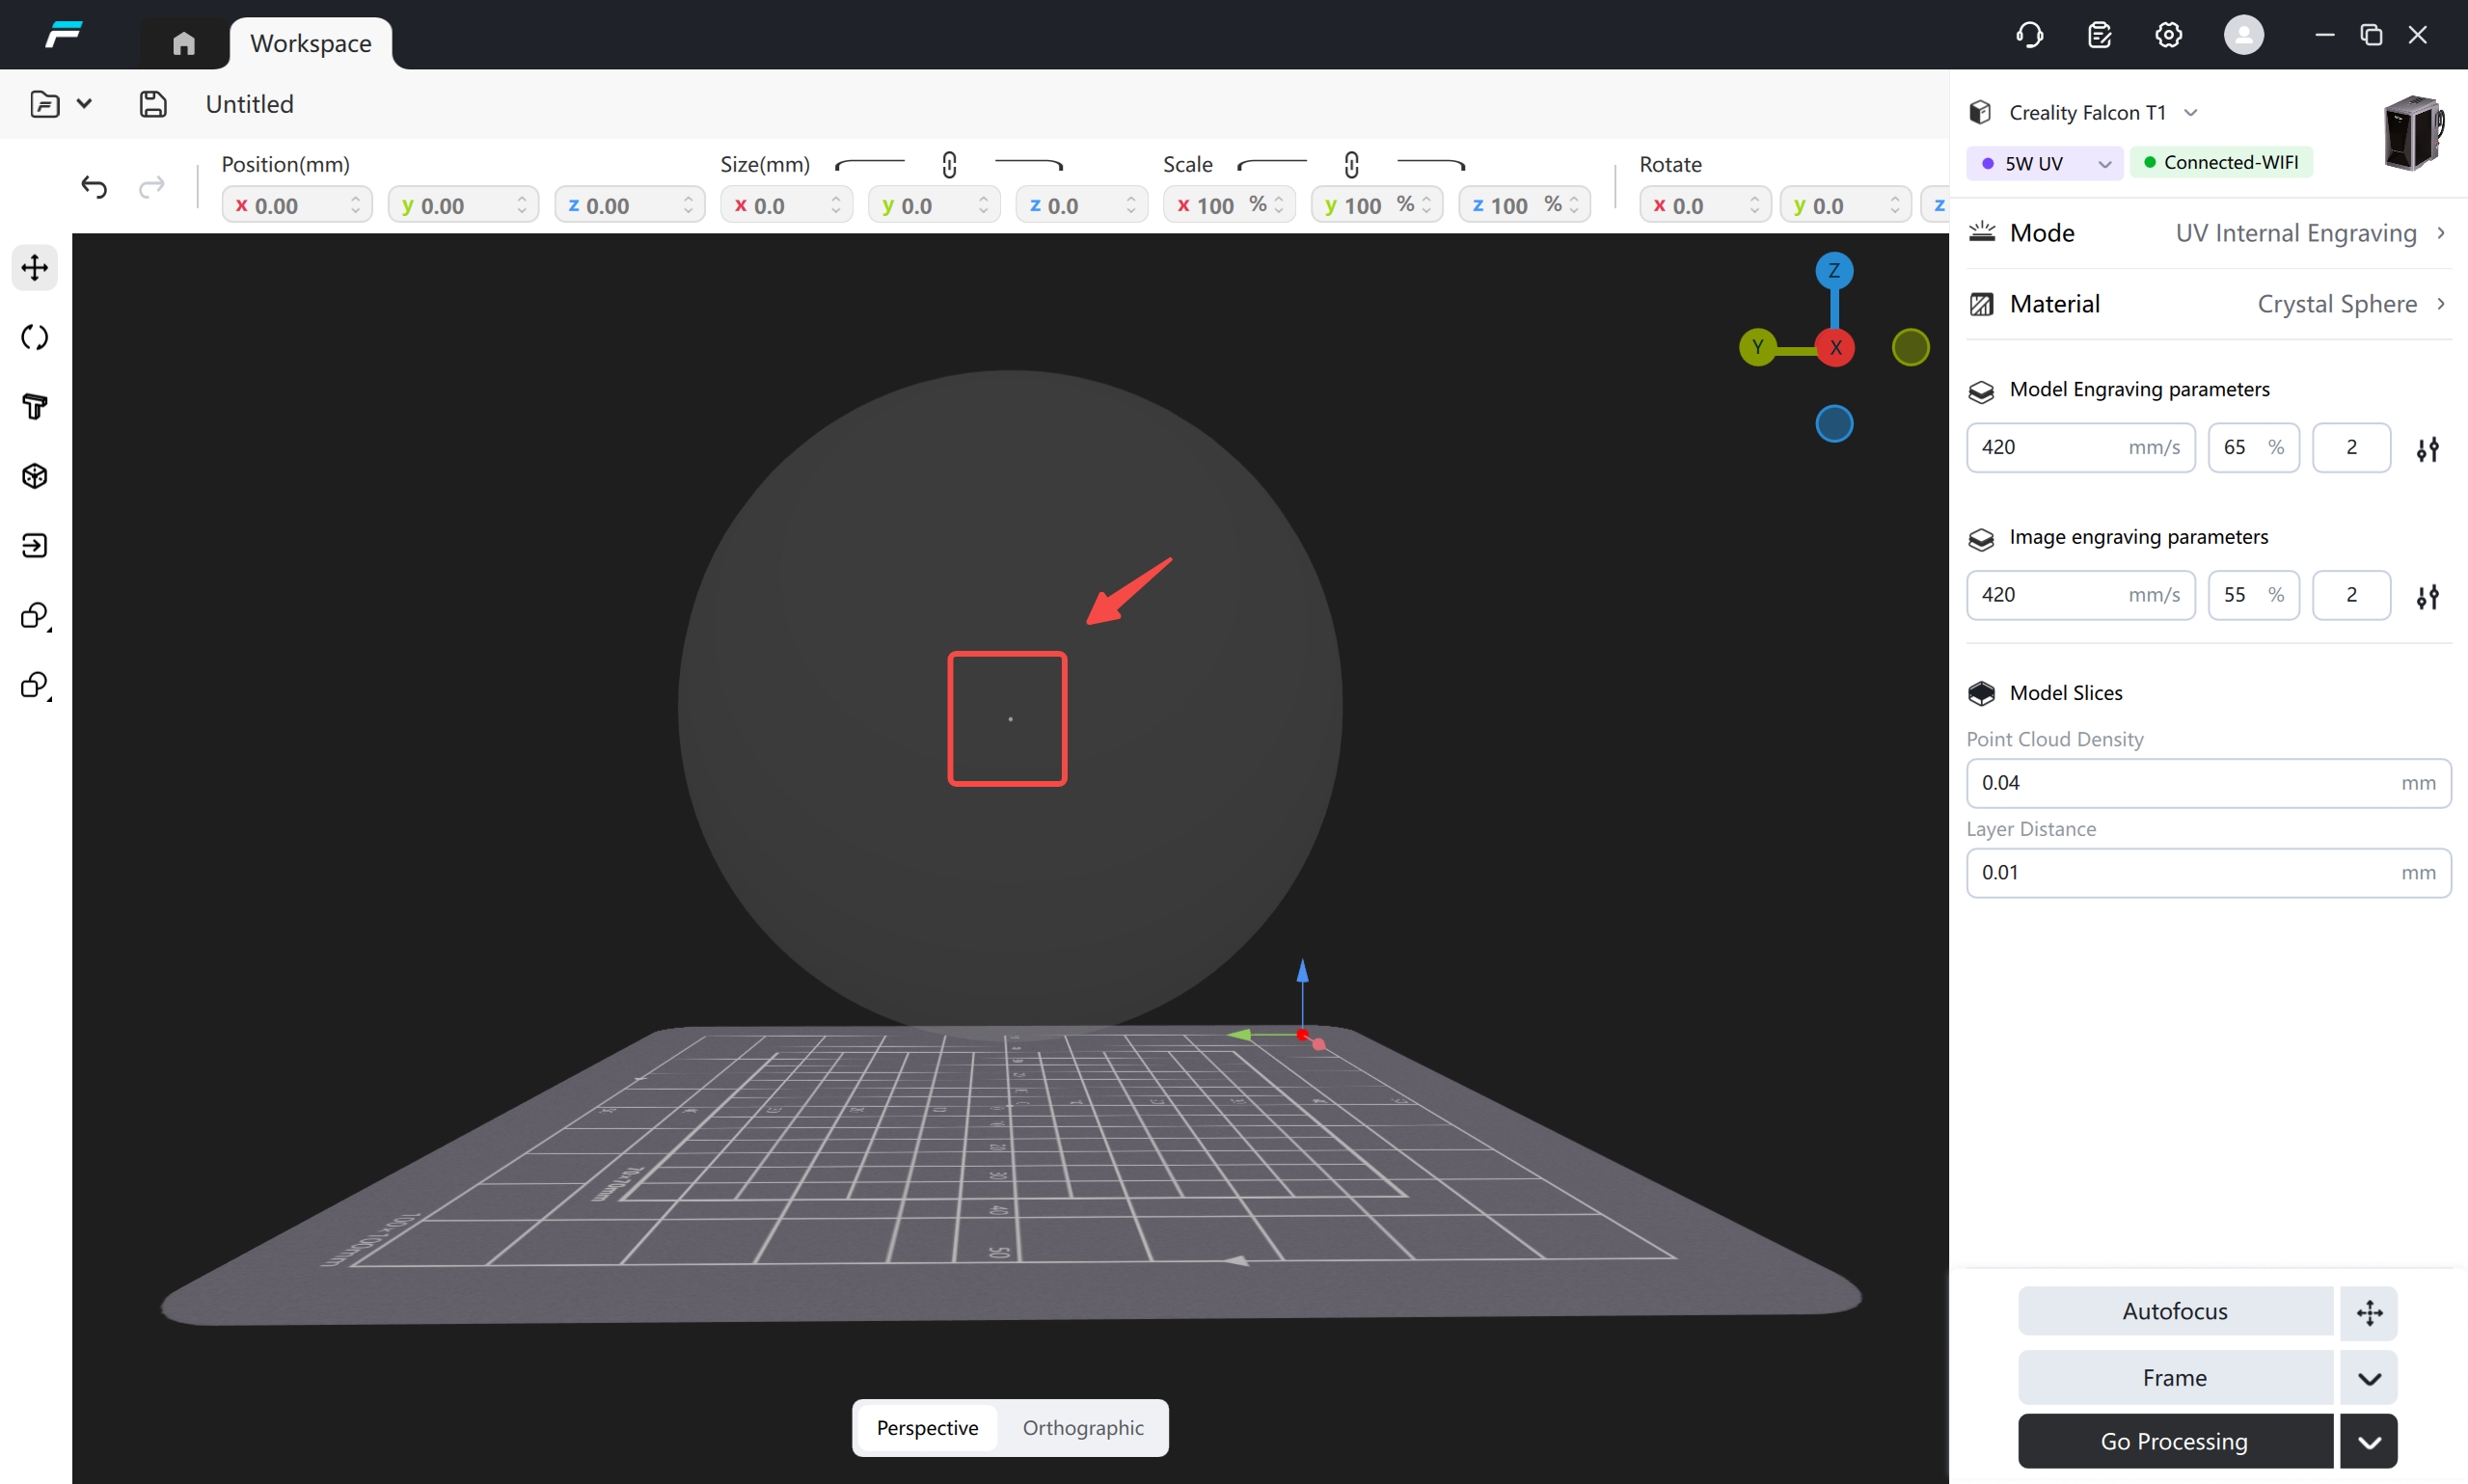
Warm Reminder: Fine-tuning of Model Sculpting Height (Recommendation for First Sculpting)
Due to cumulative factors such as refractive index, material quality, and measurement errors, the model preview position may deviate from the actual sculpting height by 1-3mm. It is recommended to first use scrap material to sculpt a small dot to test and locate the sculpting center. To ensure accurate positioning, it is recommended to first use scrap material to sculpt a small dot to test the center point, and then adjust the model position accordingly.
 |
¶ (5) Import Model (supports importing 3D models, 2D images and text inner engraving):
Support importing 3D models, images, vector, and FDS project files
Supported 3D formats: GLTF, GLB, OBJ, FBX, STL, 3MF, PLY
Supported image formats: BMP, JPG, JPEG, PNG, TIF, TIFF, SVG, DXF
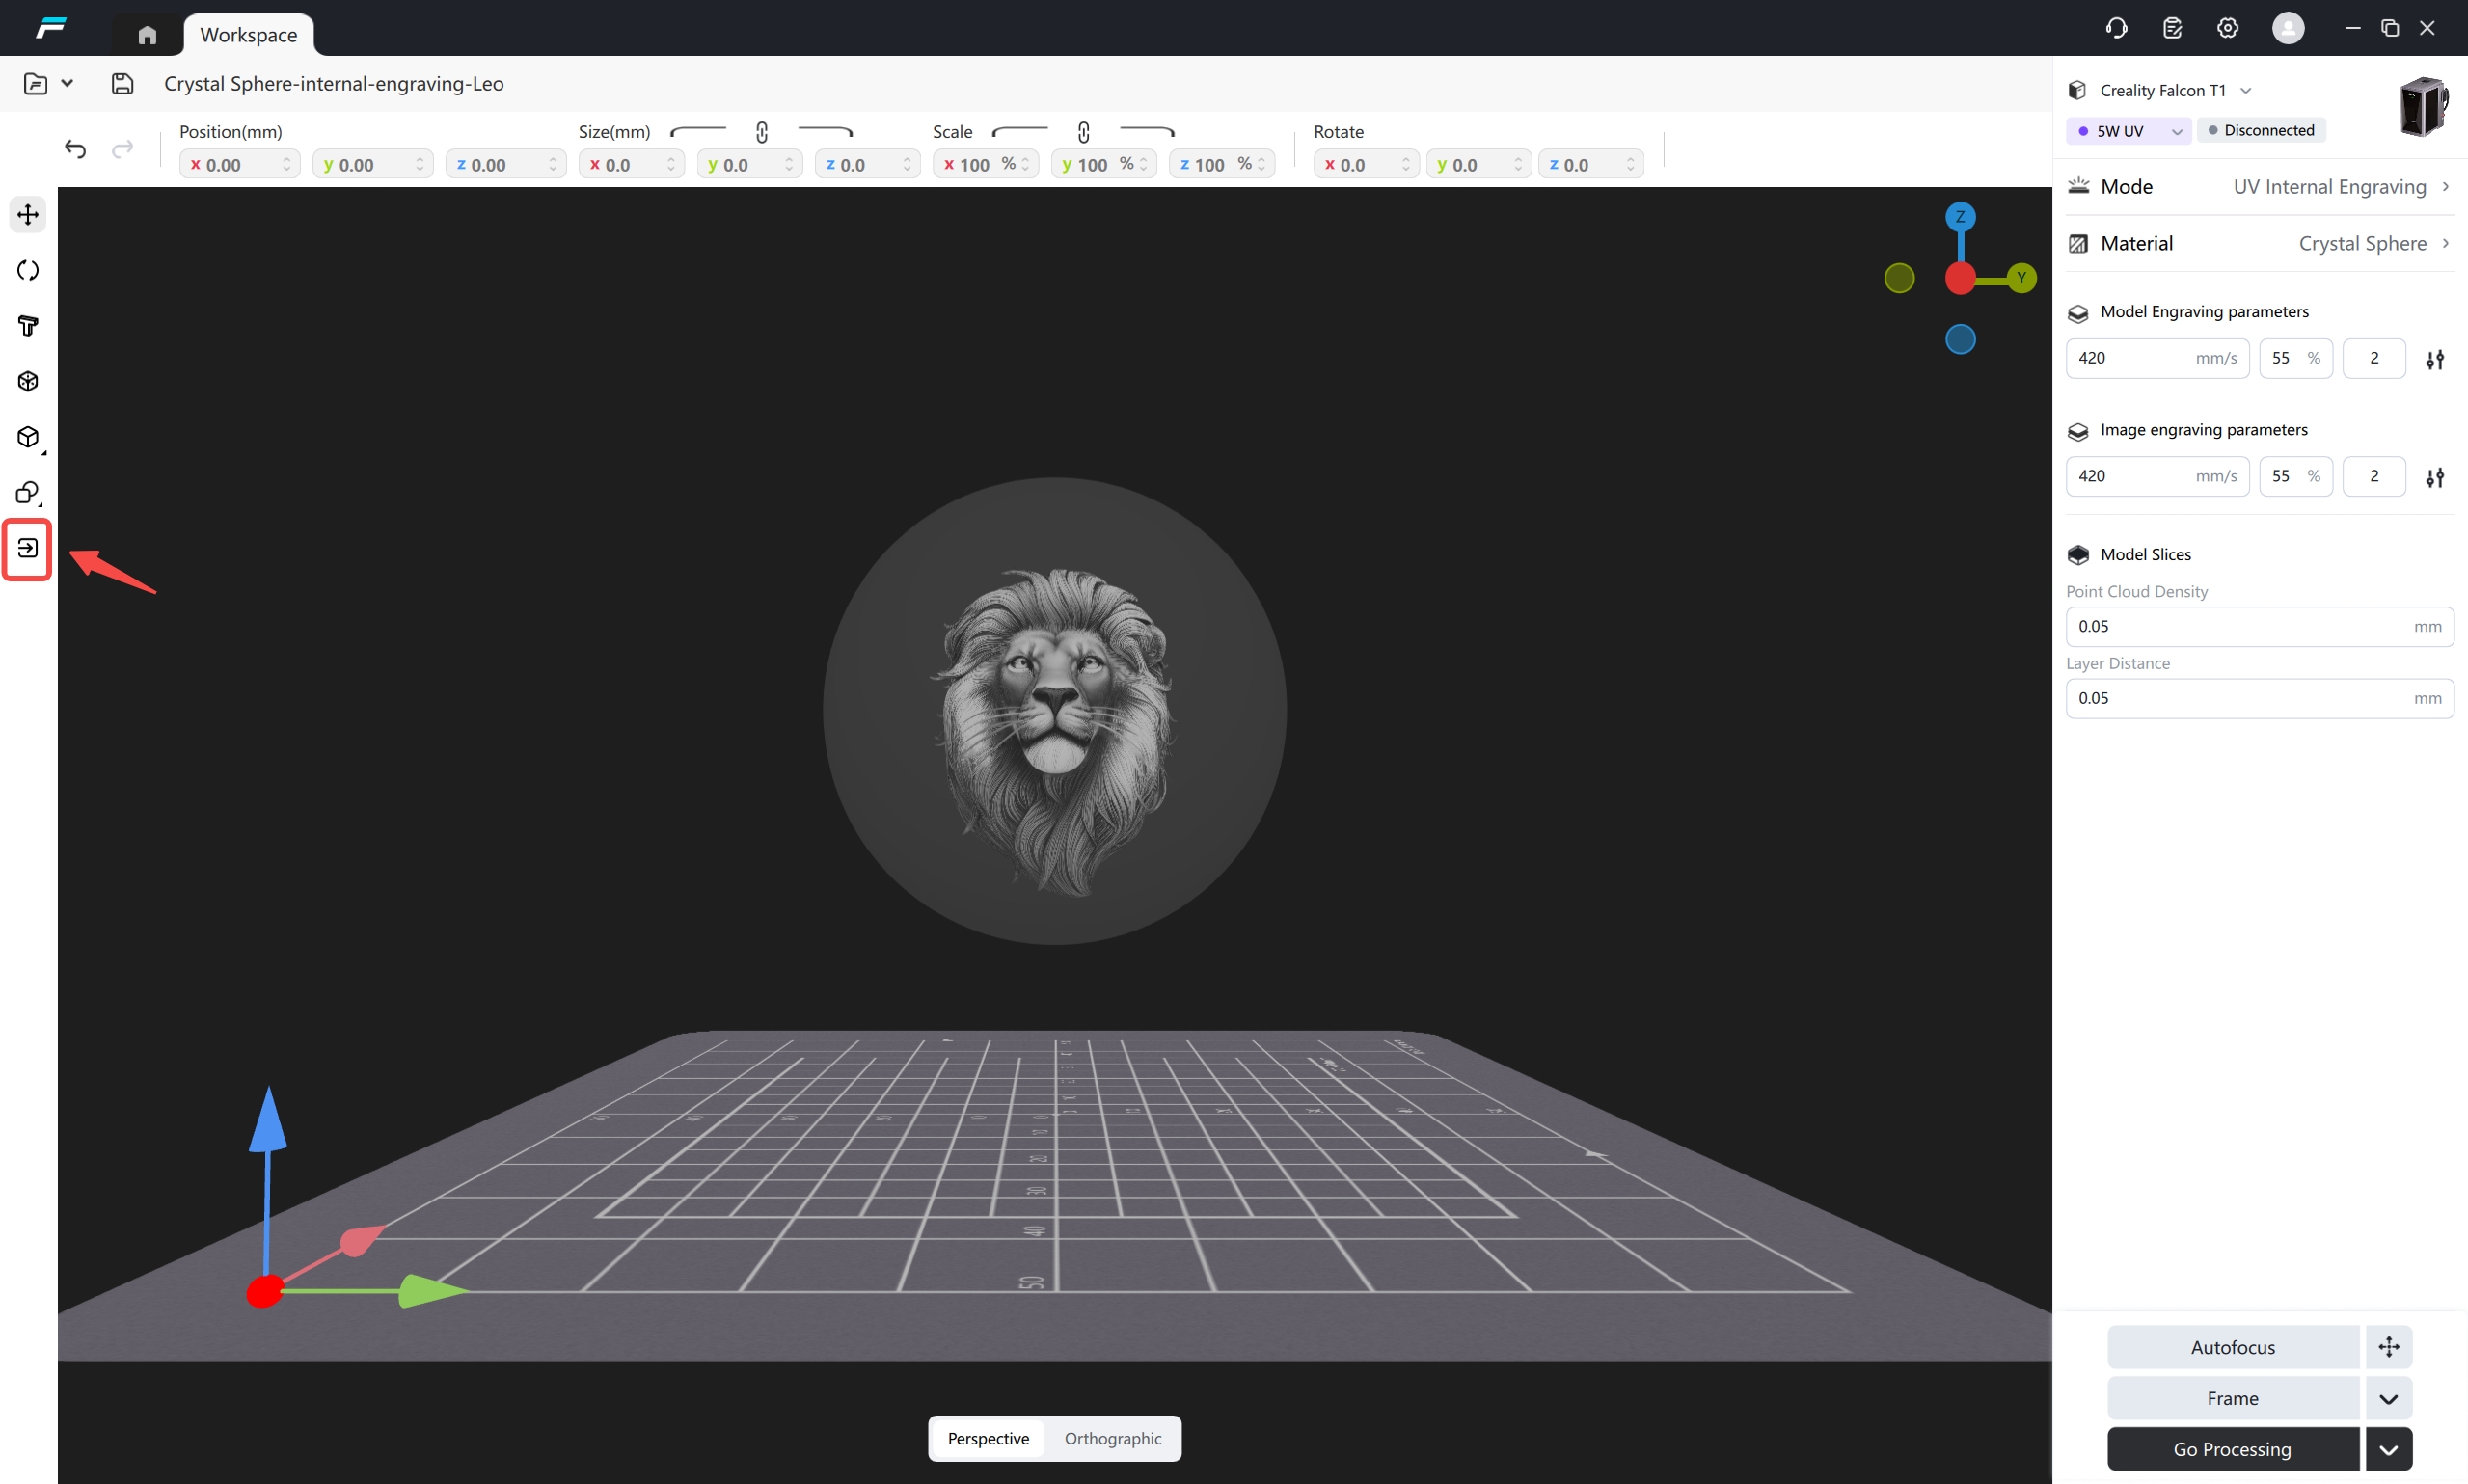
① Import a 3D model / 2D image: click the import icon, select the model, then control its position, size and rotation angle by dragging or adjusting parameters
For specific operations on adjusting the model, please refer to UV Crystal Inner Engraving Operation Guide: UV Crystal Inner Engraving
 |
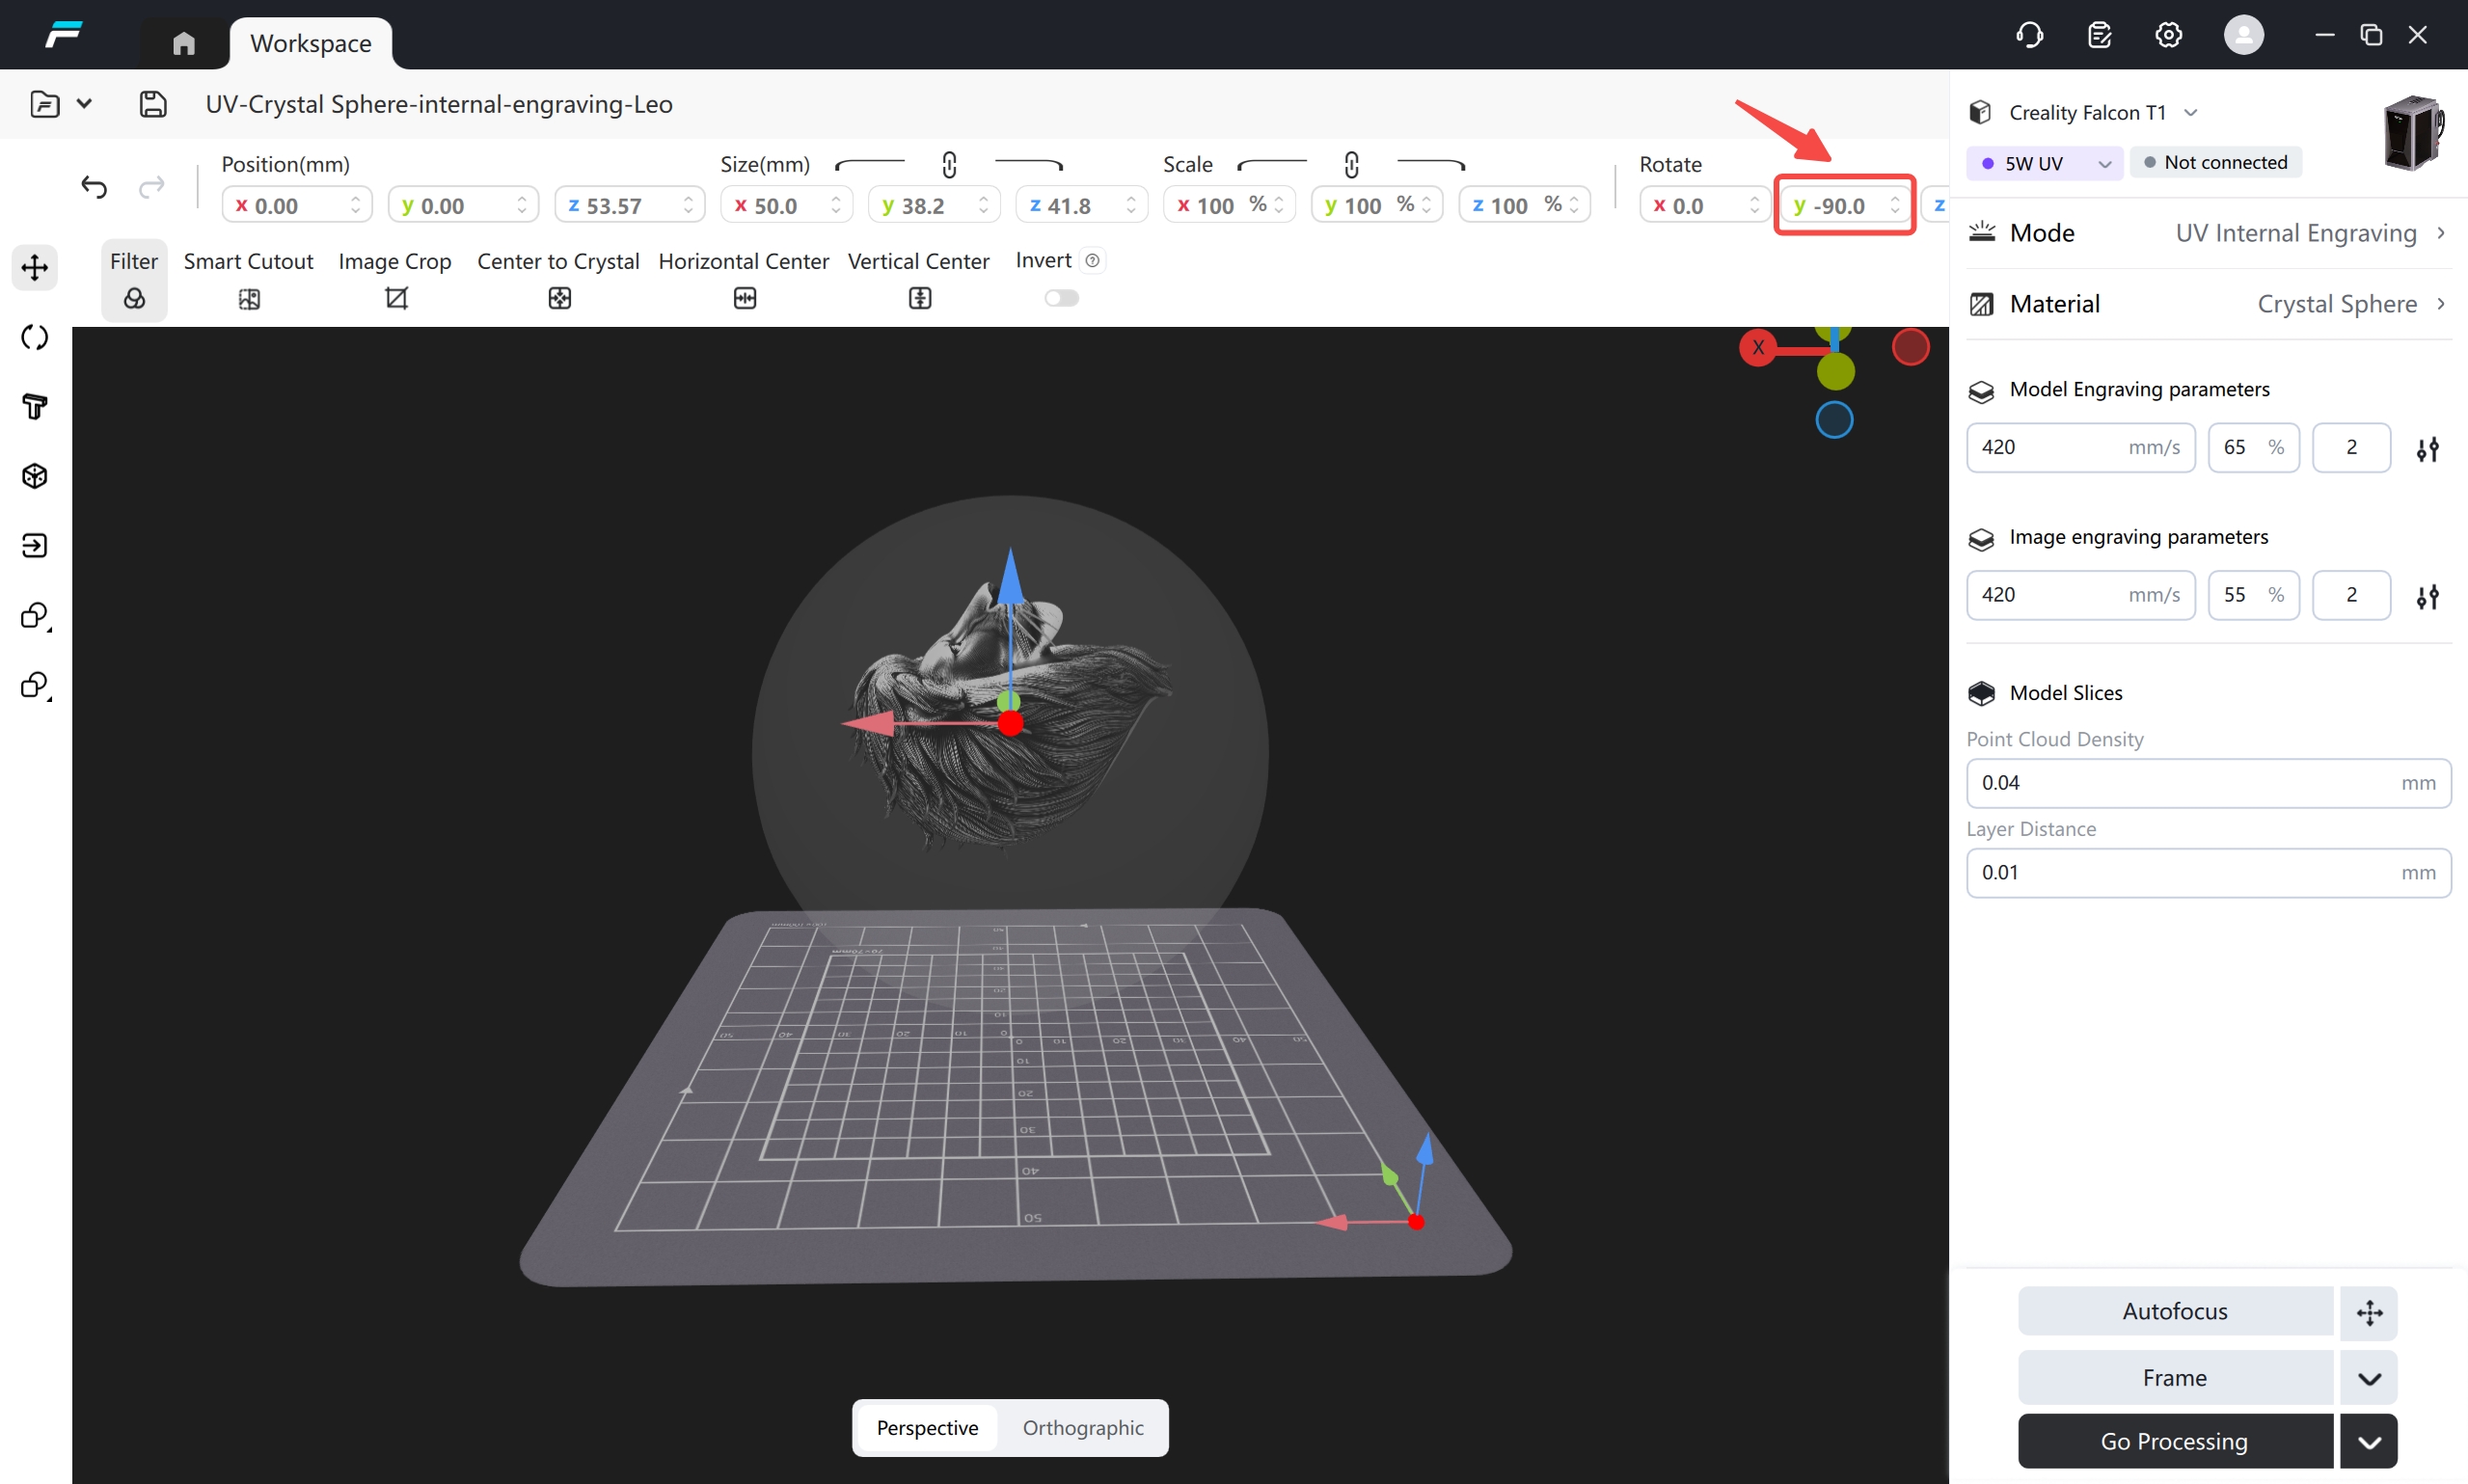
Reminder : During internal glass engraving, micro-explosions within the material generate debris and stress, naturally creating burrs on the bottom surface. To ensure engraving clarity, please rotate the model so that the clear front face points upward and the burred bottom face points downward. Scroll the middle mouse button to zoom, hold the middle mouse button to pan, and hold the left mouse button to rotate the view.
 |
¶ (6) Parameter Debugging
1. Model/Image Parameter Adjustment
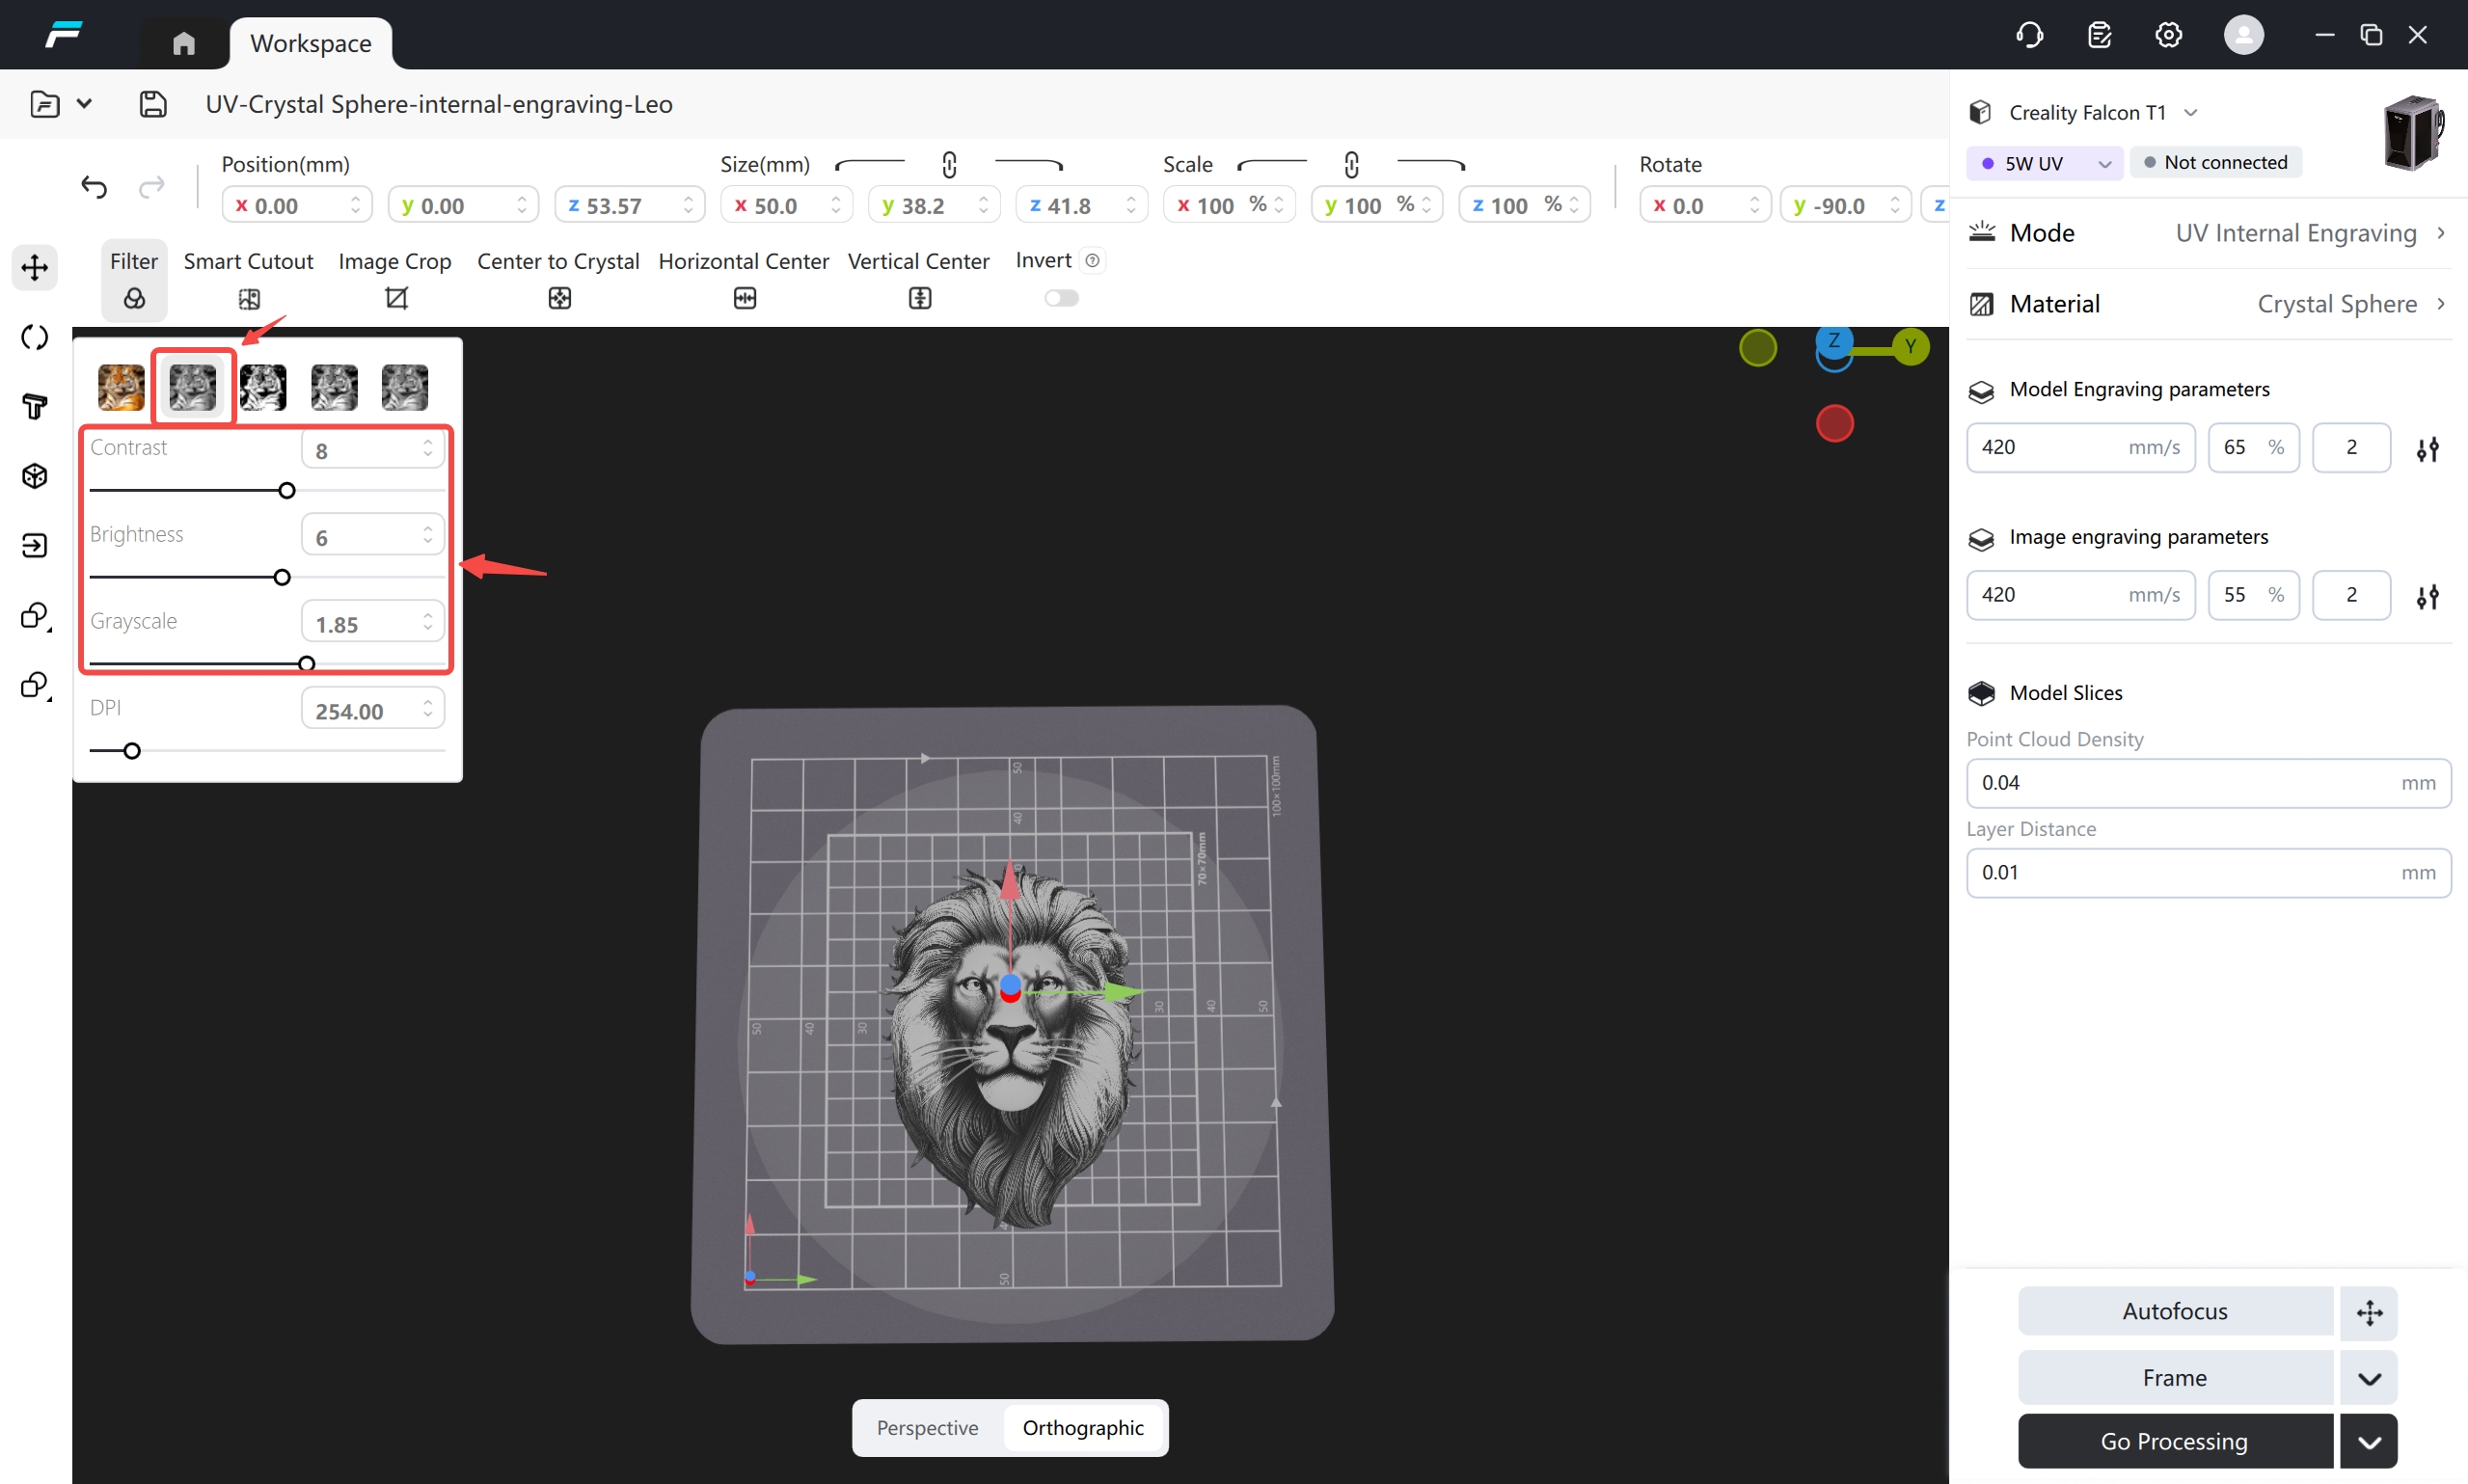
The system selects the "phased rollout filter" by default. It is recommended to make appropriate adjustments based on the effect of the original model/image to the parameters of contrast, brightness and phased rollout. In principle, the whiter the color of the area in the model/image, the more pronounced the engraving effect (the higher the whitening degree).
 |
2. Processing Parameter Adjustment
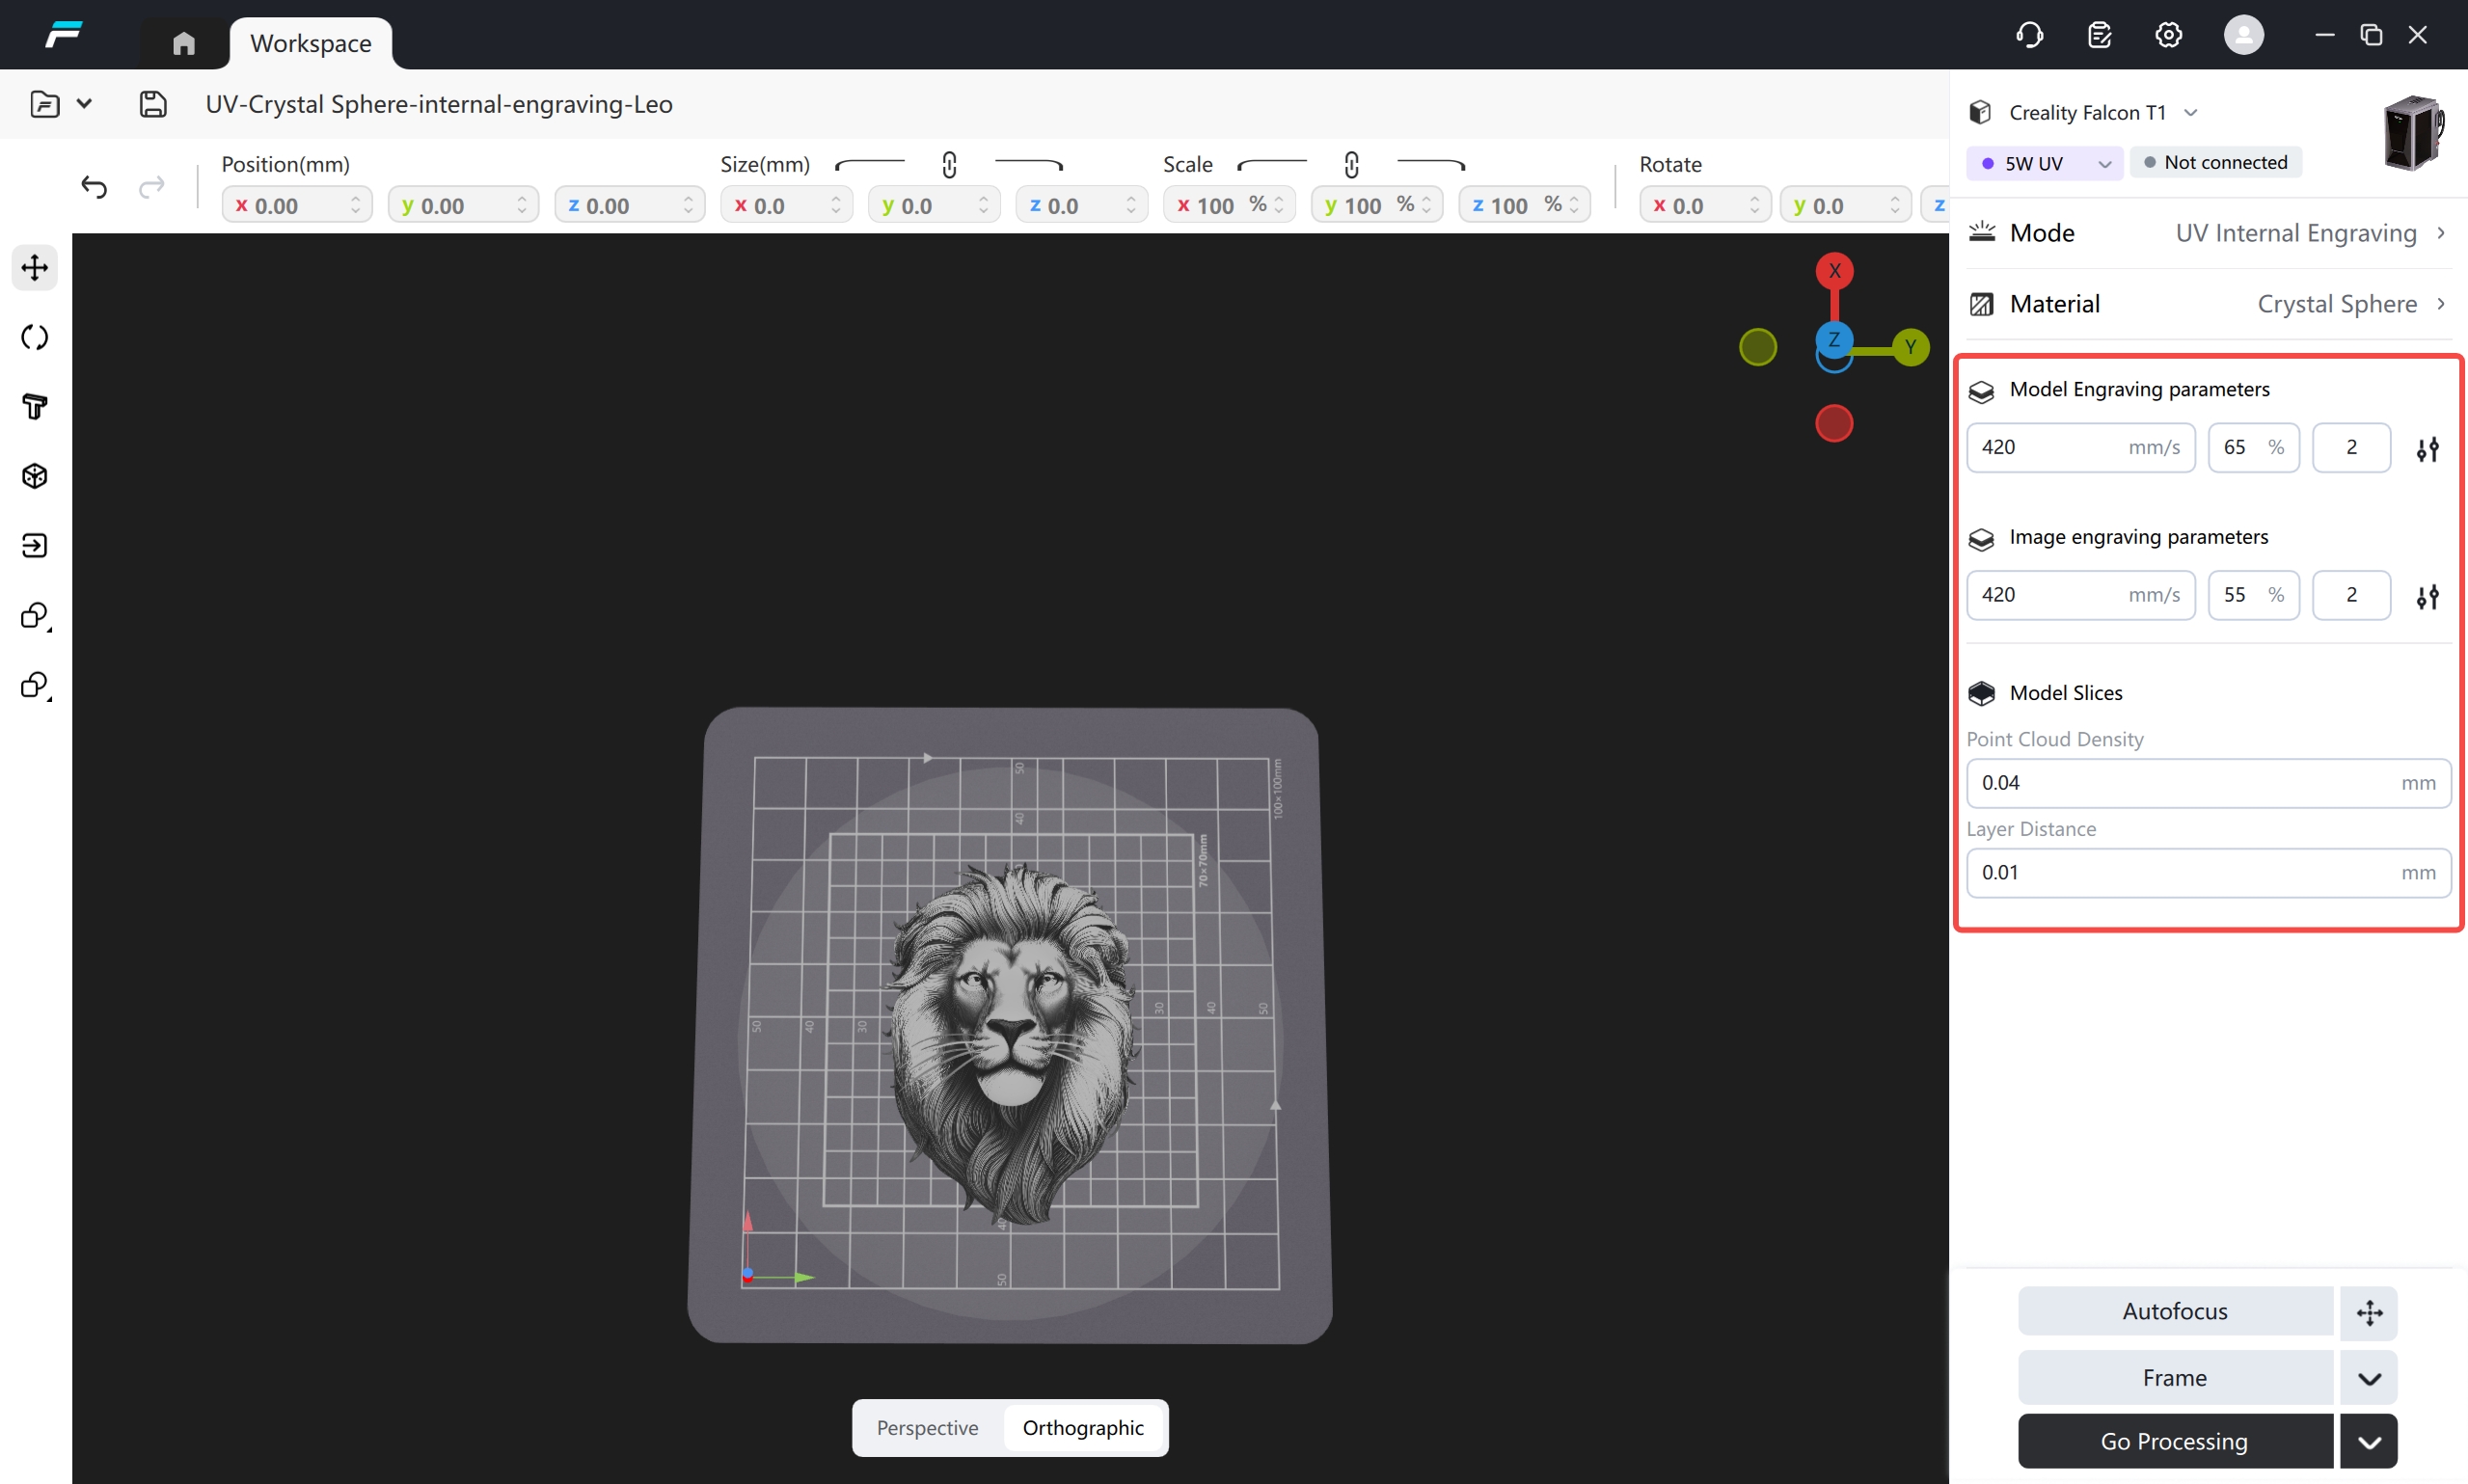
The software has built-in professional internal engraving parameters; hovering the mouse over the parameters will display their descriptions.
 |
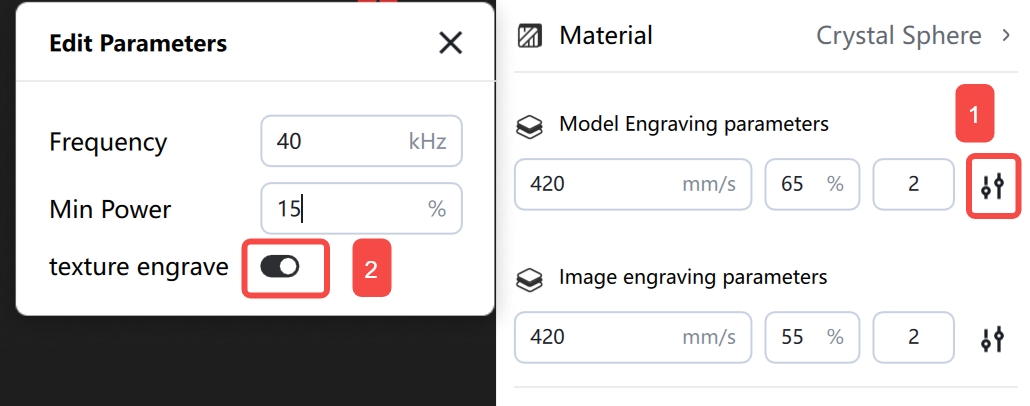
Note: For models with textures, it is recommended to enable the "Texture engrave" function to obtain richer details.
 |
The fds file in the example:
¶ Step 3: Start the internal engraving process
¶ (1) Autofocus
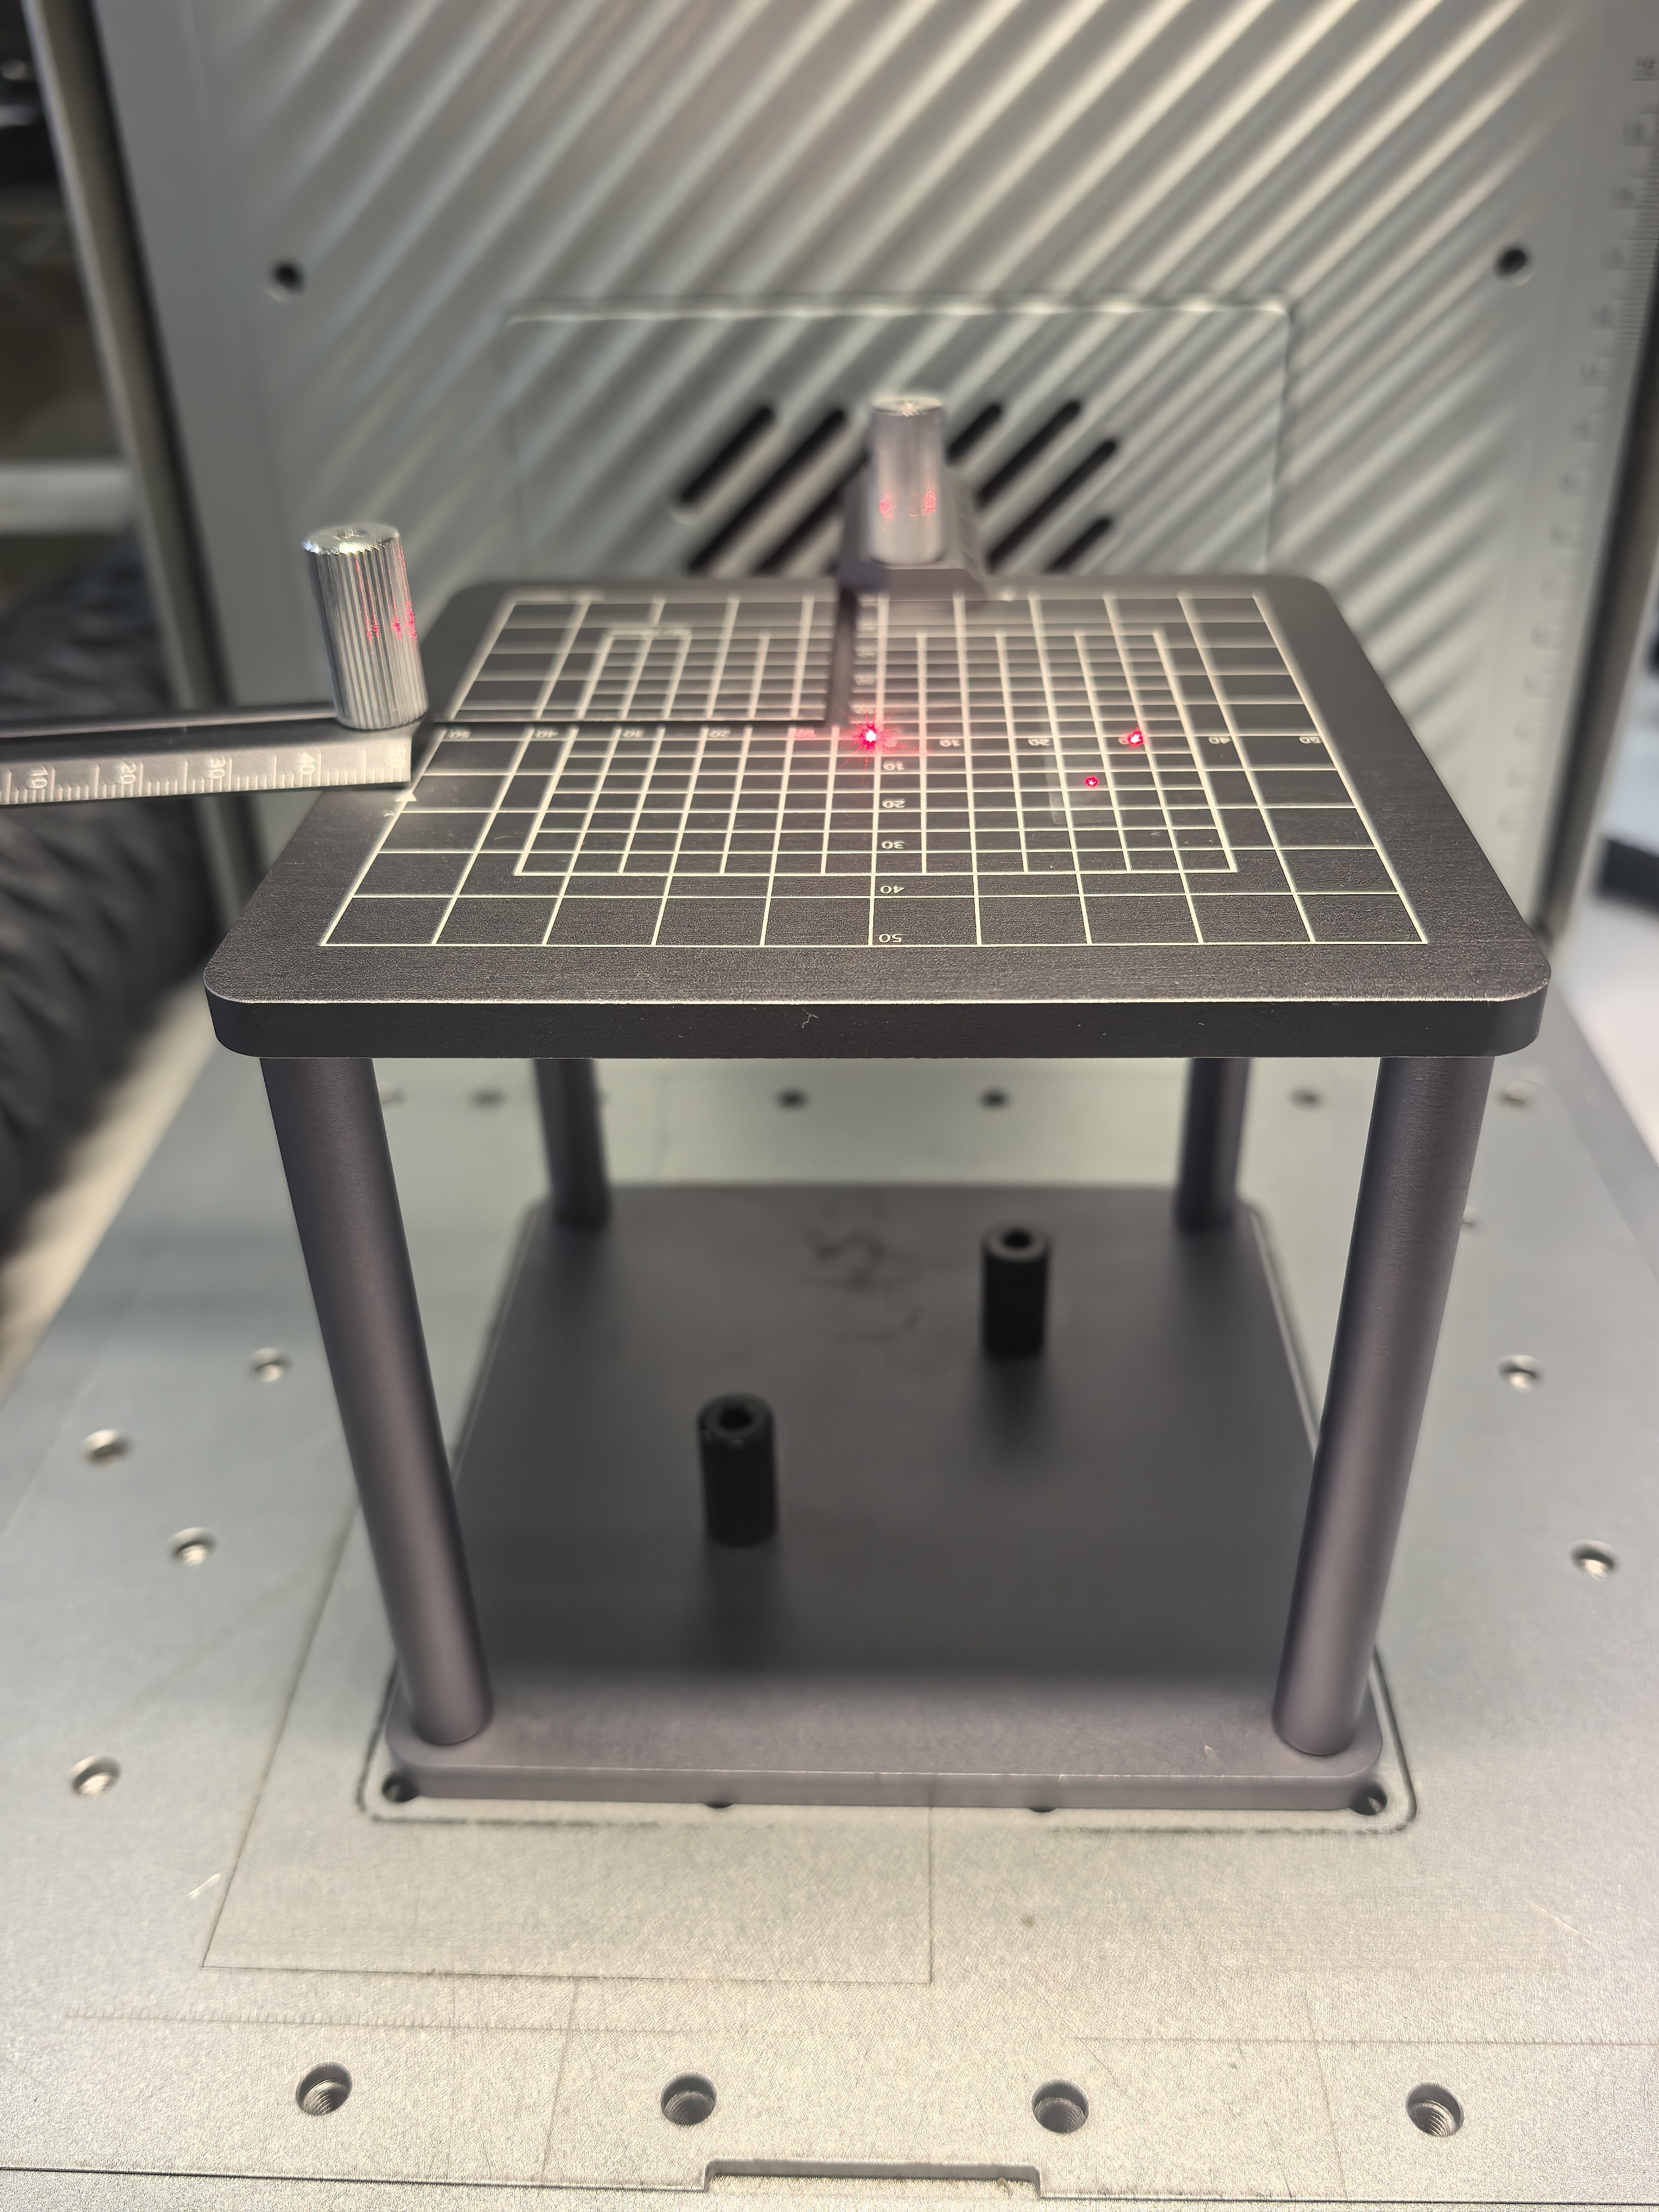
Perform the autofocus operation directly on the assembled internal engraving bracket, do not place the crystal consumables at this time, and correct focusing is required to display the precise border tracing range.
 |
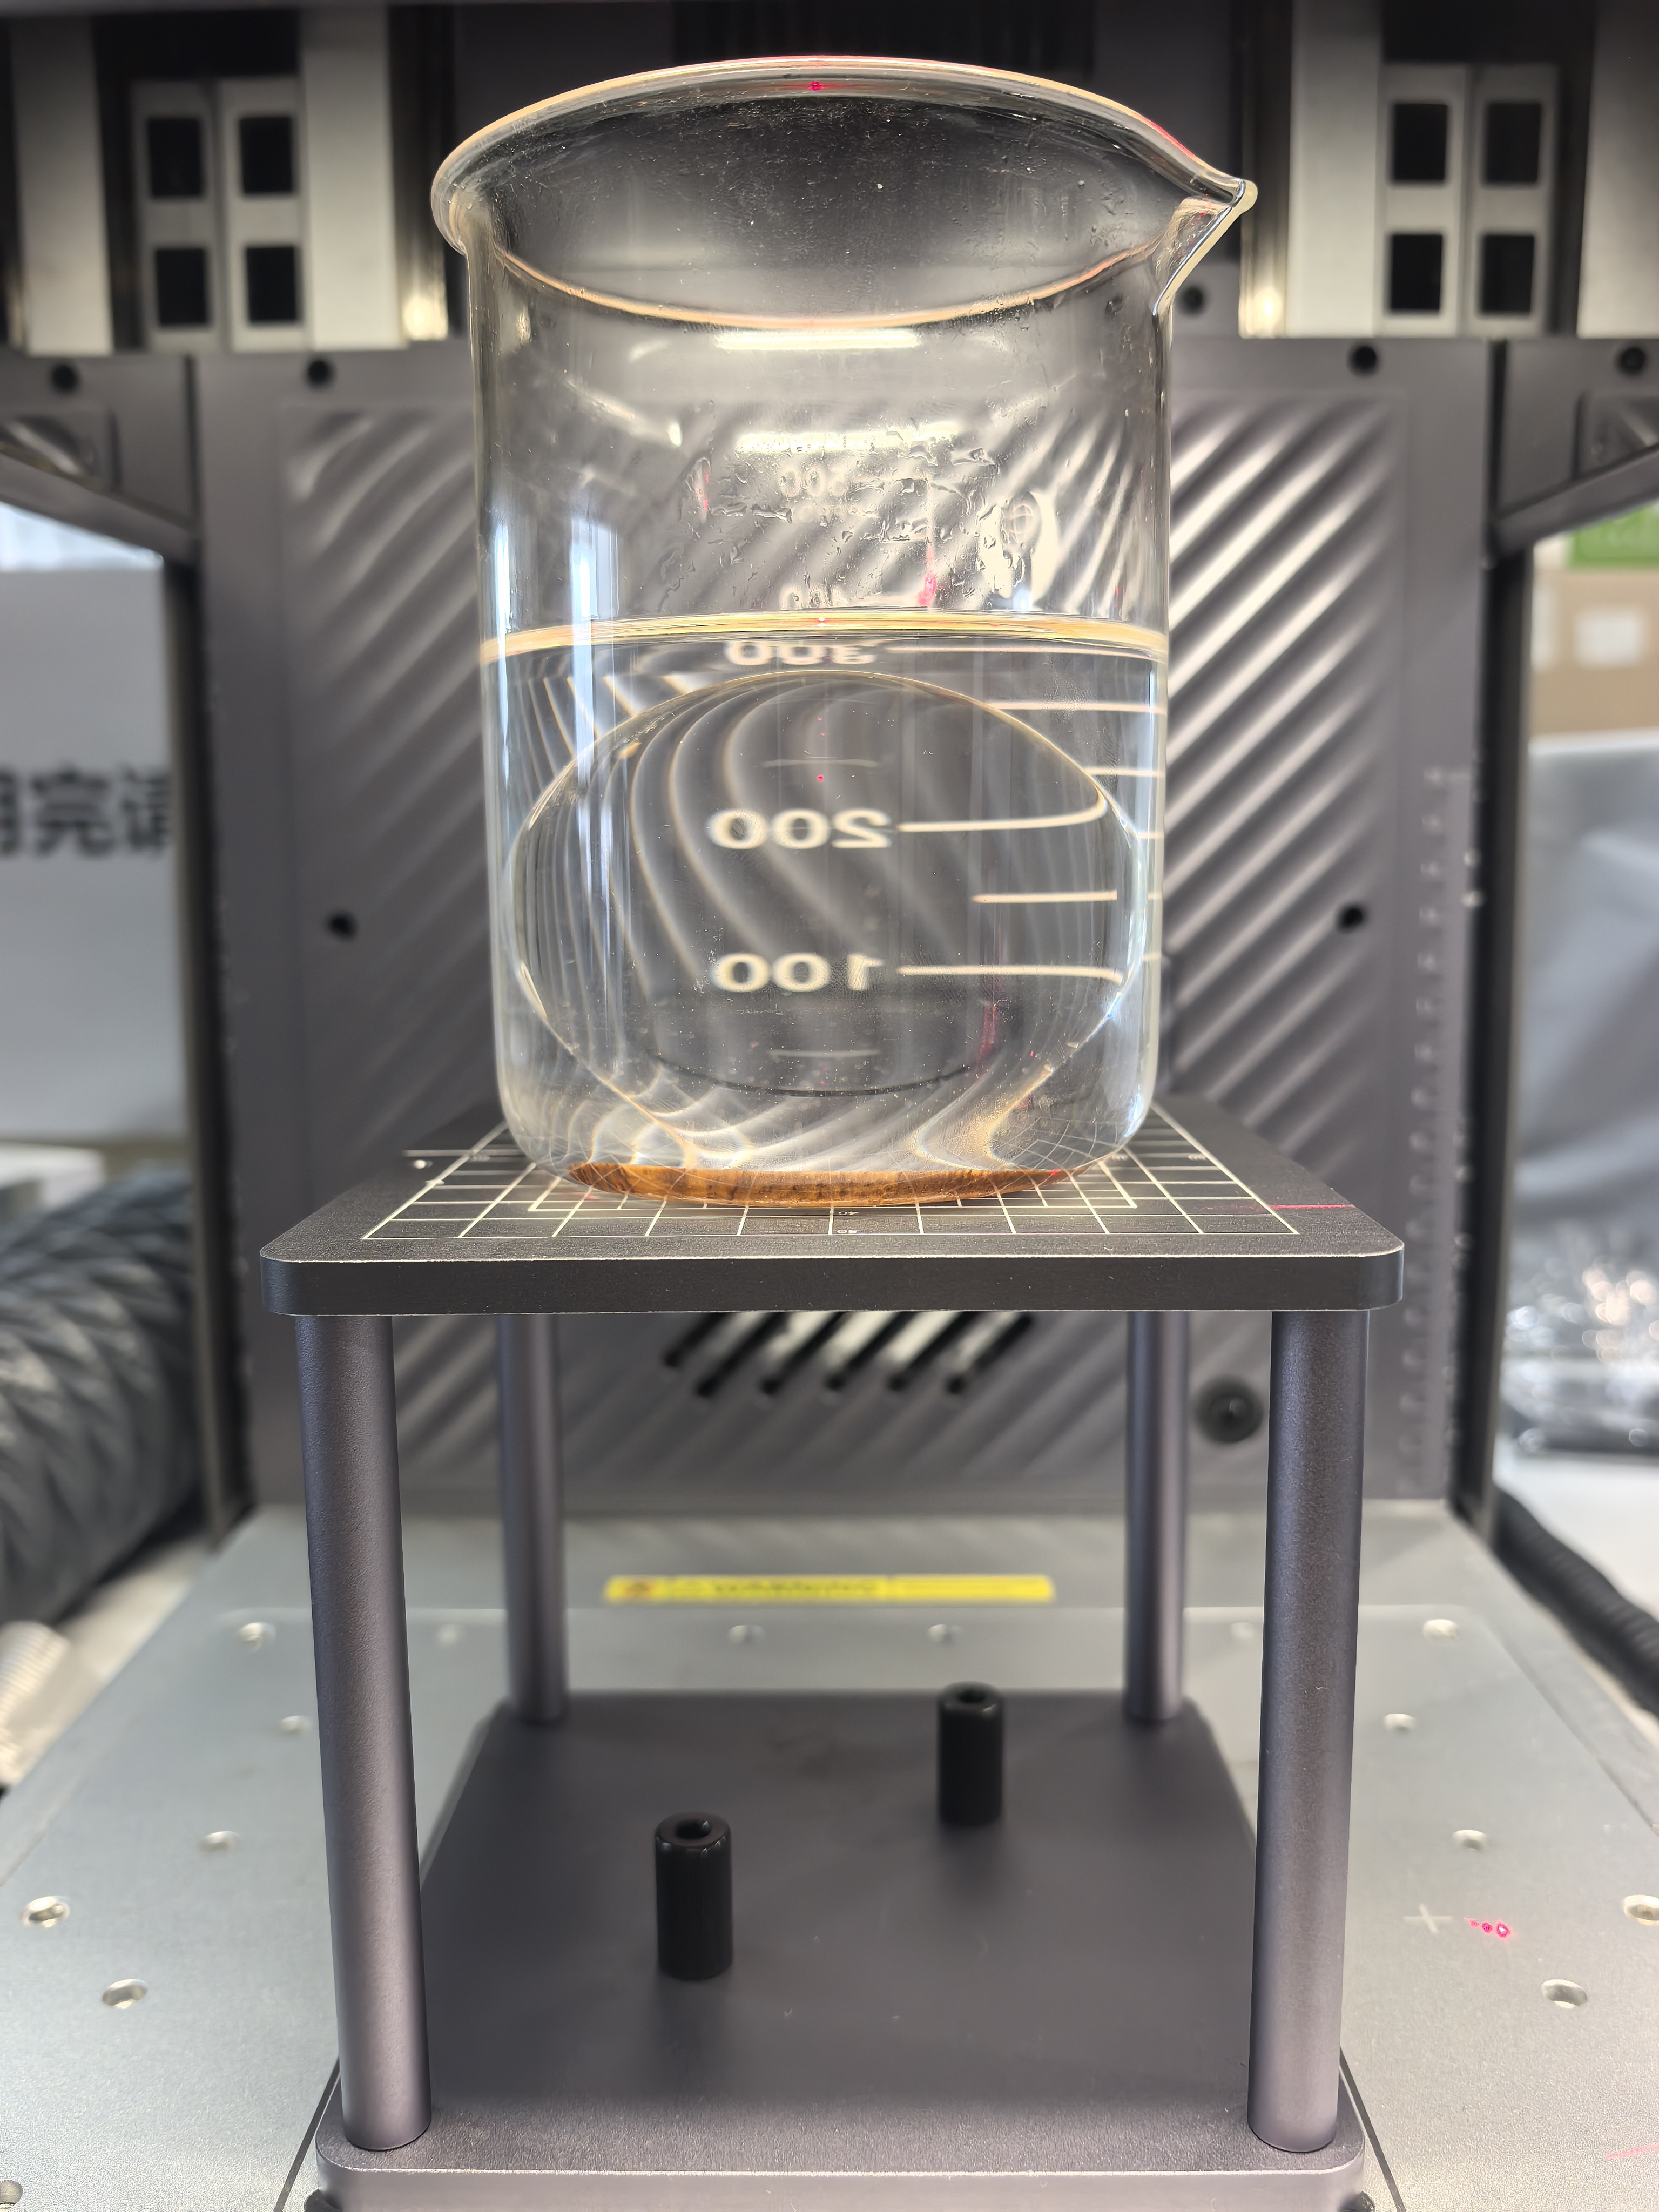
¶ (2) Place the glass containing the internally carved oil, the crystal ball and its base at the center of the top panel of the heightening stand
Note: Before placing the glass on the riser, check whether there are air bubbles in the engraving oil. If there are bubbles, let it stand for several minutes until the bubbles completely dissipate before proceeding, otherwise the final engraving quality will be affected.
 |
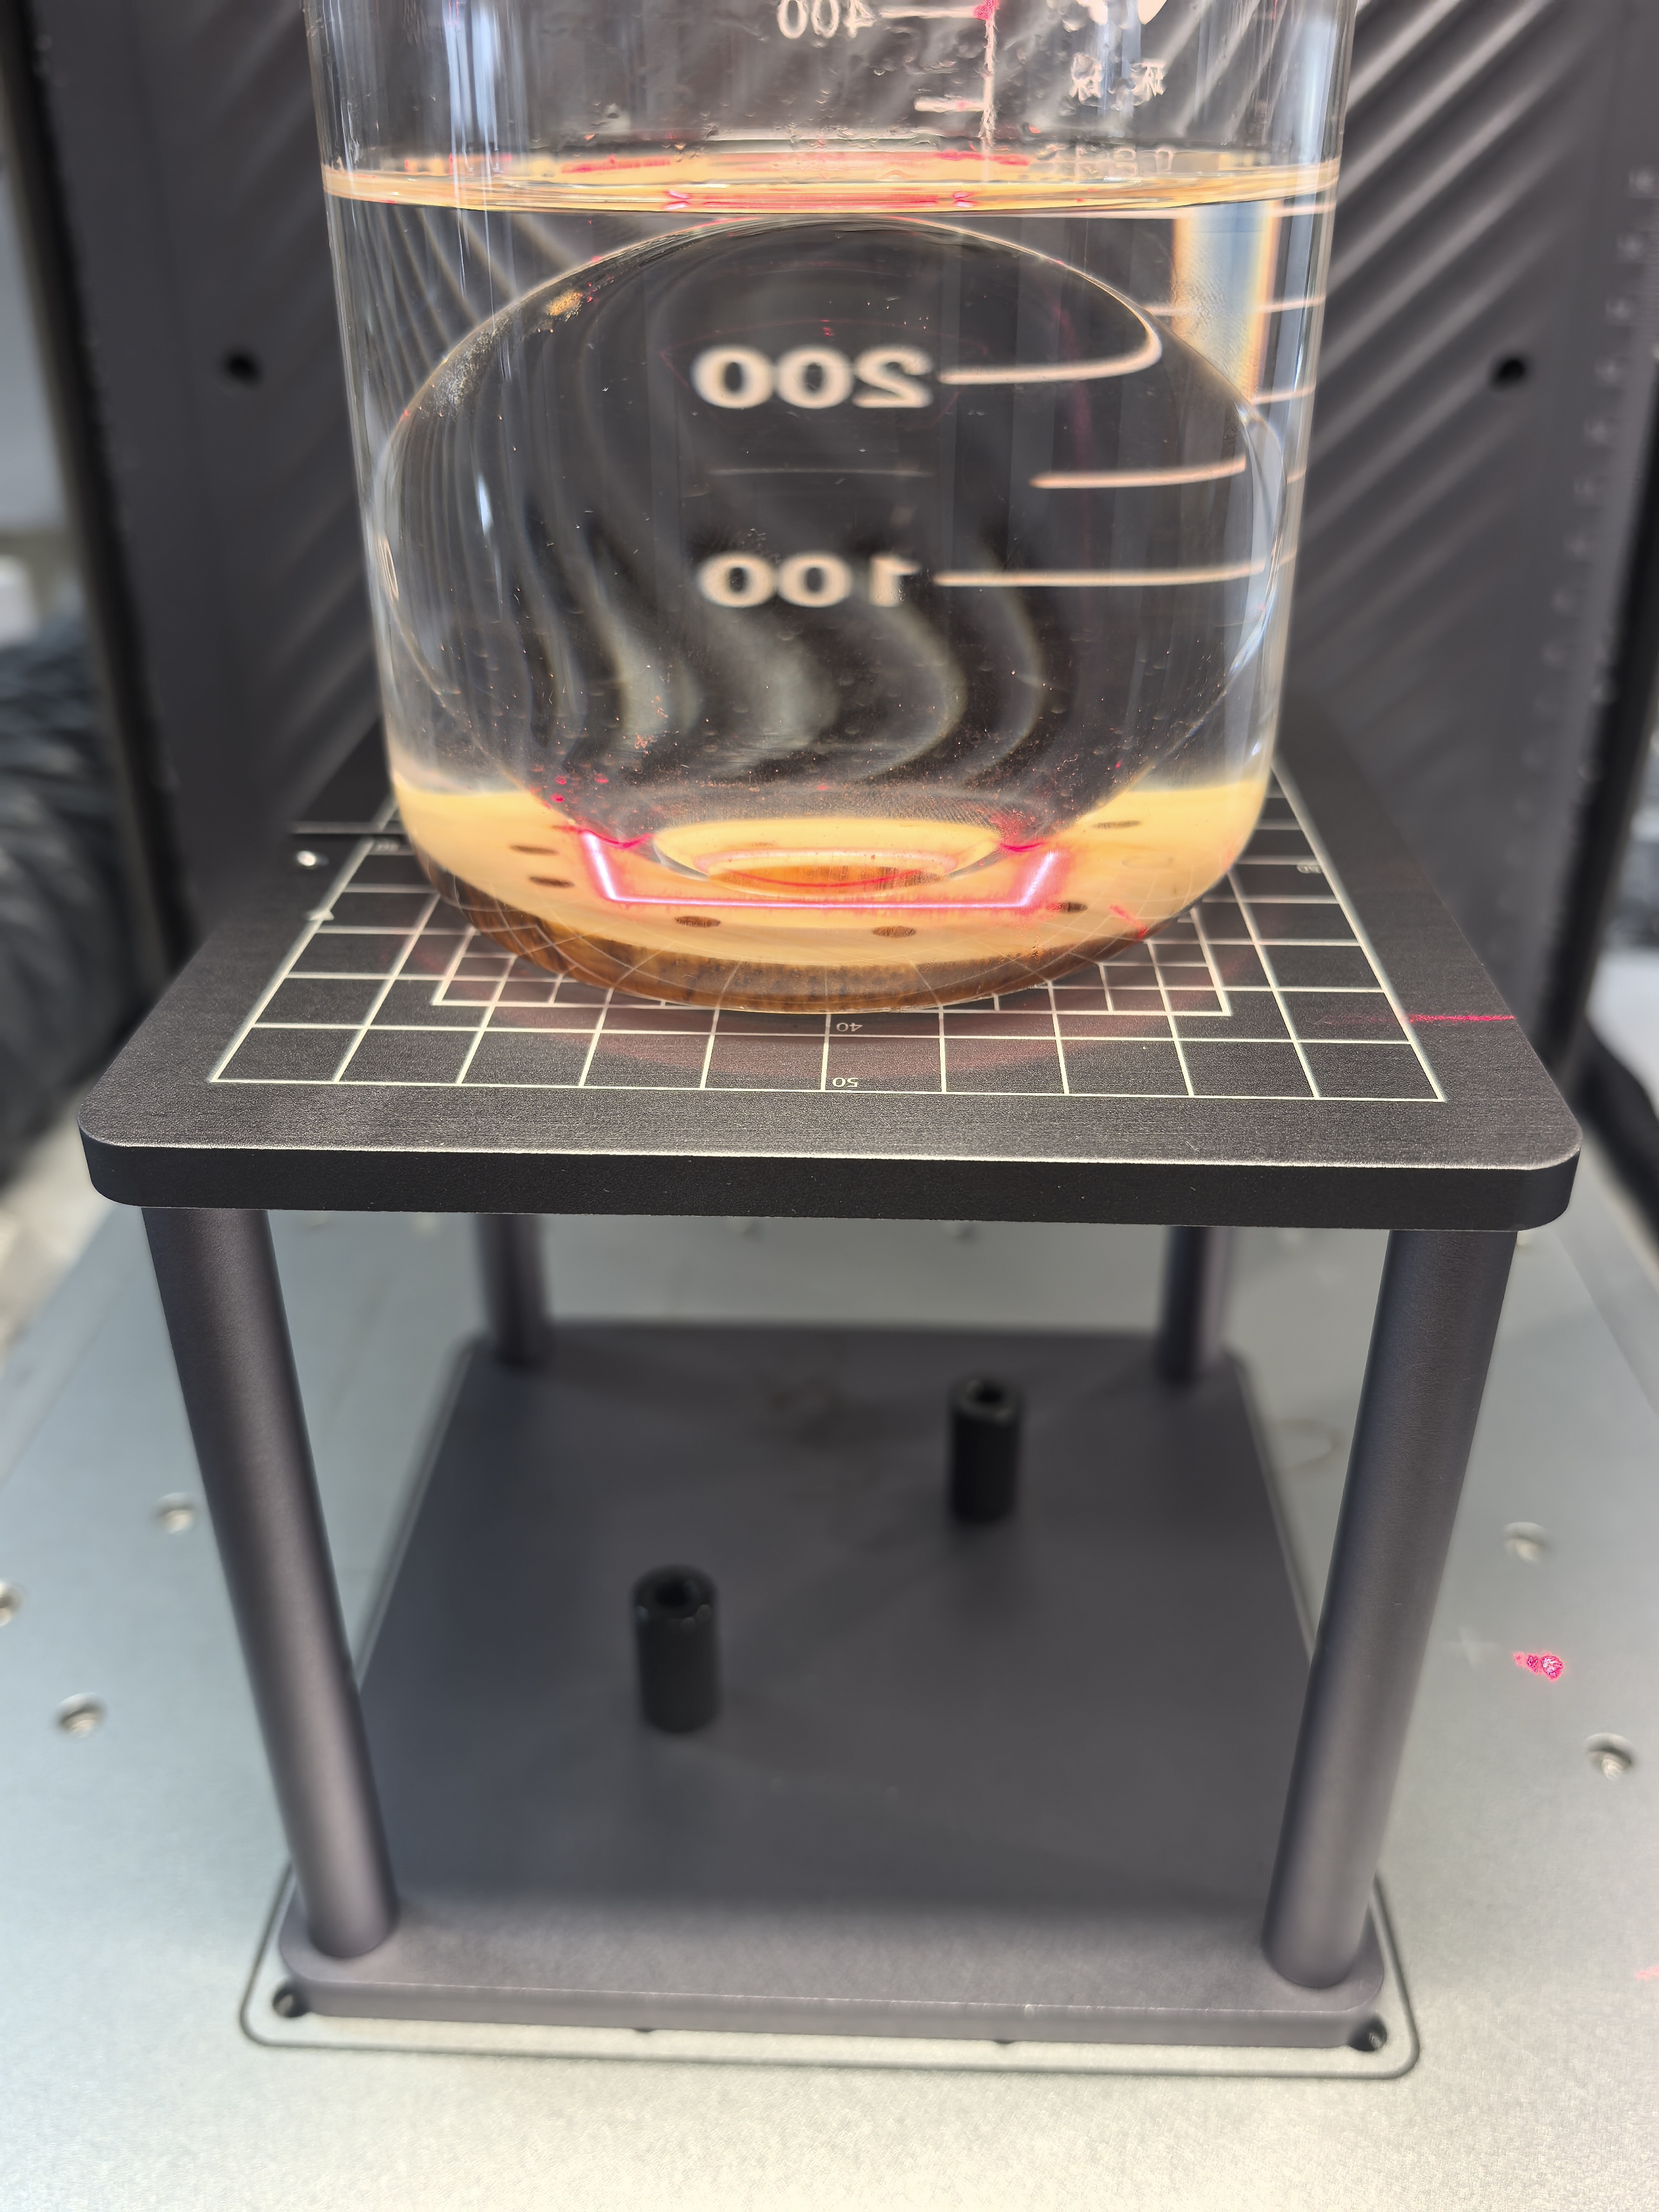
¶ (3) Frame
Click [Frame] to preview the actual machining area on the inner engraving panel, and proceed with subsequent operations after confirming the machining range.
 |
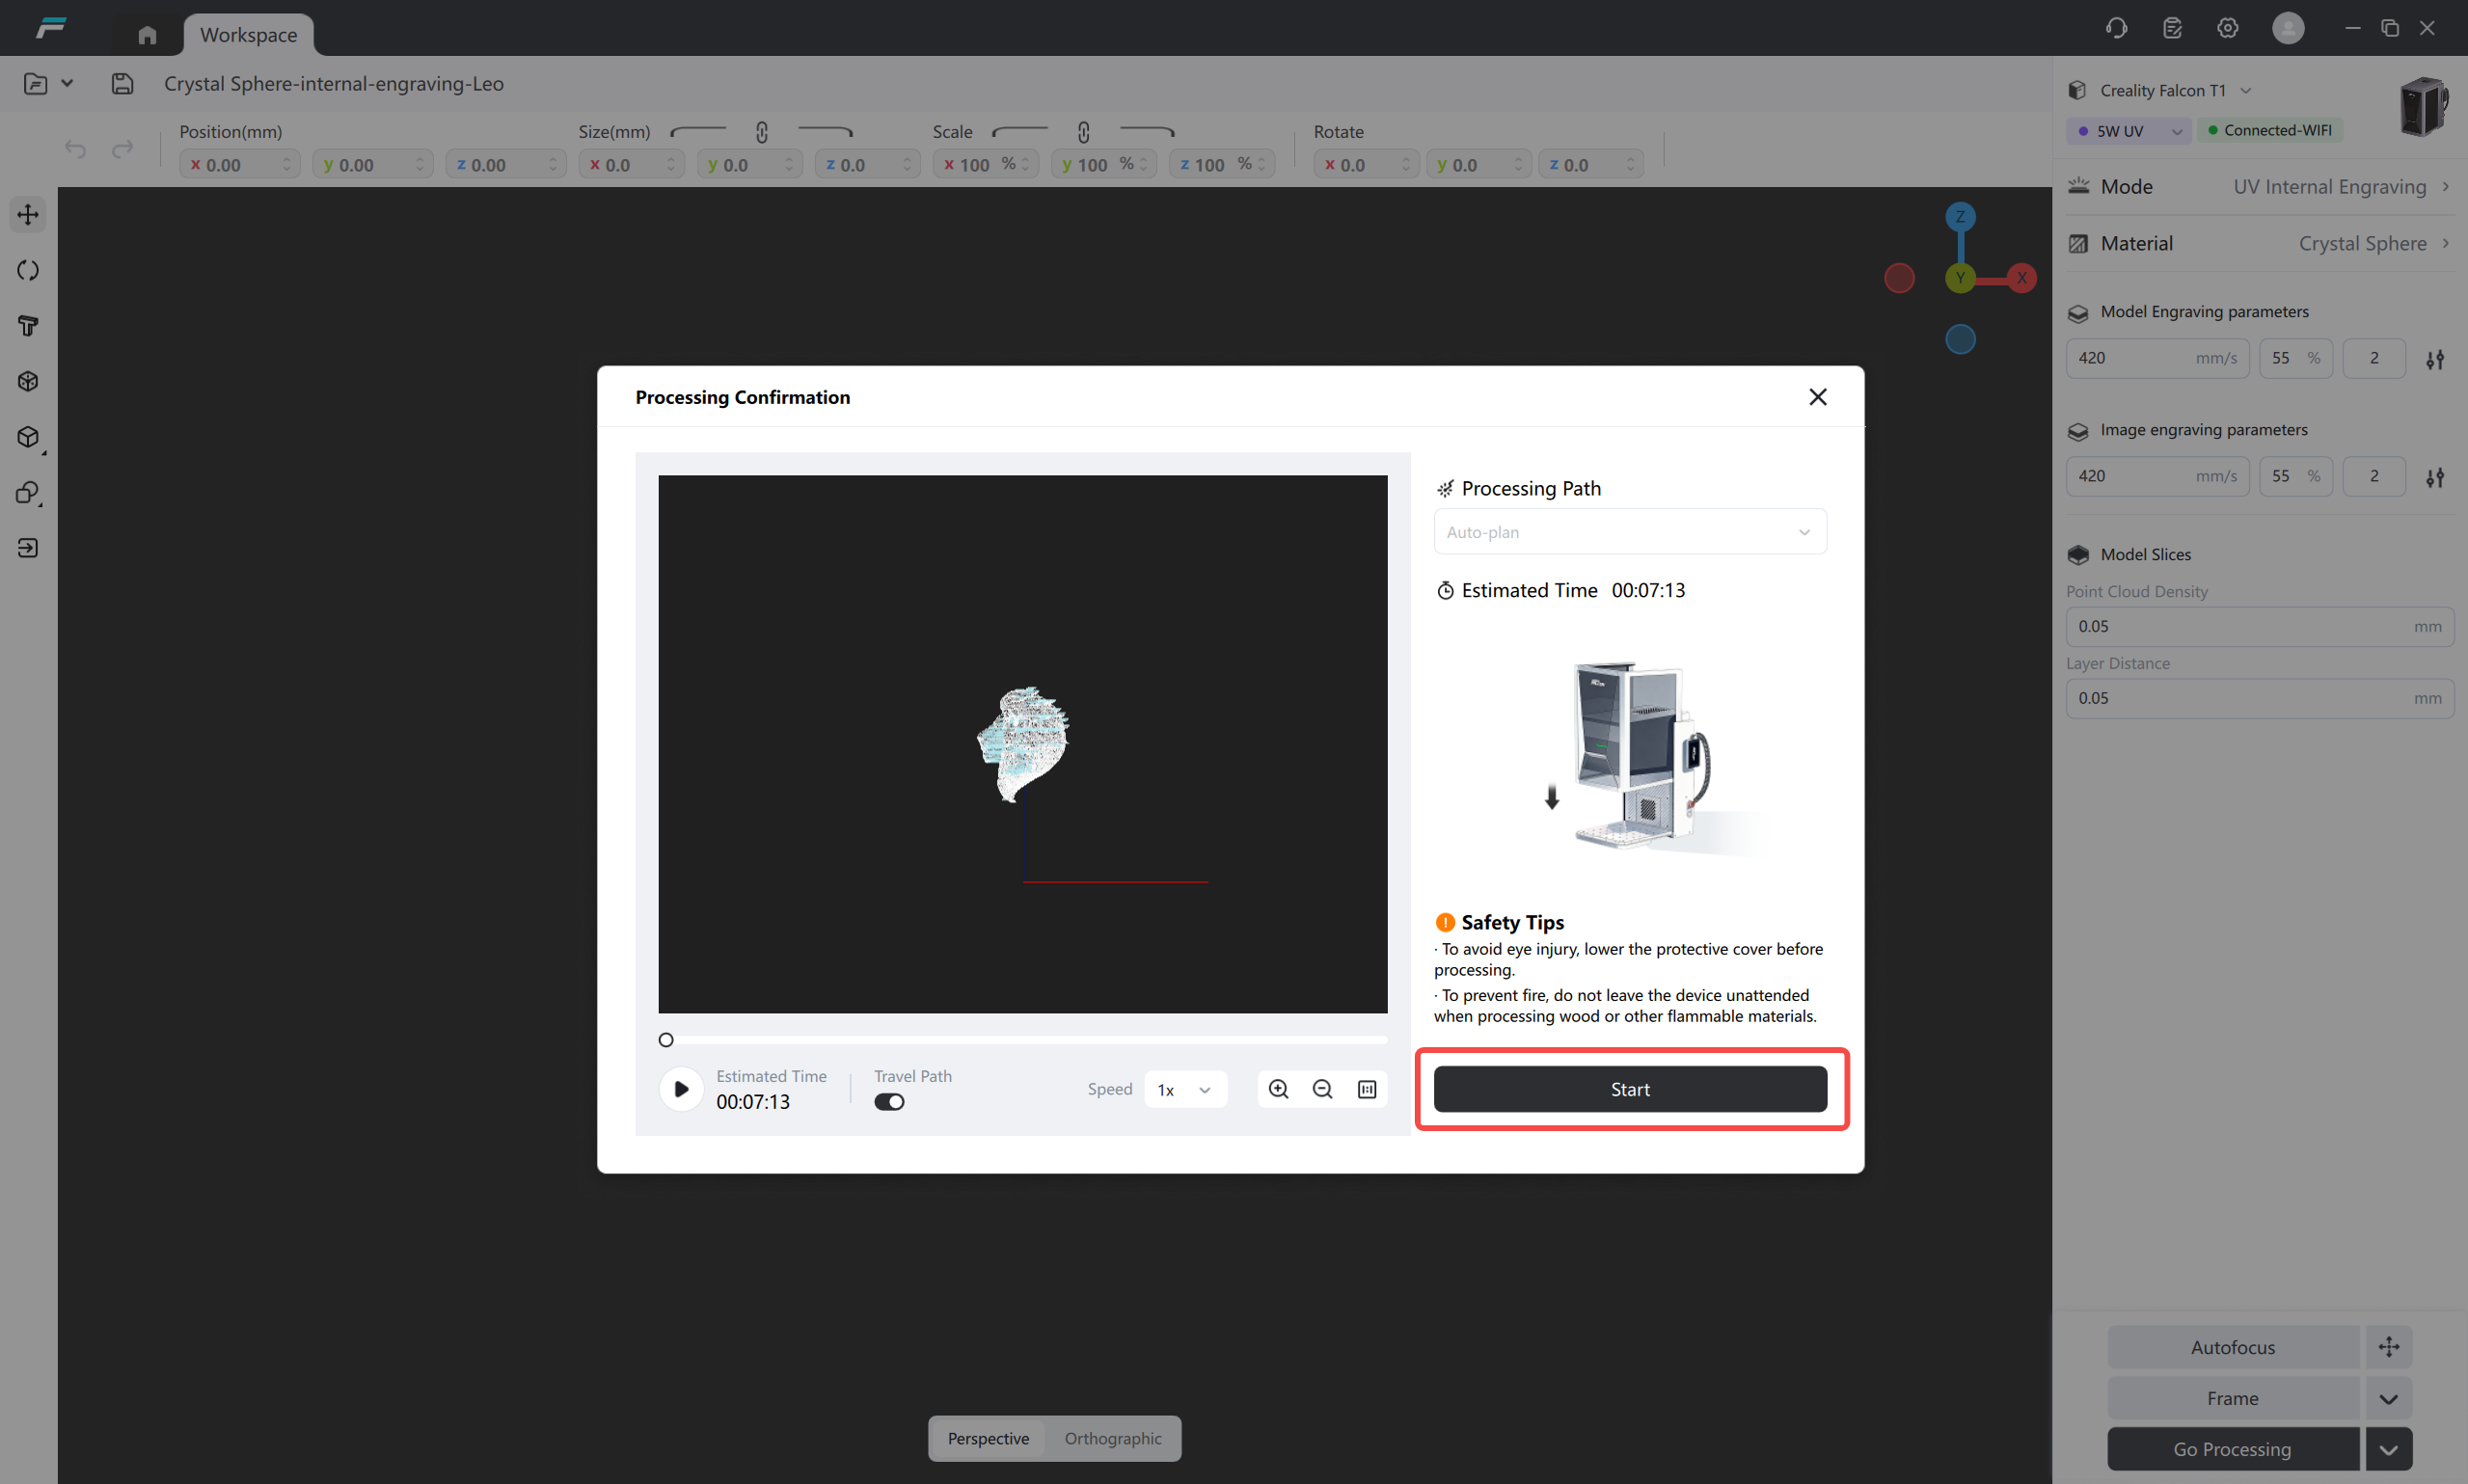
¶ (4) Proceed to processing
Click [Start] to preview the overall processing path of the inner engraving. After confirming that the path is normal, close the protective cover of the engraving machine, click the start button to launch the violet laser inner engraving processing procedure. Do not open the protective cover during the processing.
 |
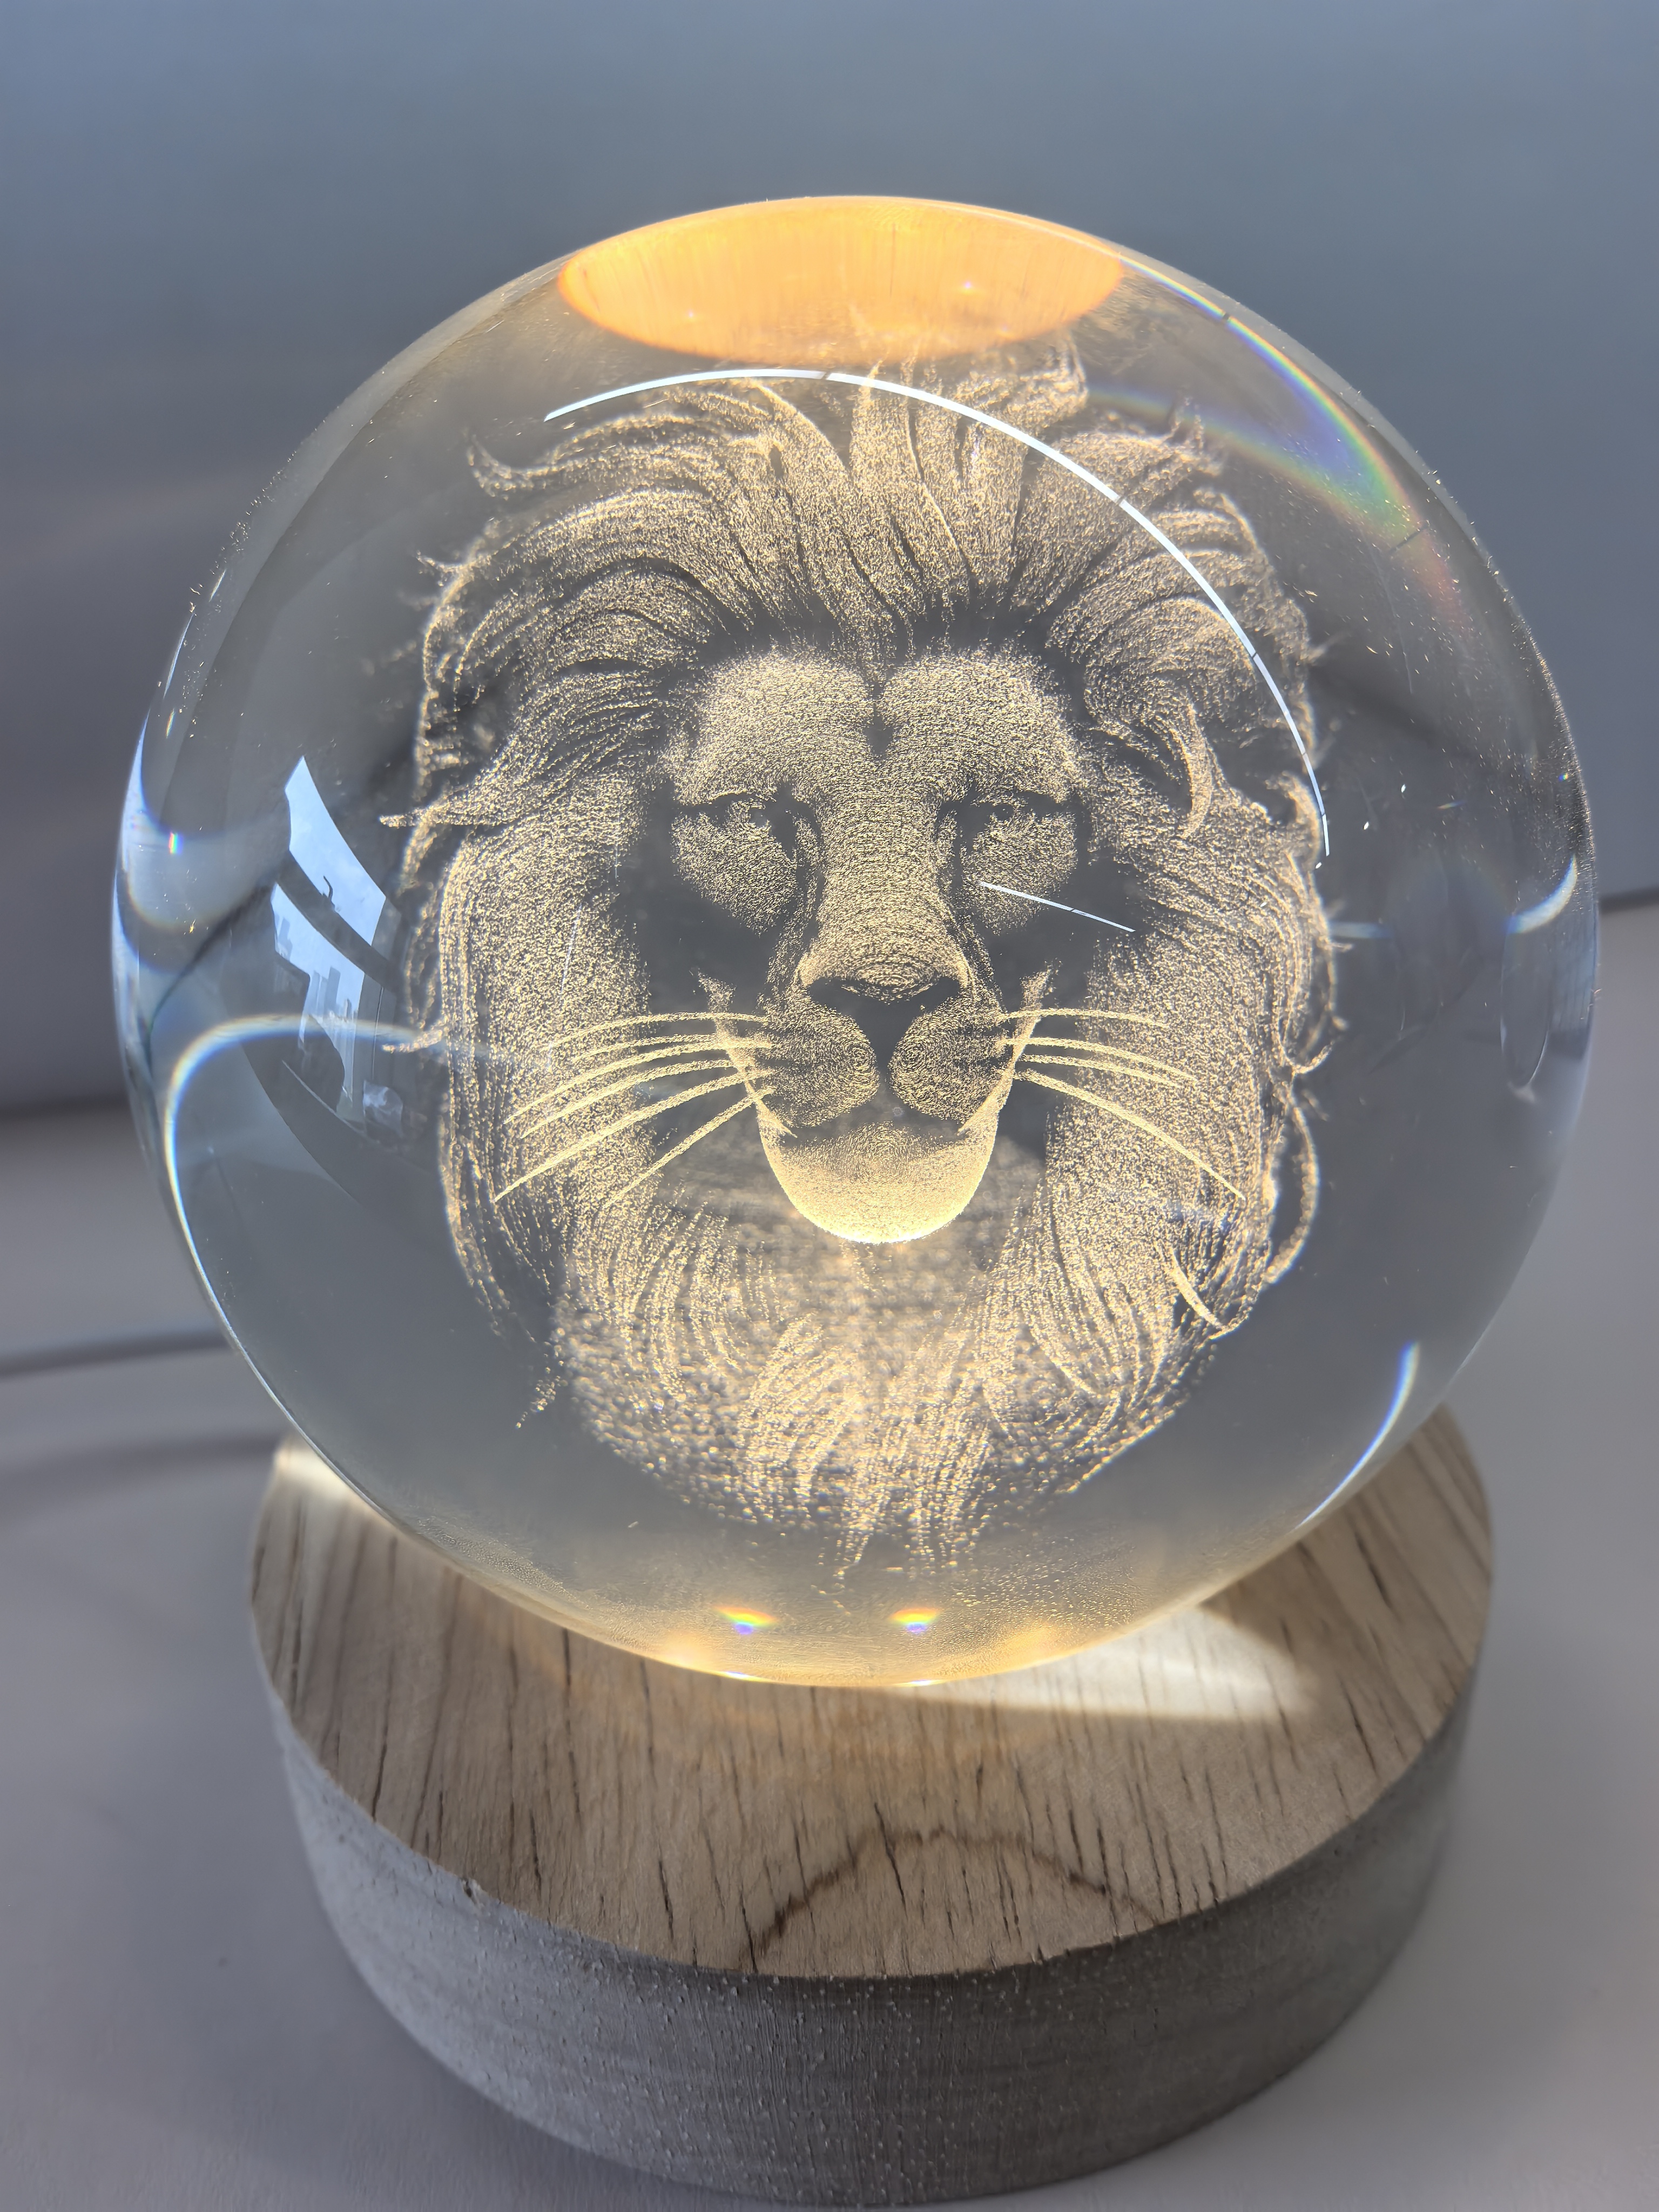
¶ (5) Machining completed
Please clean the surface of the crystal ball with a detergent, then place it firmly on the base. Now you can fully enjoy your creation!
 |