Internal Engraving Stand Compatible Engraving Machine Models: Creality Falcon T1 UV 5W
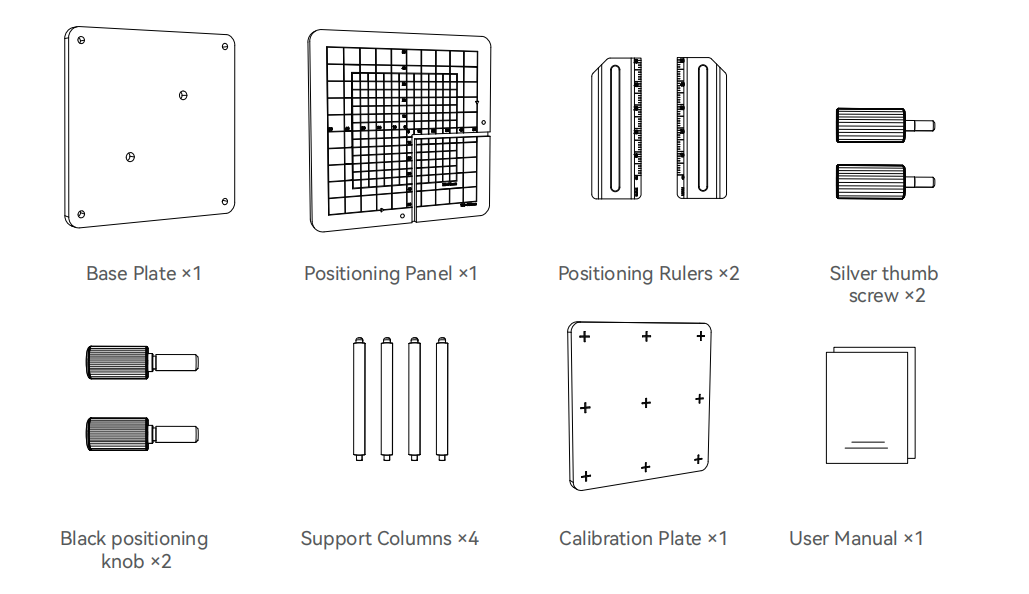
¶ Package Contents:
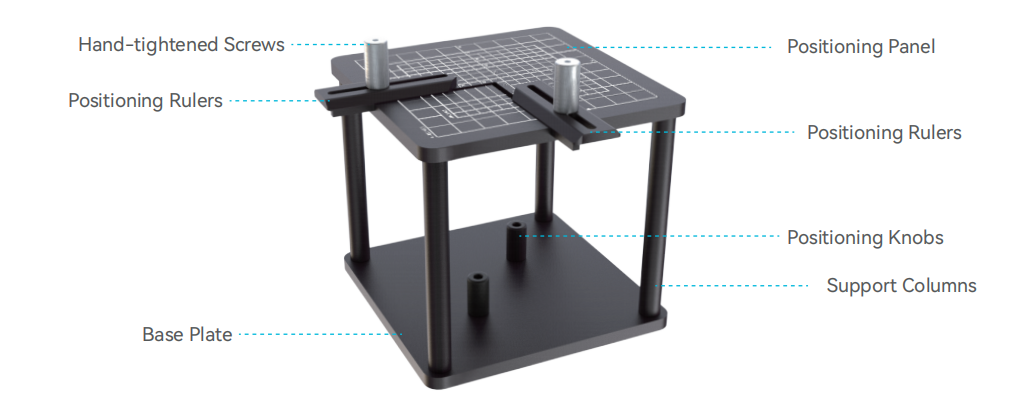
¶ Structure Introduction:
¶ Installation Steps:
Installation and Use of Stents
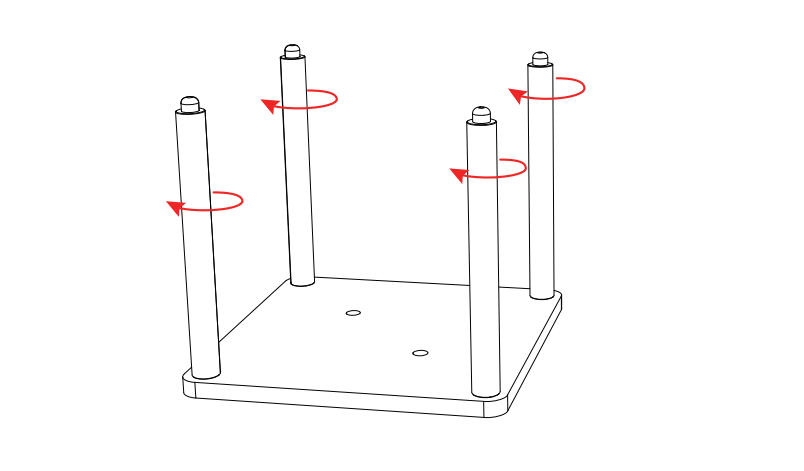
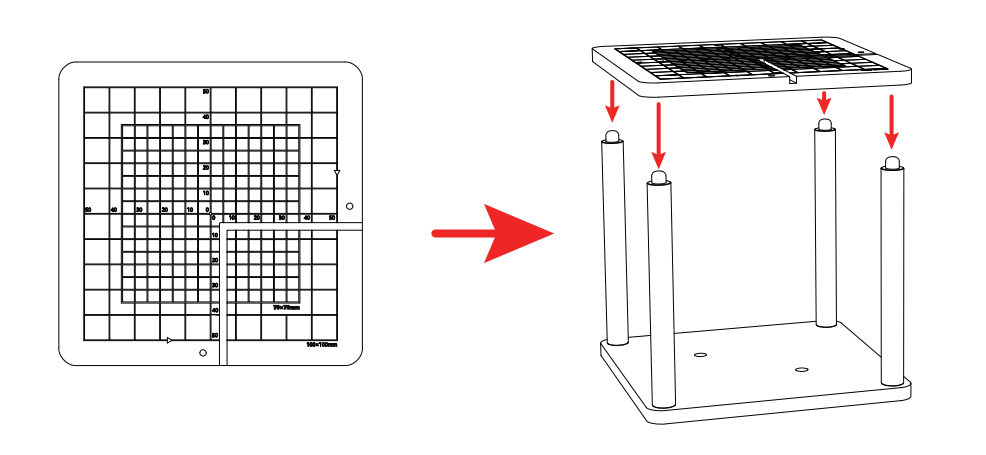
I. Screw the four support columns securely onto the base plate.
a. Positioning Panel Application Scenarios
When replacing a brand-new UV module or internal engraving F-theta field lens of the laser engraver, or when the autofocus focal length drifts, use the calibration plate and supporting tools to complete calibration.
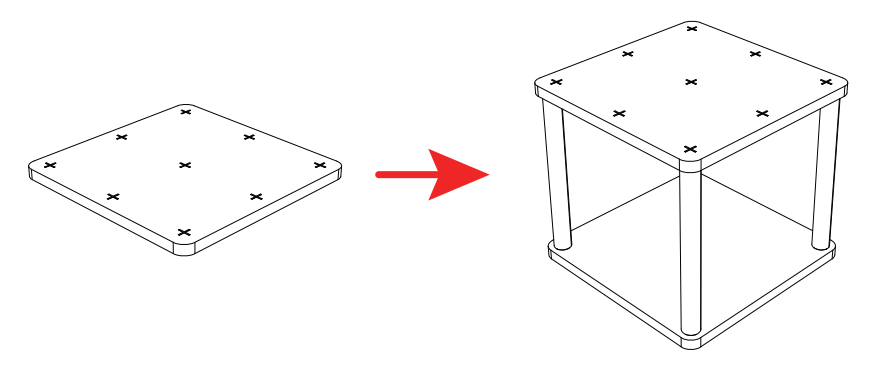
b. Usage scenarios of the positioning panel
Important Notice
1.The positioning panel of this machine adopts a quick-release plug-in structure to allow operators to adjust positioning flexibly according to material dimensions, with no locking mechanism equipped.
2.When moving the entire support frame, do not lift only the work panel, which may cause damage to machine parts or positioning deviation.
1.Insert the positioning panel onto the four support posts.
2. Install the positioning ruler
① Slide the two positioning rulers into the slide rails respectively.
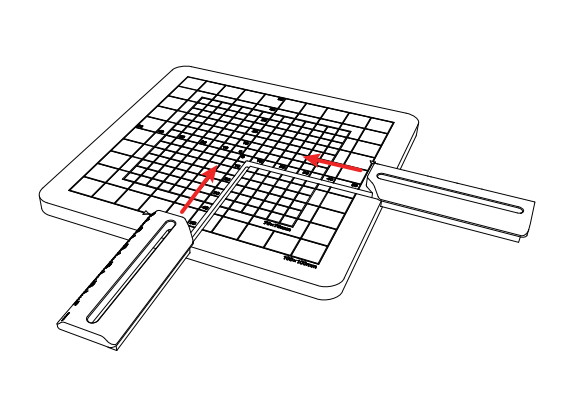
② Align their beveled surfaces to fit closely against each other.
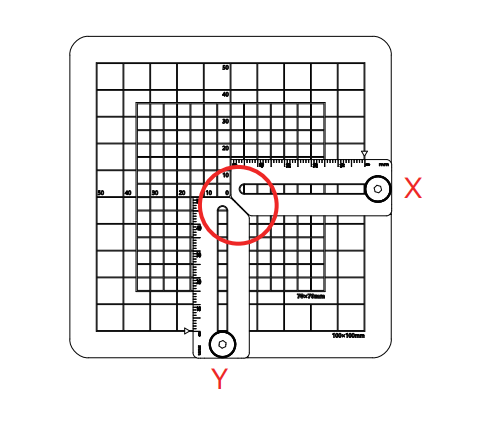
3. Tighten and secure with silver thumb screws
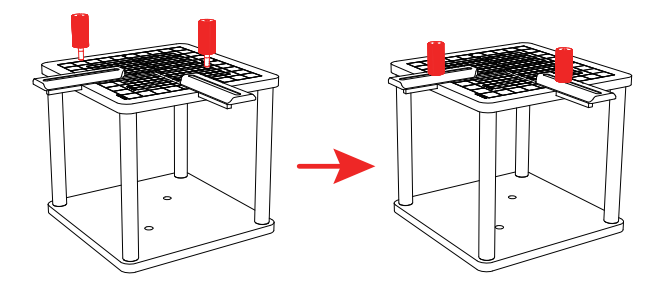
Tips:Loosen the hand-tight screws slightly counterclockwise so the positioning rulers can slide freely back and forth on the positioning panel.
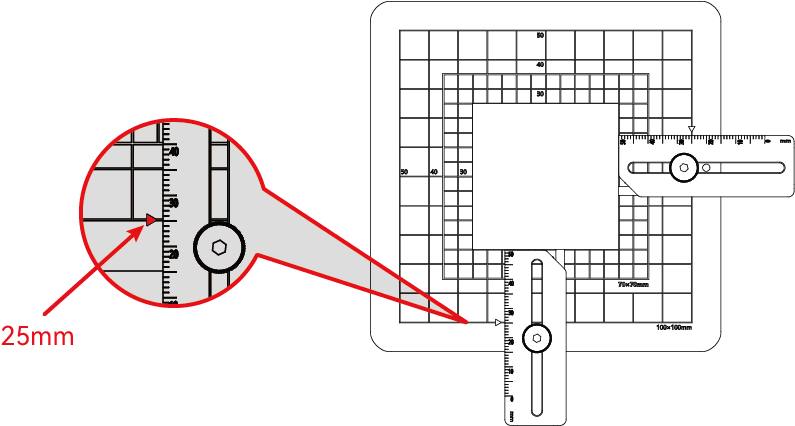
4. Place the crystal in the center of the positioning panel, slide the positioning ruler to the corresponding radius scale according to the crystal specification, and then tighten the thumb screw.
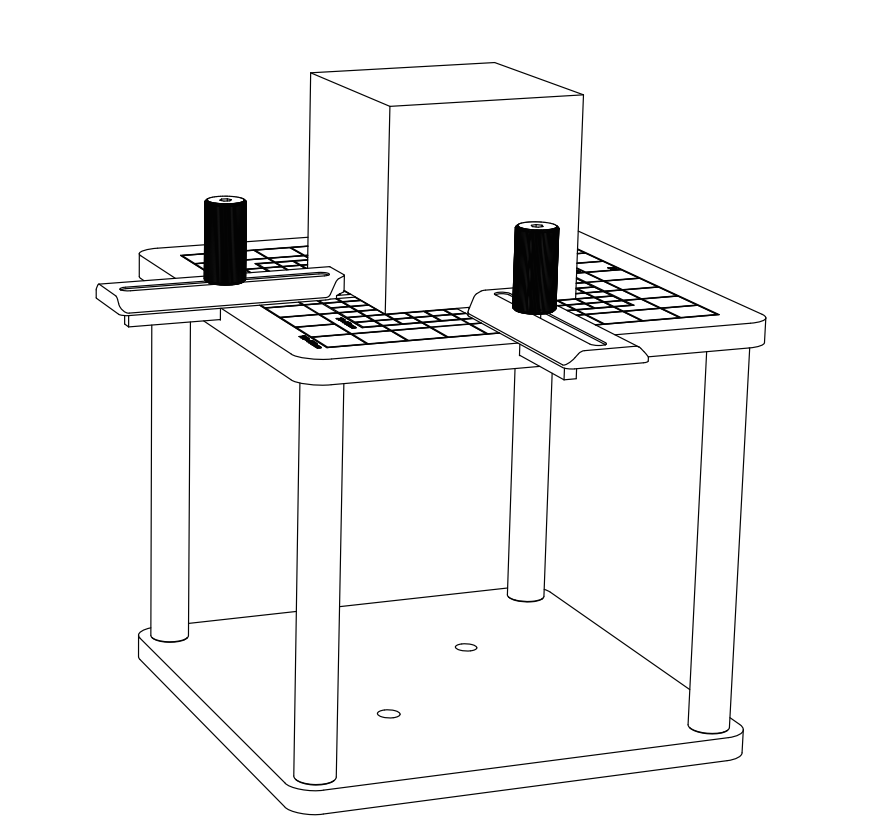
Example: If the consumable is a crystal of 50×50×50mm, you can adjust the positioning ruler to the 25mm position, which is the center of the consumable.
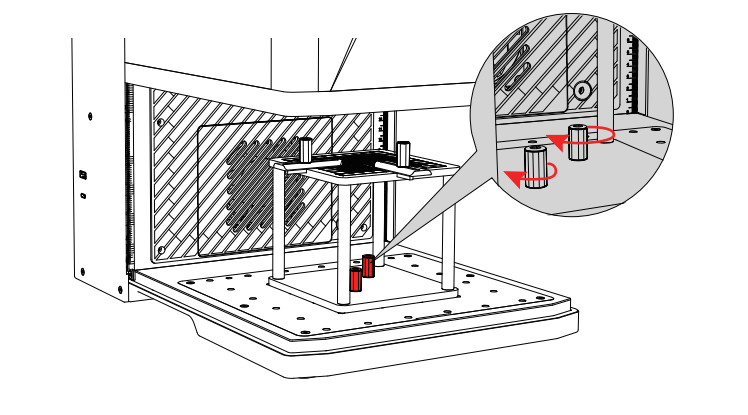
5. Fix the internal engraving bracket at the center of the working area of the engraving machine, and secure it with the black positioning .
Important Note:
When the engraving machine is equipped with other laser source modules (such as Diode\Fiber\MOPA laser) or a universal field lens for IR&Diode, using the internal engraving bracket will result in processing failure, and may damage the laser module and the field lens.