¶ 1. Phenomenon Description
The gear is idling, with no filament flowing from the nozzle.
The gear makes a clunking noise when rotating, without filament flowing from the nozzle.
¶ 2. Cause analysis
1. Filament tangled in the spool holder.


2. Extruder front cover clogged, nozzle clogged or filament leakage.

3. Excessive filament debris residue on the extruder gear.
4. Extruder switch loosened during printing.
¶ 3. Troubleshooting
¶ 3.1 Filament Entanglement Troubleshooting
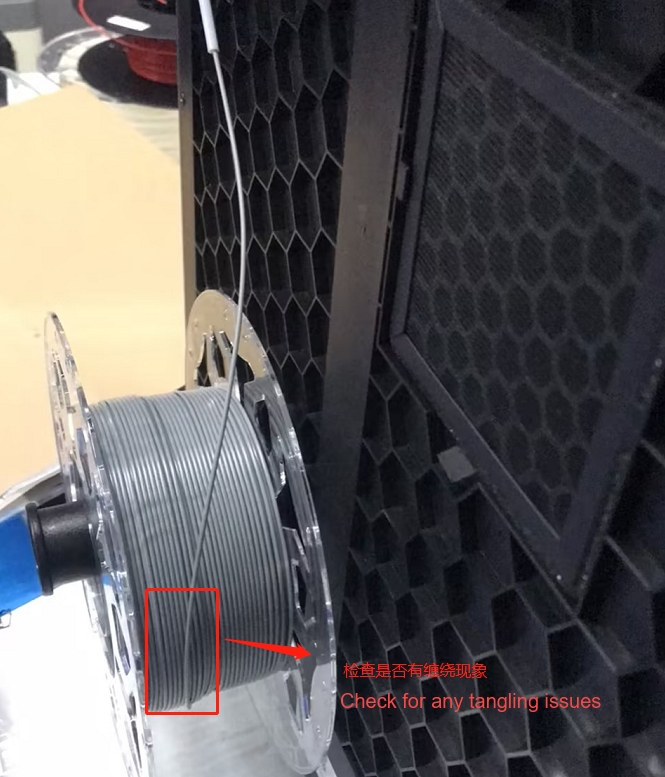
Check the filament spool holder on the side of the printer, and inspect whether there is tangling at the spool or the PTFE tube inlet. If there's entanglement, untangle the filament and restart printing. The feeding issue is resolved.

If there is no filament tangling, proceed to the next step:
¶ 3.2 Filament Clogged/Jammed Troubleshooting
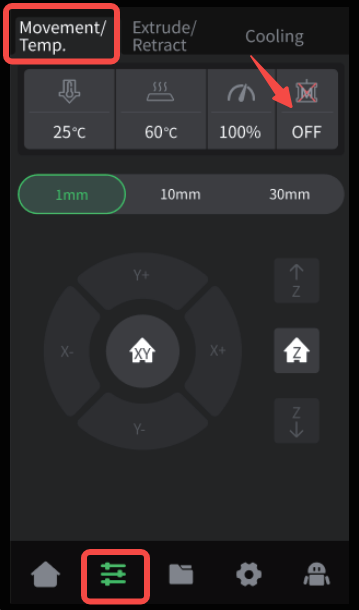
STEP 1: Enter the control page, click "OFF" to unlock the motor.

STEP 2: Press down on the white tube connector with your hand, gently pull out the PTFE tube above the extruder to expose the filament, and turn the extruder switch to the open position.

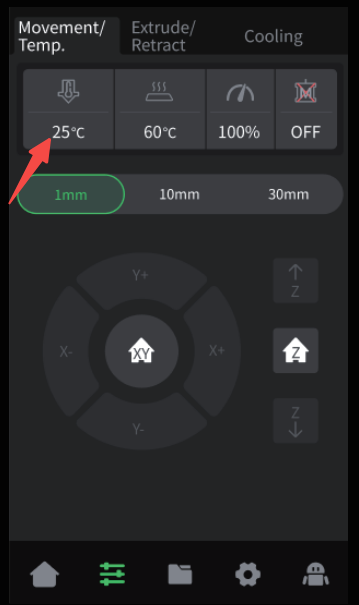
STEP 3: Set the nozzle temperature to the recommended printing temperature and wait for it to stabilize.

STEP 4: Quickly pull the filament upwards with force by hand.

¶ 3.2.1 If the filament can be pulled out
Check if there is an umbrella-shaped protrusion at the end of the pulled-out filament. If so, replace the PTFE tube of the extruder.

¶ 3.2.1.1 If the filament can be fully inserted into the hotend
1. If the filament can be inserted normally and extruded, turn the extruder switch to the closed position and click auto extrude. Check the filament extrusion and extruder gear rotation status. If the automatic extrusion is normal, the filament not extruding issue is resolved.

2. If the extruder gear does not rotate during automatic extrusion, the fault may be an extruder motor issue (or adapter board). First, check if the extruder motor wiring is loose, or replace the extruder motor to further troubleshooting.

3. If the extruder gear rotates normally but there is a slight clicking noise at the gear, and uneven extrusion at the nozzle, analyze from two aspects: extrusion assembly abnormality and nozzle damage:
a. If the extruder gear rotates normally without abnormal noise, but the filament extrusion at the nozzle is still uneven, proceed with the article Replace Ender-5 Max Nozzle.
b. If the extruder gear rotates abnormally, proceed with the extrusion assembly abnormality process:
STEP 1: Remove the extrusion assembly
(1) Remove the six screws on both sides of the hotend cover and take it off.
(2) Remove the three fixing screws of the printhead cable, press the cable buckle, and remove the back cover of the hotend.
(3) Finally, remove the three screws on both sides of the extruder motor, then gently lift the extrusion assembly (be careful not to lift the extrusion assembly suddenly to avoid damaging the extruder wire).


STEP 2: Check the extruder gear
(1) Remove the two diagonal socket head cap screws of the extrusion assembly front cover and open it.
(2) Check if there are filament debris residues on the extruder gear.
(3) Check if the gear is damaged or deformed. If damaged or deformed, replace it.


STEP 3: Clean up filament residue
(1) If there is a large amount of filament debris residue on the extruder gear, use a soft brush to clean the debris off the extruder gear.
(2) Then replace the extruder front cover and reassemble the extrusion assembly on the X-axis slider mounting position, tightening 3 fixing screws on each side and the printhead cable terminal screws.

STEP 4: Perform the auto feed operation again and observe the filament extrusion at the nozzle. If the extrusion is normal and the extruder gear rotates normally without abnormal noise, the filament not extruding issue is resolved.
¶ 3.2.1.2 If the filament cannot be inserted into the hot end
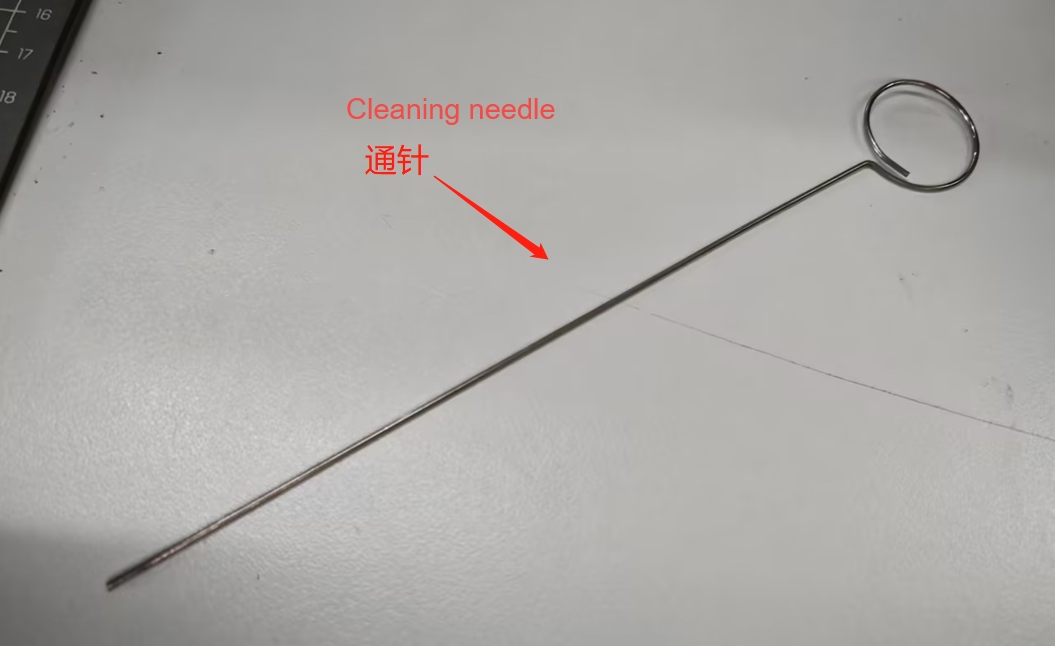
Quickly remove the filament and use the cleaning needle from the tool kit to push any residual filament in the extrusion path towards the hot end:


1. If the residual filament in the extrusion is completely pushed out of the extruder, quickly withdraw the cleaning needle to avoid the melted filament on the needle tip from adhering to the inner wall of the heat break and extruder gear. Repeat this operation to complete the filament not extruding issue .
2. If the residual filament in the extrusion cannot be cleared by the cleaning needle, then the fault is a clogged nozzle abnormality. Proceed with the article Troubleshooting for Ender-5 Max Clogged Filament
3. If the filament cannot be pulled out, it is filament is clogged in the extruder front cover.
¶ 3.3 Clogged/Jammed Filament Resolution

¶ 3.3.1 How to determine if there's a jammed filament
Heat the nozzle to extrusion temperature, open the extruder switch, and try to pull out the filament by hand. If you cannot pull it out, it's jammed.
¶ 3.3.2 How to avoid filament jamming/clogging?
1. Re-leveling.
2. Use official slicing parameter configurations, avoid using excessively high bed temperatures (no more than 50°C for PLA, no more than 70°C for PETG), and avoid using excessively low nozzle temperatures.
¶ 3.3.3 Jammed Filament Troubleshooting
STEP 1: Preheat the nozzle to the recommended printing temperature.

STEP 2: Open the extruder switch, pull out the PTFE tube, and cut the filament.

STEP 3: Remove the six screws on both sides of the hotend cover and take it off. Remove the three fixing screws of the hotend cable, press the cable buckle, and remove the back cover of the hotend. Finally, remove the three screws on both sides of the extruder motor, then gently lift the extrusion assembly (be careful not to lift the extrusion assembly suddenly to avoid damaging the extruder wire).


STEP 4: Remove the two screws from the front cover of the extruder.

Note: After unplugging, set the nozzle temperature to 0°C.
STEP 5: Separate the motor from the extruder gear part, the motor can be temporarily placed on the X-axis bracket.

STEP 7: Separate the extruder gear assembly from the front cover (you can use tools like a scraper/cutting plier).


STEP 8: Process the jammed filament in the front cover.
If it's stuck in the PTFE tube, you can use a cleaning needle/L-wrench or other tools to poke out the filament.

STEP 9: Reassemble following the disassembly steps in reverse order.
¶ 3.3.4 Clogged Nozzle Troubleshooting
STEP 1: Preheat the nozzle to the recommended printing temperature.

STEP 2: Open the extruder switch, pull out the PTFE tube, and cut the filament.

STEP 3: Remove the six screws on both sides of the hotend cover and take it off. Remove the three fixing screws of the hotend cable, press the cable buckle, and remove the back cover of the hotend. Finally, remove the three screws on both sides of the extruder motor, then gently lift the extrusion assembly (be careful not to lift the extrusion assembly suddenly to avoid damaging the extruder wire).


STEP 4: Pull out the extrusion assembly, discover the clog, and find that the clogged filament cannot be pulled out.

STEP 5: Disassemble the hotend
1. Turn off the printer power or set the nozzle temperature to 0°C before proceeding.
2. After the temperature cools to room temperature, use a hexagonal wrench to remove the two fixing screws of the heat sink.
3. Unplug the terminals of the heating ring, thermistor and the pipe fan connected to the adapter board, then remove the hotend.

STEP 7: Clean the clogged filament.
STEP 8: Reassemble.