¶ Preparation of the object to be scanned and environment:
¶ Operating system Requirements:
https://wiki.creality.com/en/3d-scanner/tutorials/general/performance
¶ Environment:
Setting the stage for a successful 3D scan involves some pre-scan preparation:
(1).Object Preparation:
-Ensure your object is clean and free of dust or debris to achieve accurate results.
-For objects with shiny or reflective surfaces, consider applying a temporary coating to reduce glare and enhance scan quality.
(2). Environment Setup:
-Set up your scanning area in a controlled environment, devoid of direct sunlight or other extraneous light sources, which may interfere with the scanning process.
(3).Object Size and Shape:
Choose a scanner capable of handling the specific size and shape of the objects you planning to scan, considering factors such as working volume and scanning range.
¶ Choosing the Right Scanning Mode
Otter-series has 3 kinds of visual tracking methods: geometry(based on the object's shape and geometric features), textures and markers.
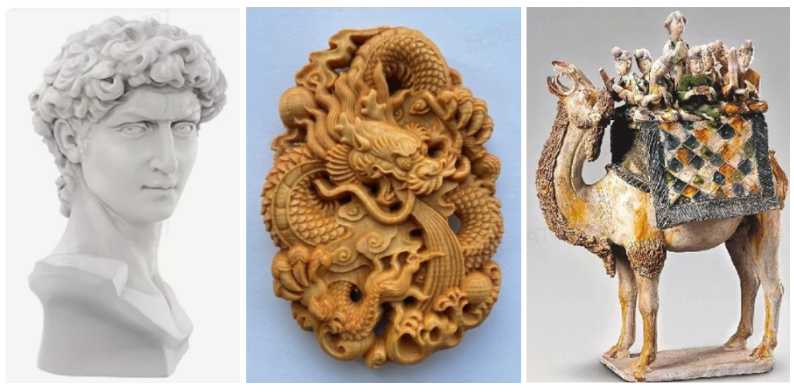
(1)Geometry Mode:
For objects with rich and irregular shapes/geometries
Statues; Face/Body; action figures, shoes, etc
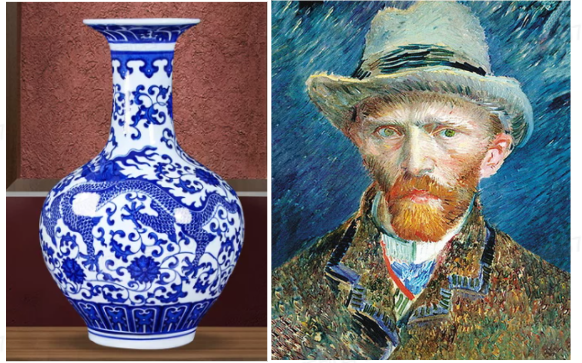
(2) Texture Mode:
For objects with insufficient geometries, but with rich, irregular textures:
Vase, Oil painting, etc
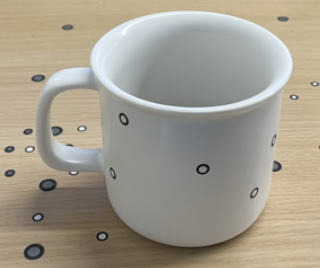
(3)Marker Mode:
For the objects with fewer irregular geometries and textures or for higher precision, requiring marker points:
eg. cups, balls, tubes, etc
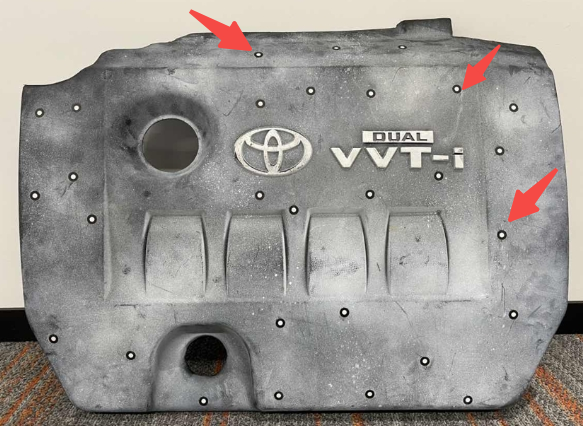
Why complex objects like cars still need markers?
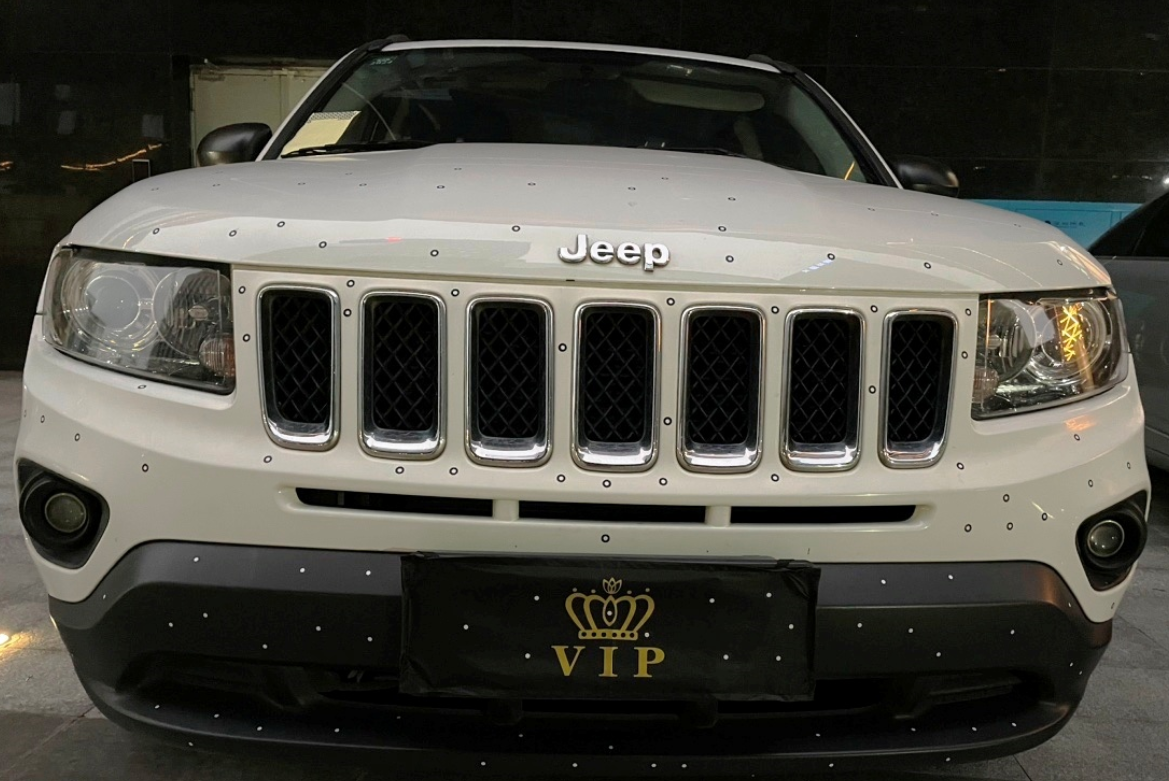
Note: If the object is complex(like thin-wall parts, hollow, etc), it would be difficult to get scanned and require some skills.
Watch Scanning Cases
¶ About scanning effect
Scanning speed:
-The scanning speed reaches up to 30fps, but varies by device.
-For wireless scanning, usually it is about 15fps.
-If the frame rate is less than 10fps, it is recommended to use another high-performance smart phone or a computer).
Tracking effect:
-Scanning fewer or regular geometries/shapes may cause tracking loss or constant spinning, leading to failure.
-Choose the correct tracking mode and get well prepared before scanning.
¶ Scanning Principle
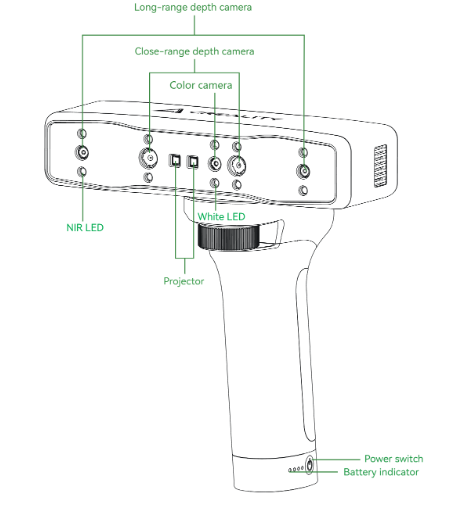
-The sensor/projector projects a pattern across the part's surface, and two cameras capture the surface geometry based on the pattern distortion, calculating 3D coordinate measurements.
-Those scan data forms the point cloud. After fusion, the raw point cloud is usable for the next step: mesh. After meshing, the color texture can be mapped on the model to generate a color object.
¶ Installation
-Mount the scanner on the scan bridge and power it on.
-Download the CrealityScan APP from App store or Google play and install.
-Wait for the blue blinking light, then connect to the scanner’s hotspot.
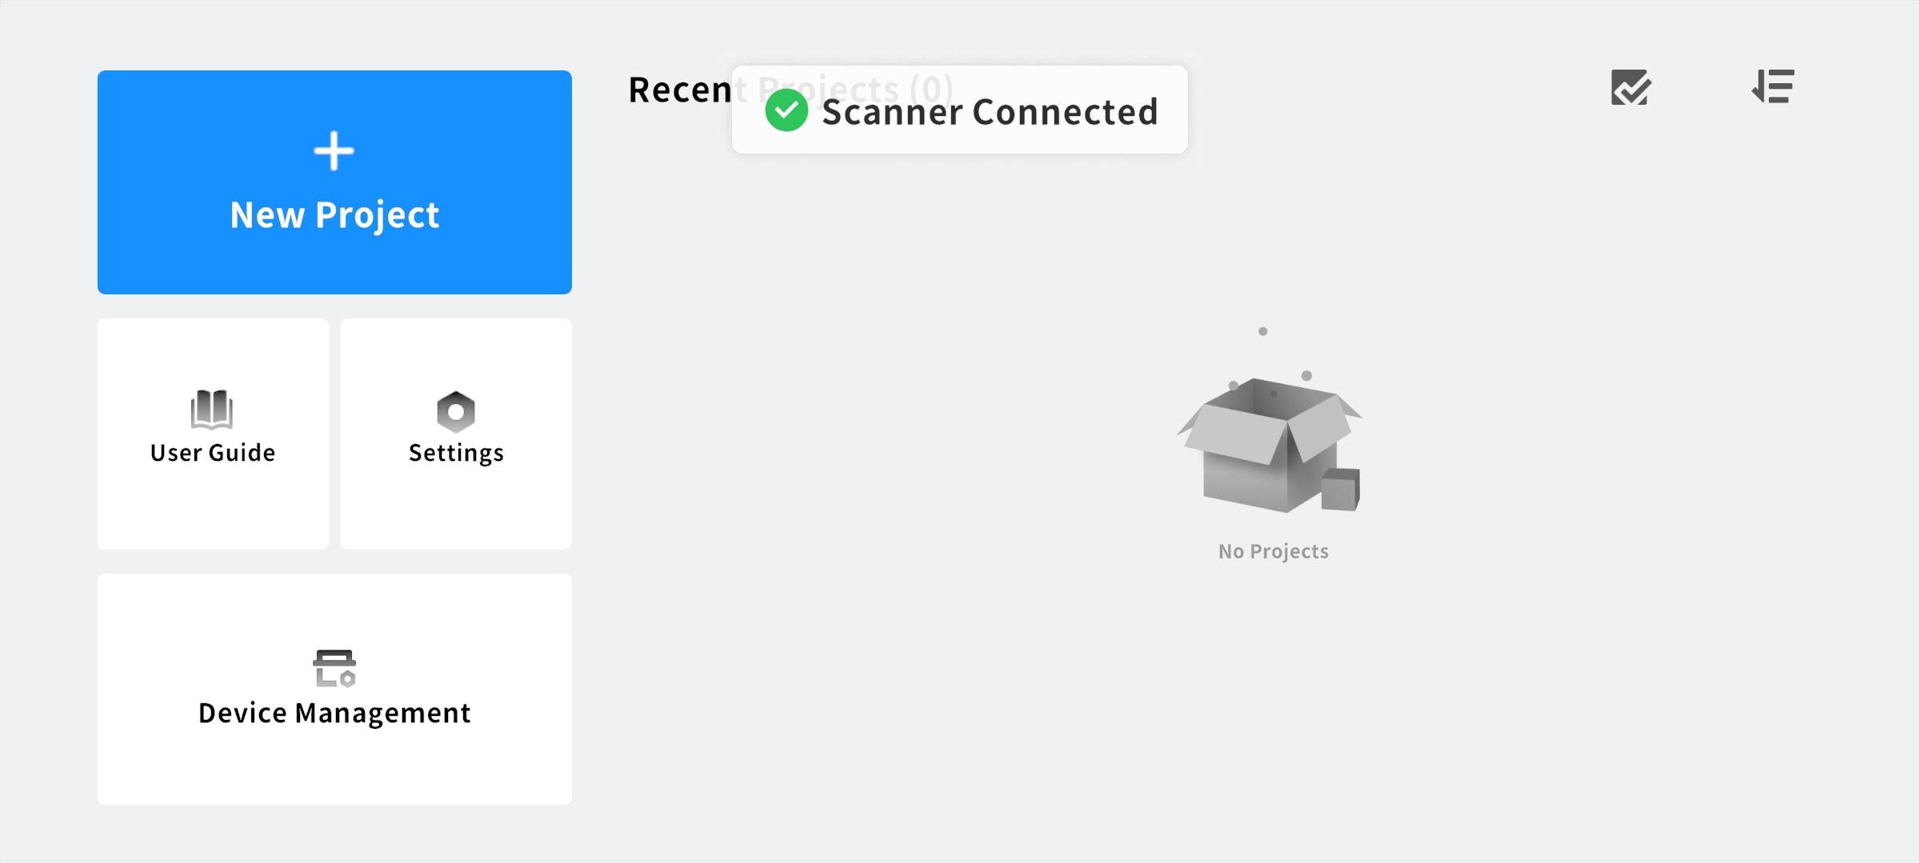
-Open the app; wait for the connection to complete. The software will display a "Scanner Connected" message.
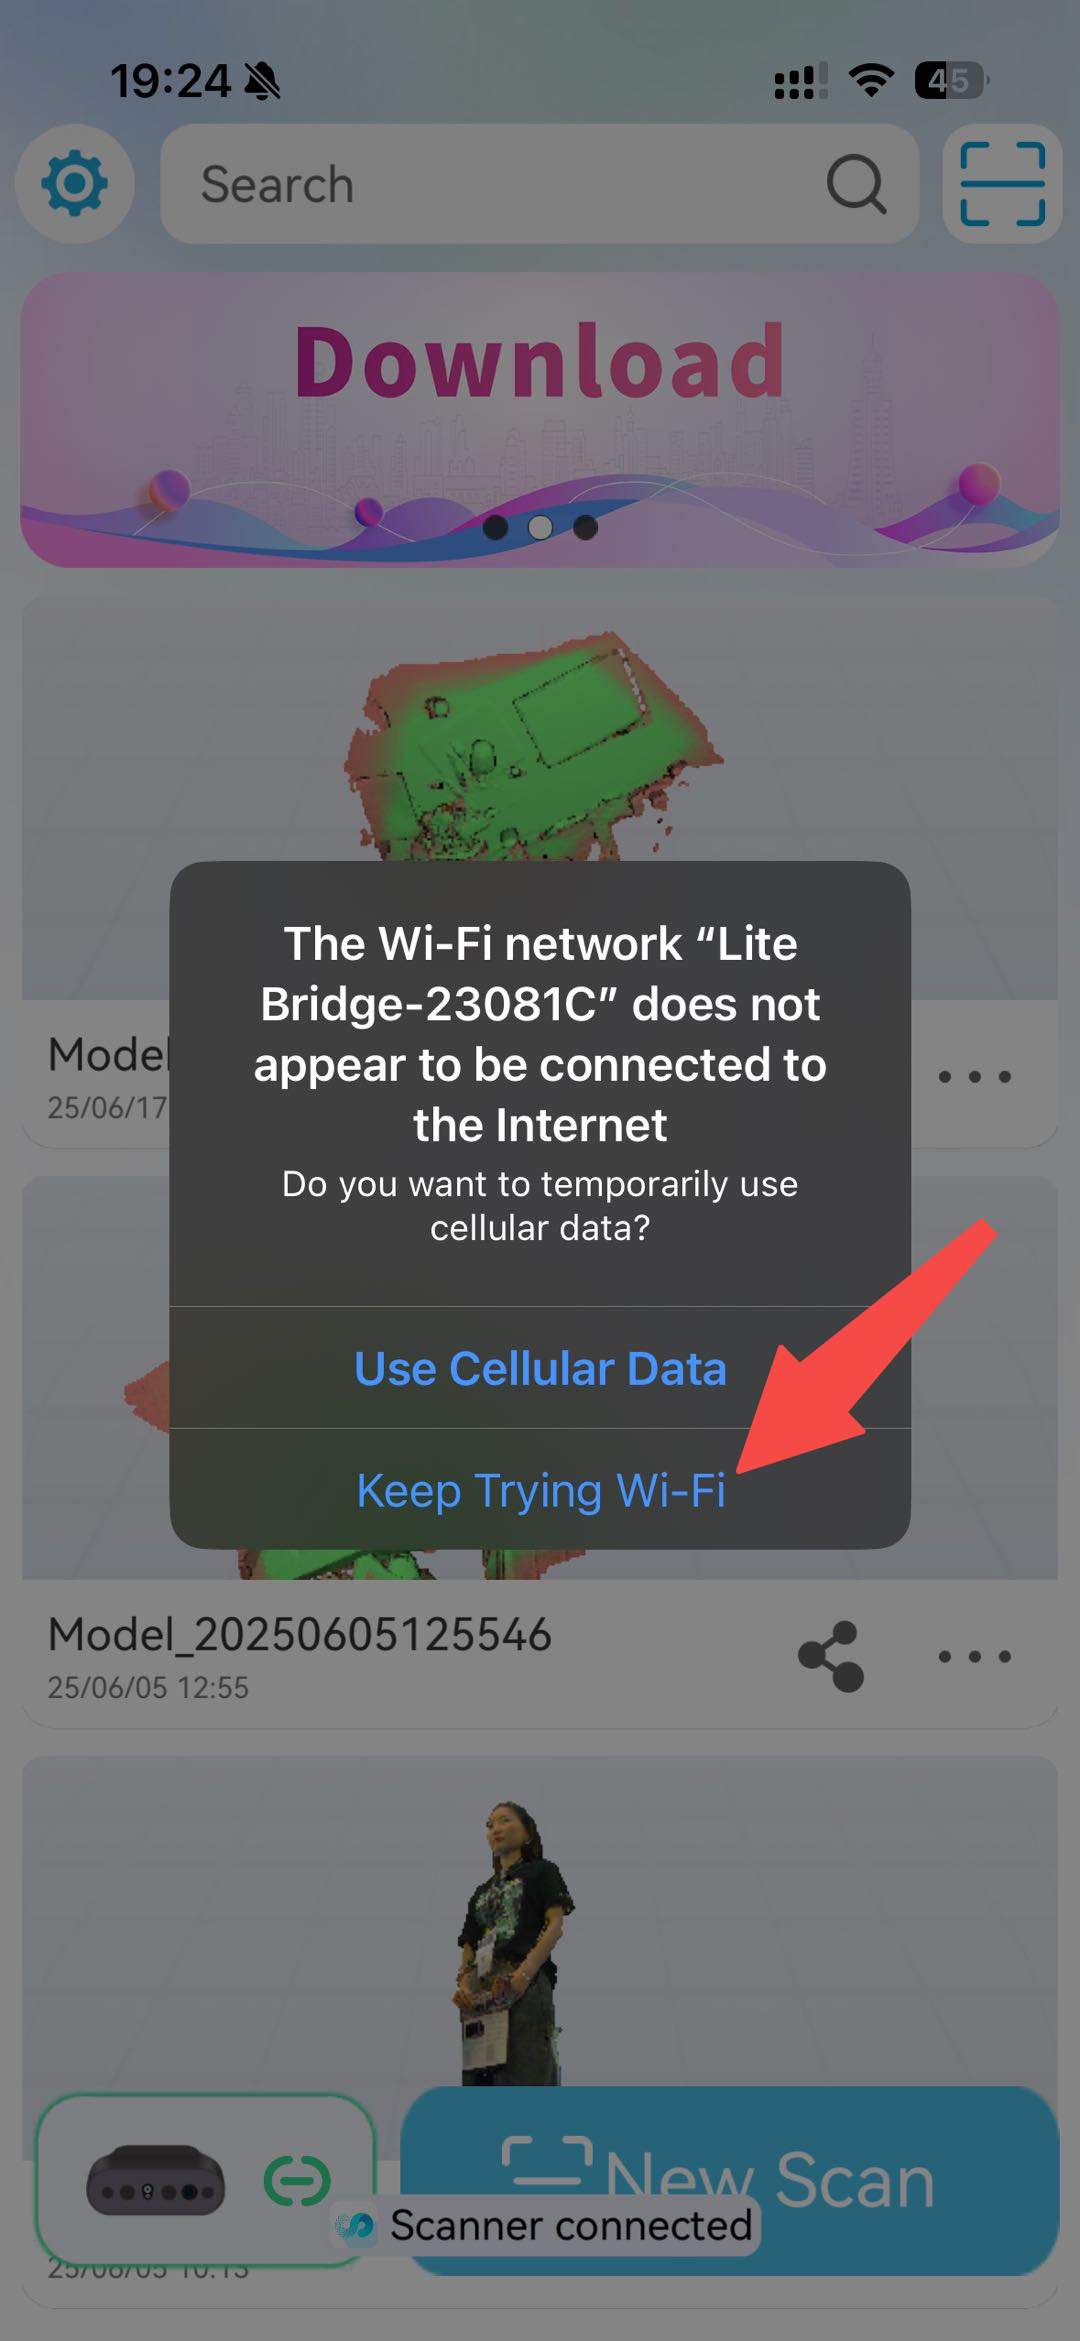
If the system displays the message "The Wi-Fi network 'Lite Bridge-xxx' does not appear to be connected to the Internet", please select "Keep Trying Wi-Fi" to continue.
¶ Start your first scan
-Select the proper scan mode and prepare the scanning environment.
-If the object is small, it is recommended to use a turntable, and you can put the object on the turntable.
-Tap to select the proper scan mode, if the option turns blue, means this mode is selected.
During Scanning:
Since the scanner has fixed focal to make sure the collected data is accurate, the scanning distance is very important. Please see the following recommendations for different scanning distances for objects of different sizes:
| Mode | small | medium | large | face | body |
|---|---|---|---|---|---|
| Object Size | 10mm-25mm cube | 25mm-50mm cube | 50mm-2m cube | Unable to scan hair | Able to scan hair |
| Scanning Distance | 110-300mm | 120-400mm | 180-1200mm | 120-400mm | 180-1000mm |
Scan from the richest feature and check if the object turns green, if yes, tap “start”.

1.Hold for a few seconds to make sure all turns green.
-Move slowly while scanning in different angles/directions, and pay attention to the preview window and the scanning distance bar(green is optimal) on the left side.
-Make sure the scanning distance is proper within the range and the object to be scanned is in the middle of the preview window.
-Keep scanning until the point cloud turns green and model is complete.
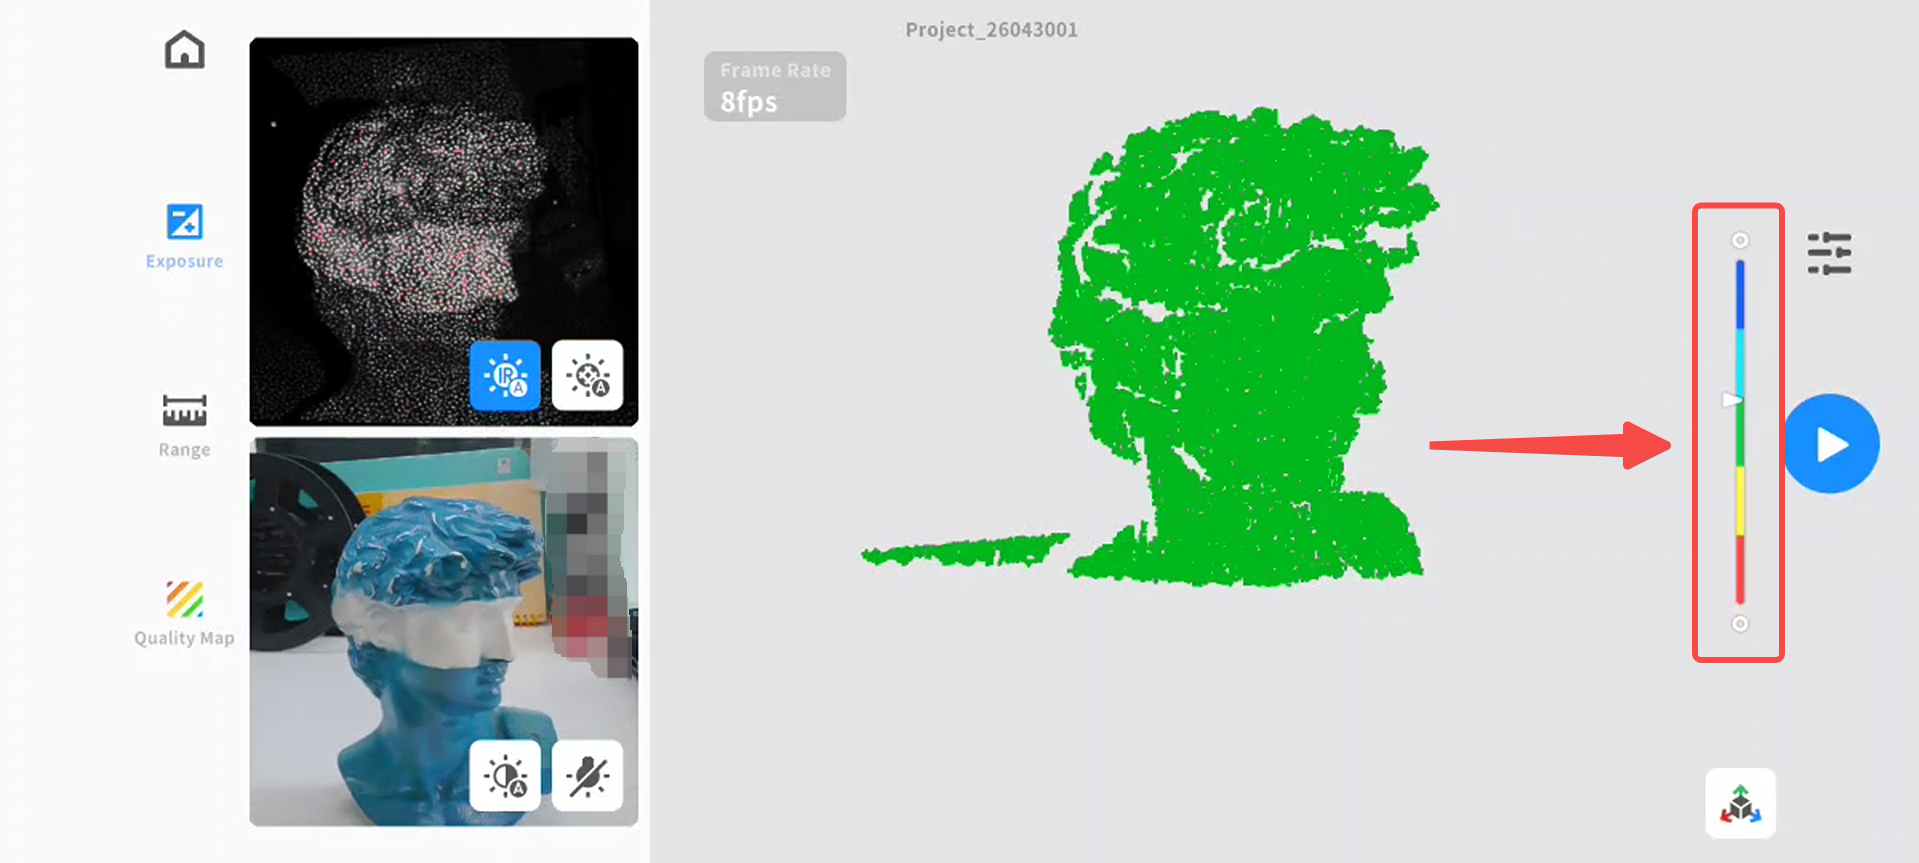
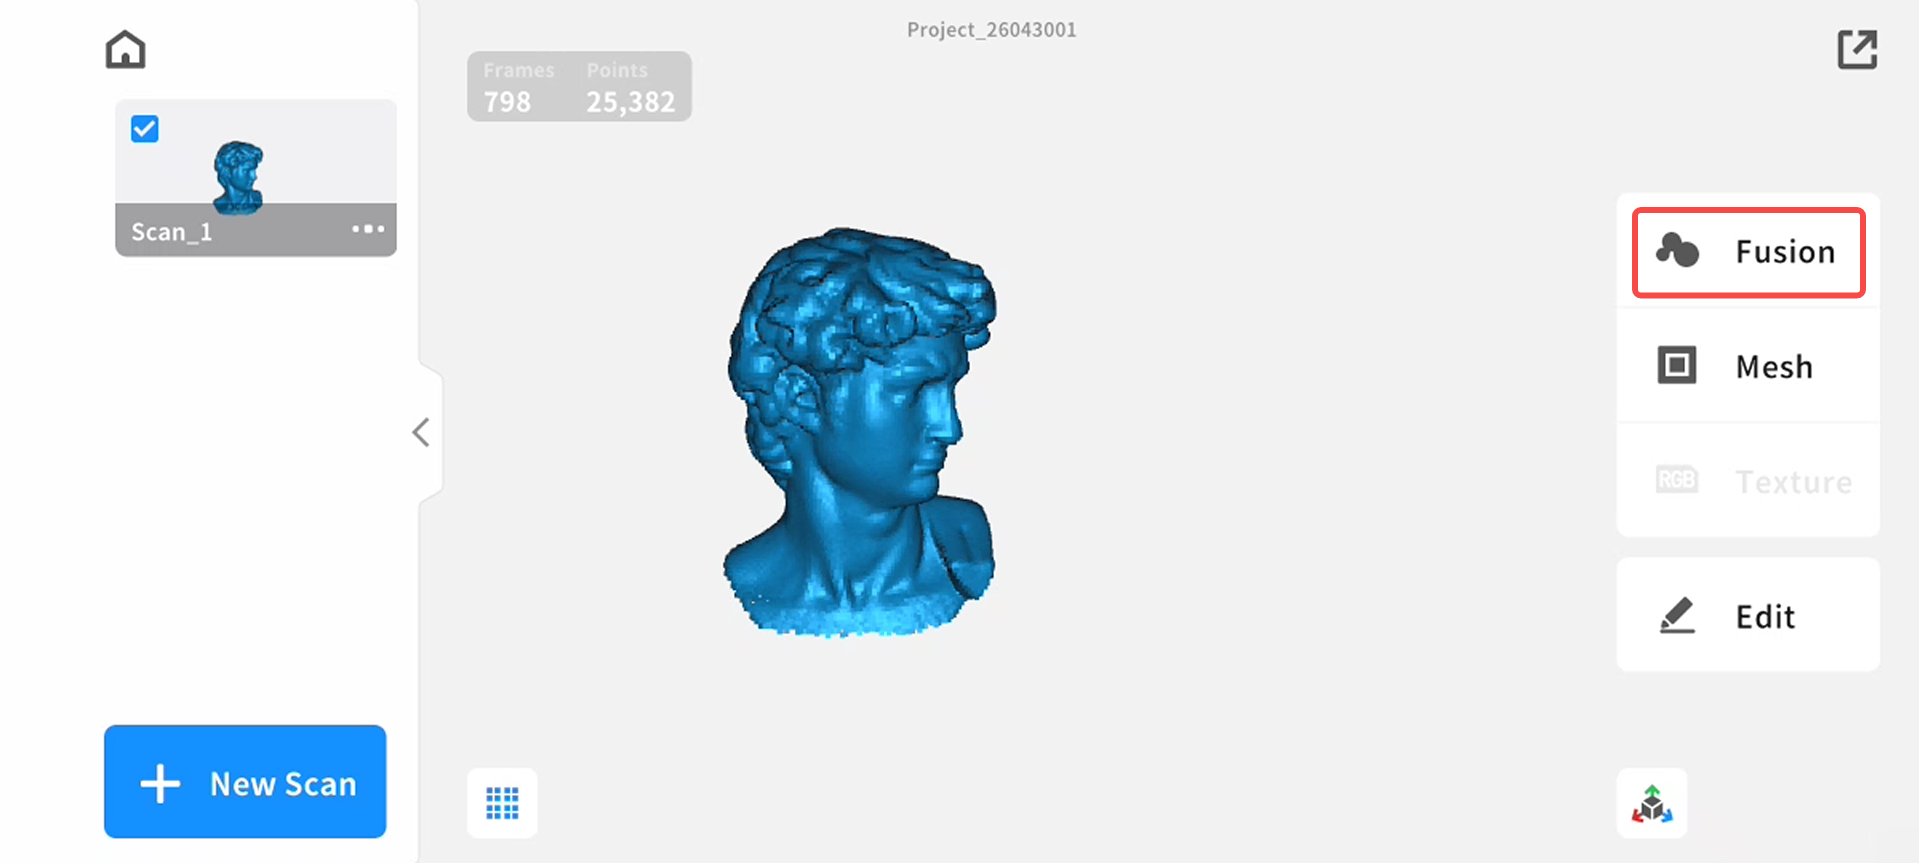
2.Tap “Complete Scan” to to enter the post-processing interface, where you can edit the point cloud data, perform point cloud fusion, mesh, and apply color textures.
Click the back icon in the top-left corner to return to the home page, and click the icon in the top-right corner to share files.
The more you scan, the better you can handle.
You can Transfer the scan data from your smart phone to computer:
https://wiki.creality.com/en/3d-scanner/transfer