¶ Watch the Video
This guide explains how to replace the filament feed channel assemblies on the SPARKX i8.
¶ 1. Filament Feed Channel Assemblies Overview
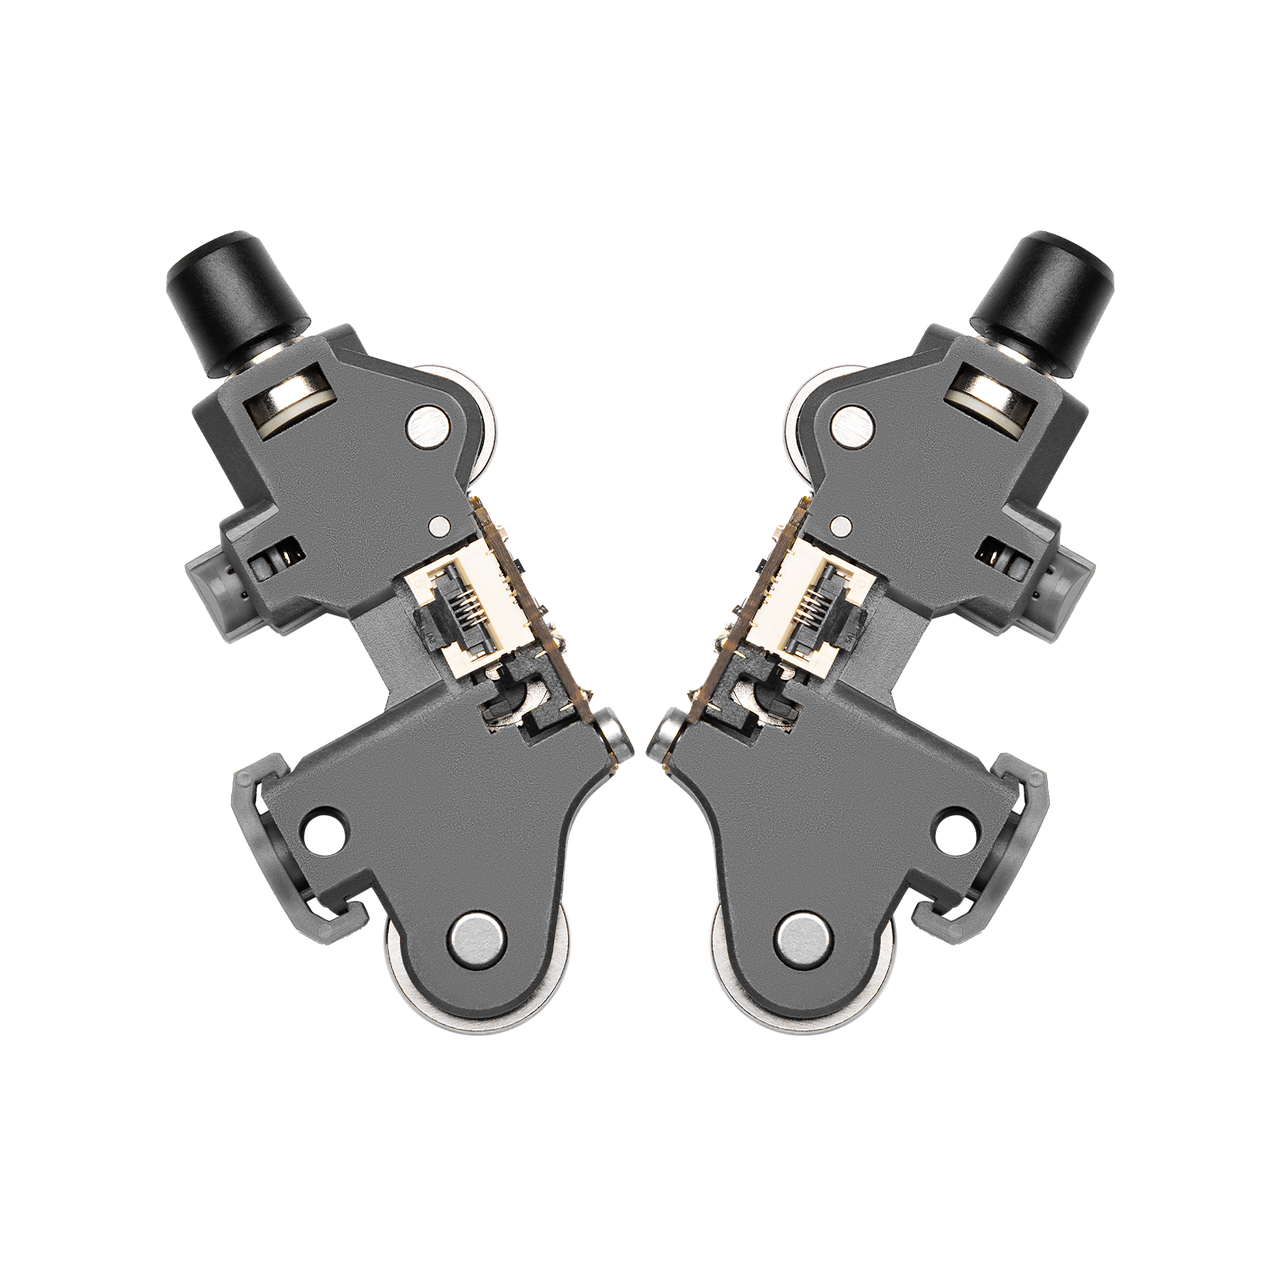
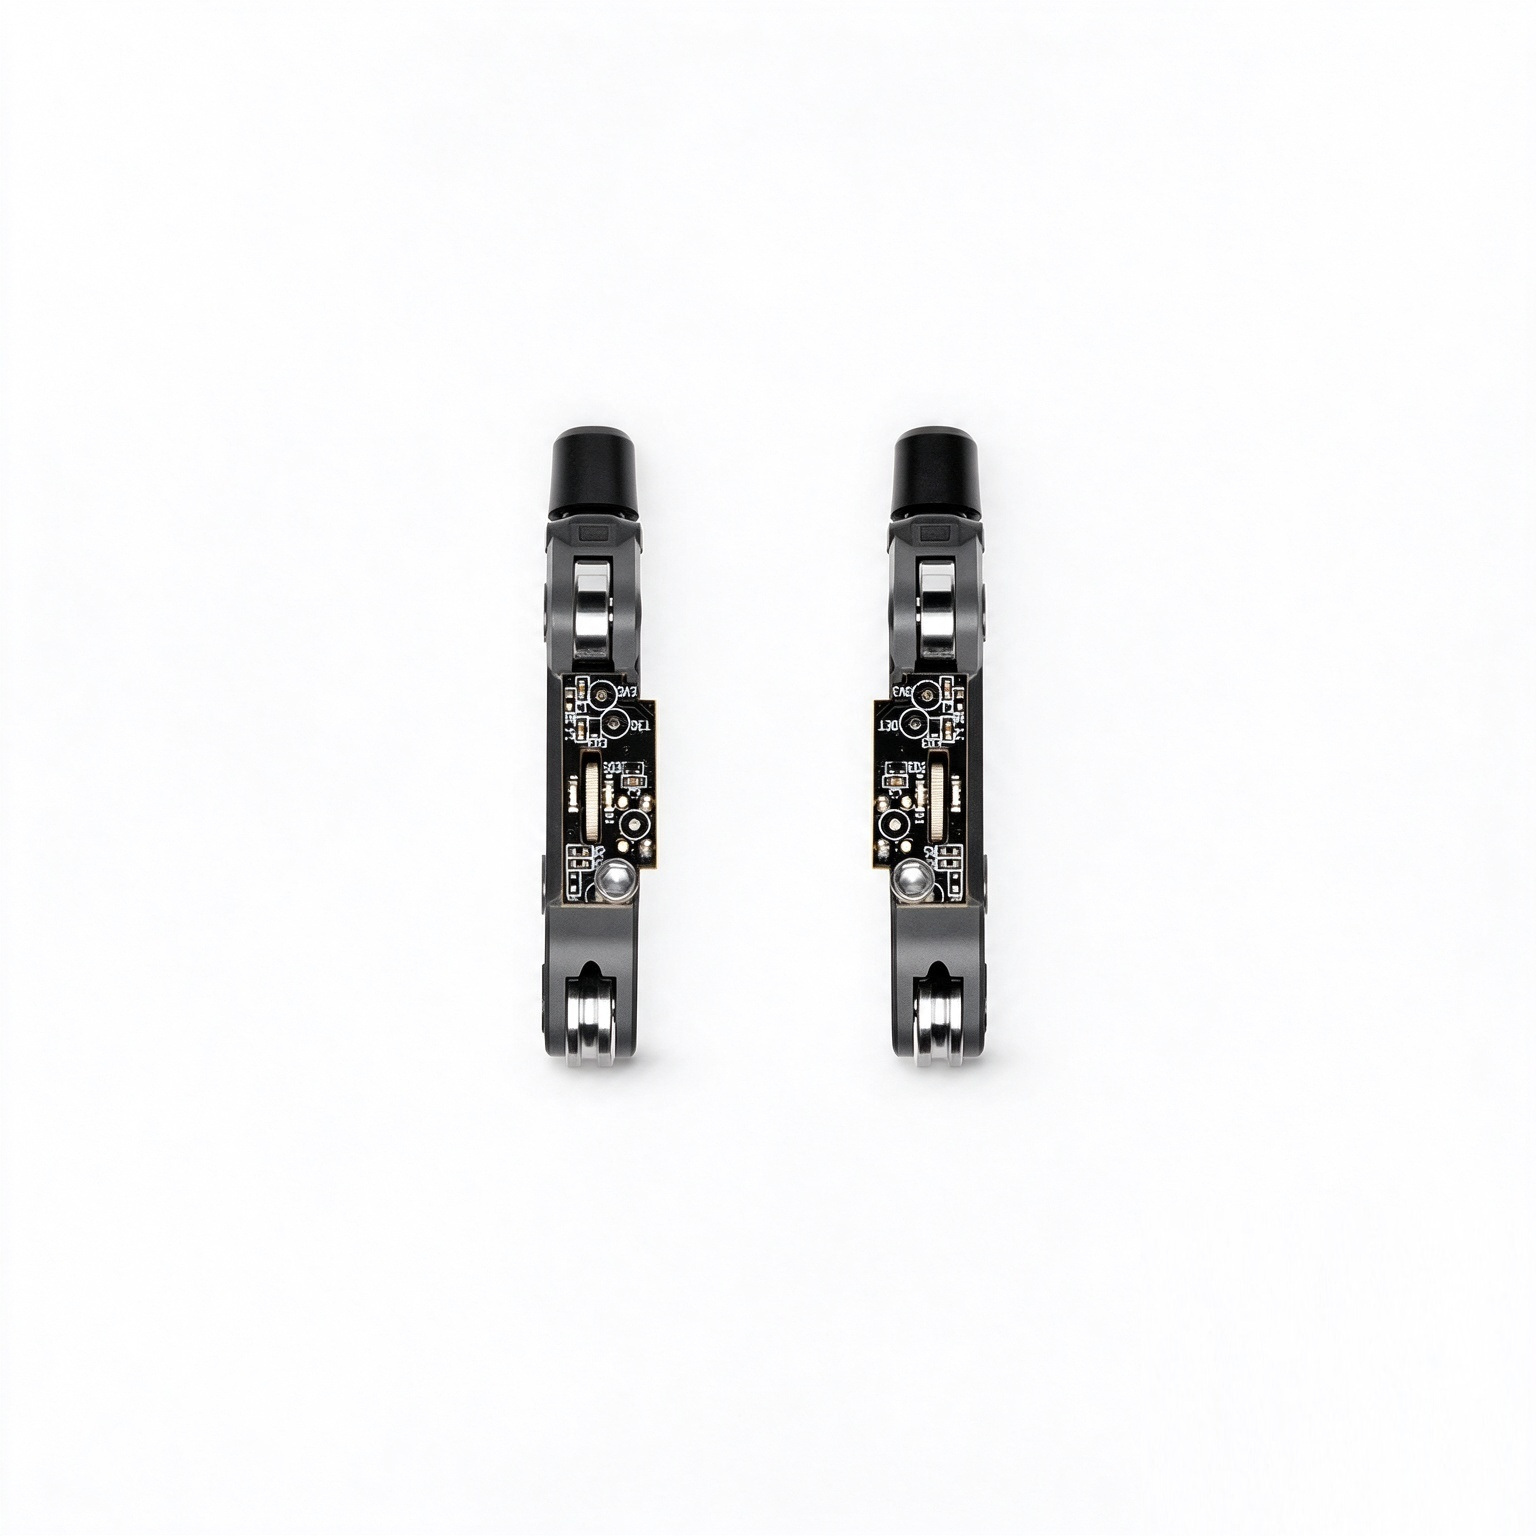
¶ 2. When to Replace Filament Feed Channel Assemblies
Inspect the filament feed channel assemblies if you notice any of the following issues. Replace any assembly confirmed to be faulty.
- The filament feed gears are worn, causing the filament to slip during feeding.
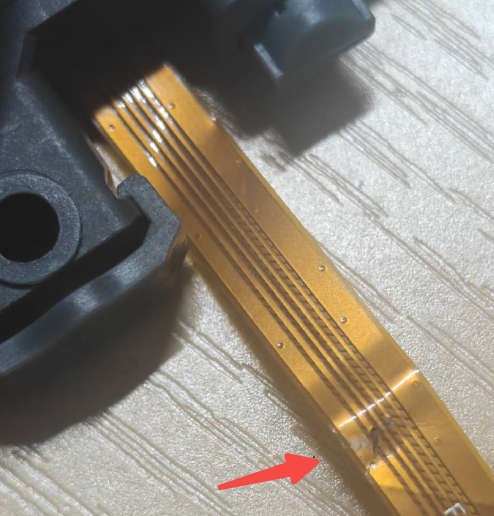
- An FPC cable is broken at its base.
- A sharply folded and broken FPC cable during installation triggers a false filament feed channel blockage alarm.
¶ 2.1 Tools Required
- 4 replacement filament feed channel assemblies, including 4 FPC cables
- 2.0 mm hex key
- Tweezers
¶ 3. Safety Precautions
IMPORTANT
- Before servicing the printer or its toolhead cables, turn off the printer and unplug the power cord to prevent short circuits, equipment damage, and electric shock.
- Allow the hotend and heated bed to cool to room temperature before maintenance or troubleshooting. Do not touch hot components with bare hands. If a separate procedure requires working on hot components, wear heat-resistant gloves to prevent burns.
- If you have questions about this operation guide, please submit a ticket on the Creality Cloud App. We will offer technical support promptly.
¶ 4. Remove the Old Assemblies
Note: Before removing the filament feed channel assemblies, complete the following steps in order. For detailed instructions, see the Toolhead Disassembly Guide.
- Cut and withdraw the filament.
- Remove the toolhead front cover.
- Remove the extruder cover.
¶ 4.1 Remove the Toolhead Rear Cover
Hold the edges of the rear cover and gently pull it outward to release the retaining clips. Remove the cover.
¶ 4.2 Remove the Filament Feed Channel Assemblies
- Make sure no filament remains in any channel to be removed.
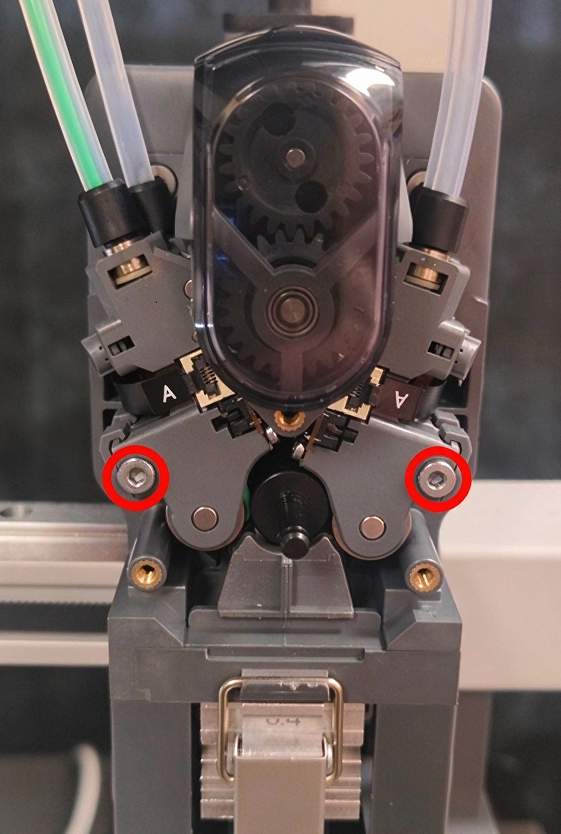
- Use a 2.0 mm hex key to remove the mounting screws, then remove the left and right groups of filament feed channel assemblies.
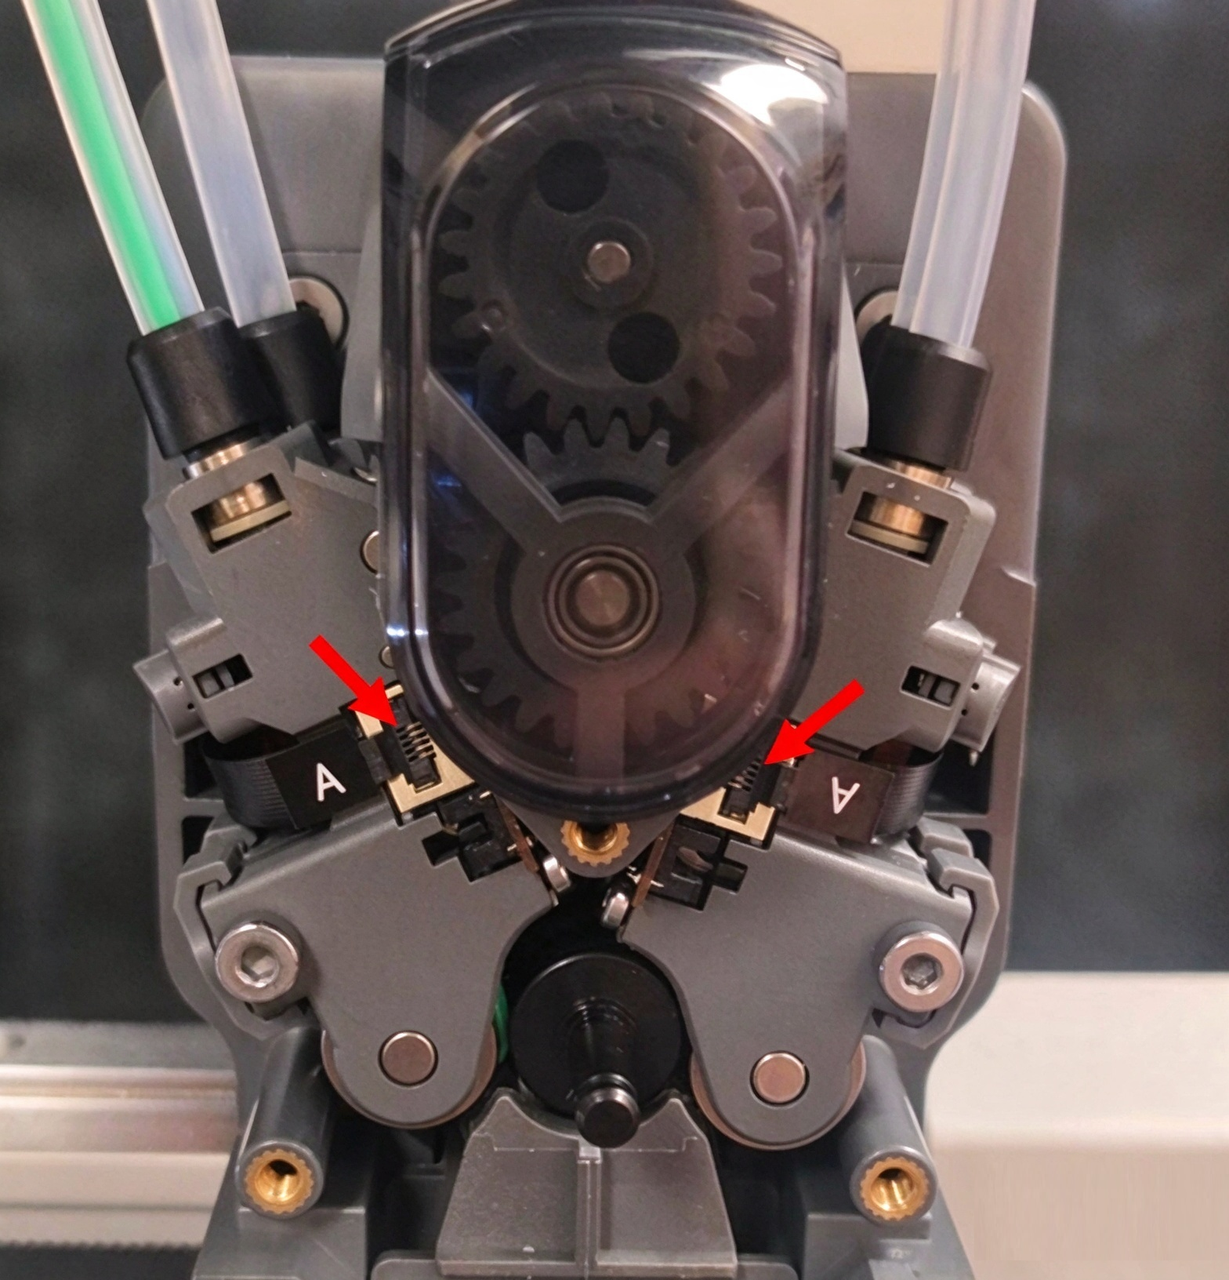
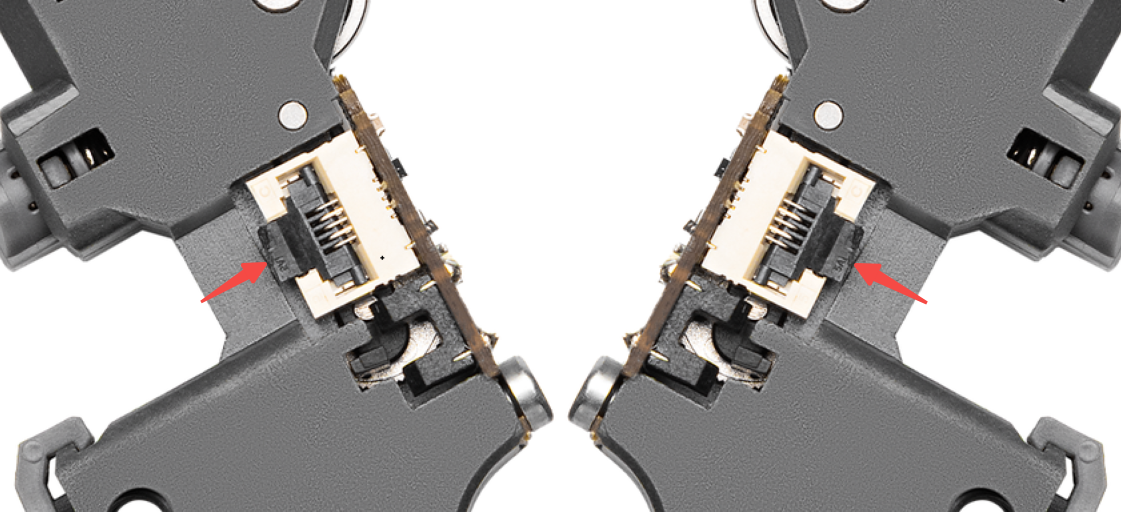
- Use tweezers to gently open the black locking latch on the FPC connector for the channel being replaced. Then disconnect the cable.
 |
 |
¶ 5. Install the New Assemblies
¶ 5.1 Reconnect the FPC Cables
Reinsert the disconnected FPC cable into the matching connector. Align the metal contacts of the cable with the traces on the latch side. Confirm the orientation is correct and the cable is fully seated, then close the latch.

Note:
- The black FPC cables for Channel 1 and Channel 4 are longer than the yellow FPC cables for Channel 2 and Channel 3.
- Black FPC cables for Channel 1 and 4 correspond to mark A; yellow FPC cables for Channel 2 and 3 correspond to mark B.
- Do not swap these two groups of FPC cables or feed channels. Swapping them will cause filament feeding failure.
¶ 5.2 Install the Filament Feed Channel Assemblies
- Align the new left and right groups of assemblies with their respective mounting slots and push them fully into place.
- Reinstall and tighten the mounting screws with a 2.0 mm hex key. Do not overtighten, as this may strip the threads.
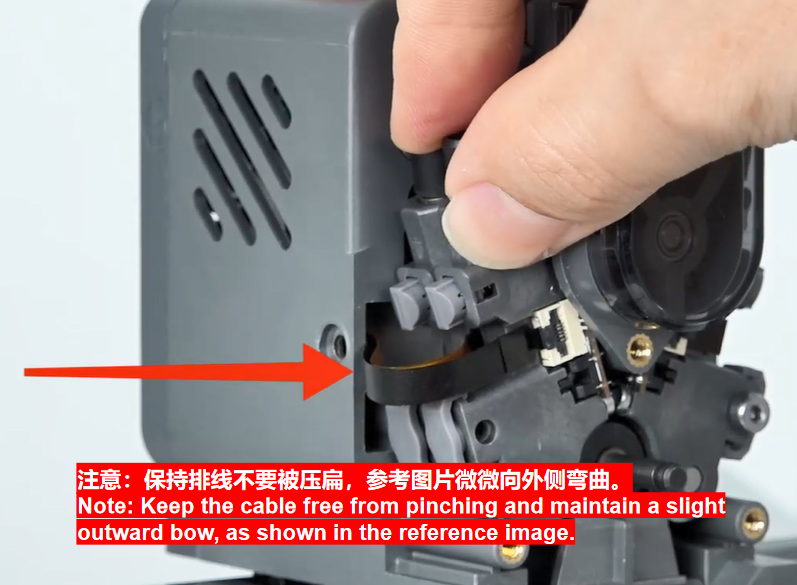
¶ 5.3 Reset the feed channel cables
Open the rear cover. Use a hex key or tweezers to gently lift the cables on both sides, then arrange and reset them as shown in the figure.
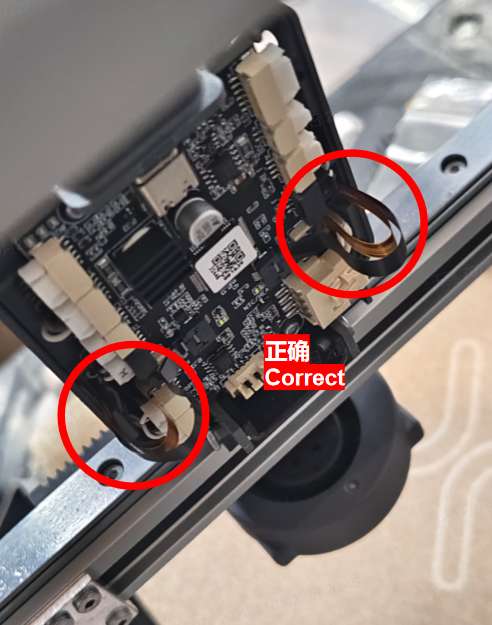
Note: Do not pinch the cables when reinstalling the filament feed channel. Ensure the cables are reset before refitting the front and rear covers.
¶ 5.4 Reassemble the Toolhead
¶ 5.4.1 Reinstall the Extruder Cover
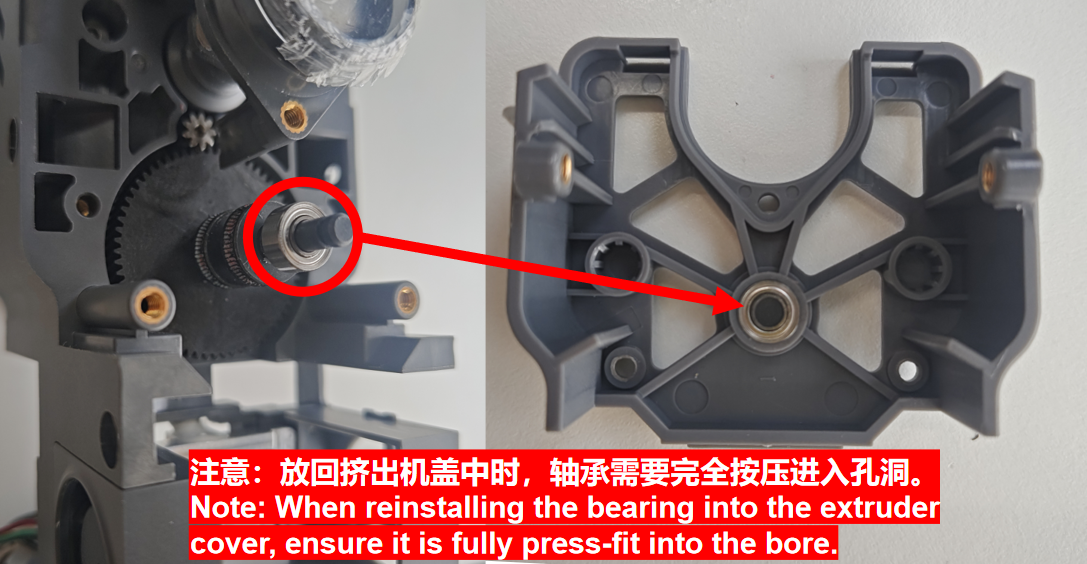
If the bearing has come out of the cover and remains on the extruder gear shaft, fit it back into the bearing seat in the cover first, as shown below.
Align the locating pins and reinstall the extruder cover. Tighten the five mounting screws, then reinstall the knob.
¶ 5.4.2 Reinstall the Toolhead Rear Cover
Align the retaining clips and gently press the rear cover into place until it clicks. Gently check that the cover is secure.
¶ 5.4.3 Reinstall the Toolhead Front Cover
Align the clips at the top of the front cover and gently press it into place until it clicks. Make sure the cover is secure.
¶ 5.5 Check the Installation
Once reassembly is complete, reconnect the power cord, turn on the printer, and perform the following checks.
- Load filament and check that the filament loading indicator lights up white and filament extrudes normally from the nozzle.
- Then unload the filament and check that it withdraws smoothly. For instructions, see the Filament Loading and Unloading Guide.
- Run a full printer calibration.