Creality Print 7.0 delivers a comprehensive upgrade across print quality, algorithm stability, and ecosystem experience. This release significantly enhances intelligent processing, slicing algorithm performance, system efficiency, community integration, and wide-area network control. We have also re-engineered key interface and compatibility modules to provide a more streamlined, intelligent, and highly efficient printing workflow.
¶ Print Algorithm Upgrades
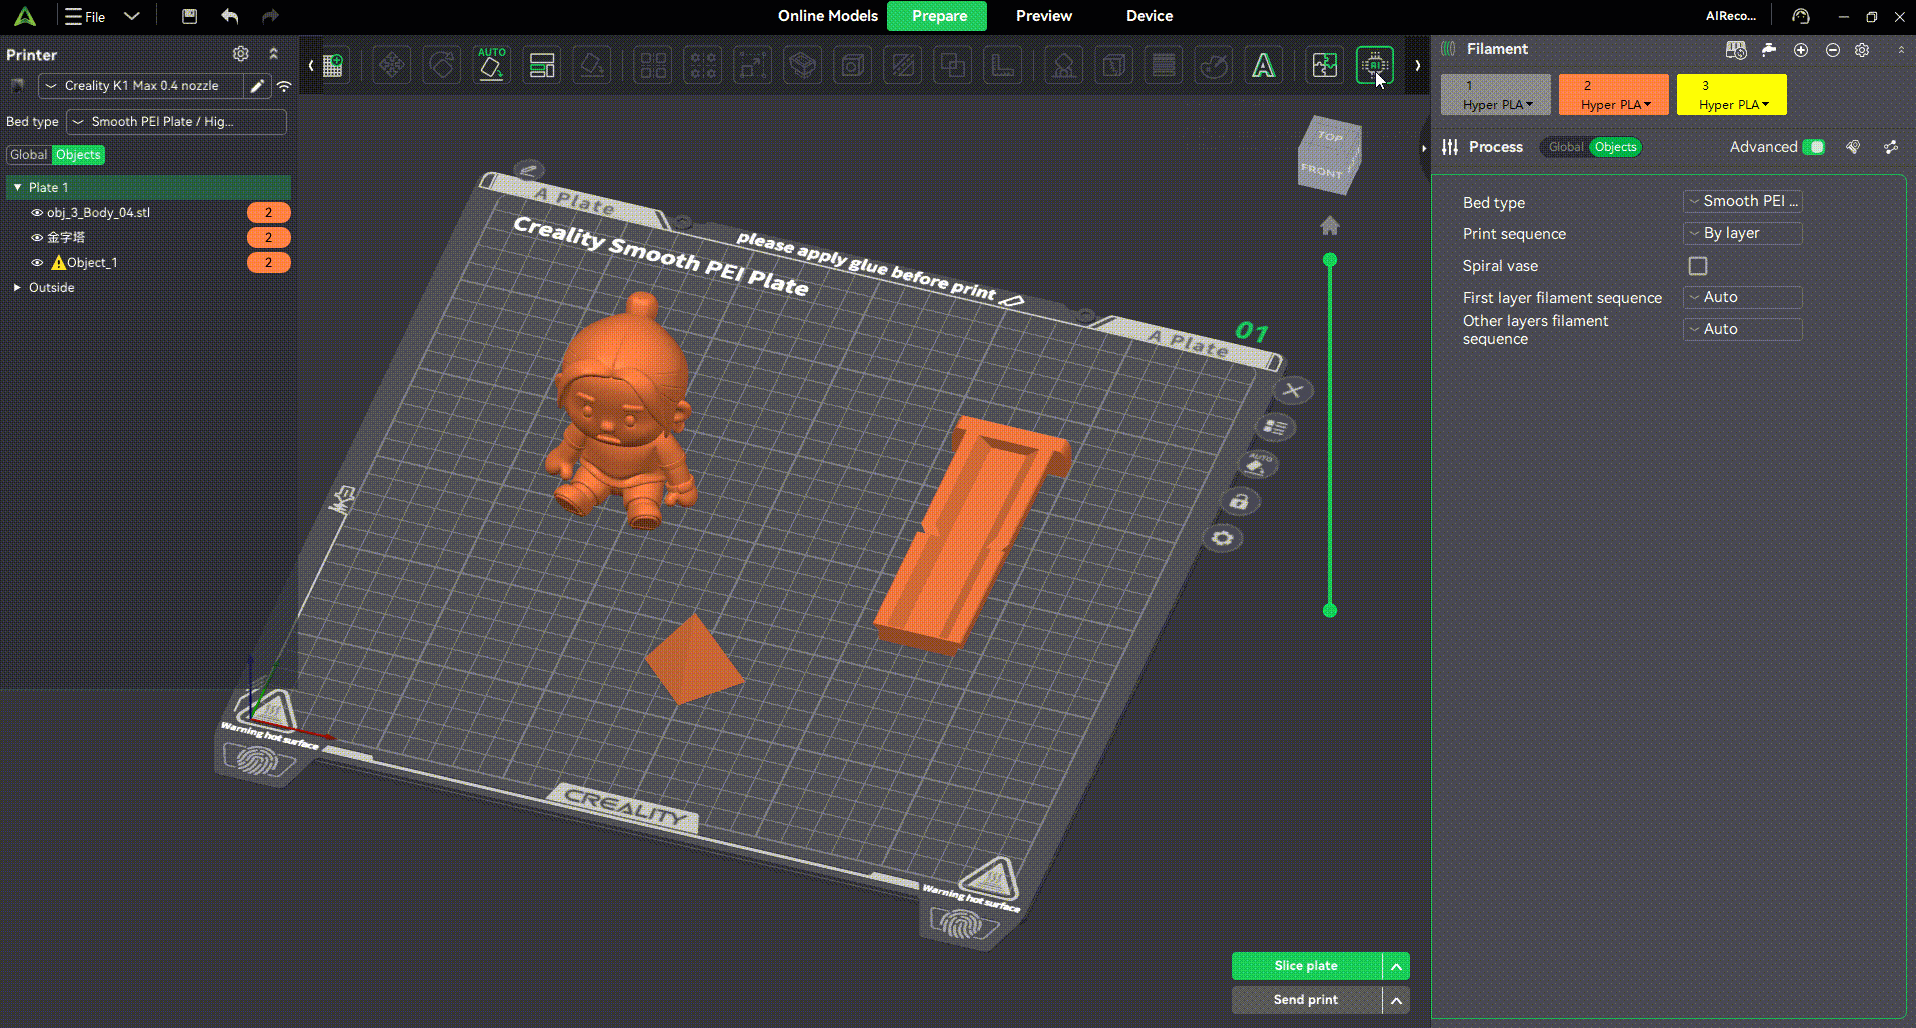
¶ AI Smart Analysis: Automatic Support Detection
A new AI Analysis feature has been added to the toolbar. When AI Cloud Service is enabled, the system automatically analyzes all models in the workspace to determine whether support is required and recommends the appropriate support type (Normal/Tree).

AI Support (AI Support (clicking “Apply” will modify the support parameters at the object level.)
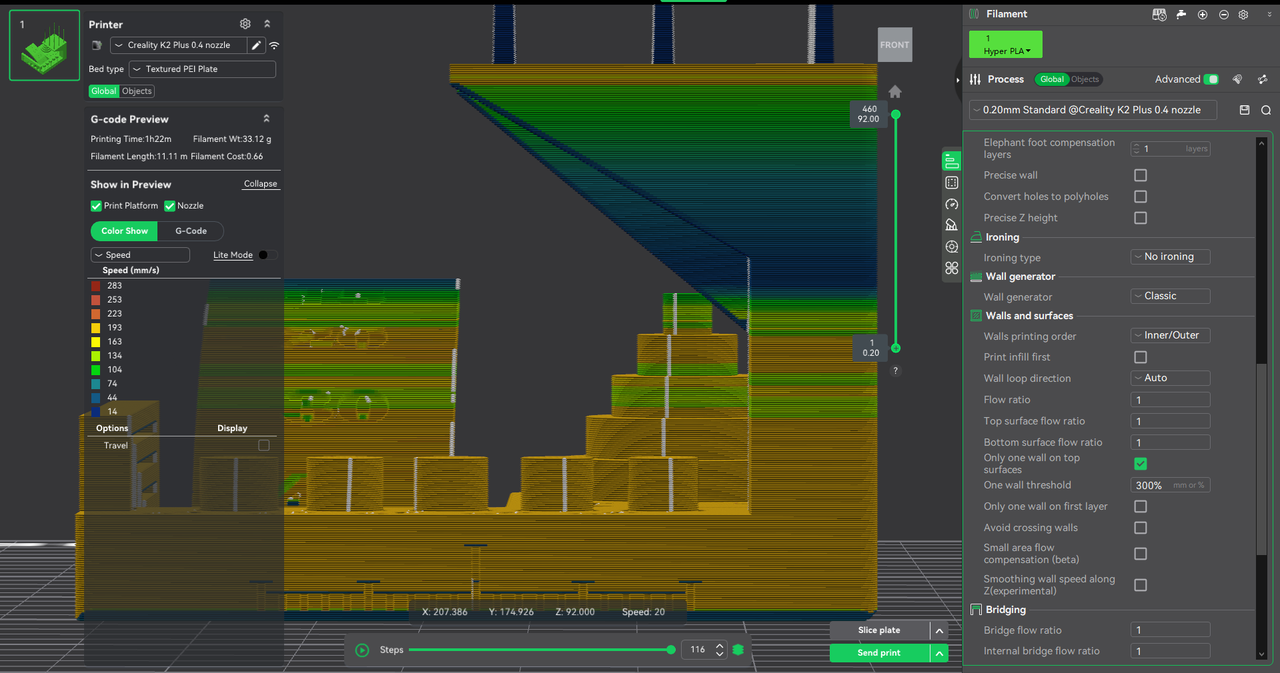
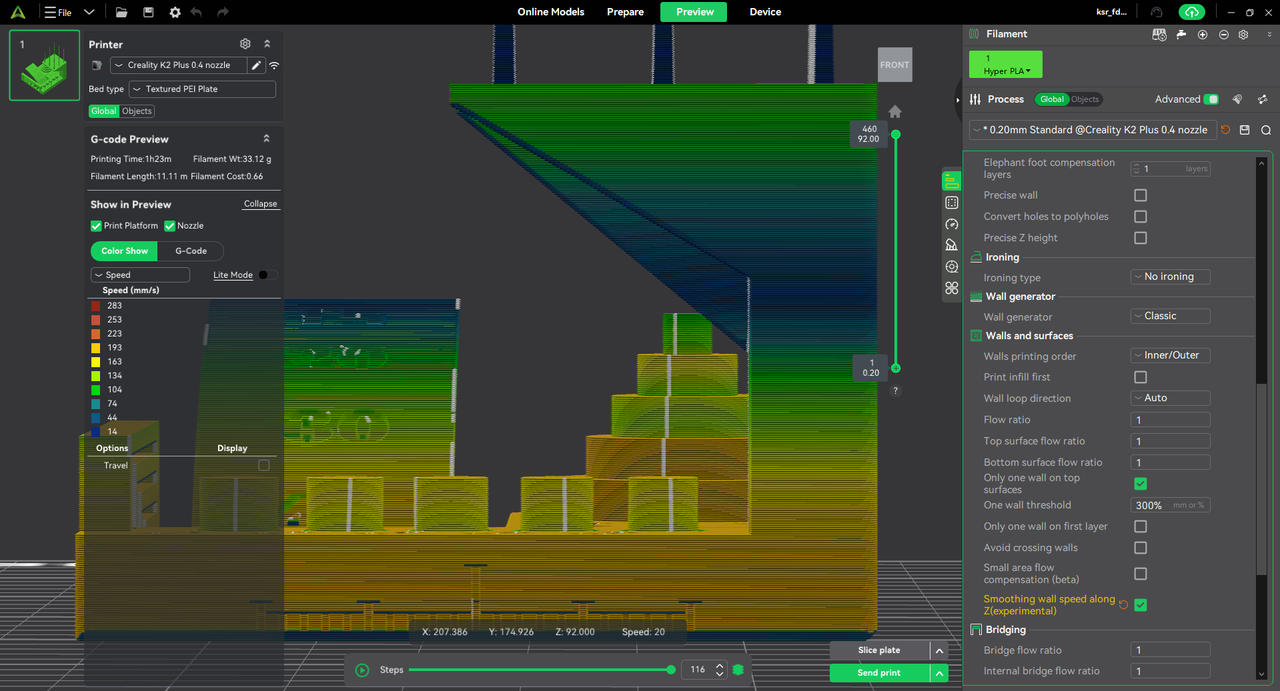
¶ Layer Lines Optimization
New Process Parameter: Quality → Walls & Surface → Smoothing wall speed along Z(Experimental)
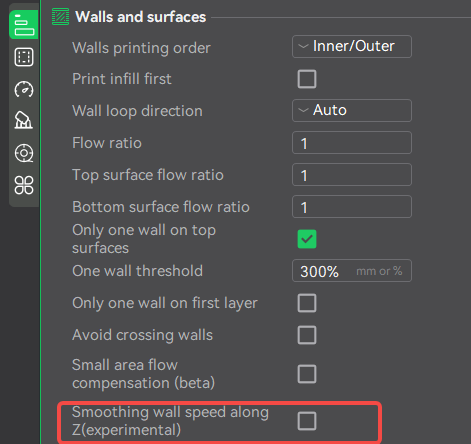
Parameter Description: Reduce visible Z-banding artifacts by smoothing speed transitions along the Z direction.
It mitigates surface irregularities caused by abrupt regional speed changes, improving the uniformity of vertical wall finishes.
|
|
|
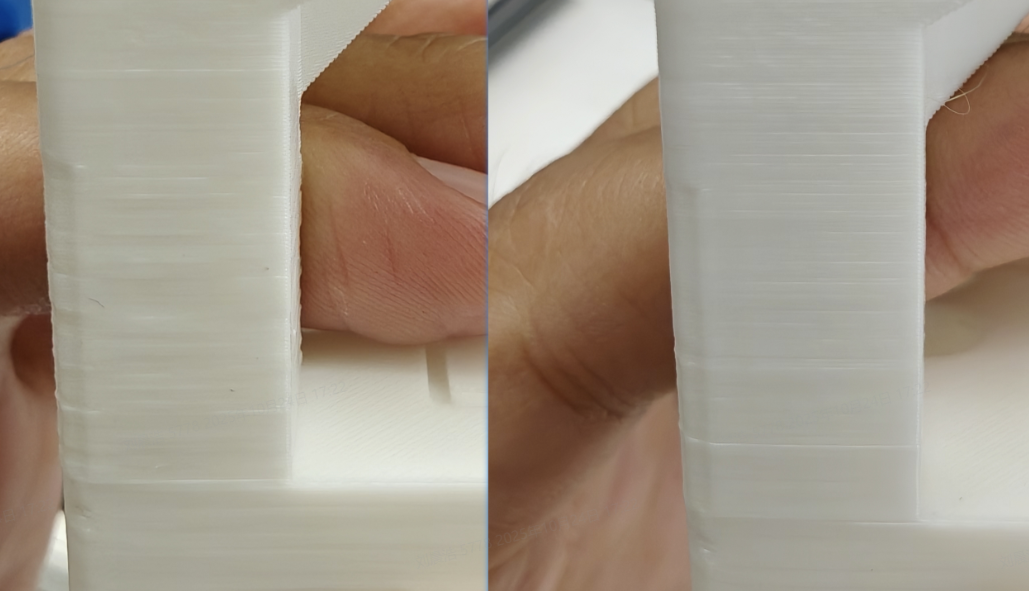
¶ Ringing Artifact Optimization
New Filament Parameter: Cooling → Cooling Slowdown Logic → Consistent Surface / Uniform Cooling
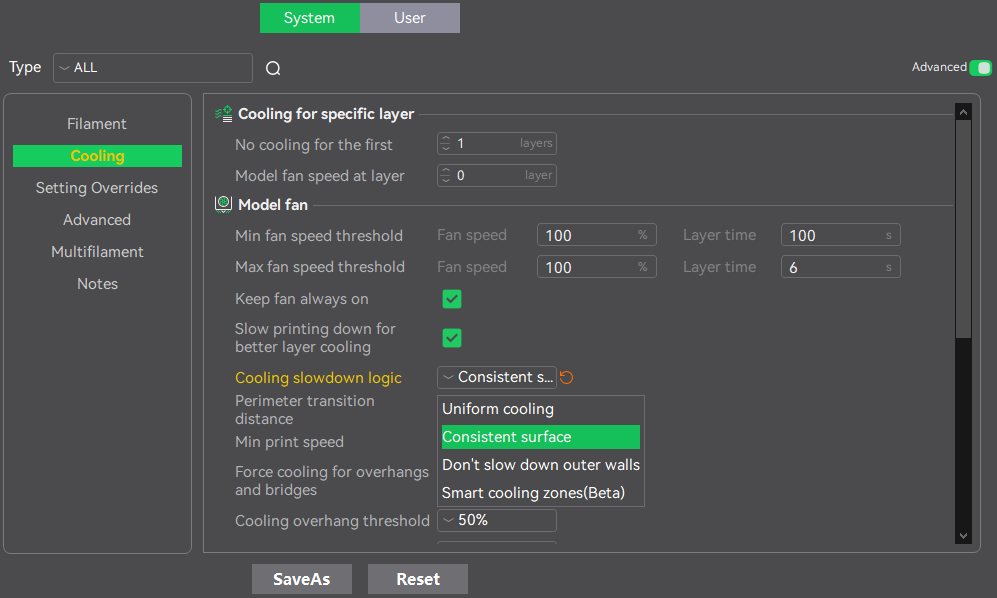
Parameter Description
Consistent Surface:
Ensures the outermost two walls are always printed at the configured maximum speed while reducing the speed of inner paths. This maintains the original layer time without sacrificing outer-wall quality. An adjustable Outer Wall Transition Distance allows the nozzle to gradually return to normal print speed, minimizing quality loss caused by sudden speed changes.
Uniform Cooling:
Maintains the traditional minimum-layer-time logic: if the actual layer time is below the minimum threshold, all paths are slowed proportionally to ensure adequate cooling.
|
|
|
|
|
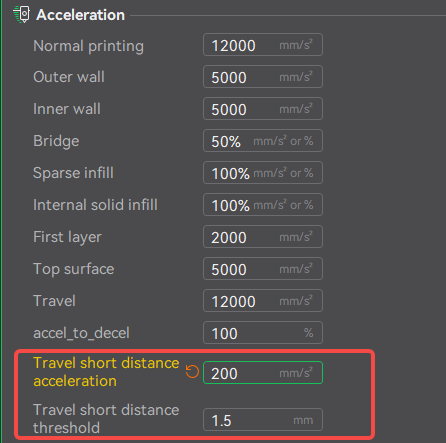
New Process Parameter: Speed → Travel short distance acceleration; Travel short distance threshold
Parameter Description: Further refines motion behavior to reduce ringing artifacts.
 |
|
|
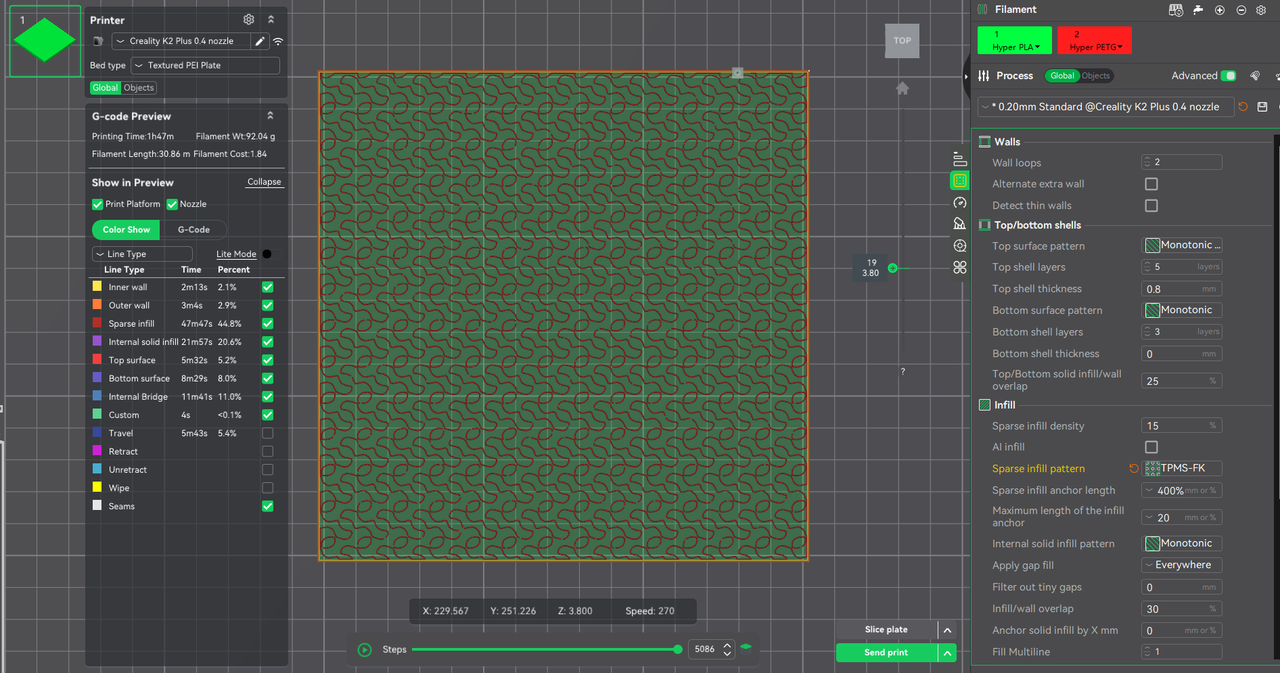
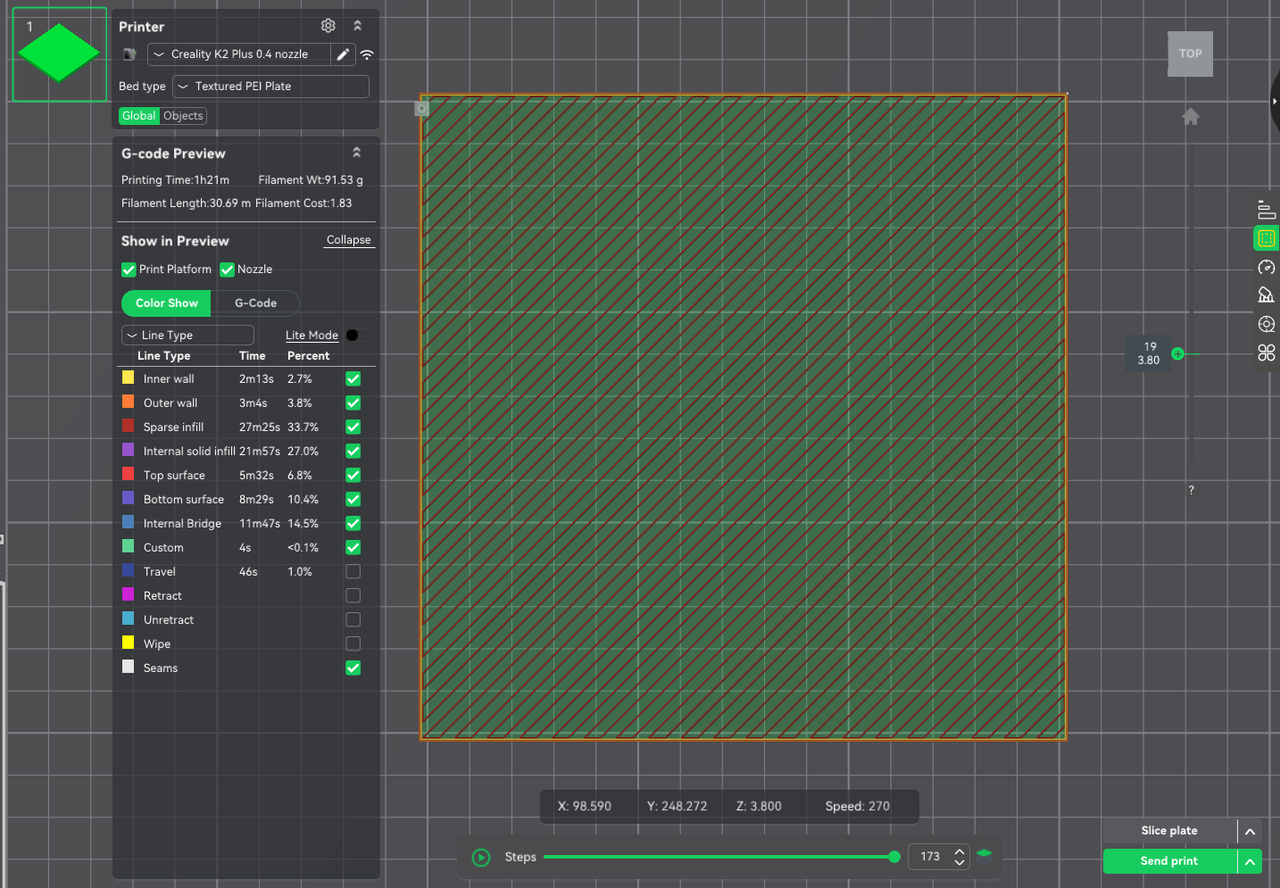
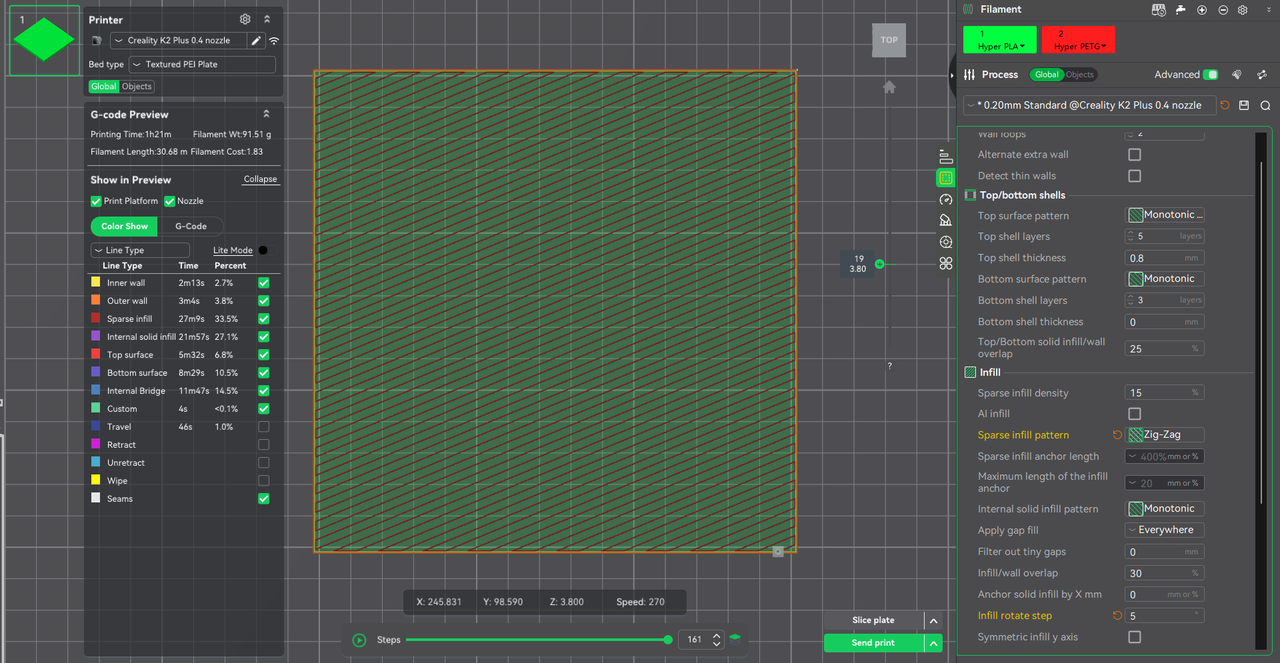
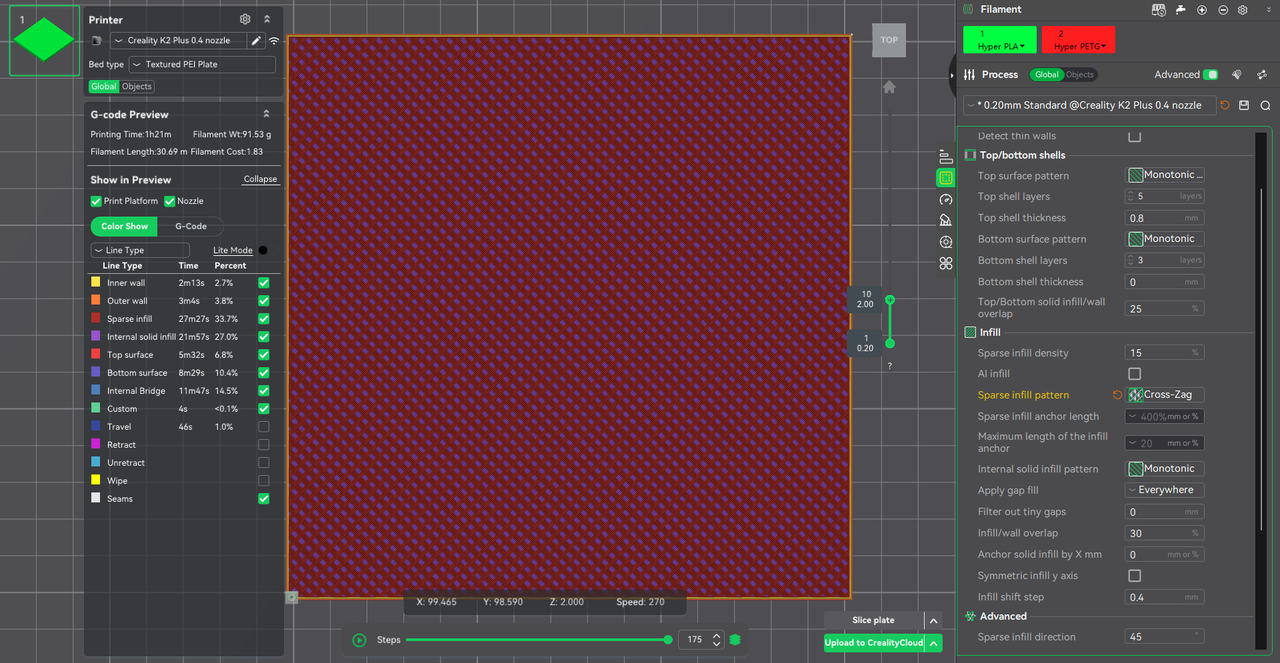
¶ Infill
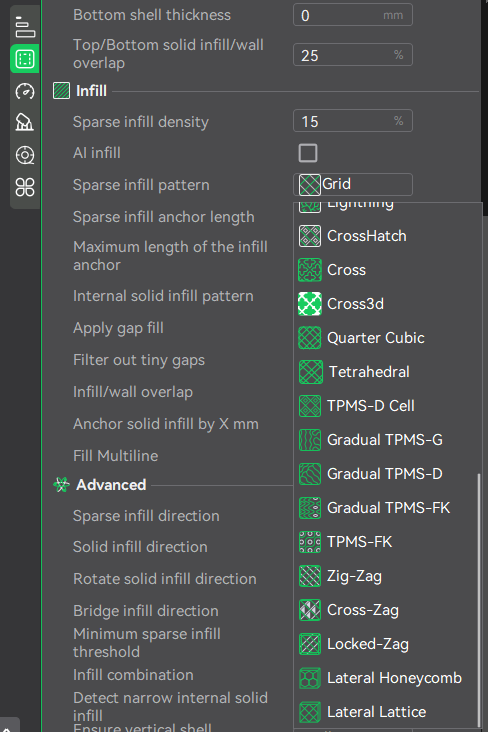
¶ New Sparse Infill Pattern Types
We’ve added a series of high-performance sparse infill patterns optimized for strength, weight, print speed, and functional behavior.
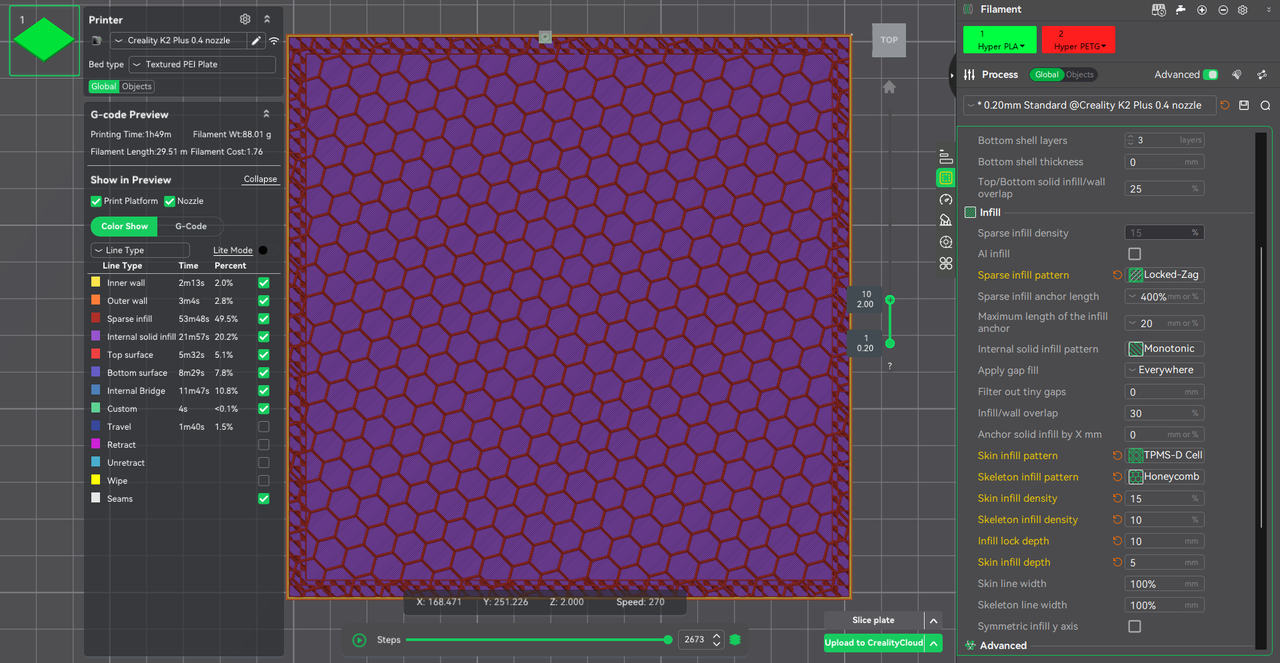
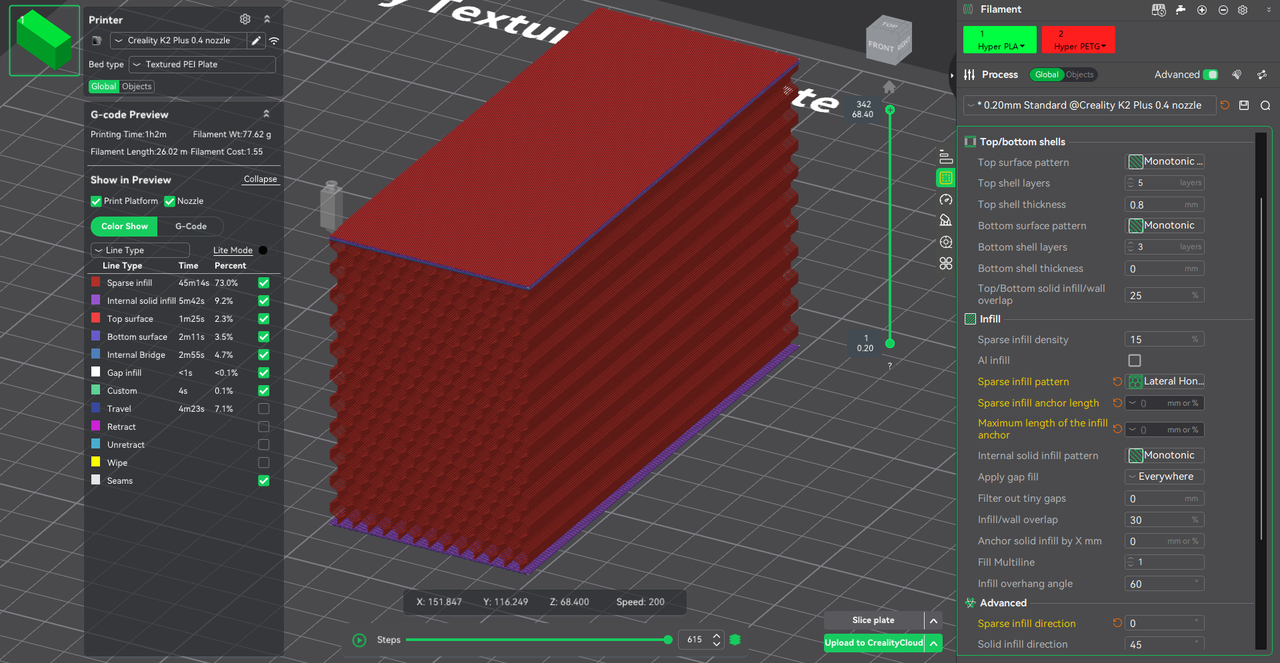
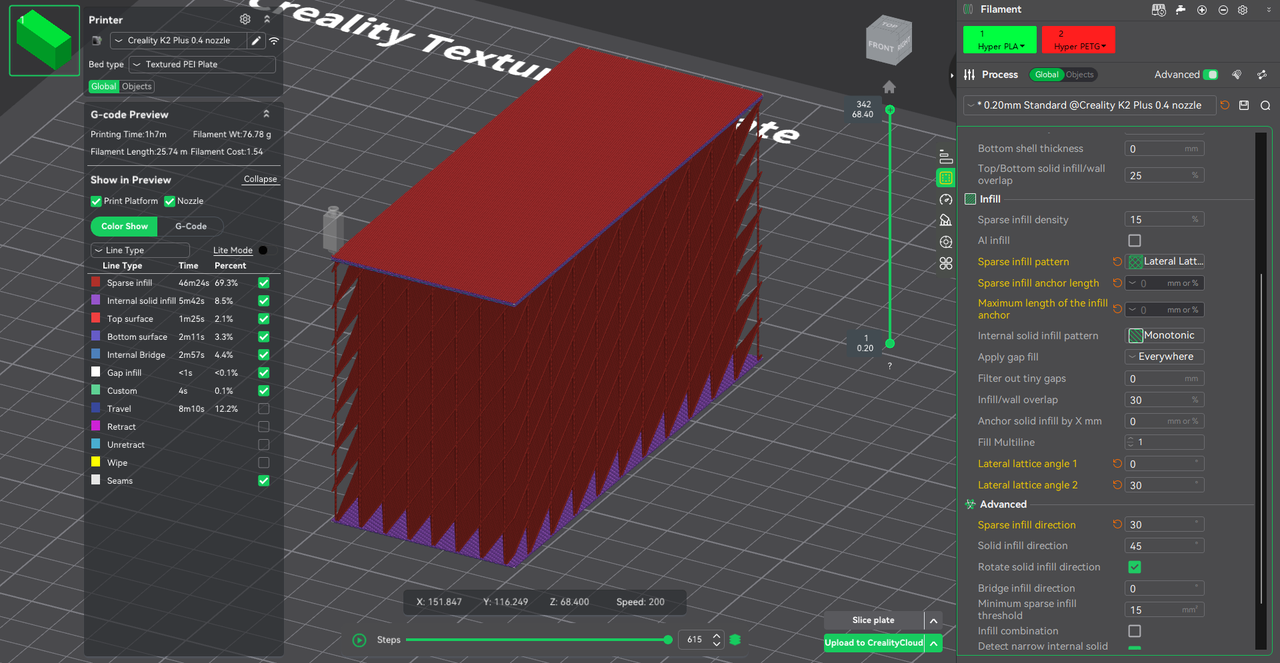
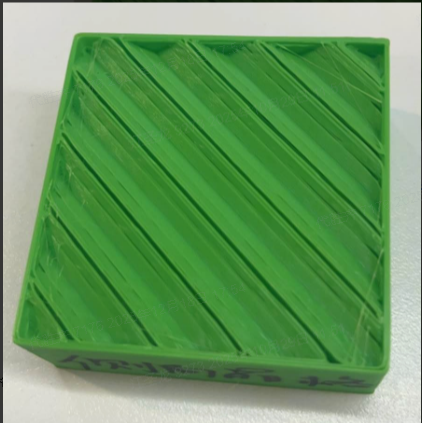
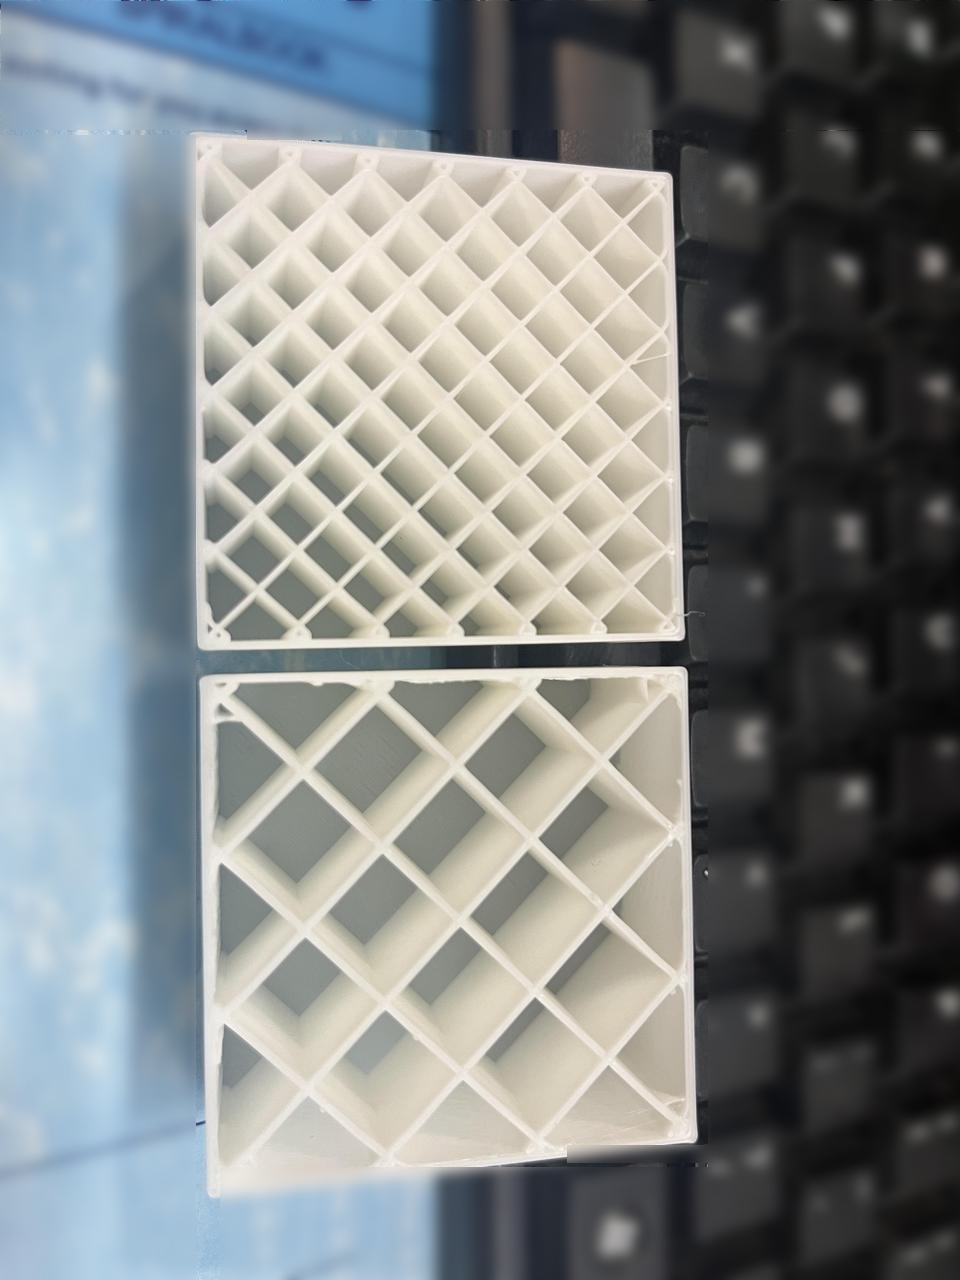
Newly supported patterns include: TPMS-FK Lattice, Zig Zag, Cross Zag, Locked Zag, Lateral Honeycomb, and Lateral Lattice.
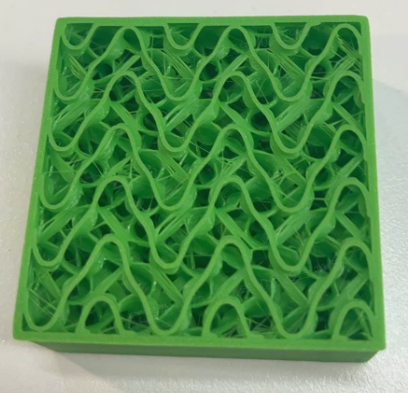
A. TPMS-FK Lattice:A lightweight, high-stiffness, high-stability infill designed for load-bearing and energy-absorbing structures.
 |
 |
B. Zig Zag:Similar to standard Line infill, its infill rotation step can be adjusted to offset the next layer’s infill by a certain line width through rotation.
 |
 |
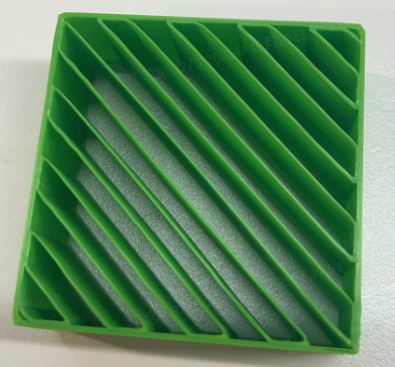 |
C. Cross Zag:Similar to standard Line infill, its infill translation step can be adjusted to offset the next layer’s infill by a certain line width through translation.
 |
 |
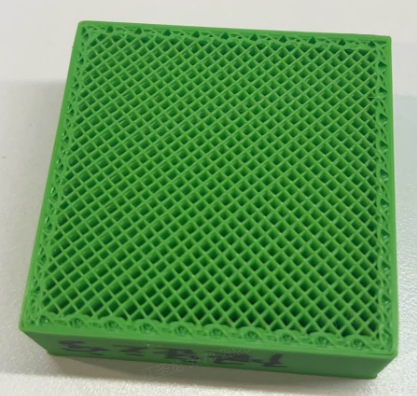
D. Locked Zag:Supports adjusting skin and core infill types, densities, and more.
Improve surface quality:Continuous, surface-friendly infill (such as Zig Zag or Concentric) can be applied to shell contact areas to reduce the impact of internal infill on the surface, resulting in smoother and more stable top surfaces.
Enhance shell bonding and shear resistance:Grid/paths near the outer walls can use denser or stronger patterns to improve shell load-bearing capacity and interlayer strength.
Save filament / increase speed:The core region can use lightweight and efficient infill (Zig Zag, Gyroid) to reduce time and filament consumption.
Functional zoning: High-density, energy-absorbing / rigid structures can be used in contact areas while keeping the core lightweight (e.g., rigid edges and elastic cores in shoe soles).
 |
 |
E. Lateral Honeycomb: Standard honeycomb is a top-down vertical honeycomb pattern with multiple speed changes within the same layer, resulting in slower print speeds. Lateral Honeycomb has mostly continuous paths with speeds close to Zig Zag.
Lateral Honeycomb = “engineering-grade infill” balancing strength + print speed + stability.
 |
|
F. Lateral Lattice: Standard lattice infill is a top-down lattice pattern with multiple speed changes within the same layer, resulting in slower print speeds. Lateral Lattice has mostly continuous paths with speeds close to Zig Zag. Lateral Lattice = Zig Zag-like speed with lattice-like strength, an “engineering-grade infill” highly suitable for FDM.
 |
 |
¶ New Parameter: Fill Multiline
Fill Multiline improves part strength, stability, top surface quality, and reduces vibration by coordinating more paths working together. It is a more stable and reliable internal structure than traditional single-line infill.
 |
 |
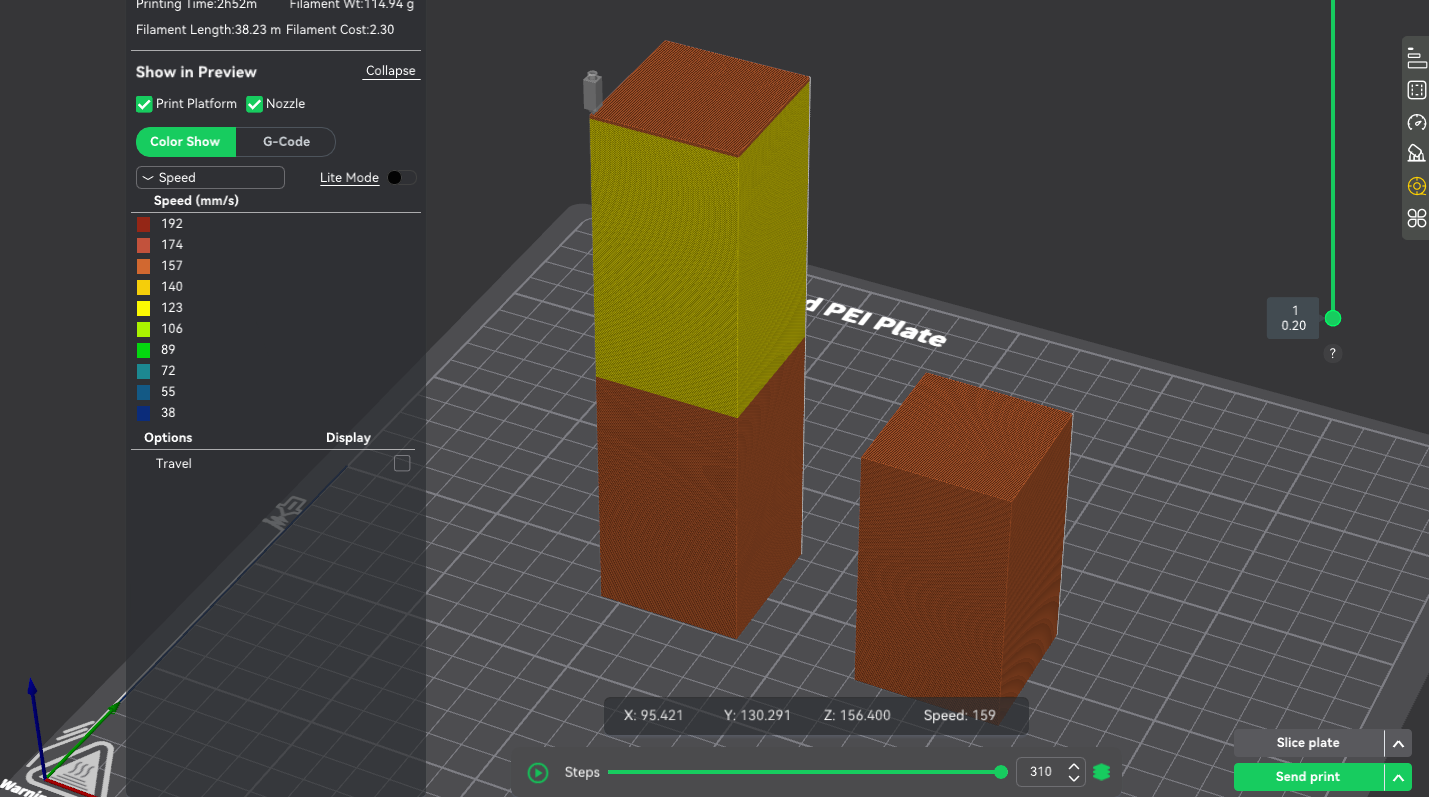
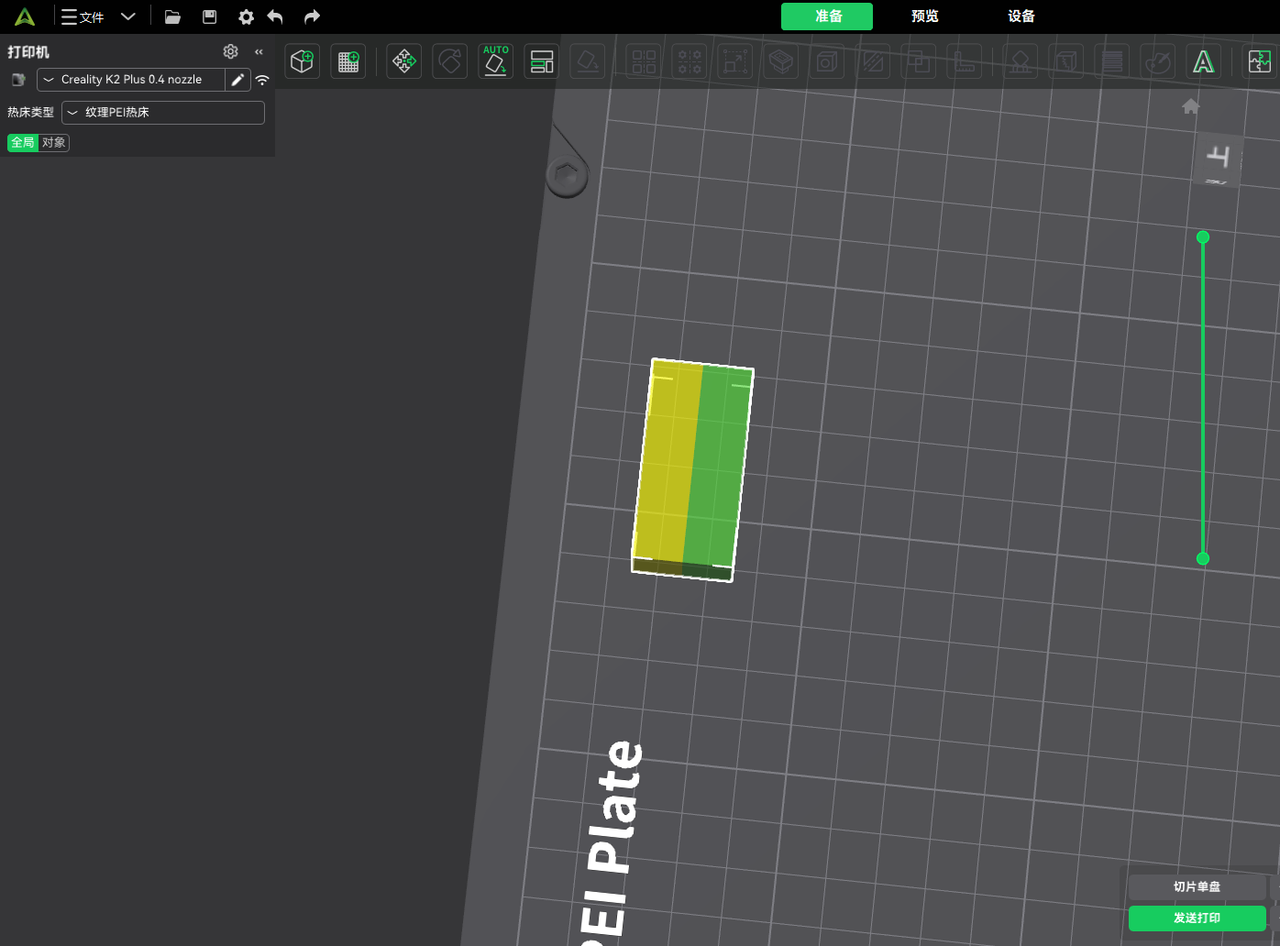
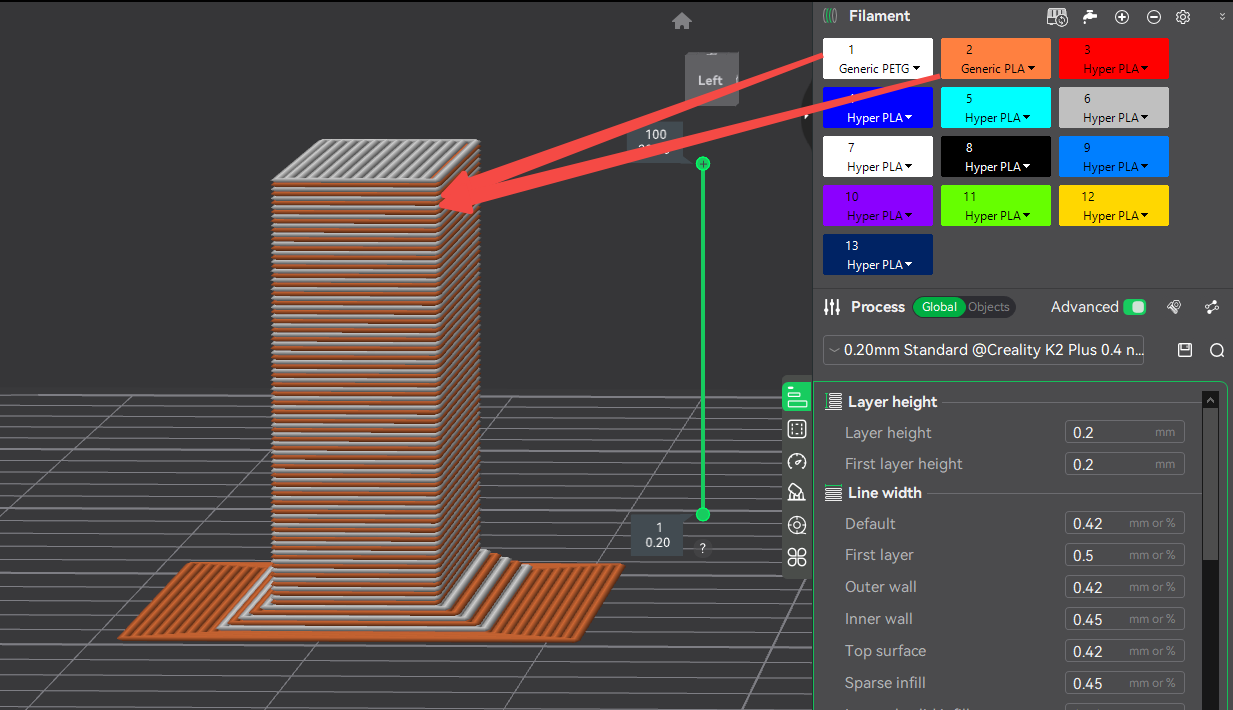
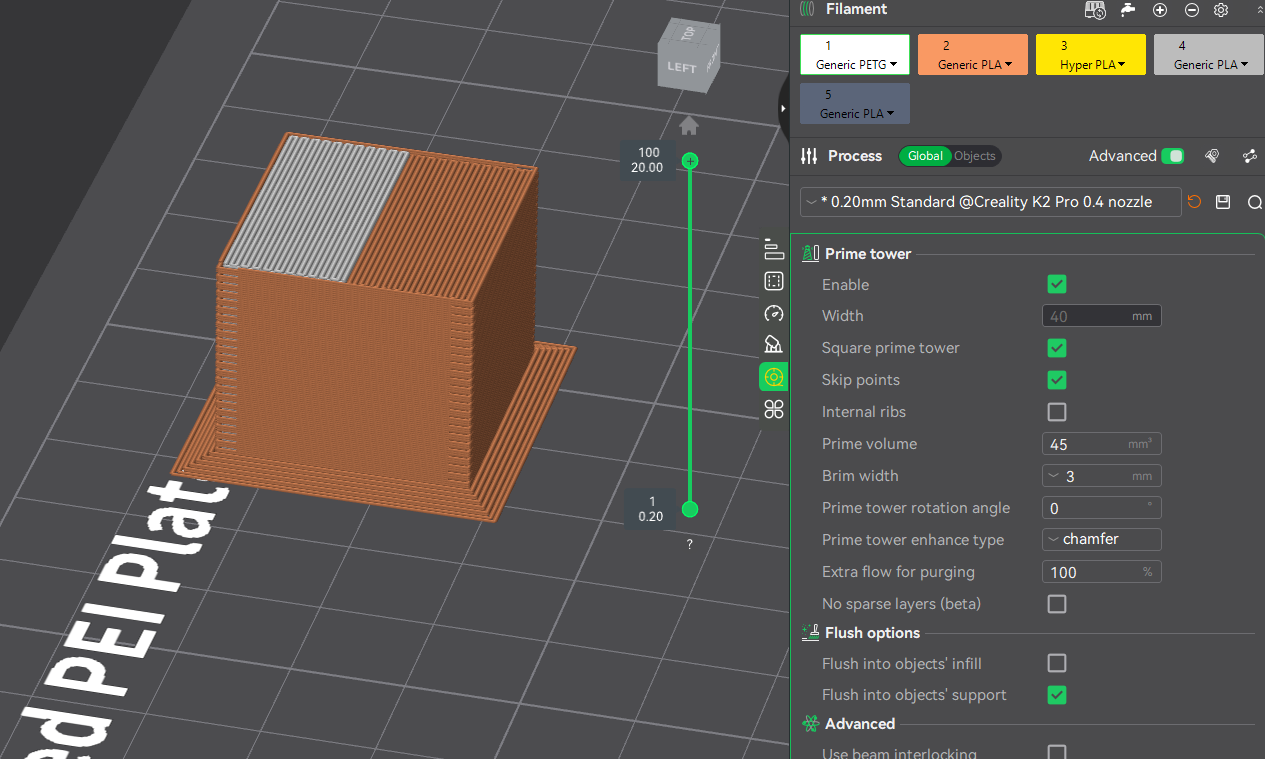
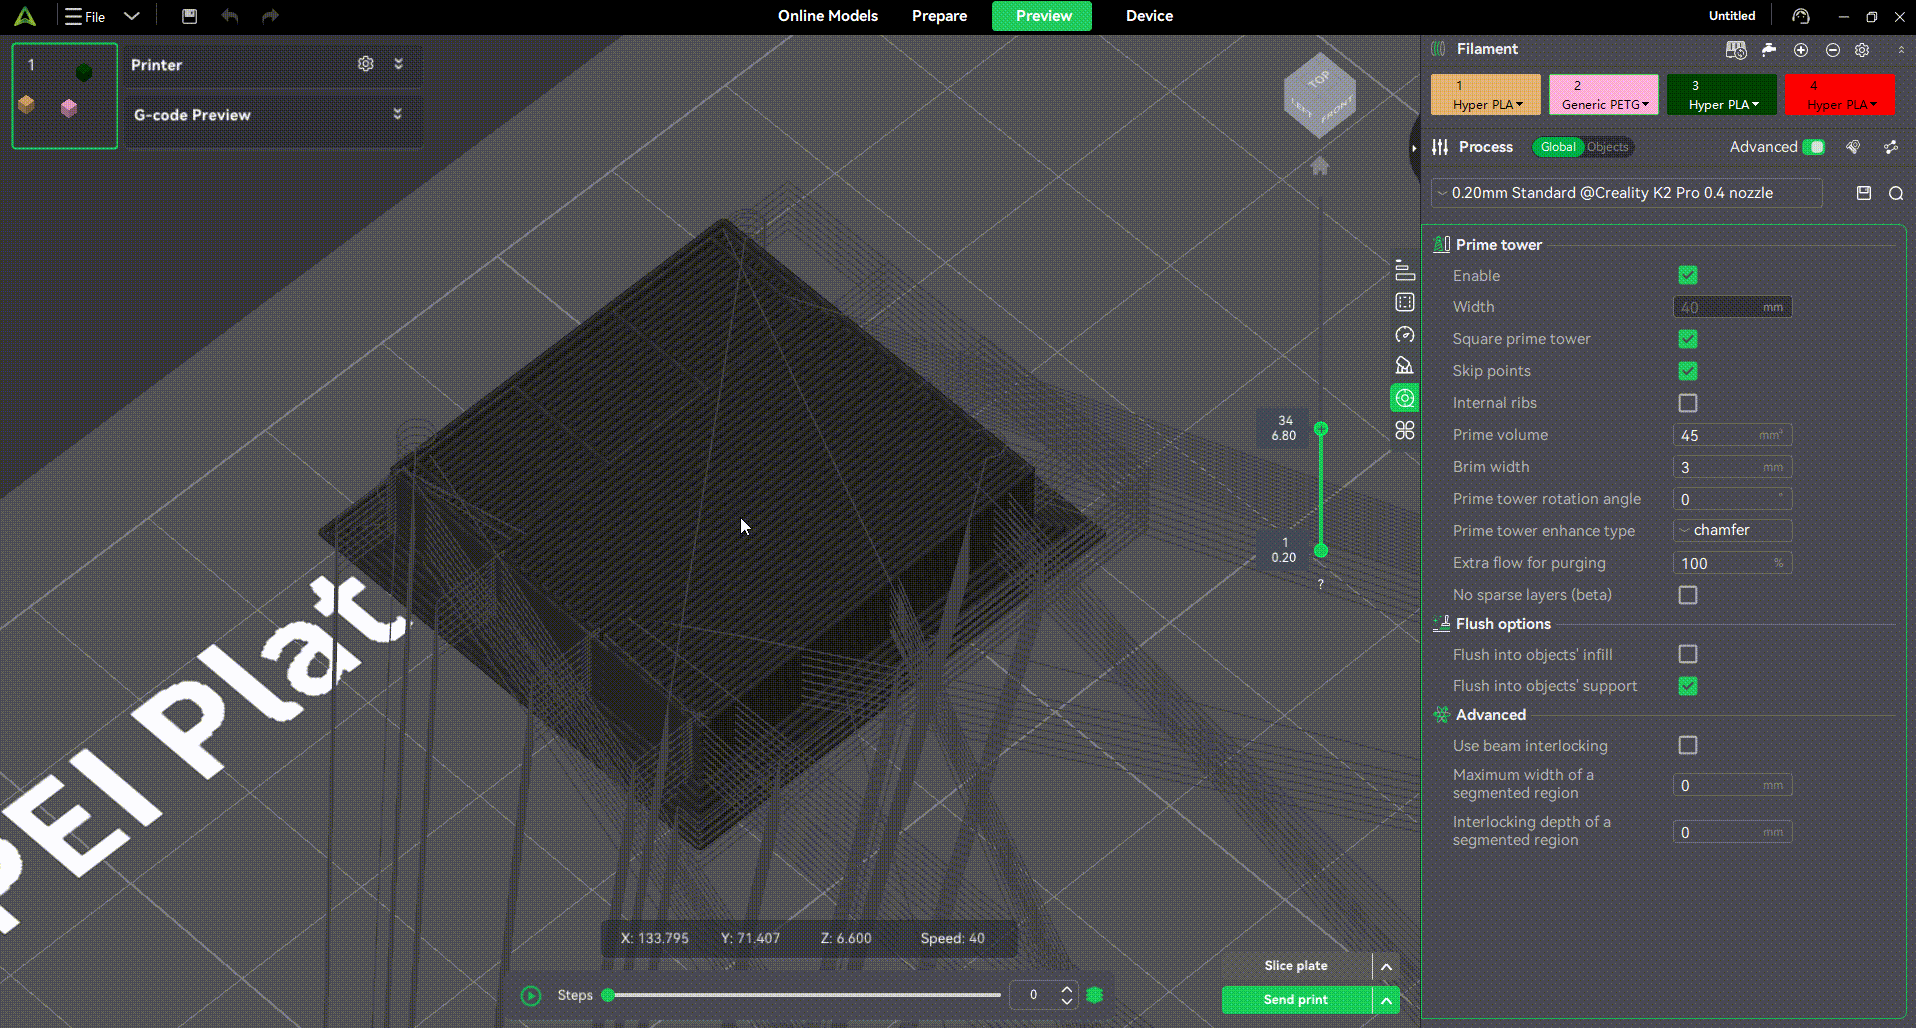
¶ Prime Tower Optimization
¶ Prime Tower Placement Visualization Enhancement
- Before slicing, a transparent preview of the Prime Tower placement is displayed.
After slicing is completed and returning to the Prepare page, the exact position and geometry of the Prime Tower are shown, allowing users to accurately control its placement.
- In previous versions, the Prime Tower could only be placed at least 15 mm away from the build plate boundary.
In the new version, with the exact shape visualization enabled, the Prime Tower can be positioned as close as 2 mm from the build plate boundary, significantly increasing the usable build area.
|

|
¶ Split-Side Prime Tower Printing
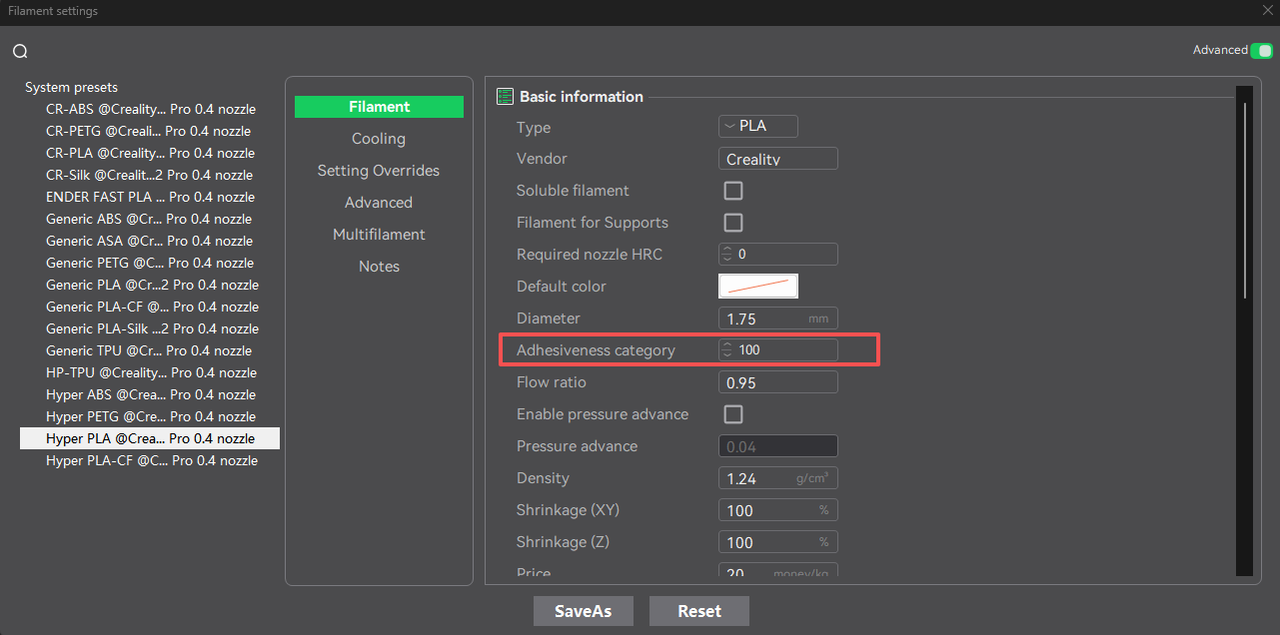
New parameter: Adhesiveness category
This feature is designed to handle filaments with different interlayer adhesion levels.
When printing a Prime Tower with filaments of varying adhesion characteristics, the tower is printed with separated sides to avoid breakage issues that occurred in previous versions where layers were printed in an interleaved manner (for example, when printing non-bonding filaments such as PLA and PETG).
|
|
¶ Added Prime Tower Outer Walls
When printing with multiple filaments, an outer wall printed with a unified filament is added to enclose the infill printed with different filaments, preventing Prime Tower collapse caused by potential collisions during printing.
Added outer wall openings and opening ironing: Openings are introduced in the Prime Tower outer wall, allowing the nozzle to enter through the opening to print the Prime Tower infill.
At the opening area, ironing is applied to smooth the extrusion start point and reduce warping caused by filament buildup.
¶ Device Management
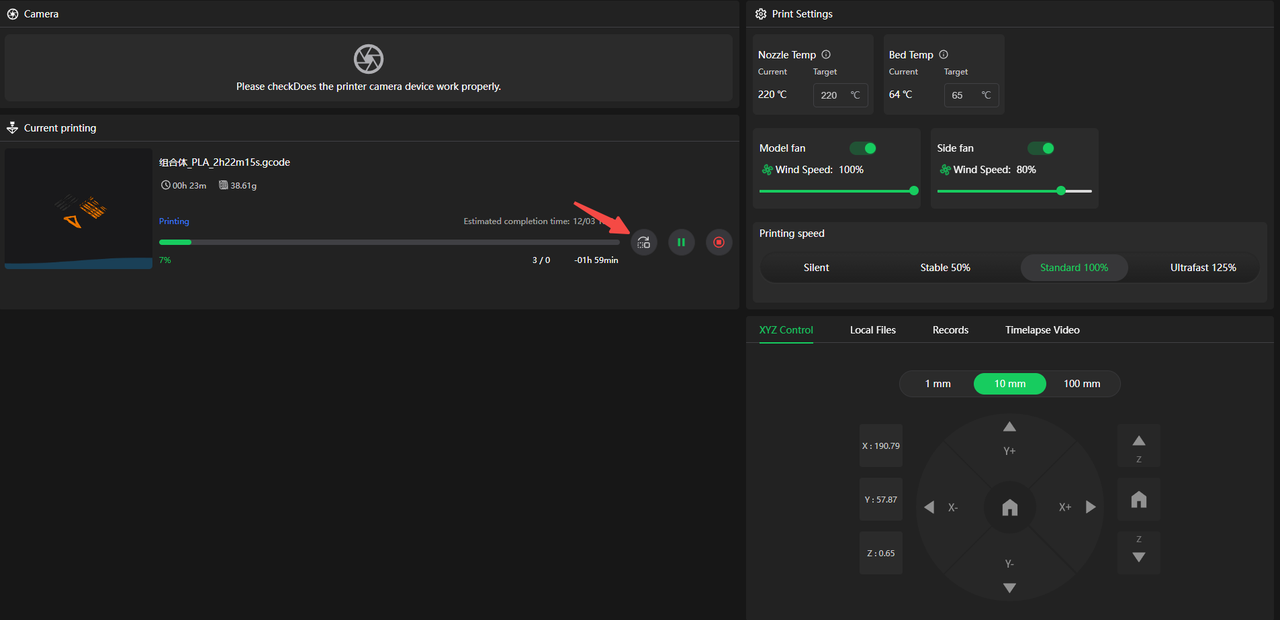
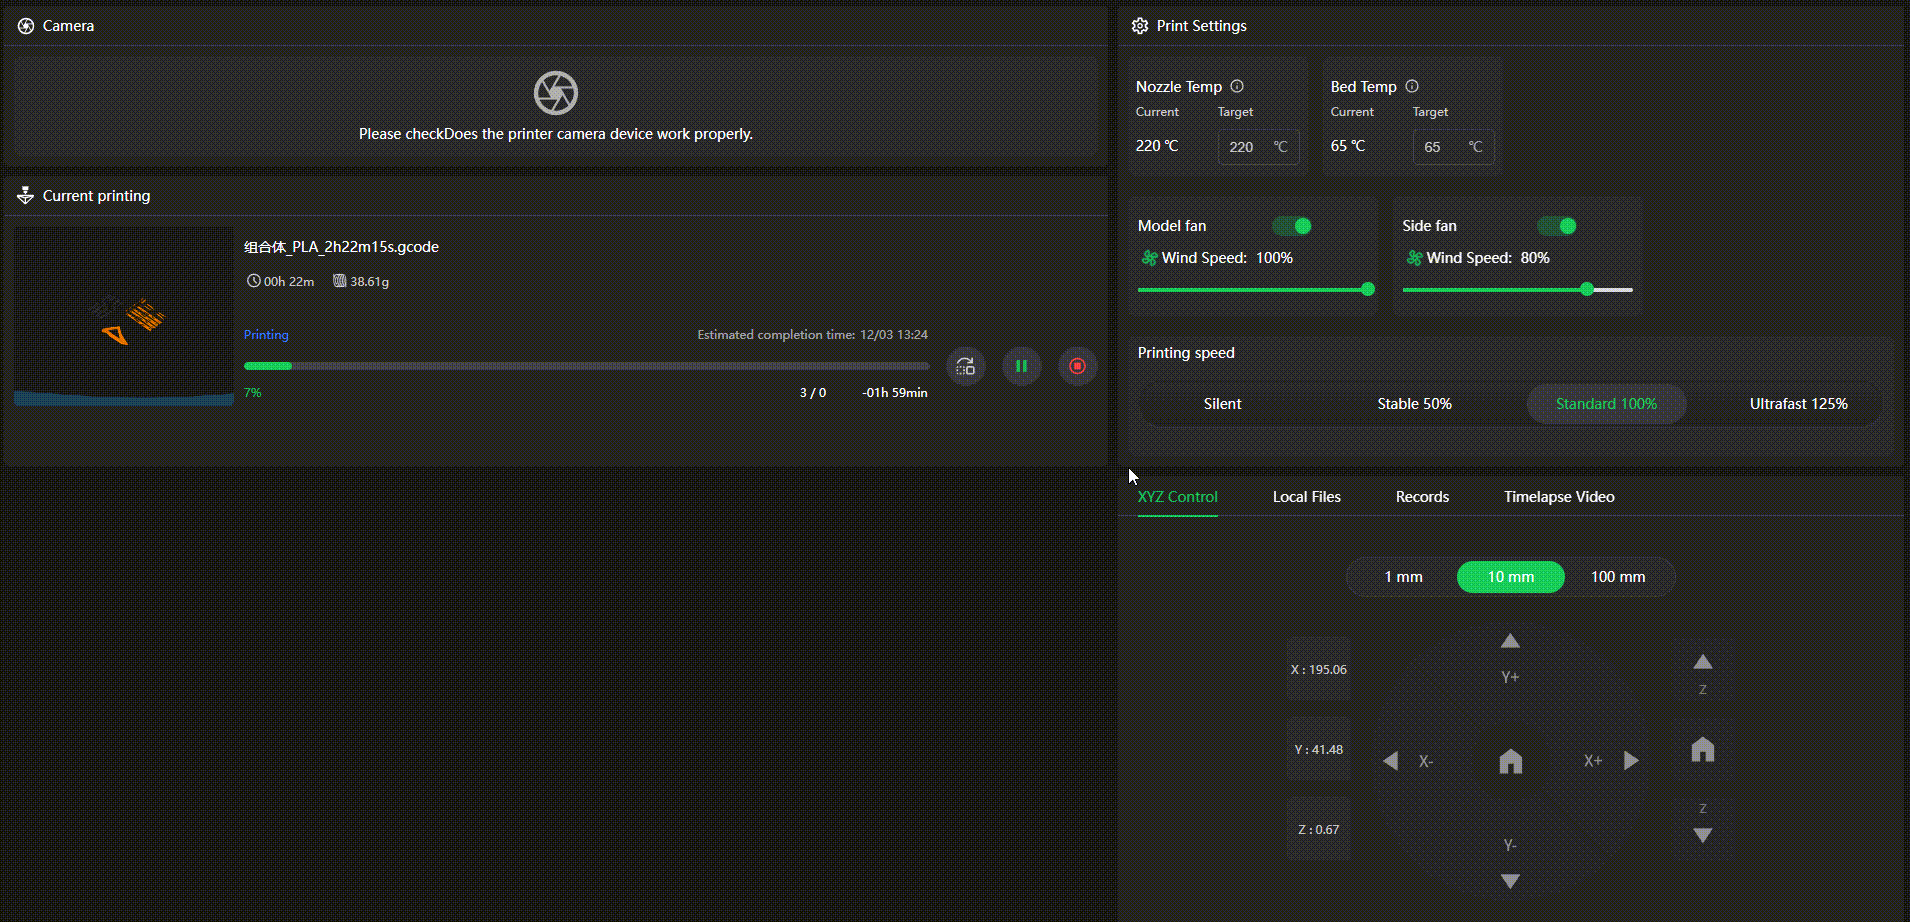
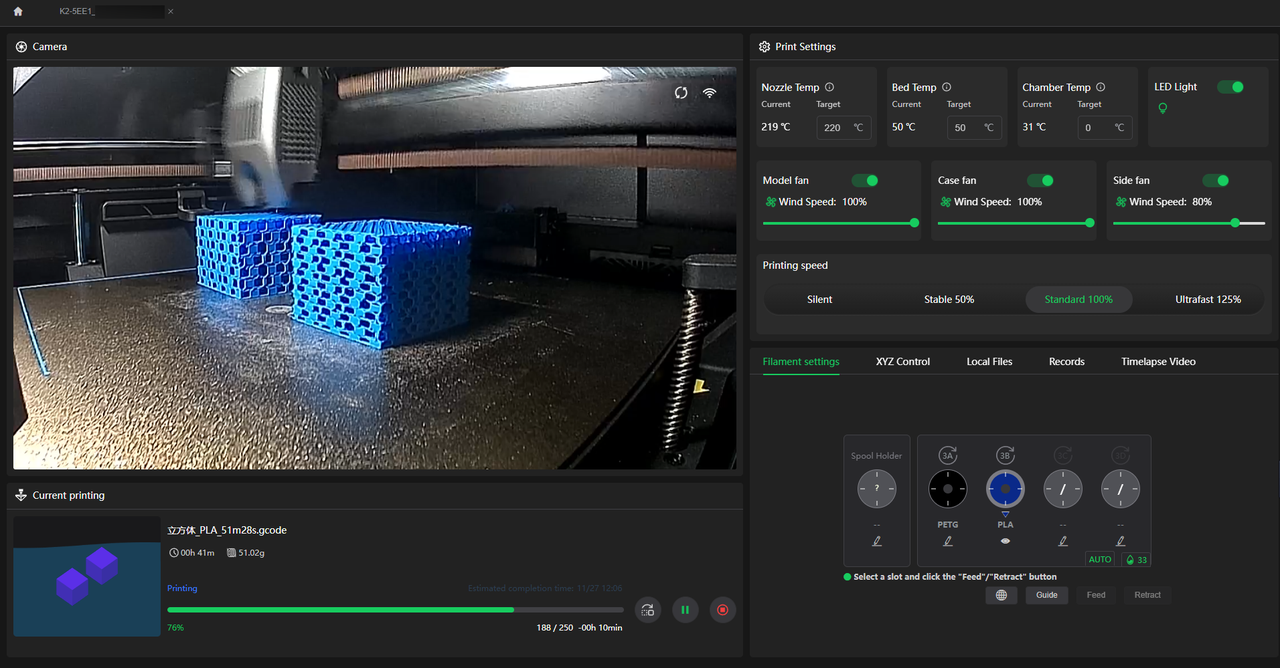
¶ Device Details Page Upgrade
Aligned with the K2 series firmware update, the Device Details page in Creality Print has been optimized accordingly.
The functional areas are now further clarified: the left side focuses on the camera and the real-time printing display area, while the right side sequentially integrates printing settings, filament settings, XYZ control, local files management, print history, and timelapse video according to operational logic, effectively improving operational convenience and visual clarity.
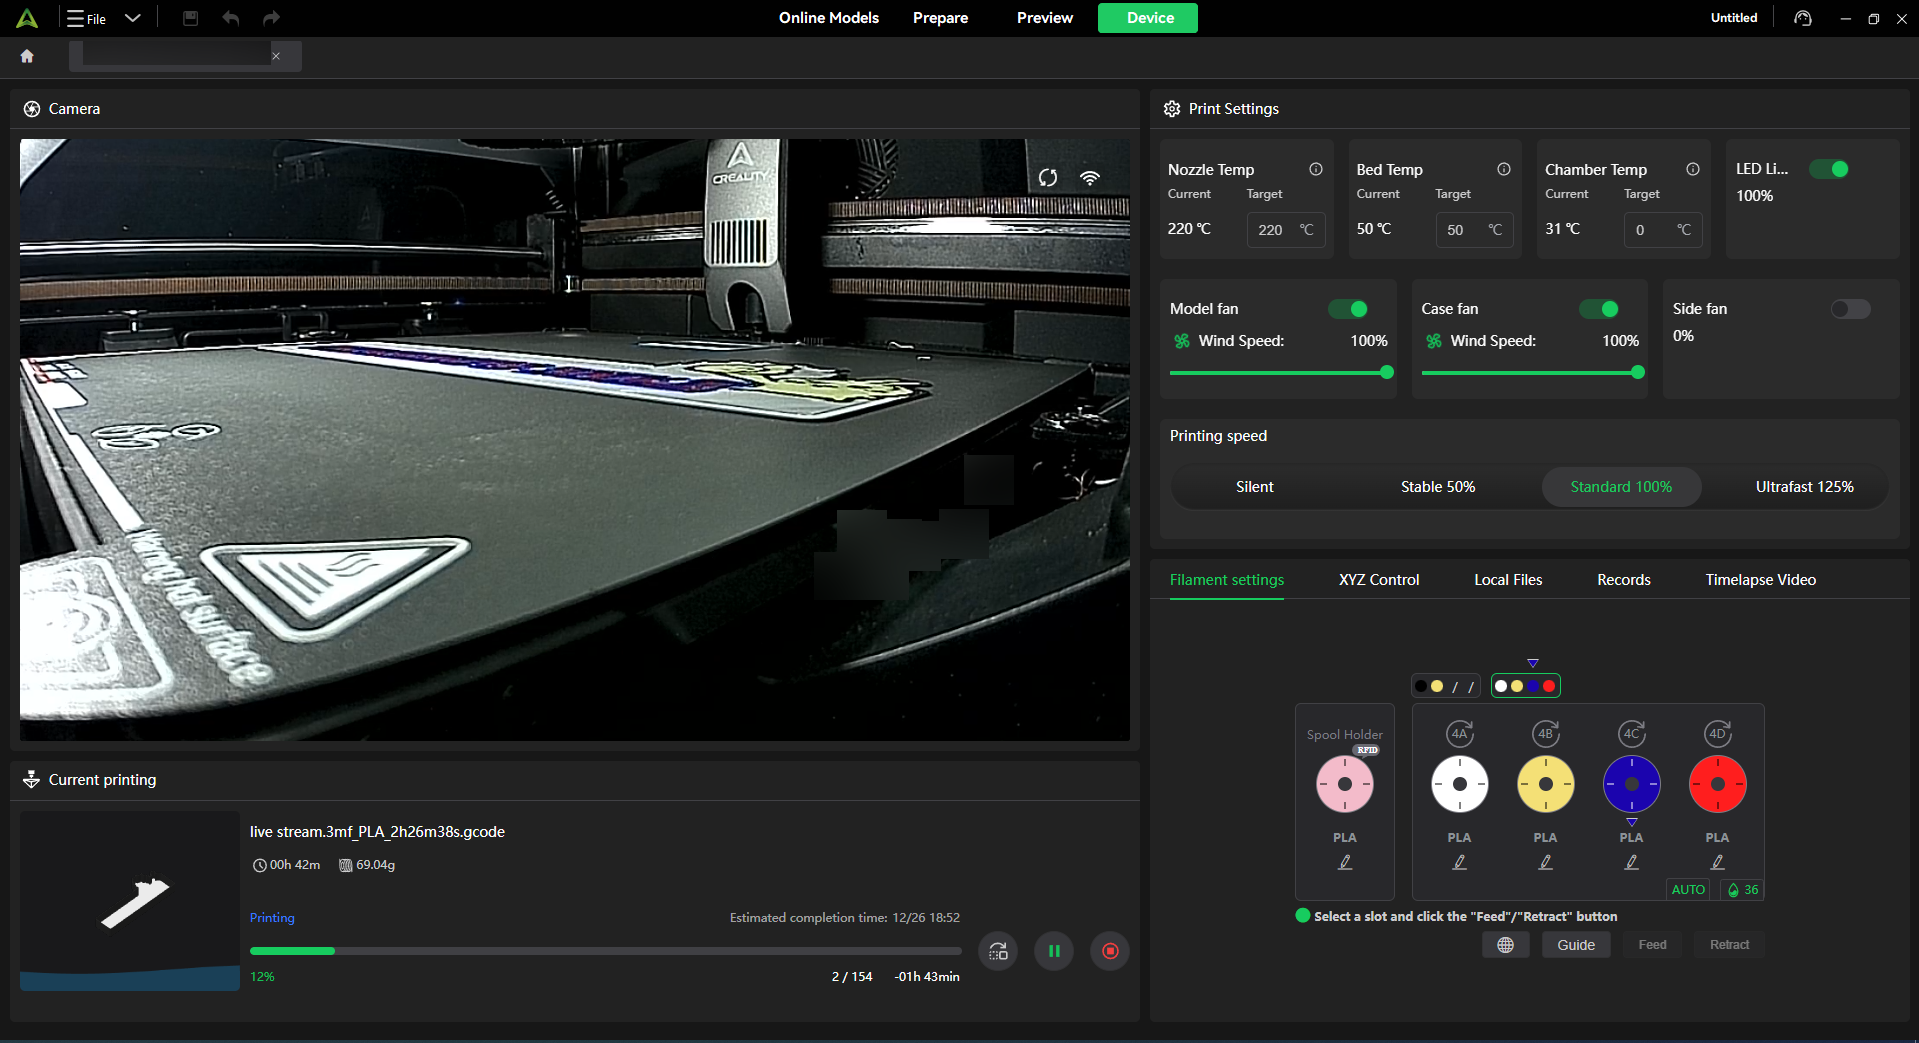
1. You can now simply hover over the icons beside the temperature indicators to view the temperature curves.
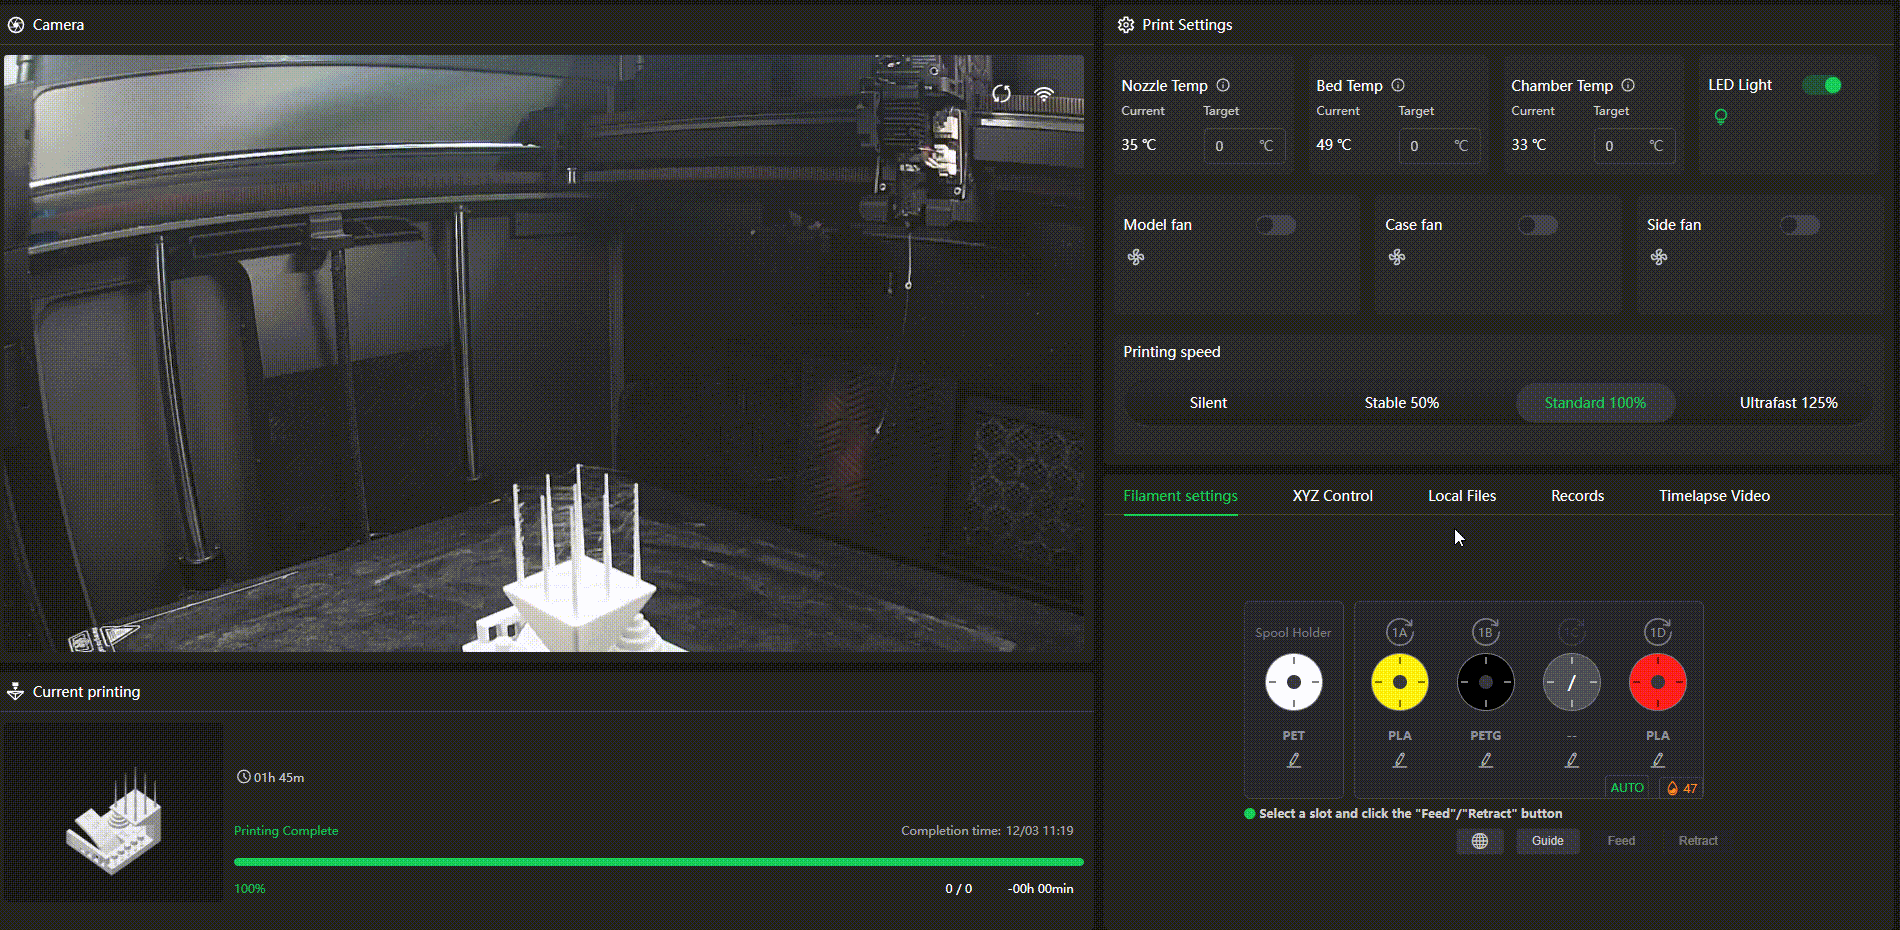
2. Previous versions displayed the “Skip Model” operation entry directly on the details page. This has now been adjusted to be triggered and used only during the printing process.
¶ WAN Connection Optimization
¶ View camera video on the device details page
The camera preview feature for devices bound to Creality Cloud is now available. Once printing begins, you can view real-time previews. Currently, playback automatically pauses after 15 seconds, but you can resume manually with a click. Effortlessly manage the entire remote printing process.
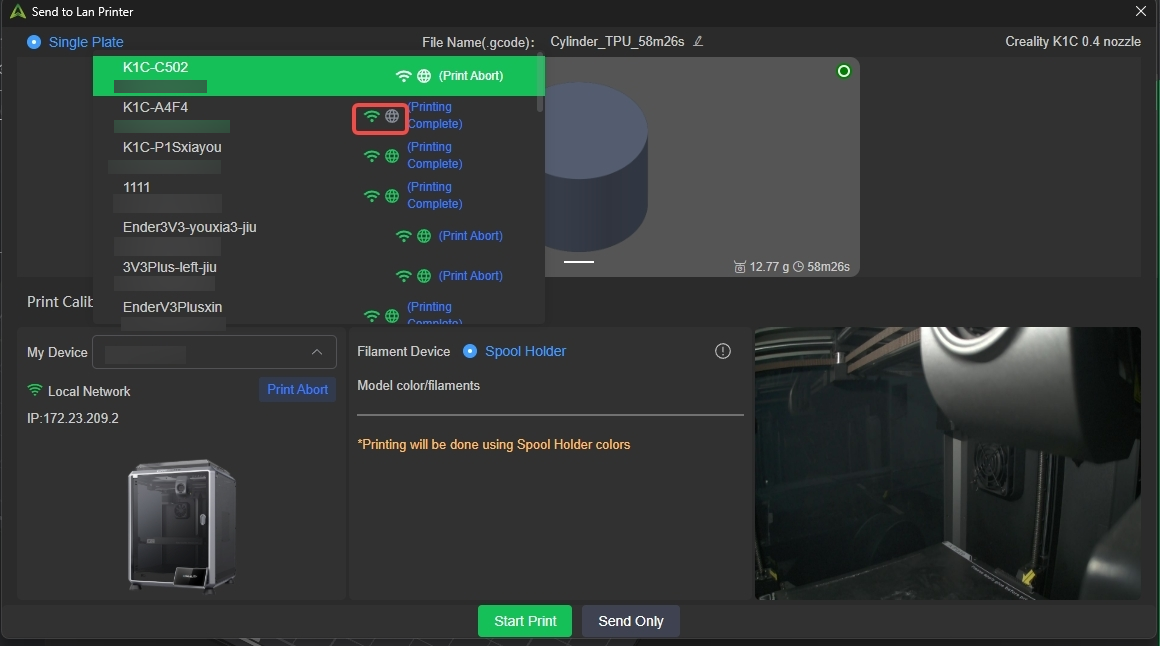
¶ Print-Sending Page Upgrade
For wide-area network transmission scenarios, the print-sending interface in Creality Print has been upgraded with the following improvements:
Optimized device display logic: The previous “LAN / Creality Cloud” grouping has been removed, and devices are now presented based on the actual network connection type.
Upgraded icon-based status indicators: When both network modes are available, the WiFi icon and the globe icon 🌐 are both shown in green. When only LAN is available, the WiFi icon remains green while the globe icon 🌐 appears gray, clearly distinguishing the availability of network modes through visual differentiation.
New intelligent channel-switching mechanism: When sending a model, the system will prioritize the LAN transmission channel. If the LAN connection fails, it will automatically switch to the WAN channel, significantly improving the success rate of model transmission and overall transfer stability.
¶ Improved Print Time & Filament Usage Estimation Accuracy
This update currently applies to K2 plus printer. The new features will take effect after upgrading the K2 Plus firmware to version 1.1.4.8. (For other printers, please wait for future firmware updates.)
For K2 plus printer running firmware below above version, please refer to the documentation here: Printing Time & Filament Estimation Accuracy——Firmware and Slicer Version Compatibility Guide
¶ Waste Flushing Optimization
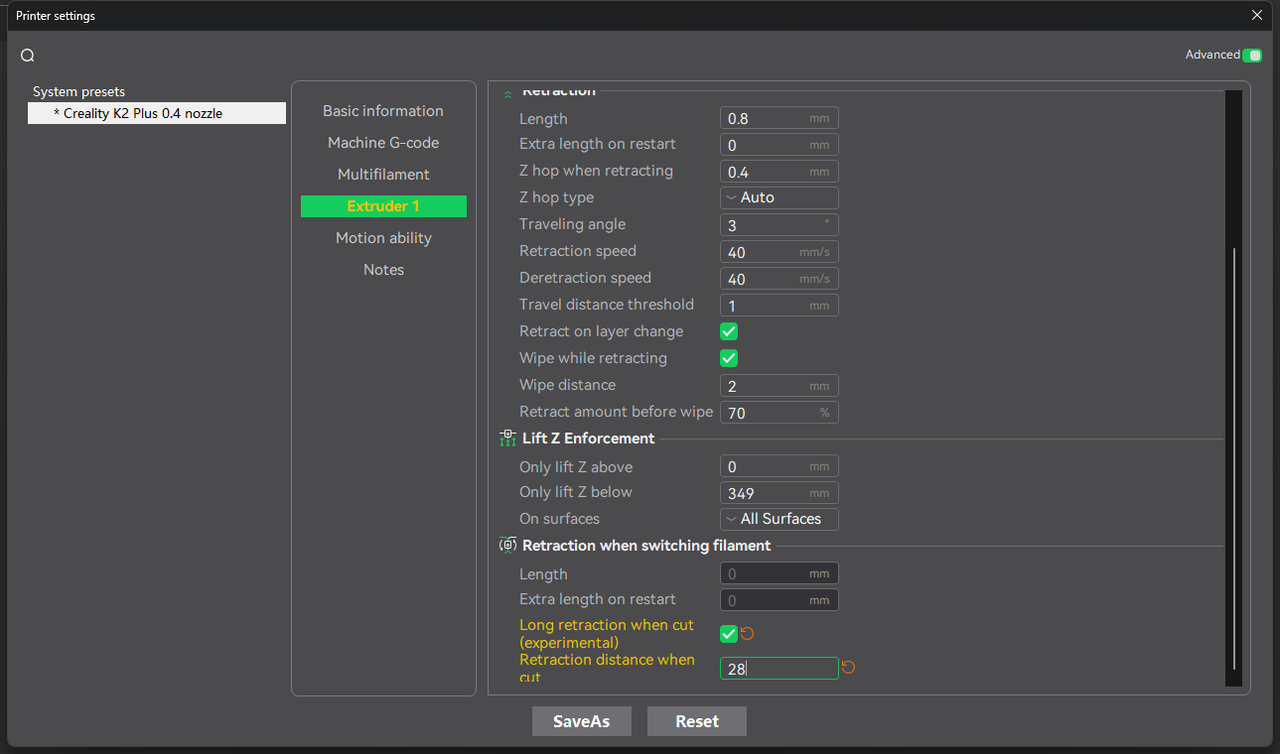
¶ New Features: Long retraction when cut(experimental)、Retraction distance when cut
During filament change flushing, a long retraction is performed before cutting. This retracts the filament from the throat tube, ensuring that unmelted filament is pulled out as much as possible before the cut. This process helps save the length of filament that would otherwise be wasted during a long retraction.
 |
|
¶ Existing features take effect
 |
 |
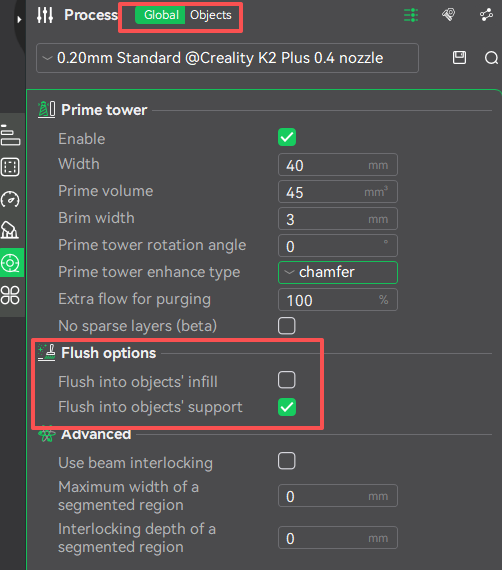
¶ Flush into Objects' Support
During filament change, waste flushing filament will be used for printing model supports.
Example: Changing from black to white requires flushing 100 mm of filament. If the next layer’s supports require 40 mm, enabling this feature will flush only 60 mm before proceeding to print the wipe tower and then the supports. This may cause slight color mixing in the supports but will not affect the main model’s print quality.
Applicable scenario: For models requiring supports, enabling this feature can save filament.
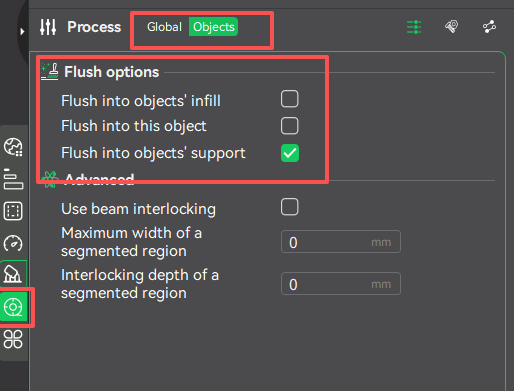
¶ Flush into Objects' Infill
Similar to “Flush into Object Supports,” this uses flushing waste for printing model infill.
Applicable scenario: For models printed with opaque filament, enabling this feature can reduce filament usage.
¶ Flush into This Object
Similar to the above, but uses flushing waste to print the entire object.
Applicable scenario: For print jobs where only the model shape matters and color accuracy is not required, enabling this option can direct most flushing into the object itself, significantly saving filament.
¶ Improved Print Time Estimation Accuracy
This version introduces extensive testing and development to significantly improve print time estimation accuracy for both single-color and multi-color printing scenarios.
Single-color printing: Print time estimation error is reduced to less than 5%.
Multi-color printing: Print time estimation error is reduced to less than 5%. The new version decomposes the entire printing process, performs detailed estimation and error analysis, and delivers much more accurate print time predictions.
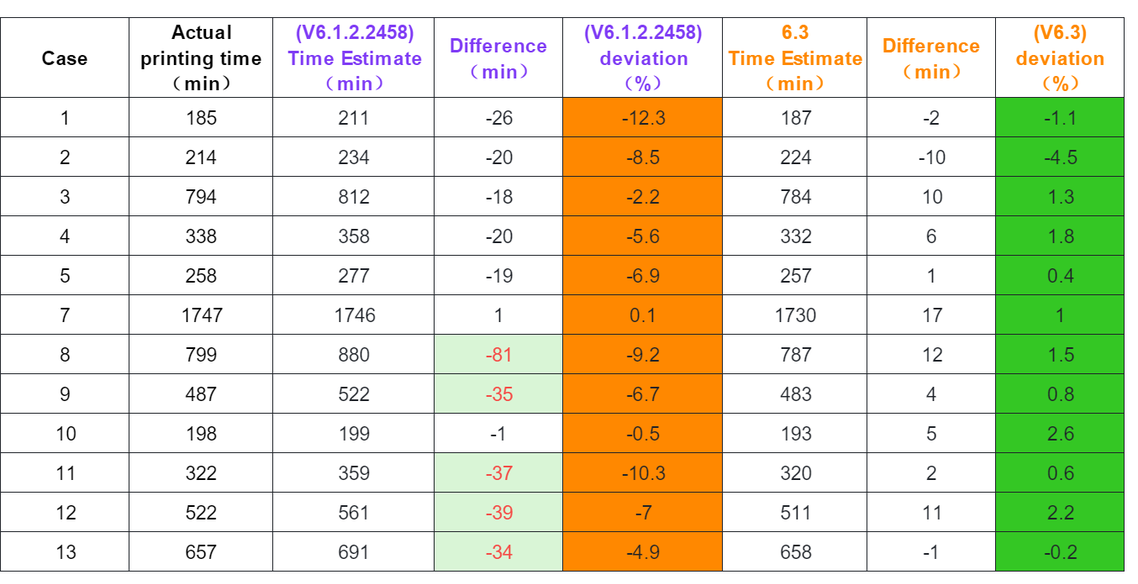
¶ Improved filament Usage Estimation Accuracy
This version includes extensive testing and development to improve filament usage estimation accuracy, with a focus on multi-color printing scenarios. filament usage estimation is now divided into three parts: model printing usage, filament change flushing usage, and wipe tower usage, each tested for accuracy. Compared to previous versions with up to 20% estimation error, version v6.3.0 reduces this error to within 5%.
¶ New Integrated Community
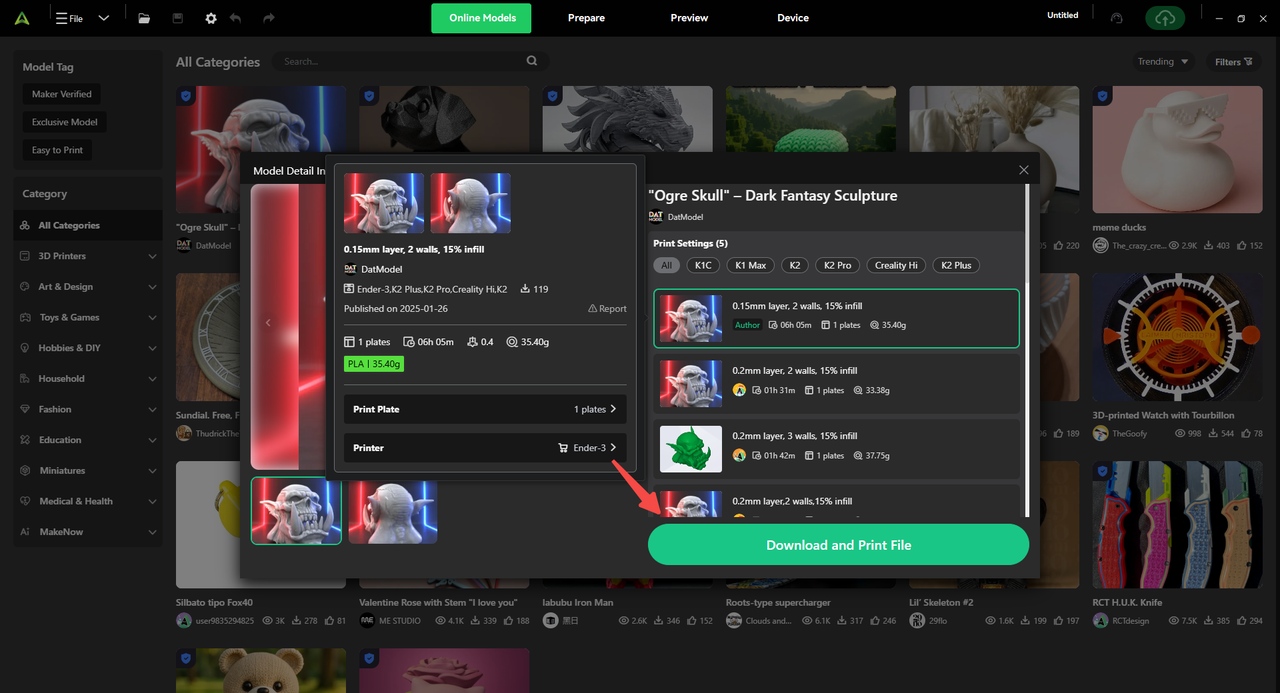
¶ Online Models
A new Online Models entry is available in the top bar, enabling one-click access to the Creality Cloud model library.
¶ Homepage Optimization
The homepage layout has been fully redesigned to improve first-screen efficiency—making online models and frequently used functions easier to locate.
¶ Tutorials
The Tutorials section has been fully rebuilt with a new UI and reorganized content structure.
Whether for hardware maintenance or advanced software techniques, users can now navigate through clear series-based and topic-based categories to quickly locate the knowledge they need.

¶ Creality Mall
A new quick-access entry to the Creality Mall has been added to the homepage sidebar—allowing users to browse and purchase printers, filaments, and accessories directly from within Creality Print.
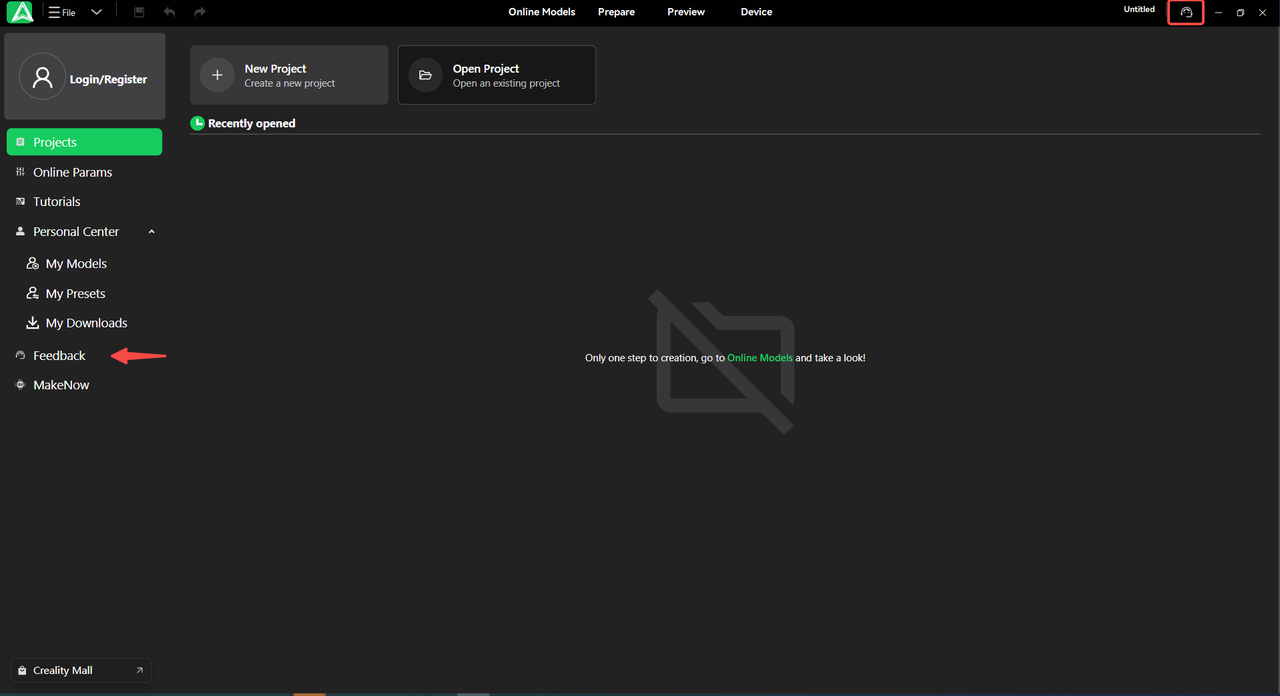
¶ Feedback
A dedicated Feedback entry has been added to the sidebar, along with a new quick-access feedback button in the top toolbar.
Users can now submit issues or suggestions instantly during operation, enabling faster turnaround on user requests.
¶ Performance & Efficiency
A new intelligent rendering pipeline has been introduced for the G-code Layer Preview:
- When viewing the full model, unnecessary detail is dynamically simplified to ensure smooth rotation, panning, and zooming.
- When zooming into specific layers, high-precision details are restored instantly.
This adaptive LOD-based rendering significantly reduces lag when previewing tall models or high-density layer data.
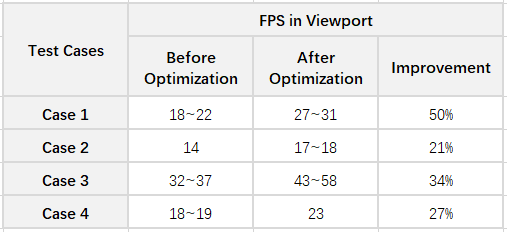
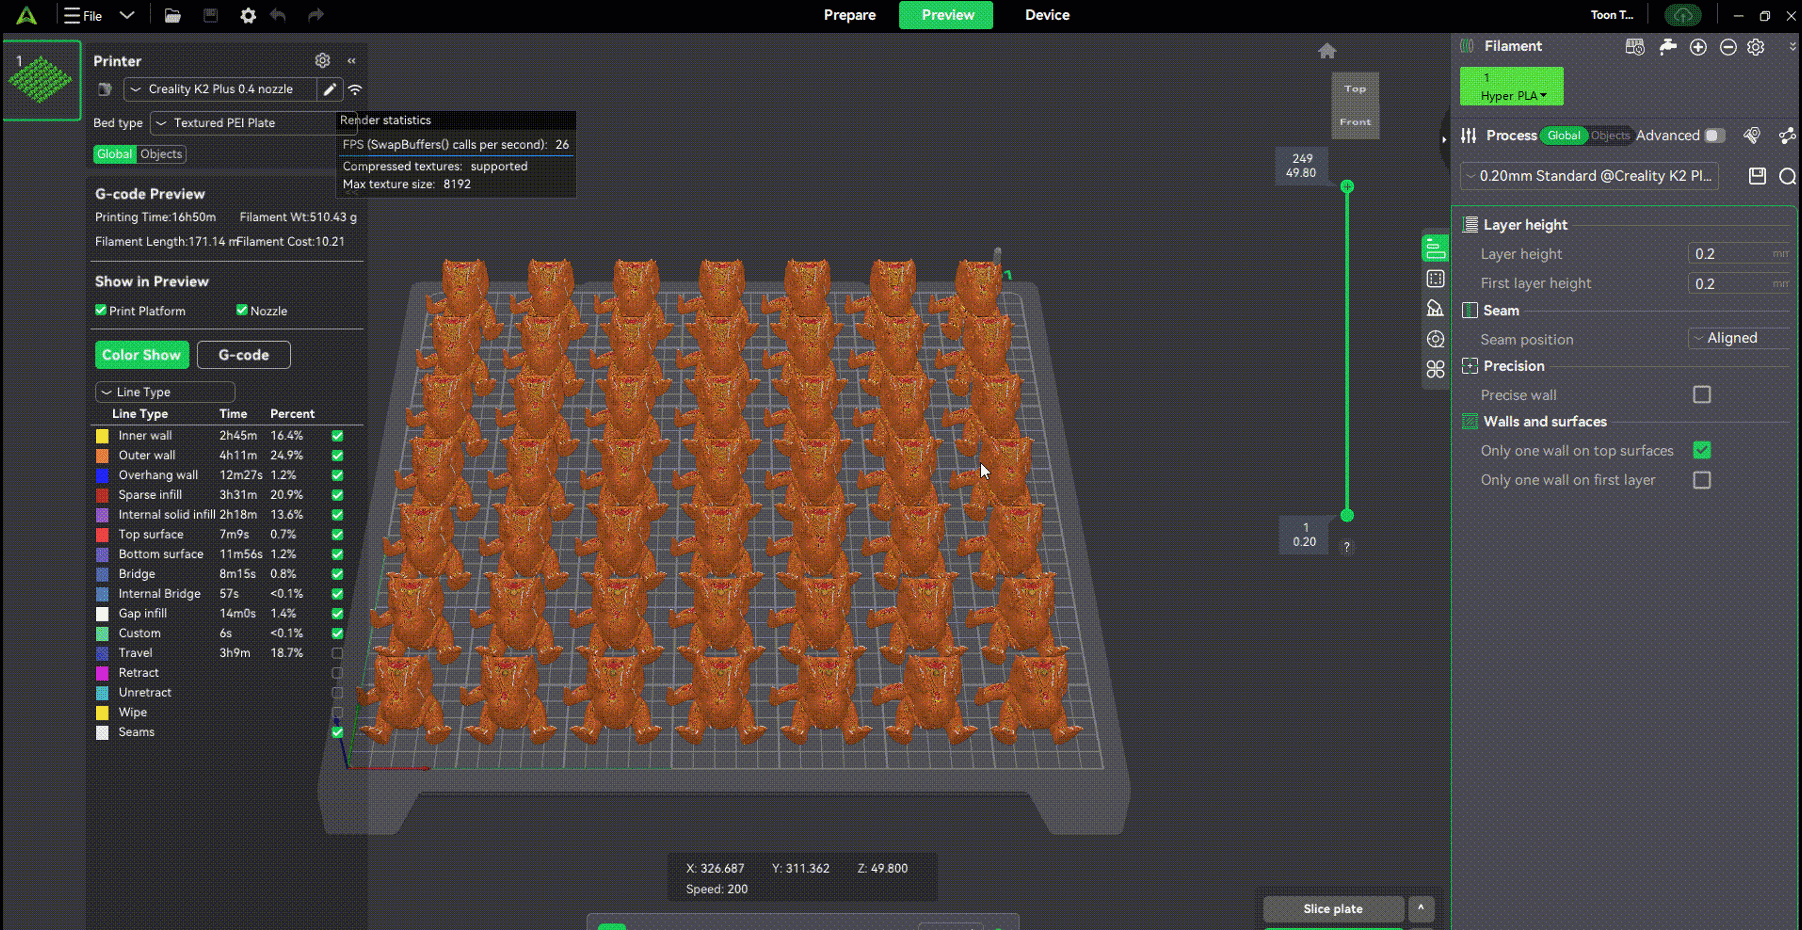
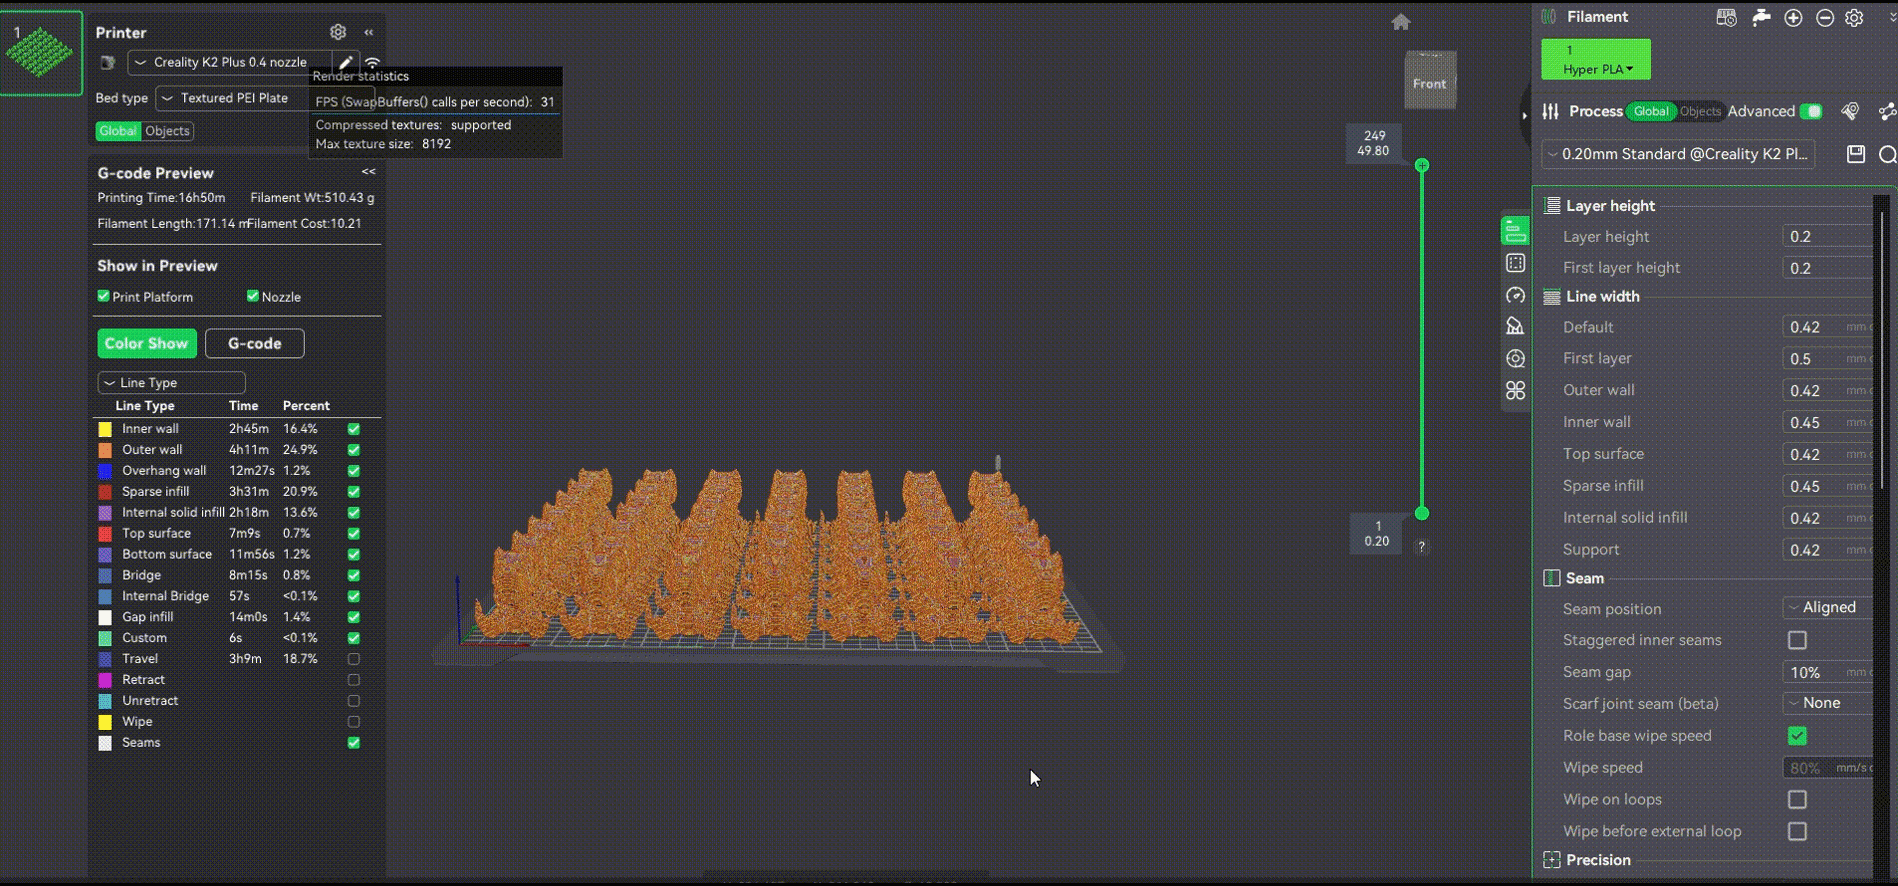
Across common preview scenarios, average framerate improved by 20% or more in internal testing. Using the small dinosaur case as an example, the frame rate improved by up to 24% after optimization.
|
|
¶ Additional Improvements
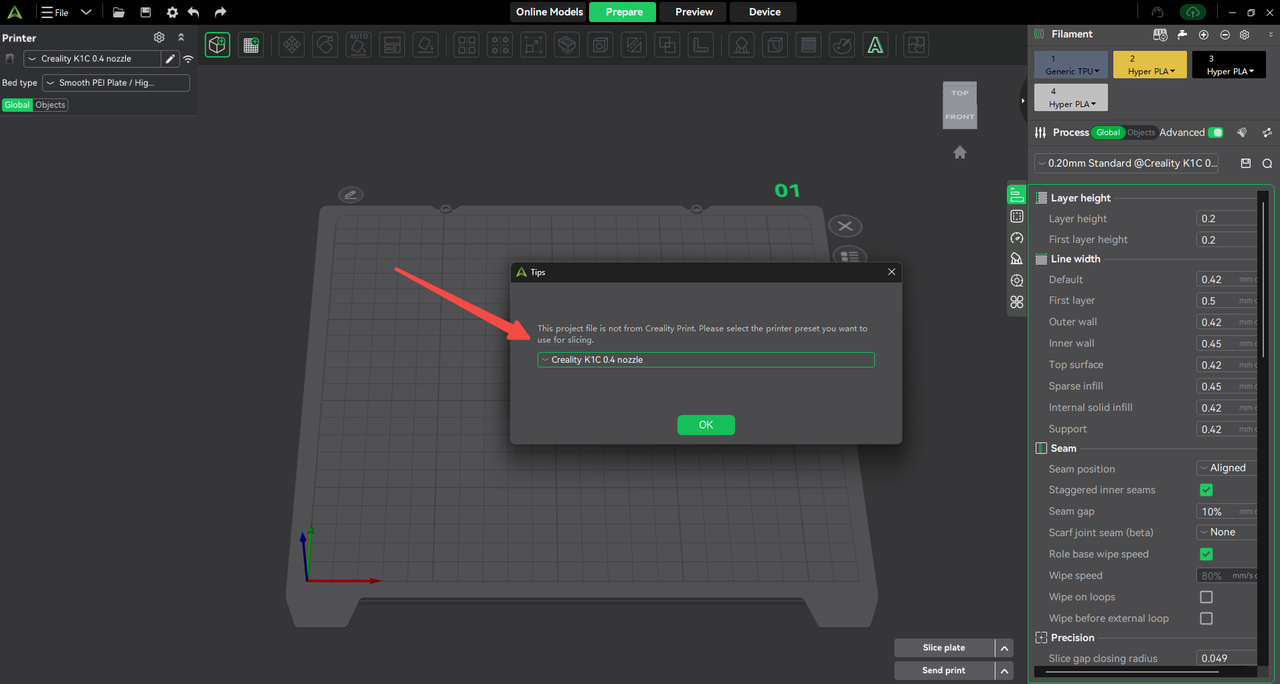
¶ Third-Party 3MF Import Optimization
Optimized the import logic for third-party 3MF files. When importing 3MF files created for non-Creality printers, users are prompted to select a printer preset. Printer parameters from third-party 3MF files that are incompatible will not be imported. Modified process parameters and filament types/colors can be imported, while any unsupported filaments or process settings will be replaced with the default parameters matched to the selected printer preset.
¶ Automatic Migration of 6.x User Presets
Local user presets saved in version 6.x will be automatically migrated to the 7.0 user folder. Presets already synced to the Creality Cloud can be accessed by logging into your Creality Cloud account.
¶ Bug Fixes
- Added one-click parameter setup when using PETG and PLA as mutual support filaments.
- Fixed missing supports on certain models when tree supports are enabled globally by default.
- Fixed an issue where Boolean Difference operations were incorrectly processed as Union operations. #439
- Fixed missing support generation in certain overhang regions.
- Fixed an issue where STEP files containing only SHELL geometry (without SOLID) could not be parsed.
- Fixed an issue where models in Personal Center → My Models could not be imported or downloaded.
- Fixed an issue where the Preview page did not refresh correctly after collapsing and expanding the panel.
- Fixed an issue where the K1 printer was not recognized during initial machine setup. Thanks to @DangerouslyMike.
- Fixed an issue where enabling Surface-only Z Lift and Top Surface Only caused abnormal empty first layers and toolpaths dropping to Z = -1. Thanks to @newtd.
- Fixed an issue where the Select All button for timelapse videos was unresponsive in WAN scenarios. Thanks to @李孟龙.
- Fixed untranslated fields still displaying Chinese text. Thanks to @Vietti-Teppa.
- Fixed a crash occurring after clicking the Local Files section in the Device Details page. Thanks to @neal.
- Fixed abnormal nozzle wipe line speed during maximum volumetric flow calibration.
- Fixed non-straight Z-seam generation under Arachne wall mode.
- Fixed an issue where the first filament slot was not selected during maximum volumetric flow calibration. Thanks to @Slowyata.
- Optimized UI elements including the Preview page and build plate shape display.
- Fixed incorrect application icon display on macOS.
- Fixed multiple localization and translation issues. Thanks to @neal, @Alex2Lab, @松猫儿, @tux0topo.
- Fixed an issue where print videos could not be played for printers bound to Creality Cloud.
- Fixed UI compatibility issues on the new Device Details page. Thanks to @Michael Hudson, @梓川咲太.
- Fixed display issues when switching between primary and secondary monitors with different resolutions. Thanks to @甘露.
- Fixed slicing crashes occurring with certain files. Thanks to @吉利.
- Fixed an issue where temperature input fields in Device Management could not be confirmed using the Enter key. Thanks to @李孟龙.
- Fixed an issue where importing custom machine presets prompted an empty folder warning during export.
- Fixed screen flickering when clicking Save As while saving large files.
- Fixed crashes when clicking AI Cloud Services. Thanks to @GeoffZhong, @neal, @幸运字符.
- Fixed crashes occurring after drawing supports and starting slicing. Thanks to @甘露.
- Fixed unclear rendering of certain models. Thanks to @kaiwen.
- Fixed insufficient support height beneath models when using Organic Tree Supports.
- Fixed missing purge waste calculation in the Preview page, which caused incorrect total filament usage estimation.Thanks to @Vyacheslav Shcherbakov.
- Fixed third-party account login failures. Thanks to @joaocervo, @DangerouslyMike.
- Fixed abnormal object speeds when overhang slowdown was disabled at the object level. Thanks to @廖先生.
- Fixed incorrect filament information retrieval for CFS auto-mapping in WAN scenarios. Thanks to @GeoffZhong.
- Fixed ineffective wall order setting (Inner–Outer–Inner) in Classic Wall mode.
- Fixed occasional freezes when closing the application. Thanks to @三月的狮子.
- Fixed layout issues after hiding objects.
- Fixed unexpected model reorientation after scaling. Thanks to @甘露.
- Fixed incorrect first-layer path planning during maximum volumetric flow calibration, where Wall 1 and Wall 2 shared the same Z height.
- Fixed incorrect filament slot status display during sync when slot 1B was empty. Thanks to @tux0topo.
- Fixed navigation issues when entering user profiles from the Online Models page. Thanks to @幸运字符.
- Fixed incorrect English font rendering on the new Device Details page. Thanks to @freelancerfotograaf.
- Fixed an issue where setting wall count to 0 under Arachne wall mode did not take effect. Thanks to @甘露.
- Fixed generation of redundant internal bridging regions.
- Fixed an issue where models disappeared after modifying parameters in the Preview page.Thanks to @LookAtTheShinyShiny.
- Fixed incorrect first-layer display after applying the Hole tool to cube models. Thanks to @GeoffZhong.
- Fixed an issue where minimizing the filament panel after auto-mapping caused the spool rack panel to pop up. Thanks to @幸运字符.
- Fixed an issue where brim disappeared when zooming in/out with Preview LOD enabled. Thanks to @Yang.
- Fixed incorrect print progress display in WAN printing scenarios. Thanks to @neal.
- Fixed missing chamber temperature curves in WAN mode. Thanks to @李孟龙.
- Fixed missing layer count and time display in WAN mode. Thanks to @neal.
- Fixed abnormal XYZ control UI display on the Device Details page when launching the app in minimized mode on high-DPI screens. Thanks to @松猫儿.
- Fixed automatic layout failure during sequential printing of certain models. Thanks to @callmebabyang.
- Fixed extra groove artifacts appearing in Preview rendering for certain models. Thanks to @StatiC.
- Fixed incorrect embossing results when using default Chinese fonts. Thanks to @neal.
- Fixed inconsistent silk-screen pattern appearance between Light and Dark modes. Thanks to @Chuckie_NL.
- Fixed Device Details page compatibility issues on certain display devices. Thanks to @Bobby Davis Kix3DPrints.