¶ Preparations
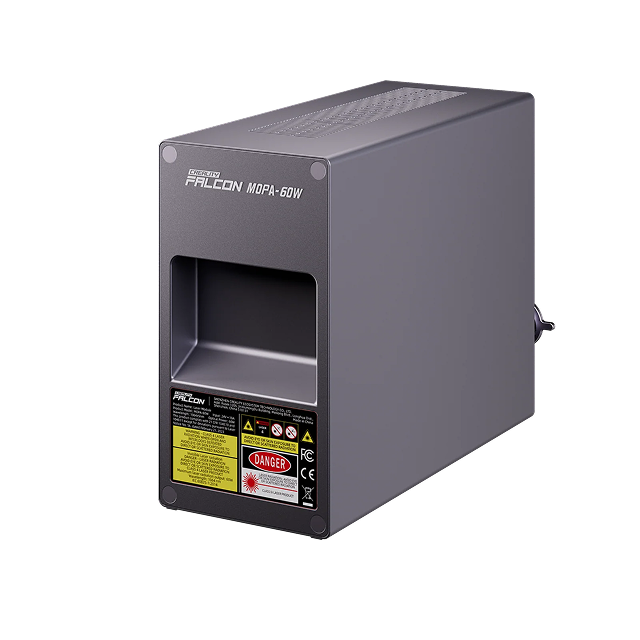
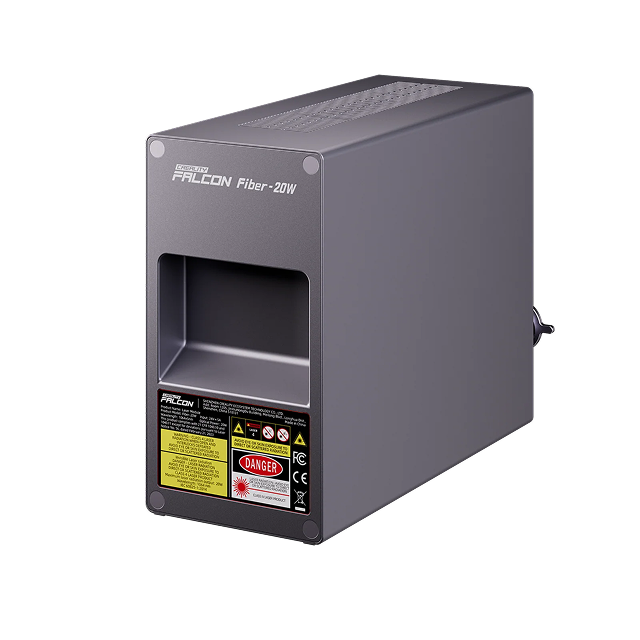
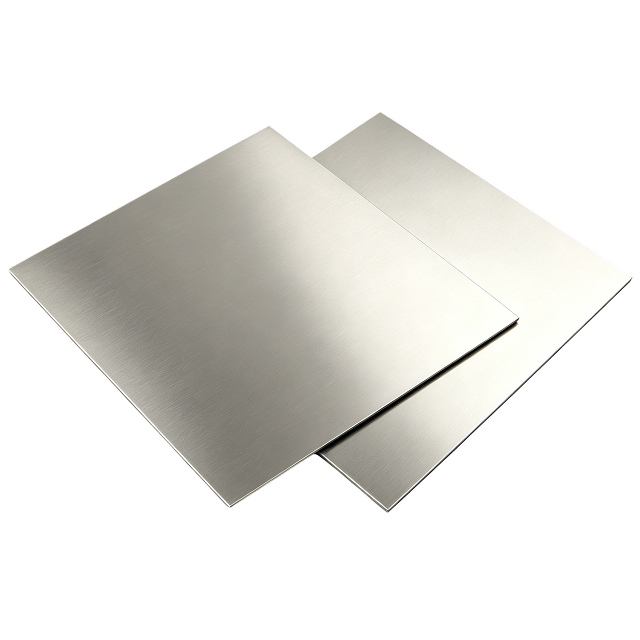
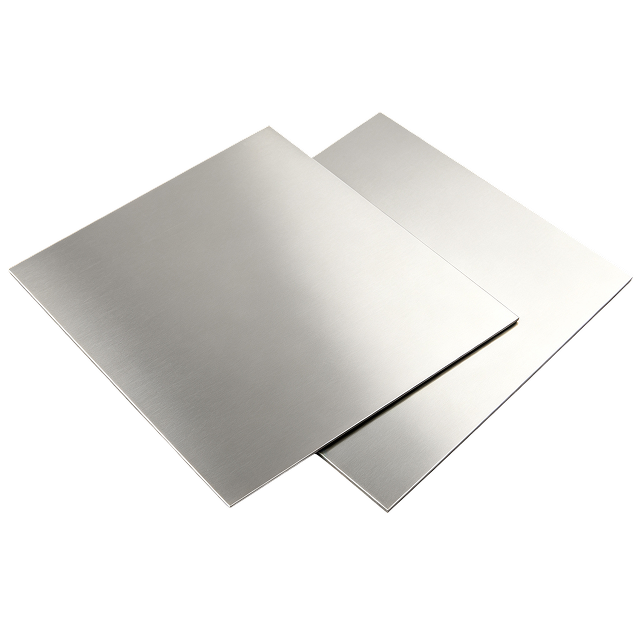
Before starting the carving, please prepare the following items and materials in advance
60W MOPA can engrave titanium plates or 304 stainless steel plates
20W Fiber can engrave titanium plates
|
|
|
|
Laser Module Replacement Tutorial
Field Lens and Laser Module Calibration Tutorial
Ensure that the correct field lens is used - the red and blue light universal field lens (black). The field lens does not support hot swapping, so it must be replaced after the machine is turned off. If you have replaced it while the machine is powered on, please restart the machine.
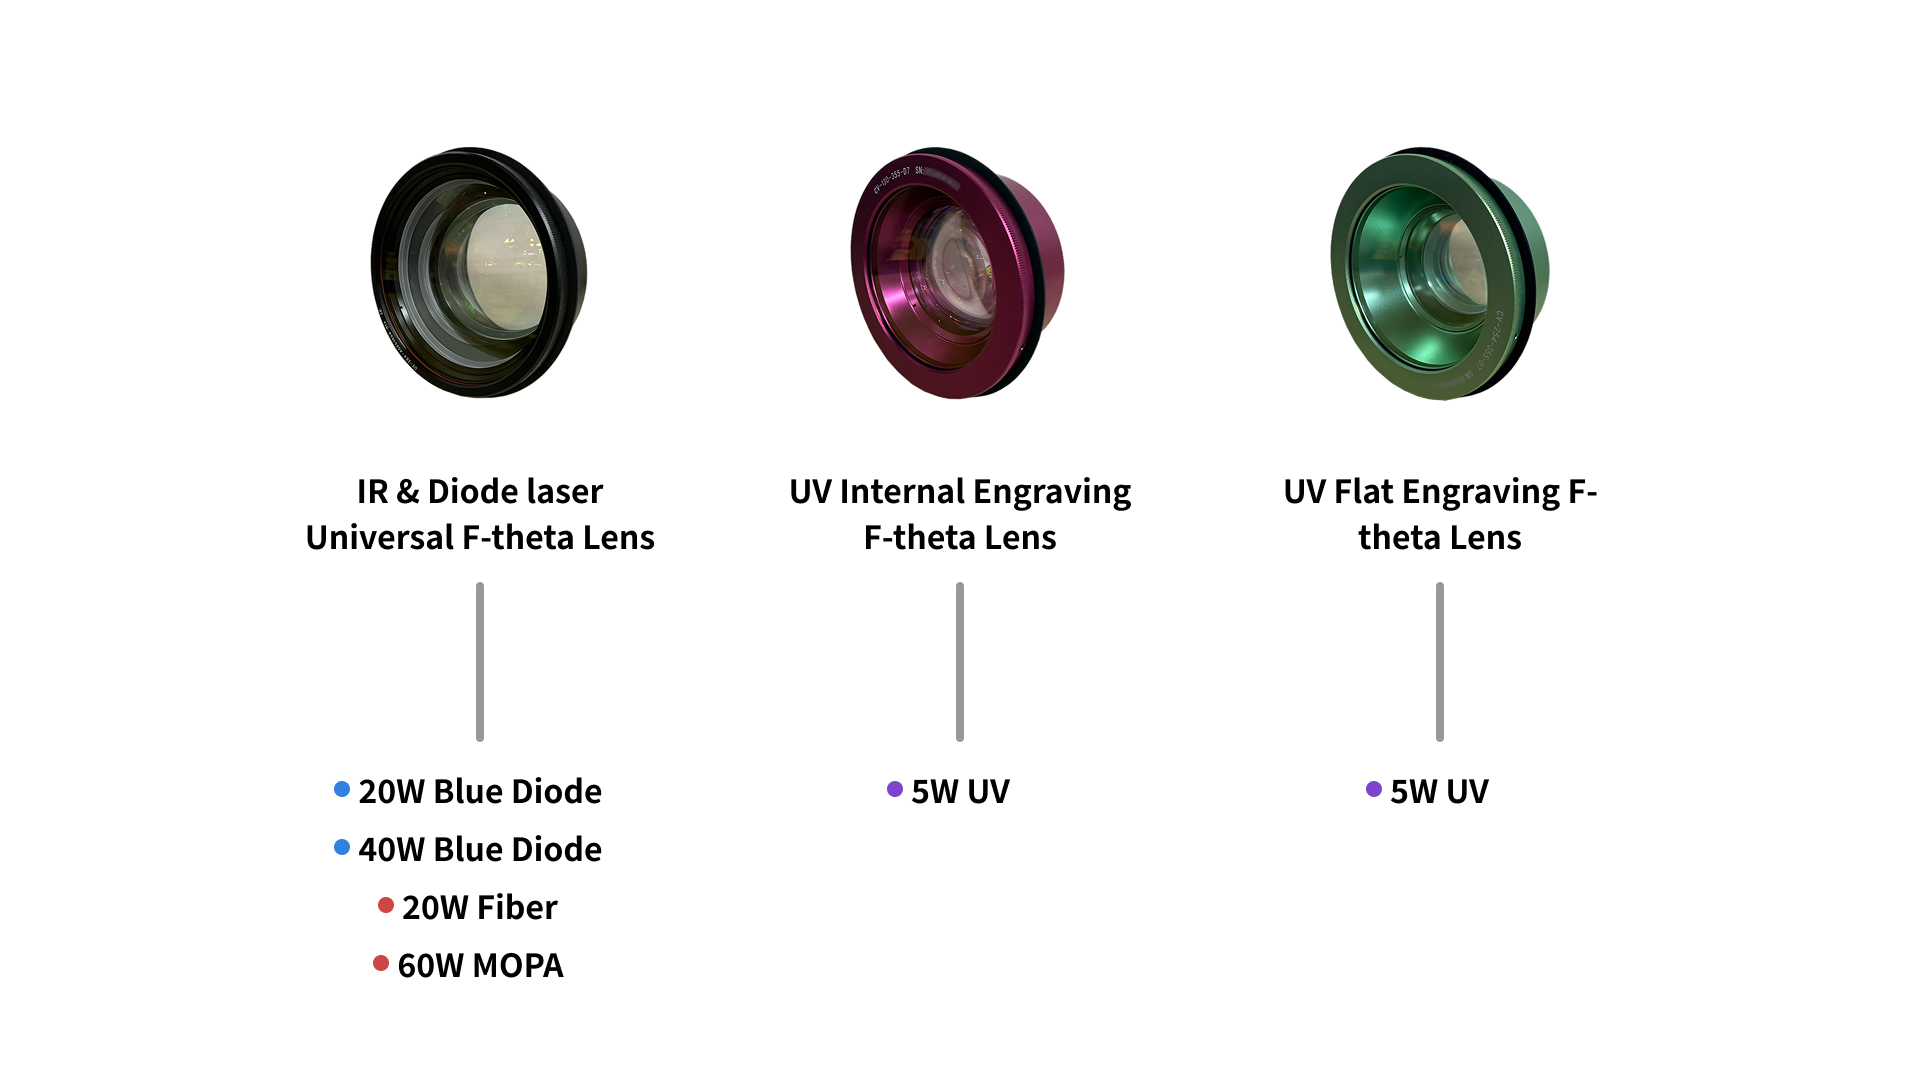
Minimum software requirement: Falcon Design Space 1.10.1 Download link
Minimum device firmware requirement: 1.1.35+
Please update to the latest firmware version in your device's "Settings".Firmware upgrade Operation Guide
The colors of color engraving are highly sensitive to different materials, as well as the power deviation and focal length deviation of different lasers. It is normal that there is a slight deviation between the color displayed on the canvas and the actual engraving color. To achieve precise color matching, it is necessary to complete the color engraving calibration and the color engraving test array in accordance with the process. After engraving, input the relevant parameters and save the custom material for color engraving. For subsequent use, engraving with the same material and the same custom material can achieve precise matching.
¶ Color Engraving Calibration
This calibration aims to correct Z-axis deviation. Here we take "60W MOPA" as an example (the 20W Fiber process is exactly the same, and stainless steel materials can be used in this process without affecting the final result).
Specific steps:
 |
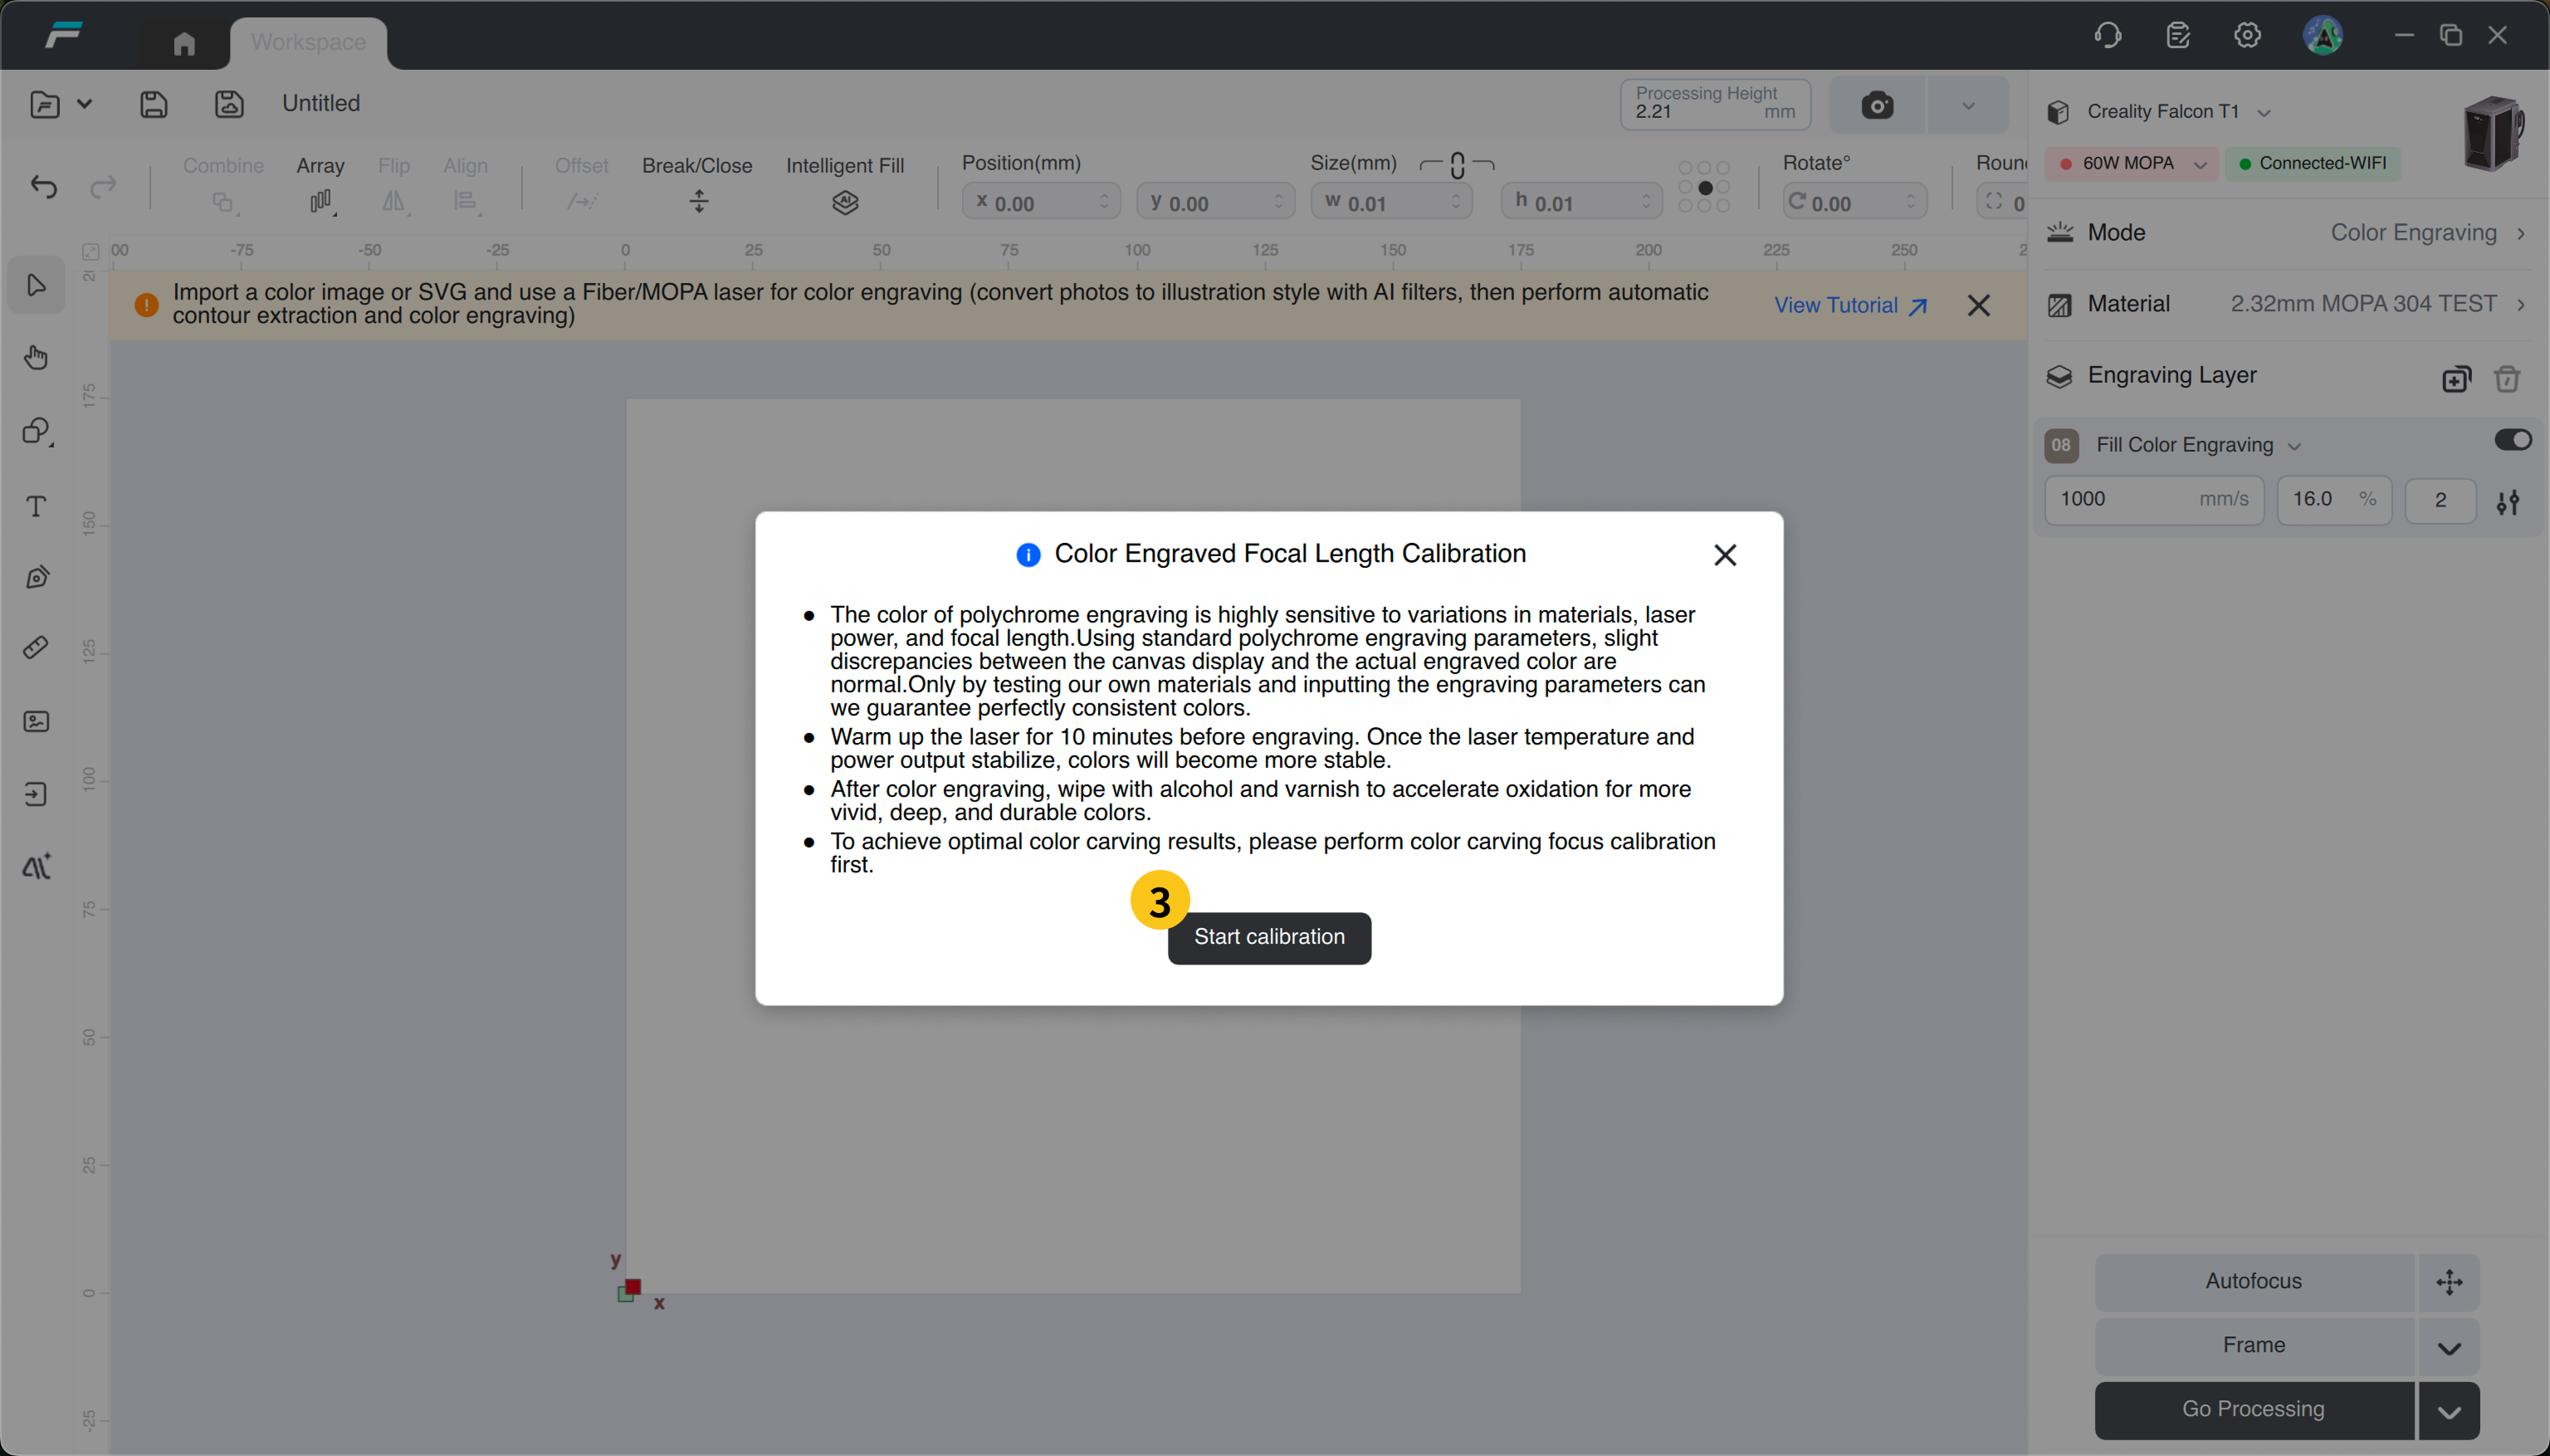 |
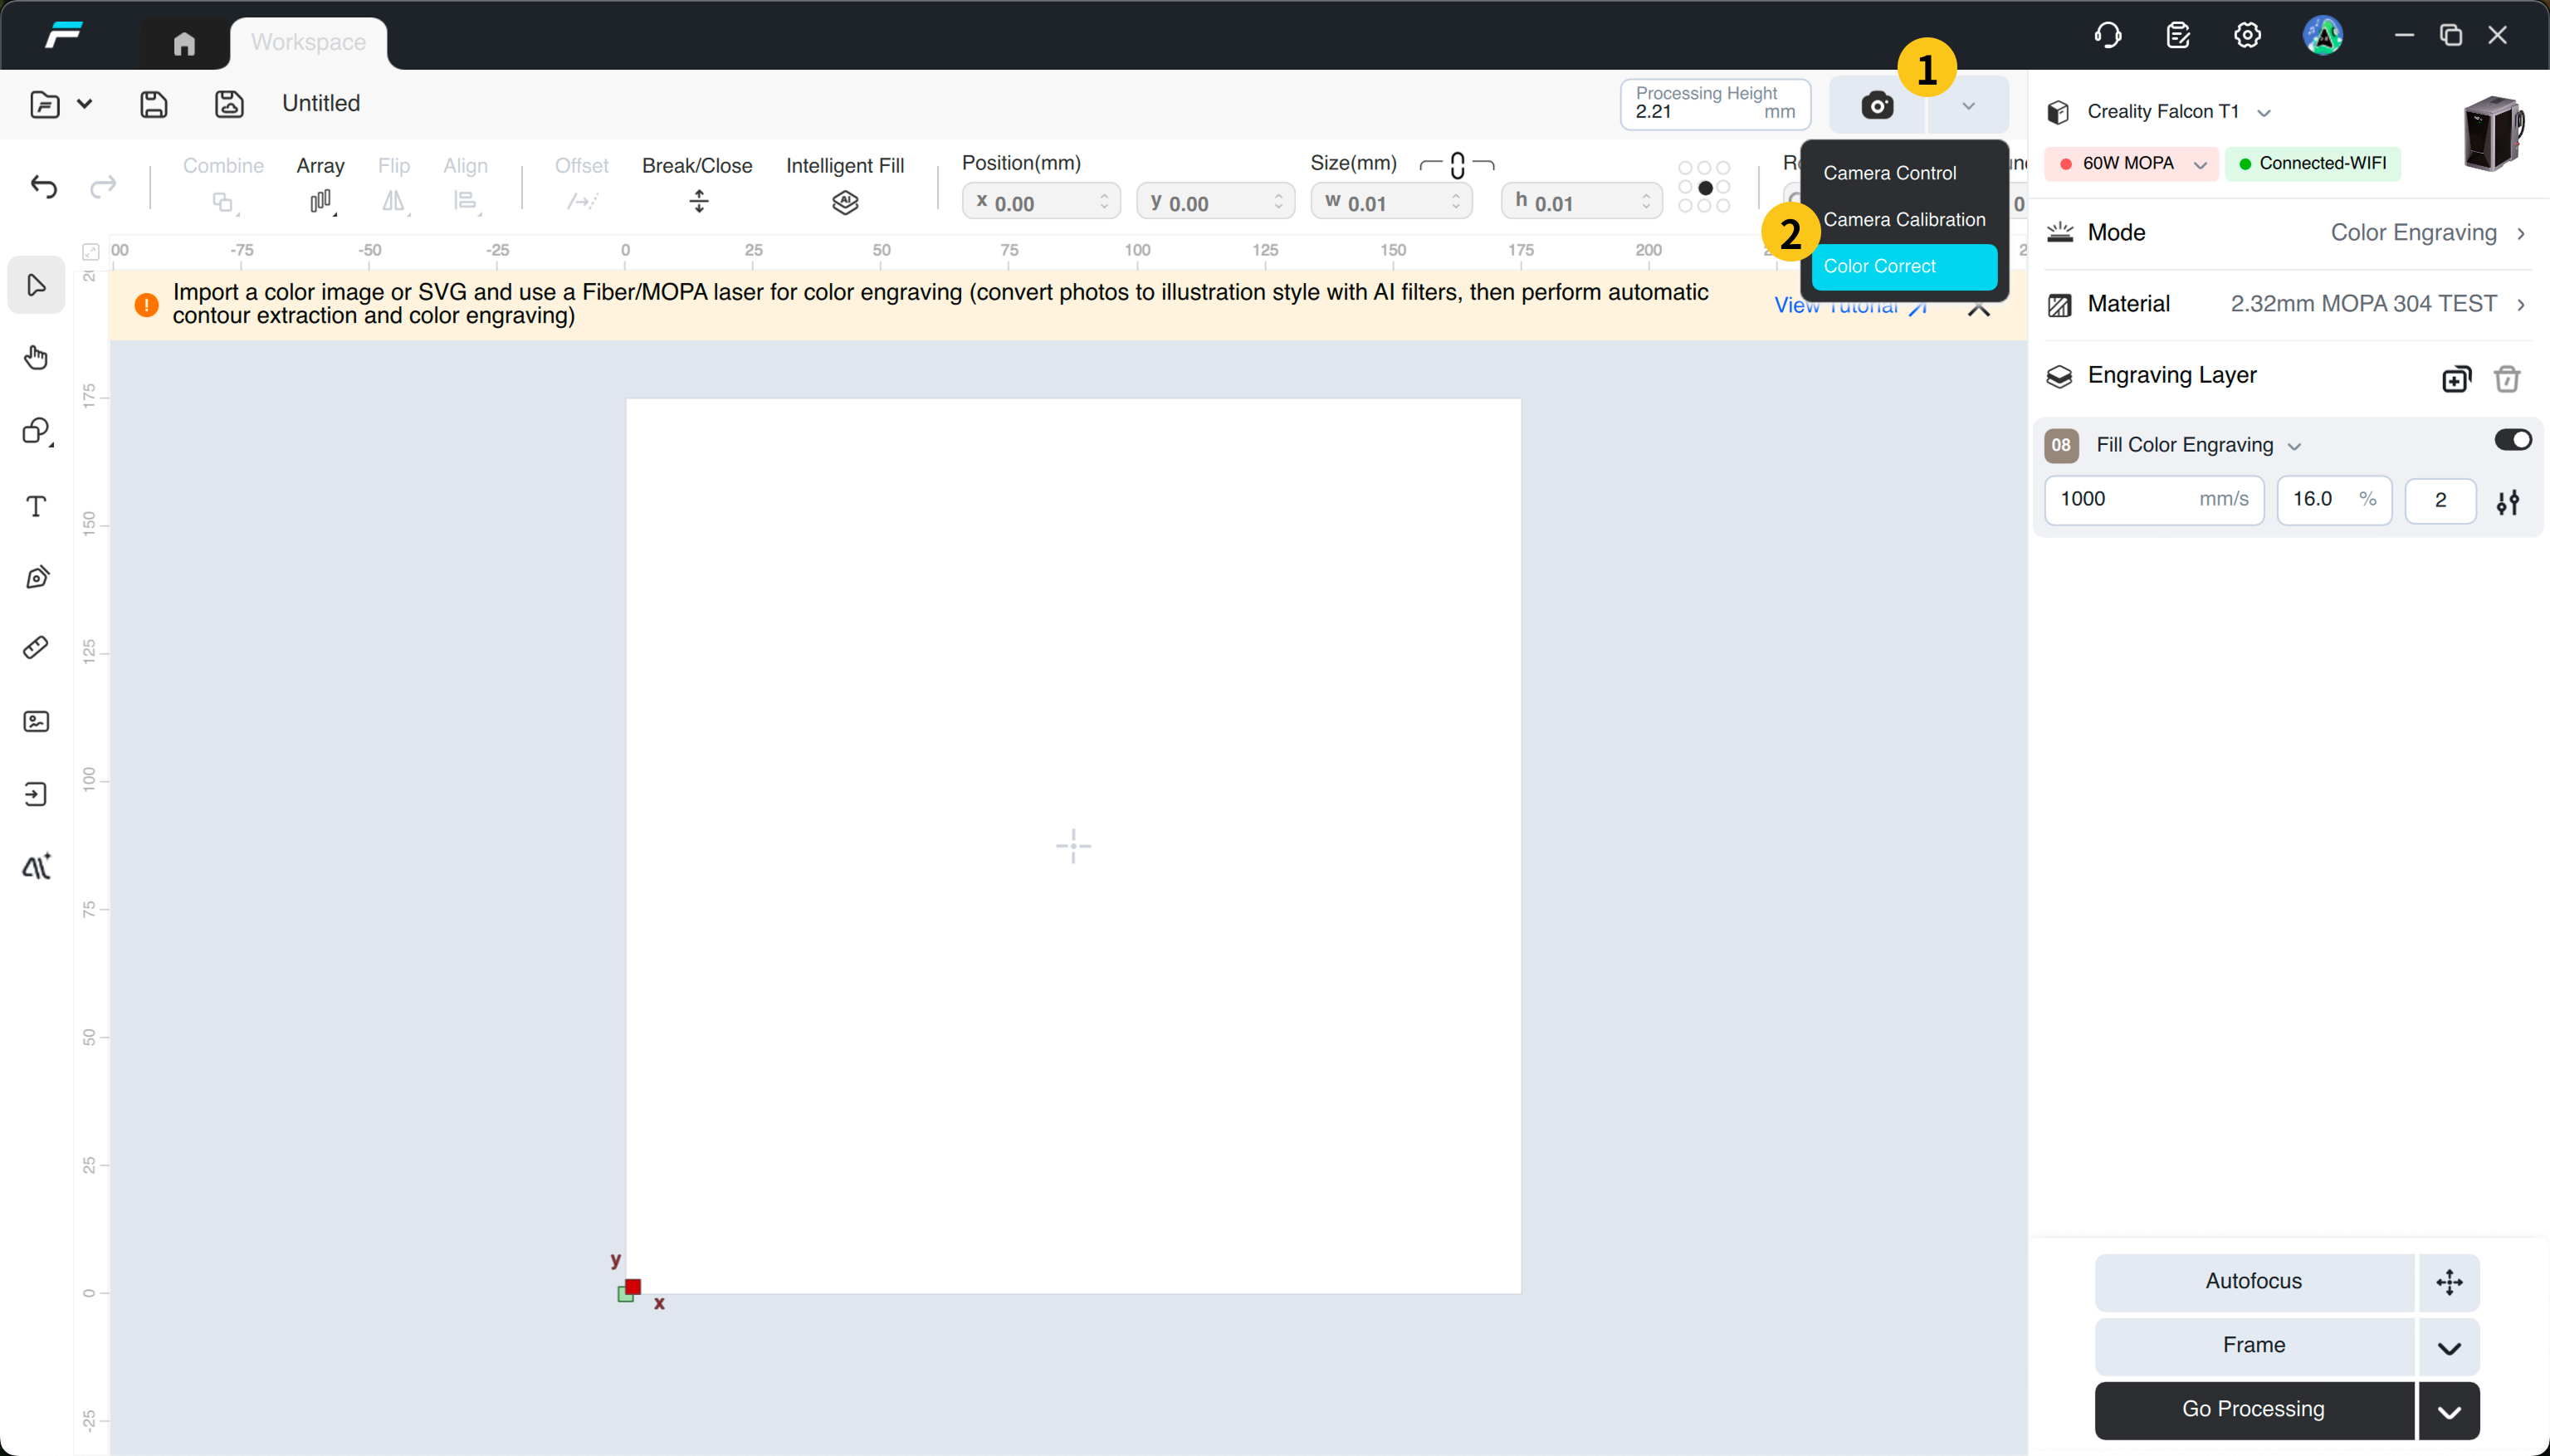
(1) When the device is used for the first time for color engraving, a prompt will appear to initiate "Color Engraving Calibration". If you miss the pop-up window, you can manually access this function via the drop-down box on the right side of "Camera".
(2) Click "Color Carving Calibration"
(3) Click "Start Calibration"
 |
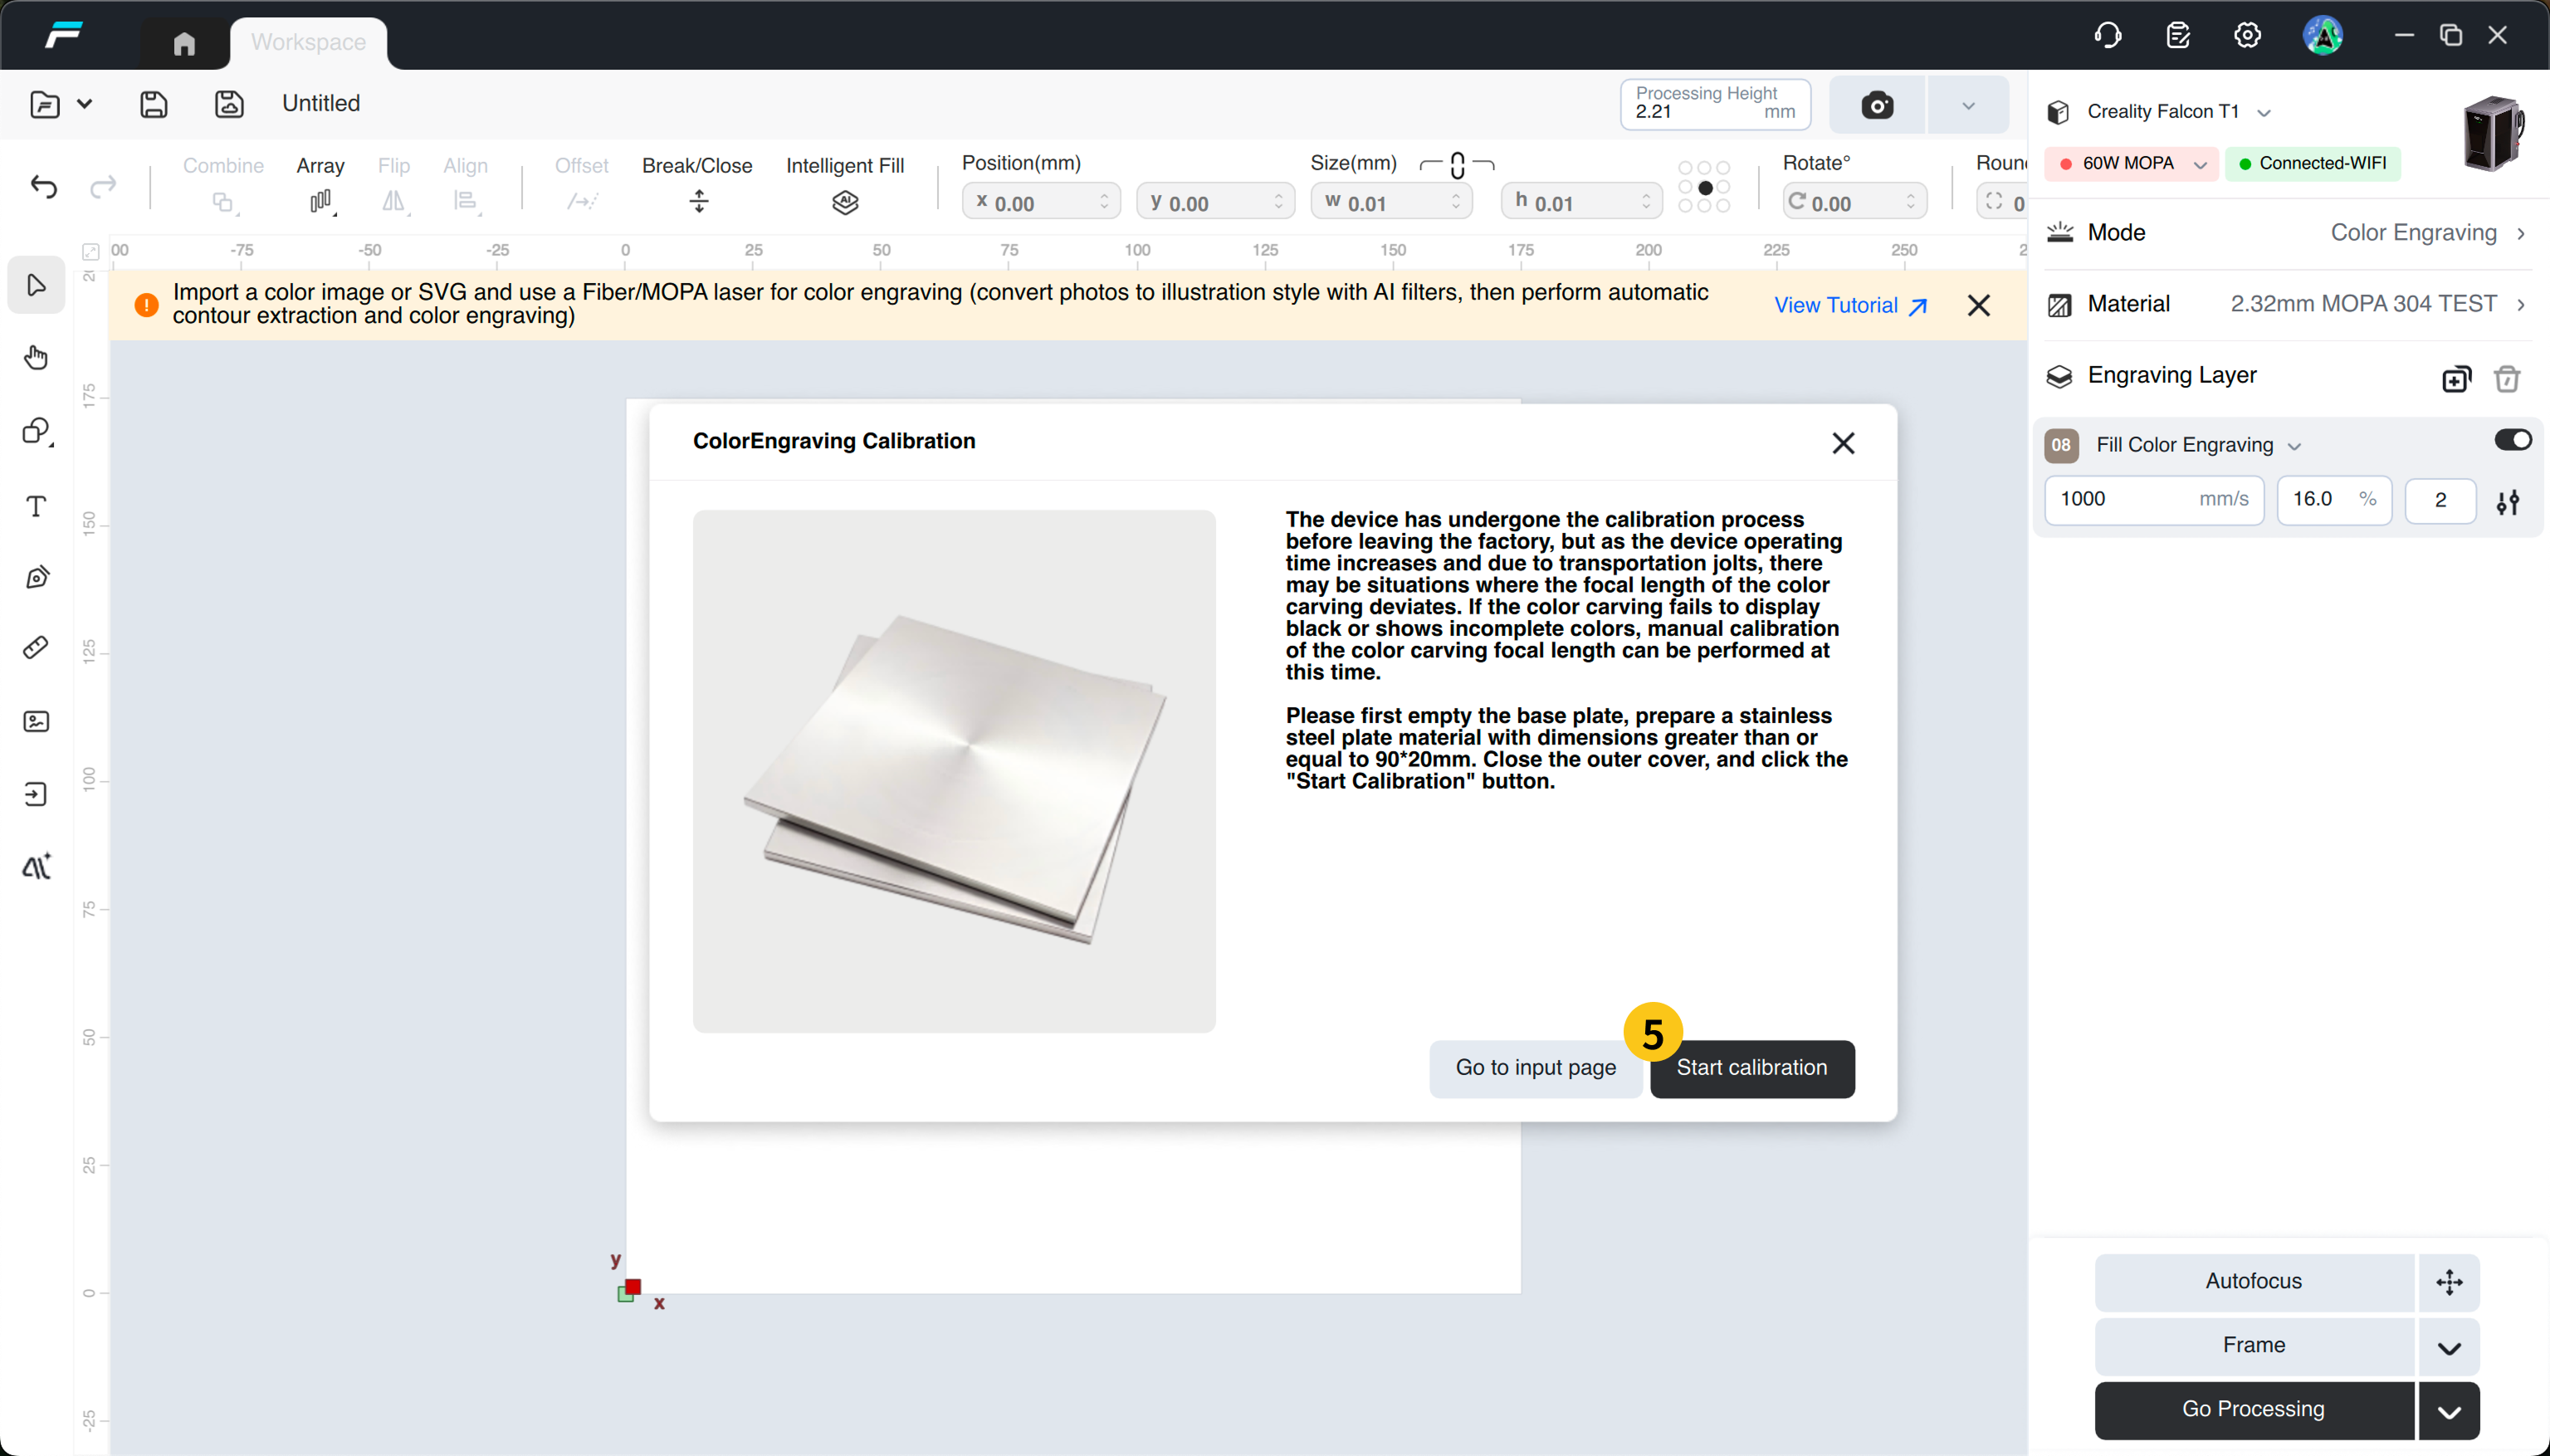 |
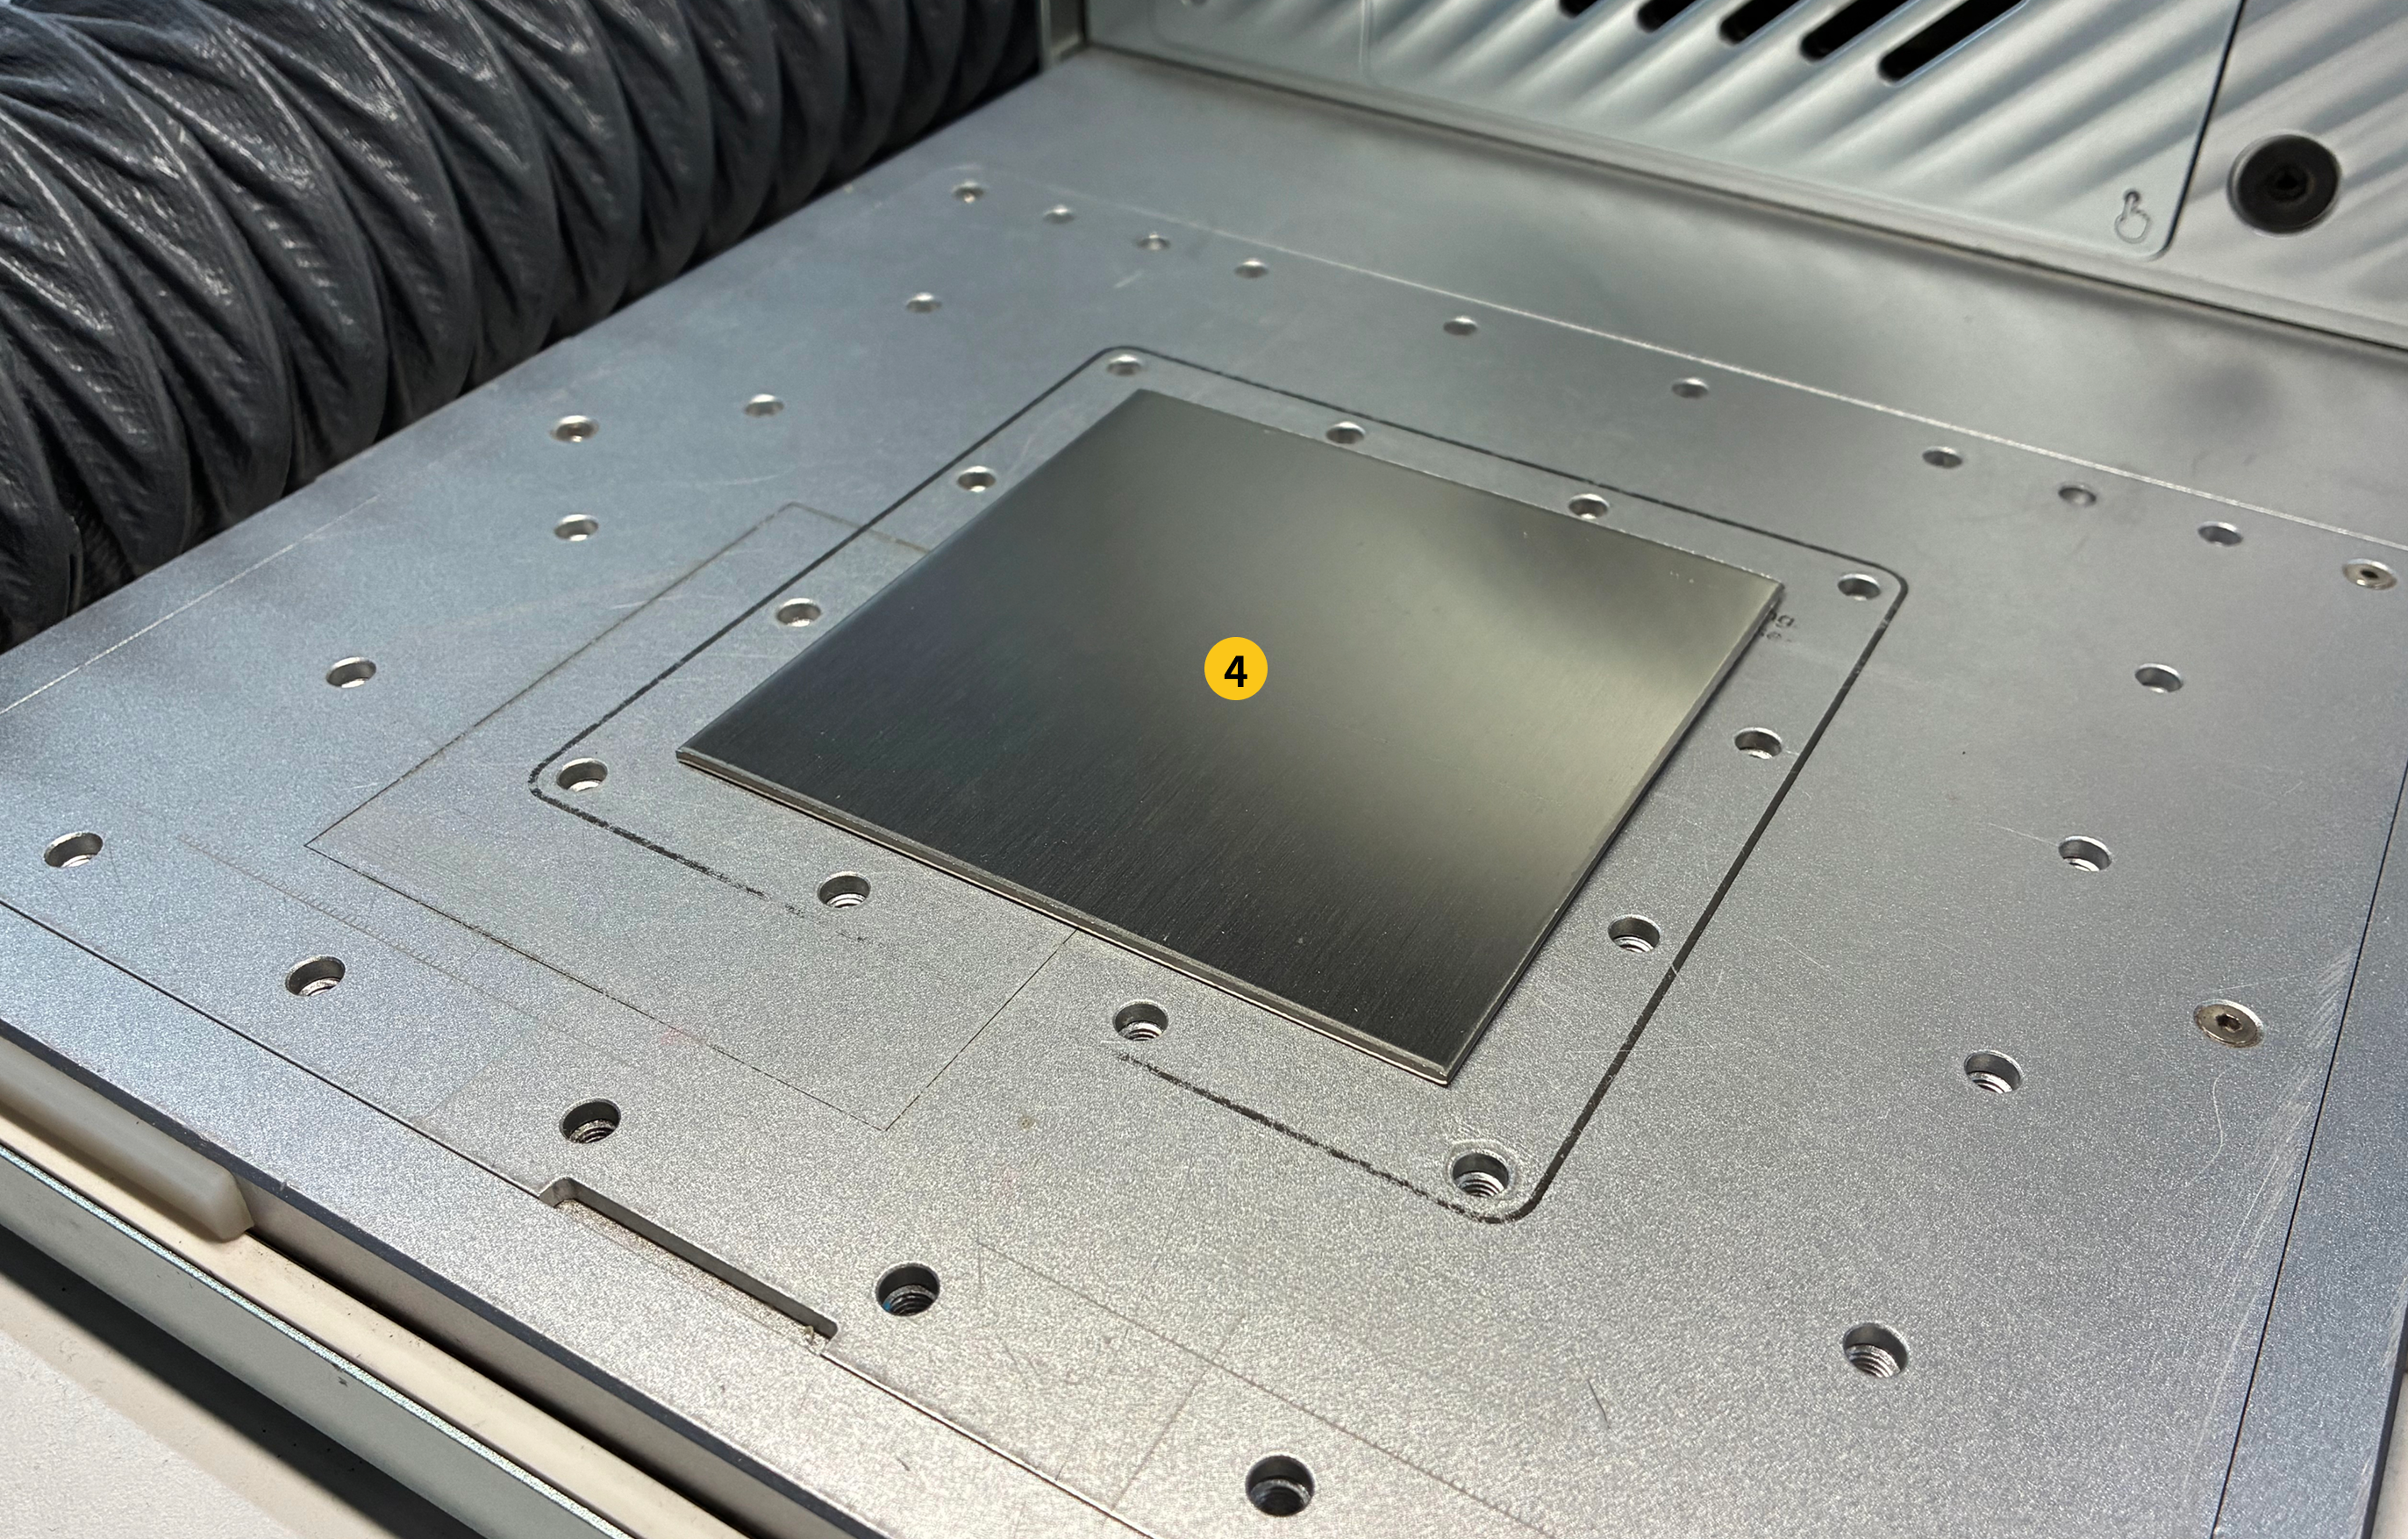
(4) Place a stainless steel material with an area of no less than 90mm*20mm in the center of the base plate.
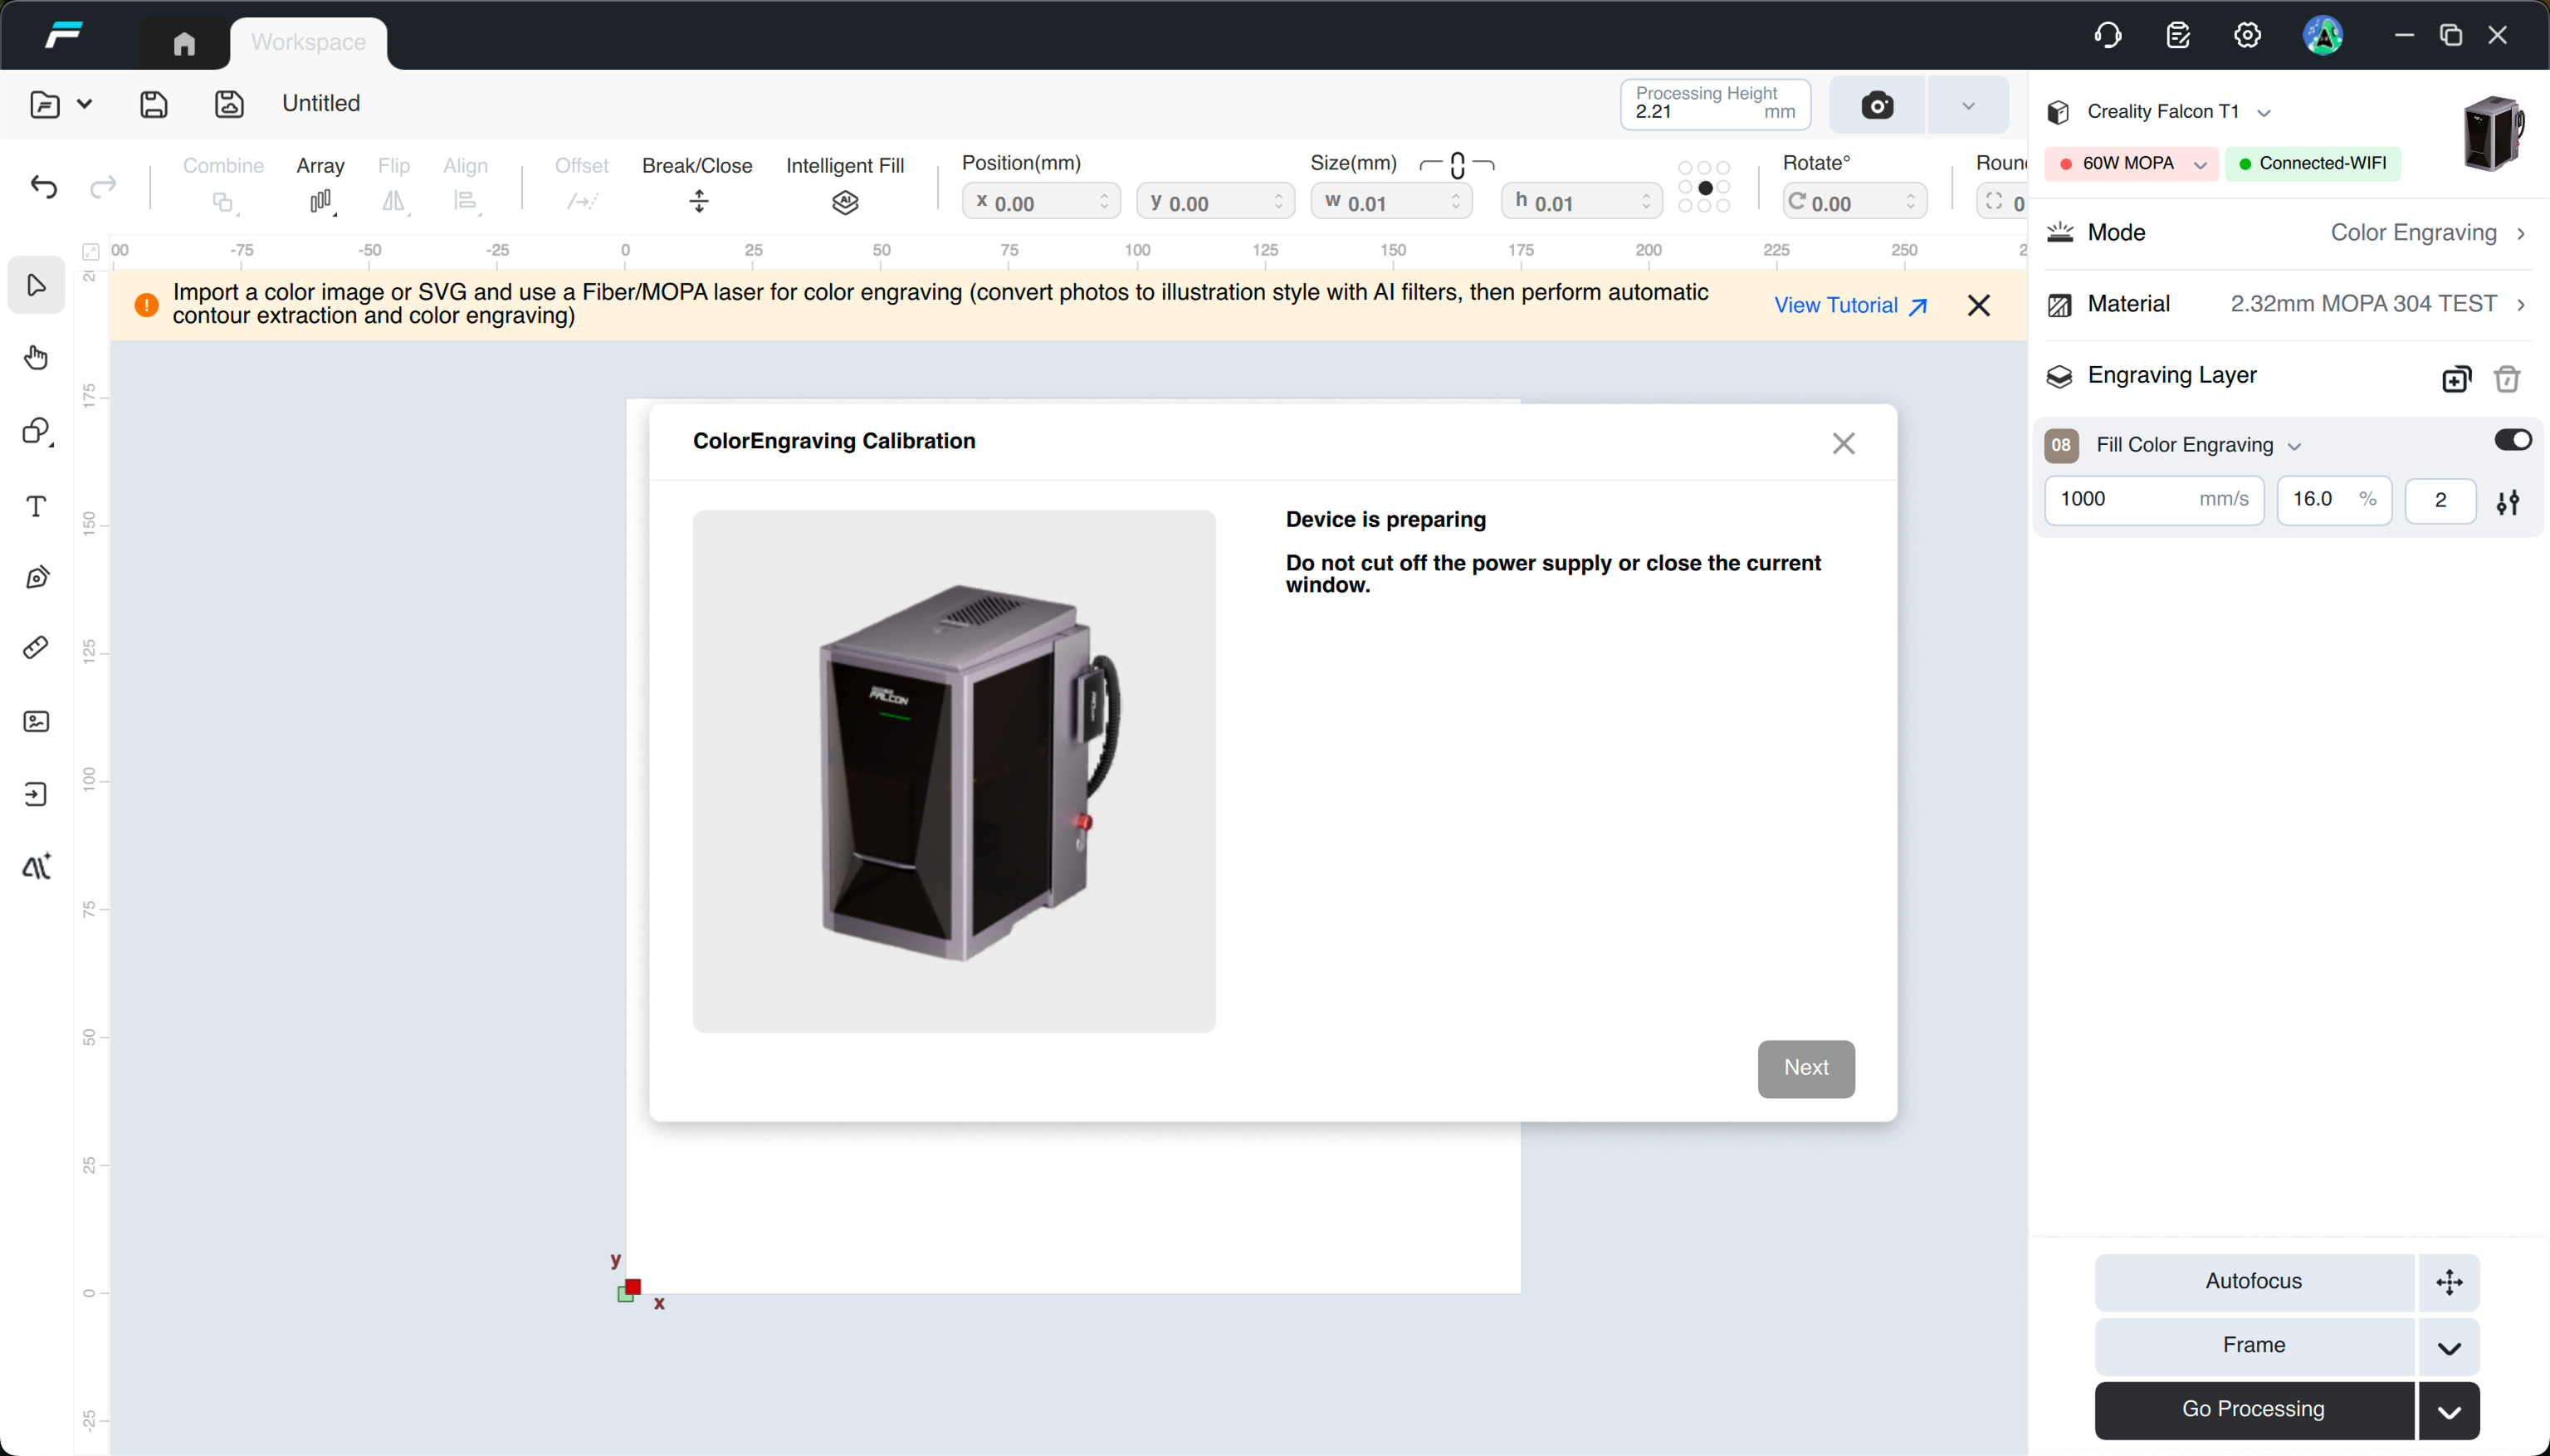
(5) Click "Start Calibration"
 |
 |
(6) After the device is ready, check whether the border-tracing path on the stainless steel material exceeds the edge of the material, and adjust the material position if it does.
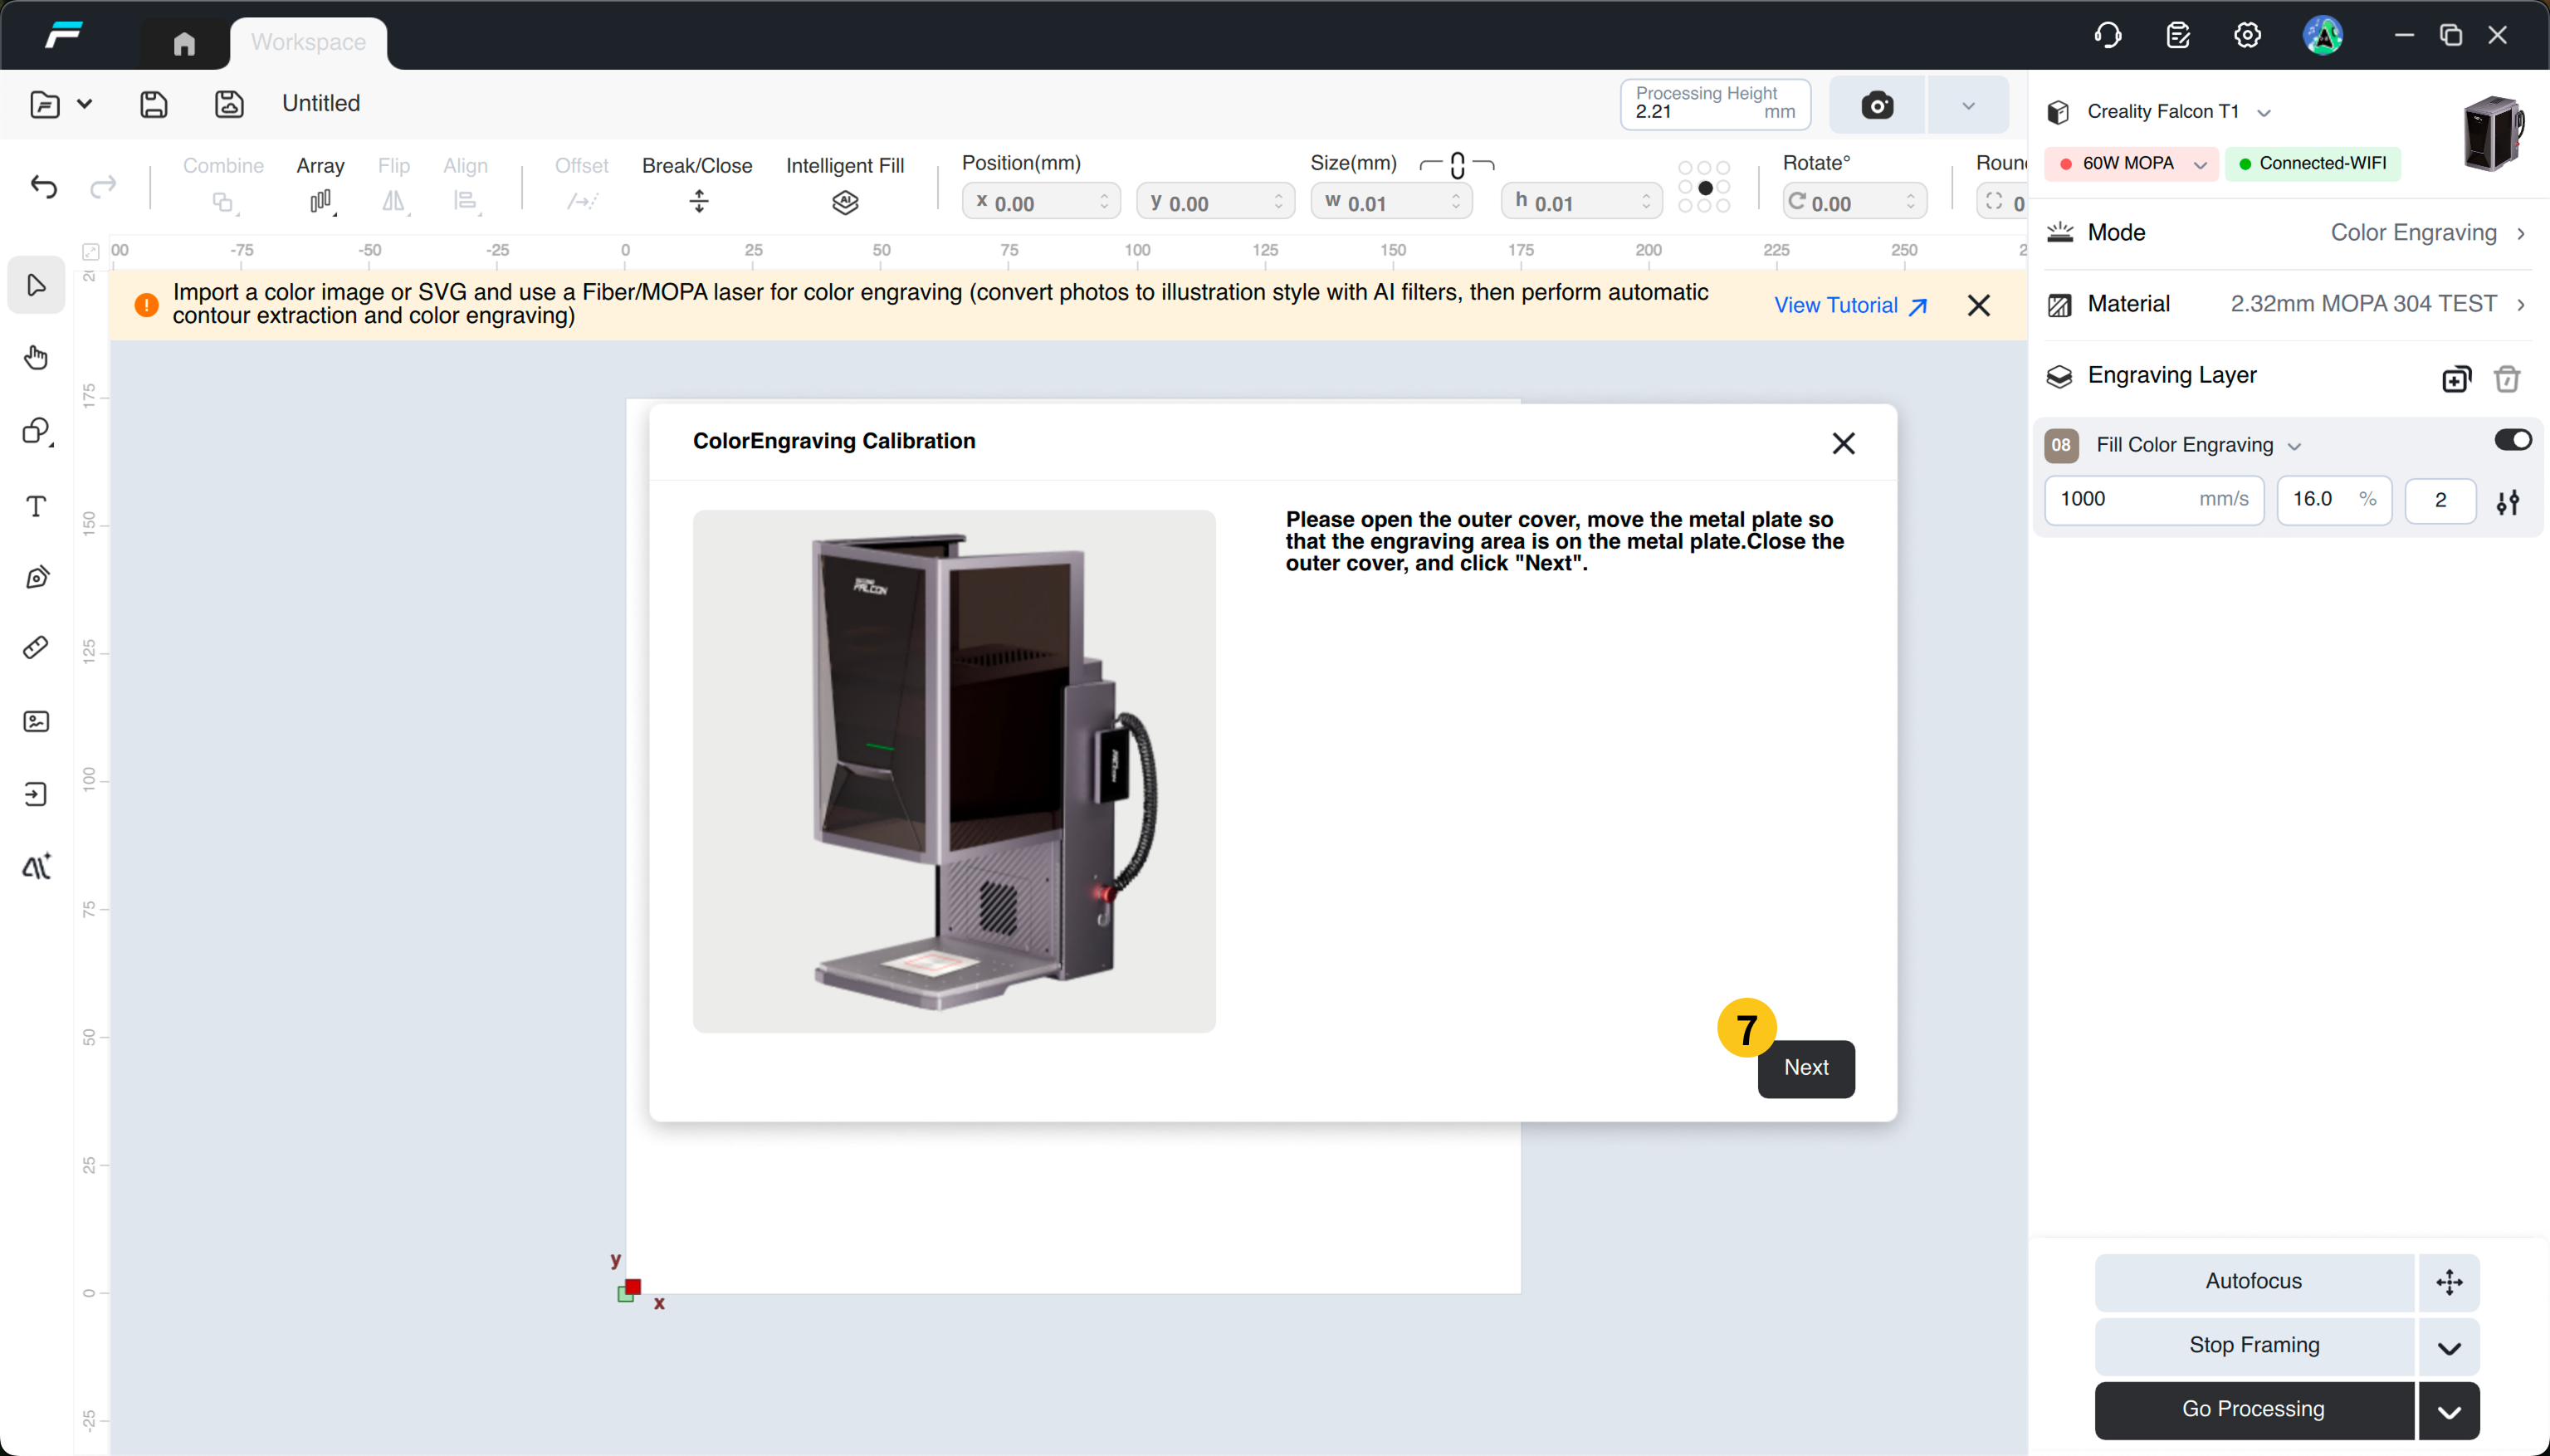
(7) After confirming everything is correct, close the protective cover. Click "Next".
 |
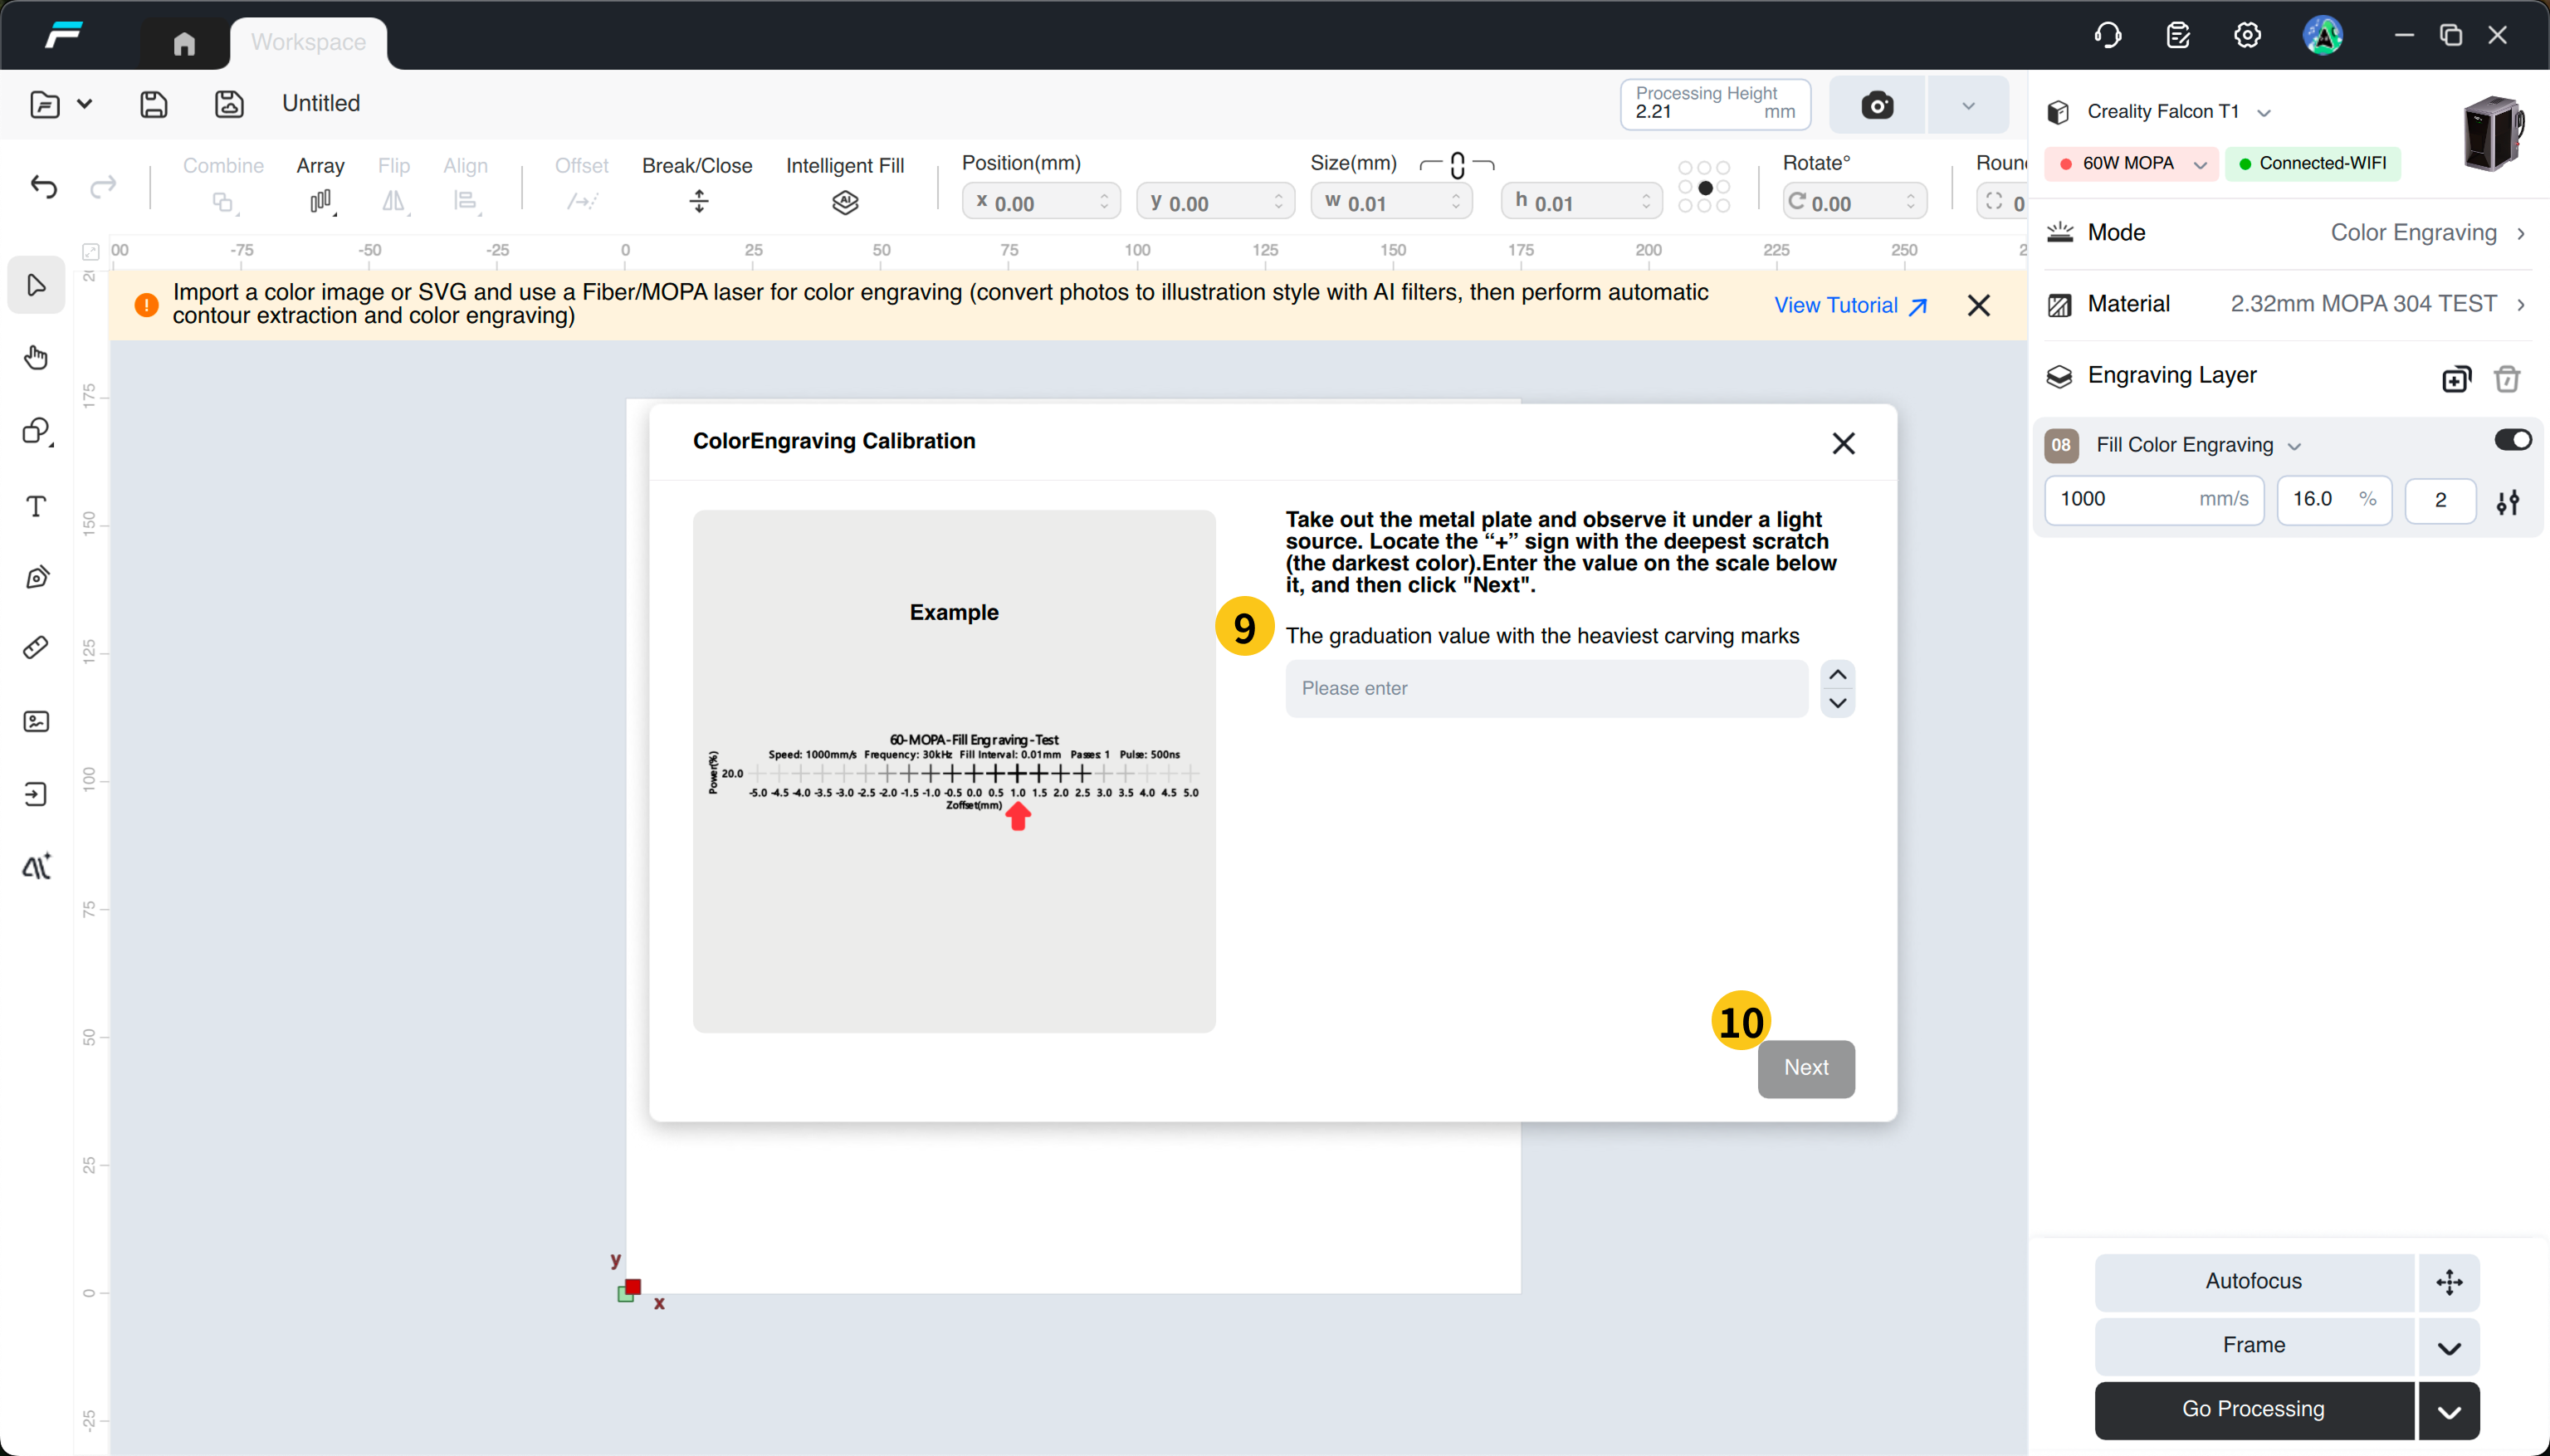 |
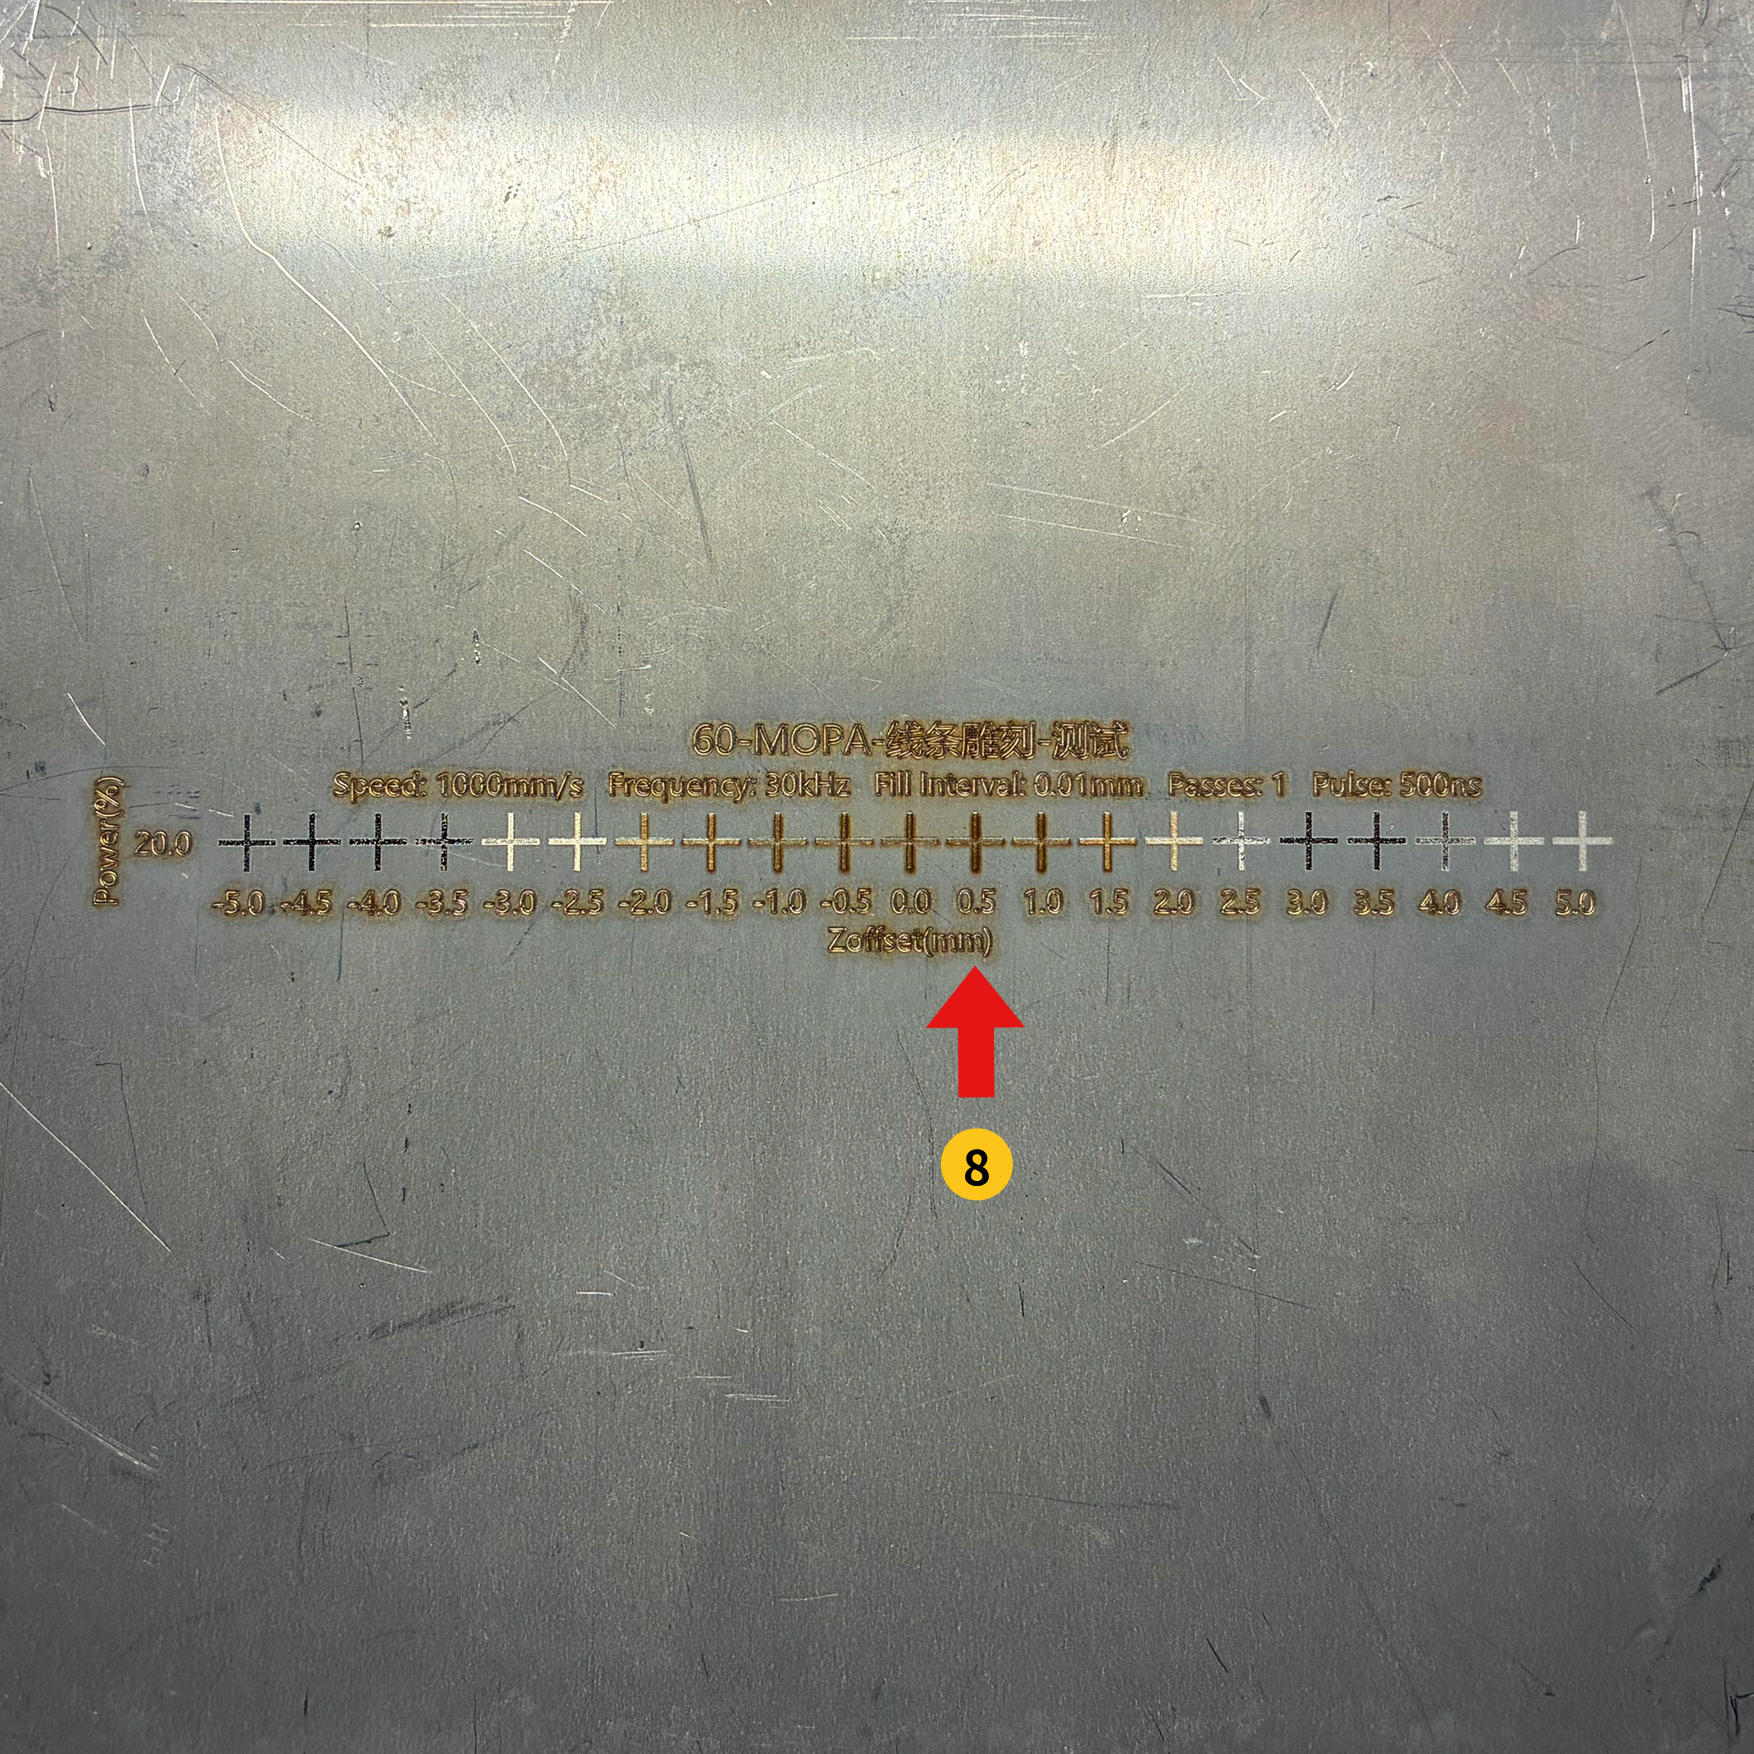
(8) After the engraving is completed, take out the material and find the power number corresponding to the cross of the engraving color, which is "0.5" in the legend.
(9) Enter this number in the input box.
(10) Click "Next" to complete the calibration.
¶ Color Engraving Test Array
Here we take a "60W MOPA", "stainless steel", and "2D color engraving test array" as an example (the process is exactly the same for 20W Fiber, but stainless steel is not recommended).
Specific steps:
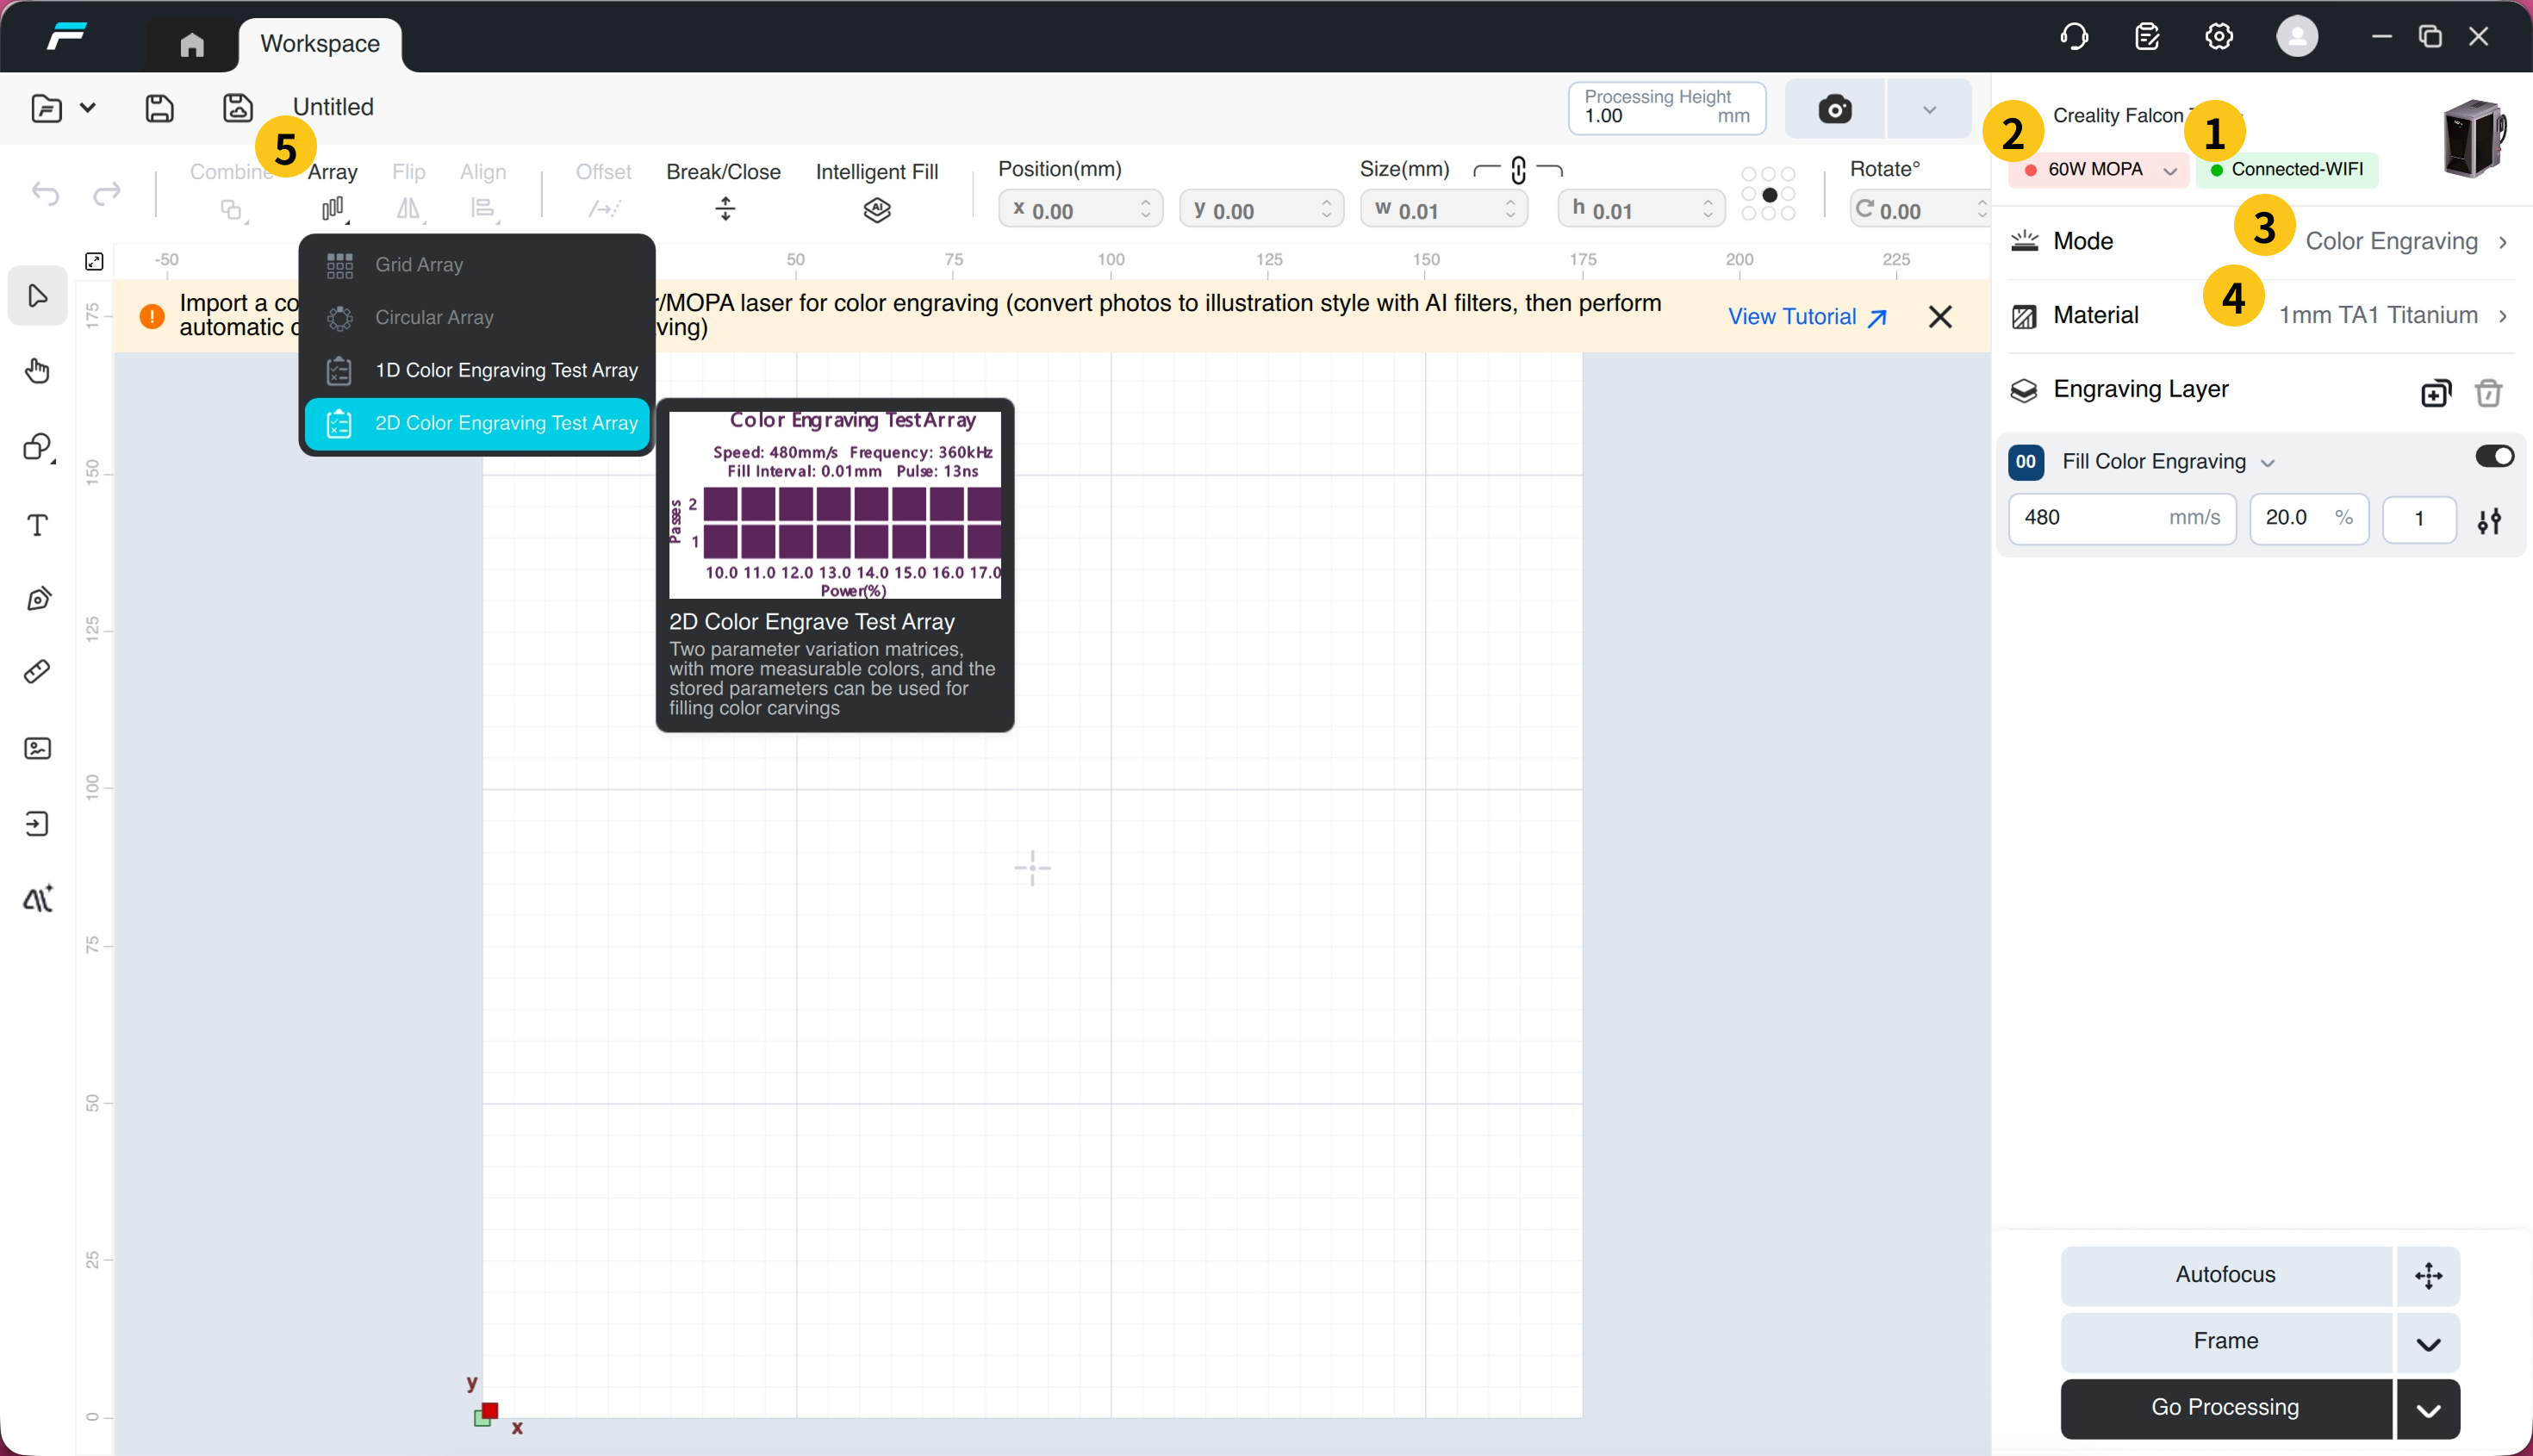
(1) Confirm the connected device
(2) Confirm that the laser module is a 60W MOPA
(3) Switch to "Color Engraving" Mode
(4) Select the base material to be calibrated: titanium or 304 stainless steel
(5) Click "Array", select "1D Color Engraving Test Array" or "2D Color Engraving Test Array"
| Comparison | One-dimensional color engraving test array | 2D Color Engraving Test Array |
| number of variables | 1 | 2 |
| variable | Power | Speed, Power, Pulse Width, Frequency, Interval, Count, Z-axis Offset |
| Definition | serves as the base test array. With all other parameters kept unchanged, custom material parameters in one-to-one correspondence between power and color are obtained after engraving by varying the power. | It serves as an advanced test array. By selecting two parameters to construct an engraving matrix, custom material parameters corresponding to the color matrix can be obtained after engraving. |
| Note | The 2D array has already covered the effect of the 1D array, so it is recommended to directly use the 2D array for testing. |
The default-created 2D color engraving test array has an effect almost identical to that of the 1D color engraving test array. You can first create a basic shape (such as a circle, a square, etc.), then click to create a test array, and the corresponding array will be created according to the basic shape. |
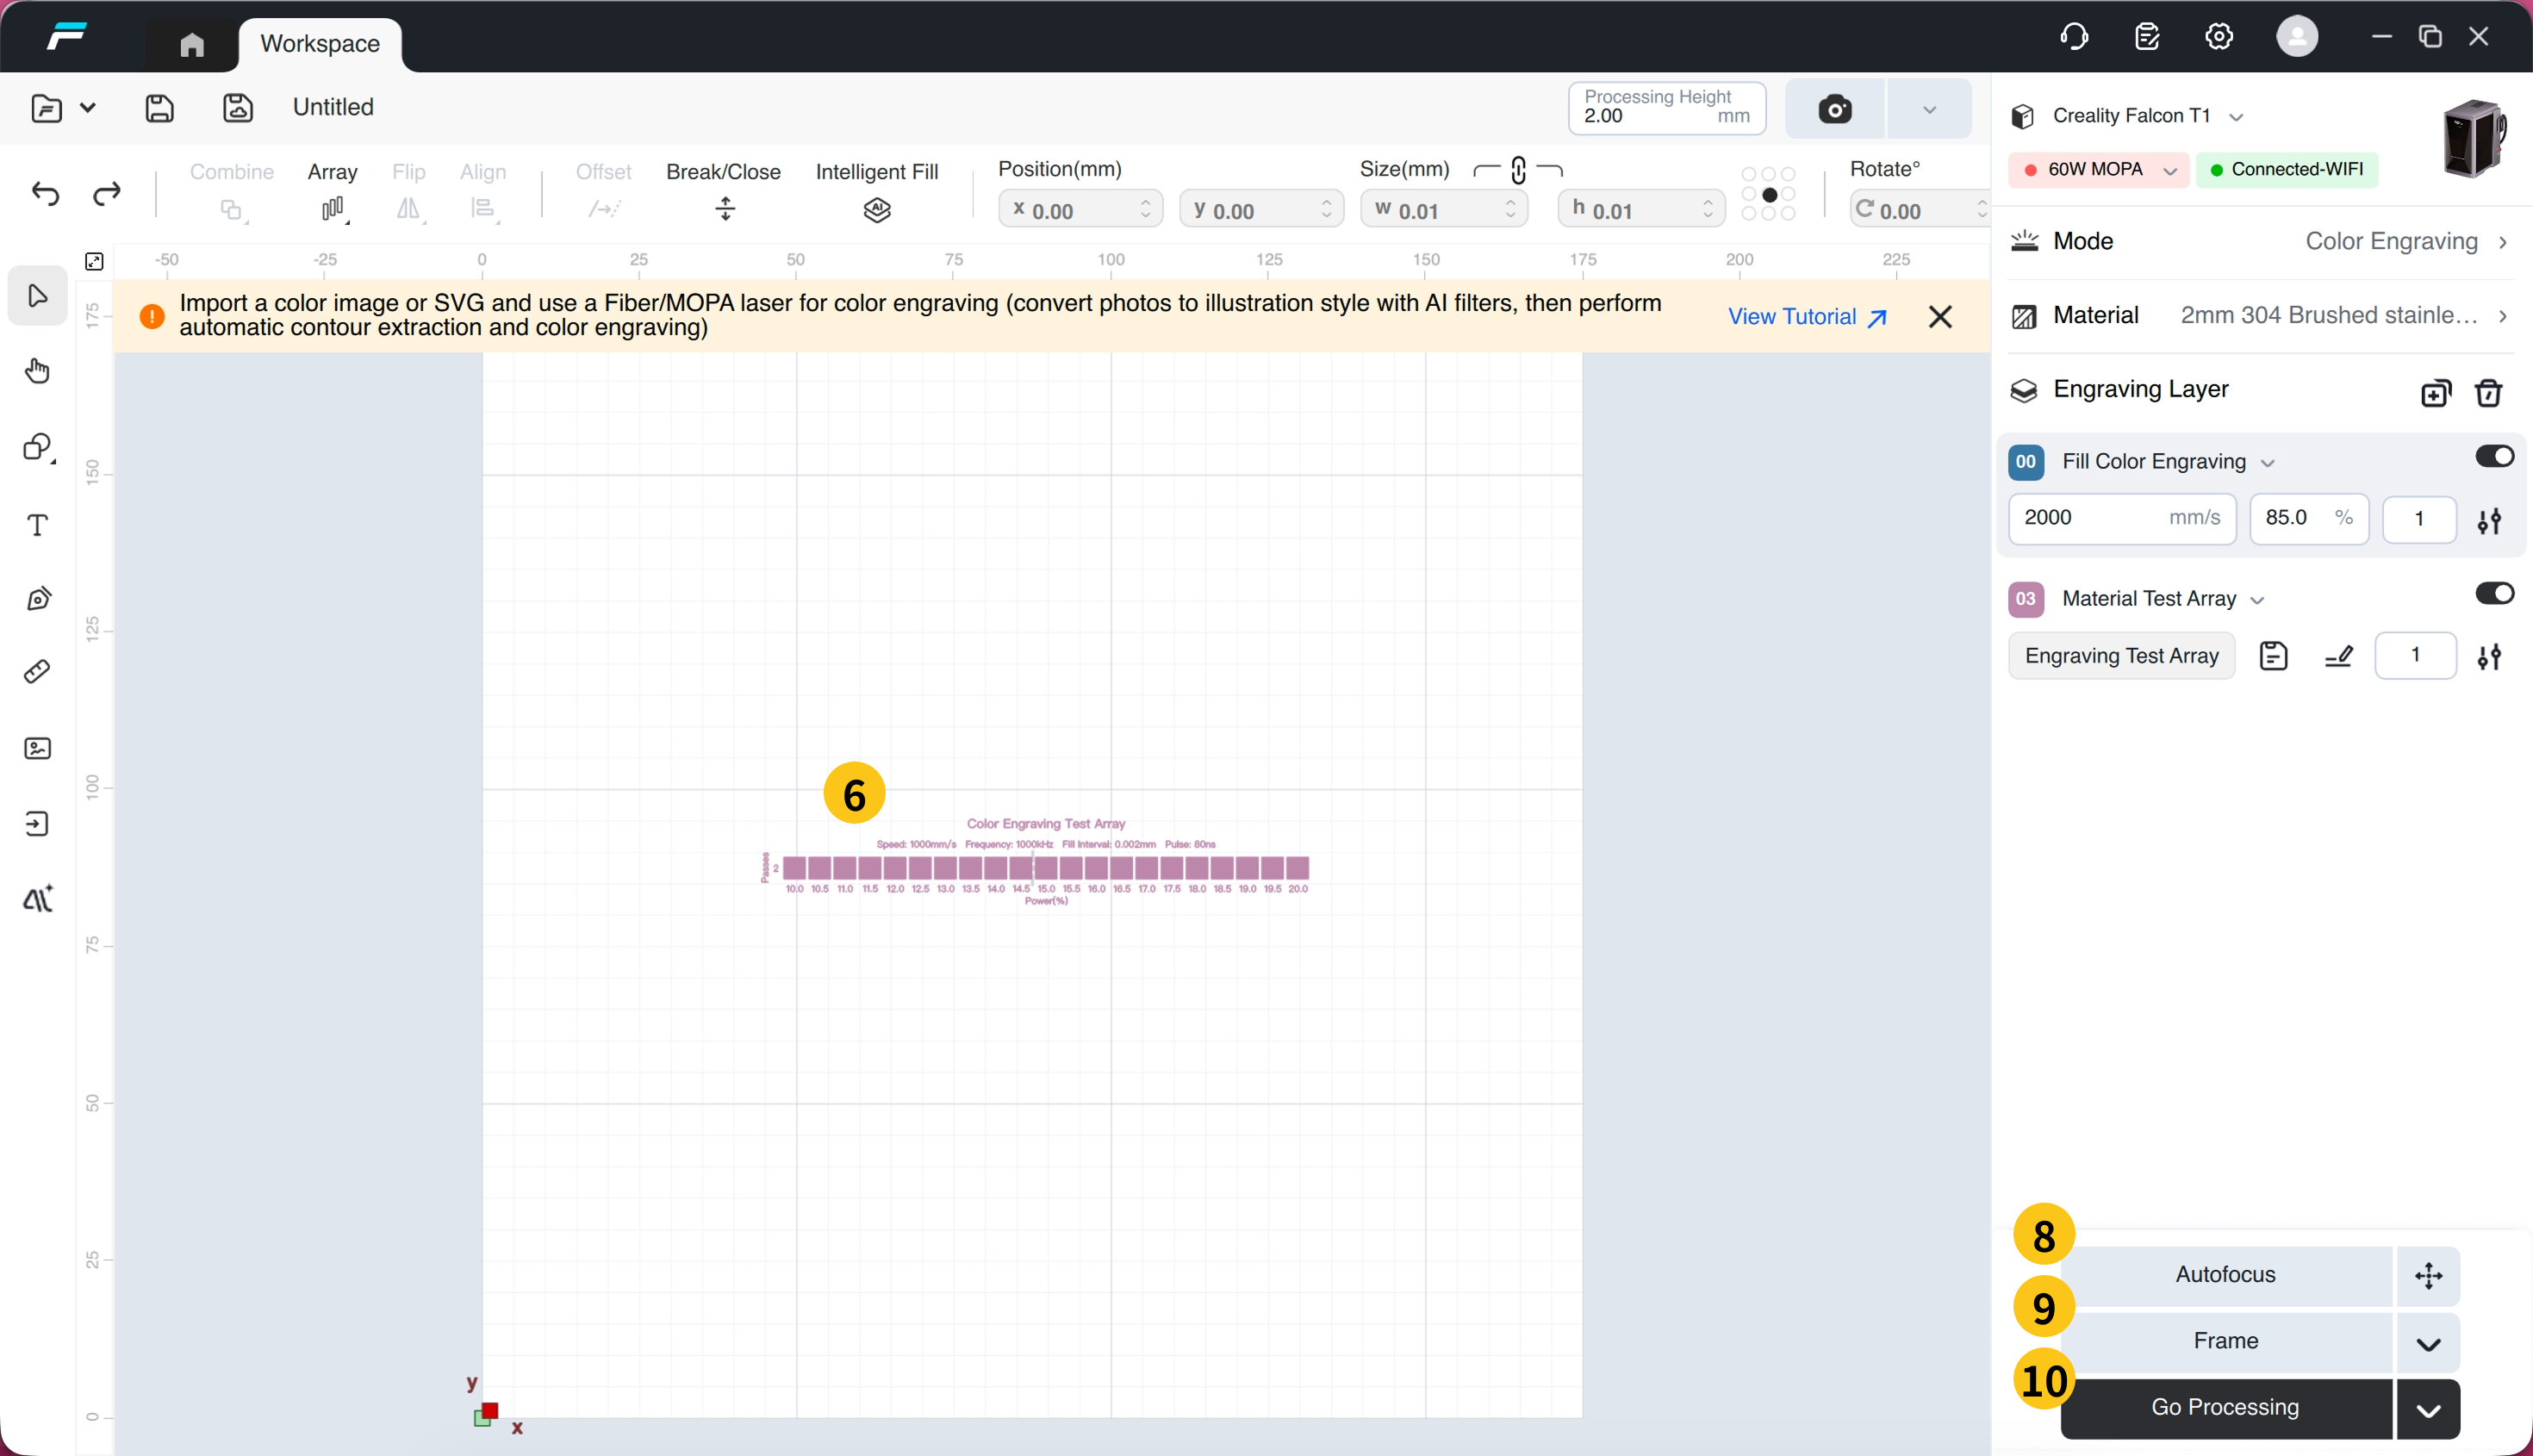
Here we take "Stainless Steel" and "2D Color Engraving Test Array" as an example:
 |
 |
(6) Center the array on the canvas
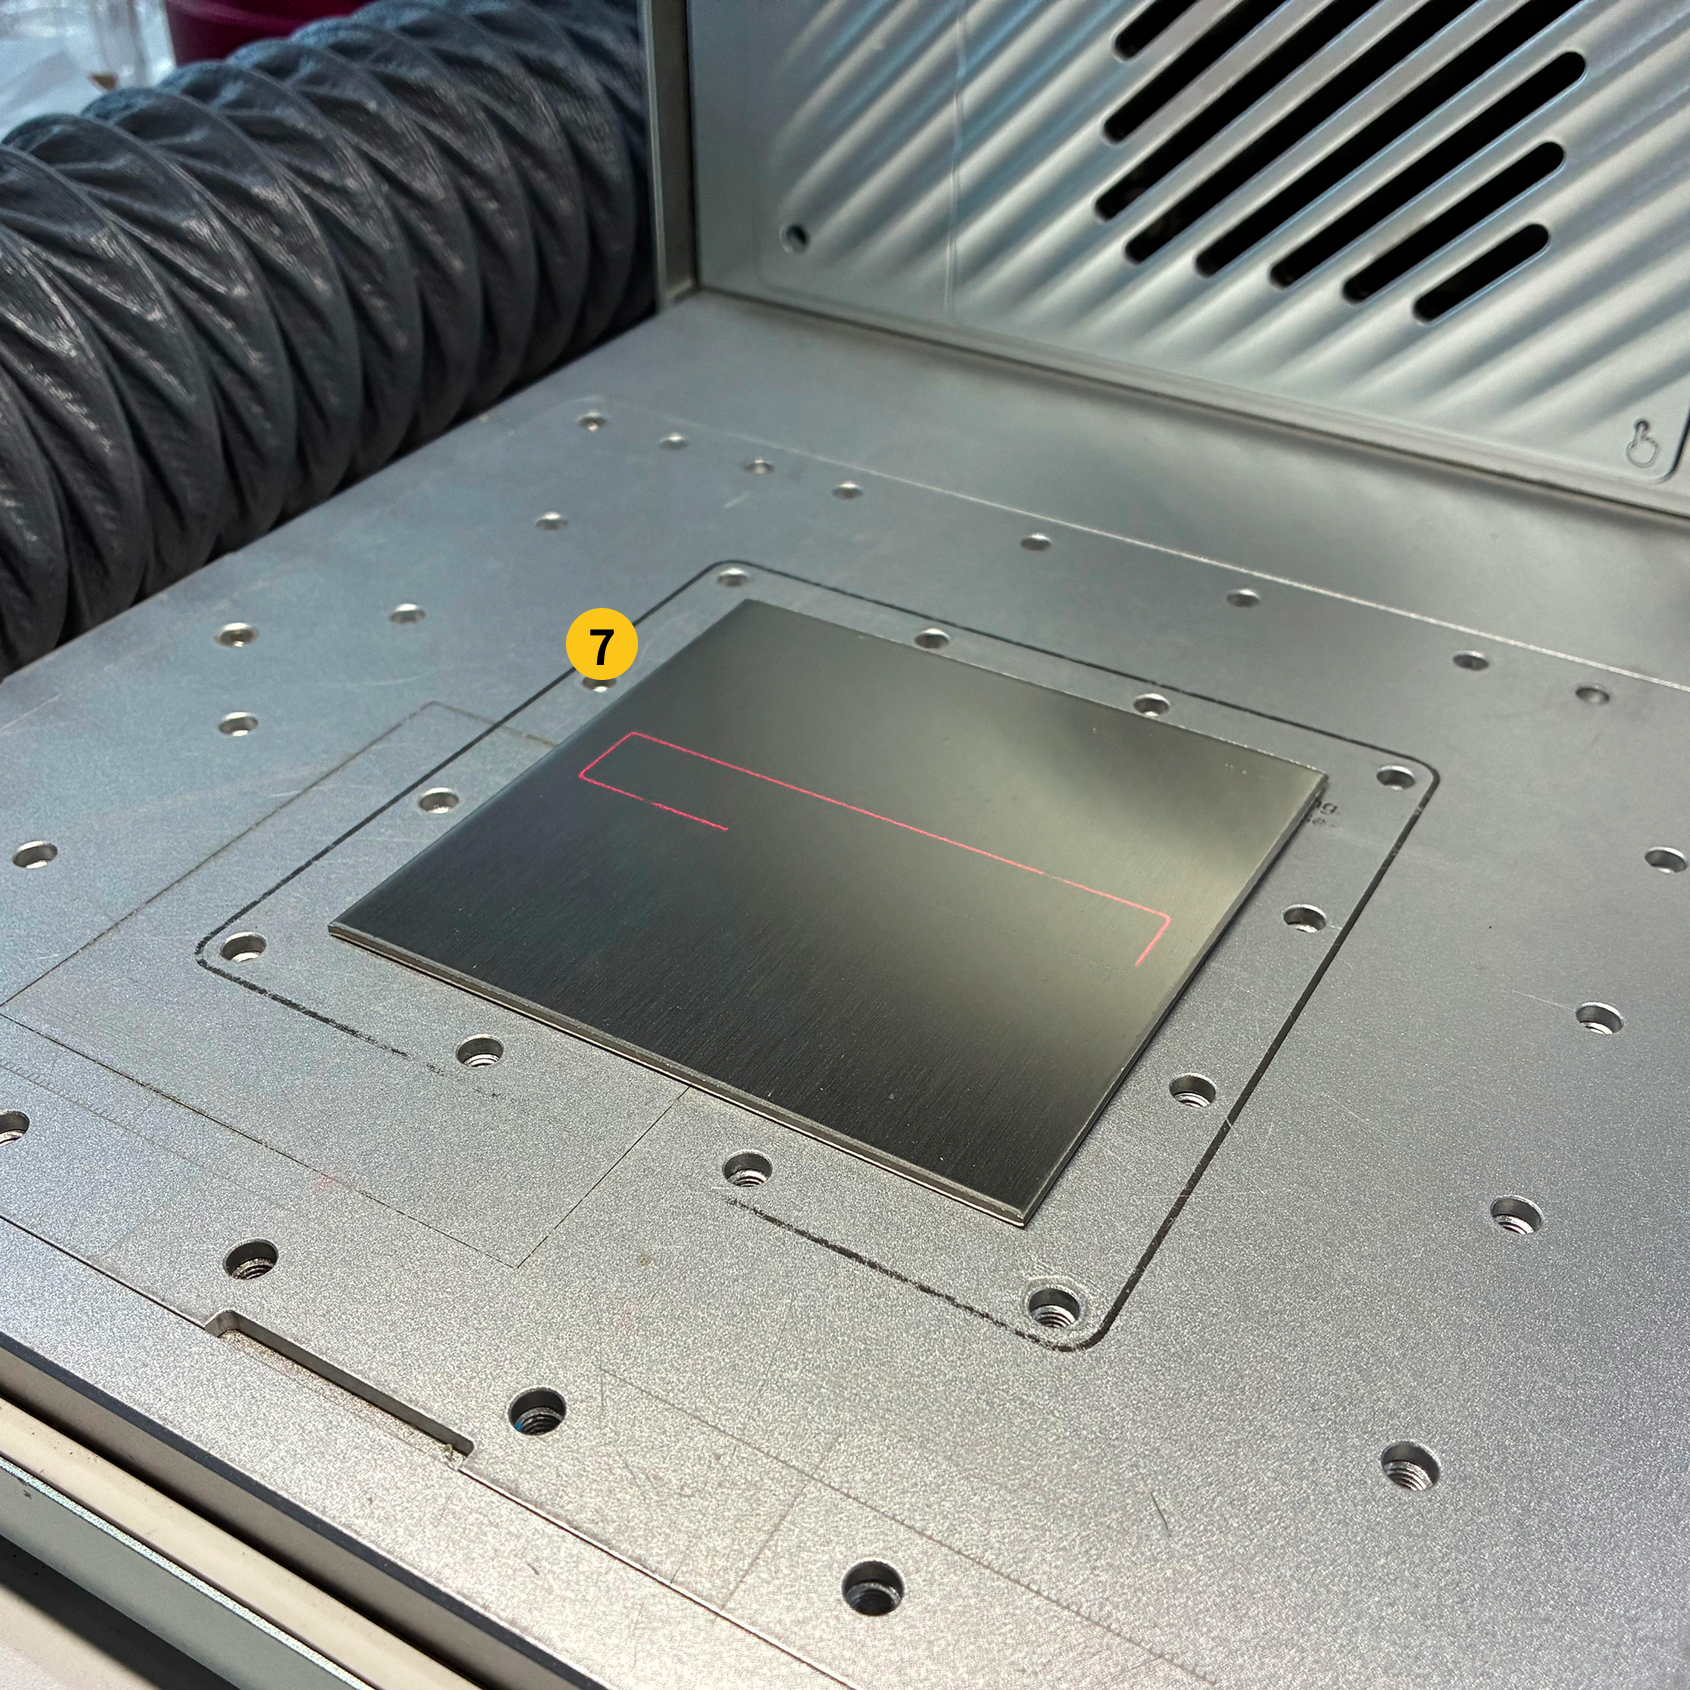
(7) Place the material at the center of the processing area
(8) Close the protective cover, Click "Auto Focus"
Closing the protective cover helps improve autofocus accuracy. Color engraving is extremely sensitive to processing height. If the material surface is uneven, the value measured by the vernier caliper will deviate from the actual processing height, resulting in a color effect that does not match expectations. Therefore, please be sure to recalibrate the processing height using the autofocus function before each processing session.
(9) Click "Border Walking", and check whether the red border exceeds the material range in the device processing area. If it exceeds the range, relatively reduce the array on the canvas.
If the red border cannot be clearly seen when the protective cover is closed, please turn off the "stop on lid opening" function, then wear laser protective goggles and open the protective cover for observation.
If you do not have laser safety goggles, click "Capture", and make sure the array border does not extend beyond the material range. If it does, scale down the array relative to the canvas. ("Capture" is an auxiliary function with minor deviations from the physical world.)
(10) Click "Go to Processing", confirm the processing, and wait for the processing to complete.
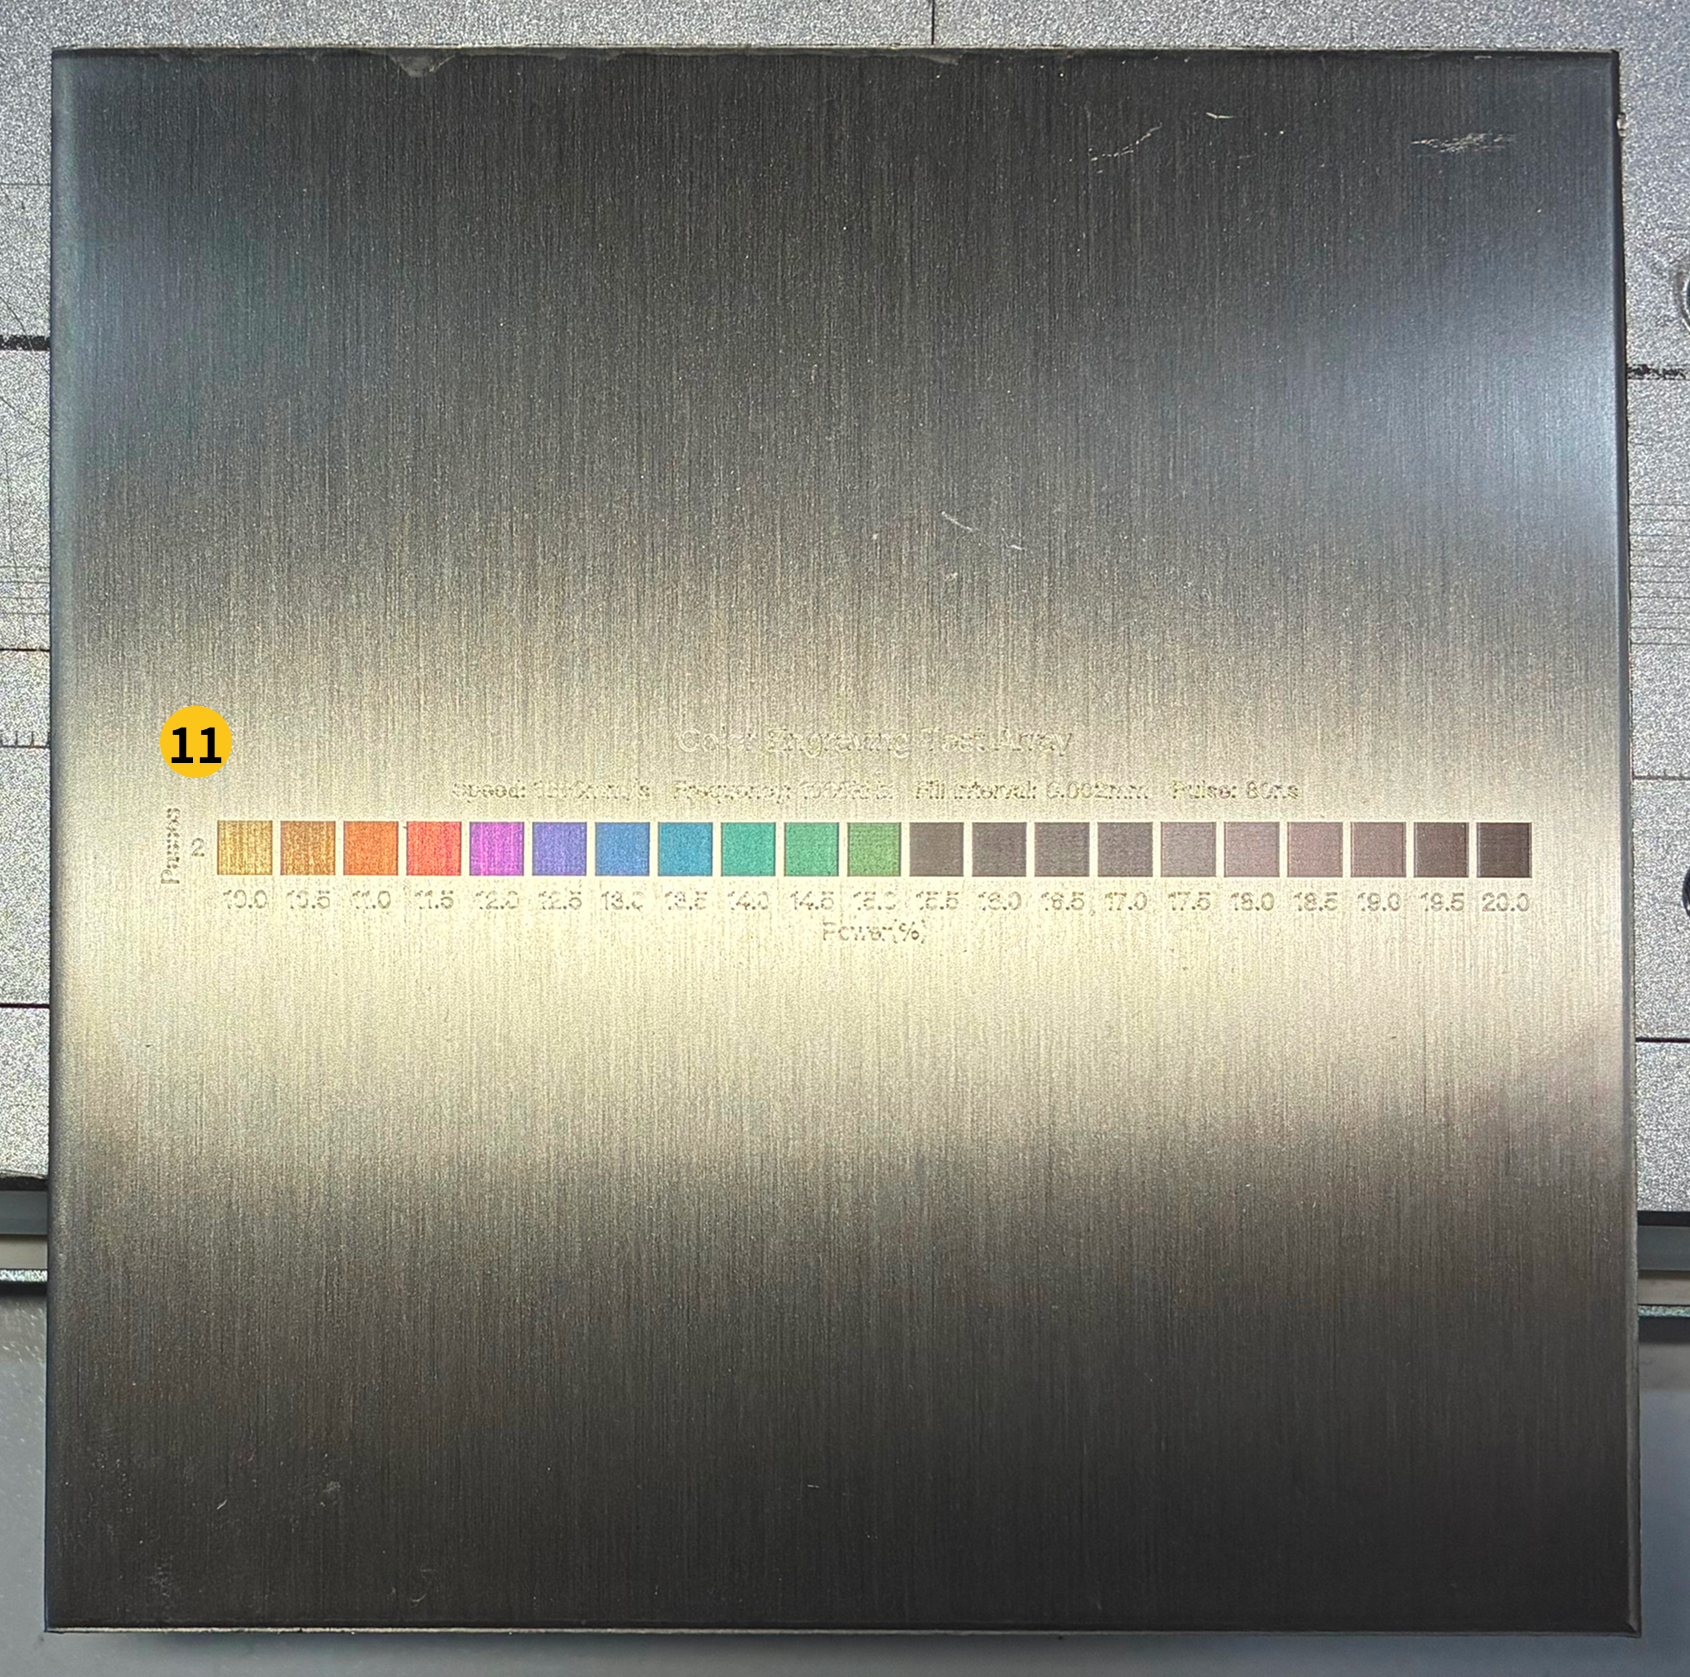
(11) Take out the material and use a mobile phone to photograph the actual color effect of the array
 |
 |
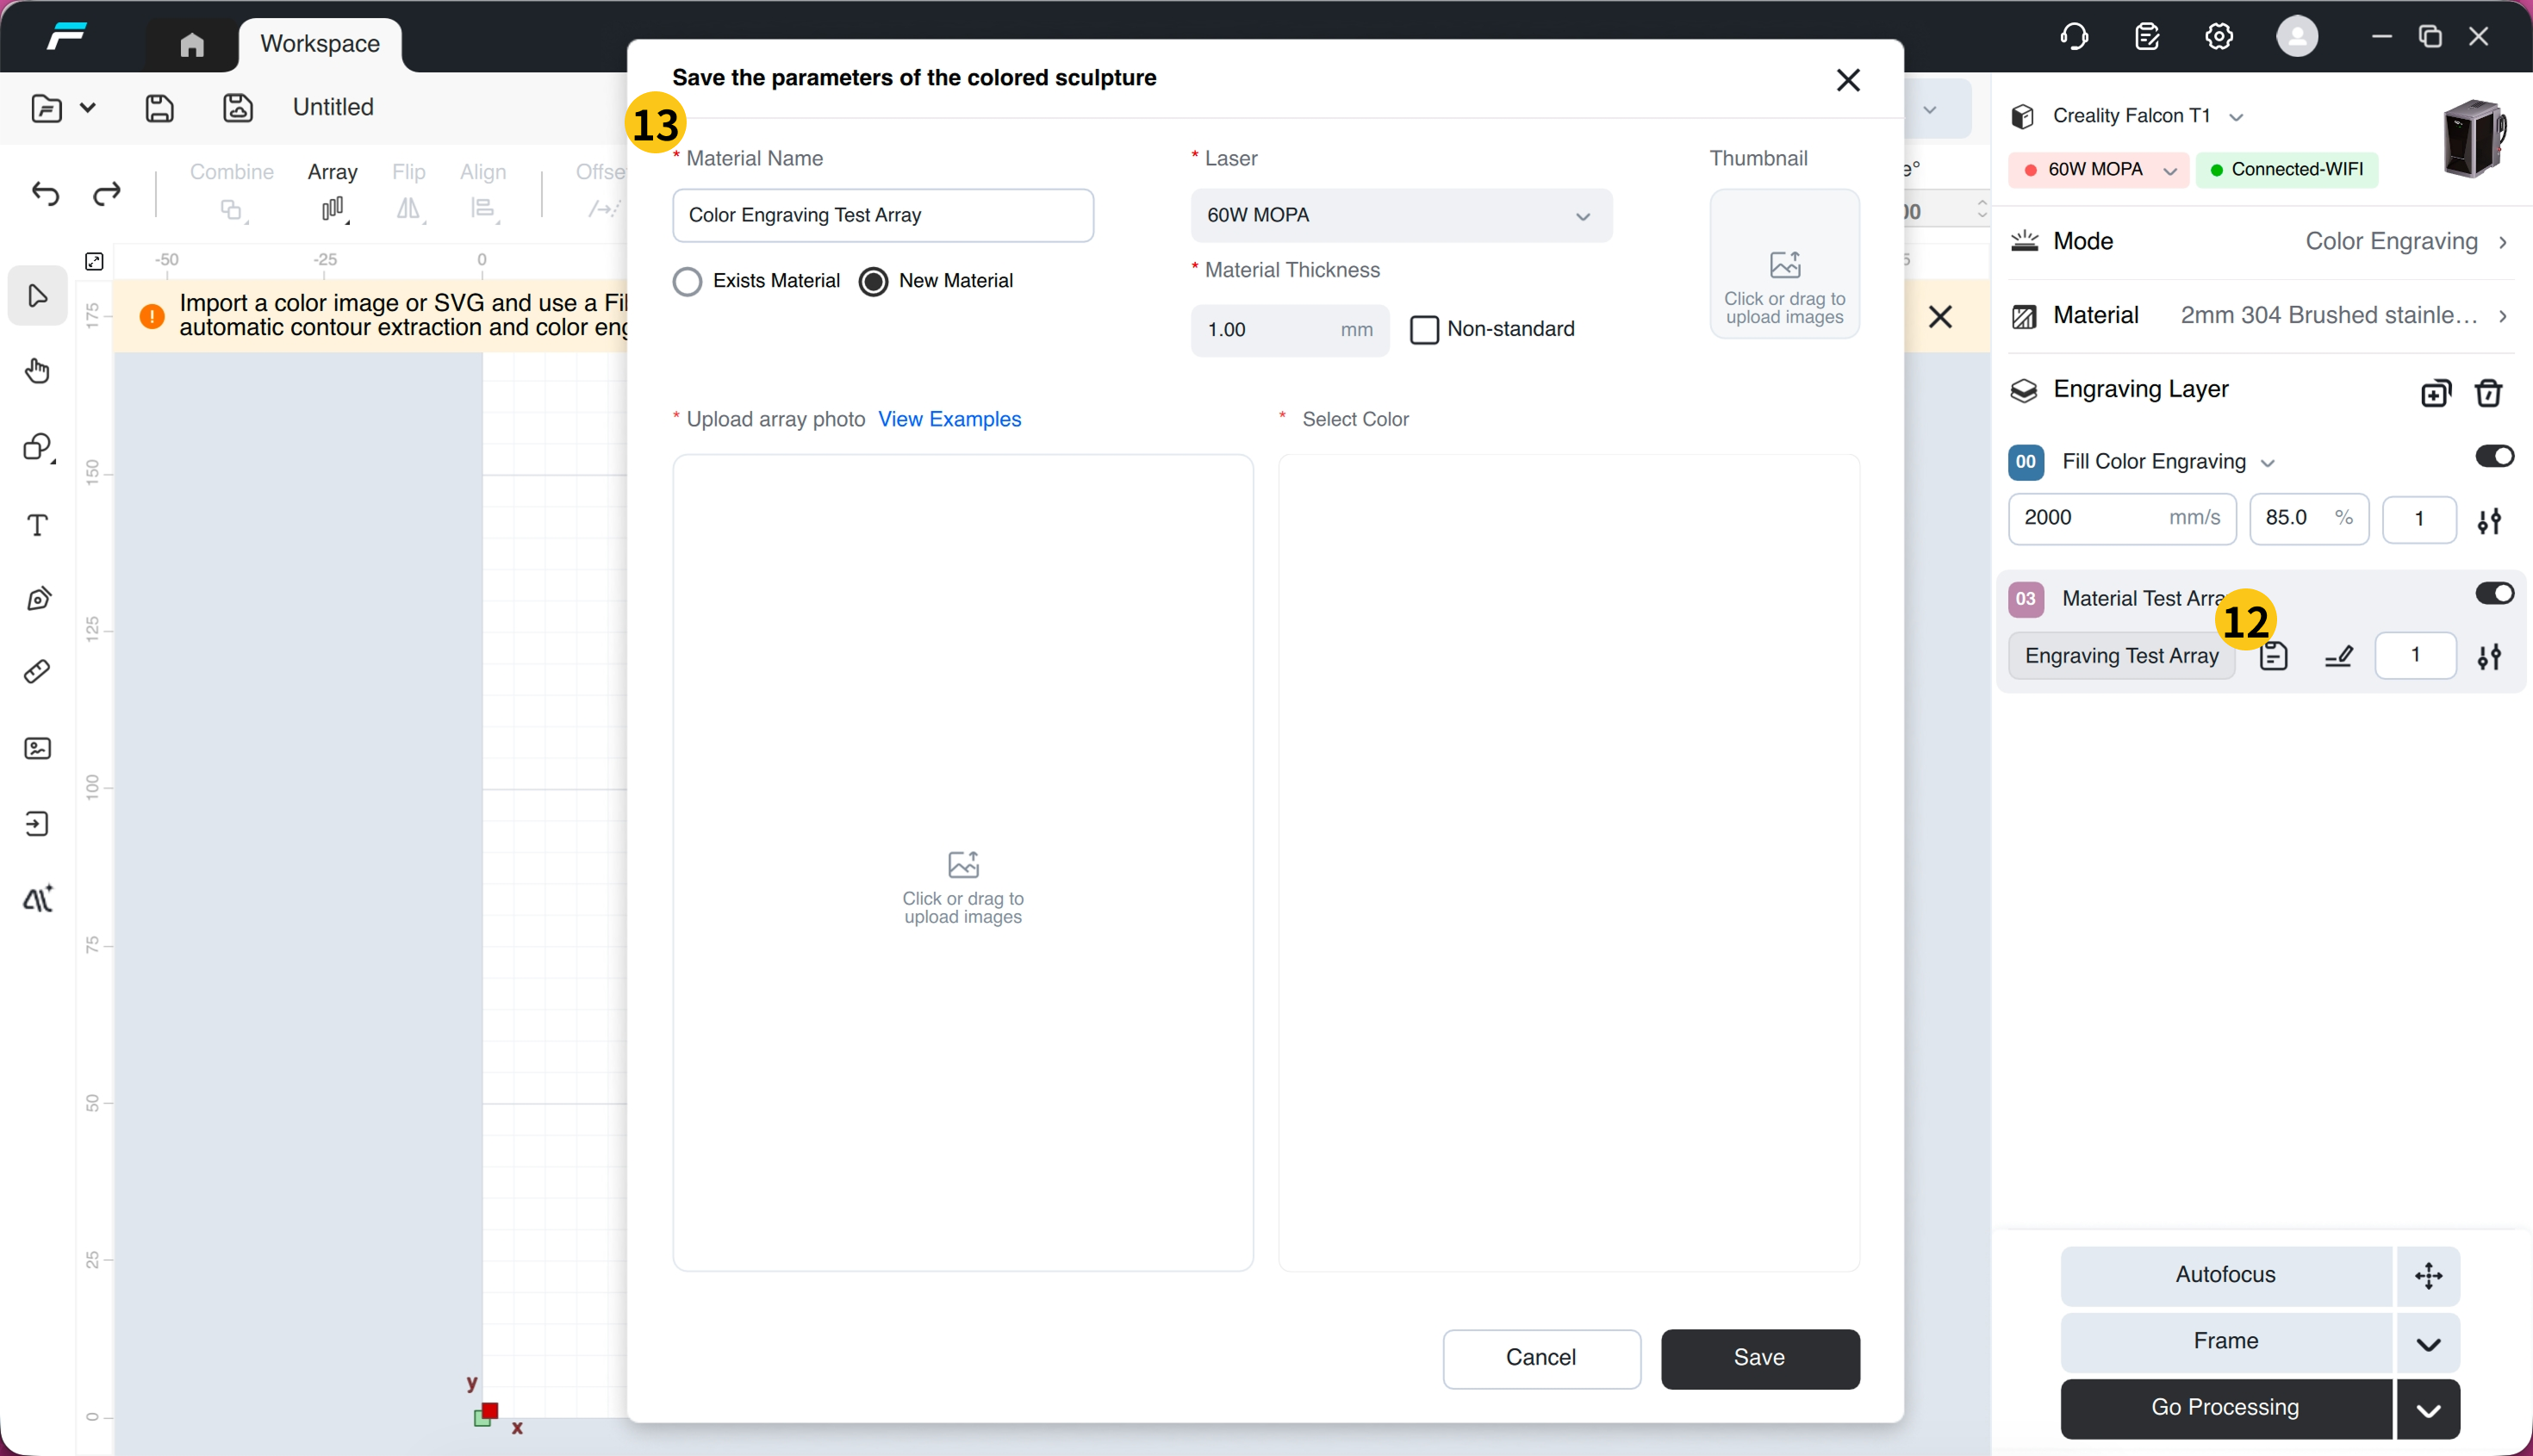
(12) Transfer the photo to your computer, select the test array layer you just created, and click "Save Custom Color Carving Material"
The color carving material library is an independent material library, and it is only available in the "Color Carving" mode that the "Save Custom Color Carving Material" option appears
(13) Enter the correct "Material Name", "Equipment Power", "Material Thickness", and "Material Cover"
Please select a new material from "Add New Material".
Please select an existing material. For the selected existing material, the new parameter color will be added to the selected material; if the parameter color is duplicated, the new parameter color will overwrite the original one.
If the material surface is uneven or non-standard planar, please check "Non-Standard".
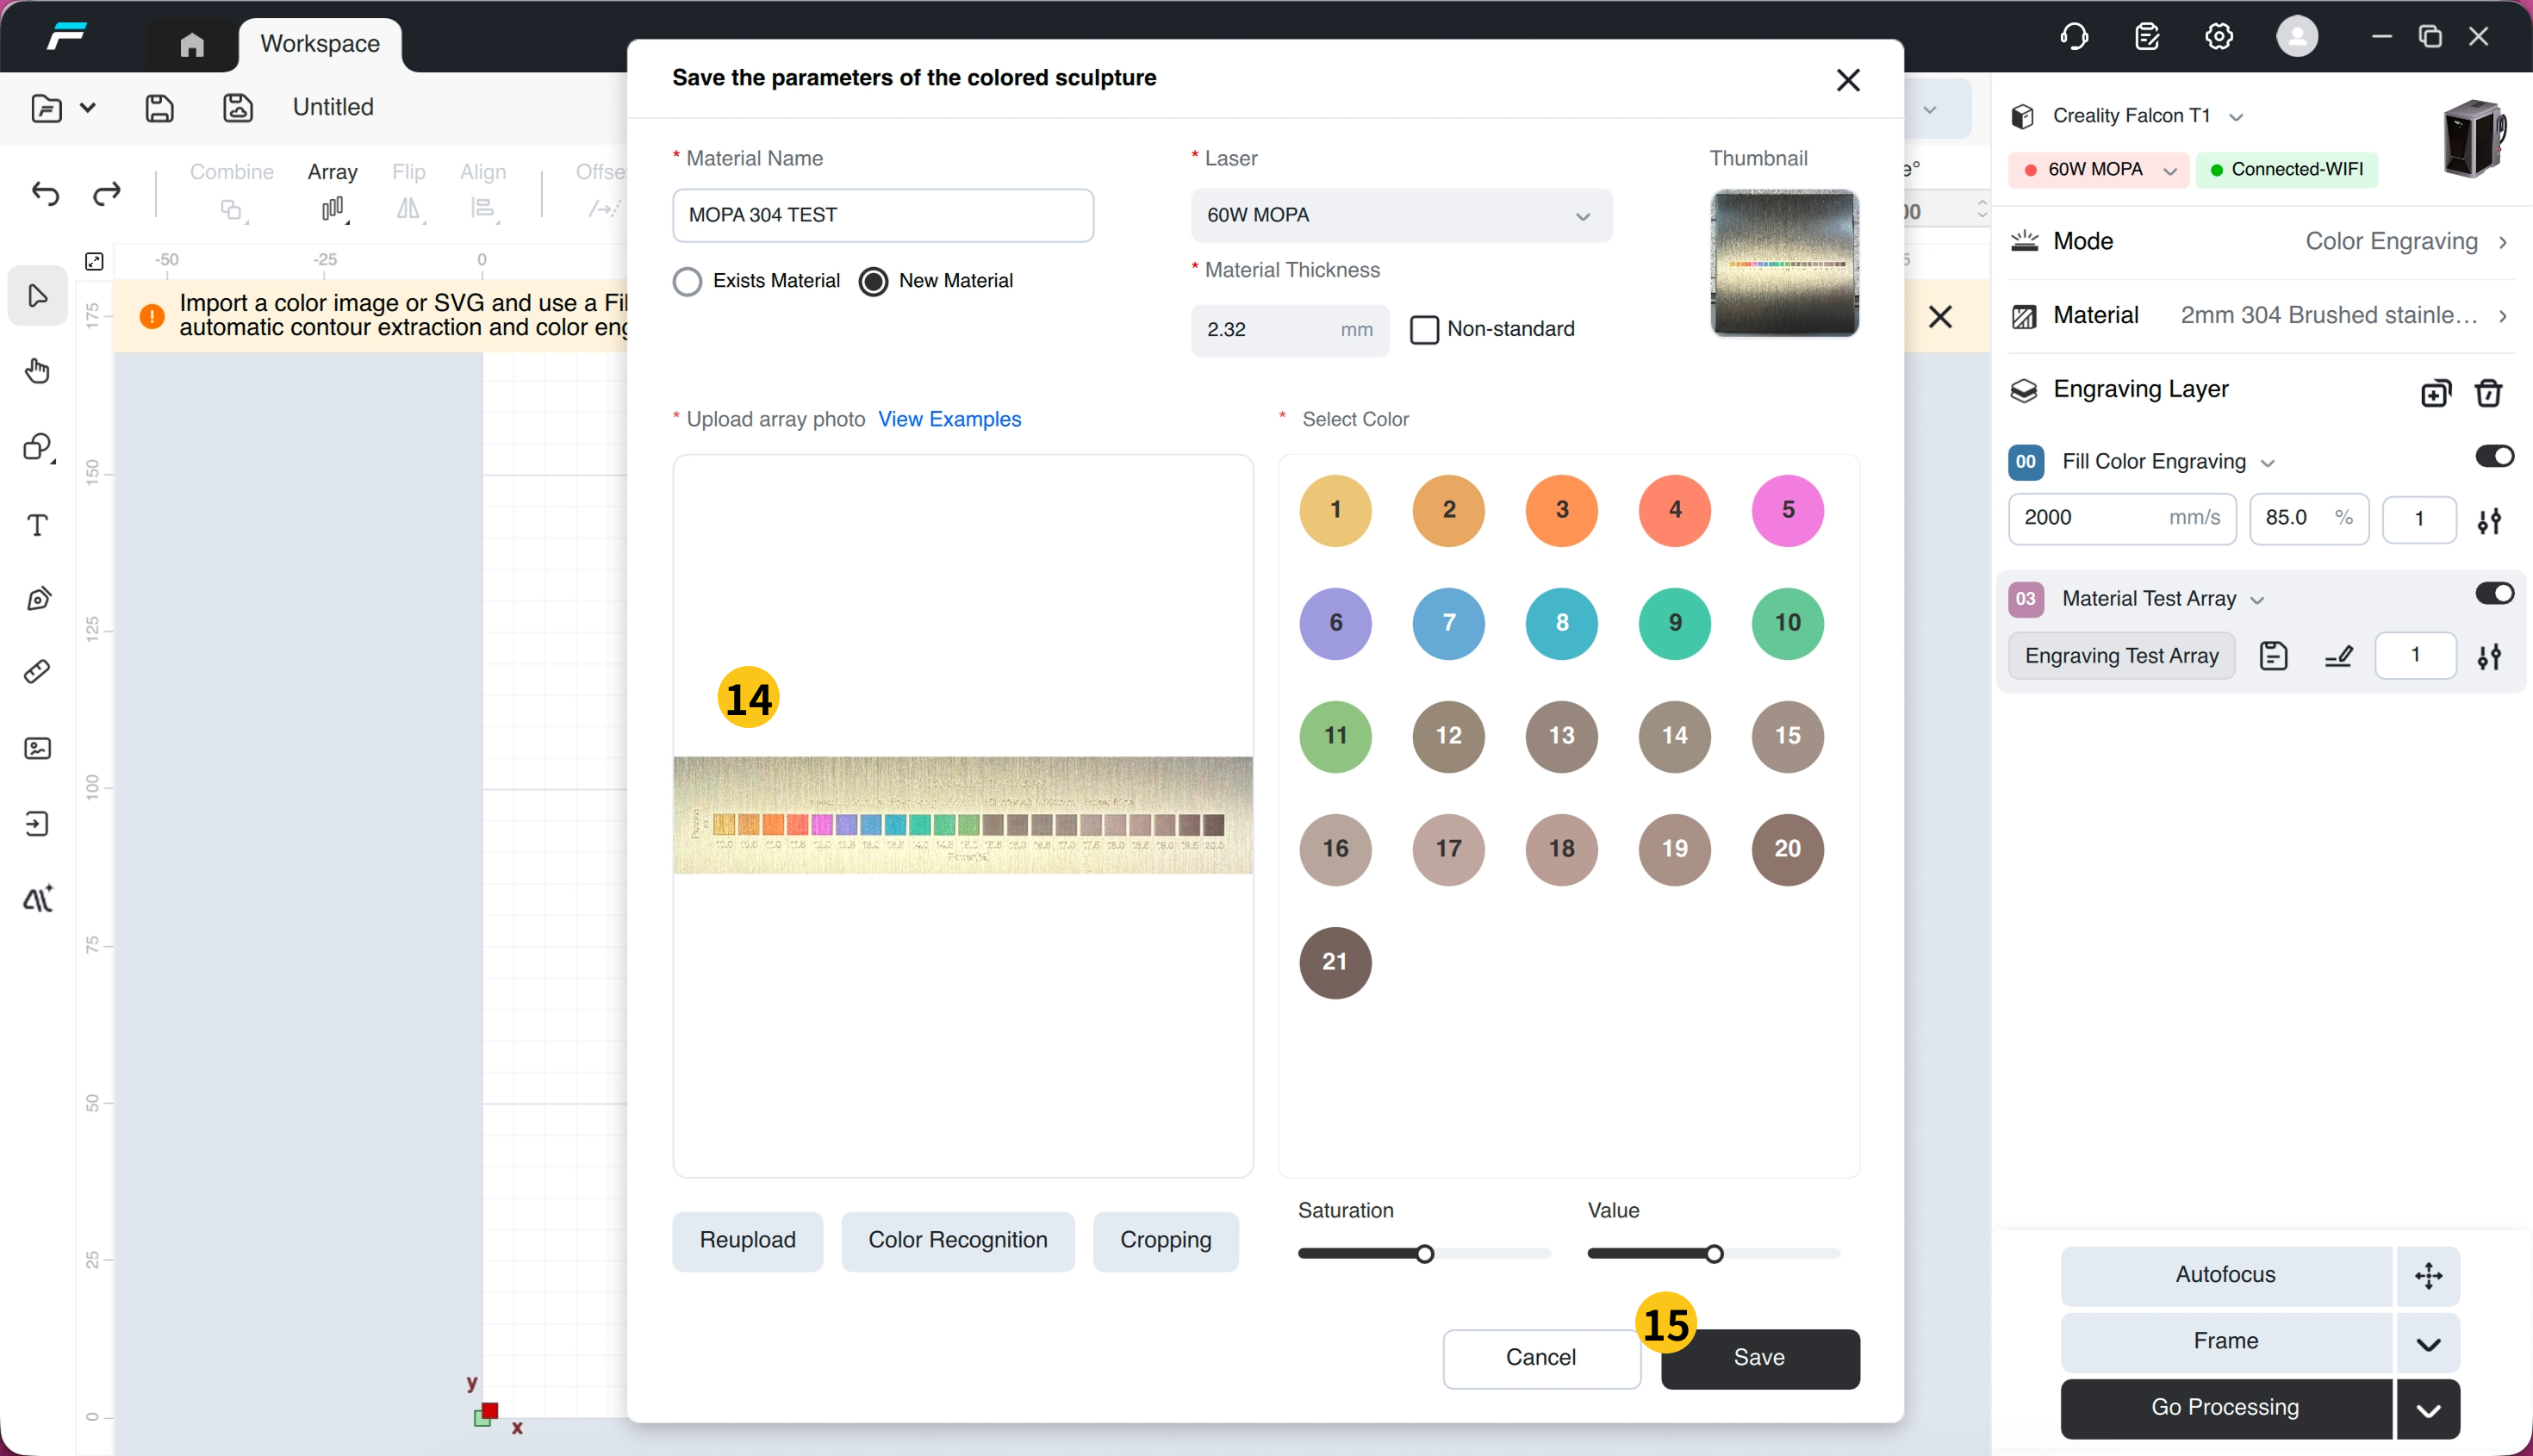
(14) Upload the array photo. Please refer to the photo example, crop the photo to ensure no redundant information, and rotate the photo to ensure that the rows and columns are horizontal and vertical.
If the color cannot be recognized correctly all the time, you can double-click the unrecognized color in the "Select Color" window and re-select the color via the color picker.
If the overall color is distorted, it can be corrected by adjusting the saturation and brightness.
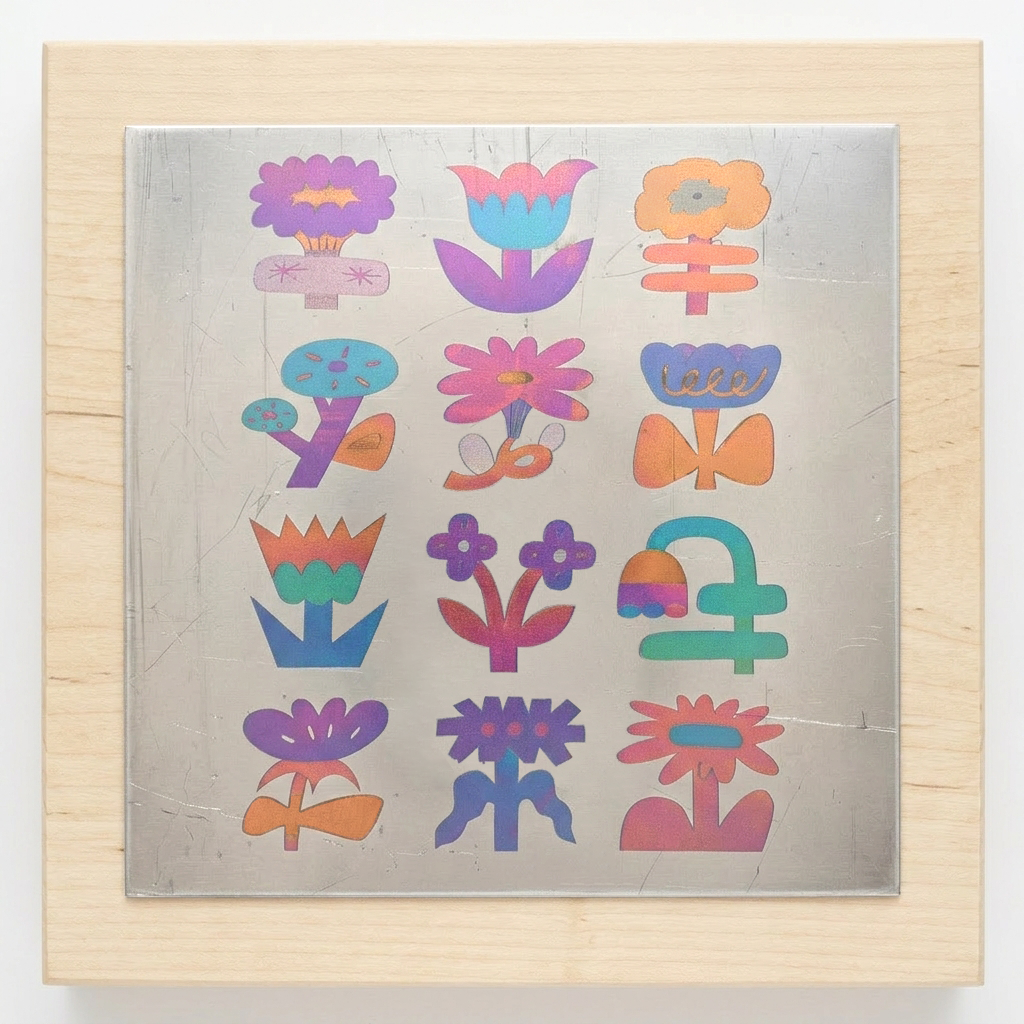
(15) Click "Save", and the custom material will be added to the material library of "Color Engraving".
|
|
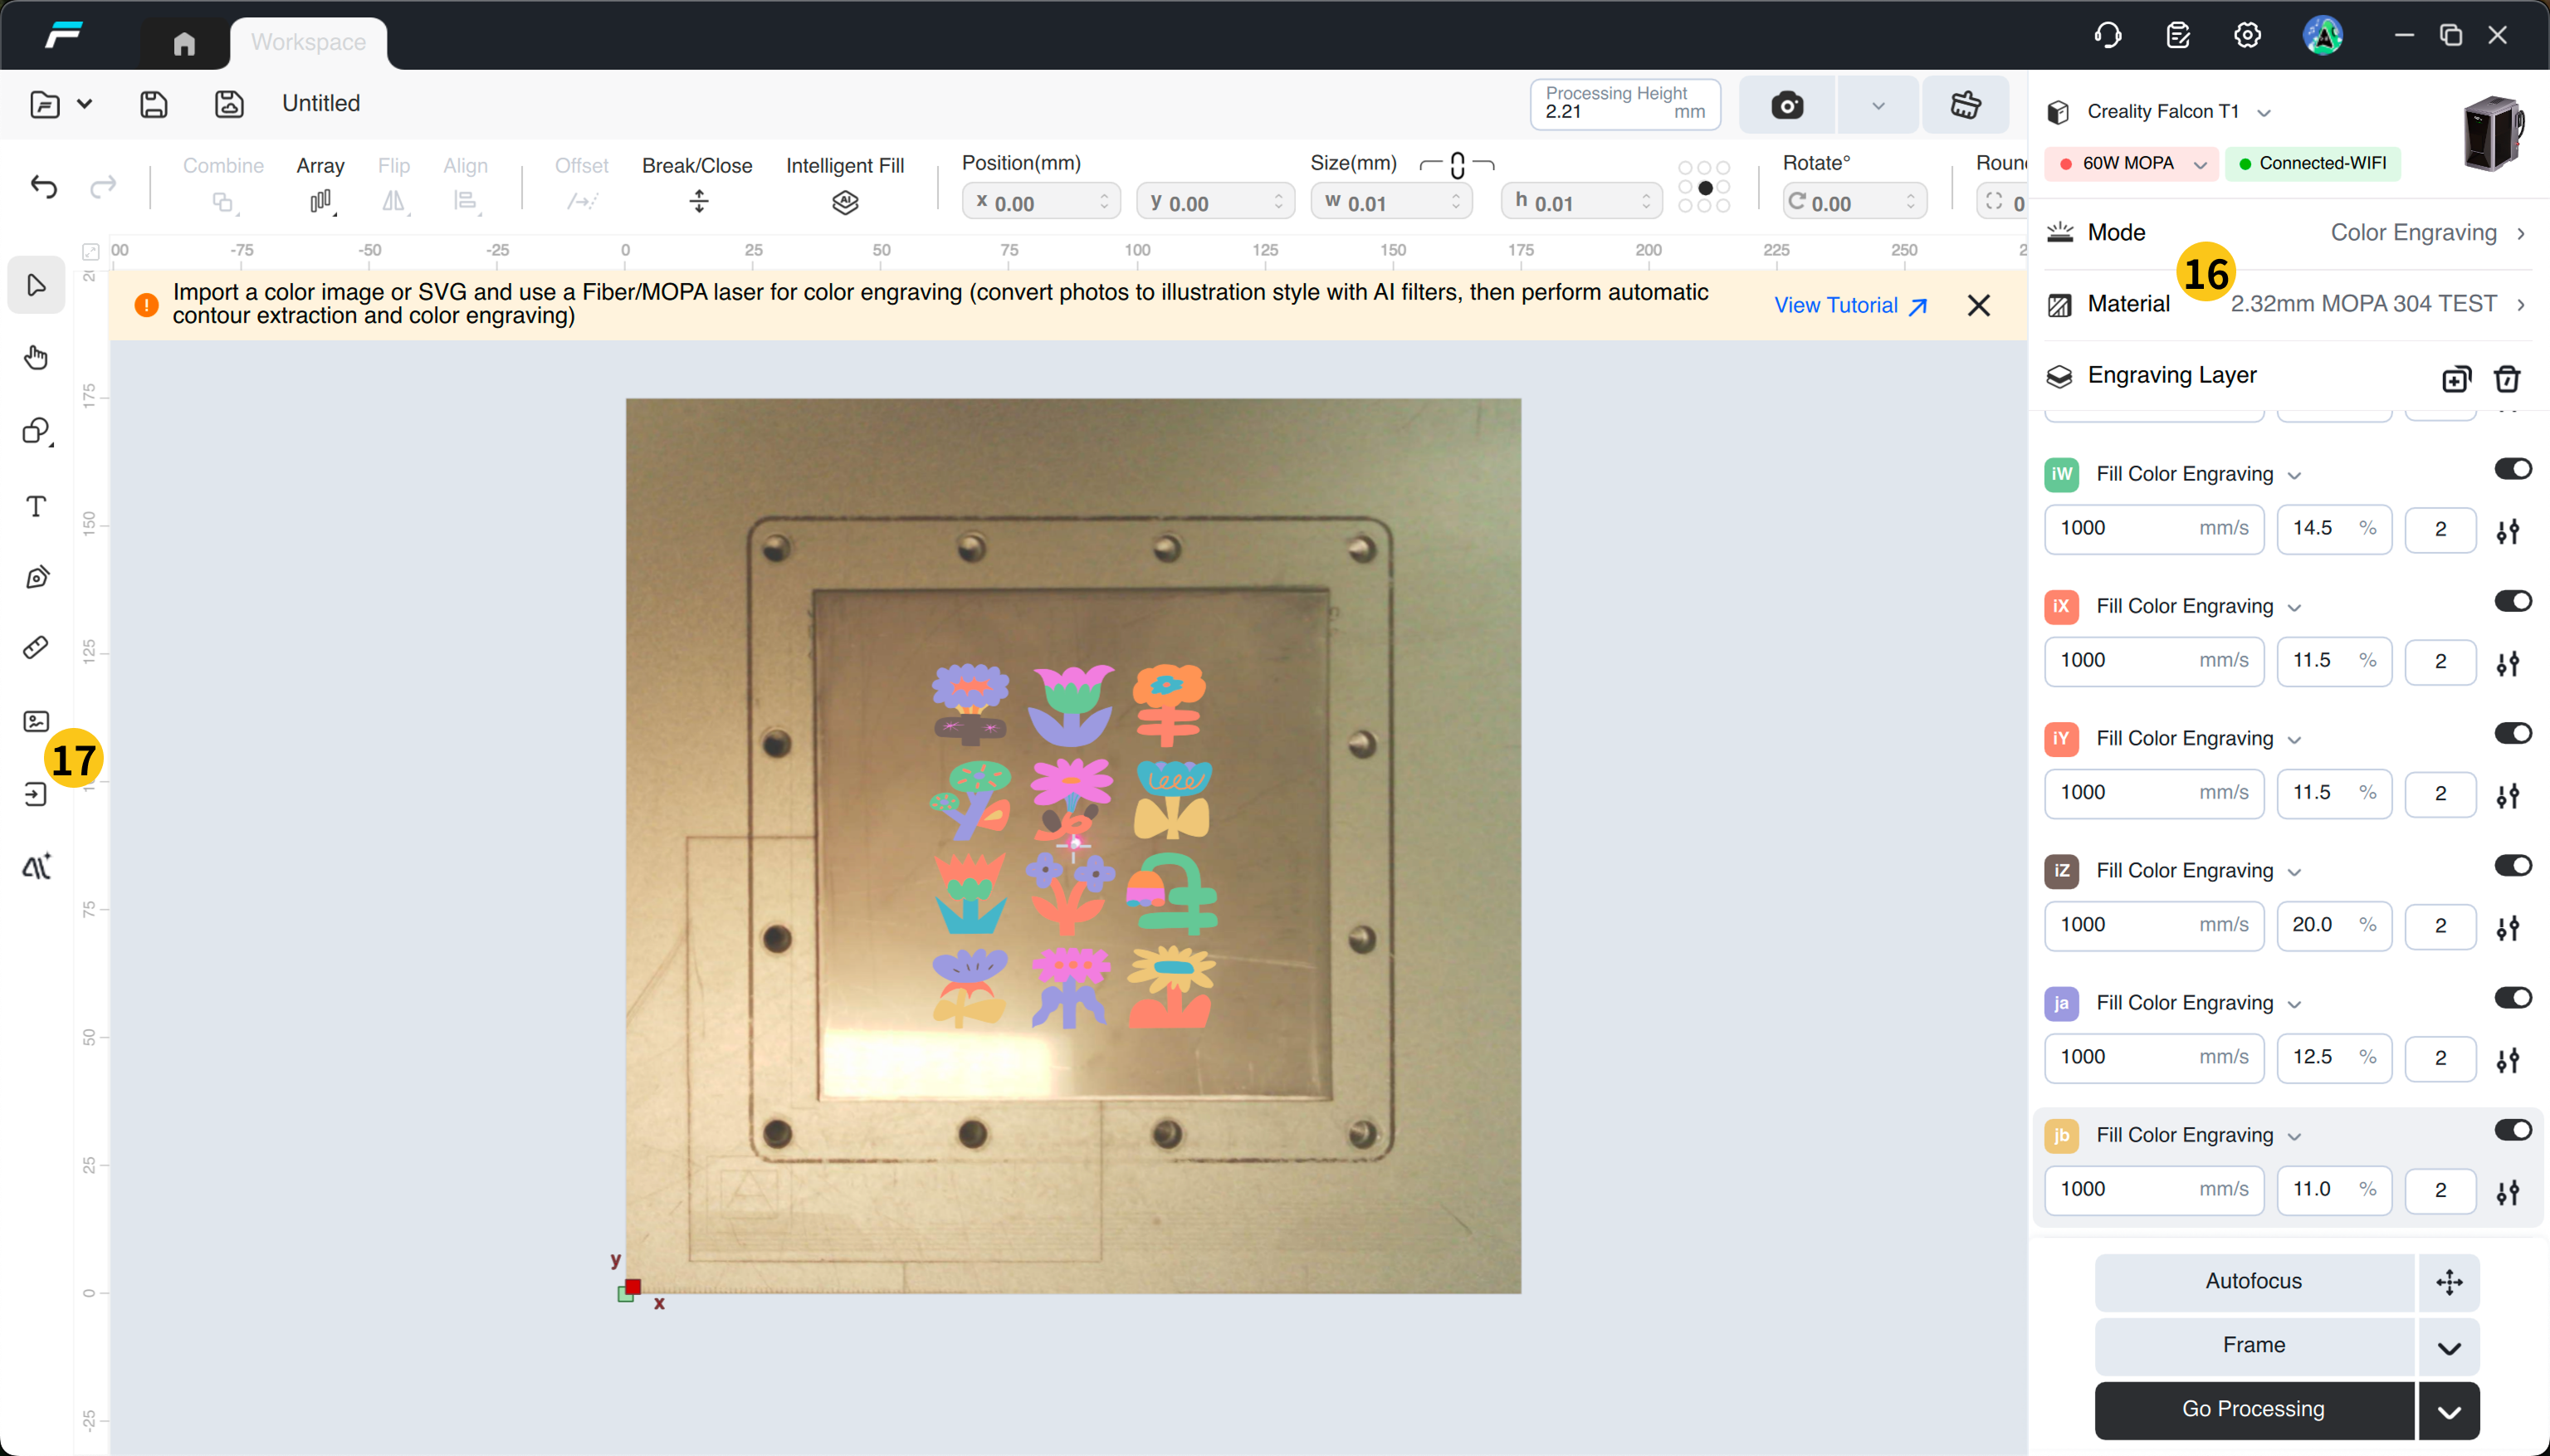
(16) Select the custom material you just saved
(17) After importing the engraving creatives, the colors displayed on the canvas can be accurately matched with the final engraving colors.
The material needs to be extremely flat; otherwise the engraving result will have some gradient colors (imperfections).
Be sure to process using exactly the same materials; otherwise, the custom material parameters will be invalid.
Stainless steel is not recommended for image phased rollout engraving; it is advised to import vector images. If image phased rollout engraving is required, titanium plate material shall be used.
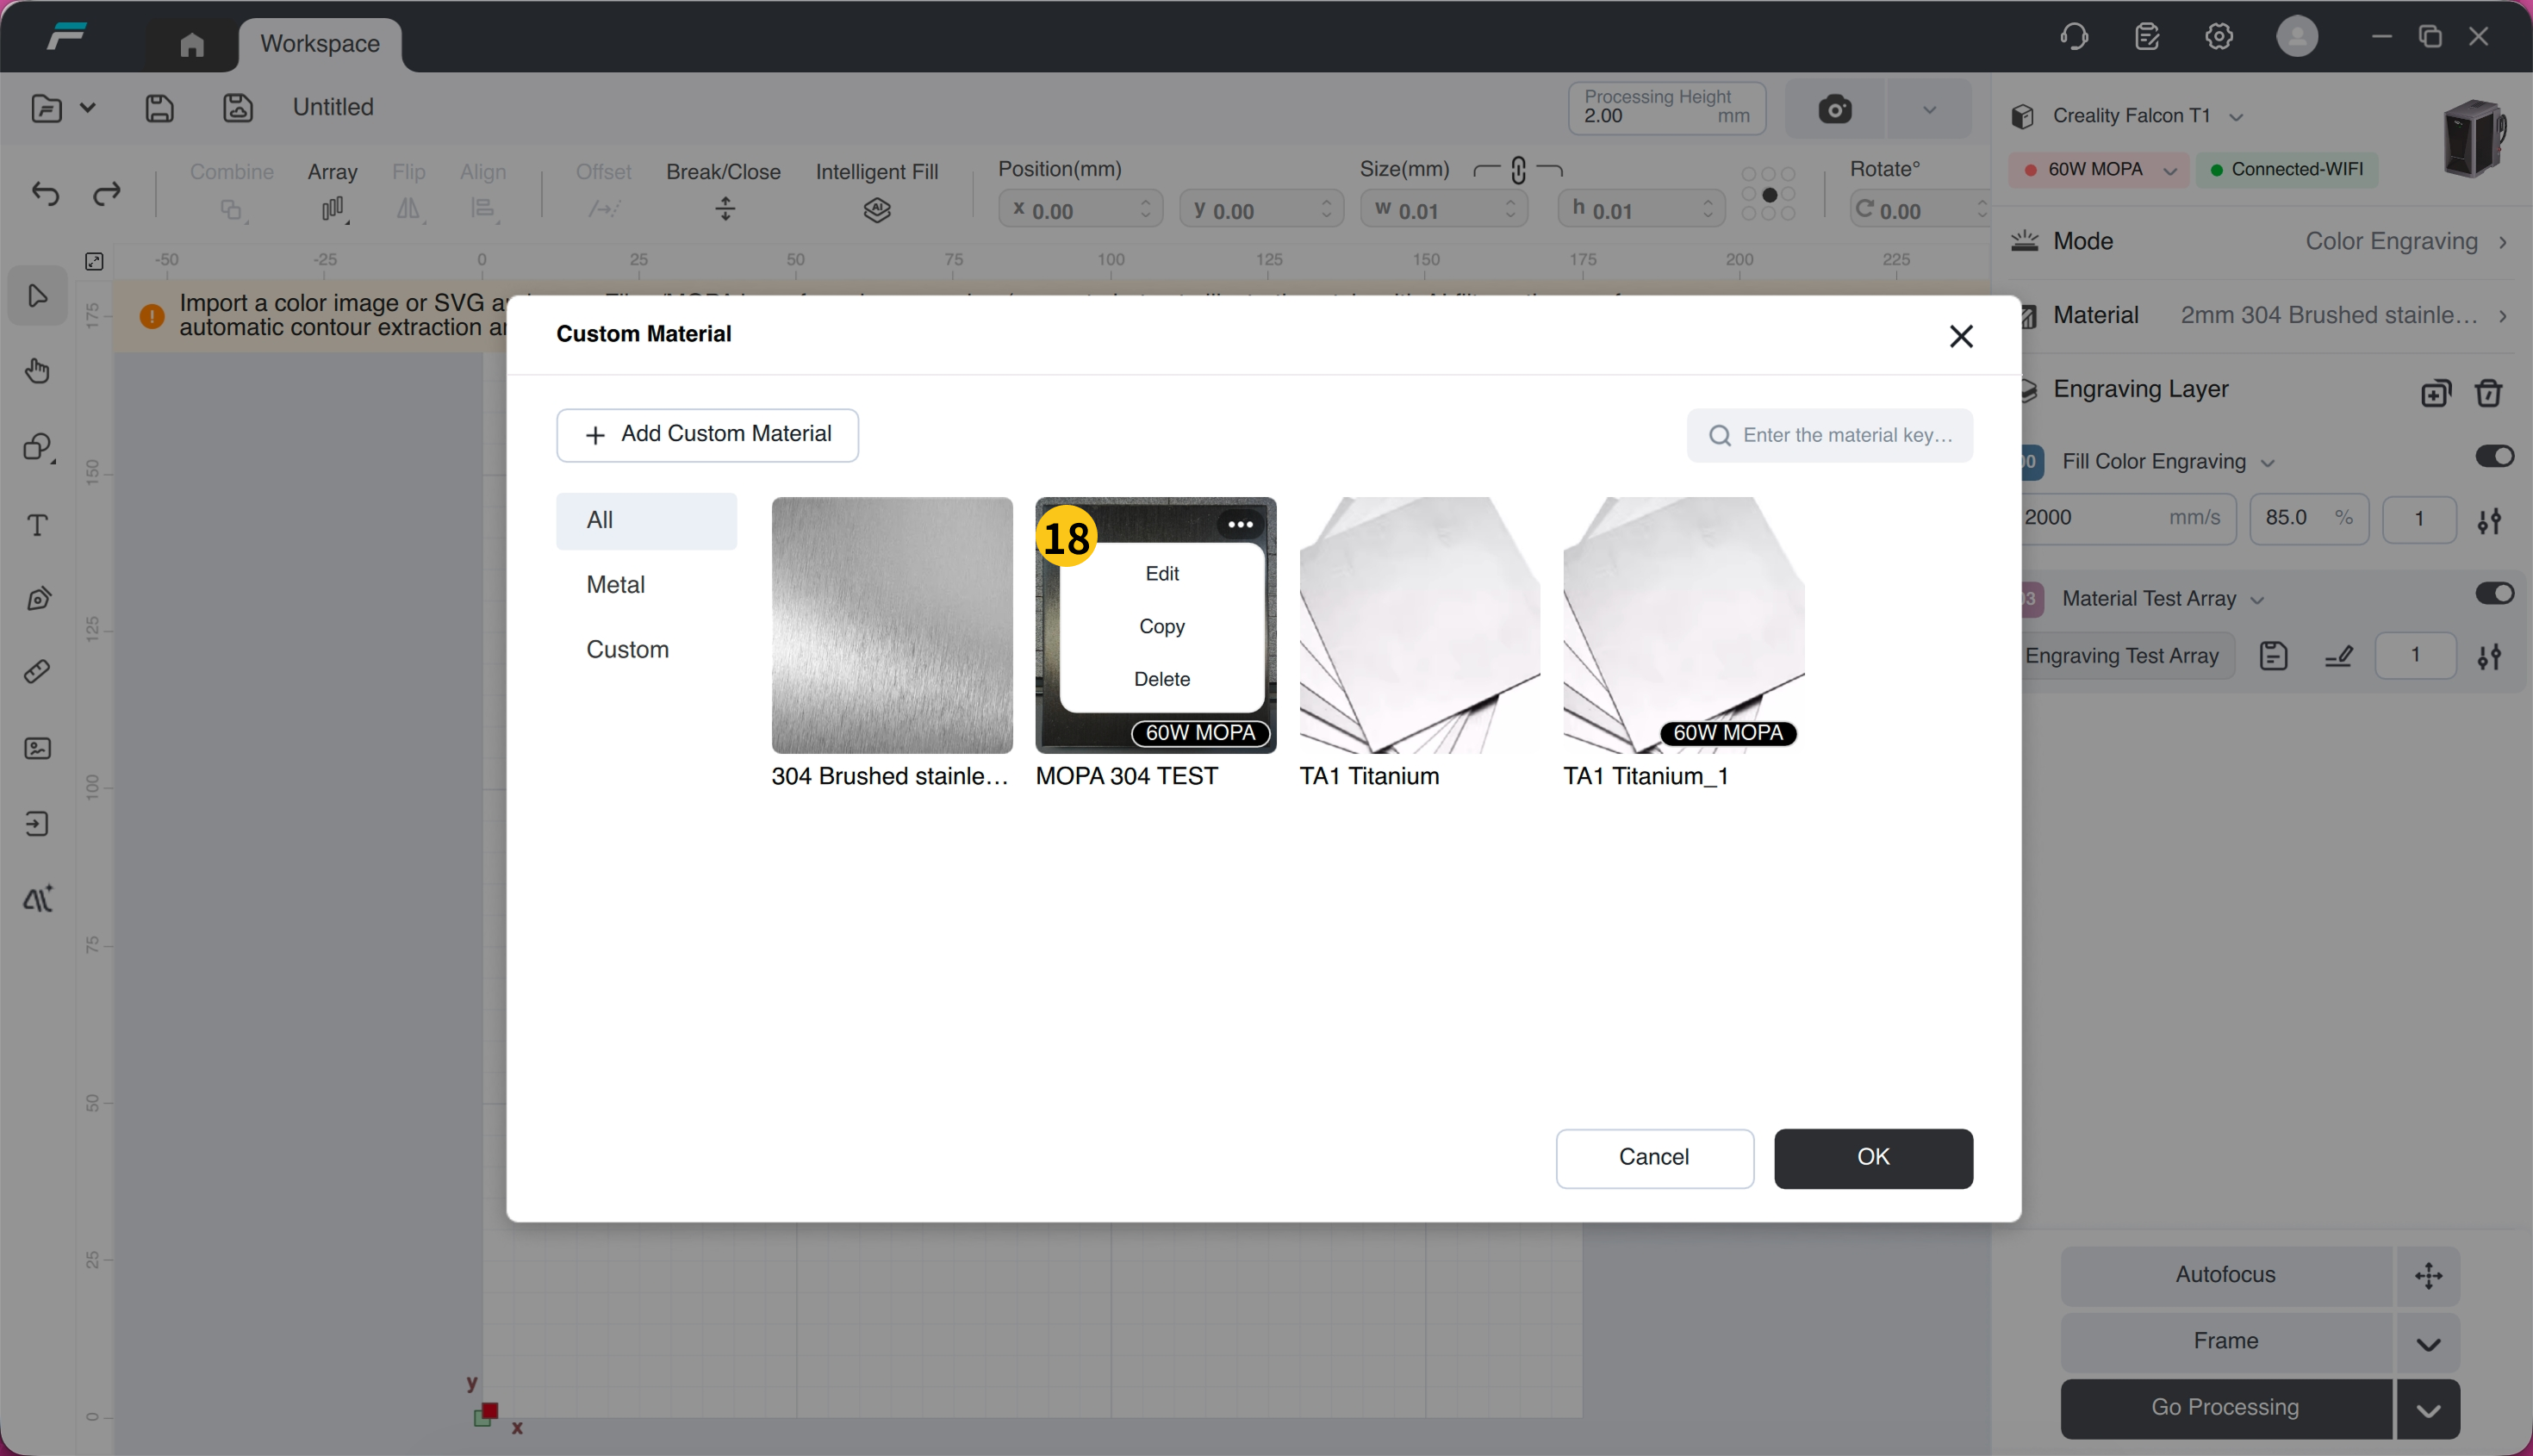
(18) After saving successfully, you can find the material in the material library and re-edit it
¶ Color engraving case
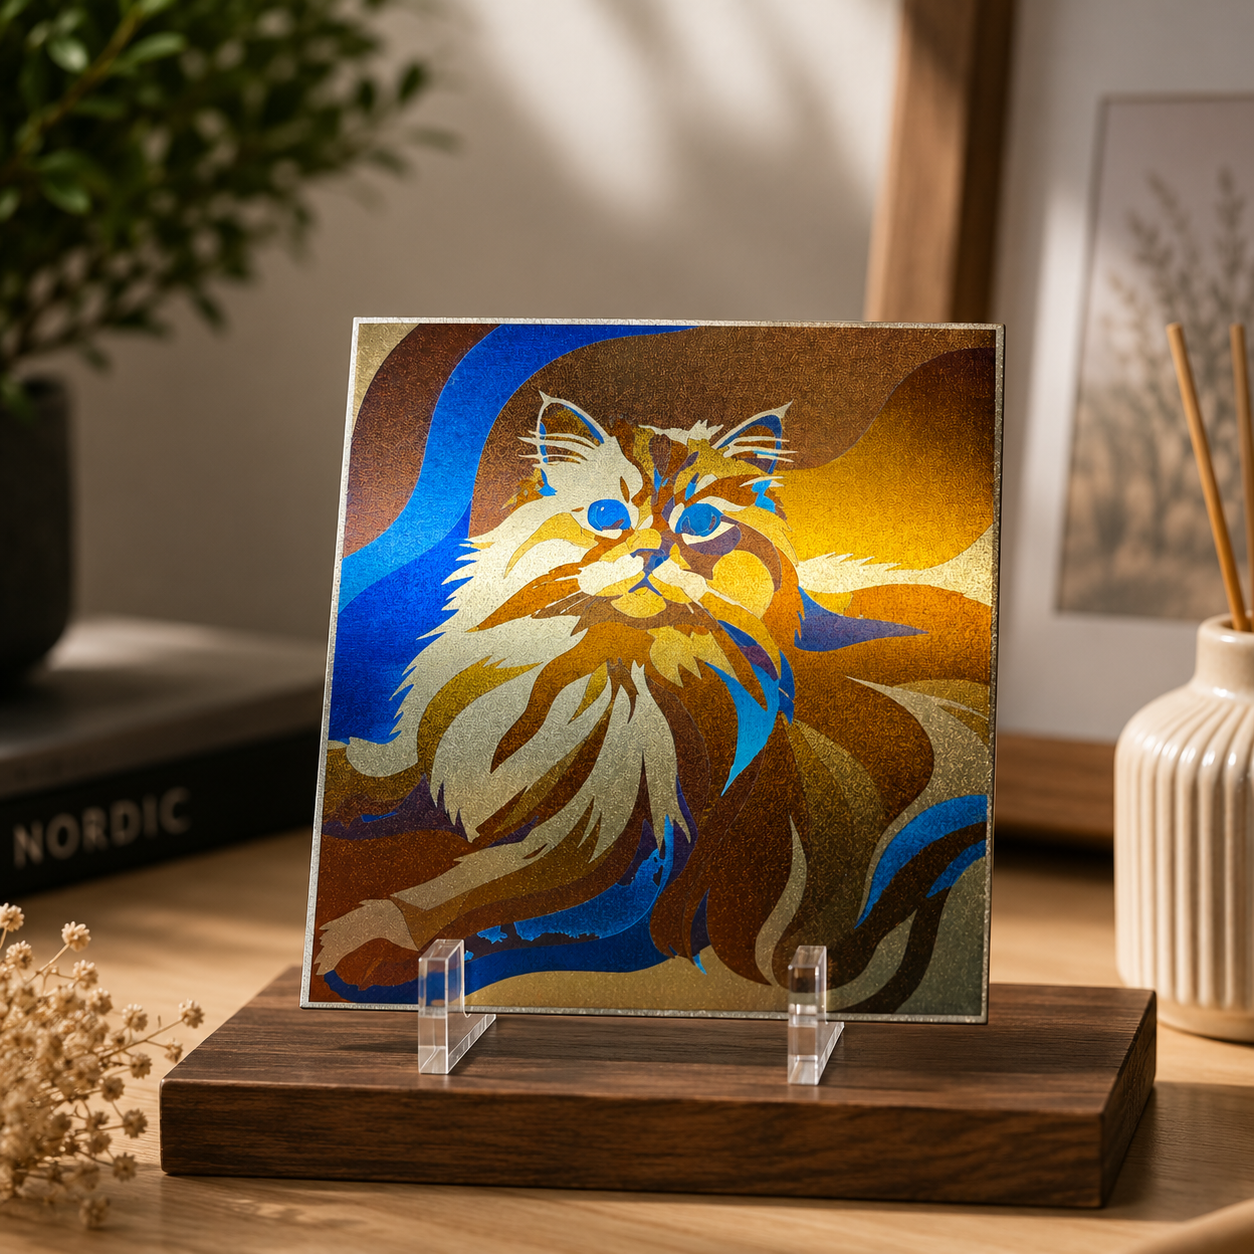
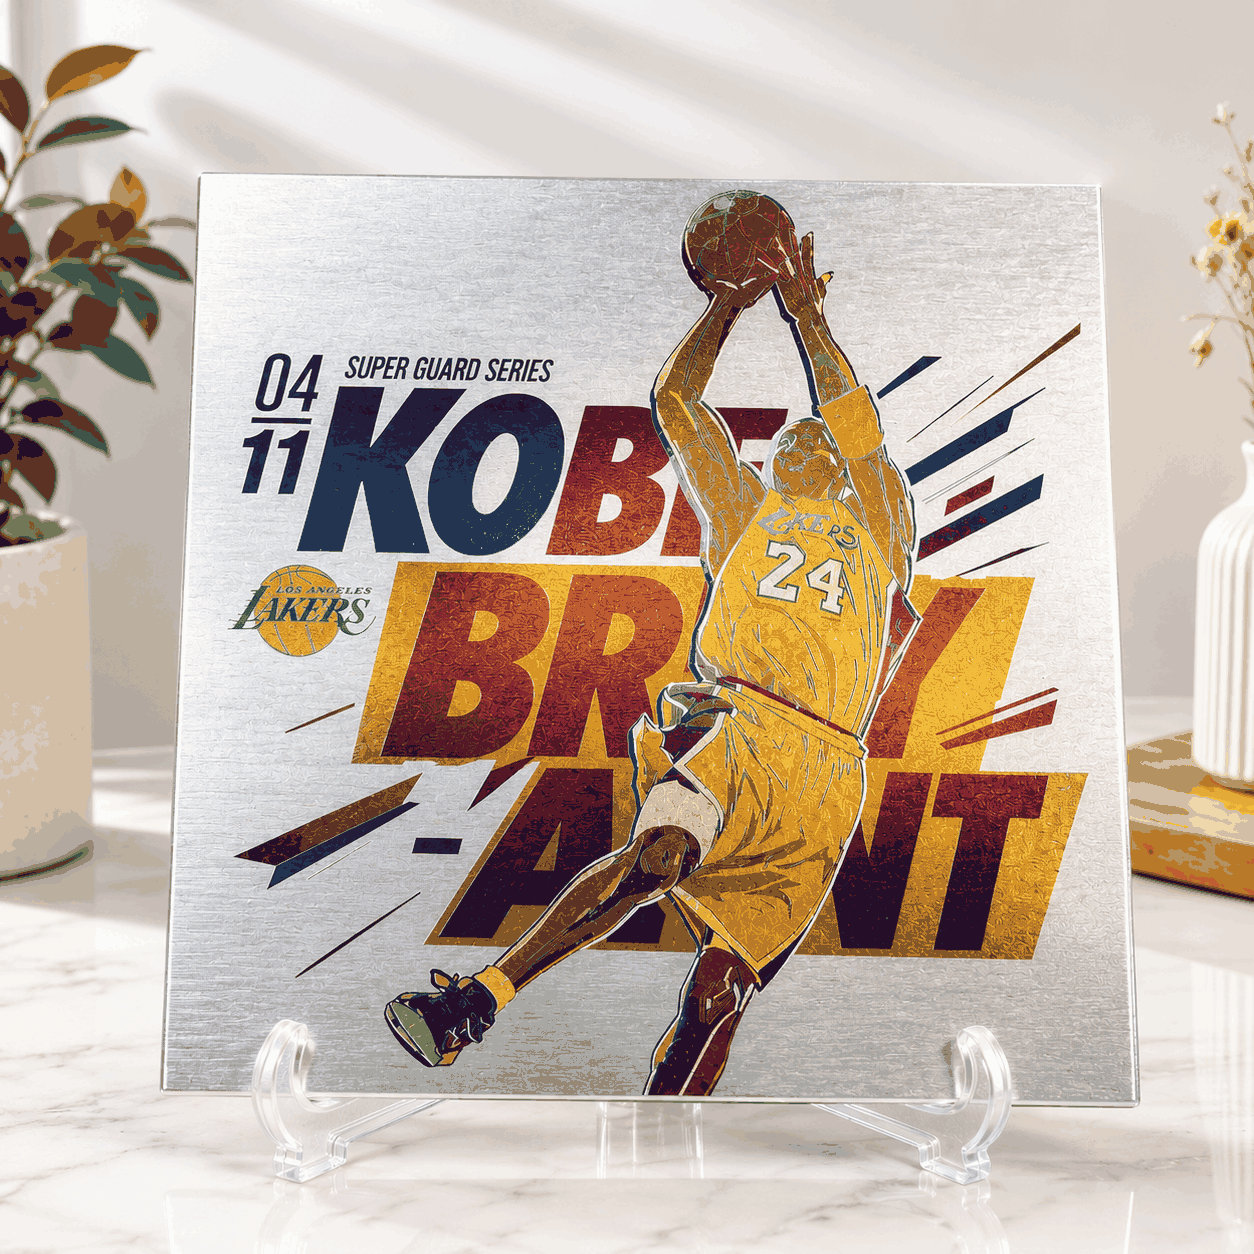
304 Stainless Steel Case
Titanium Plate Case
¶ Principle of Color Engraving
Laser heating of a metal surface (titanium or stainless steel) generates a transparent oxide film on the surface, which produces interference colors through reflection. Such colors are typically caused by the interference phenomenon of light on the metal surface and the light absorption properties of the material. Different processing parameters (power, speed, frequency, pulse width) correspond to different film thicknesses, and variations in film thickness directly lead to color changes. Essentially, the color engraving of titanium and stainless steel belongs to optical structural color, rather than the inherent color of the material itself.
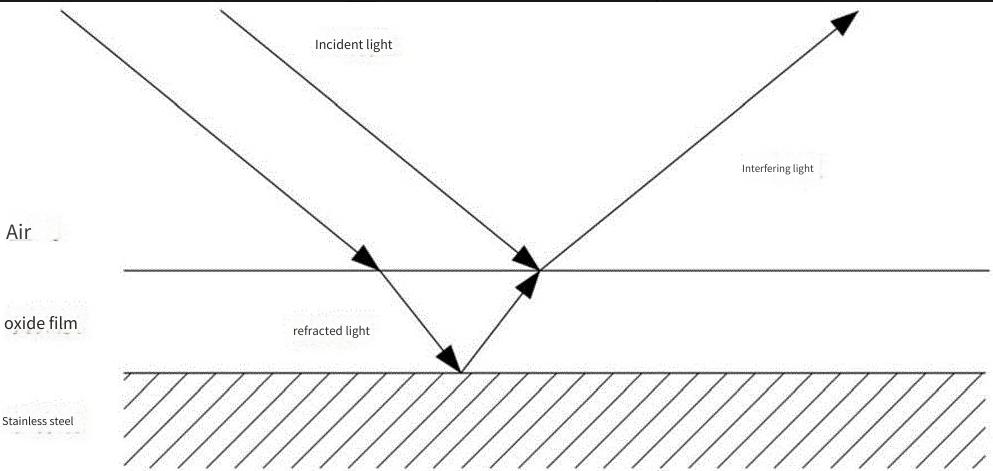
Color-filled engraving: Read the color of the layer, match the closest color from the material color table, and output the engraving power corresponding to that color.
Image color engraving: Read the image and convert it to a phased rollout image, then map the phased rollout to engraving power according to the power range selected from the material color table.
¶ FAQ
1. Check the color saturation of the colored carving to ensure there are no issues such as rainbow-like discoloration, darkening, missing colors, or excessively low saturation.
2. If the overall color of the colored carving appears yellowish, it is necessary to check whether the focusing height of the colored carving matches the thickness of the material.
3. If the overall brightness and darkness of the colored carving is unstable, it is necessary to check whether the default configuration parameters of the colored carving are consistent with the settings; if you have set the parameters by yourself, you need to modify them to the system default parameters.
4. Material selection: If 20W Fiber Laser Module is used, only titanium plate-like materials can be processed; if 60W MOPA Laser Module is used, color engraving can be performed on stainless steel and titanium plates; materials such as aluminum plates and copper cannot be processed.
5. Before color engraving, use a power level of 25% or higher and warm up the machine for 10 minutes for more accurate colors.
6. Place the engraving area in the center for better results.
7. Wipe with alcohol before and after coloring for better engraving results.
8. If color engraving fails to produce color, try fine-tuning the Z-axis up or down after focusing.
9. Focusing Instructions: Color engraving is highly sensitive to focus distance. Manually focus by inputting the processing height and pressing Enter to accurately focus on the material surface, avoiding errors from automatic focusing.
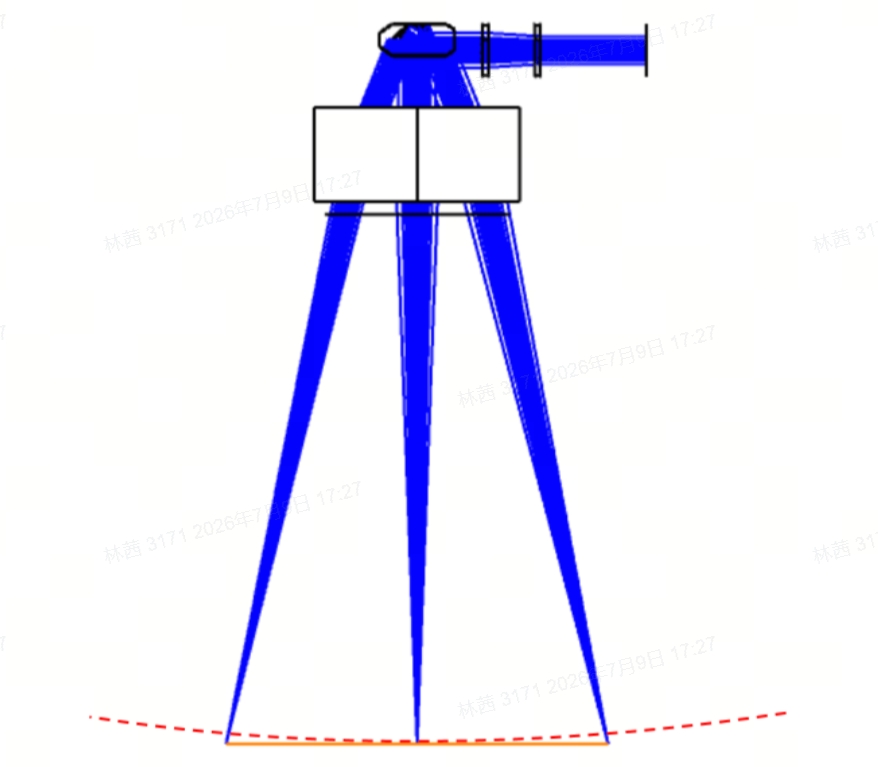
10. Precautions: Due to field curvature of the field lens's focal plane, it is recommended to engrave within 100mm of the center of the image. For peripheral areas, adjust the color by gradually lowering the Z-axis by 0.5mm, with the focus shift typically not exceeding 2mm.
¶ Maintenance of Colored Sculptures
After the color engraving is completed, please wipe the surface with varnish to accelerate the formation of a dense oxide film, which will make the color more vivid, deep and long-lasting;
Color-engraved titanium plates are corrosion-resistant but require protection against sharp scratches. Generally, no additional anti-rust agent spraying is needed after color engraving, as the oxide film itself provides a certain level of protection.
For long-term preservation of colored carved works, you can laminate them to prevent discoloration caused by prolonged oxidation from air.