¶ Laser engraving and cutting machine
¶ Equipment FAQ
¶ 1、Which laser modules can the machine be used with?
- CV-01 Pro 1.6w
- Falcon Laser (5w\7.5w\10w)
- Falcon Laser Pro 10w
- Falcon2 (12w\22w\40w)
- Falcon2 pro (1.6w\22w\40w)
- Falcon2 pro 60w(1.6w)
¶ 2、What is the working area of the machine?
- CV-01 Pro:170*200mm
- Falcon Laser:400*415mm
- Falcon Laser Pro 10w:400*415mm
- Falcon2:400*415mm
- Falcon2 pro:400*415mm
- Falcon2 pro 60w:400*400mm
¶ 3、Which materials are suitable for Blue Light 455nm?
Suitable for paper, wood, bamboo, plywood, leather, fabric, acrylic, plastic, etc
¶ 4、blue light 455nm suitable for choosing which acrylic to make?
- Mirror acrylic selection: black, purple, red, orange, green
- Transparent acrylic options: red, yellow, green
- Frosted acrylic options: Black, orange, green, purple
¶ 5、How often and how to clean the laser module?
When the LENS light turns red during use, the laser module needs to be cleaned. The cleaning tutorial is linked below
https://www.youtube.com/watch?v=TLa7eLiKvkI&list=PLW9O3eZmo5E0t4dIL9EK1NQ6LlqroyJP8&index=7
¶ 6、How to clean air assist?
View the video tutorial:https://www.youtube.com/watch?v=PbnSHNWIT58&list=PLW9O3eZmo5E0t4dIL9EK1NQ6LlqroyJP8&index=11
¶ 7、What can I do if the laser module cannot be inserted into the slot?
First, power off the machine, check whether the pins in the slot are bent and deformed, and adjust them. Unable to handle please contact customer service
¶ 8、How to deal with the laser when the machine is turned on?
If the machine is powered off, check whether the pins in the slot are bent and deformed, and adjust them. Unable to handle please contact customer service
¶ 9、What if the machine doesn't start?
- Check that the power plug at the end of the machine is properly inserted
- Check whether the power socket is powered on
- Check whether the power switch, emergency stop switch and child lock on the machine are open
¶ 10、What happens when the power goes out while the machine is working?
When the engraving task is powered off, the laser head will stay in place. When powered on again, the machine initializes and does not continue to perform the original task.
¶ 11、Why is the pattern carved out different from the original effect (such as straight line, distorted distortion)?
Please check whether the machine screws are tightened and whether the belt is too loose or too tight.
Judgment method: When the laser module can slide slowly on the X-axis profile perpendicular to the desktop under the action of gravity, and any pulley in the laser head assembly does not slip, the tightness of the belt is appropriate, otherwise please manually adjust the tightness of the belt.
¶ 12、Is the work platform damaged during laser engraving?
During engraving or cutting, the laser may penetrate the object and leave traces on the work platform. Be sure to pad the laser impenetrable object below the engraving object, such as: stainless steel plate, aluminum alloy plate, etc.
¶ 13、When the machine is working, the buzzer suddenly makes a "drop" sound, and then stops working. How to deal with it?
The machine is equipped with four limit switches, and when working, if the laser module exceeds the engraving format of the machine, the buzzer will "drop" and stop the current work. Adjust the position of the laser module and check the size of the figure.
¶ 14、What if the buzzer makes a rapid alarm sound?
When offline engraving, in preview mode and engraving mode, if the machine is abnormal or moves, the machine will turn off the laser, the motor will stop moving, the indicator light will blink, and the buzzer will make a rapid sound for alarm. Please restore the machine to the original position and press the Frame or start pause button on the machine control panel to continue the preview or engraving.
¶ 15、Do I have to wear goggles when the machine is working?
The machine adopts the design scheme of shading and eye protection, and integrates the MEMS attitude sensor, and the abnormal rollover will stop during the working process. Even so, we still recommend wearing safety goggles at work.
¶ 16、How does loose synchro tape affect engraving or cutting?
Carved figures will be deformed, obviously misaligned: such as a perfect circle into an oval.
¶ Operation common problems
¶ 1、Rotary chuck test using tutorial
Check out the video tutorial wiki link
¶ 2、Rotary drum use tutorial
Check out the video tutorial wiki link
¶ 3、Camera alignment tutorial
Check out Camera calibration guide | Creality Wiki
¶ 4、Where to view the files in TF card?
See the wiki link to download
¶ 5、Want to know some material recommended engraving, cutting parameters?
- Parameters are automatically recommended after material selection using self-developed software Falcon Design Space
- View in wiki
- TF card file view
¶ 6、After camera calibration, the actual engraving position is different from the photo position
- Recalibration is required when material thickness changes greatly
- After calibration, the camera needs to fine-tune the x and y coordinates to make the engraving position coincide with the photo position
¶ 7、How to deal with the material that does not cut through?
- Make sure the protective lens of the laser module is clean
- Use a focus bar to determine accurate focal length.
- Make sure the machine and the engraving material are parallel to the work surface
- Gradually increase the number of cuts, or appropriately reduce the cutting speed
- Reduce the focal length for cutting
- When the material is too thick, it is limited by power performance and cannot be cut
¶ 8, The same material after a period of time after the cutting performance becomes worse how to deal with?
- Check the focal length is accurate
- Check lens for dirt and clean lens
- If it is plywood, the different thickness of the glue in the middle of the material will also affect the cutting performance
¶ 9、How to determine focal length without a focus bar?
Use 3mm, 5mm, 7mm objects instead of multi-stage focus strips
¶ 10、How to use multistage focus bar to confirm focal length?
Use the multi-stage focus bar, place on the material, and put the bottom of the laser module on the multi-stage focus bar, and finally use the right hand screw to lock it
|
|
¶ 11、What is used to clean honeycomb panels?
Use a kitchen cleaner to remove tar from the honeycomb
¶ 12、Engraving effect edge color dark?
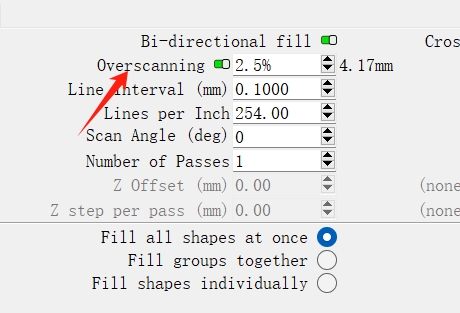
Enable the scan function in the software, and try to change the scan value such as: 5%

13, when offline engraving, why can't you start engraving after you press the button on the control box?
Make sure that the engraving file is stored in the root directory of the TF card and that the TF card is inserted. Attention:
1、the machine default read TF card root directory, suffix gcode engraving file, only keep a gcode file in the root directory.
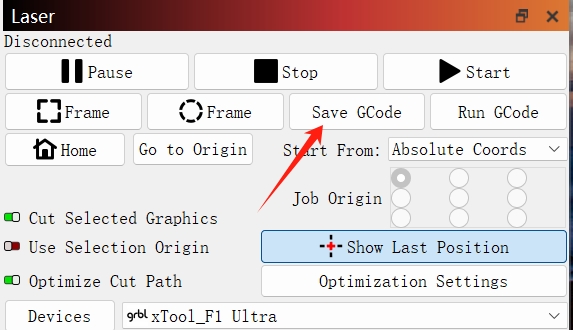
2、The file is generated by the software. After drawing the graph in the software, select the absolute coordinates and save the gocde file to the tf card.

¶ 14, Why is the pattern completely carved (or carved very shallow)?
The imported picture should be clear, the color should not be too light; Ensure that the focus is normal before engraving, and the power, speed, and frequency are set appropriately.
¶ 15, Pattern engraving is incomplete (or inconsistent) how to do?
Make sure that the object to be carved is flat, observe the level on the machine to ensure that the machine is horizontal and has been properly focused according to the user manual.
¶ 16. Can you carve on curved material?
Yes, but the curvature of the material and the carved graphic area are not easy to be too large, otherwise there will be slight deformation.
¶ 17. Can you carve on reflective/transparent materials such as ceramic/glass?
Yes, but before carving, it is necessary to coat the surface of the material with anti-reflective material to ensure the engraving effect and prevent the reflected light from damaging the laser module.
¶ 18, why the same material, but different colors of materials using the same G-Code file processing effect will have a relatively big difference?
Different colors of materials will have different optical properties, the absorption and reflection of laser energy are different. It is recommended to set different power and speed in the software when engraving materials of the same material and different colors.
¶ 19, there is a lot of smoke on the material after cutting, how to deal with it?
Please reduce the laser power appropriately, increase the speed, and use an air assist kit.
¶ 20. Should air assist be used?
The main role of air assistance:
- Effectively blow away the dust generated in the cutting process, protect the laser module lens, and ensure the stability of laser energy;
- Quickly reduce the surface temperature of the cutting material, blow away the high temperature dust, keep the surface of the material clean, so that the cutting edge is more smooth and more delicate.
- It is recommended to open a weak airflow when carving and a larger airflow when cutting (the effect depends on the specific material).
¶ Common software problems
¶ 1, CR-Laser Falcon Laser engraving machine support what software?
Third party software: LaserGRBL (free - live, LightBurn (paid) - Live/offline 30-day trial
Self-developed software: Falcon Design Space (free)
Real-time engraving pay attention to the computer do not get stuck, can not enter the standby state (do not lock the screen), so as not to affect the engraving.
¶ 2, the machine connected to the computer can not identify how to deal with?
- Win7 systems require drivers to be installed, check out the Tutorial win7 Driver Installation Guide at | Creality Wiki
- Use a communication cable instead of a charging cable
- Computers without USB-a ports, using a hub USB-a to USB-c connection
- Ensure that the COM port is not occupied by other software connections
¶ 3. How to handle the issue of devices not being able to connect to software on a Mac?
On a Mac with all C-type ports, a Type-C to Type-A adapter is needed for connection.

The connection method is shown in the diagram below:


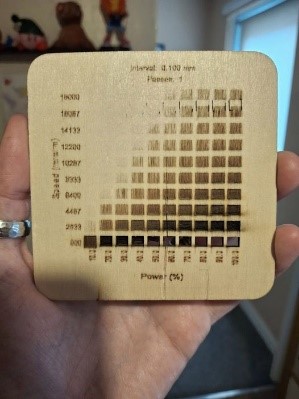
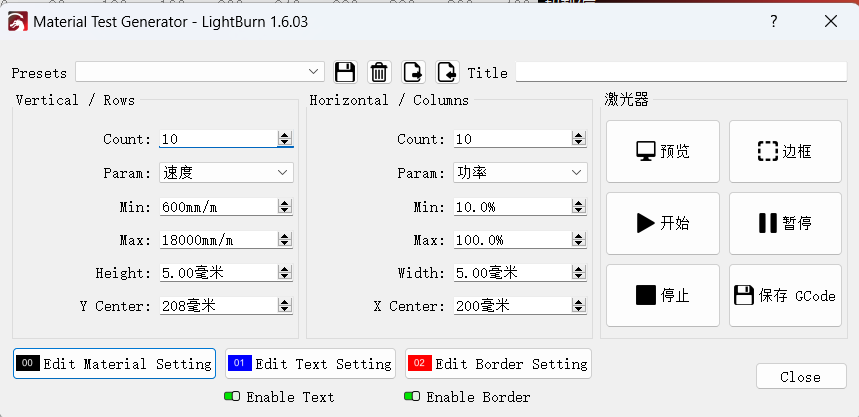
¶ 4. How to conduct material testing and where to set it in the software?
Open Lightburn->Laser Tools->Material Test according to the path, and test according to the requirements


¶ 5. where to check the firmware version of the machine?
After the machine is turned on, the version information can be seen in the console in the software; If not, try restarting the machine
¶ 6. Which image formats does the software support?
- LaserGRBL(bmp/png/jpg/gif/svg)
- LightBurn(bmp/png/jpg/jpeg/gif/tif/tiff/tga/ai/pdf/sc/dxf/hpgl/plt/rd/svg)
- Falcon Design Space(bmp/jpg/jpeg/png/svg/dxf)
¶ Laser module indicator FAQ
¶ 1.AIR indicator light
Steady green: indicates the air auxiliary flow, as described below
- After the machine starts normally, the AIR green light keeps on
- The AIR green light is long on during machine cutting mode operation

Orange long on: indicates a small air flow assisted by air, as described below
- The AIR orange light will light up when the machine moves the frame
- The AIR orange light is long bright when the machine engraving mode is working
- The machine side regulating valve regulates the AIR flow when the air orange light is long bright

Blinking red: There is no air flow
- If the machine does not work, the AIR red light blinks after 30 seconds of standby
- Abnormal air pump connection, silicone gas pipe is not connected or bent. At this time, the air pump and silicone gas pipe should be checked

3.When the control valve on the side of the machine is closed, the AIR red light flashes

FIRE indicator light
Steady green: No flame is detected, as described in the following table
- After the machine starts normally, the green light of FIRE will keep on

Blinking red: indicates that a flame is detected and the machine stops working. The situation is described as follows
- Slowly cut flammable objects (such as cardboard, paulownia, etc.), when the flame is detected, the FIRE of the laser module will flash red and stop working; At this time, move the laser module away from the flame, press the reset button to clear the current alarm information, the FIRE becomes orange light, indicating that there is a risk of fire, press the Start button to continue working; After restarting the machine, the FIRE green light is steady on
¶ 三、LENS indicator light
Steady green: No dirt is detected, as described in the following table
After the machine starts normally, LENS will keep on green

Long orange light: indicates that the lens is slightly dirty, as described below
- If there is a slight dust attached to the LENS, the orange light will be on for a long time, and the machine can continue to work
Red light flashing: indicates that the lens is seriously polluted and the machine stops working. The situation is described as follows
- Machine sculpting reflective material triggers false alarms, flashing red lights. At this time, press the Reset button on the module and restart the machine, and the green light of LENS will be on for a long time
- Heavy dust on the LENS will cause the lens to blink red. At this time, clean the LENS of the laser module after the machine is powered off. After the machine is powered on, press the Reset button on the module, and the green light of LENS will be on for a long time
