¶ 1. Connect the printer
Connect the CFS and the printer, then power on it."
The method:
How does CFS configure K2 Plus?
¶ 2. Unlock
Unlock the clamps and open the CFS top cover.
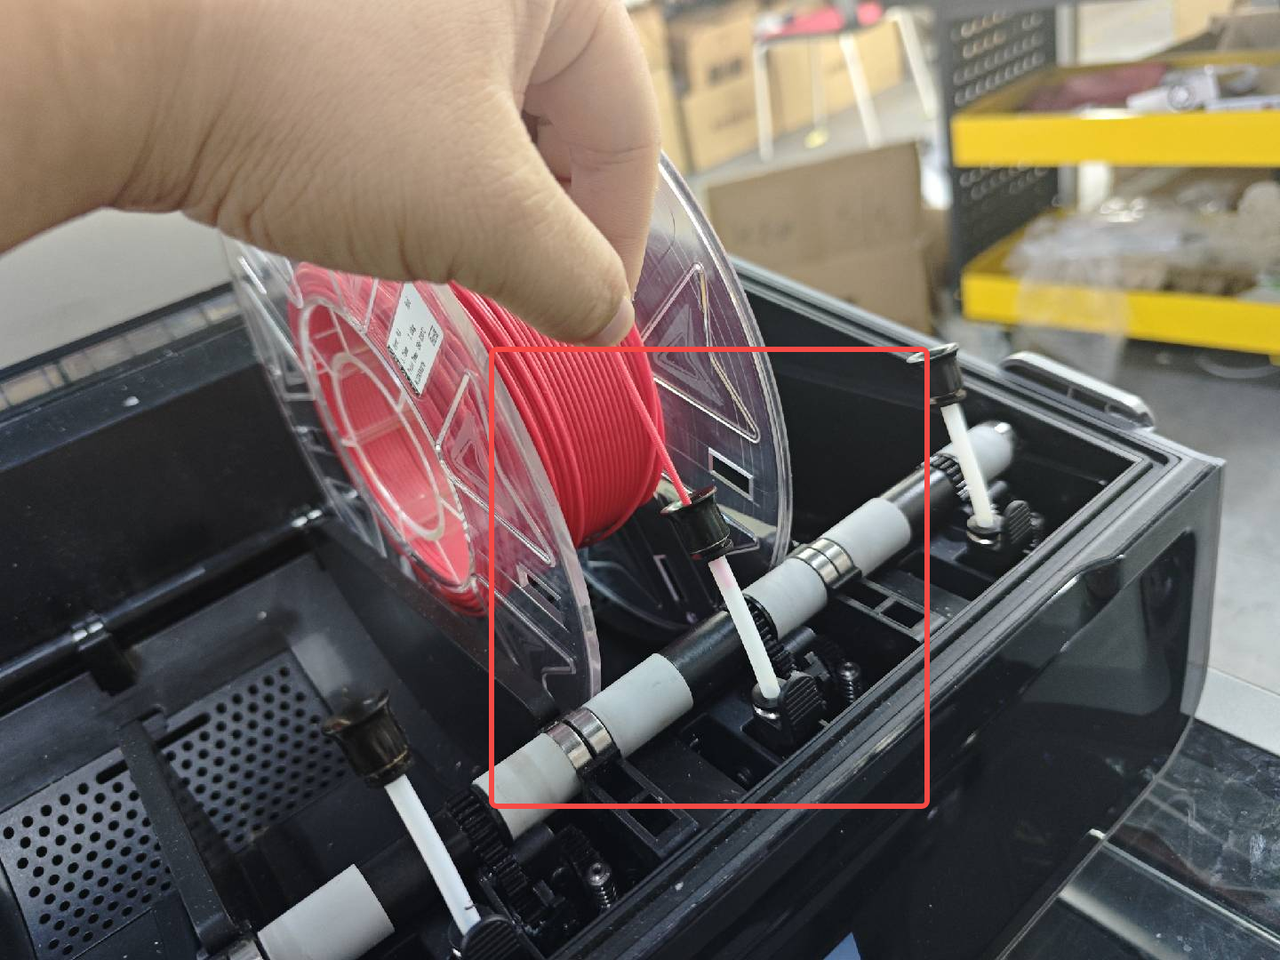
¶ 3. Insert the filament
Insert the filament into the CFS, put the filament head into the teflon tube of the corresponding slot, gently push it in. When you feel the pulling force, release your hand.
The CFS corresponding indicator lights up and starts to automatically load. The filaments are pulled in and drive the tray to rotate.
¶ 4. Edit Filament
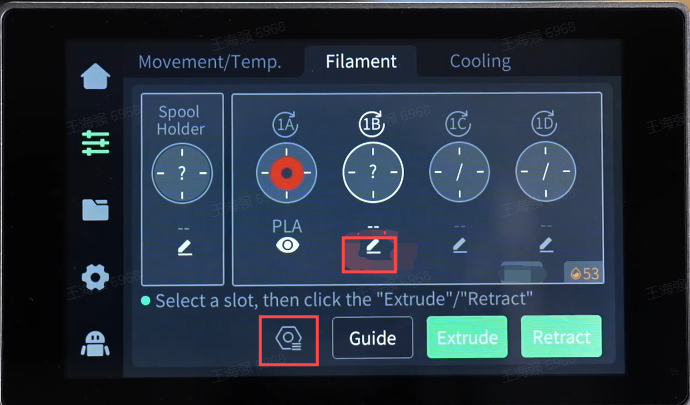
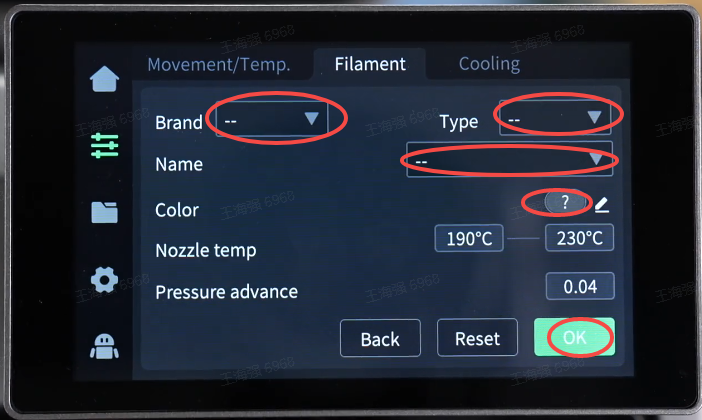
¶ 4.1 Use non-RFID filament
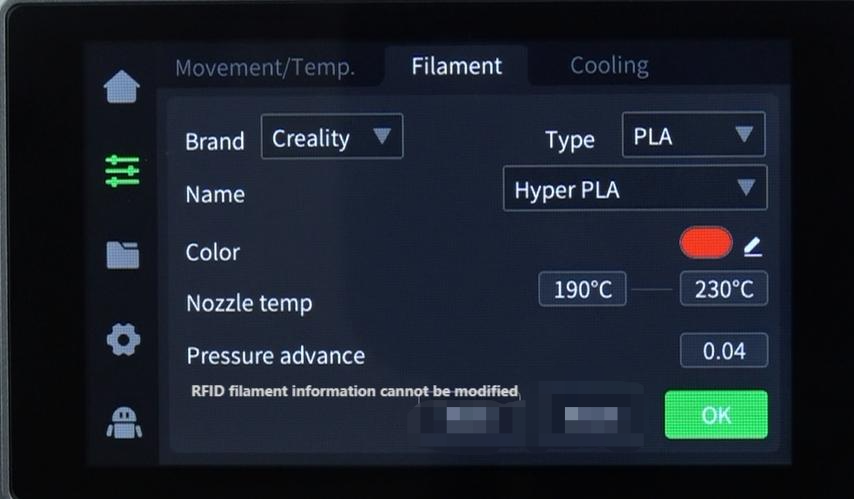
When inserting non-RFID filament, after the printer automatically tensioned reading, the interface will display "?" And the edit button is activated on the filament page, click the edit button of the corresponding bin, set the filament brand - filaments type - filament name respectively, and finally set the filament color, click "OK" to save.
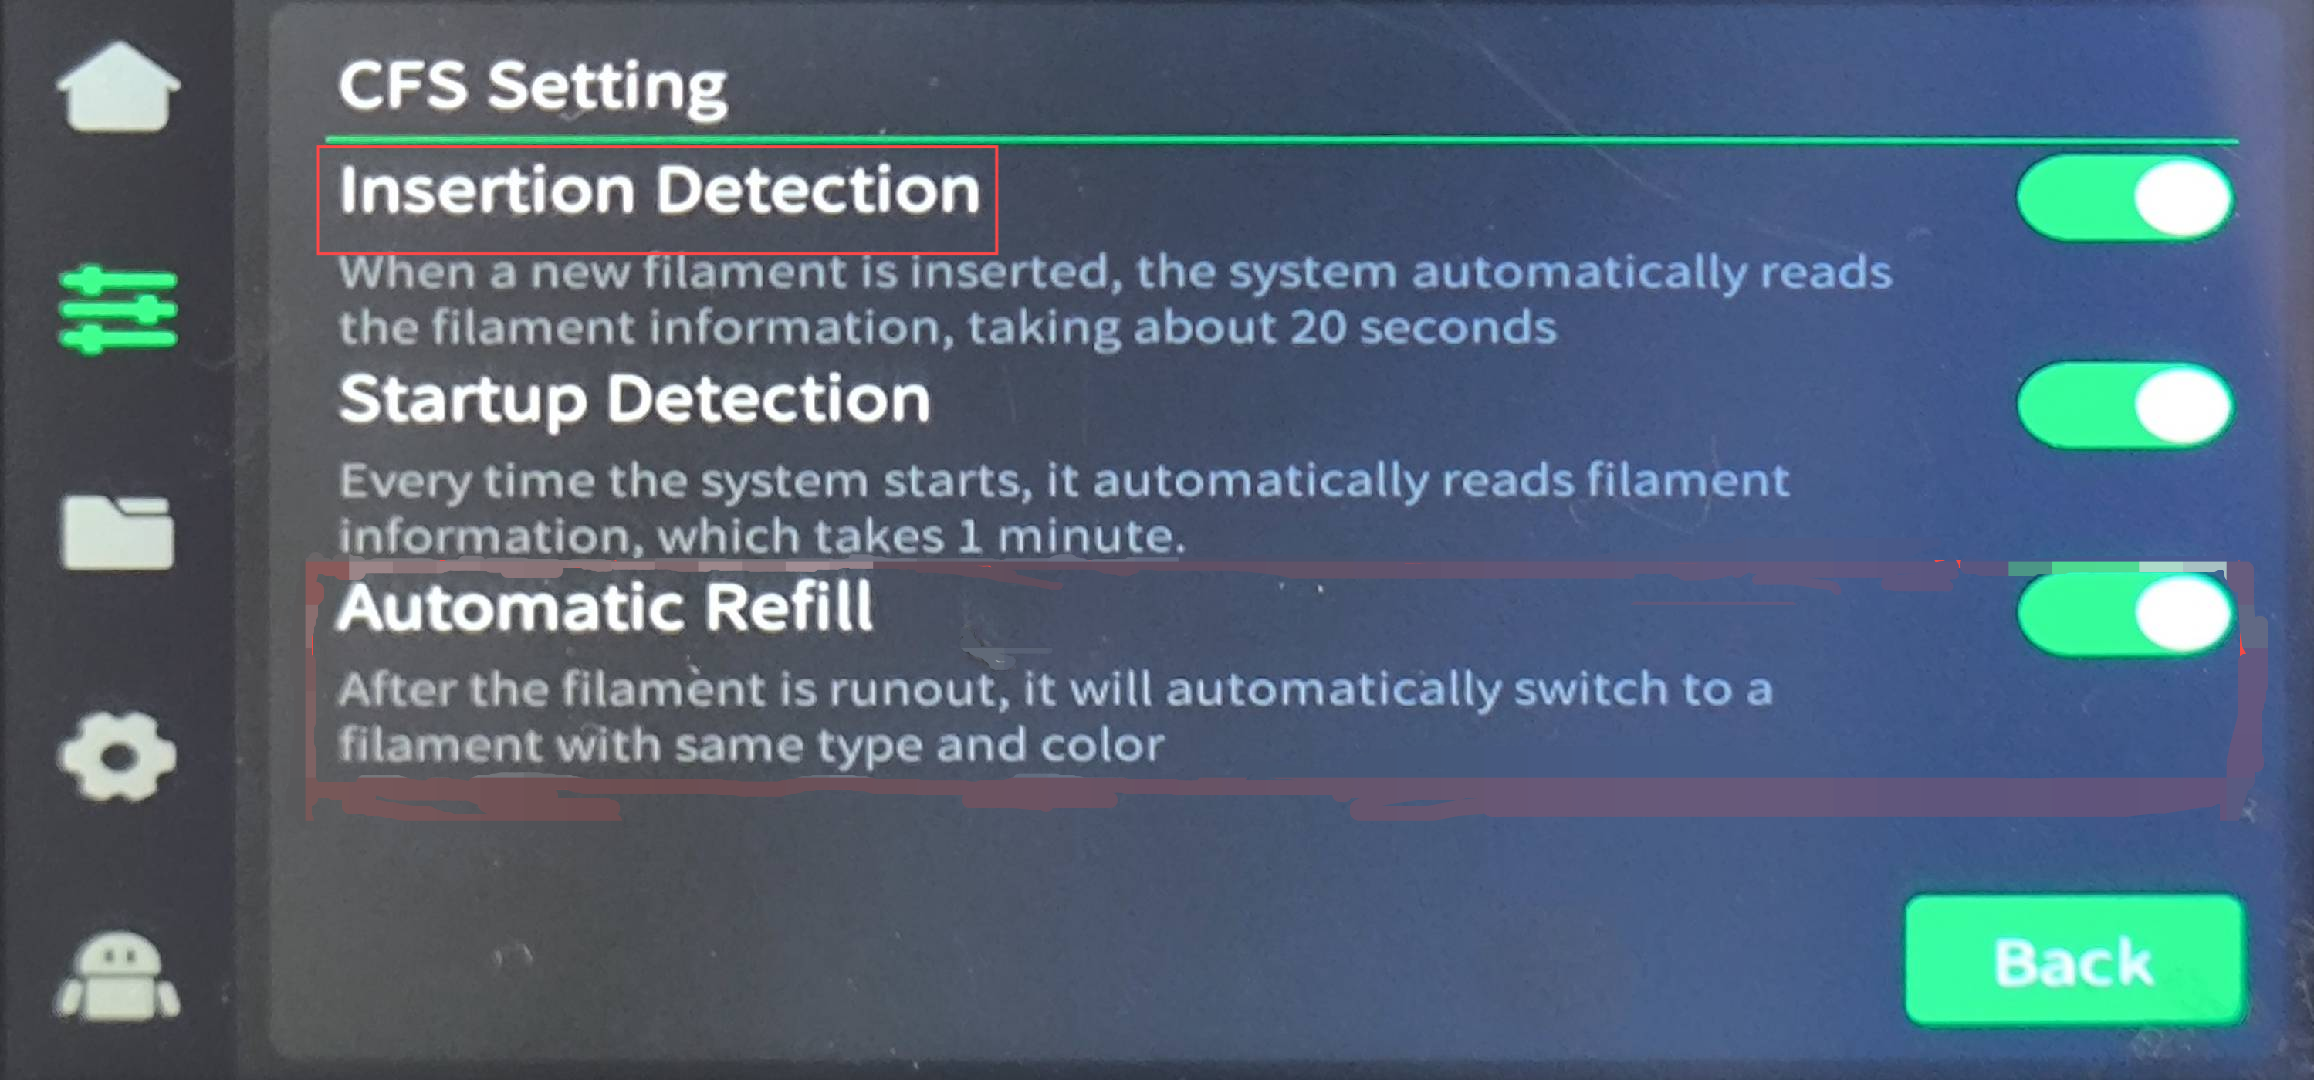
¶ 4.2 Use RFID filament
When the RFID filaments are inserted, the CFS will automatically read the filament information (the "Detect when inserted" option ensures that it is turned on), and there is no need to edit the filaments. At this time, the view button is below the filaments, and there is no edit button.
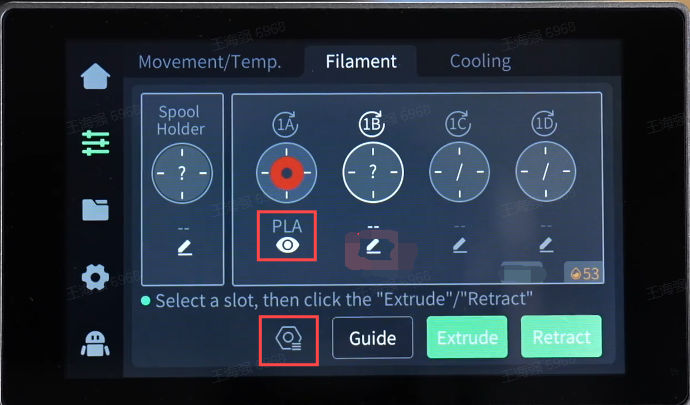
Click the view button below the filaments, cannot edit and modify.
¶ 5. Start to print
Put in all the required filaments as described above and start printing