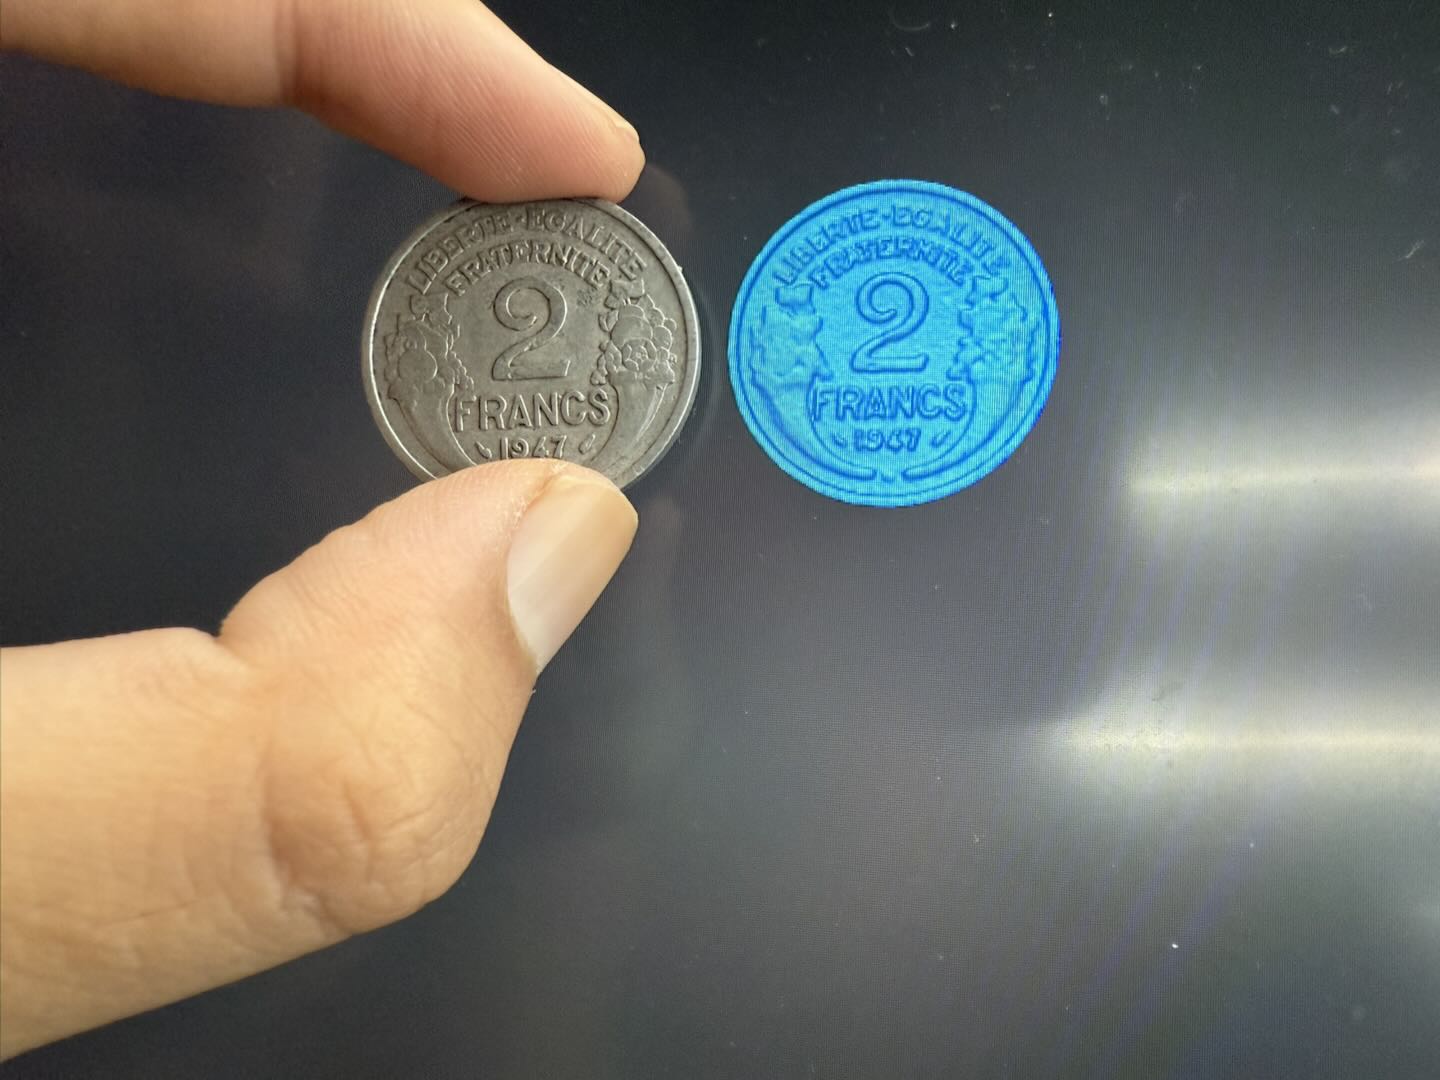
In 3D scanning, we often encounter objects with extremely fine surface details, such as coins. Because features like patterns and engravings on a coin are very small, if the scanning resolution is insufficient, the resulting point cloud can easily become distorted and fail to capture the true details.
So, how should we scan such fine objects?
¶ Complete Scanning Workflow
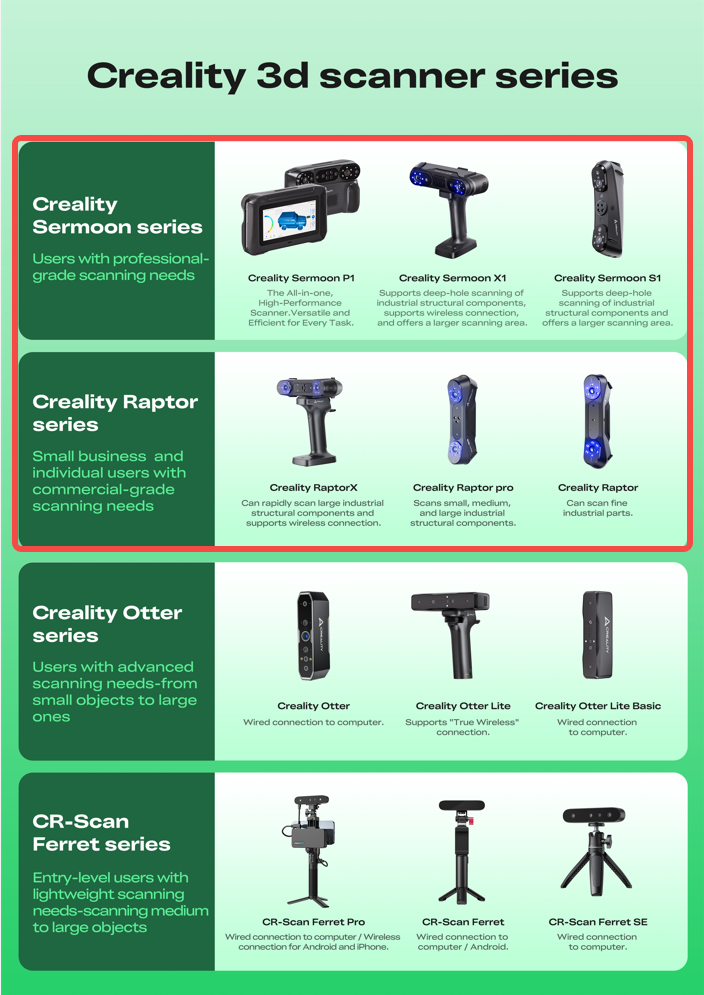
¶ 1. Choose the right scanner
Use a scanner that features blue 7‑line parallel laser mode. This mode supports smaller resolution settings, which helps capture finer details.
¶ 2. Observe the surface material of the object
Observe whether the object's surface is reflective. If it is, apply scanning spray before scanning – this will greatly improve the level of detail.
How to use scanning spray tips 🔗: https://wiki.creality.com/en/3d-scanner/tutorials/general/black
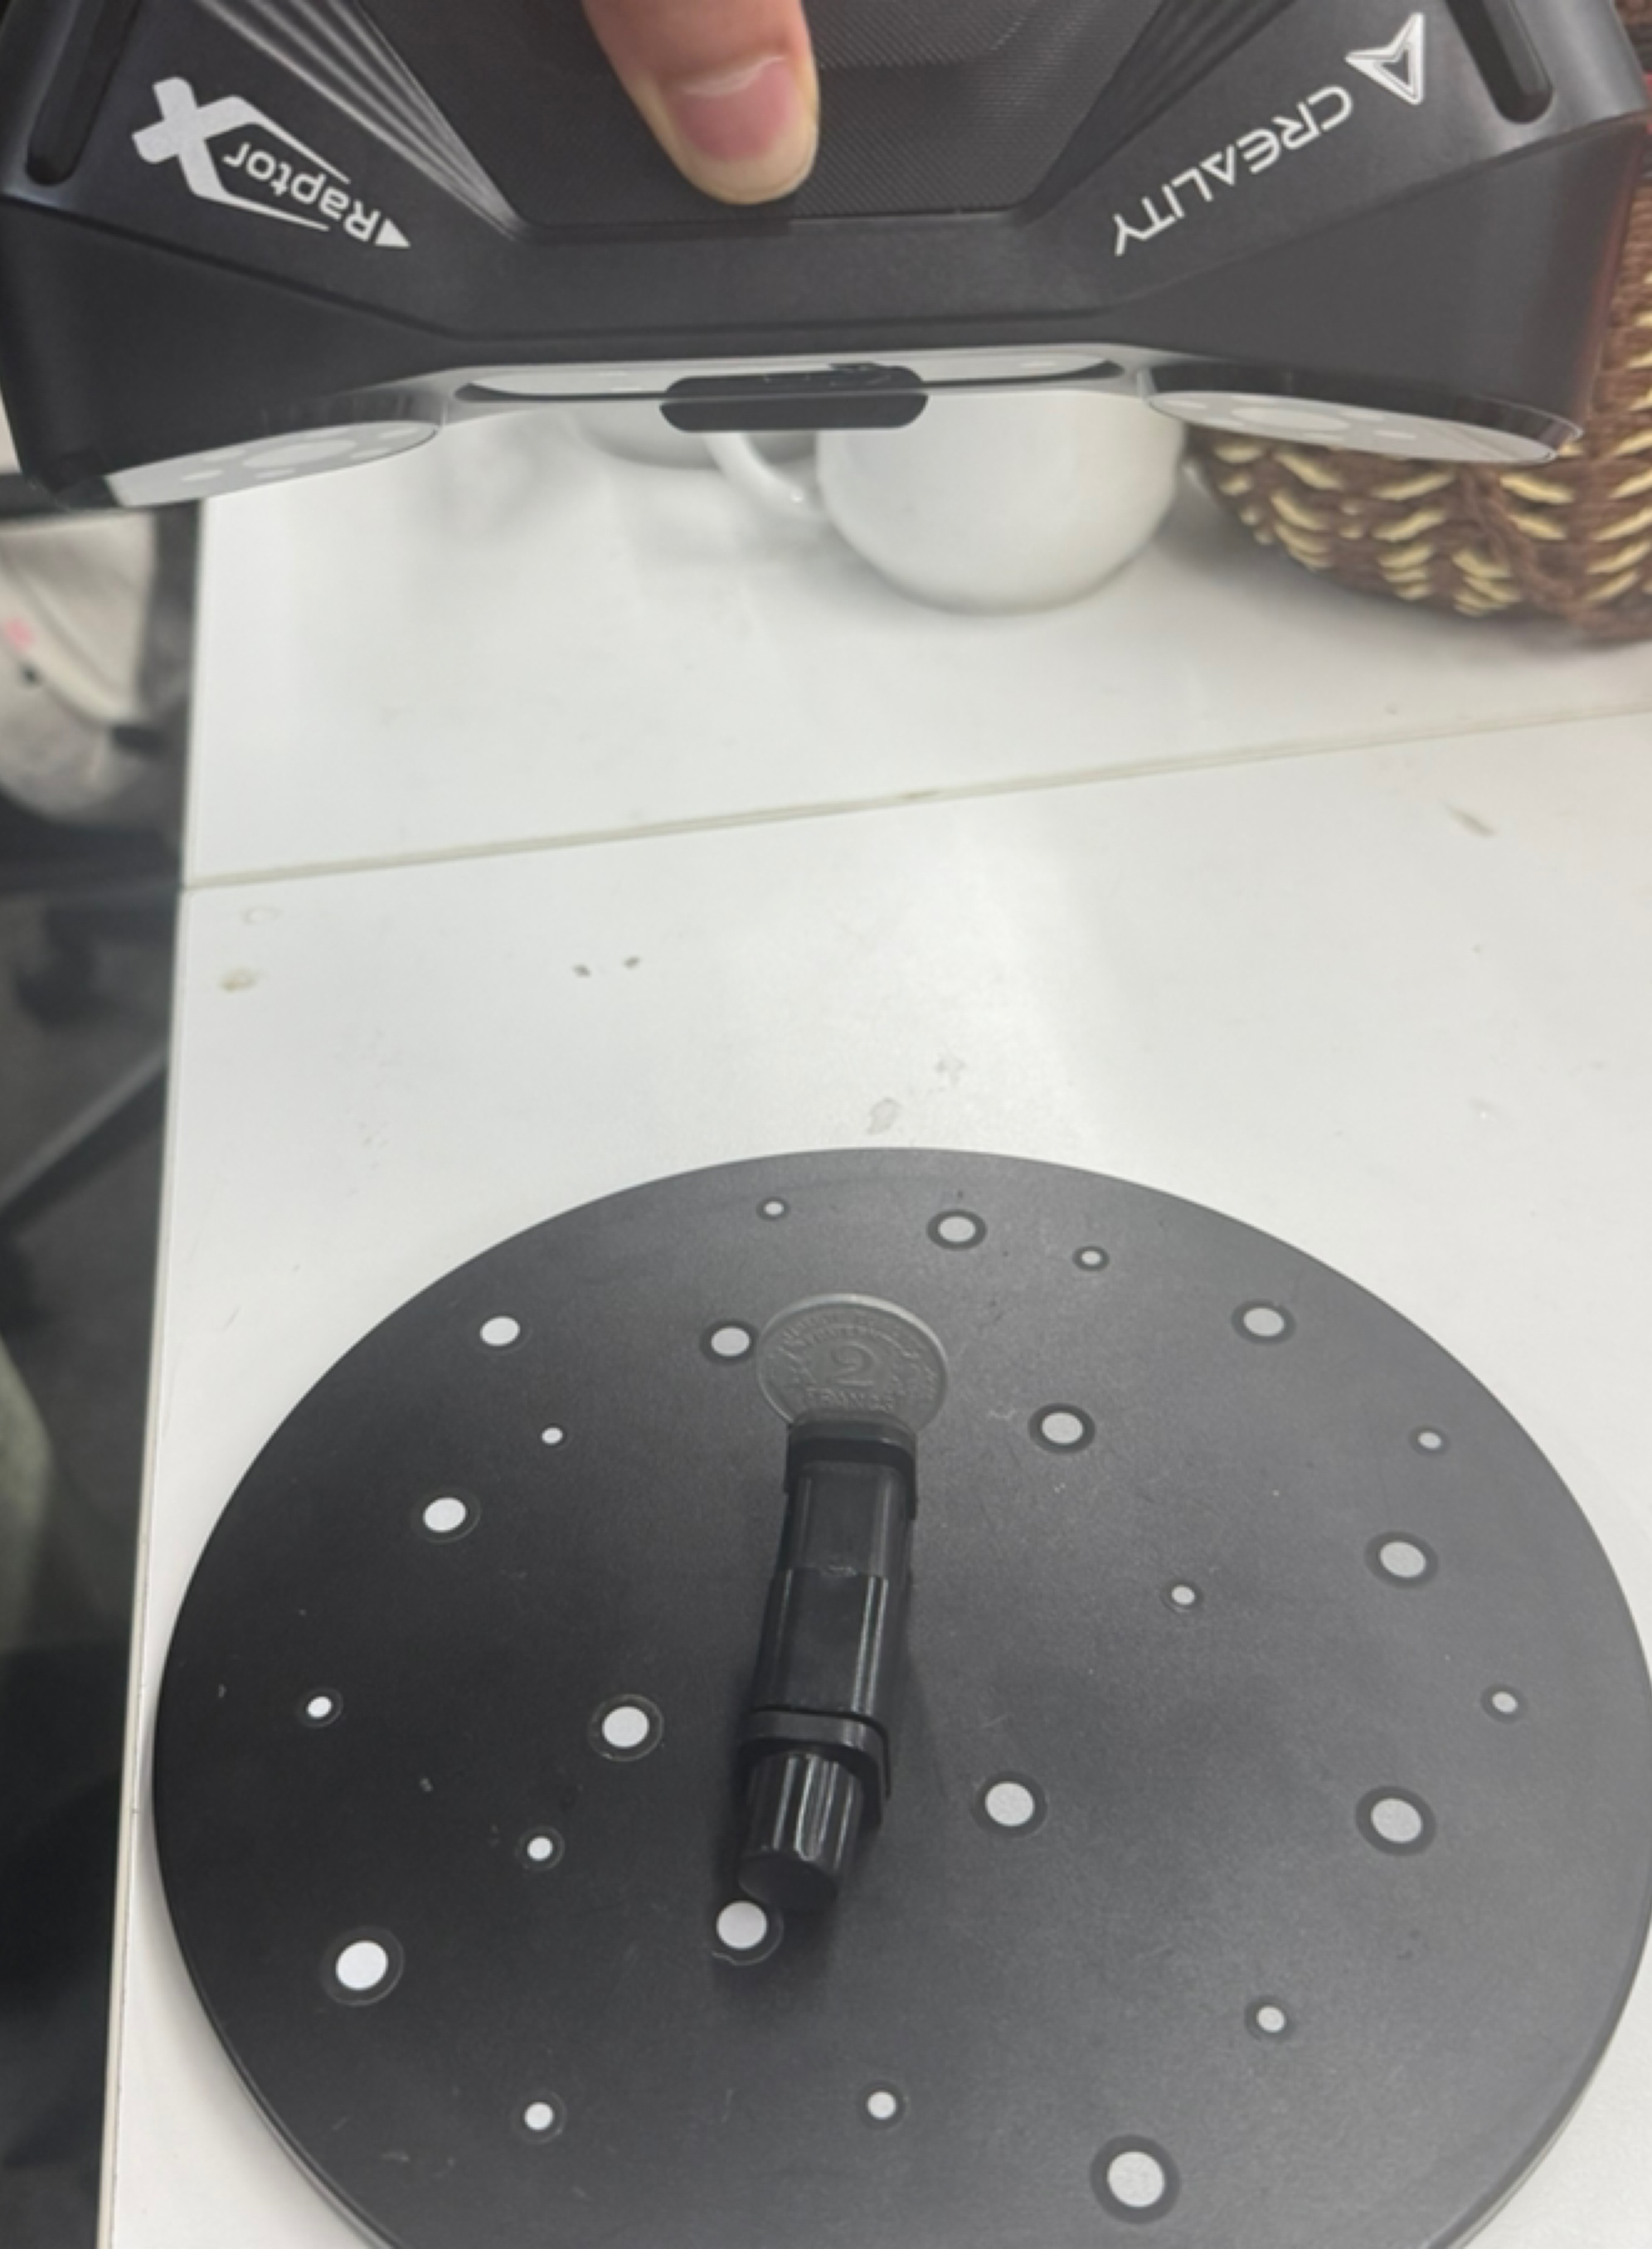
¶ 3. Preparation before scanning
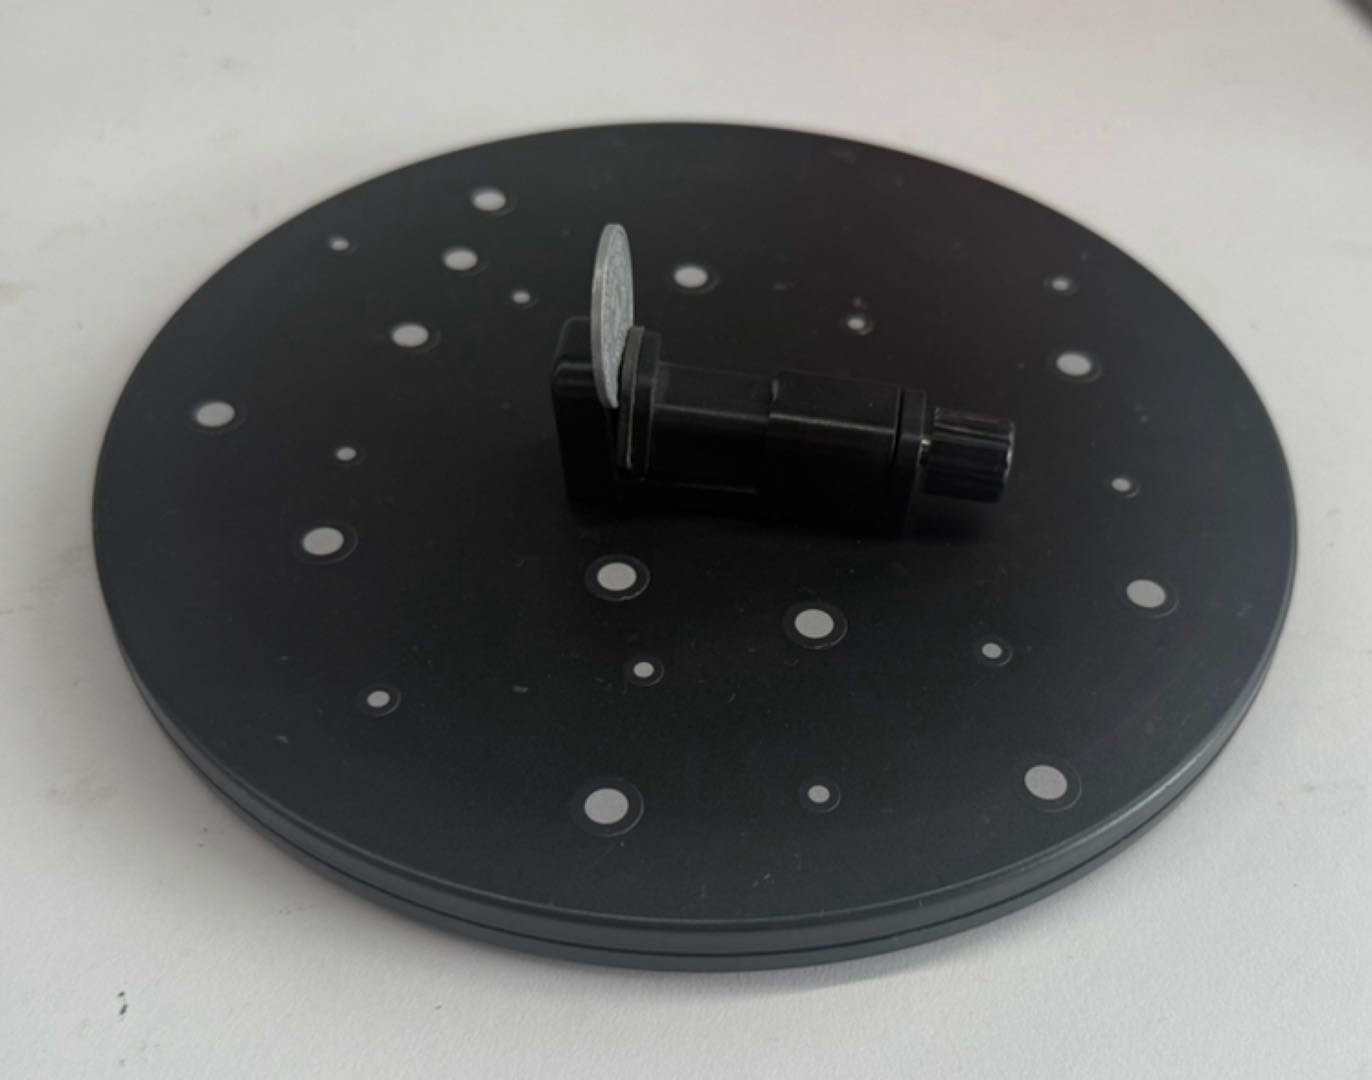
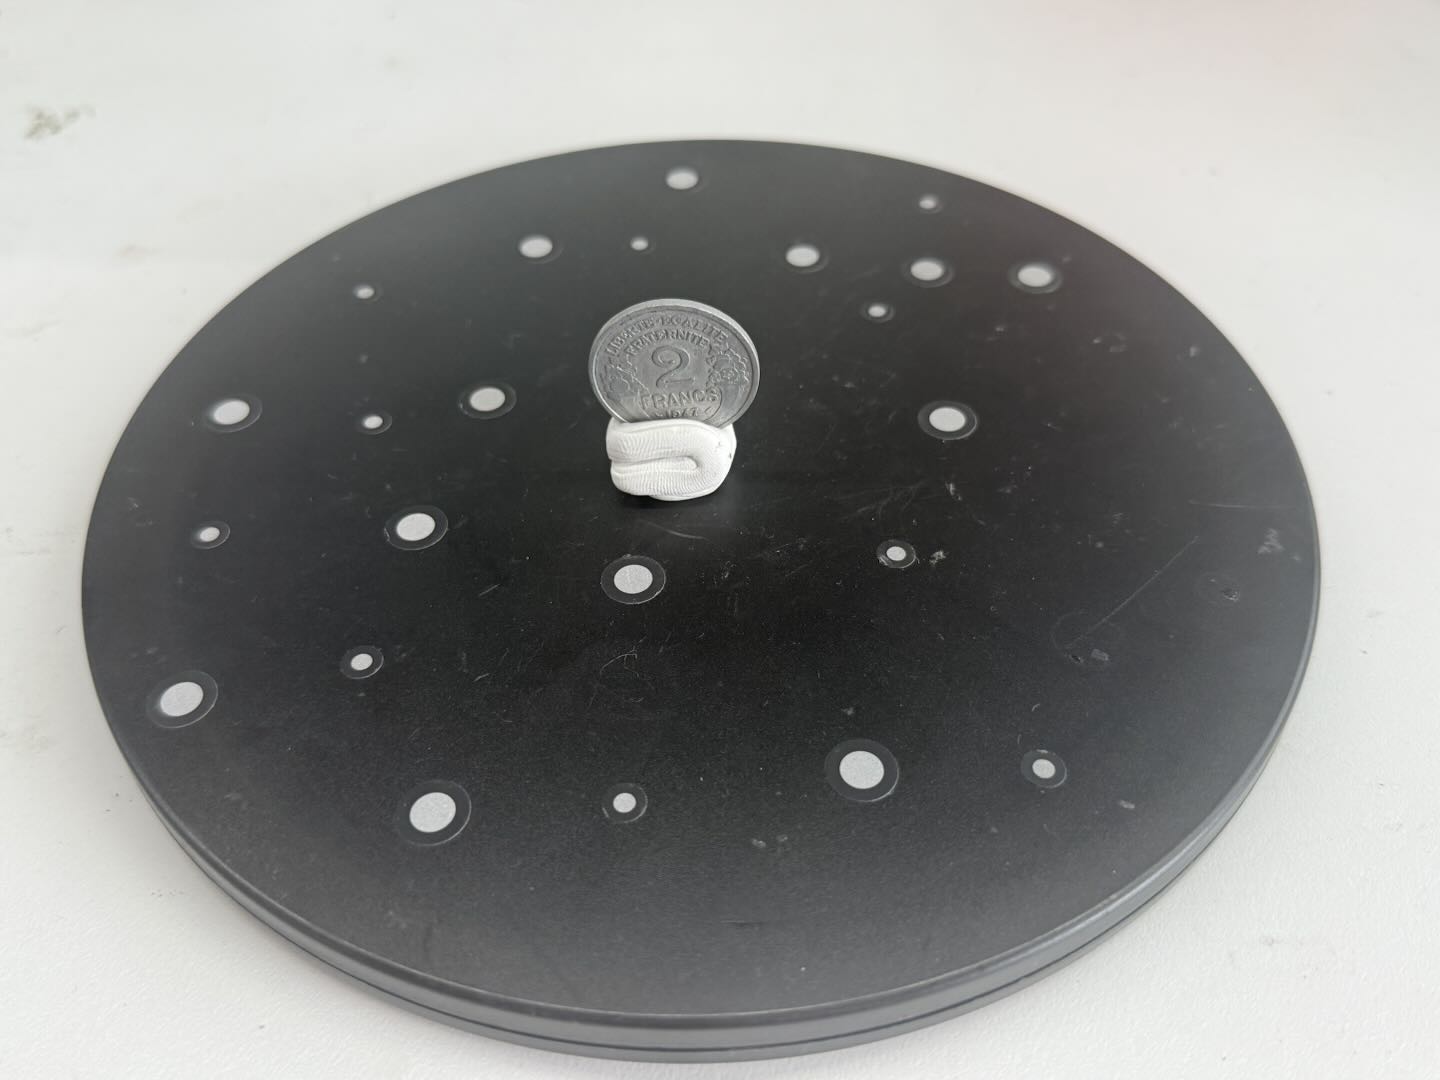
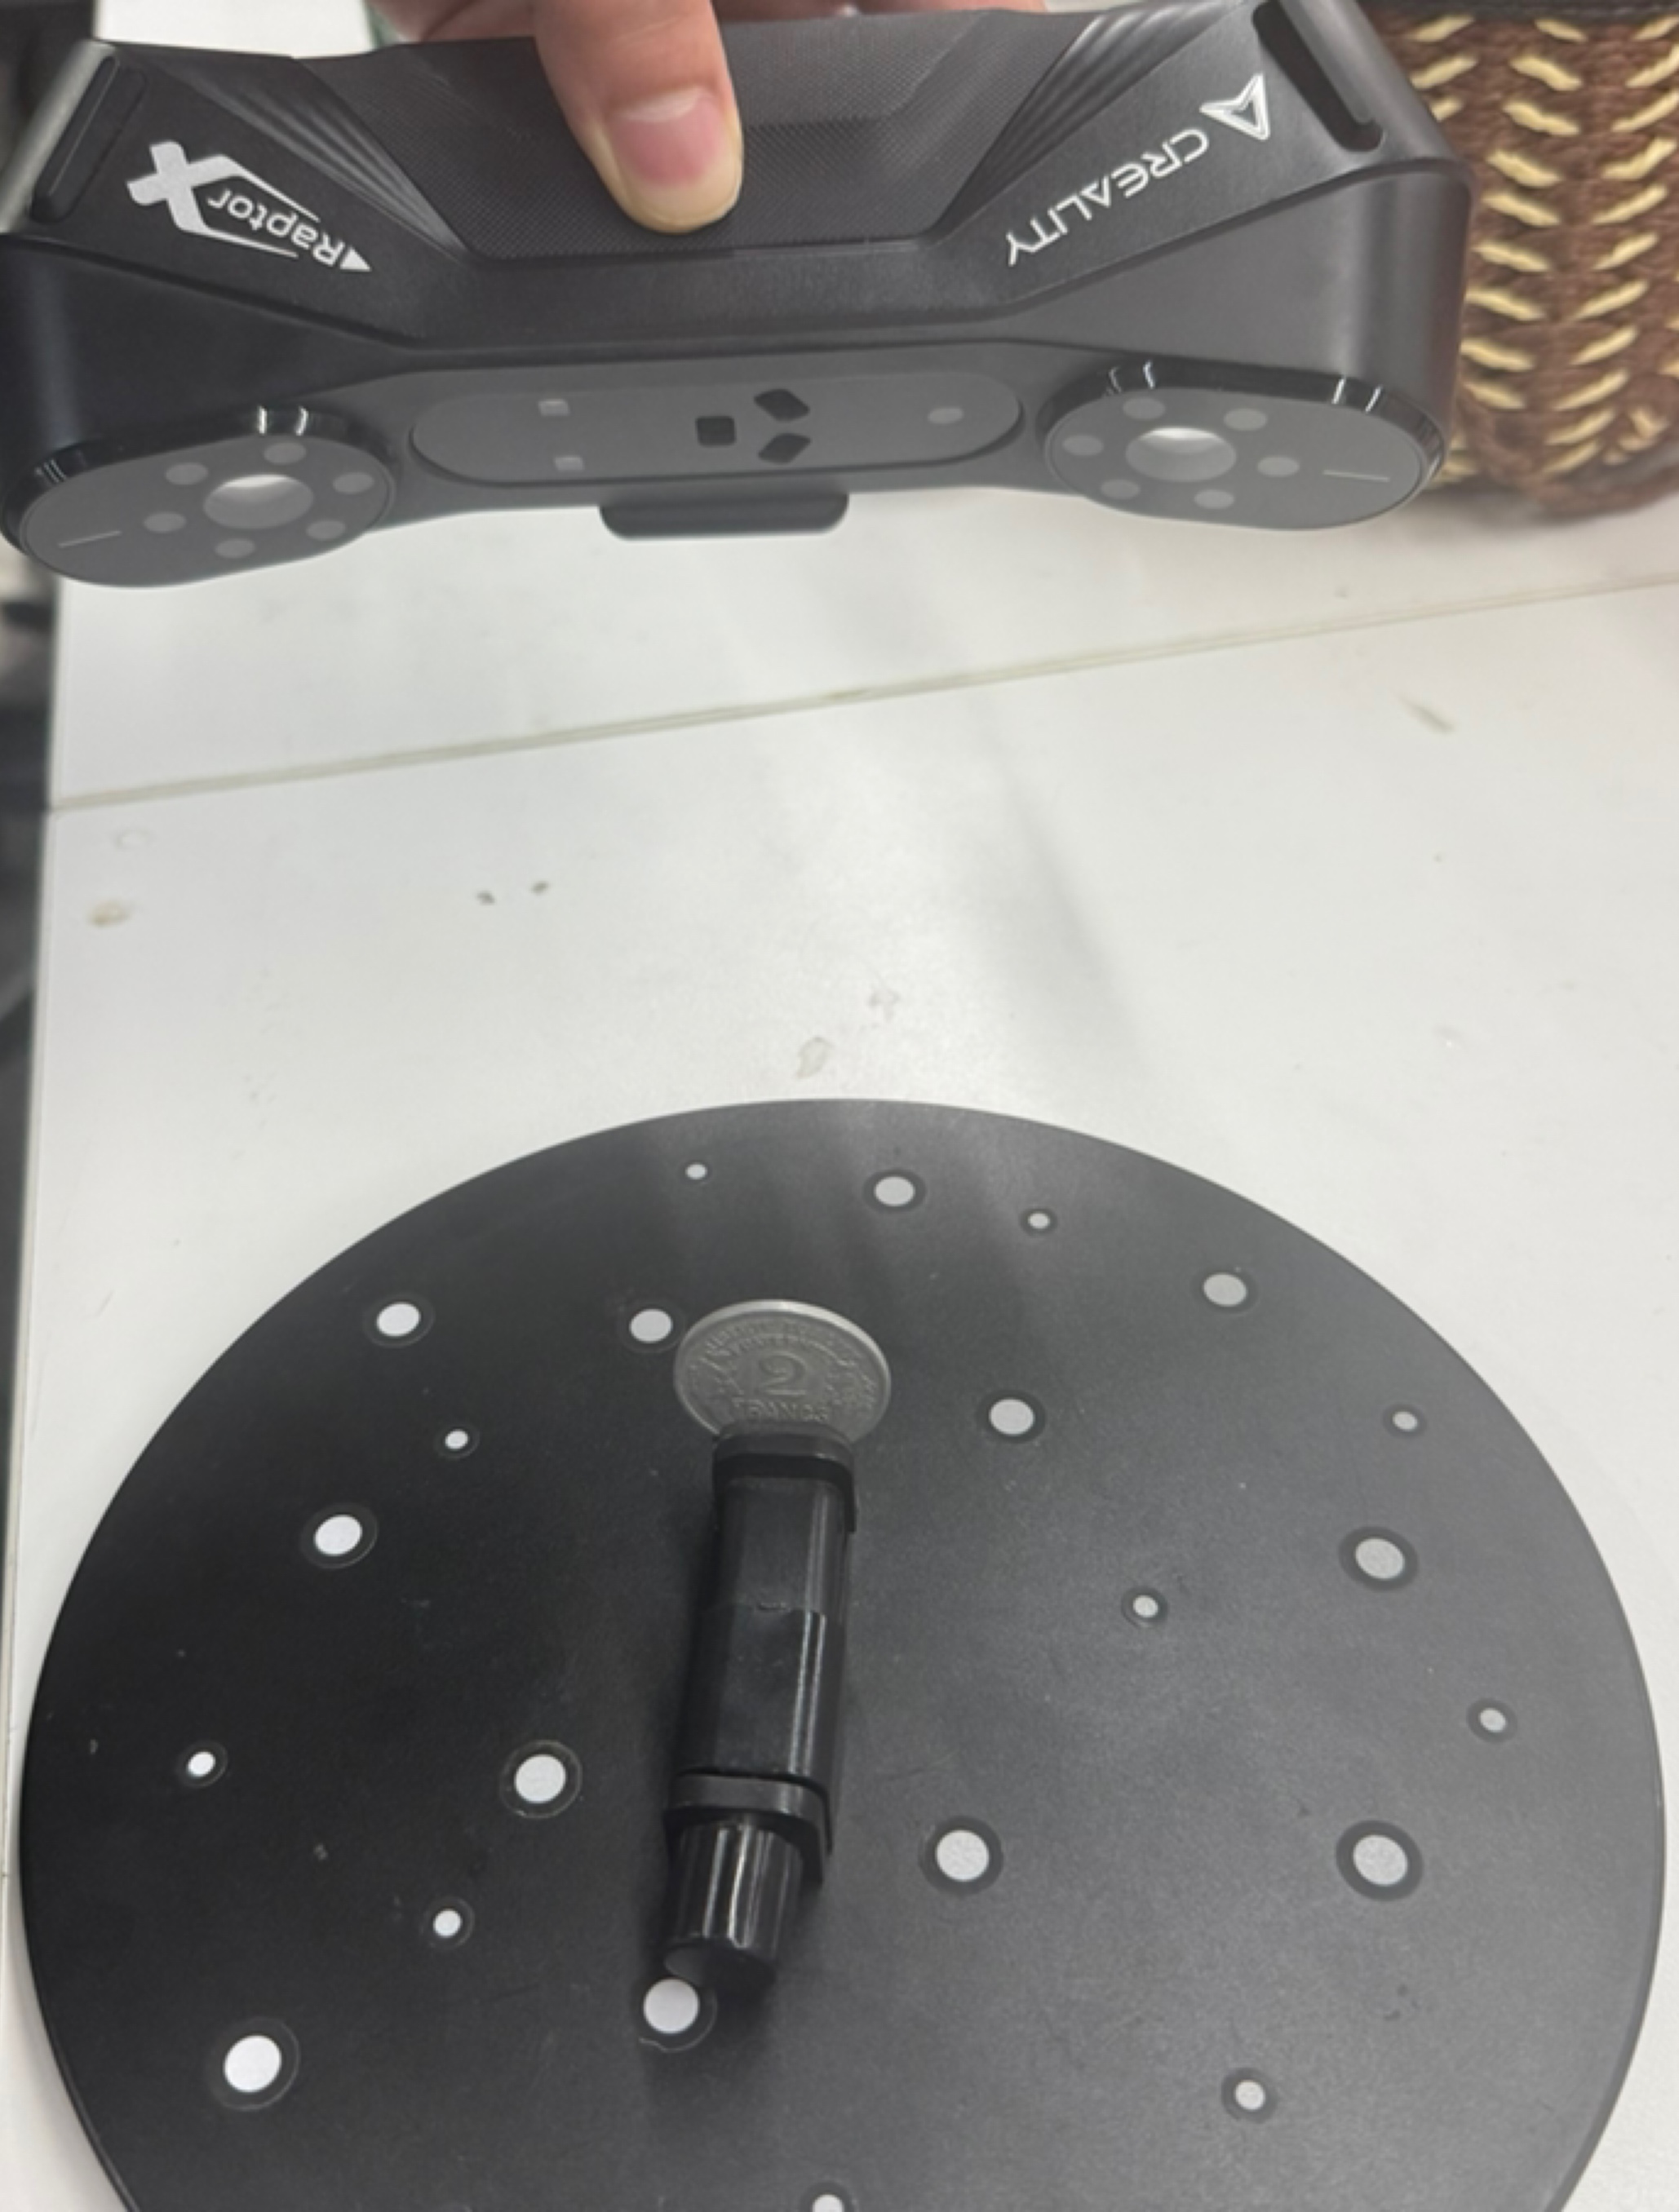
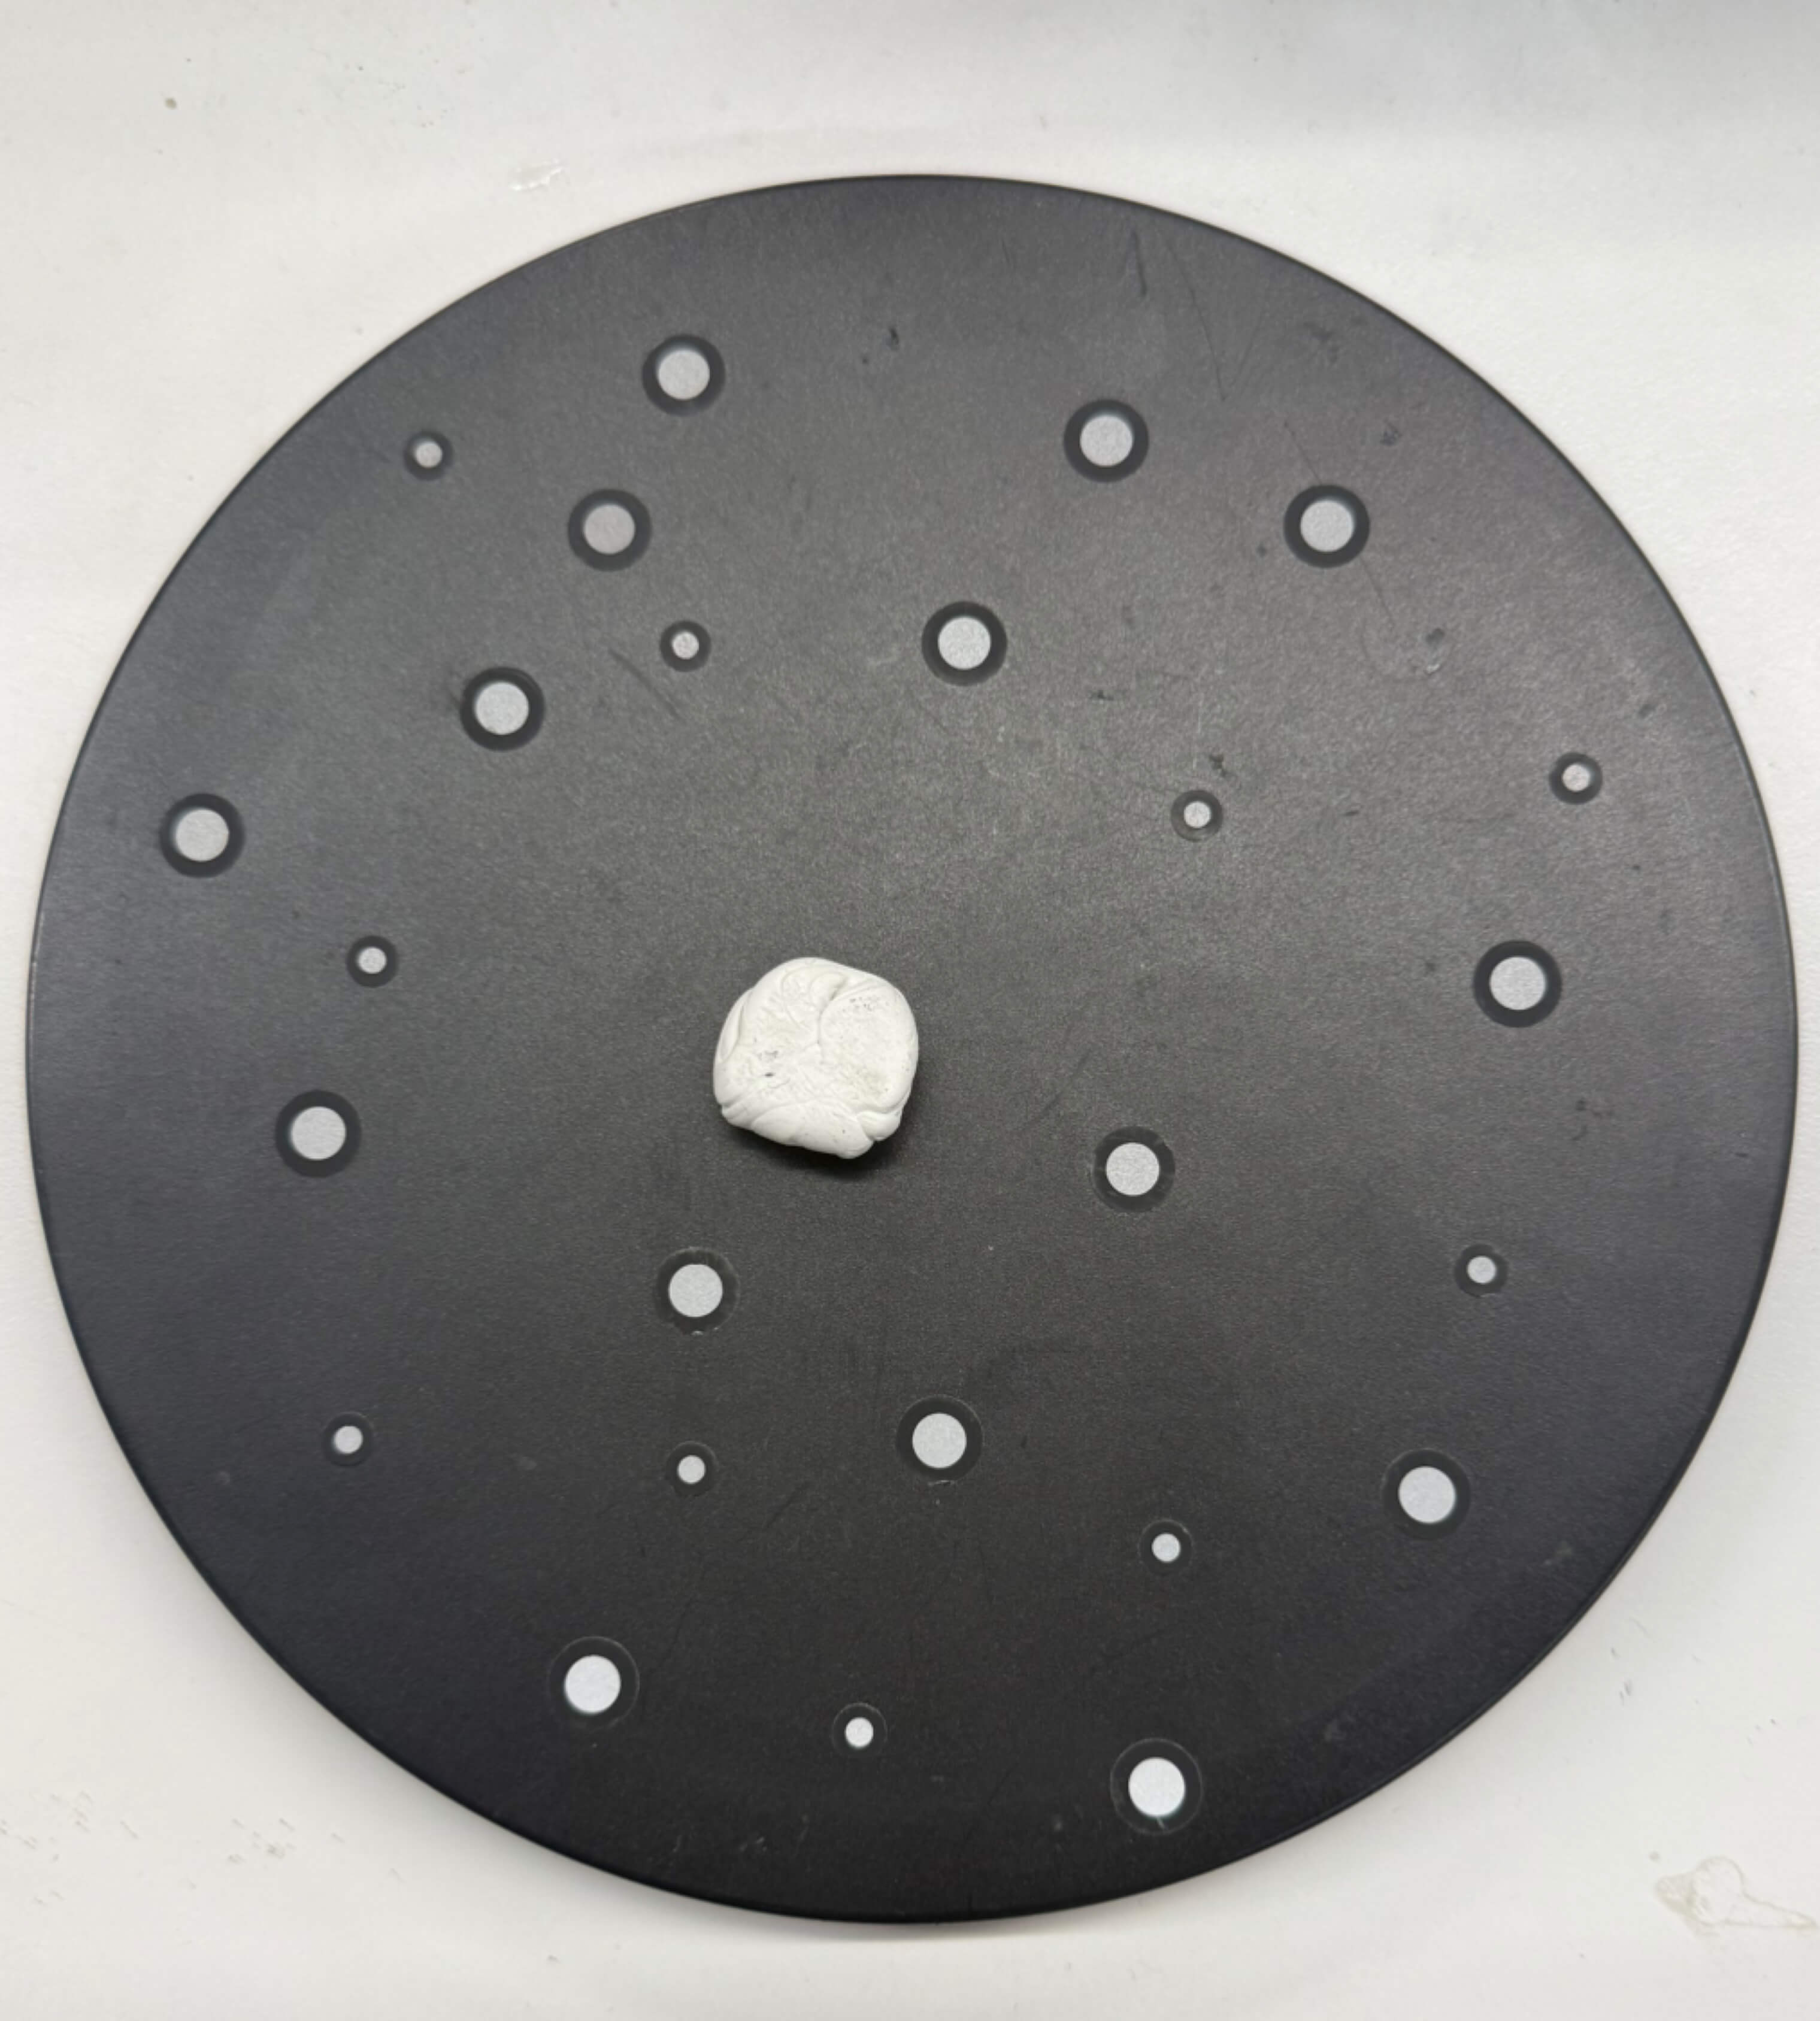
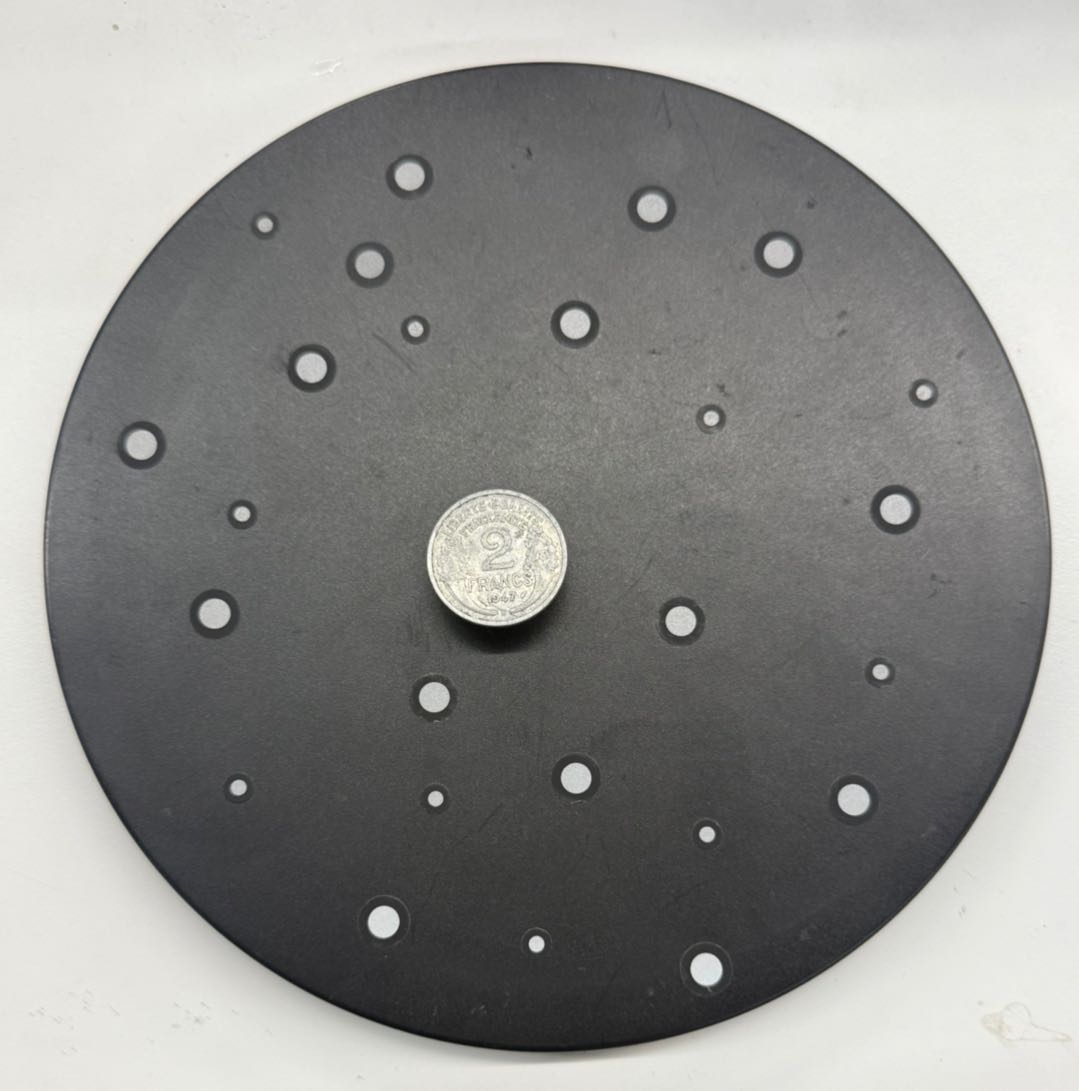
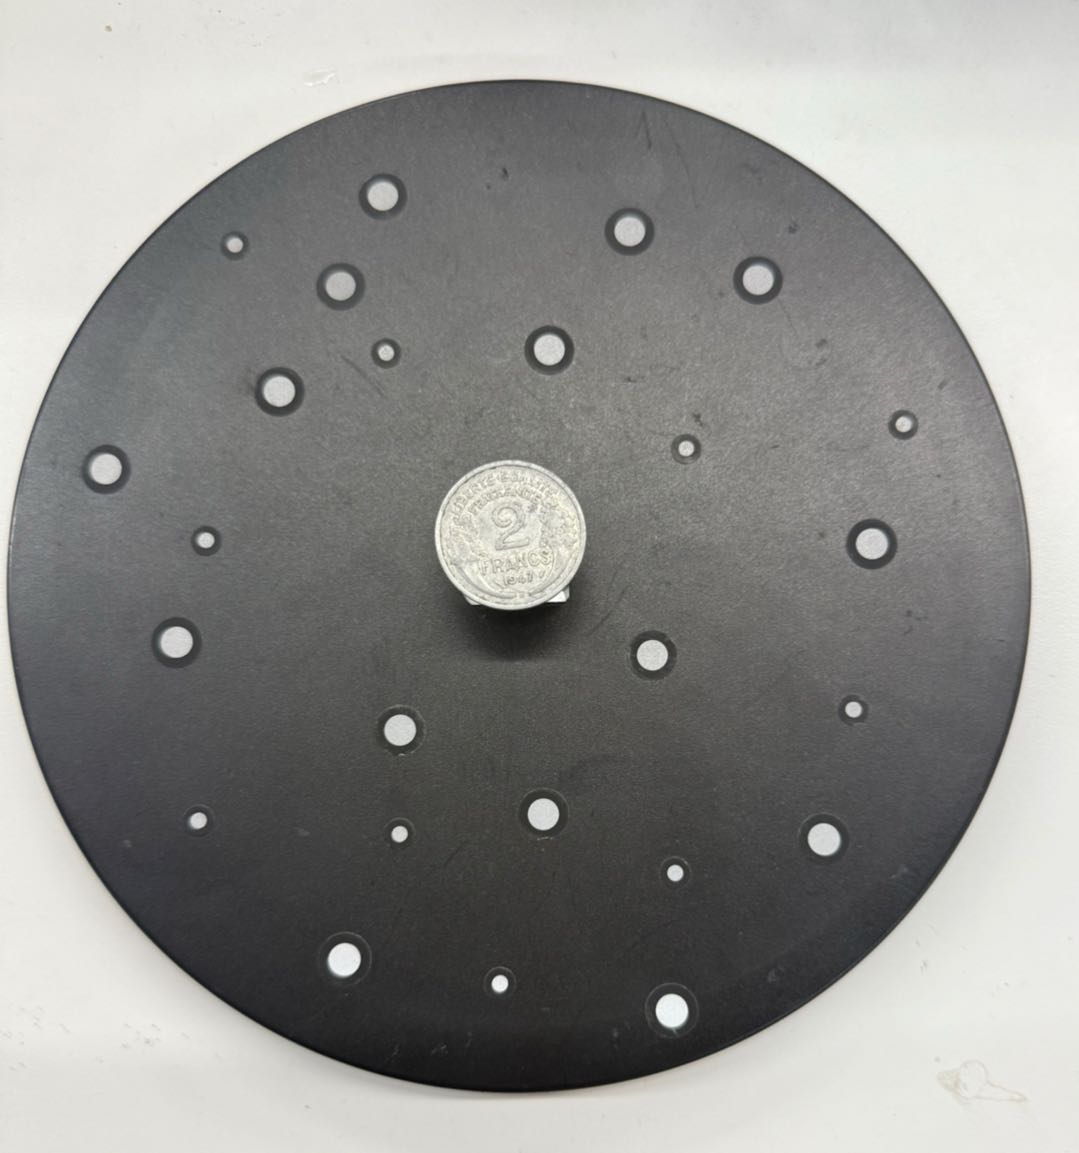
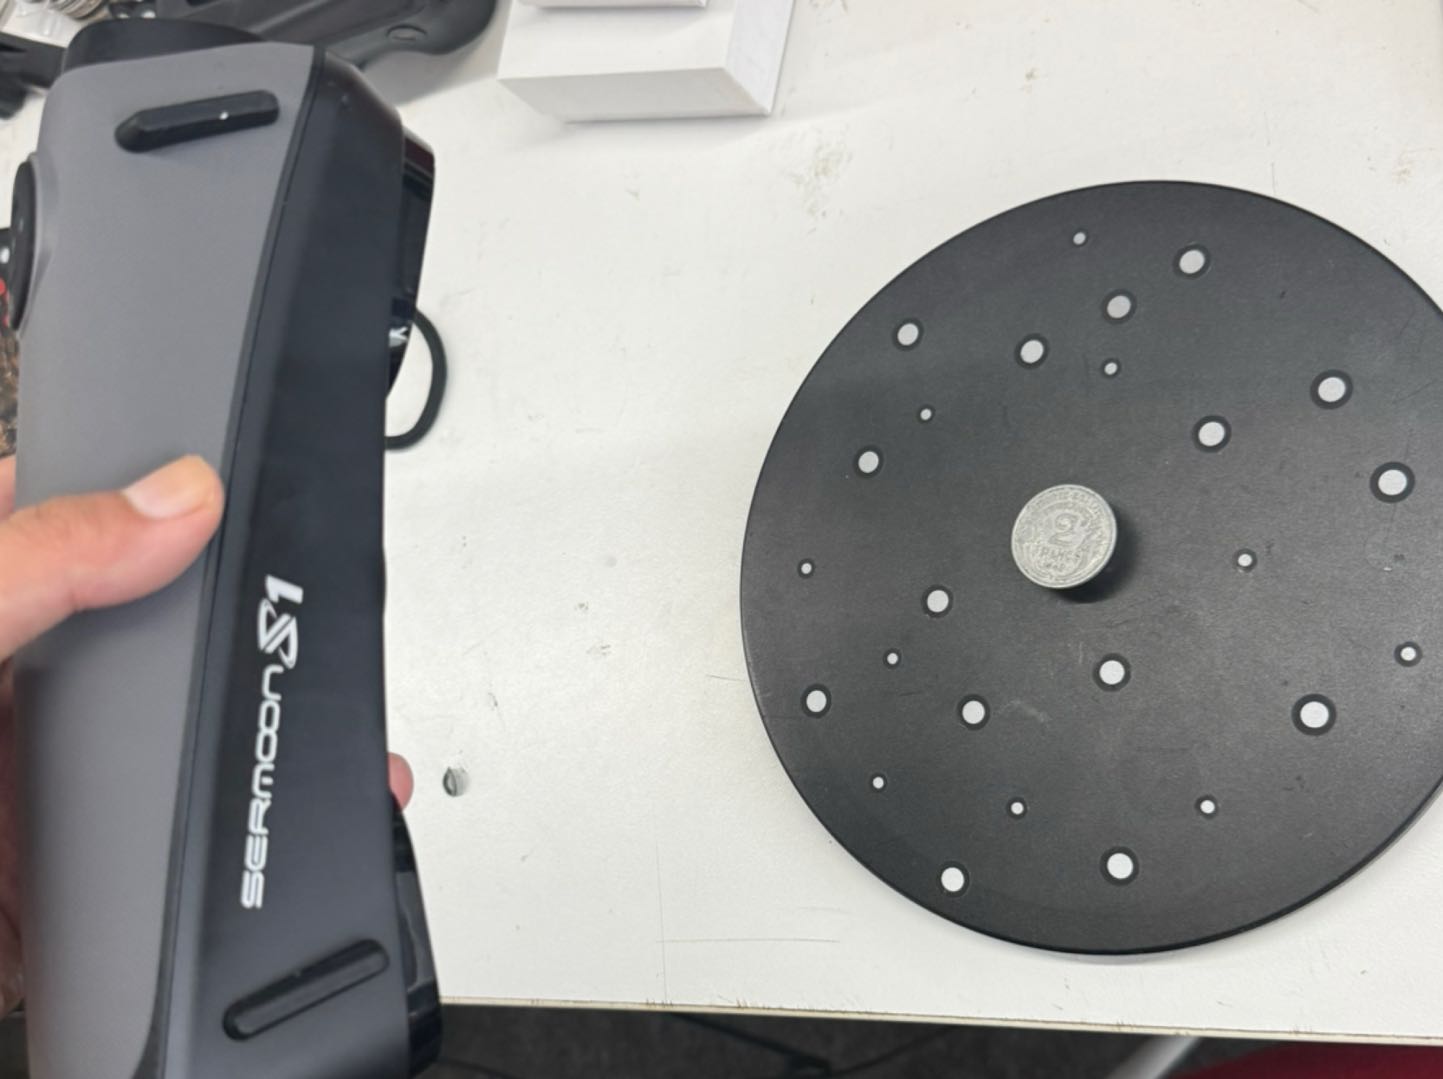
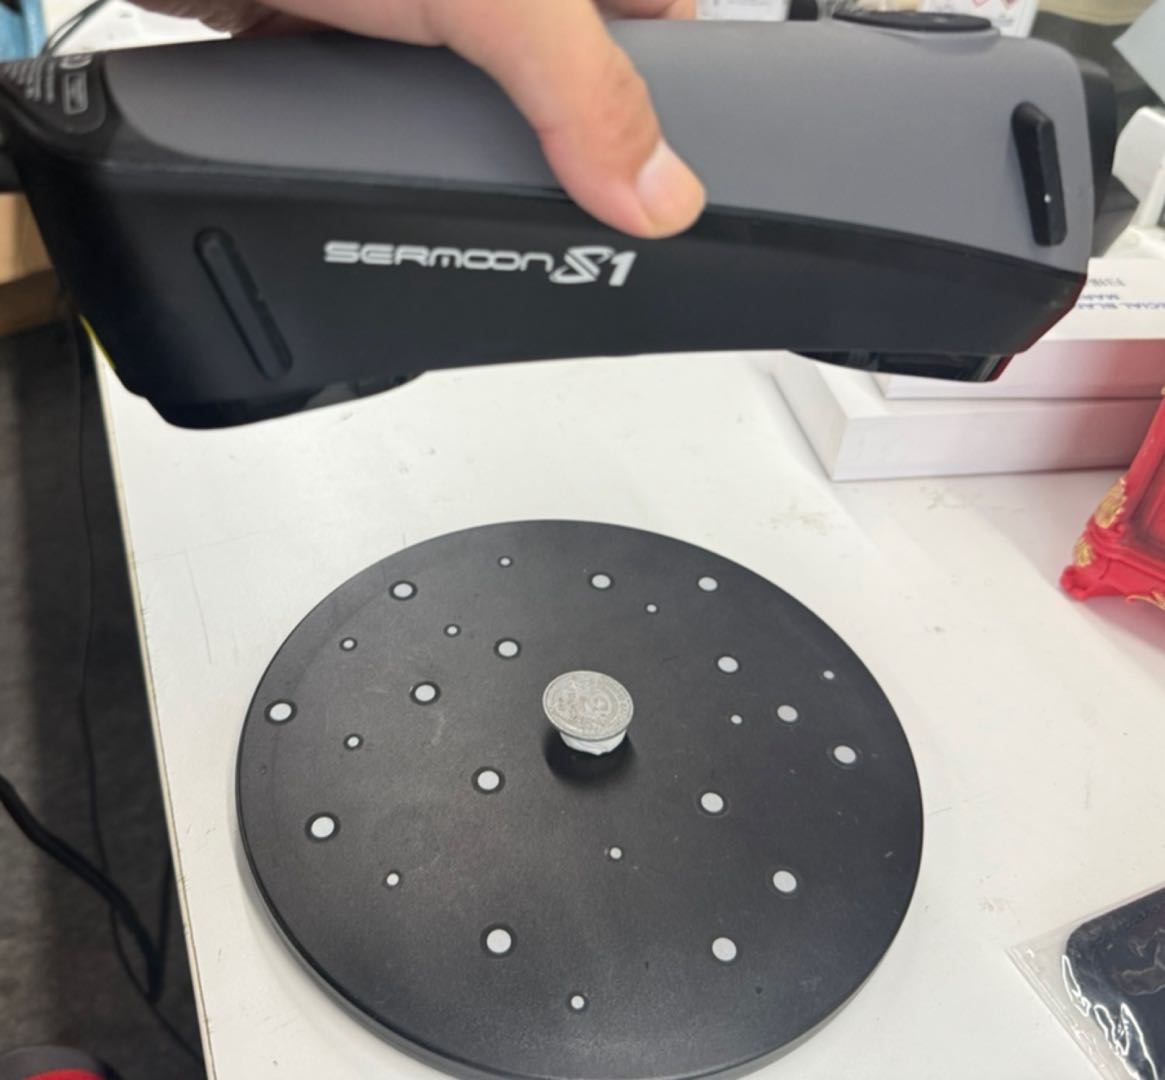
A coin is a thin‑walled object. It is recommended to use a turntable with quick‑release clamp、plasticine or modeling clay.
Turntable + quick‑release clamp
Turntable + plasticine
¶ 4. Scanning steps
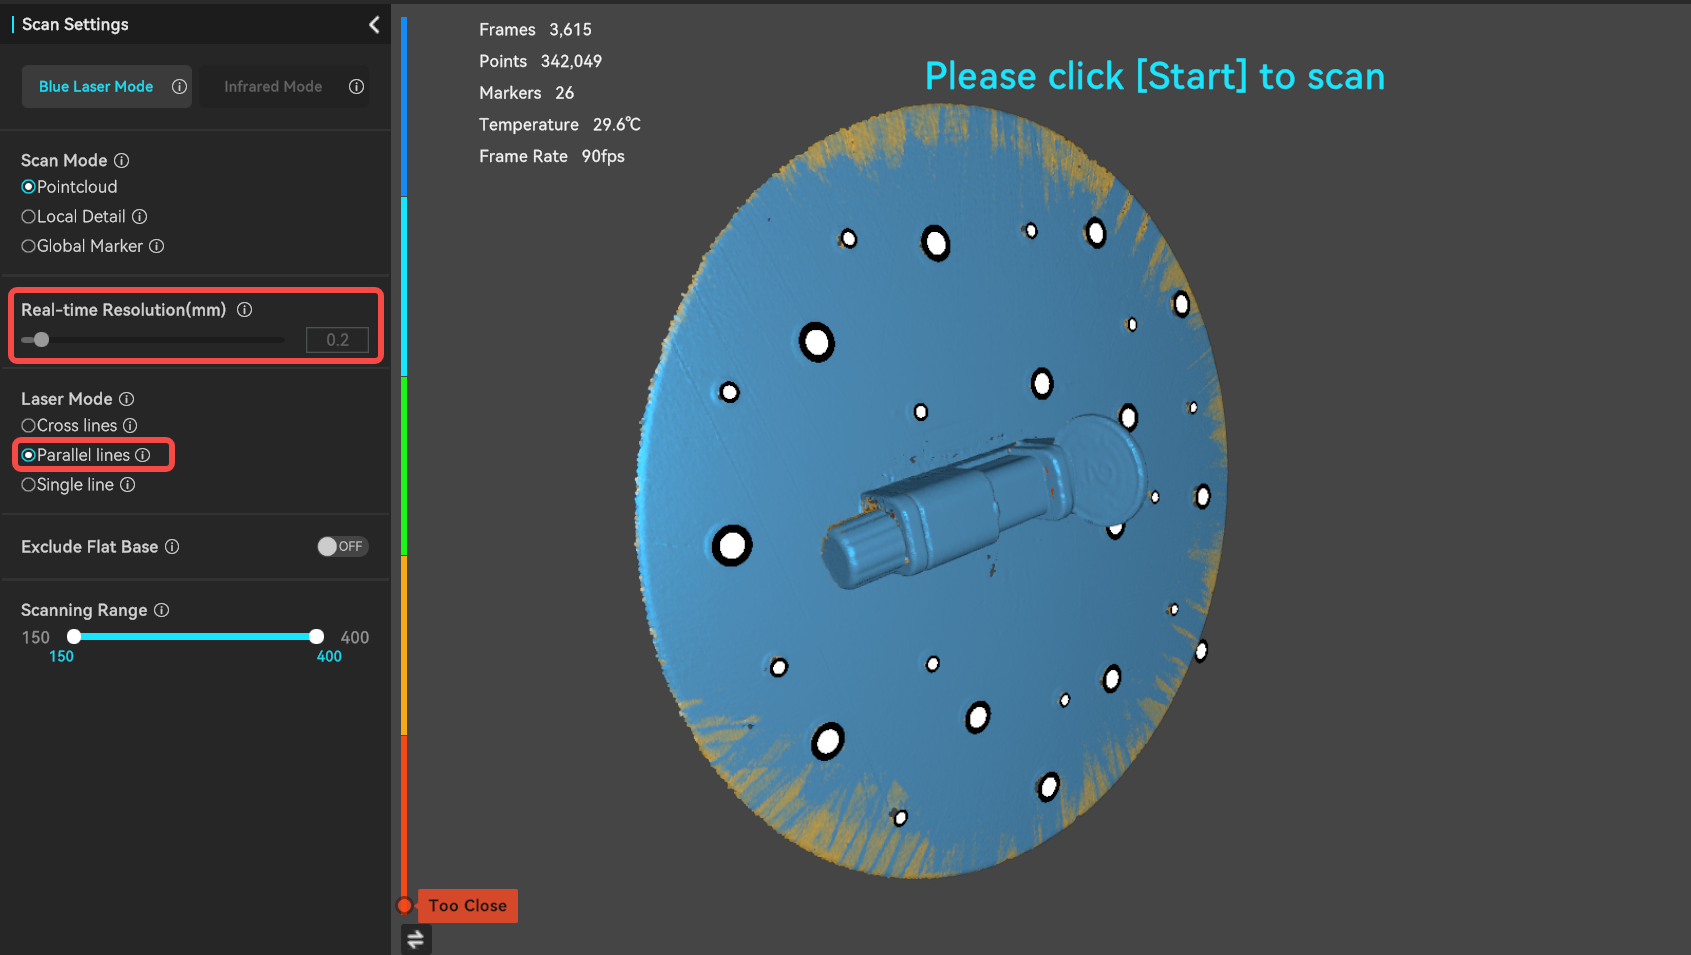
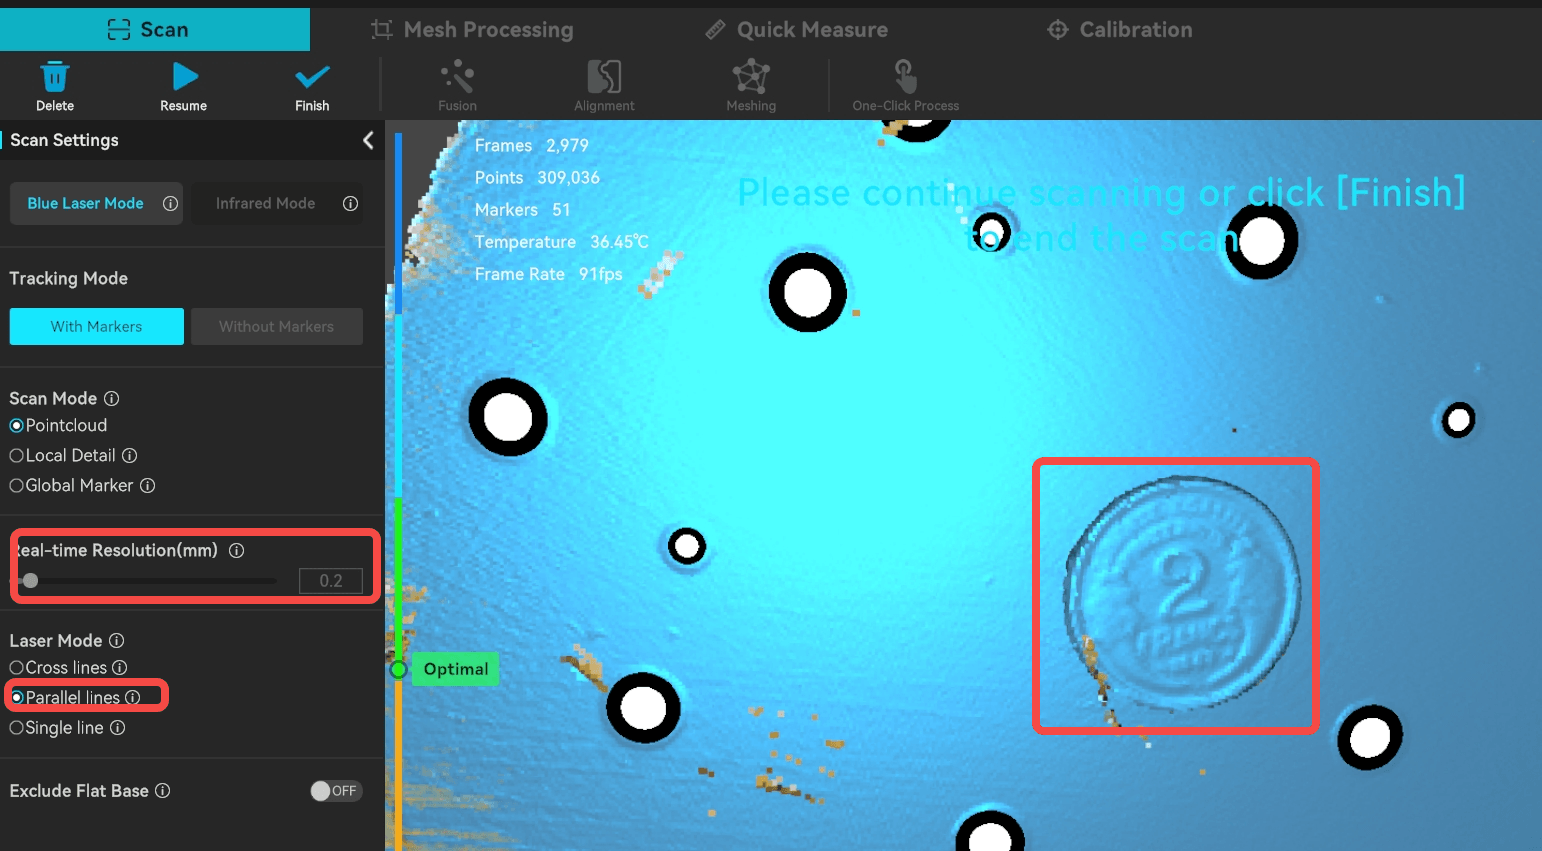
- Set the Real-time Resolution to 0.2 mm and select Parallel lines Mode.
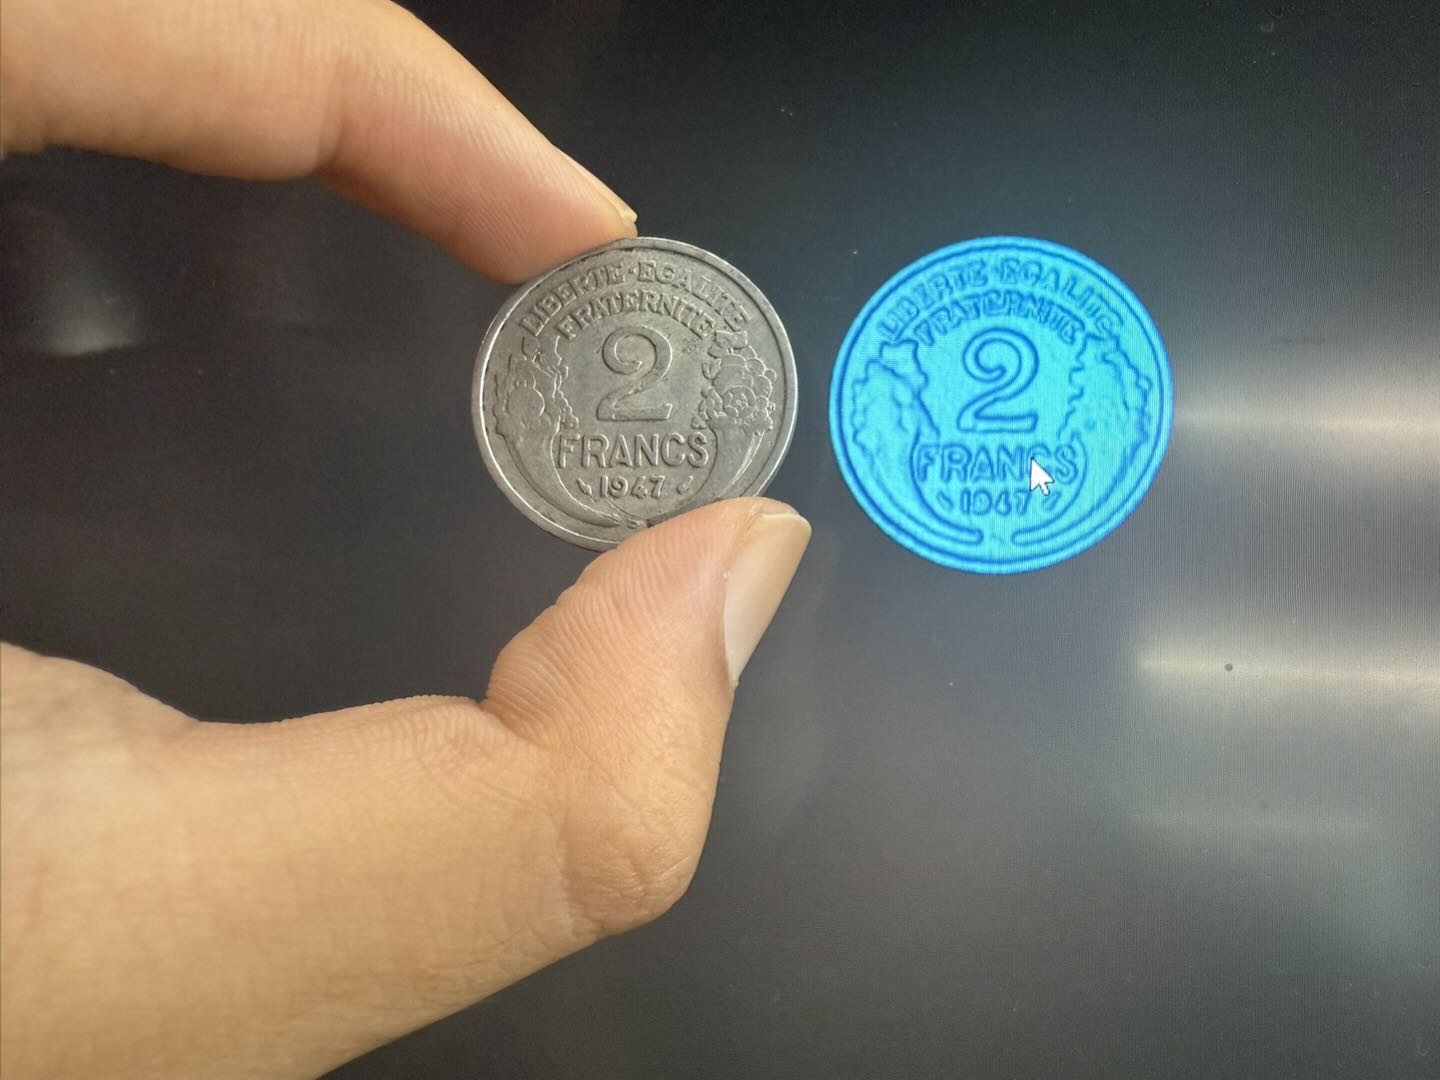
- Roughly scan the coin once, making sure the entire model turns blue (indicating successful scanning).
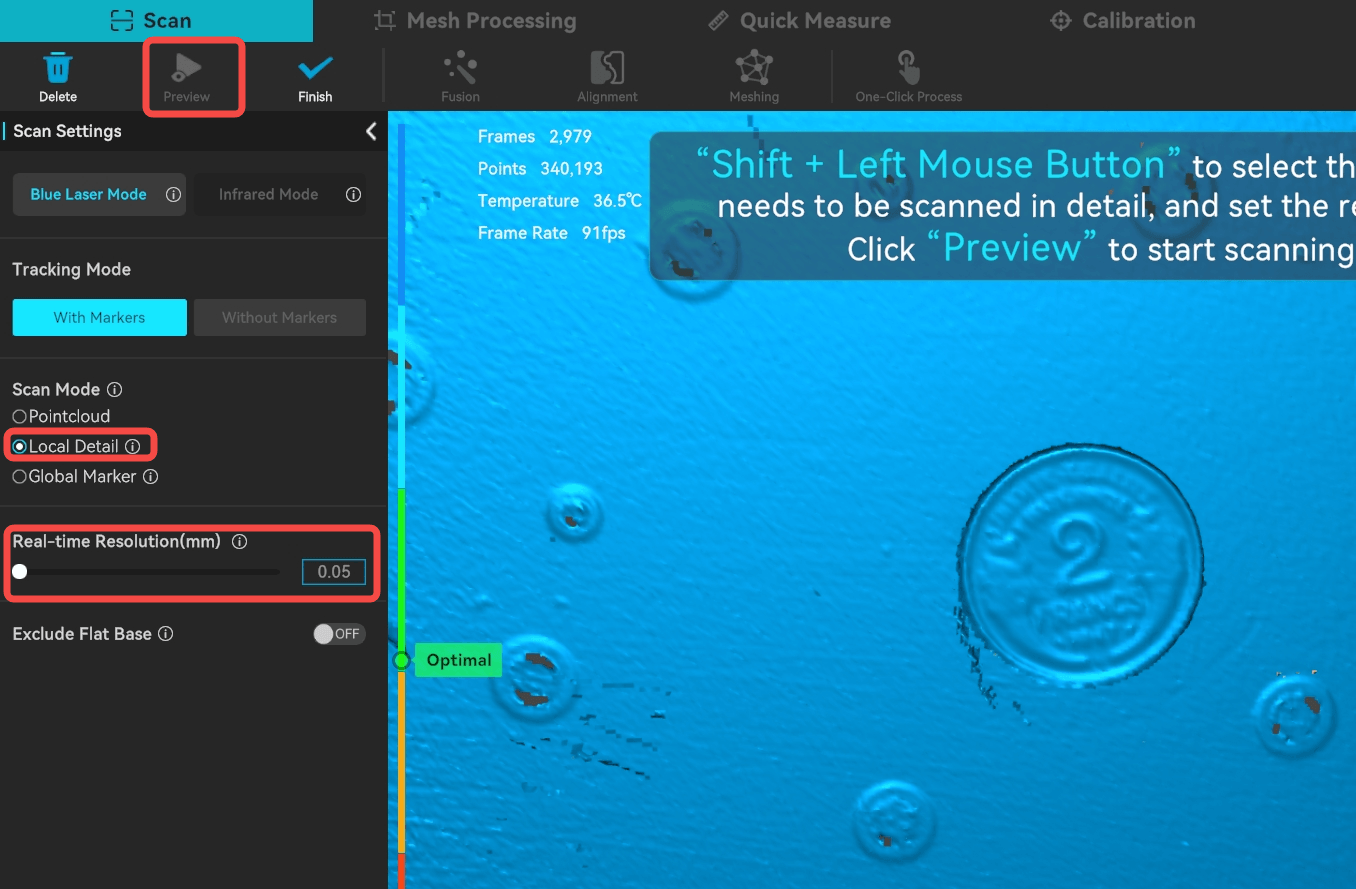
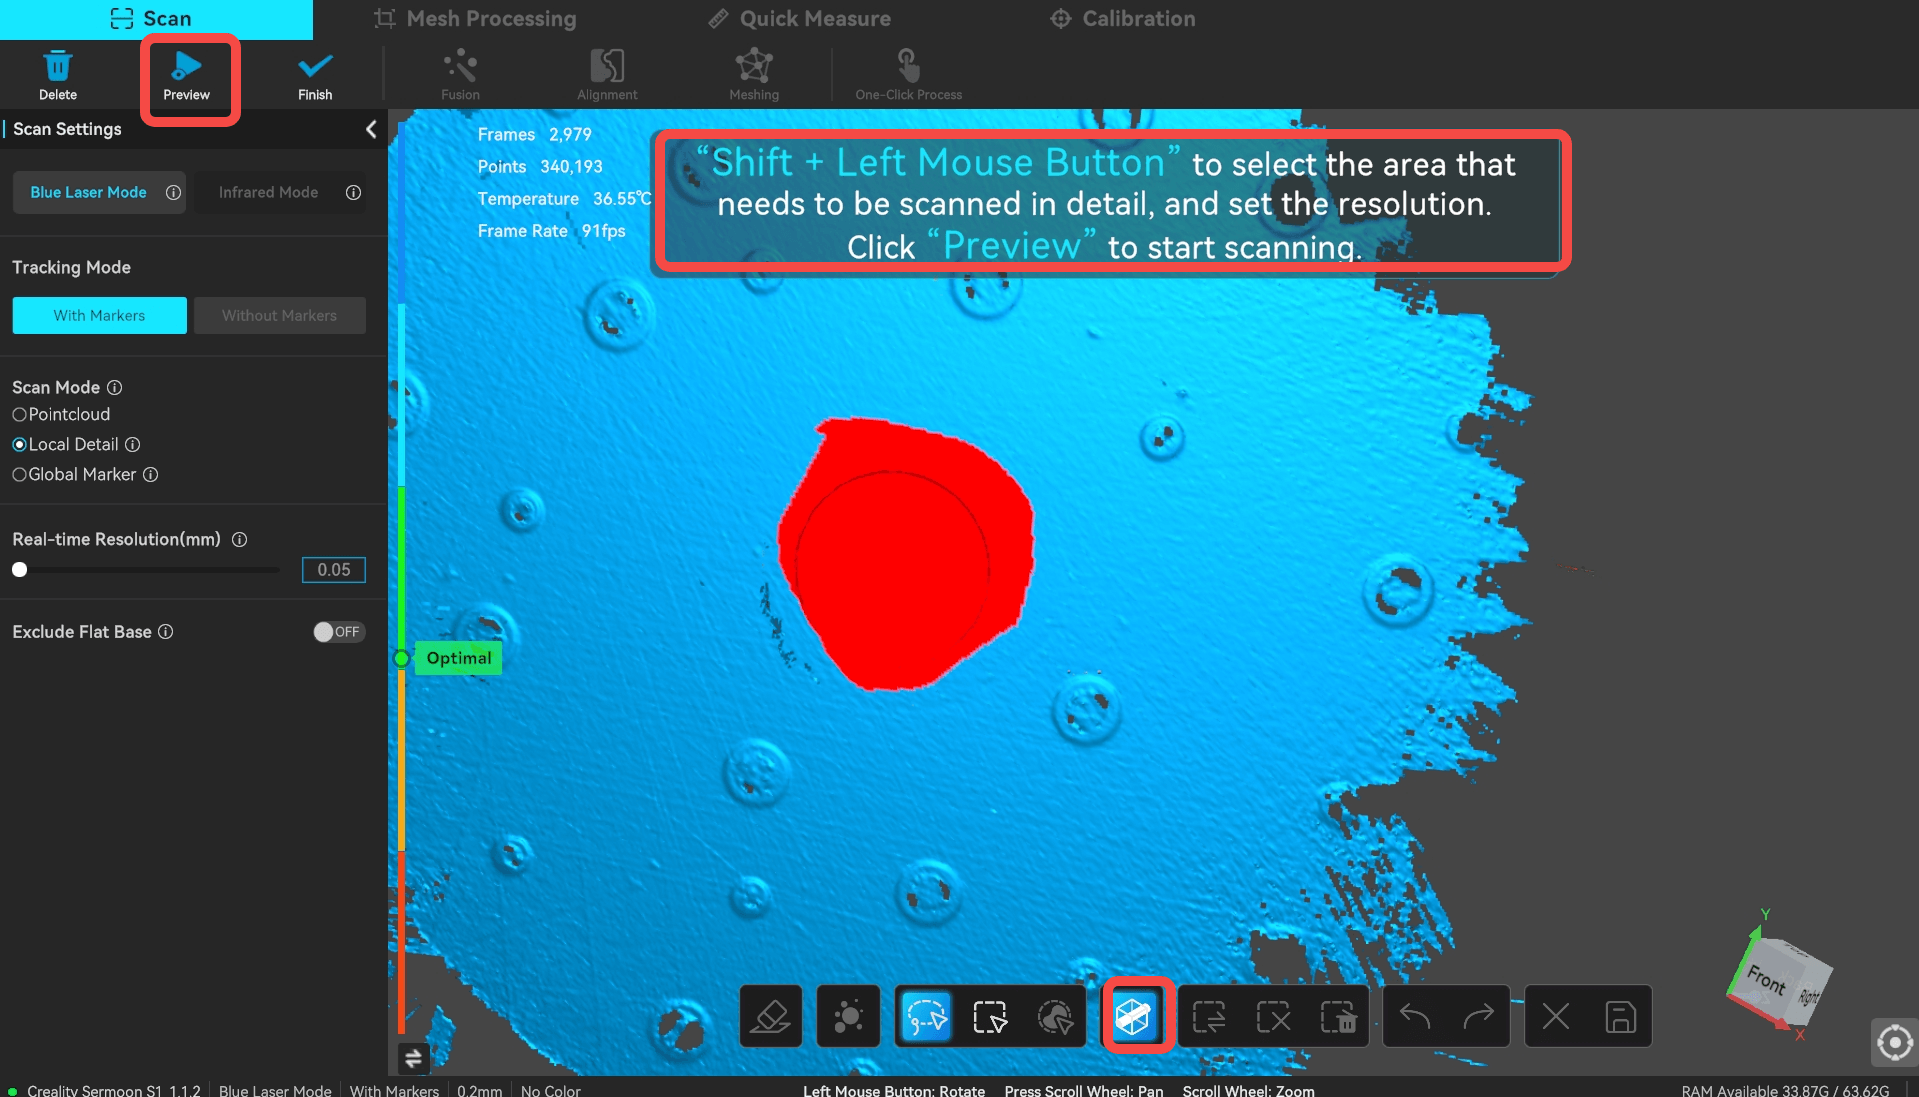
- Pause the scan, then activate Local Detail Scan and reduce the resolution to 0.05 mm.
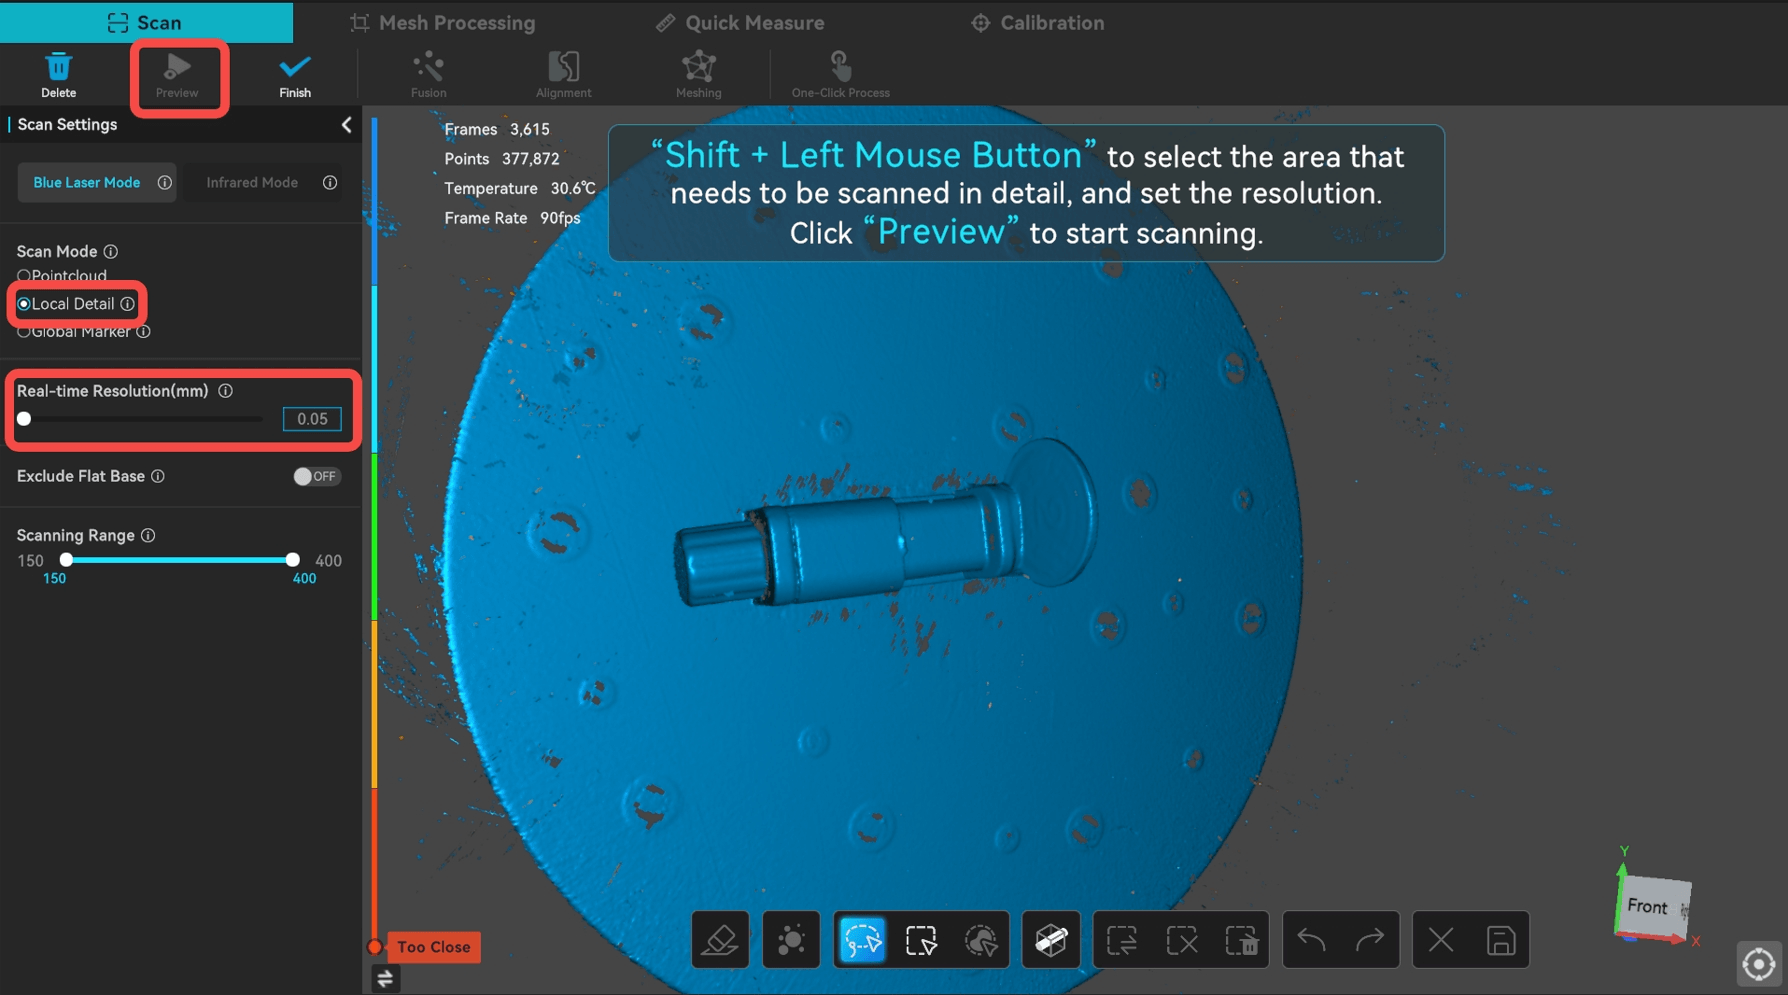
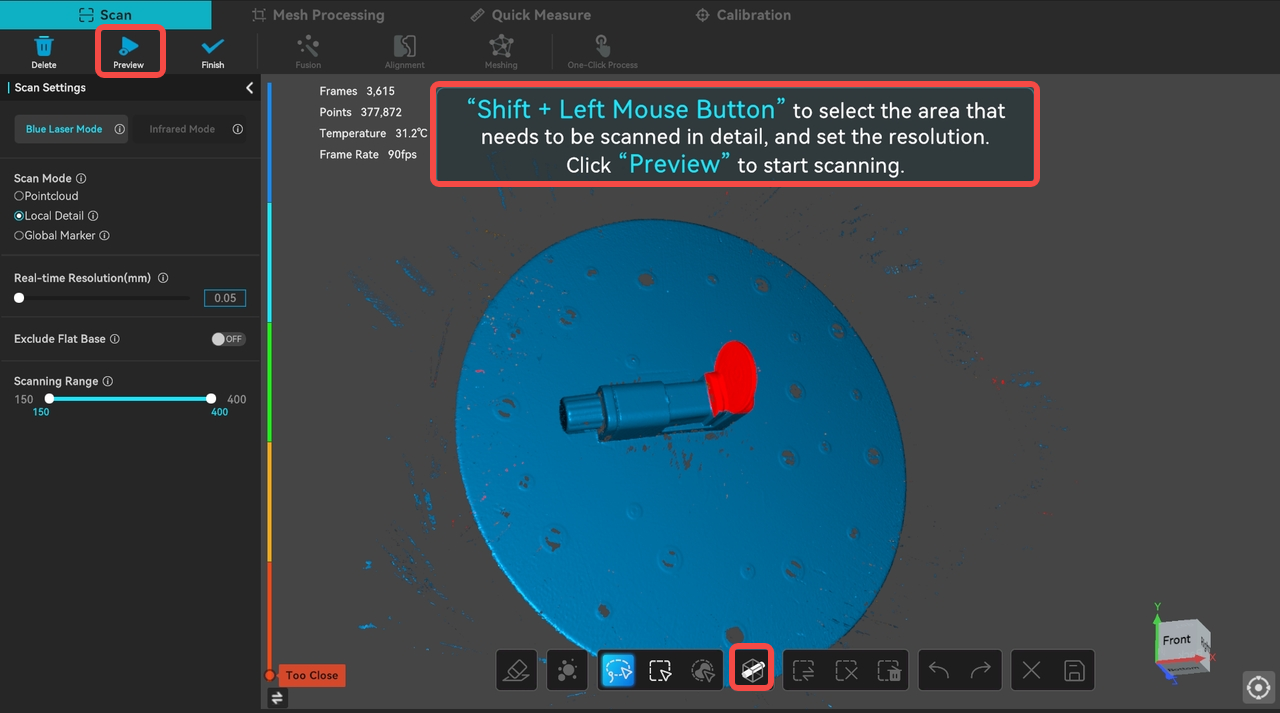
- Select the area for local detail scanning as prompted on the screen, then click Preview to start.
Tips: If you can only select resolution on one side, please enable Penetrate Selection and re-select the area.
- Scan the model from multiple angles while rotating the turntable until the whole scanned data turns blue. This avoids detail loss due to insufficient point cloud data.
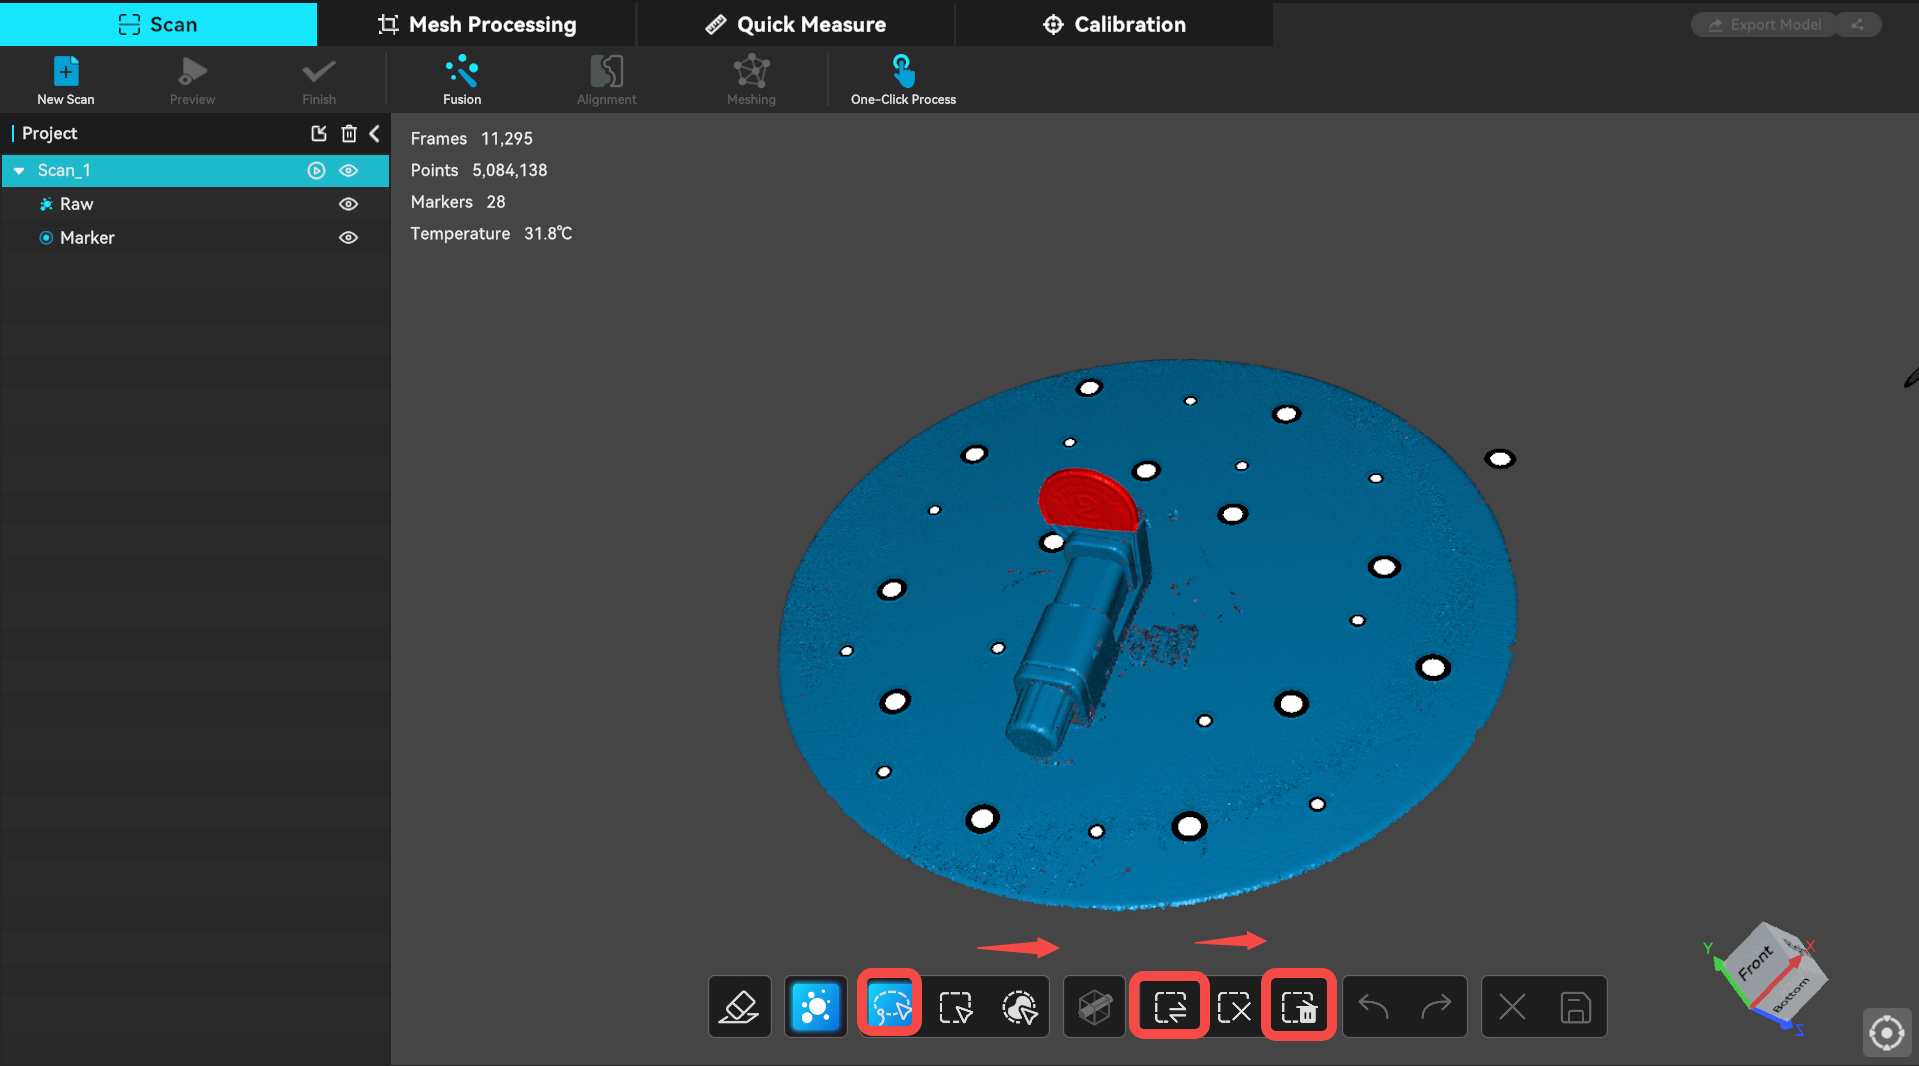
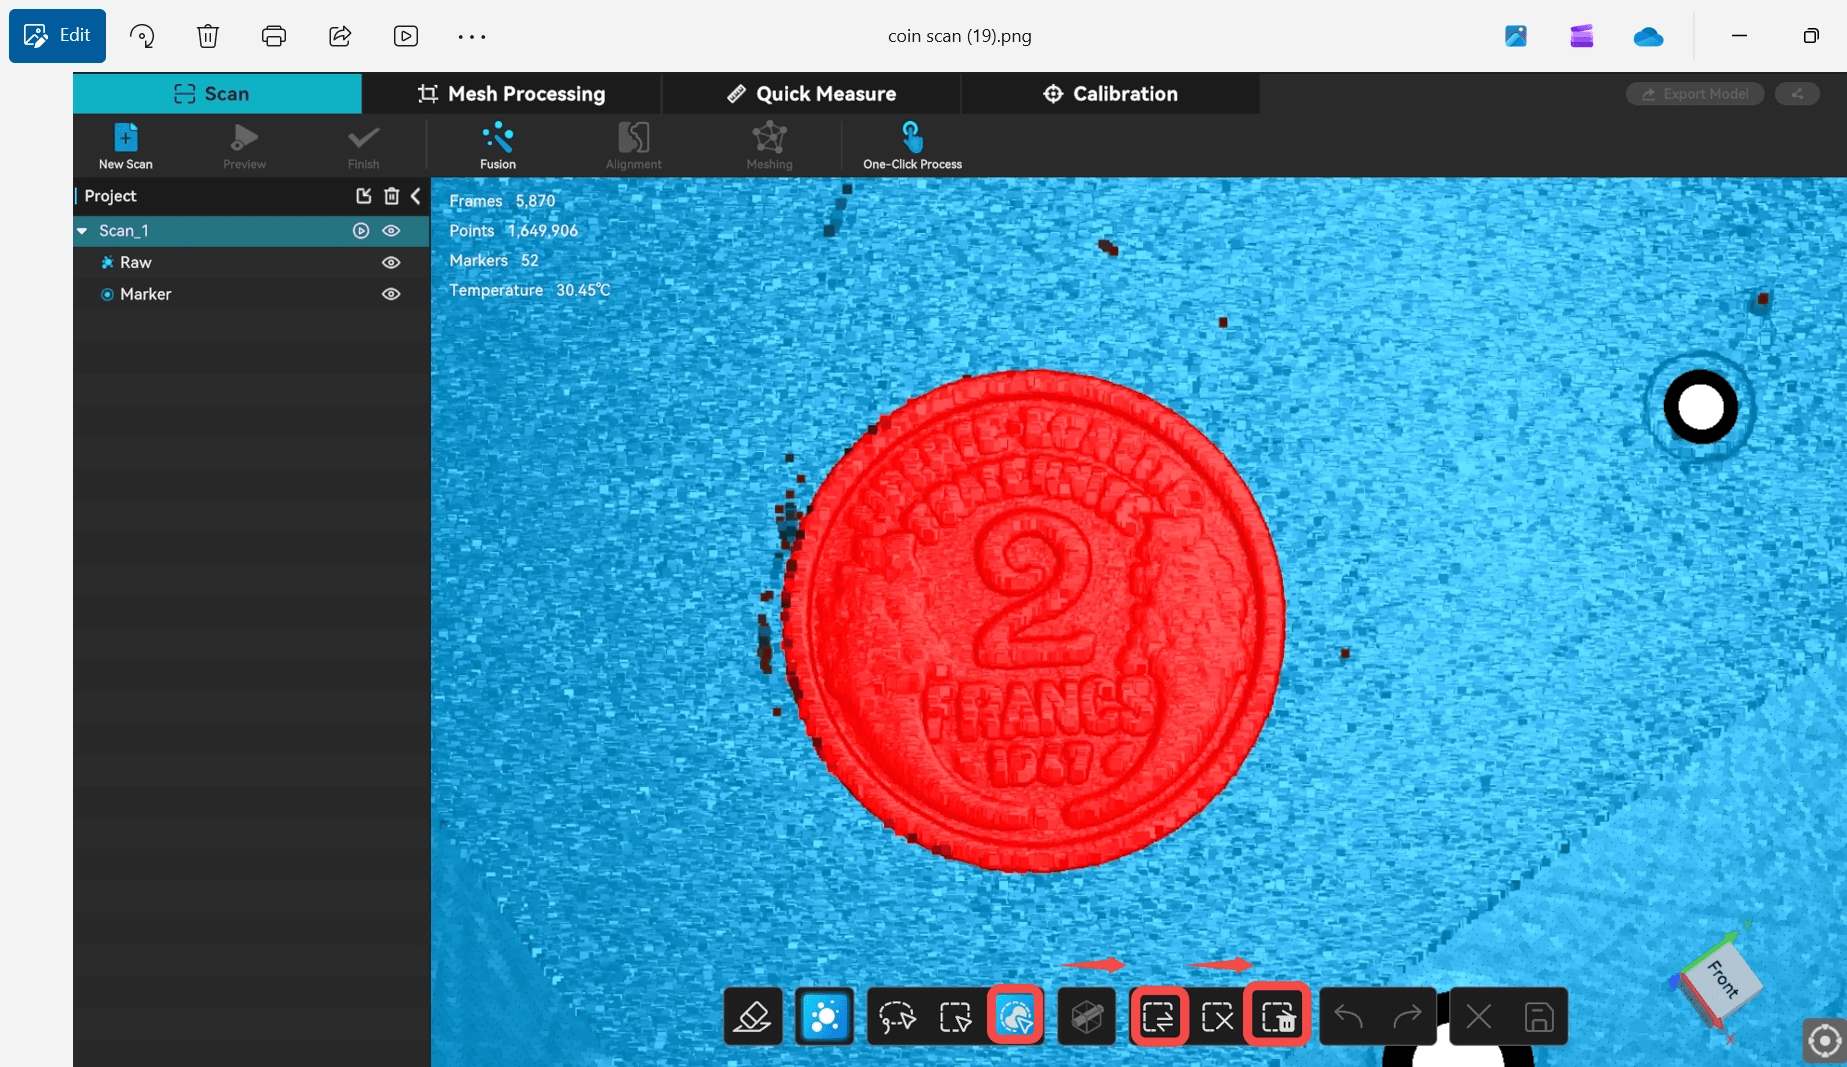
- After finishing the detail scan, select the coin data you want to keep, then invert the selection and delete the rest.
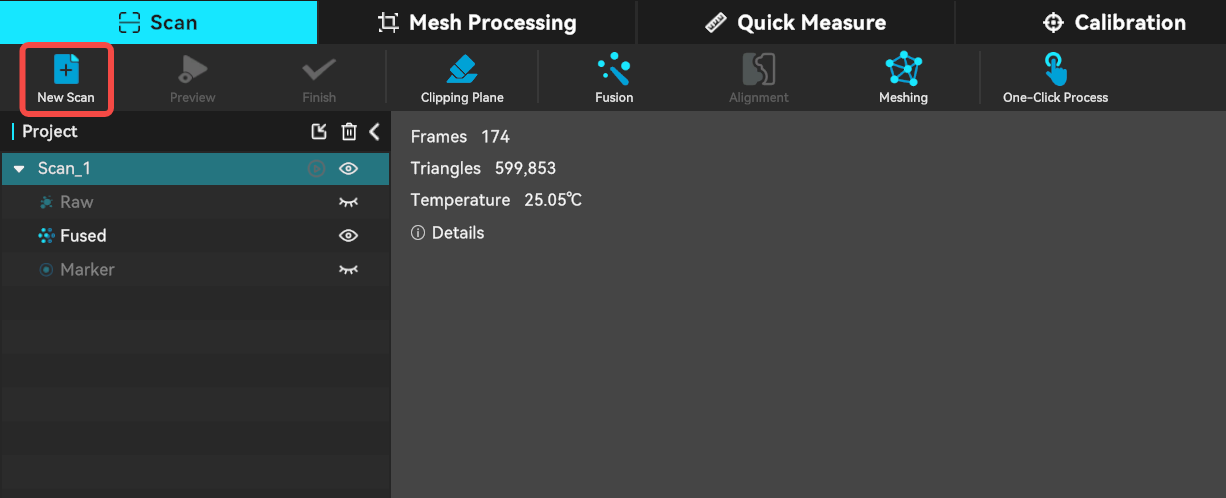
- Remove the coin from the clamp, flip it over and install it back to the clamp. Create a new project to scan the bottom half.
Repeat the same scanning steps to capture the bottom half.
¶ 5. Post‑processing
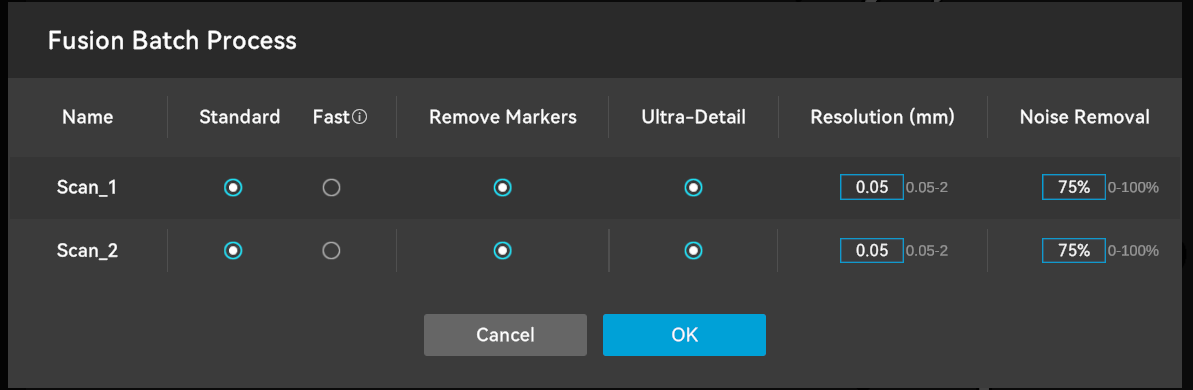
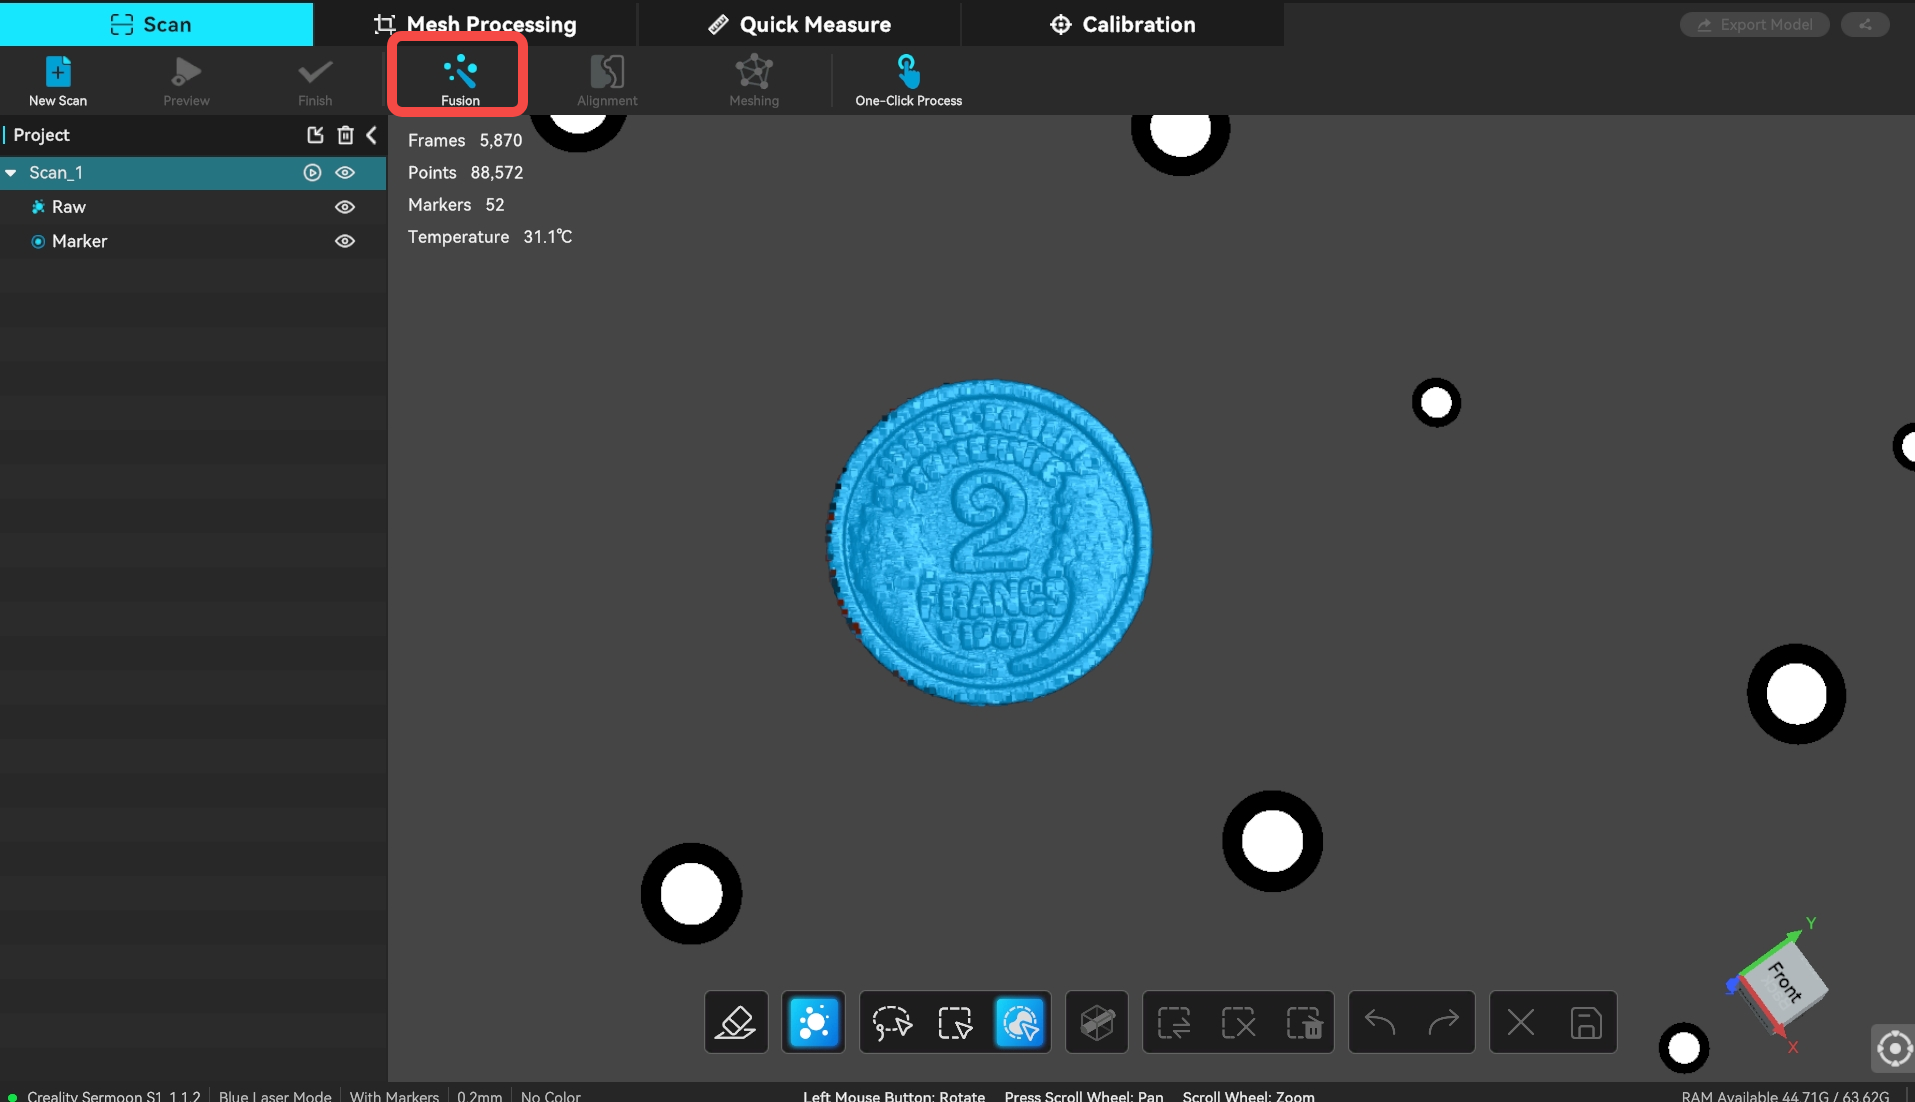
- Hold Ctrl and select both scan files, then click Fusion.
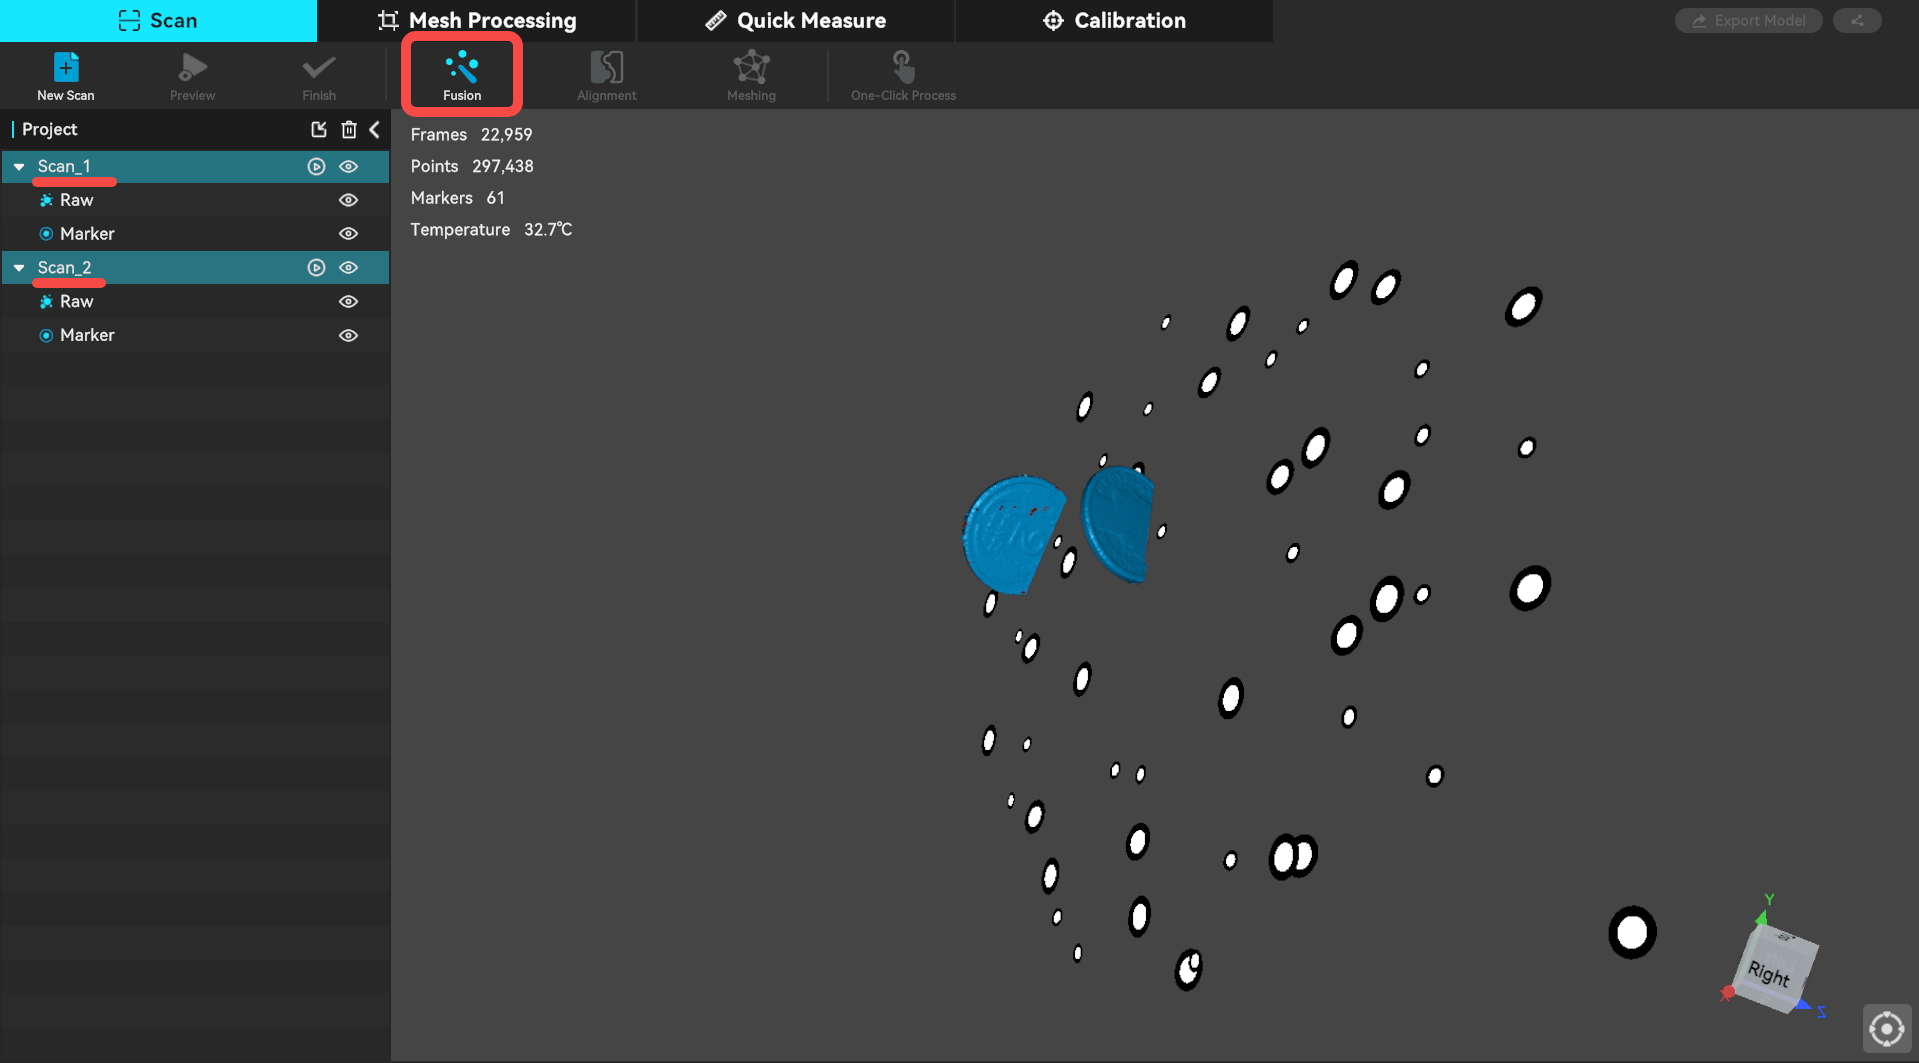
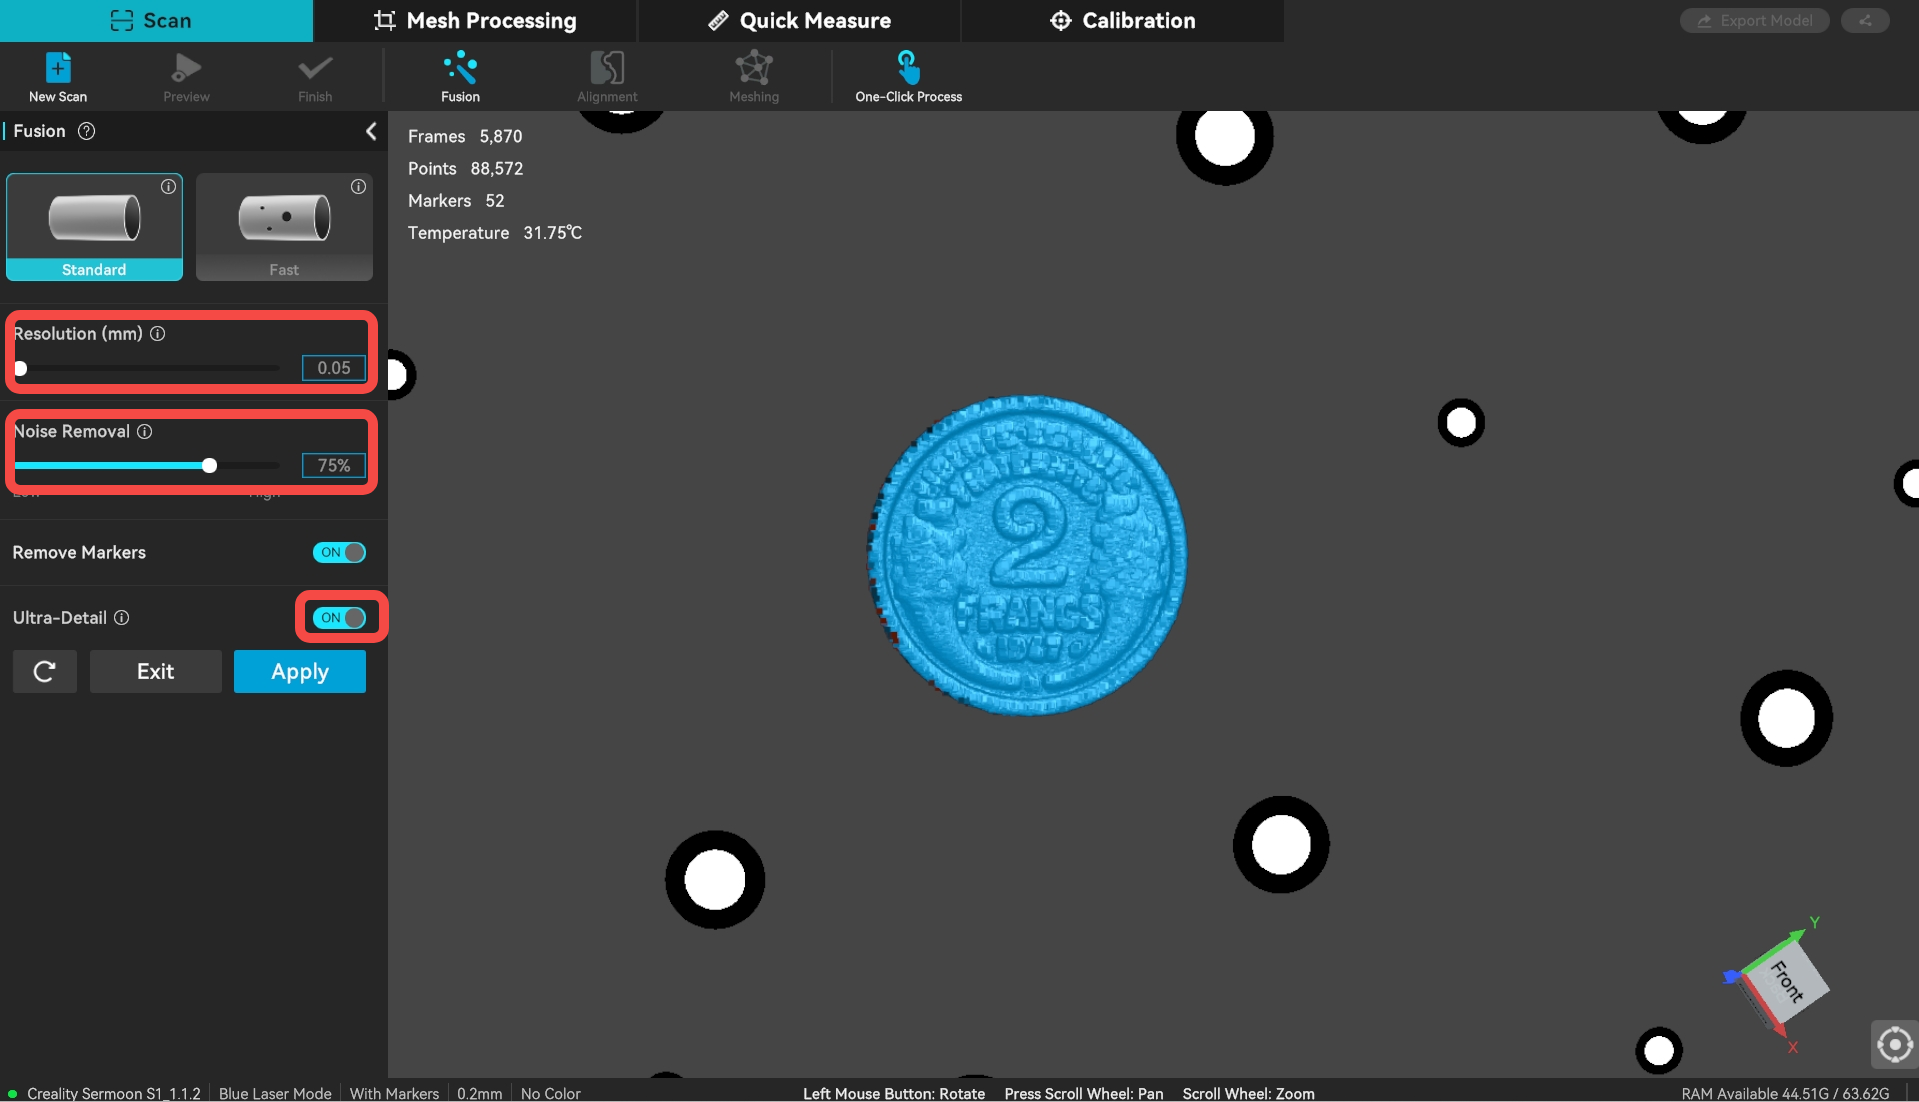
- Use Ultra-Detail with a resolution of 0.05 mm and 75% noise removal.
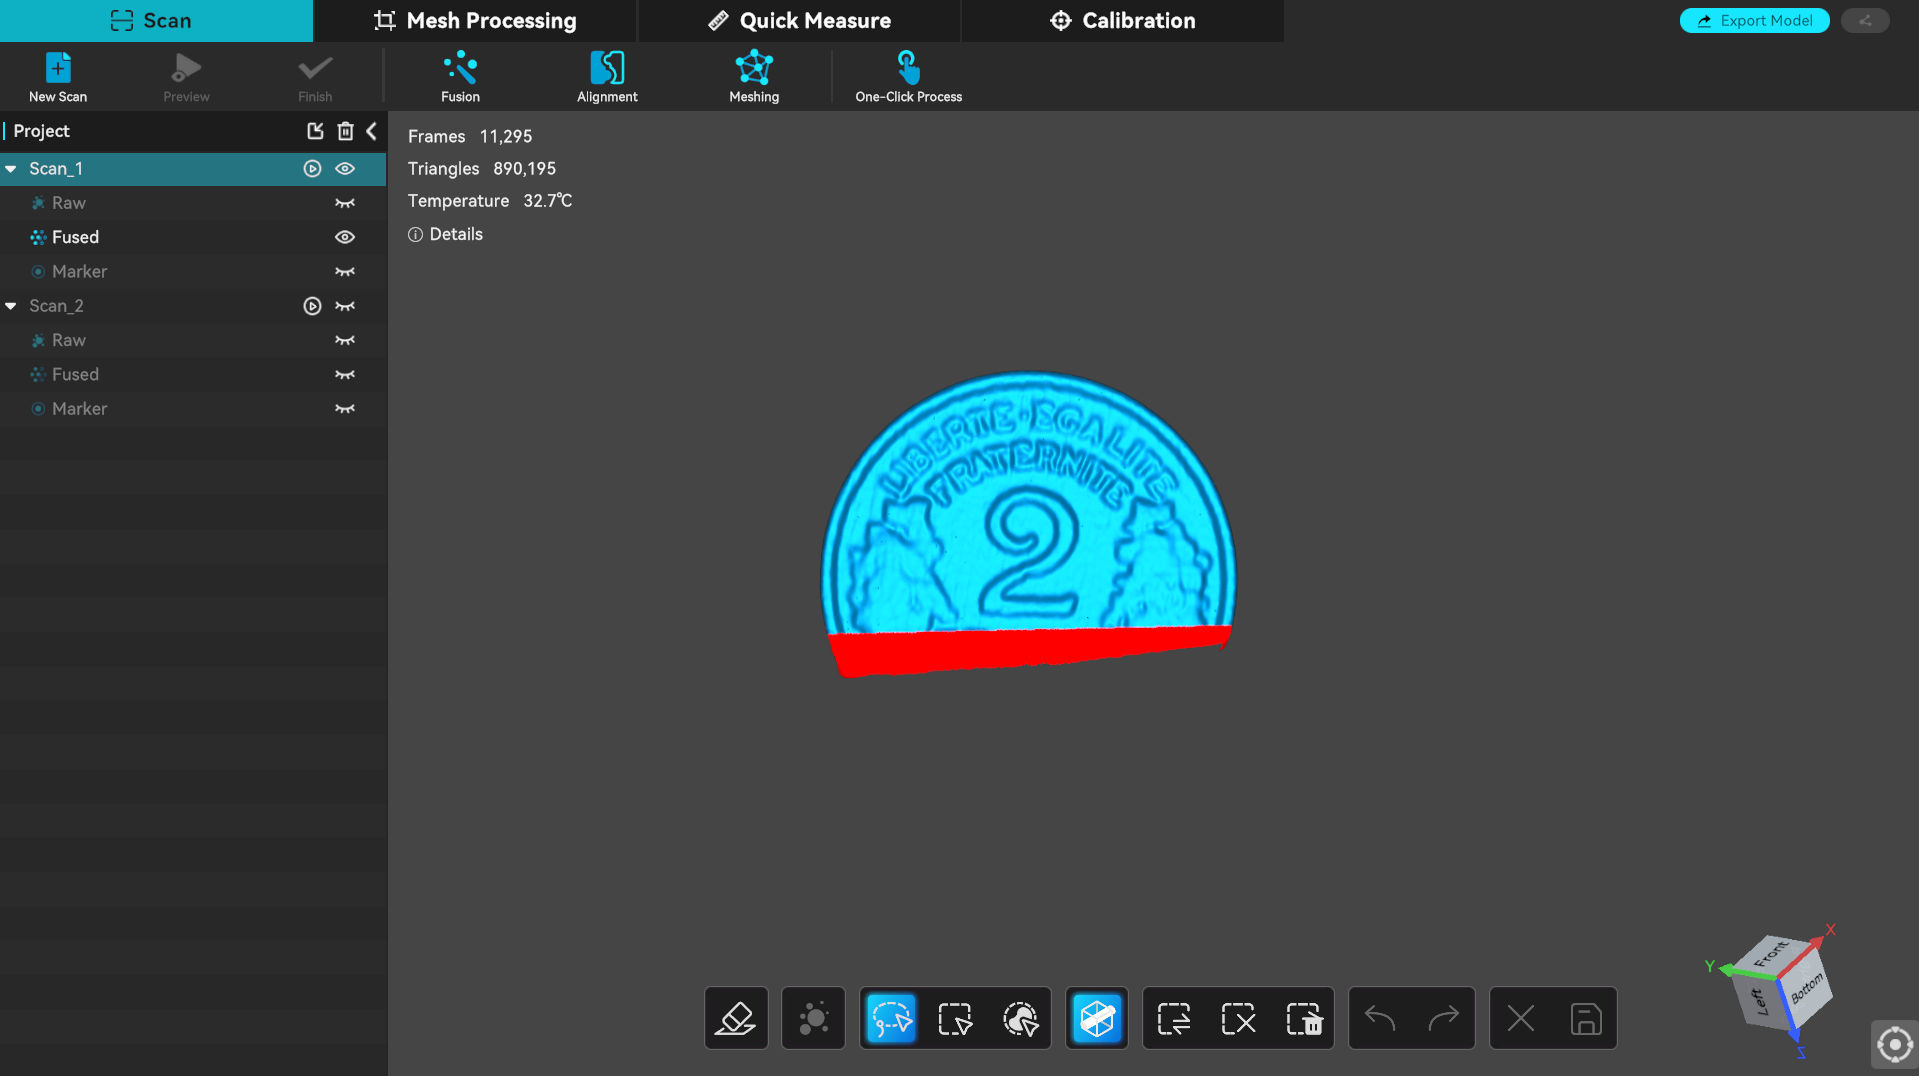
- To improve fusion quality, you can delete some edge data first, but make sure enough overlap area remain between the two scans for alignment.
- After cleaning the edges, click Alignment.
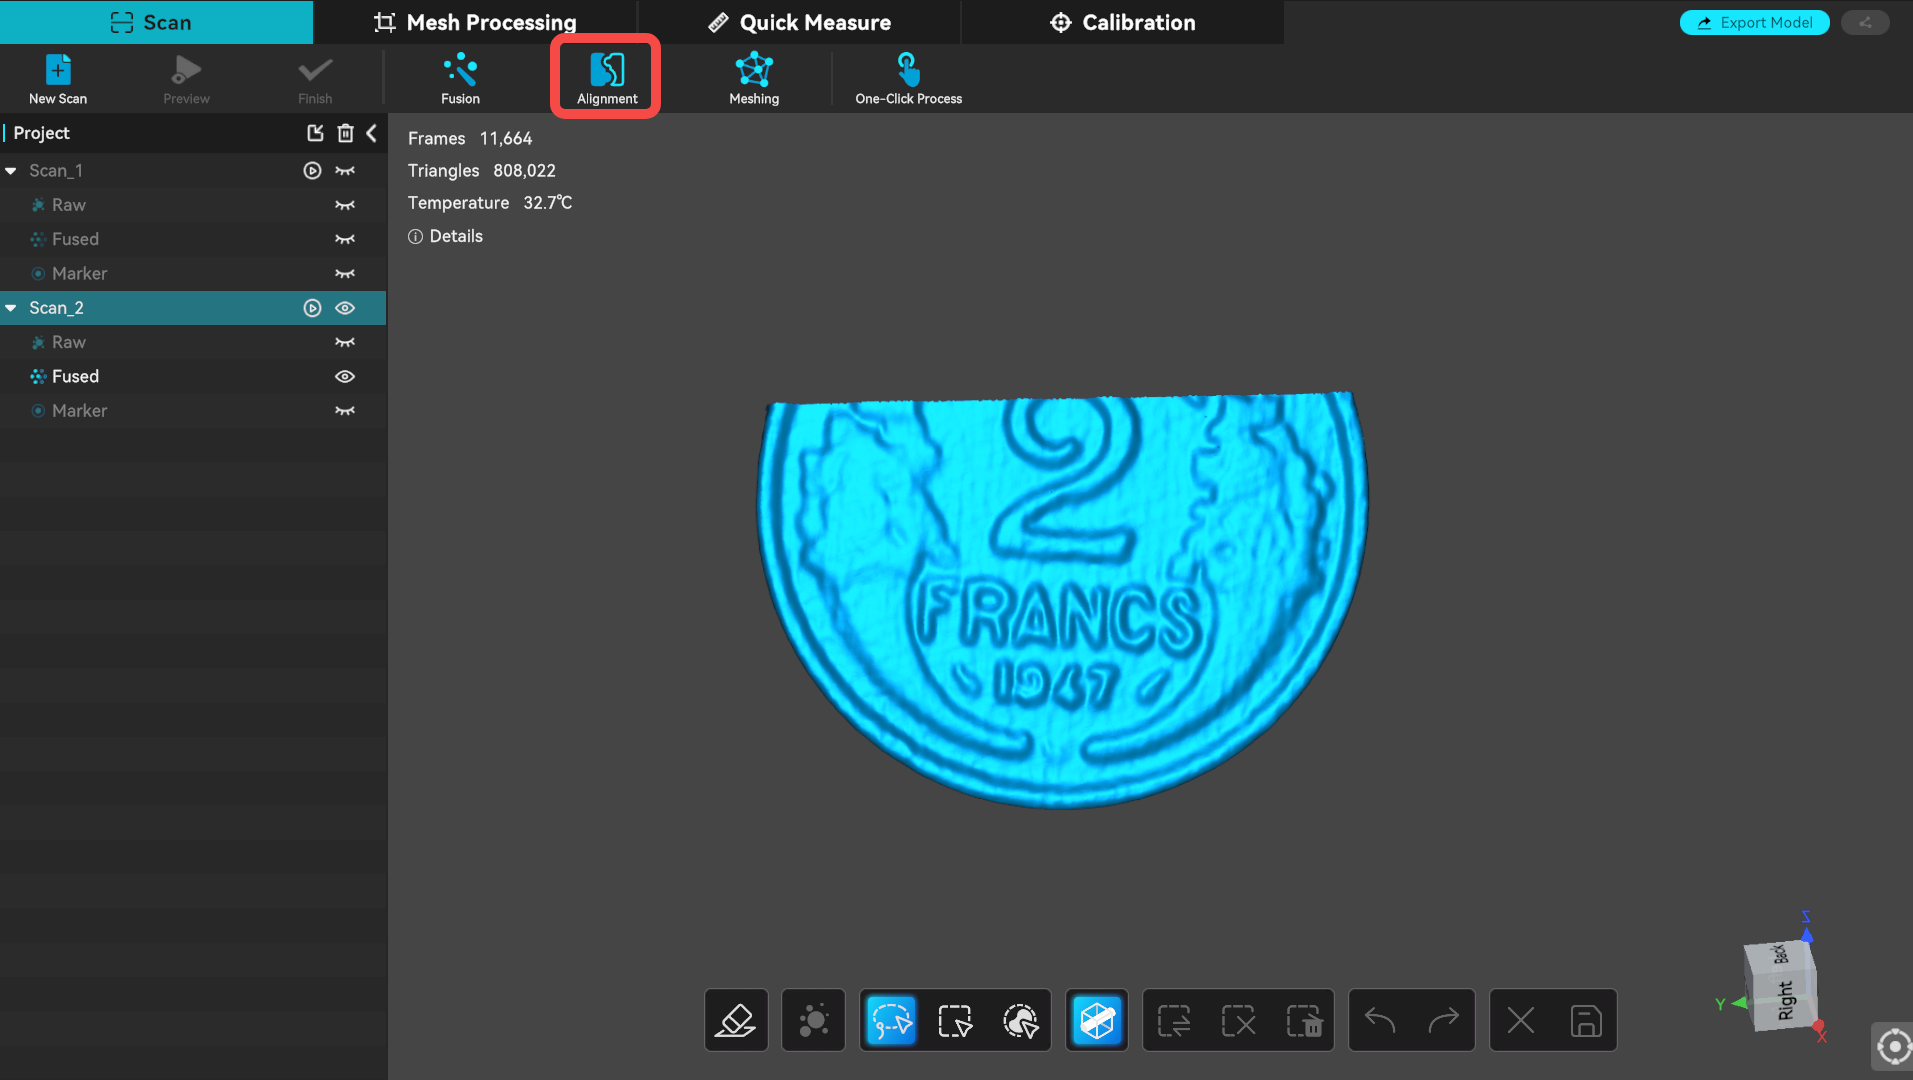
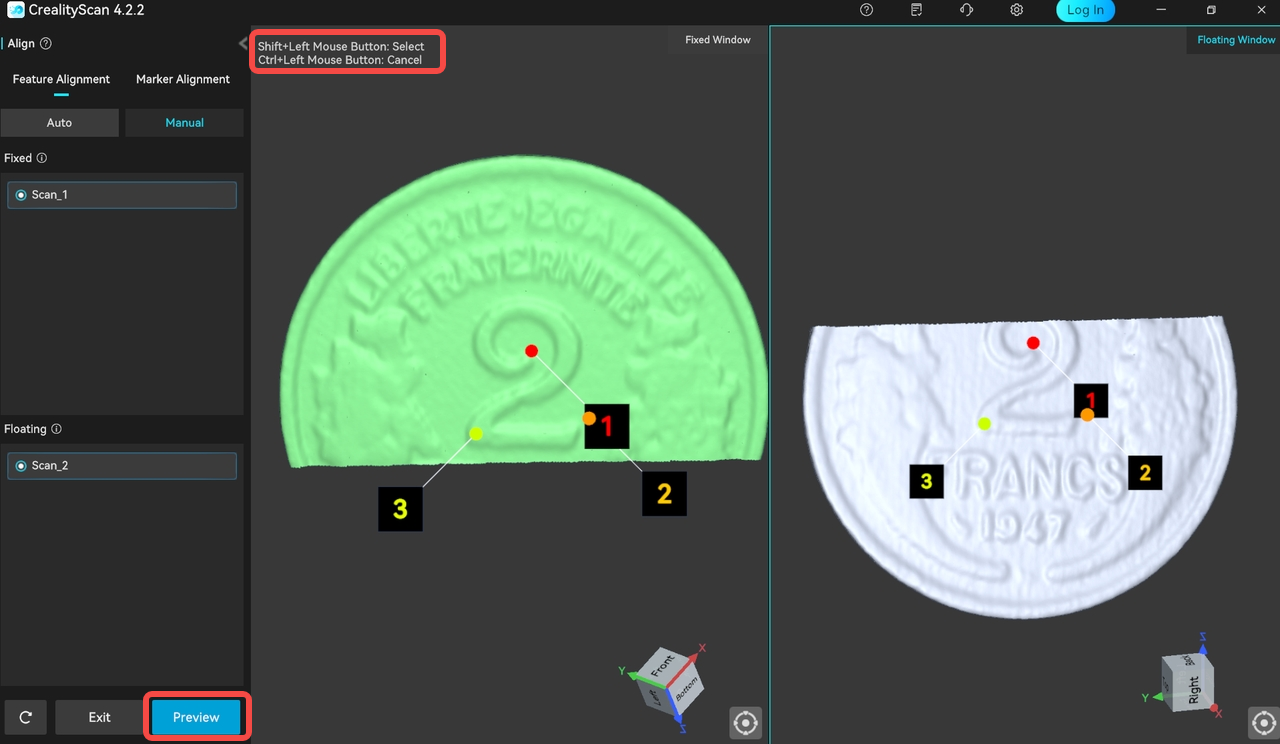
- Use Feature Alignment → Manual.
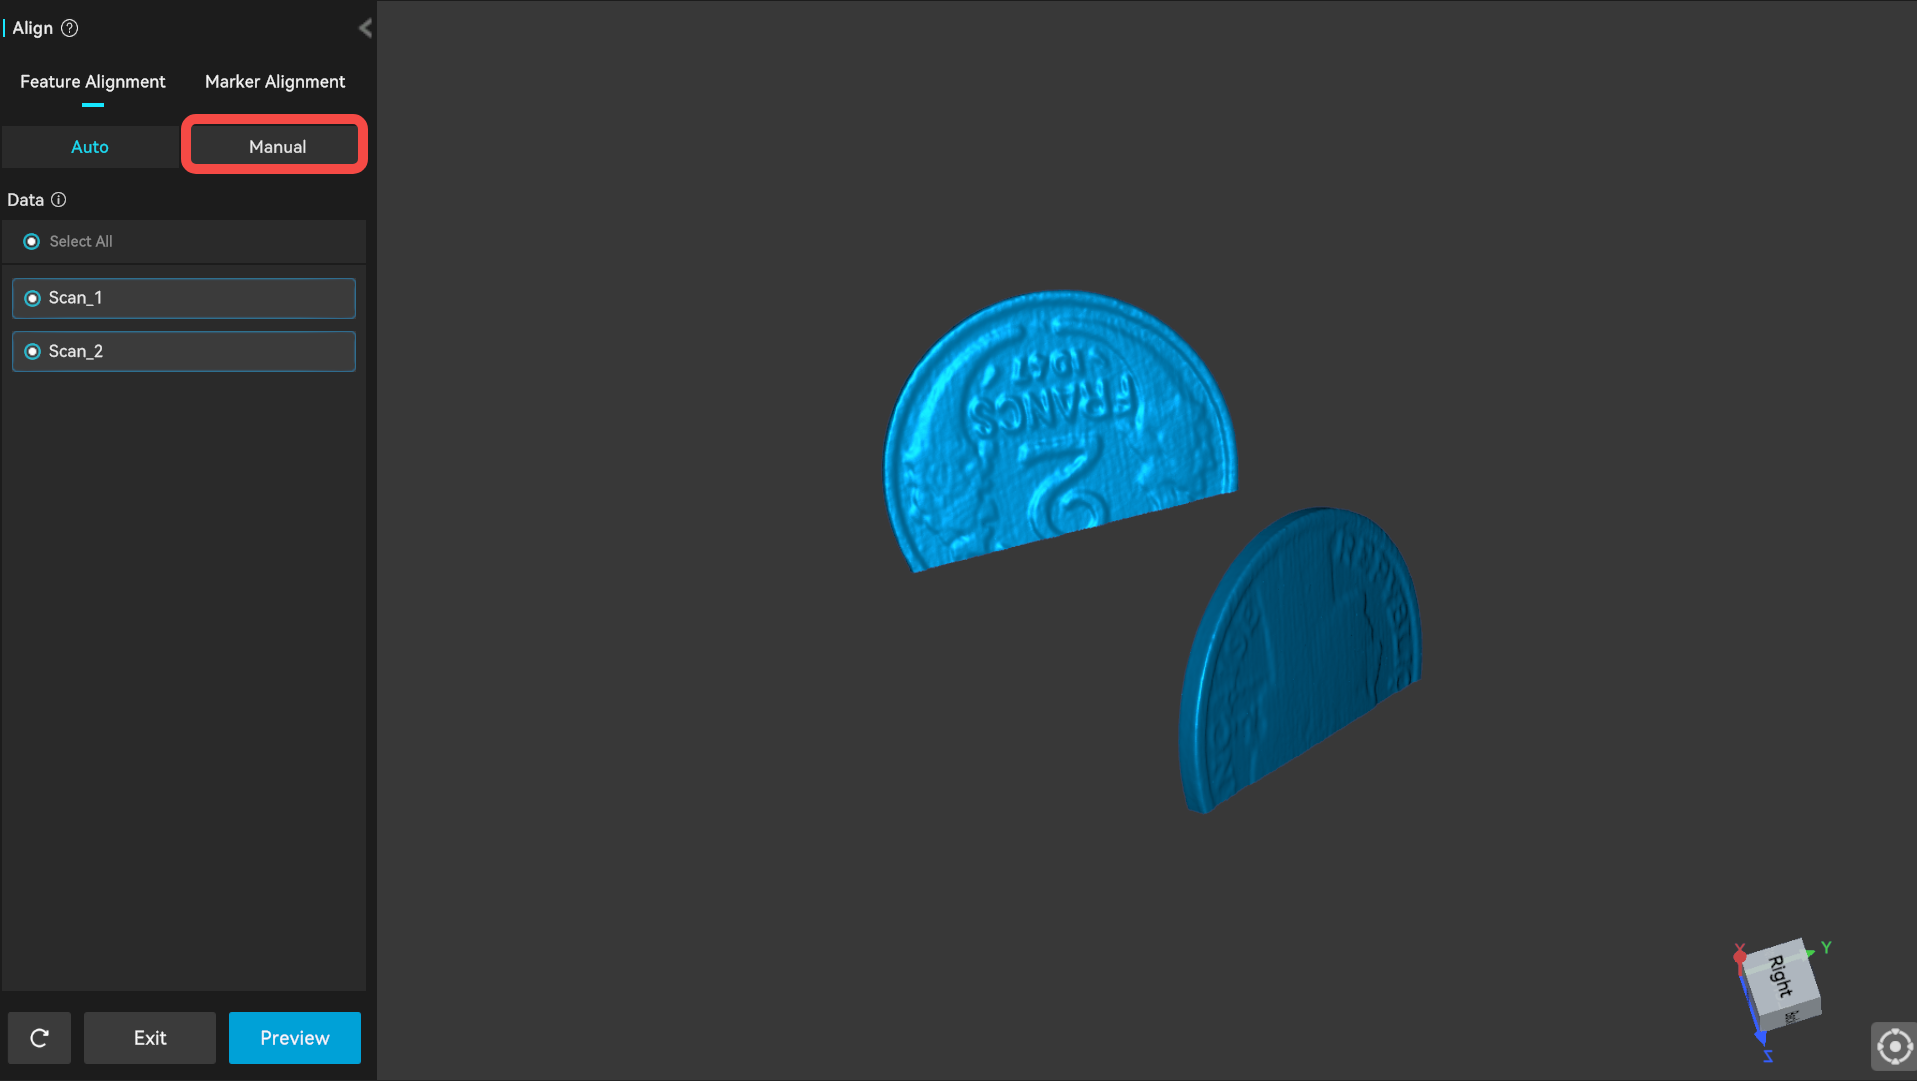
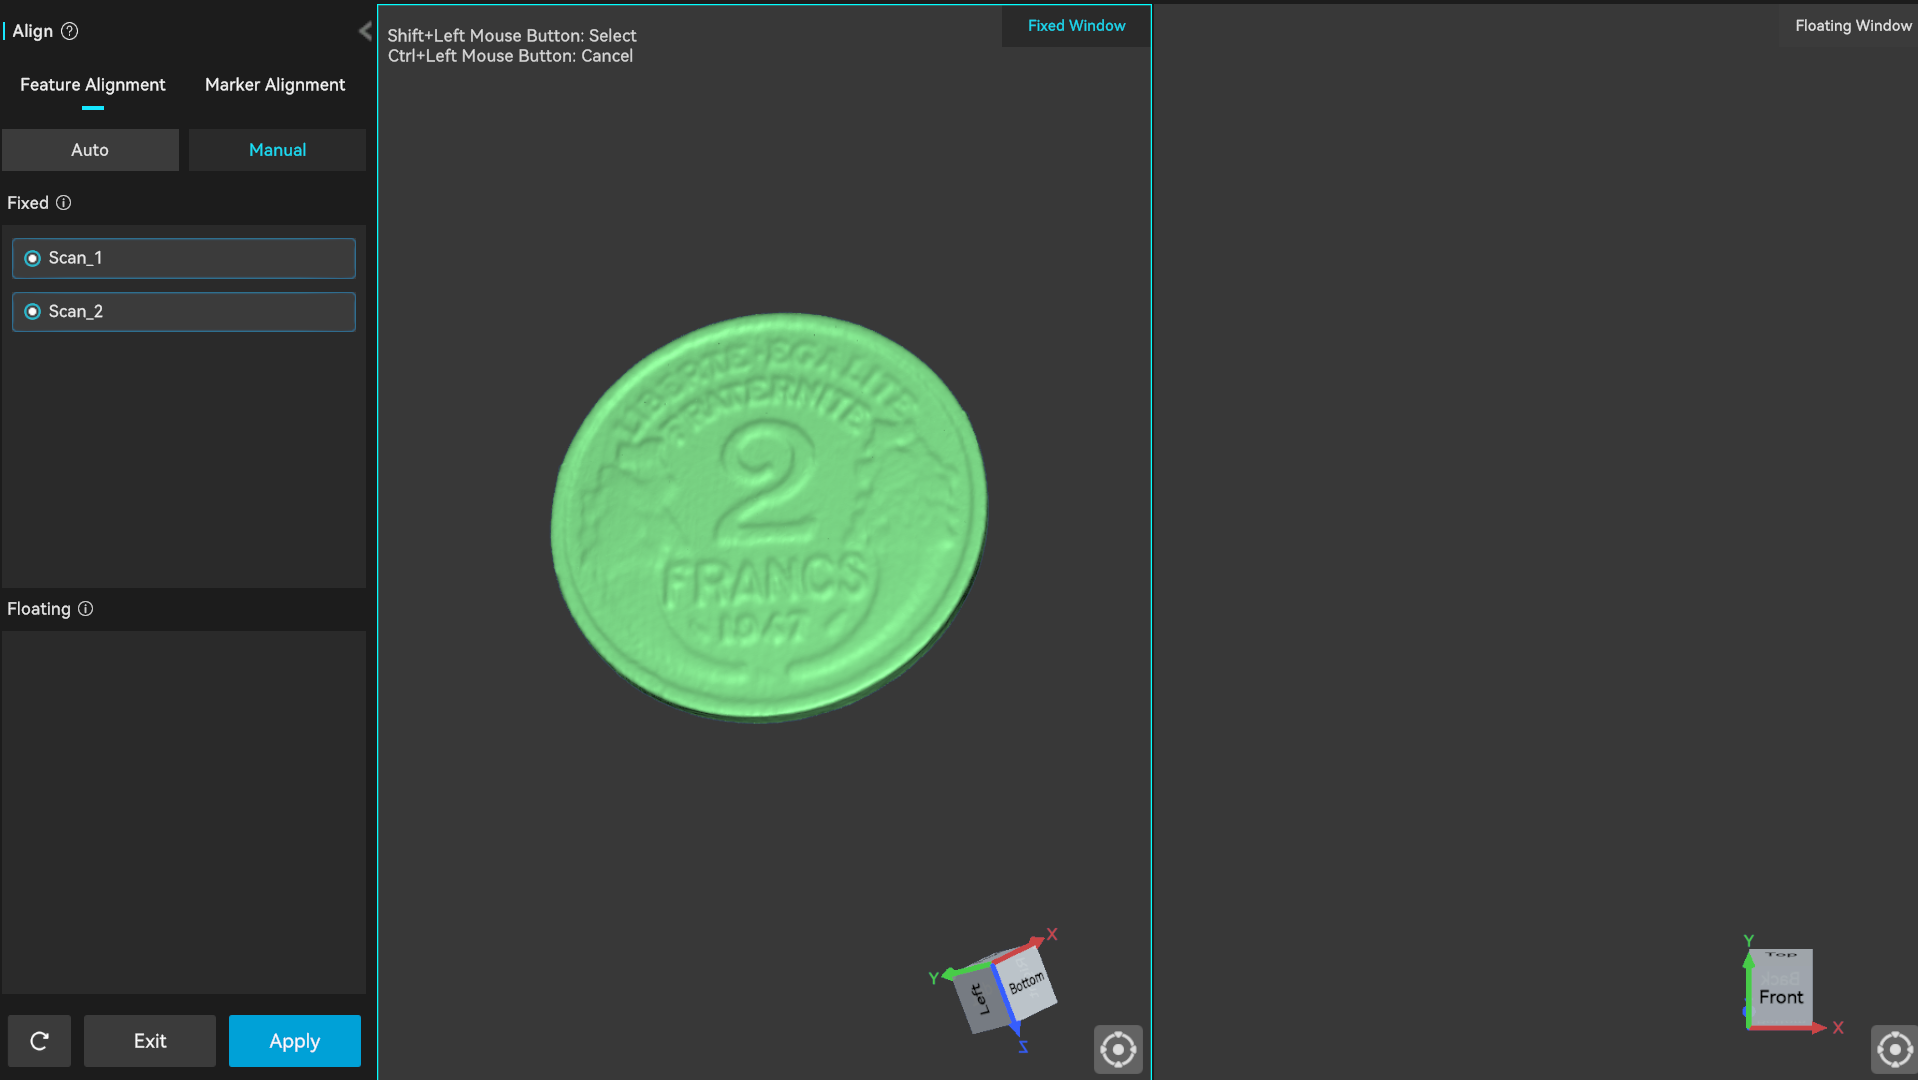
- Rotate the two models to a matching angle, then select three points that form a triangle – with the first point near the center. Click Preview, confirm the alignment, then click Apply to complete alignment.
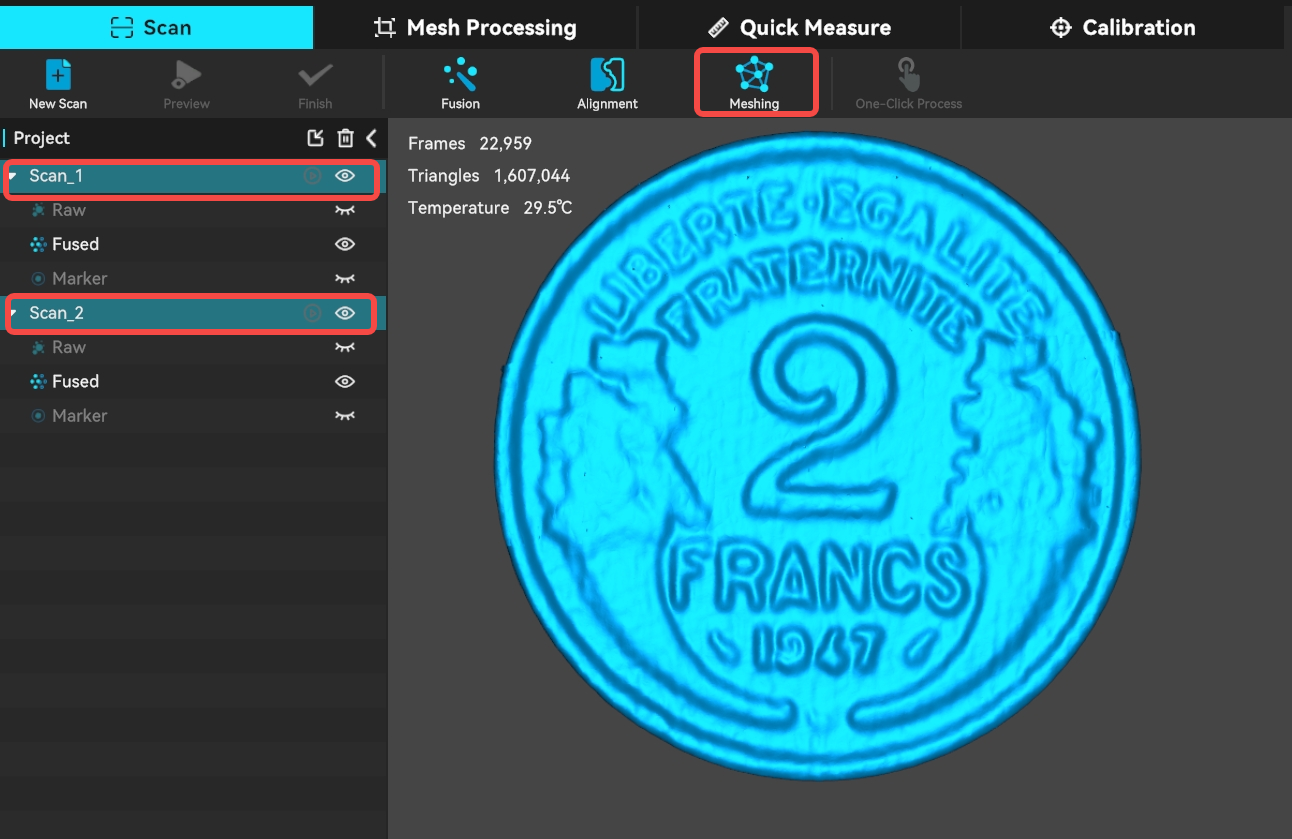
- After alignment, hold Ctrl and select both files, then click Meshing to merge the two aligned meshes into a single model.
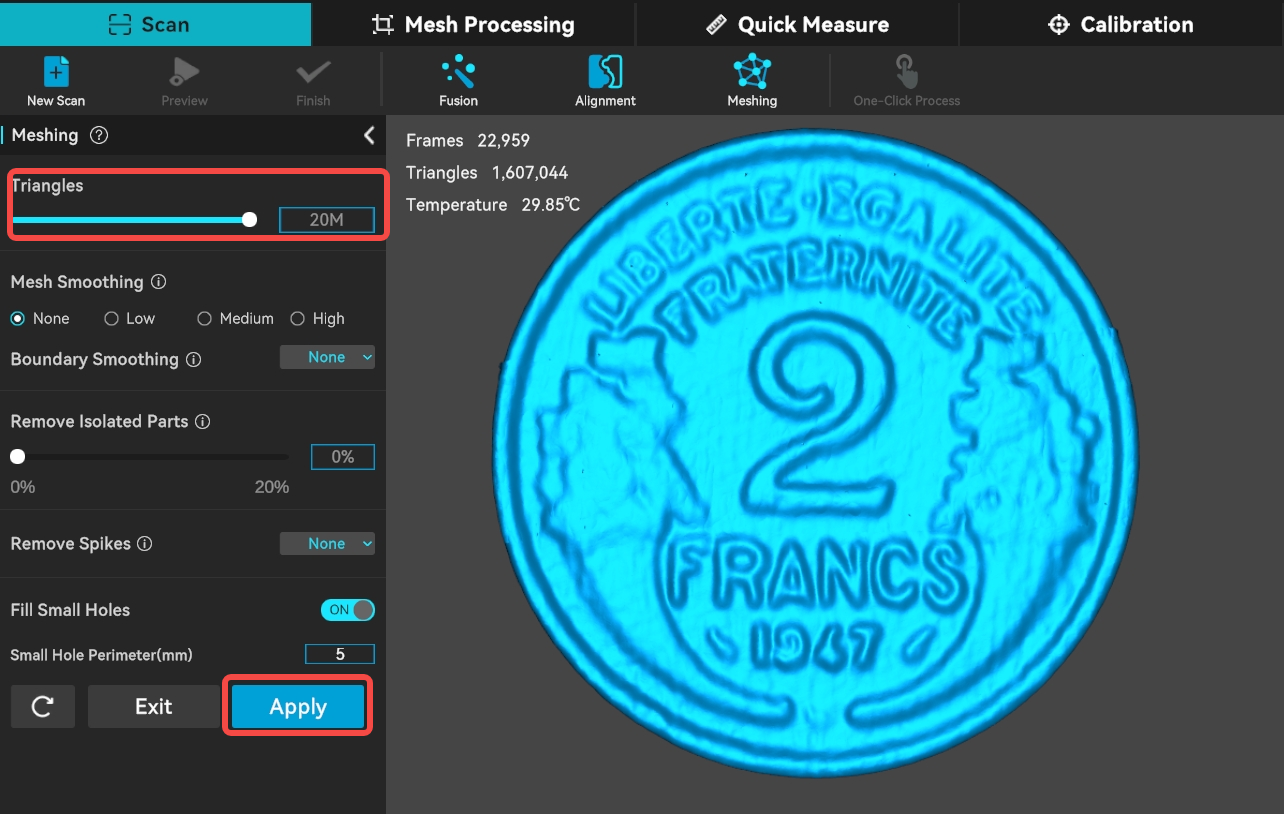
- For a coin, set the triangles as high as 20 million – The more triangles give better mesh quality. Then click Apply.
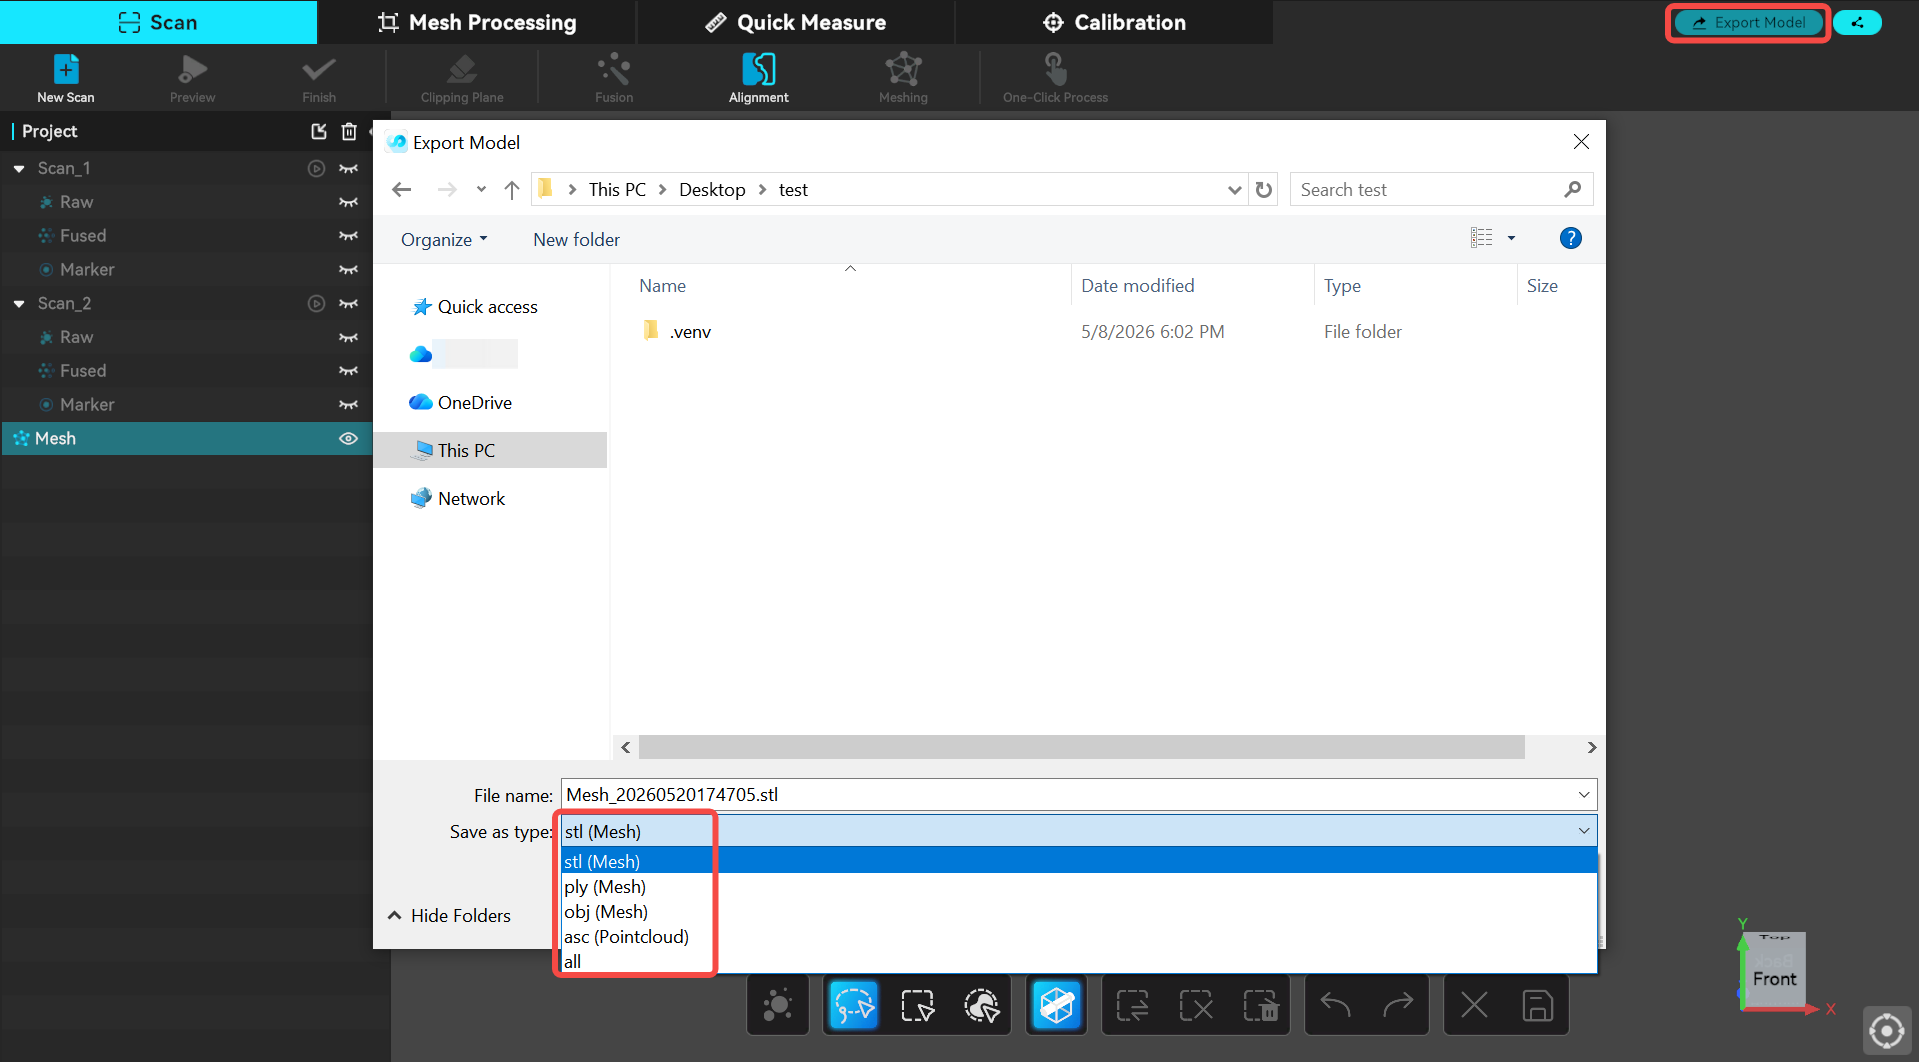
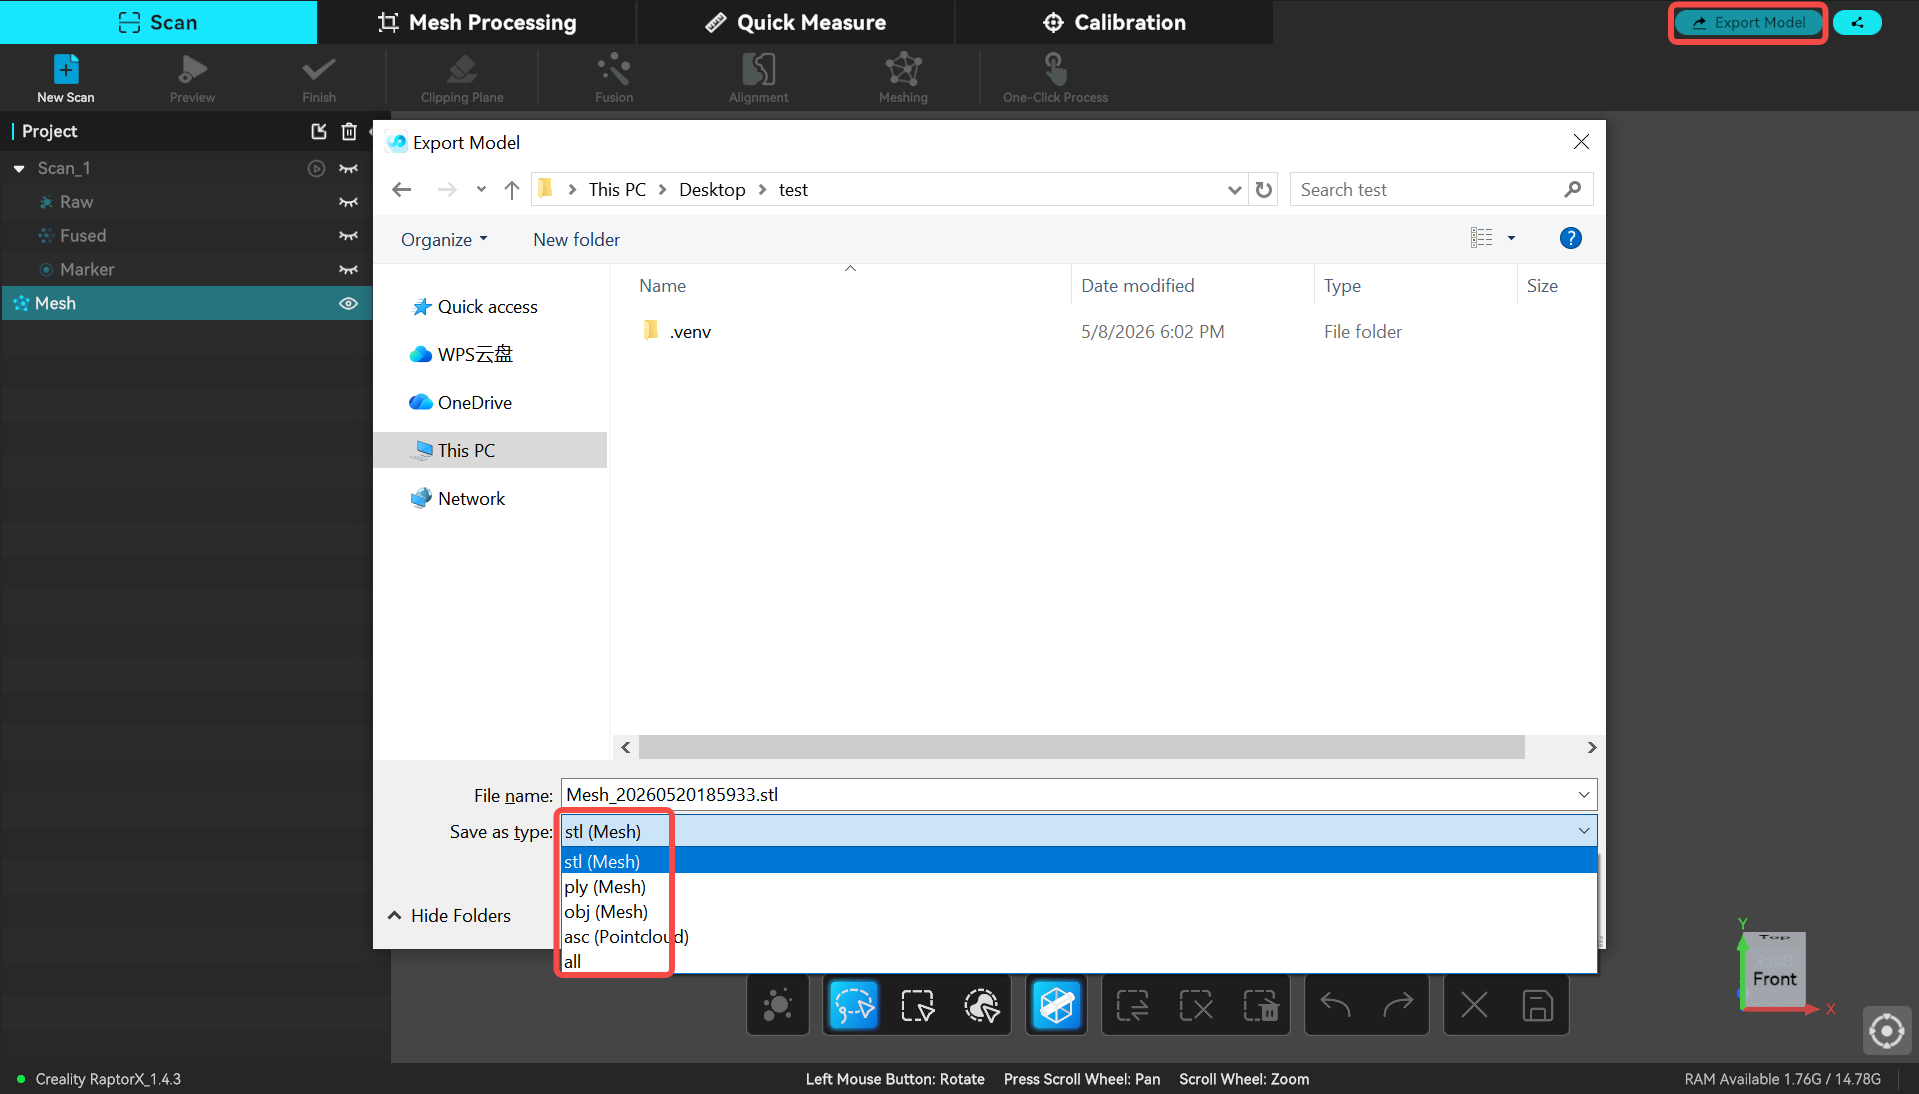
- Choose your desired format and export the model.
¶ 6. Done!
¶ One‑Side Scanning Workflow (if you only need one face)
¶ 1. Preparation
Same as the complete scanning workflow, but the setup differs slightly.
A coin is a thin‑walled object – avoid placing it directly on the table. Recommended setups:
- Turntable + modeling clay
- Turntable + glass block
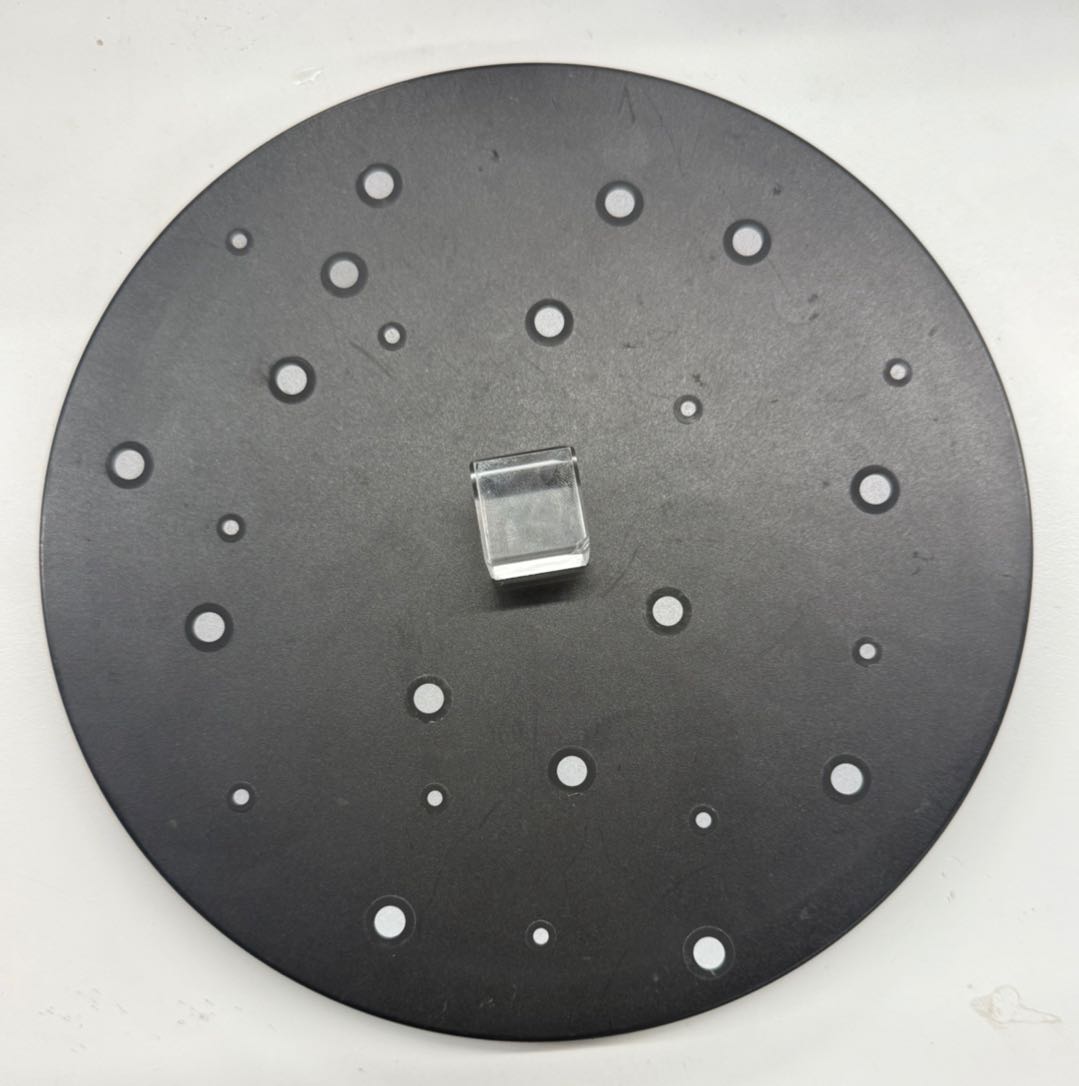
¶ 2. Scanning steps
- Set resolution to 0.2 mm, choose Parallel Line Mode.
- Roughly scan the coin once, making sure the entire model turns blue (indicating successful scanning).
- Pause the scan, then activate Local Detail Scan and reduce the resolution to 0.05 mm.
- Select the area for local detail scanning as prompted on the screen, then click Preview to start.
Tips: If you can only select resolution on one side, please enable Penetrate Selection and re-select the area.
- Scan the model from multiple angles while rotating the turntable until the whole scanned data turns blue. This avoids detail loss due to insufficient point cloud data.
- After detail scanning, select the Connected Components feature, hold Shift and left‑click to select the coin data you want to keep, then invert the selection and delete the rest.
¶ 3. Post‑processing
- Click Fusion to convert the point cloud into a mesh.
- Use Ultra-Detail with 0.05 mm point distance and 75% noise removal.
- Choose your desired format and export the model.
¶ 4. Done!