The actual time spent on a 3D scan is influenced by many factors, including the scanner's speed, the size of the object, surface characteristics, scan parameters, number of markers, real‑time resolution (for blue laser scanning), and the hardware performance of both the scanner and computer. All of these factors affect scanning efficiency to varying degrees.
From a practical workflow perspective, a reasonable way to calculate total project time is:
Total Project Time = Setup Time + Data Capture Time
This article covers the key factors that affect 3D scanning time and offers practical tips to improve scanning efficiency.
¶ 1. Scanner Hardware Performance
Different scanners use different optical technologies and hardware configurations, resulting in significant differences in data acquisition methods and scanning efficiency. When evaluating scanner speed, the following parameters are usually the most important.
¶ 1.1 Scanning Rate (measurements/s)
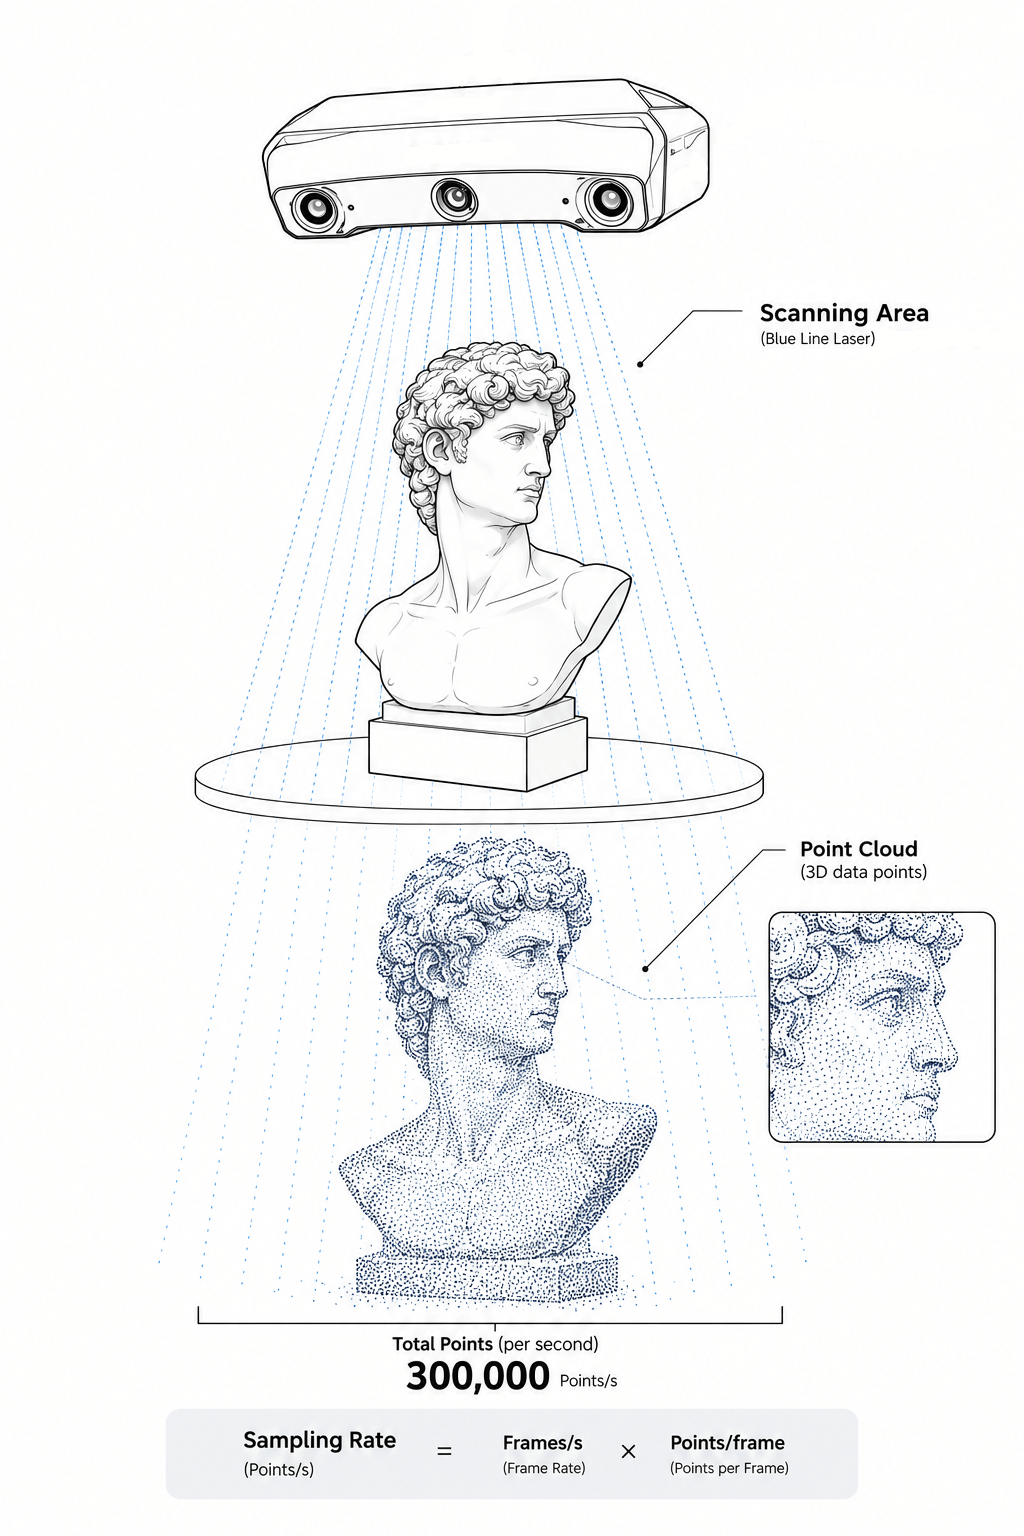
Scanning rate is typically expressed as measurements/s (points per second), i.e., the number of 3D data points the scanner can capture per second.
Scanning Rate (measurements/s) = Frame Rate (fps) × Measurements per Frame
In theory, a higher scanning rate means the scanner can acquire more data in the same amount of time. However, when comparing different scanners, it's important to consider scanning rate together with other parameters such as field of view, light source, and frame rate.
¶ 1.2 Field of View (FOV)
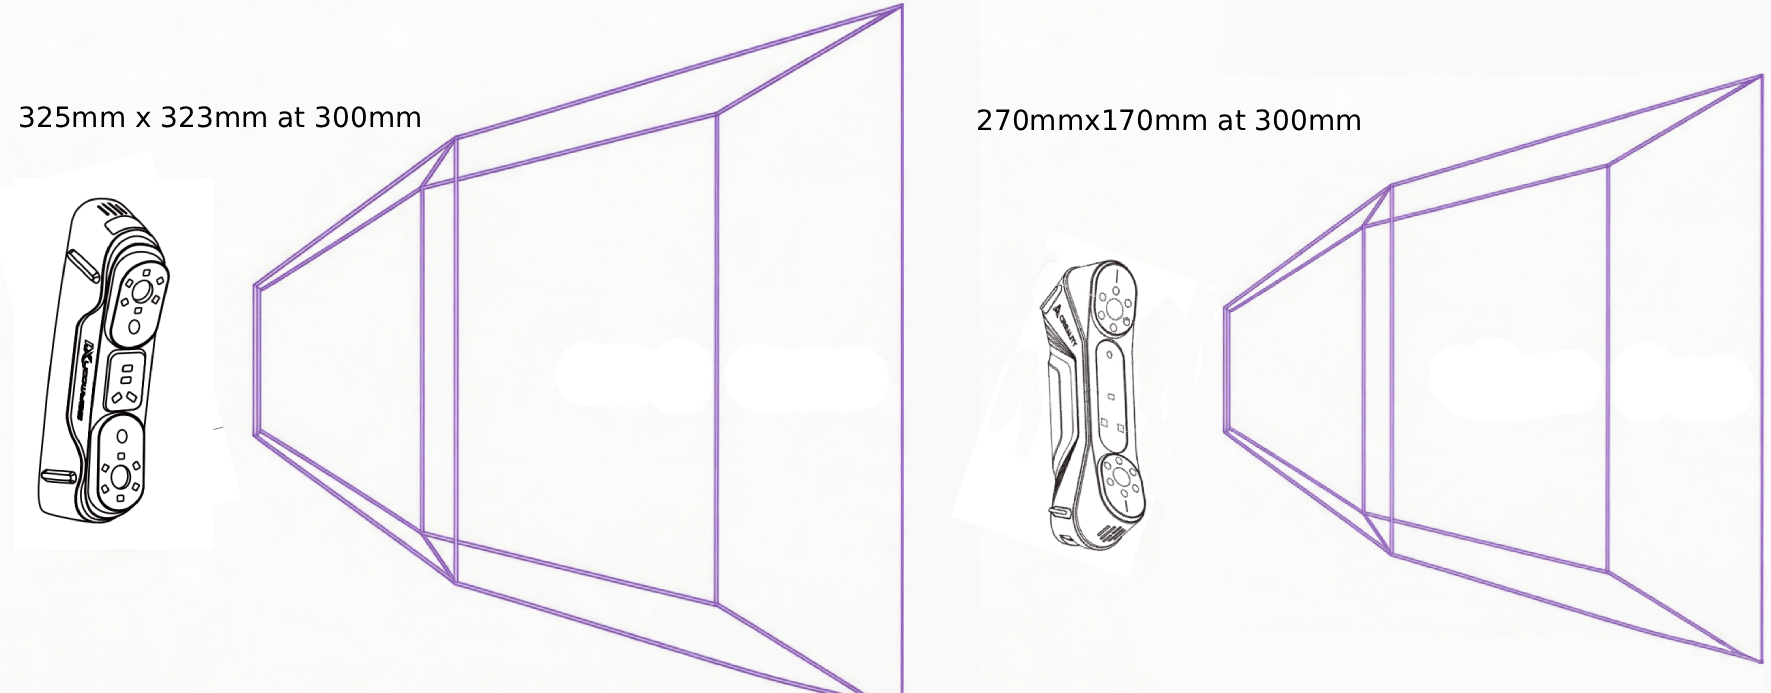
FOV (Field of View) refers to the area that the scanner can capture at a given scanning distance. A larger FOV generally means more area can be covered in a single pass.
For large objects, a larger FOV typically improves surface coverage efficiency. For example, when scanning a car body, furniture, or large mechanical parts:
- Smaller FOV → less area per pass → more passes required
- Larger FOV → more area per pass → fewer passes and shorter scan path
¶ FOV Size and Suitable Use Cases
A larger FOV generally means:
- Greater coverage per pass
- Faster scanning of large objects
- Fewer required scan paths
For smaller objects with complex structures or fine details (e.g., gears, small mechanical parts, object details), a larger FOV may actually reduce point cloud density and compromise detail reproduction. Such objects typically require higher point cloud density and a narrower field of view.
In short, the choice of scan range should be based on object size and detail requirements.
¶ 1.3 Frame Rate (FPS)
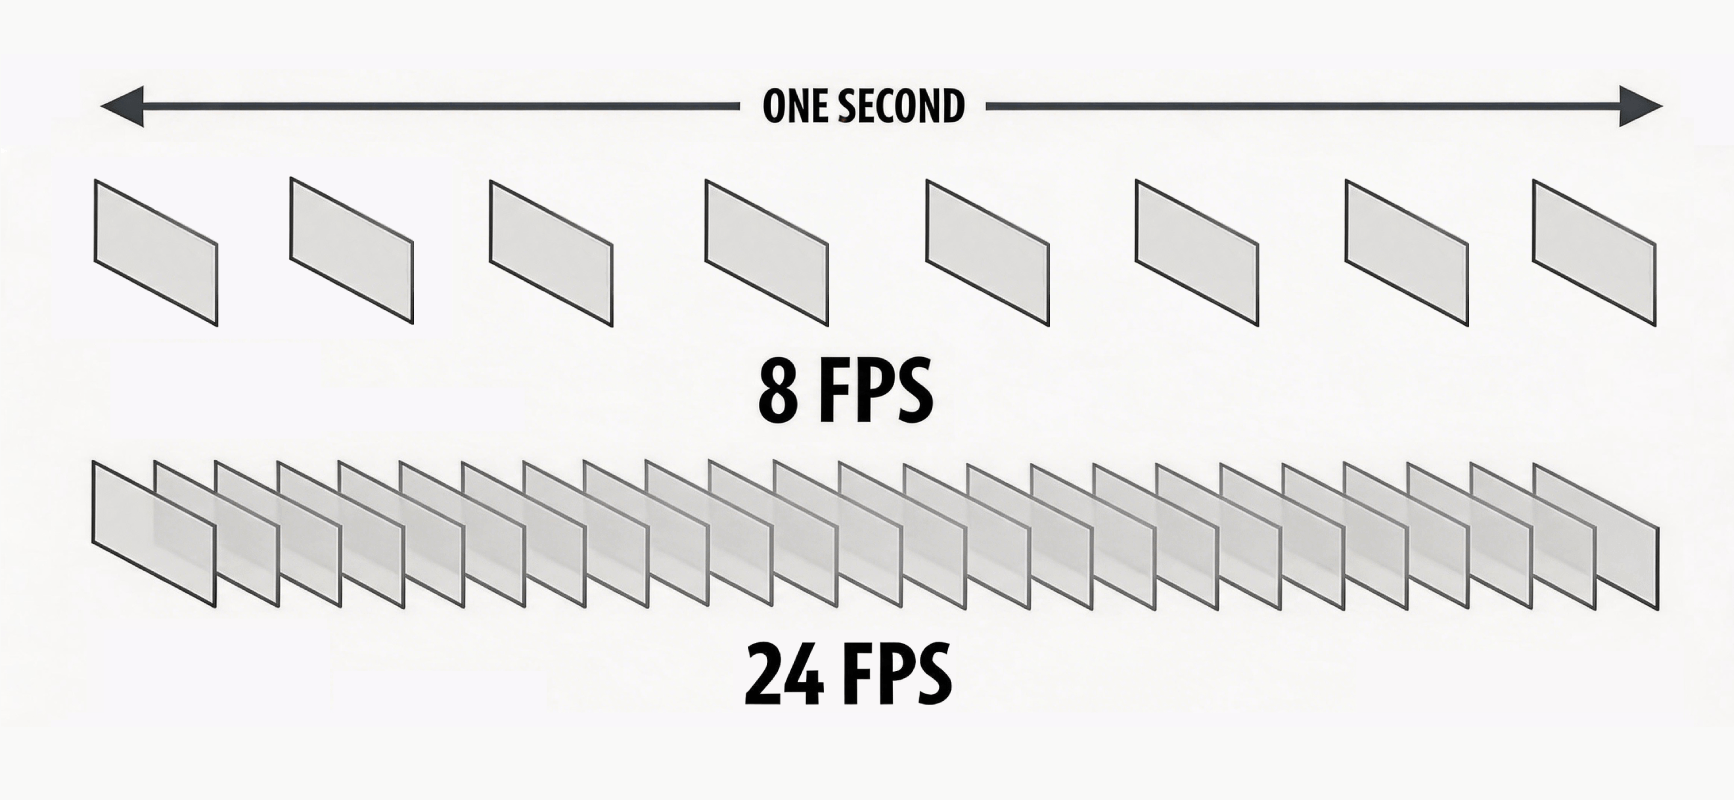
FPS (Frames Per Second) indicates how many image frames the scanner can capture or process each second.
When the frame rate is low, moving the scanner too quickly increases the spatial displacement between consecutive frames, reducing the overlap between frames. The scanner, lacking sufficient overlapping features, may fail to determine the current position, leading to tracking loss or scan failure.
Therefore, a higher frame rate generally allows for more natural and fluid scanning movements, without the need to deliberately slow down.
However, it is important to note that a scanner's maximum supported FPS does not necessarily mean that your computer can consistently achieve that frame rate. Computer performance, USB data transfer, and the software's real-time processing capabilities can all affect the actual frame rate.
¶ 1.4 Light Source Technology
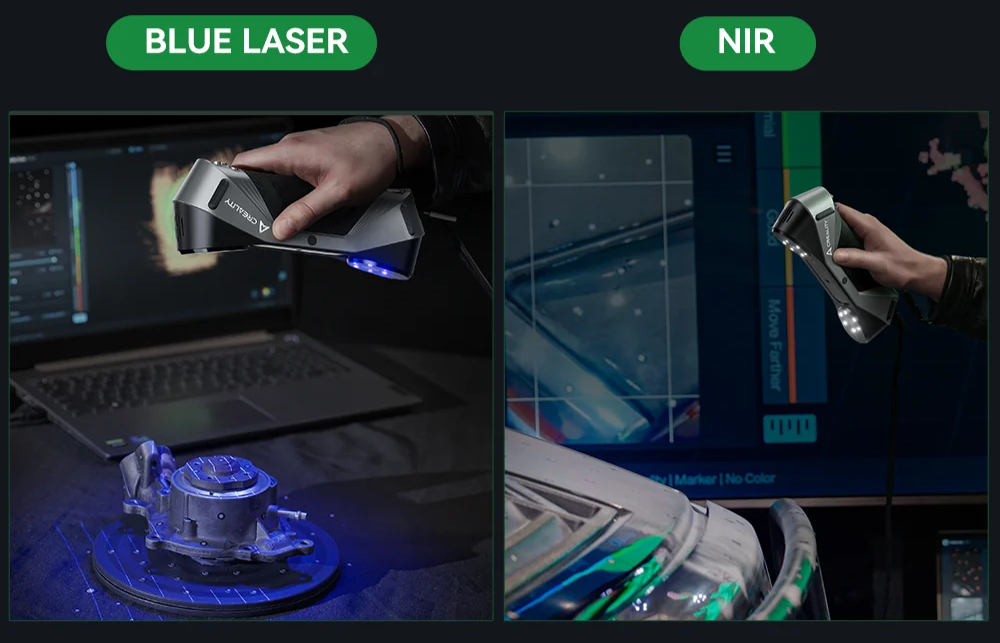
Different scanning technologies use different data acquisition methods, resulting in varying scanning efficiency.
¶ Infrared Structured Light
Infrared structured light typically captures a larger surface area in a single frame for 3D computation. Key characteristics of this technology include:
- Large single‑frame coverage
- Suitable for fast coverage of large areas
- Supports geometry or texture tracking
For objects with clear geometric or textural features, geometry or texture tracking can reduce the need for markers, shortening preparation time. However, scanning results with infrared structured light are still affected by ambient light, surface material, color, and reflectivity.
¶ Blue Laser Line
Blue laser line scanners acquire 3D data using laser lines projected onto the object surface. Their efficiency is typically related to:
- Number of laser lines
- Acquisition frequency (frame rate)
More laser lines cover more area at the same time. Therefore, in scenarios such as scanning large mechanical parts or quickly covering large areas, cross‑line laser mode can improve data acquisition efficiency.
¶ 2. Computer/Mobile Hardware and System Configuration
Insufficient hardware performance is a common cause of extended scan times, mainly in two aspects:
- During real‑time scanning: If your computer or phone is underpowered, previews may stutter and frame rates may drop, increasing the risk of tracking loss. Once tracking is lost, you need to reposition, significantly adding to total scan time.
- During data processing: Insufficient memory or GPU performance slows down fusion, meshing, and other post‑processing steps.
To minimize processing time, keep these two points in mind:
- For wired scanning, connect the scanner to a high‑speed USB port (USB 3.0 recommended) and use the original data cable. Insufficient USB bandwidth can slow data transfer and affect scanning efficiency.
- When using a laptop, always connect the power adapter and set the power plan to "High Performance". On battery power, the system may limit hardware performance, noticeably slowing down the scan.
Different scanner models have different hardware requirements. For detailed recommended or minimum configuration specifications for your specific model, please refer to the official performance guide.
¶ 3. Scan Object and Scan Parameters
In addition to device and computer performance, the object itself is a major factor affecting scan time. Before starting, it's helpful to evaluate:
- Object size
- Surface material and color
- Whether the surface is reflective or transparent
- Whether there are clear geometric or textural features
This information will directly influence the choice of scan mode and preparation work.

¶ 3.1 Object Size
Generally speaking, the larger the object, the more surface area to cover, and thus the longer the scan time. However, scan time is not always directly proportional to size.
For example: a large object with a simple flat surface may be easier to scan than a smaller object with a highly complex structure.
¶ 3.2 Resolution (Point Distance)
Resolution is the distance between adjacent 3D data points in the final point cloud.
- Smaller Resolution → denser point cloud → retains more detail
- Larger Resolution → sparser point cloud → smaller data volume
.png)
Resolution should be chosen based on the actual size and accuracy requirements of your application. Using a much smaller resolution than necessary for a large object can lead to:
- Significantly larger data volume
- Increased memory usage
- Longer fusion and post‑processing time
Recommendation: Don't blindly aim for the smallest resolution. Instead, choose a resolution appropriate for your object size and final use case.
Examples:
- Large objects → typically allow larger resolution
- Precision parts → may require smaller resolution
- Models for display → may not require the smallest resolution
- Models for dimensional inspection or reverse engineering → set based on actual tolerance requirements
¶ 4. Surface Characteristics and Pre‑Processing
Scanning efficiency is often affected before the scan actually begins. Certain special materials may require extra preparation:
Examples: black objects, highly reflective metals, transparent or translucent materials, and objects with uniform texture or color. These materials may not be easily recognized by the scanner.
To improve the chances of a successful scan, you may need to:
- Use markers and marker tracking mode
- Adjust exposure or scan parameters
- Apply scanning spray to reduce surface reflectivity
All of these steps add preparation time. So scanning speed depends not only on how fast the scanner is, but also on how much time is needed to make the object "scannable."
¶ 5. Number of Markers and Tracking Mode
Markers significantly improve tracking stability, especially when the object surface lacks geometric or textural features. However, applying and removing markers takes time – for large projects, preparation may even exceed the scanning time itself.
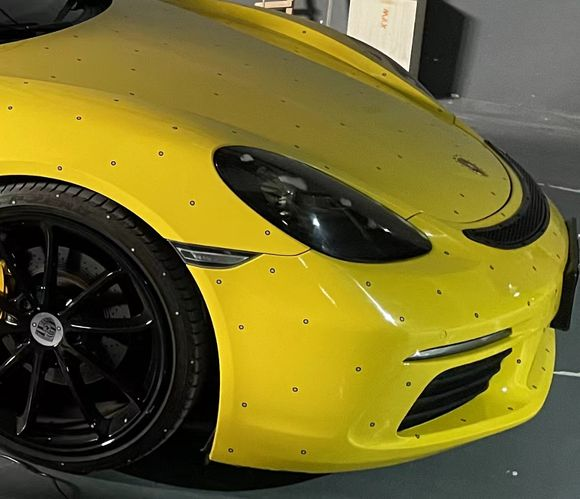
If the object has sufficient geometric or textural features, you can choose markerless tracking, eliminating the need to apply and remove markers and greatly shortening preparation time.
In practice, choose between marker‑based and markerless tracking based on the object's features. Minimize marker usage while ensuring tracking stability to improve overall efficiency. (Note: some blue laser scanners – such as the Creality Pika, Sermoon X1, Sermoon S1, and Sermoon P1 – support blue laser markerless scanning.)
¶ 6. Scan Operation
Scan operation also affects scanning efficiency. Frequent tracking loss, repositioning, or missed areas significantly increase project time. Plan your starting position and movement path before scanning, and maintain the optimal distance throughout the scan.
Re‑scanning the same area typically doesn't improve quality but adds to data volume and processing load. Minimize unnecessary re‑scanning while ensuring complete coverage. For complex objects, consider scanning in separate sections.
.png)
For small objects, using a turntable can stabilize the scan path and ensure more consistent multi‑angle data acquisition. Compared to manual adjustments, this simplifies operation and helps establish a more standardized scanning workflow.
.png)
¶ Summary
An efficient scanning workflow should:
- Enable fast preparation
- Capture data stably
- Minimize re‑scanning
- Complete data processing within a reasonable time
Therefore, when choosing a 3D scanner and setting up parameters, always start from the actual application:
- How large is the object?
- How much detail is needed?
- Is the surface easy to scan?
- Are markers required?
- Does the computer meet the requirements?
- What will the final model be used for?
Only by considering all these factors together can you find the right scanning solution for your project – maintaining quality while maximizing overall efficiency.