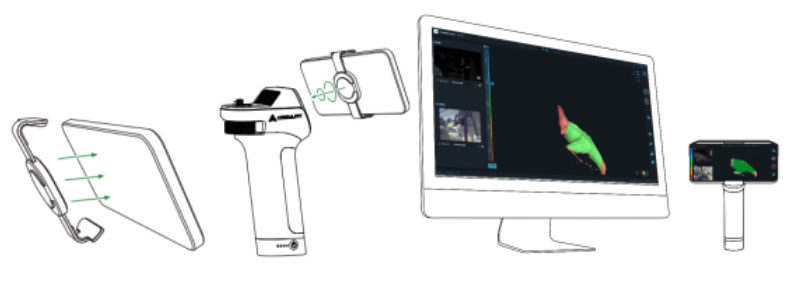
¶ Scan directly with your phone
For recommended performence of smartphone, please visit: https://wiki.creality.com/en/3d-scanner/tutorials/general/performance
1.Install the Creality Scan App on your phone.
- For iPhone: search for "CrealityScan" in the App Store and download the app.
- For Android: search for "CrealityScan" on Google Play and download the app.
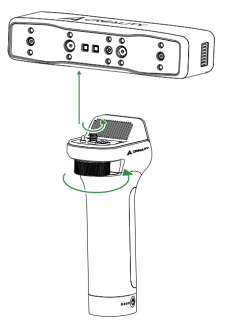
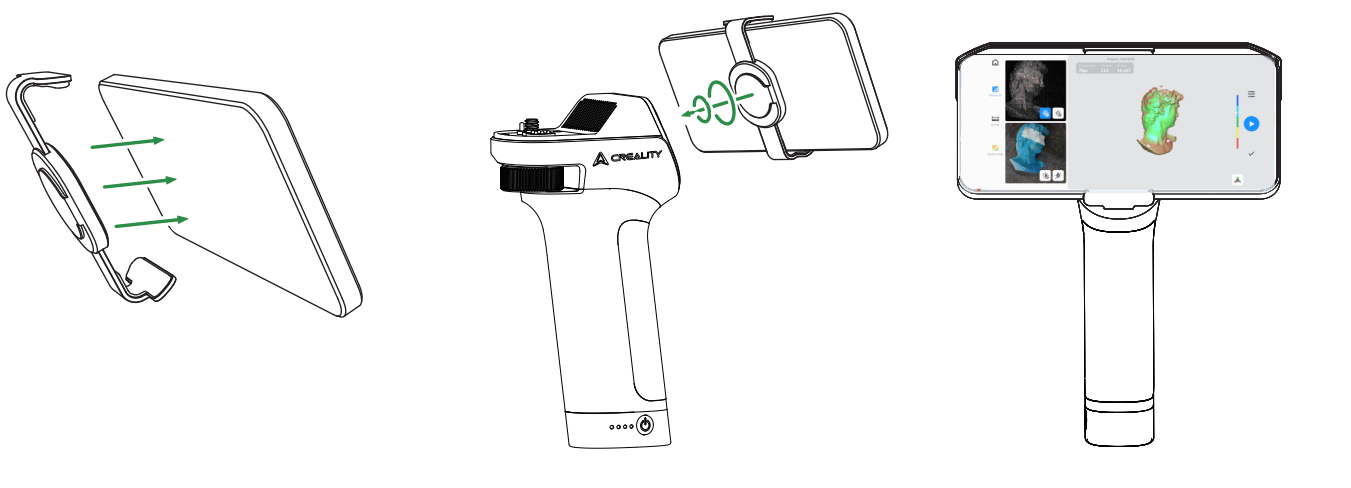
- Please fully charge the Lite Bridge and install the Otter Lite scanner onto the Lite Bridge as shown in the following image.
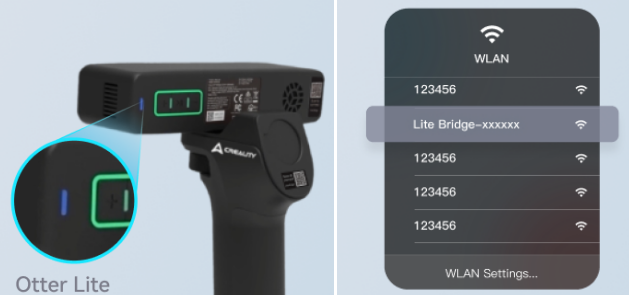
3.Connect WiFi to Lite Bridge:
(1) First, set your phone to airplane mode,
(2) briefly press the power switch, and wait for the scanner's WiFi indicator light to start flashing blue (when the scanner is in WiFi mode).
(3) Then, turn on WiFi again on your phone and connect to the Lite Bridge WiFi network.
4.Open Creality Scan on your phone. When connecting the scanner via Wi-Fi for the first time, you need to set a password. Follow the prompts to set a password, which will terminate your WiFi connection. After successful setup, reconnect to the Lite Bridge WiFi network.
5.Clip the magnetic phone clip onto the phone and attach it to the Lite Bridge as shown in the diagram. The app recognizes and connects to the scanner to start wireless scanning.
¶ Scan with a computer and use your phone as a screen(wireless mirroring)
- Install the Otter Lite scanner onto the Lite Bridge as shown below. Download the CrealityScan mobile app on your smartphone and the CrealityScan desktop software on your computer in advance.
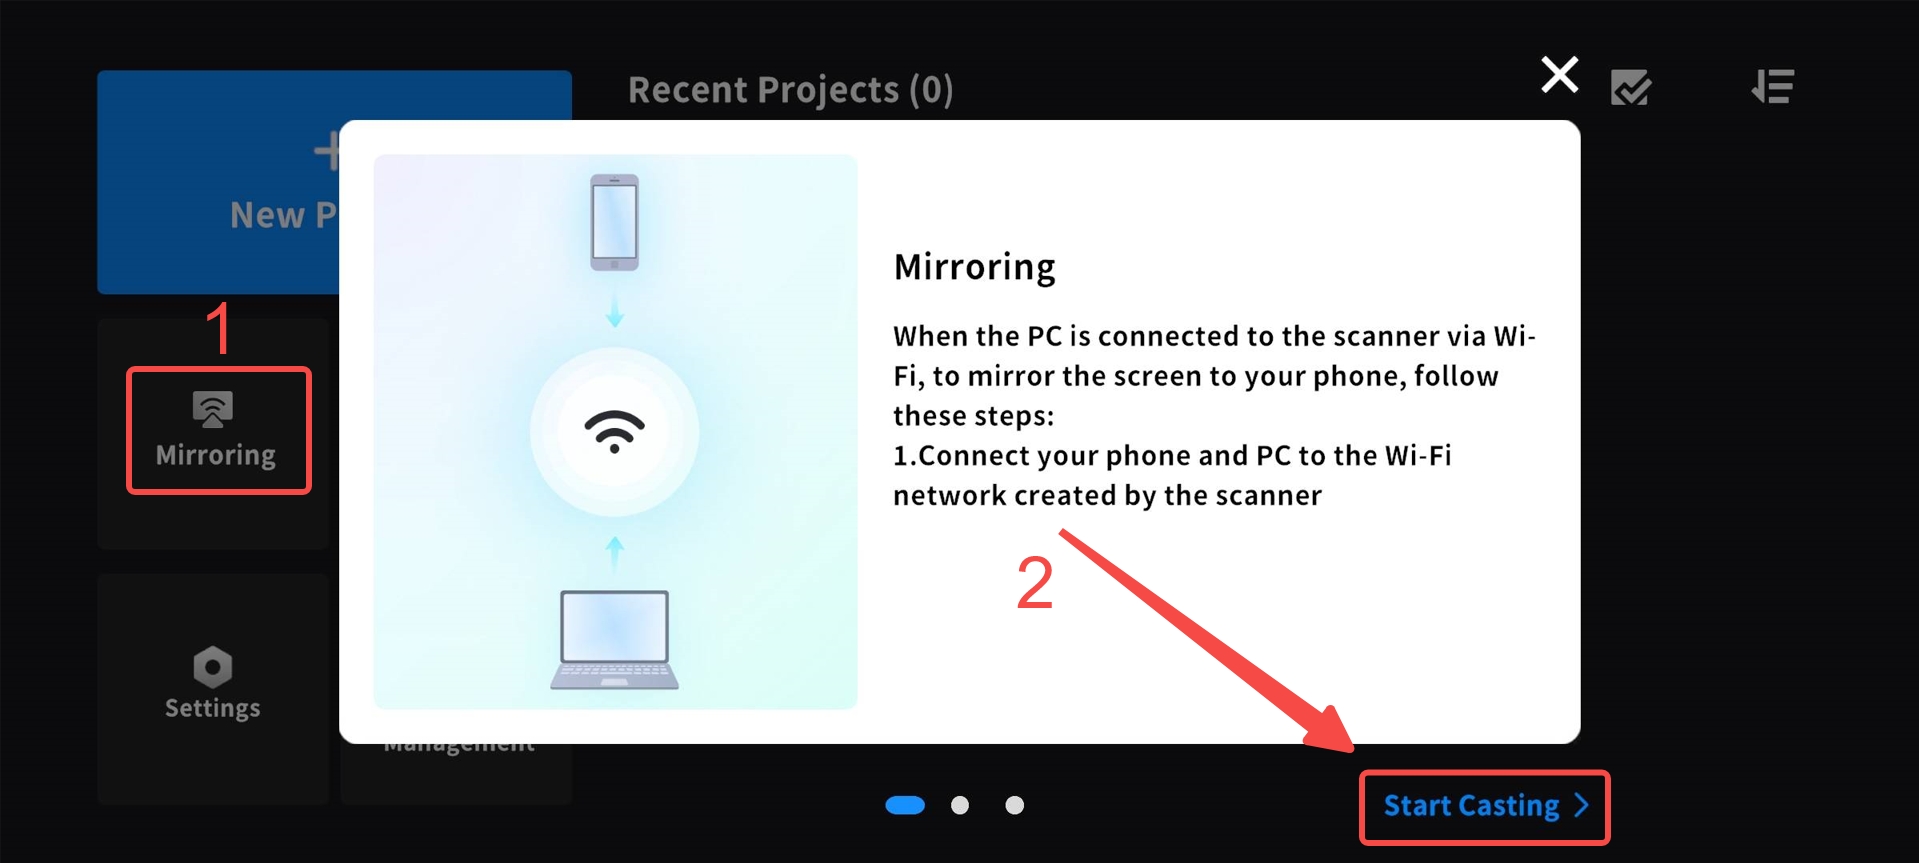
2.Power on the Lite Bridge—the indicator light will confirm the device is on. Connect your computer to the Wi-Fi network named “Lite Bridge – xxxxxx.” For the first connection, enter the password when prompted, then reconnect to this Wi-Fi. Connect both the computer and your phone to this Wi-Fi signal.
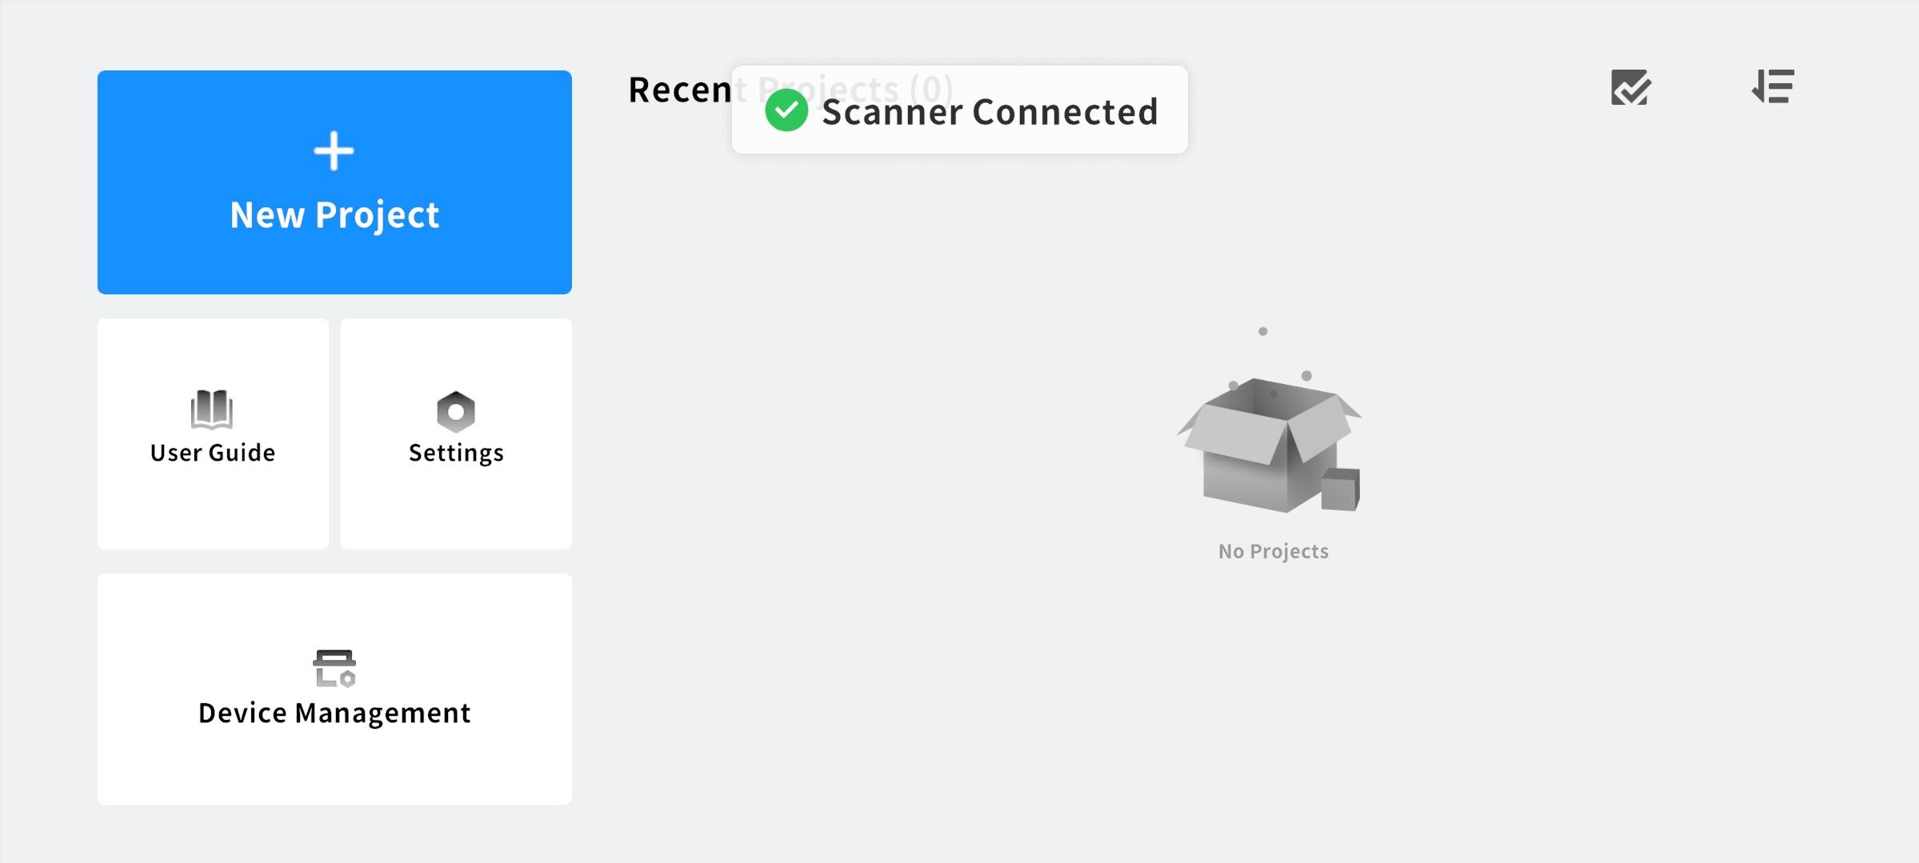
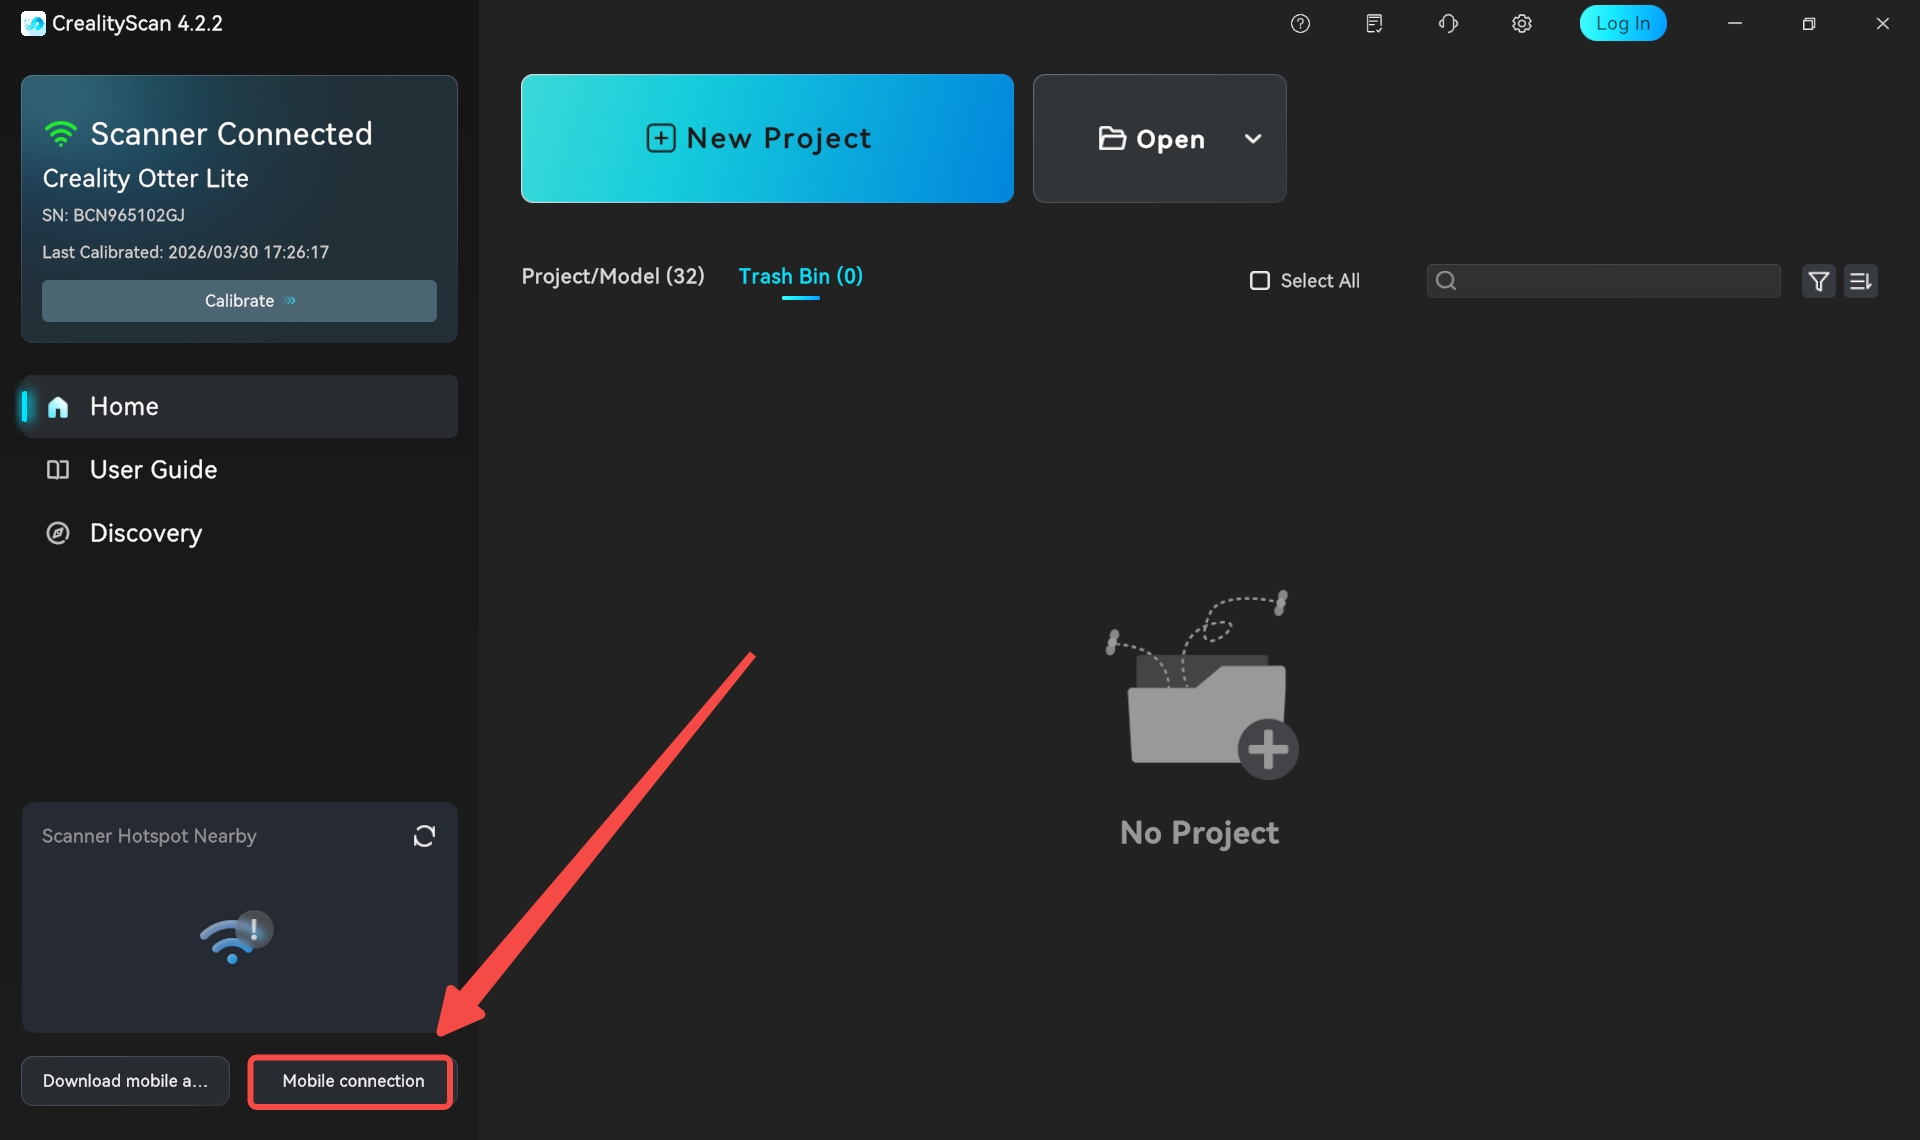
Open the CrealityScan desktop software. After the scanner is connected, click "Mobile Connection" in the lower left corner.
Use your mobile phone to scan the QR code displayed on the PC software.
3.Attach the magnetic phone holder to your phone, then mount it onto the Lite Bridge as illustrated. You may now begin wireless scanning, which will sync the scanning images from your computer to your phone.