Instruction for Otter
¶ 1. Introduction
CR-Scan Otter is a high-precision handheld 3D scanner that is compatible with both small objects and large objects, with a maximum accuracy of 0.02mm. It can easily scan objects ranging from human teeth to entire human bodies, and large automotive components. It benefits from the innovative four-lens stereo vision design. It includes a set of large focal-length binocular stereo vision sub-system for capturing details of small and medium-sized objects at close range; and a set of short focal-length binocular stereo vision sub-system with a larger FOV for scanning relatively large objects, ensuring stable tracking and efficiency.
Main features
- High Accuracy (up to 0.02mm)
- Fast scanning (up to 20 fps)
- Anti-shaking
- Support outdoor scanning (≤30000 lux)
- Supplemental light (2 white LED, 8 NIR LED)
- All-metal body
- Touch buttons
- Interactive indicator lights
¶ 2. Scanning Setting
In the Creality Scan software, multiple scanning modes are provided. It is important to choose the appropriate scanning mode for different types of targets.
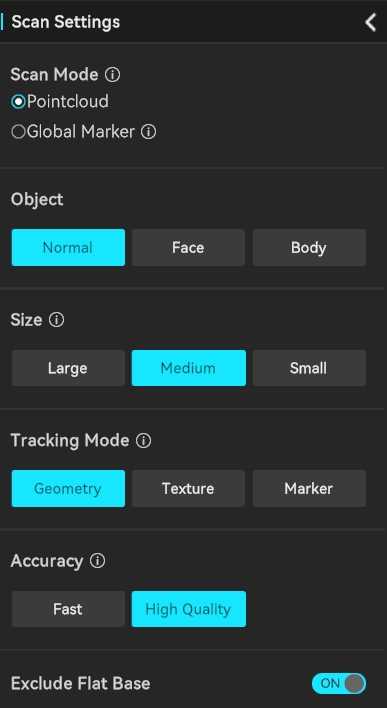
How to choose Feature type?
(1) Geometry: For objects with rich geometric features, it is recommended to use the Geometry Mode for scanning.
(2) Texture: For small objects with limited geometric features, it is suggested to apply the Texture Mode after placing or drawing markers. For very small objects, the marker points can be placed on the table. For objects with rich texture but limited geometric features, the Texture Mode can be directly used for scanning.
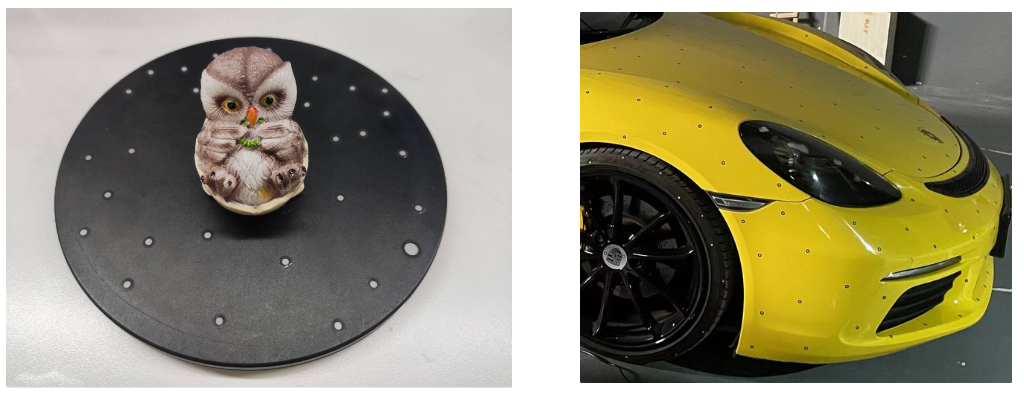
(3) Marker: For objects with limited geometric features, the software also provides Marker Mode for scanning. This mode requires Reflective circular markers to be attached to the surface of the object. For large objects, marker points with an inner diameter of 6mm should be used, while for small objects, marker points with an inner diameter of 3mm can be used.
How to determine if an object has rich geometric features?
Objects with simple geometric shapes, such as cubes or cylinders, or objects with large flat surfaces, often lack distinctive geometric features, which may affect tracking performance. Common objects like cylindrical mugs, square-shaped boxes, or truck cargo compartments do not have rich geometric features too.
On the other hand, objects like portrait sculptures, shoes, or doll models have rich geometric features.
![]()
Accuracy
If you want to obtain better details, do not hesitate to choose “High-Quality”. If your computer has a dedicated graphics card (i.e. GPU), the Hi-Quality mode will provide smoother performance.
For large objects or lower computer specifications, you can choose "Fast Mode“ for scanning.
¶ 3. Basic Terms and Concepts
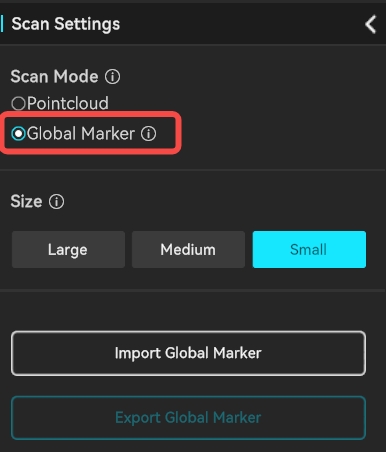
¶ Global Markers
For large objects, we recommend scanning the global markers first, followed by scanning the point cloud. Following this approach will result in higher scanning accuracy.
¶ (1) Scanning distance
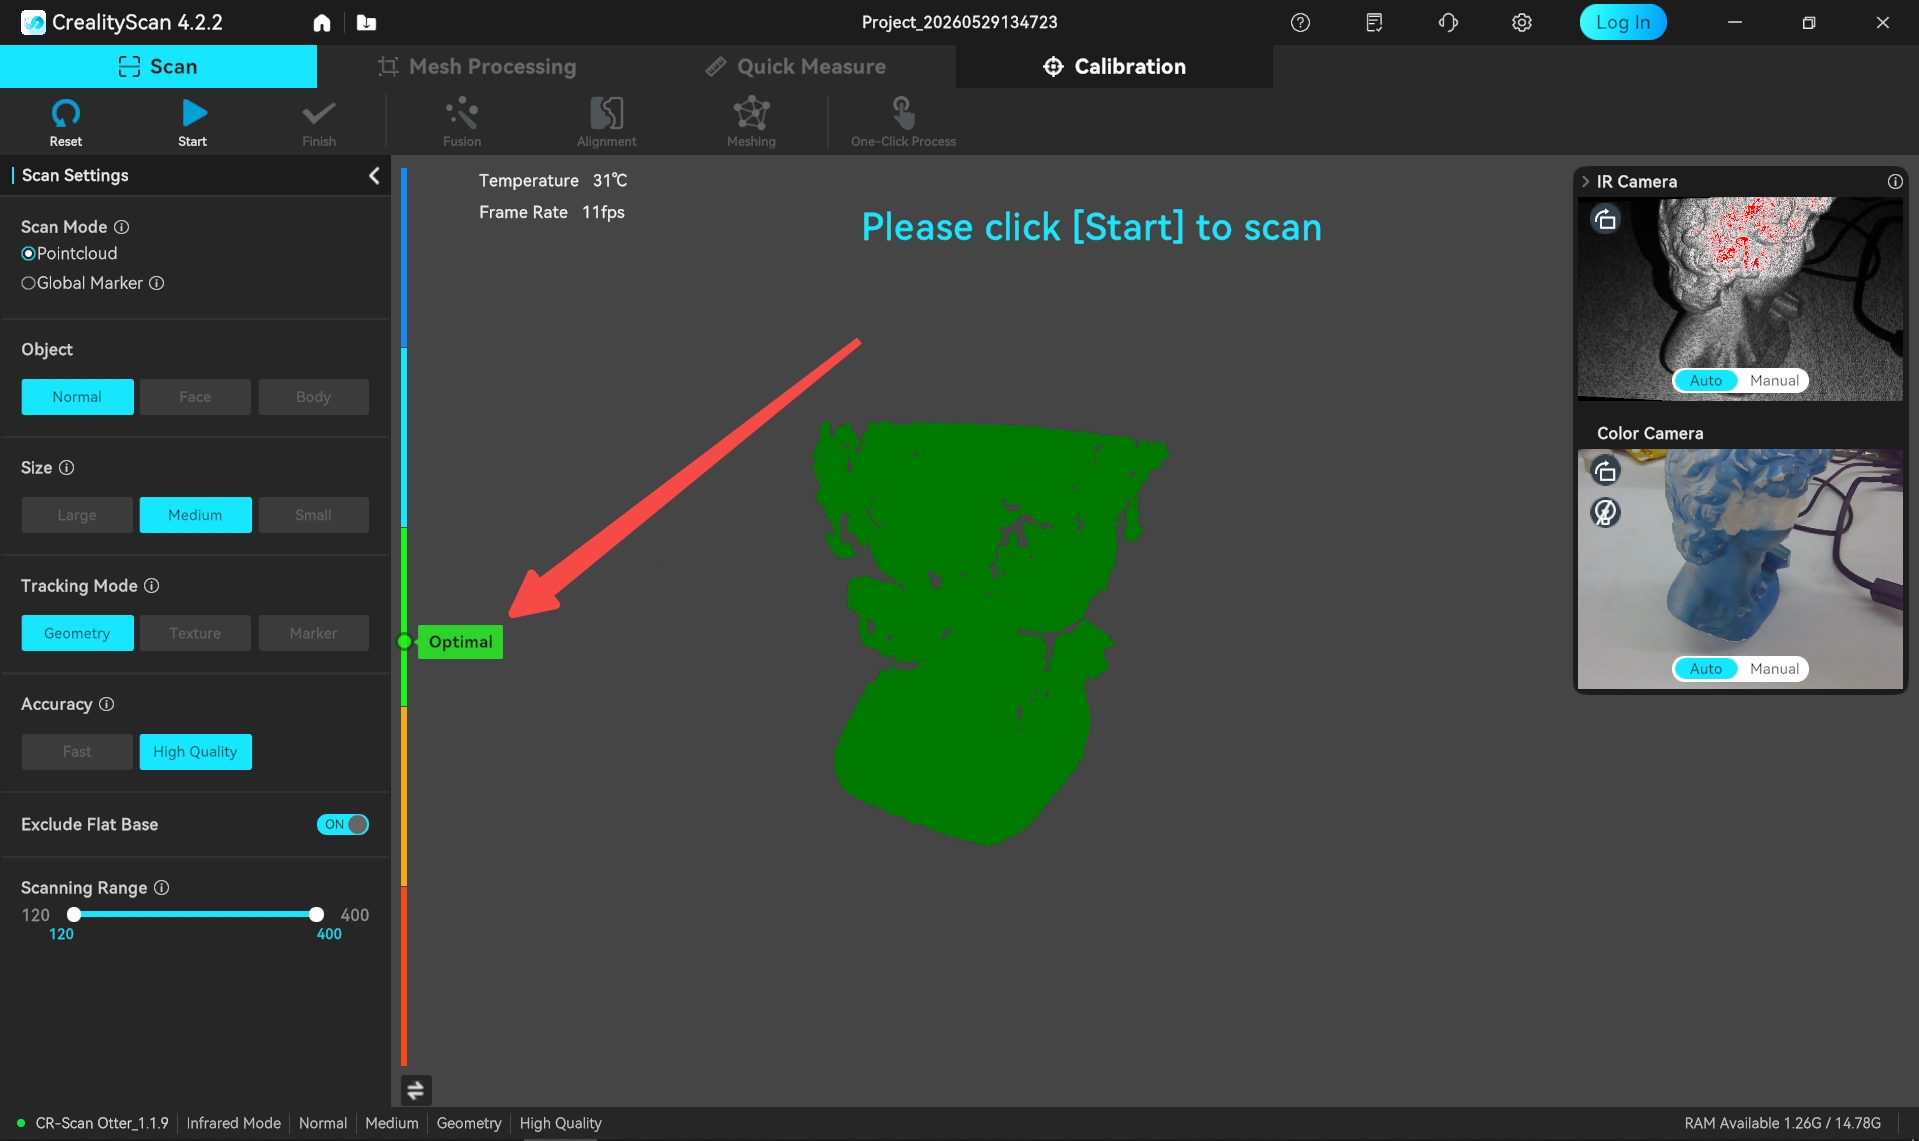
The accuracy of all scanners is related to the scanning distance. Generally, the closer the scanner is to the target while still obtaining point clouds, the higher the accuracy. The Otter scanner has a minimum working distance of 110mm and can reach a maximum distance of 1000mm. For scanning smaller objects, the scanner should be positioned close enough to the target to ensure reliable tracking without losing accuracy.
Follow the instructions provided by the scanning software to maintain the "Optimal Distance".
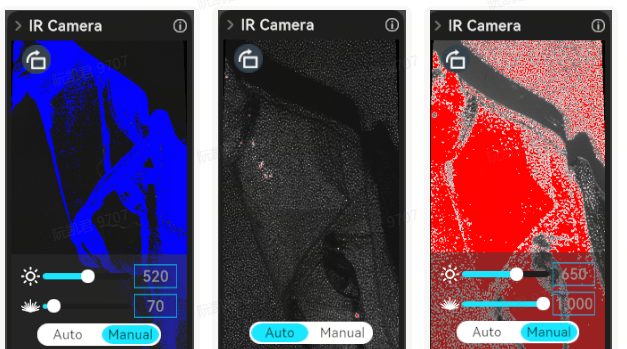
¶ (2) Exposure time
Creality Scan offers two camera exposure control modes: Automatic Exposure and Manual Exposure.
For larger targets, such as faces, Auto-Exposure can be used for scanning.
For smaller objects, automatic exposure may not be accurate. It is recommended to manually adjust the exposure time of the IR camera.
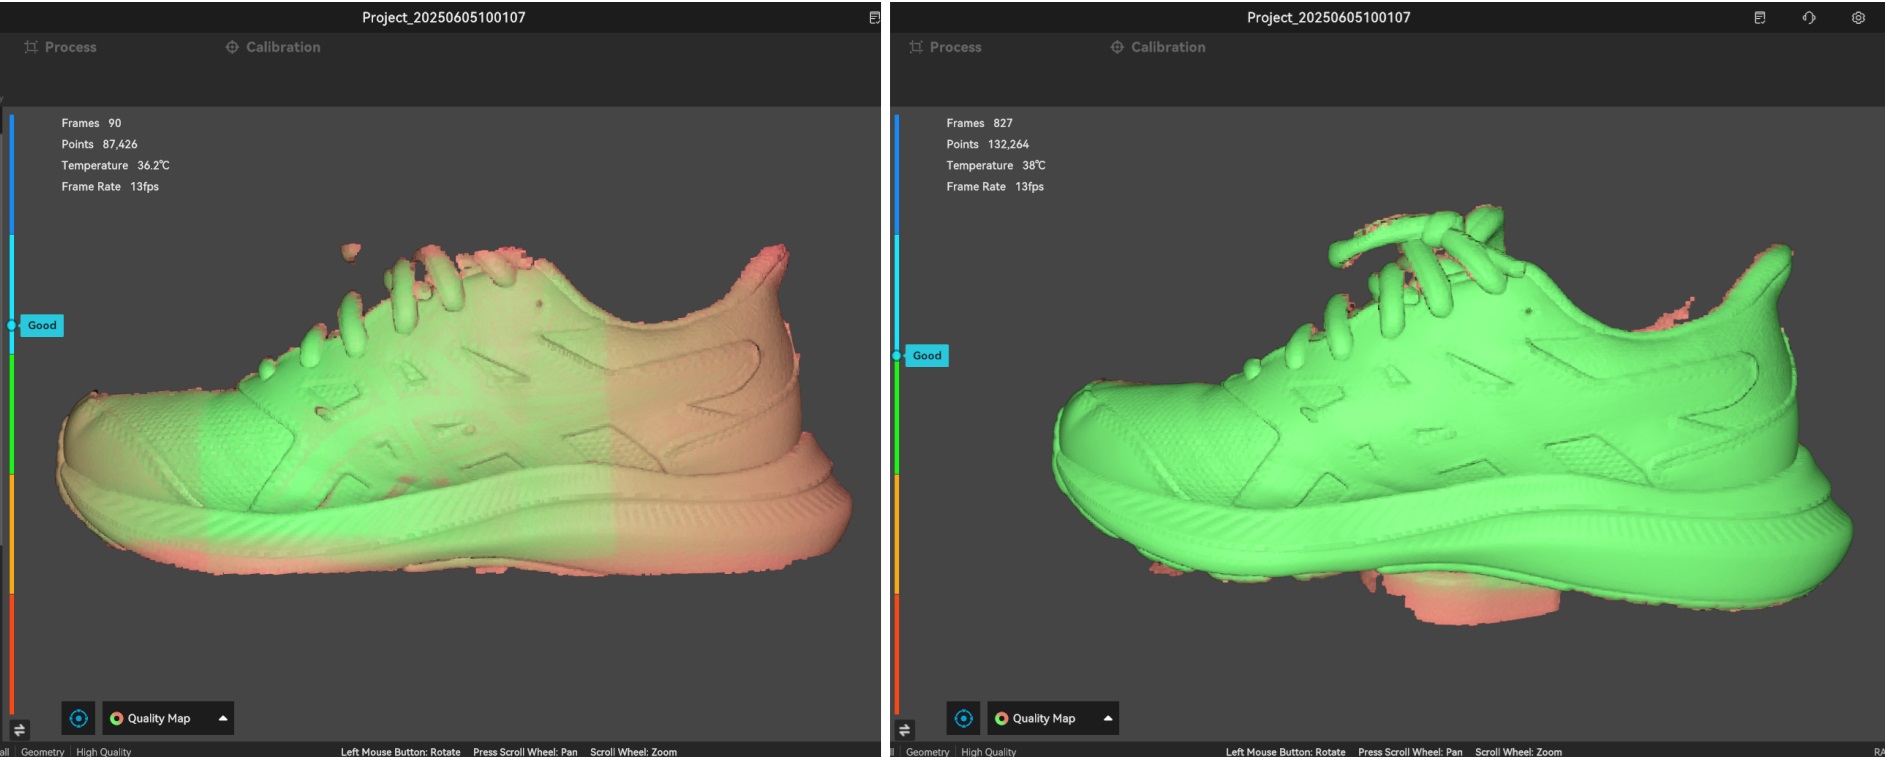
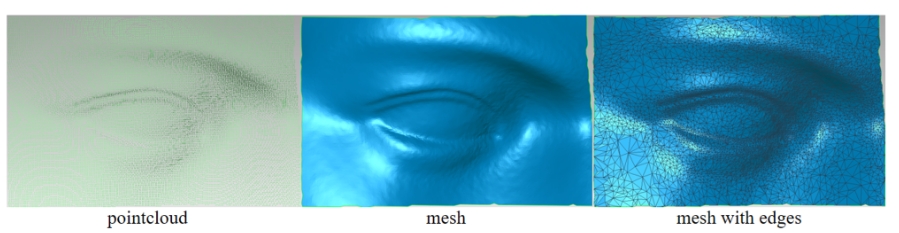
¶ (3) Quality map
During the scanning process, Creality Scan provides a quality map for point clouds to indicate whether the current scan quality is high enough. The following image is an example of determining scan completeness based on the quality map of point clouds. The object on the left shows a mix of red and green, indicating a relatively poor quality of the scanned point cloud, while the object on the right appears uniformly green, indicating a relatively good quality of the scanned point cloud.
¶ (4) Pointcloud fusion
After the scanning process, it is necessary to perform pointcloud fusion to fuse the scanned multiple frames of point clouds (several hundred or even thousand frames) and obtain a higher quality pointcloud.
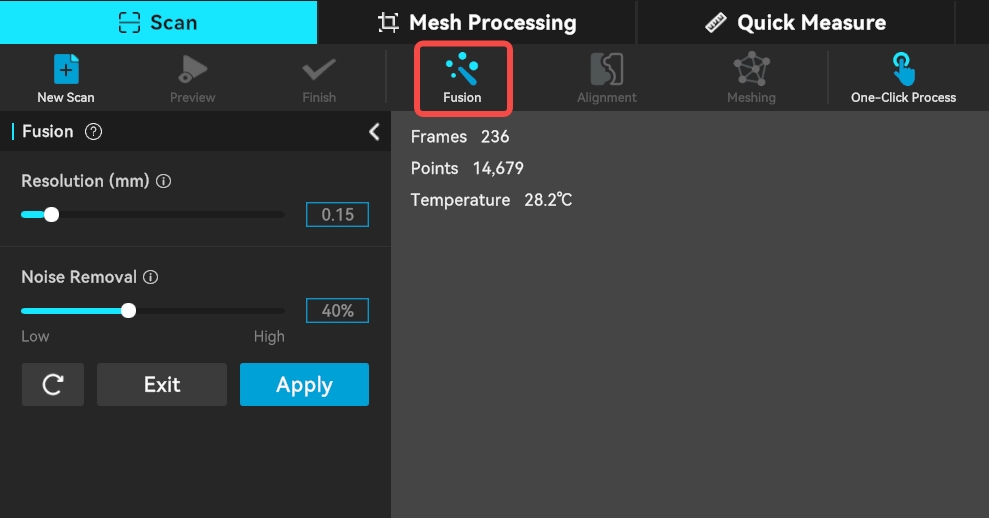
Resolution is one of the important parameters for this process. A smaller resolution setting will capture more details in the model but may require longer processing time. However, setting the resolution too small, such as 0.05mm, may result in missing parts of the model. When dealing with smaller objects, such as those below 25cm, or when seeking better details, it is recommended to set the resolution to 0.1mm or 0.15mm.
Noise Removal: The lower the noise reduction level, the more data can be retained.
Remove Markers: This function is only displayed when markers are set in tracking mode. It is used to remove markers and fill the corresponding holes.
Creality Scan software allows users to perform pointcloud fusion multiple times. For instance, if you are not satisfied with the current fusion results, you can modify the parameters and re-run the pointcloud fusion step.
¶ (5) One-click Process
One-click processing is designed for beginners who have little experience with 3D scanners. If you require better scan quality, it is not recommended to use One-click Processing and instead manually adjust the parameters for each processing step.
.png)
¶ (6) Model editing
Creality Scan provides pointcloud editing functionality.
After scanning is complete, you can immediately use the point cloud editing feature to remove unnecessary parts, which can accelerate the data processing process.
| Icon | Function Description |
|---|---|
| Penetrate Selection: Supports selecting the point cloud/mesh behind the selected area. | |
| Lasso Select: Selects an area by dragging the mouse. | |
| Rectangle Select: Selects an area in a rectangular shape. | |
| Connected Component: Select all connected points in the clicked area. | |
| Invert Selection: Automatically selects the unselected area (opposite of the current selection). | |
| Unselect: Cancels the current selection. | |
| Delete Selection: Removes the selected part. | |
| Undo:Reverts the last deletion operation. | |
| Redo:Restores the last undone deletion operation. | |
| Cancel Edit:Exits the editing mode without saving changes. | |
| Saved Edit: Saves the editing changes and exits the editing mode. |
.png)
¶ (7) Meshing
The meshing operation converts pointcloud data into a triangular mesh model.
During the meshing process, you can manually configure the number of the triangles, adjust the mesh smoothness, set the percentage for removing isolated parts, and choose whether to remove spikes, fill holes, and make the model watertight.
The more triangles in the mesh, the finer the model, but it also takes longer to generate the mesh.
.png)
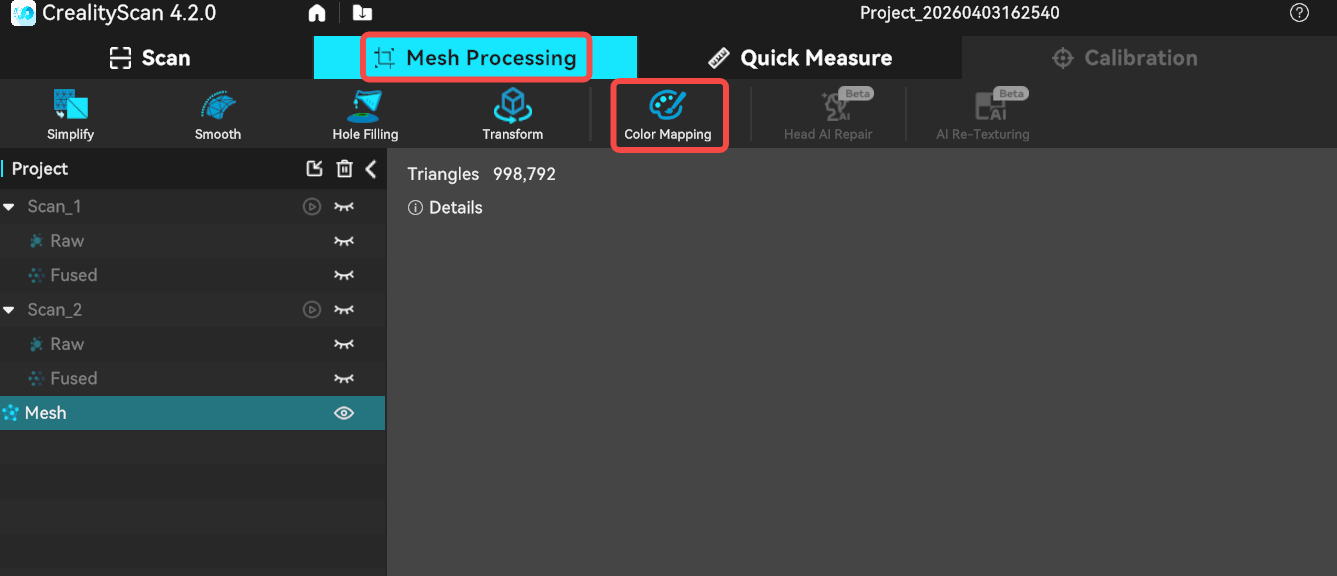
¶ (8) Color mapping
The Raptor scanner is equipped with a high-definition RGB camera, allowing for the capture of true-color textures for 3D models.
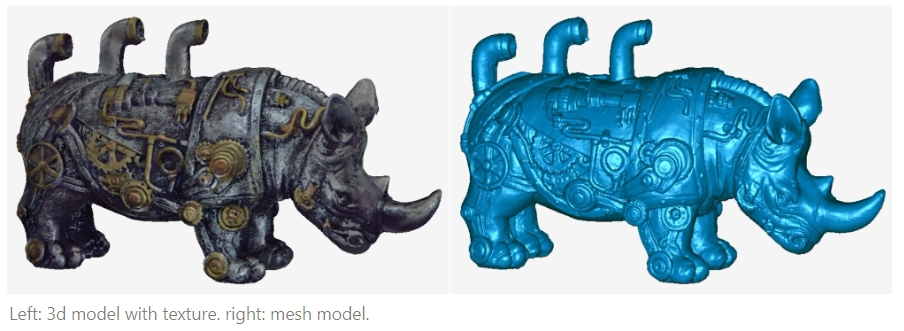
After meshing is complete, if the color mapping function is enabled in the scanning settings, you can click Mesh Processing -> Color Mapping to apply the texture.
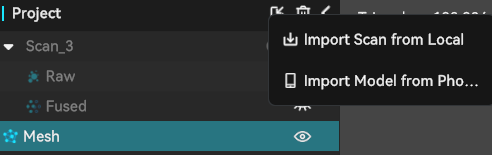
¶ (9) Import Scanned File
When scanning with a PC, if you don't have time to wait for the post-processing to complete, you can click "Complete" and use the "Import Scanned File" feature in the future to import the scan project file into the software for further processing.
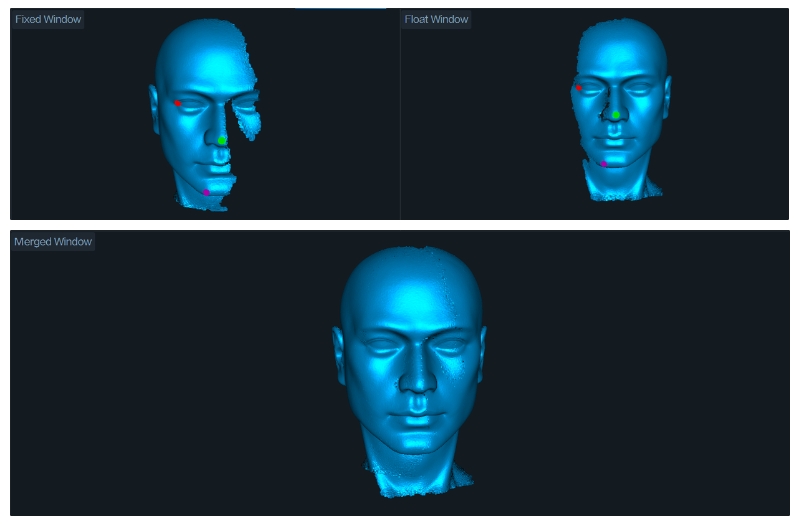
¶ (10) Alignment
If it is unable to capture all the data of an object in one scan, you can perform multiple scans. you can use the Alignment feature to combine them into a complete model. This is extremely helpful for scanning larger objects.
.png)
Of course, you can unmerge the data.
How to scan the bottom of an object?
When you need to scan the bottom of an object, you can place the object on a tabletop and scan the visible parts first. Then, create a new scan and position the object on its side or upside-down for another scan. Use the alignment feature to merge these two sets of pointclouds together, creating a complete 3D model of the object. During both scans, make sure that there are sufficient overlapping areas being captured.
After completing the first scan and performing pointcloud fusion, you can start a new scan by selecting "New Scan."
.png)
On the page for alignment, you can automatically or manually align the fused point clouds. Below is an example of manual feature alignment.
¶ (11) Calibration
When the scanner is bumped or hasn’t been calibrated for a long time, calibrating it with the included calibration board can restore the scanner’s measurement accuracy.
Additionally, if your scan requires high precision, please preheat for 30 minutes before starting the calibration, and commence scanning your target after the calibration is complete.
Creality Otter-series : Calibration Tutorial (for CrealityScan 4)
¶ 4. Scanning Cases and Techniques
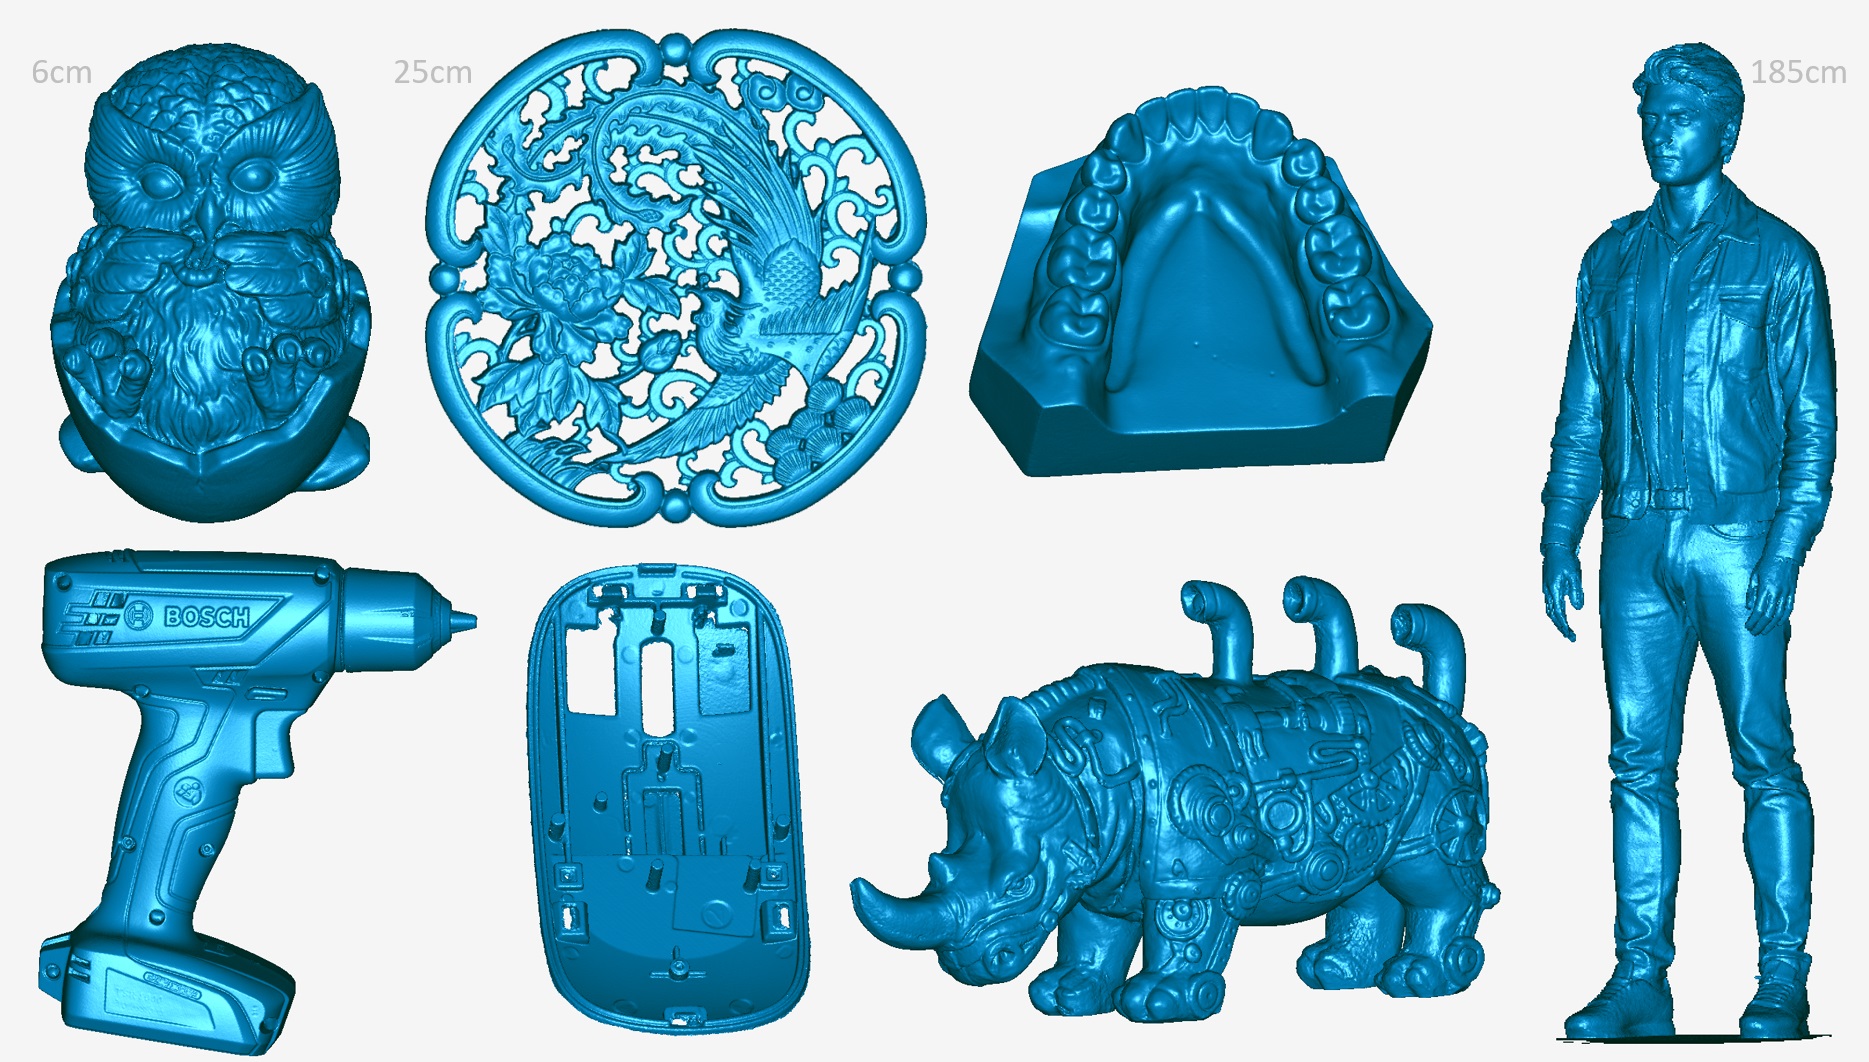
¶ (1) Small Objects
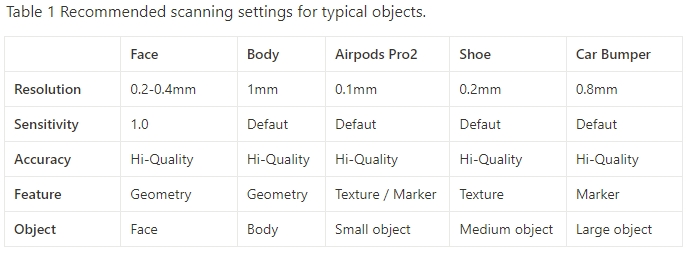
To assist users in quickly selecting appropriate scanning parameters, the following are some actual scanning cases, each accompanied by the corresponding scanning parameters.
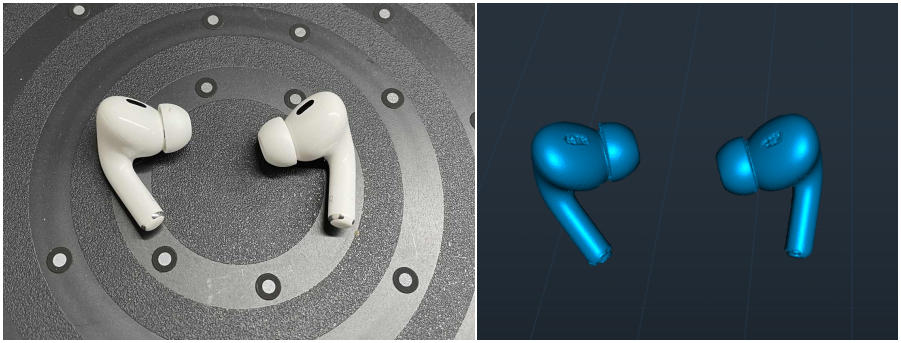
Airpods Pro2
Size: 30mmx20mmx17mm
Setting: Marker mode, Small object, High-Quality, Resolution 0.1mm.
Reflective markers with a diameter of 3mm were used.
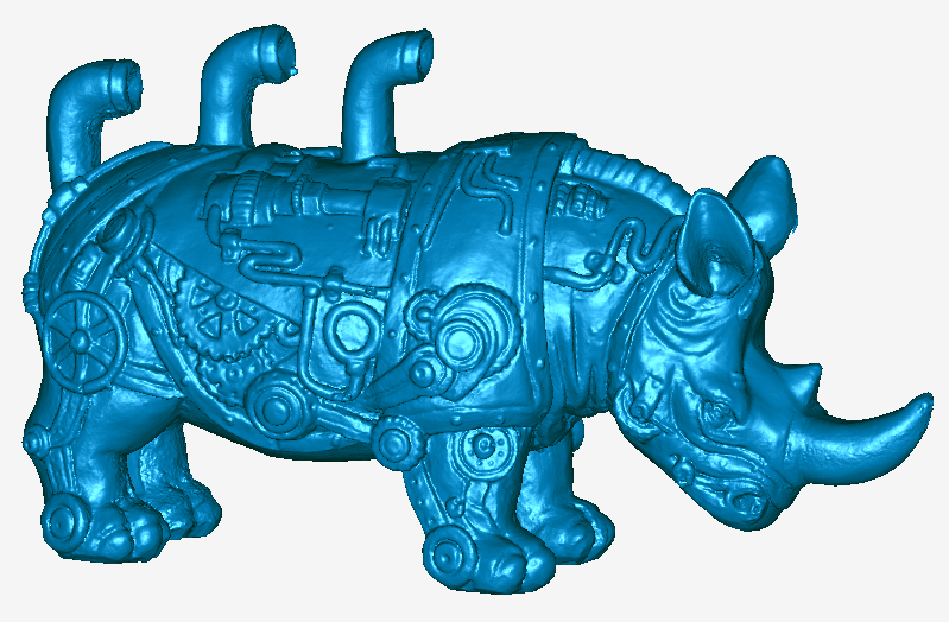
Toy Rhino
Size: 196mmx117mmx65mm
Setting: Geometry Mode, Small Object, High-Quality, Resolution 0.15mm.
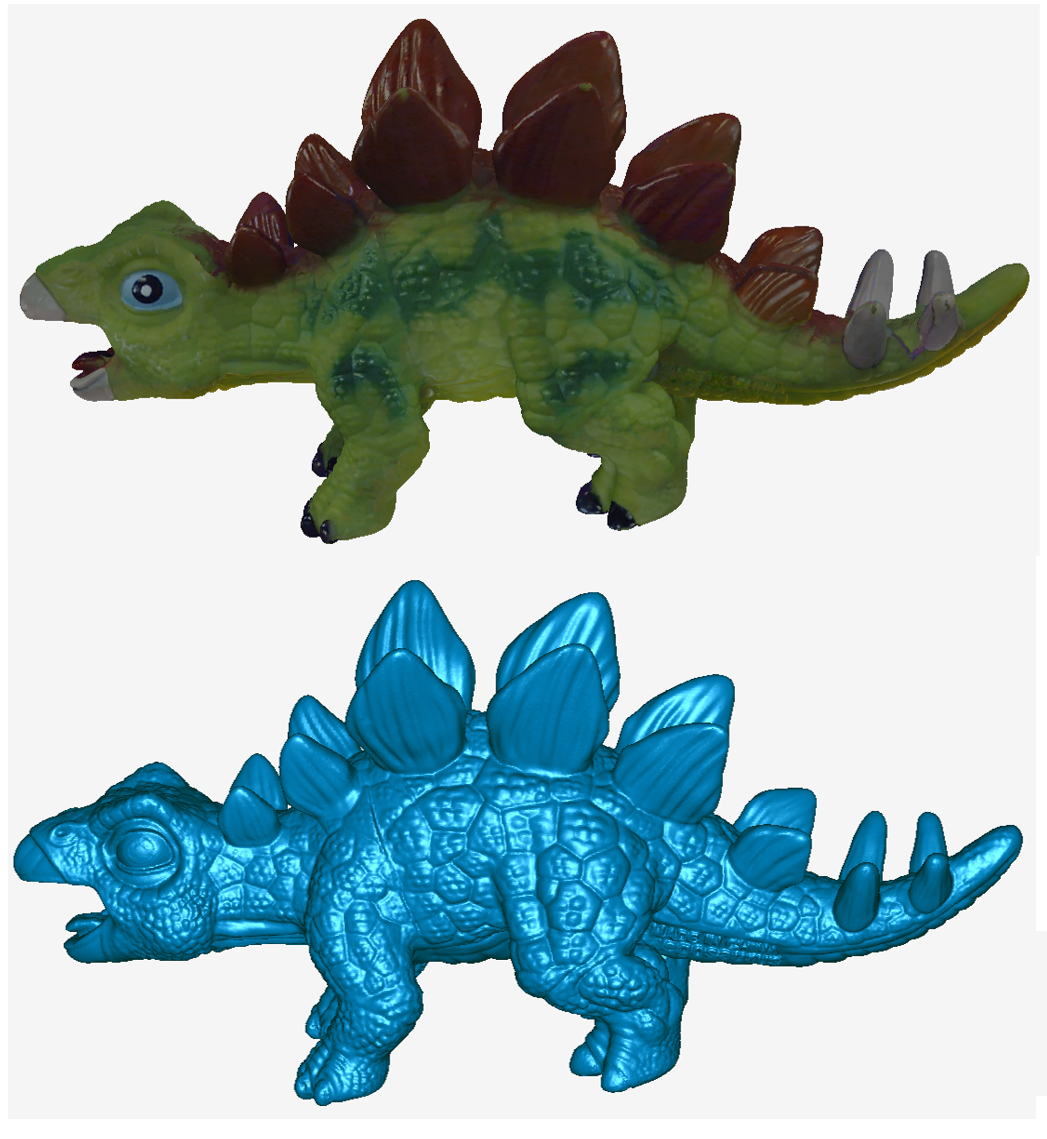
Toy Dinosaur
Size: 260mmx120mmx65mm
Setting: Geometry Mode, Small Object, High-Quality, Resolution 0.15mm.
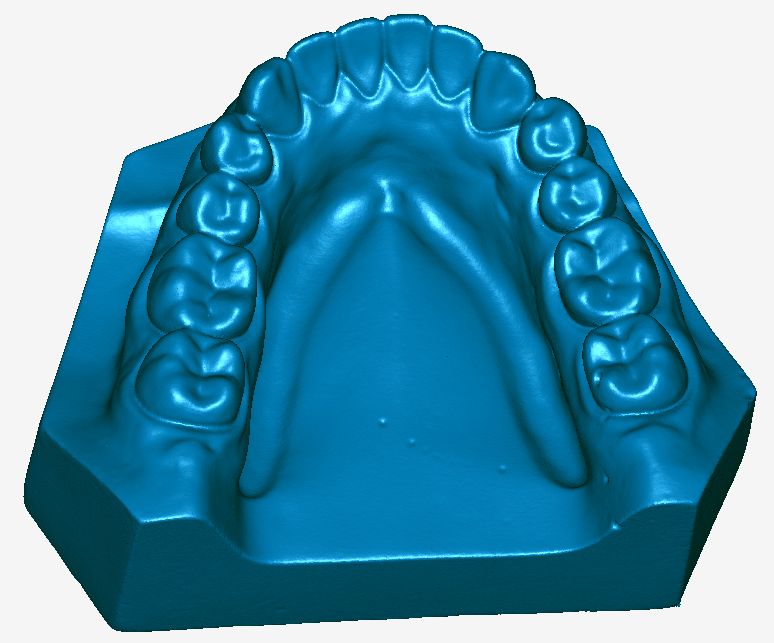
Tooth model
Size: 70mmx60mmx30mm
Setting: Geometry Mode, Small Object, High-Quality, Resolution 0.1mm.
¶ (2) Mechanical Parts
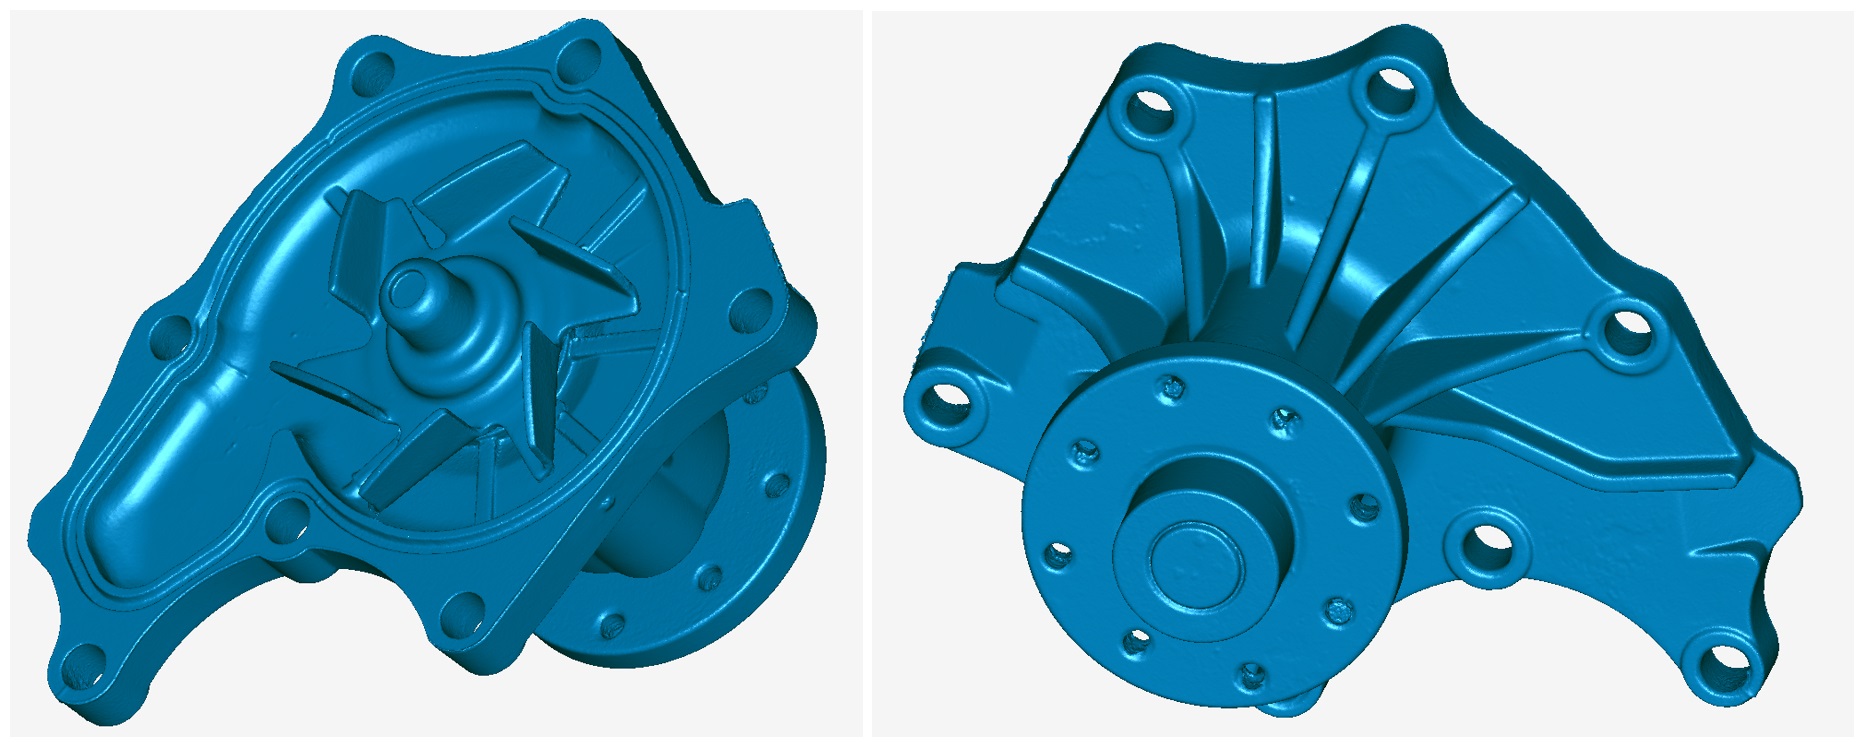
Engine water pump
Size: 170mmx140mmx120mm
Setting: Geometry Mode, Small Object, High-Quality, Resolution 0.15mm.
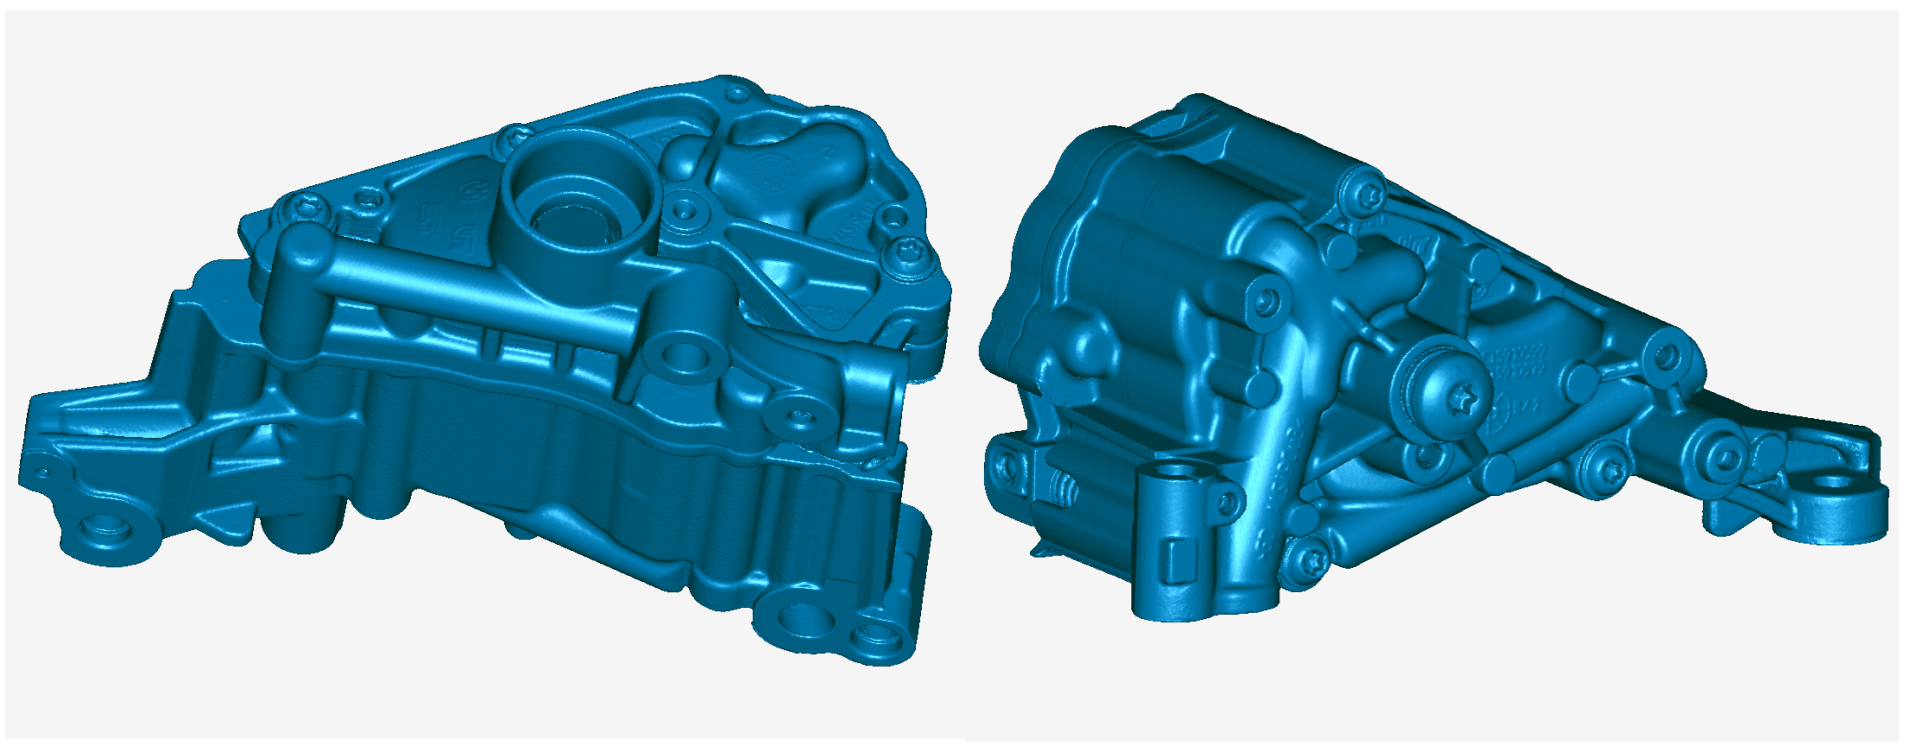
Engine oil pump
Size: 200mmx135mmx99mm
Setting: Geometry Mode, Small Object, High-Quality, Resolution 0.15mm.
¶ (3) Crafts
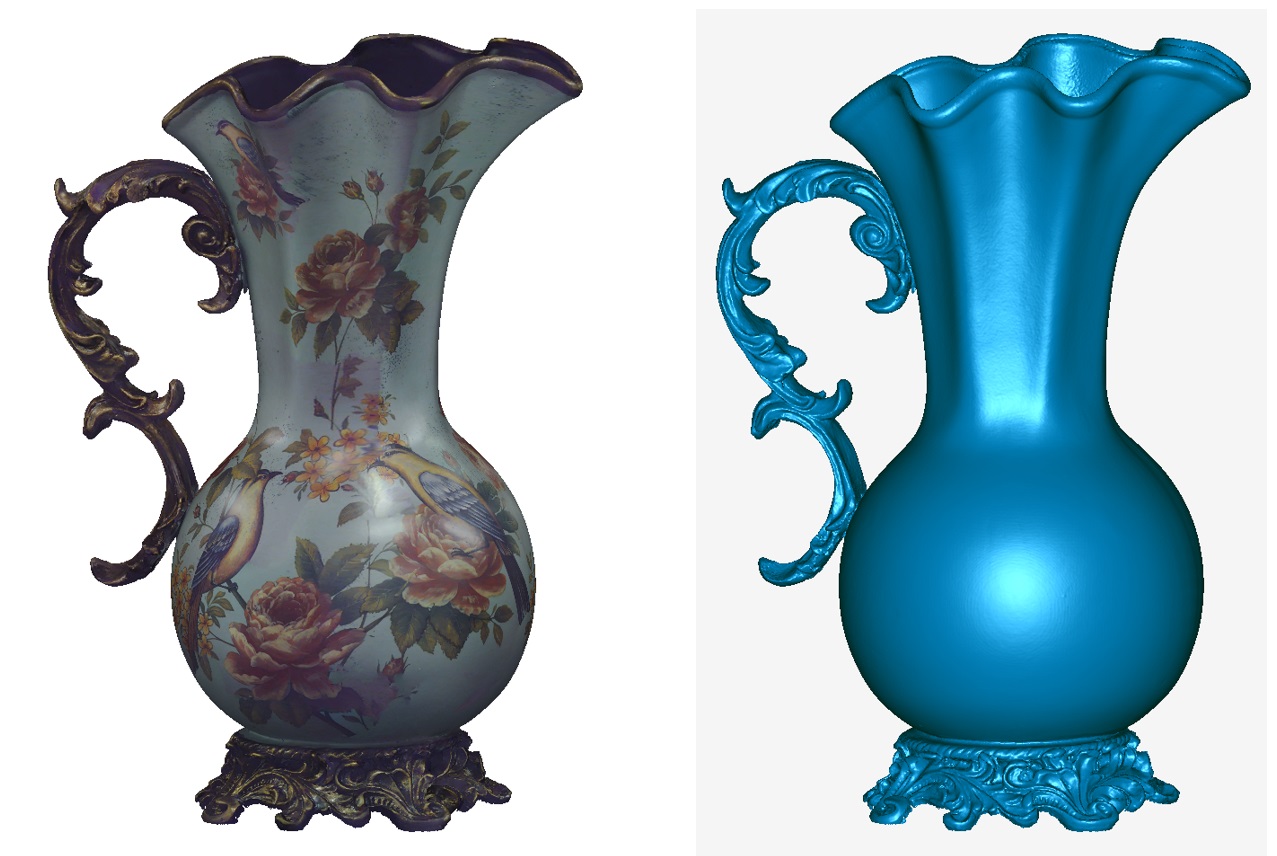
Vase
Size: 500mmx300mmx230mm
Setting: Texture Mode, Medium Object, High-Quality, Resolution 0.3mm.
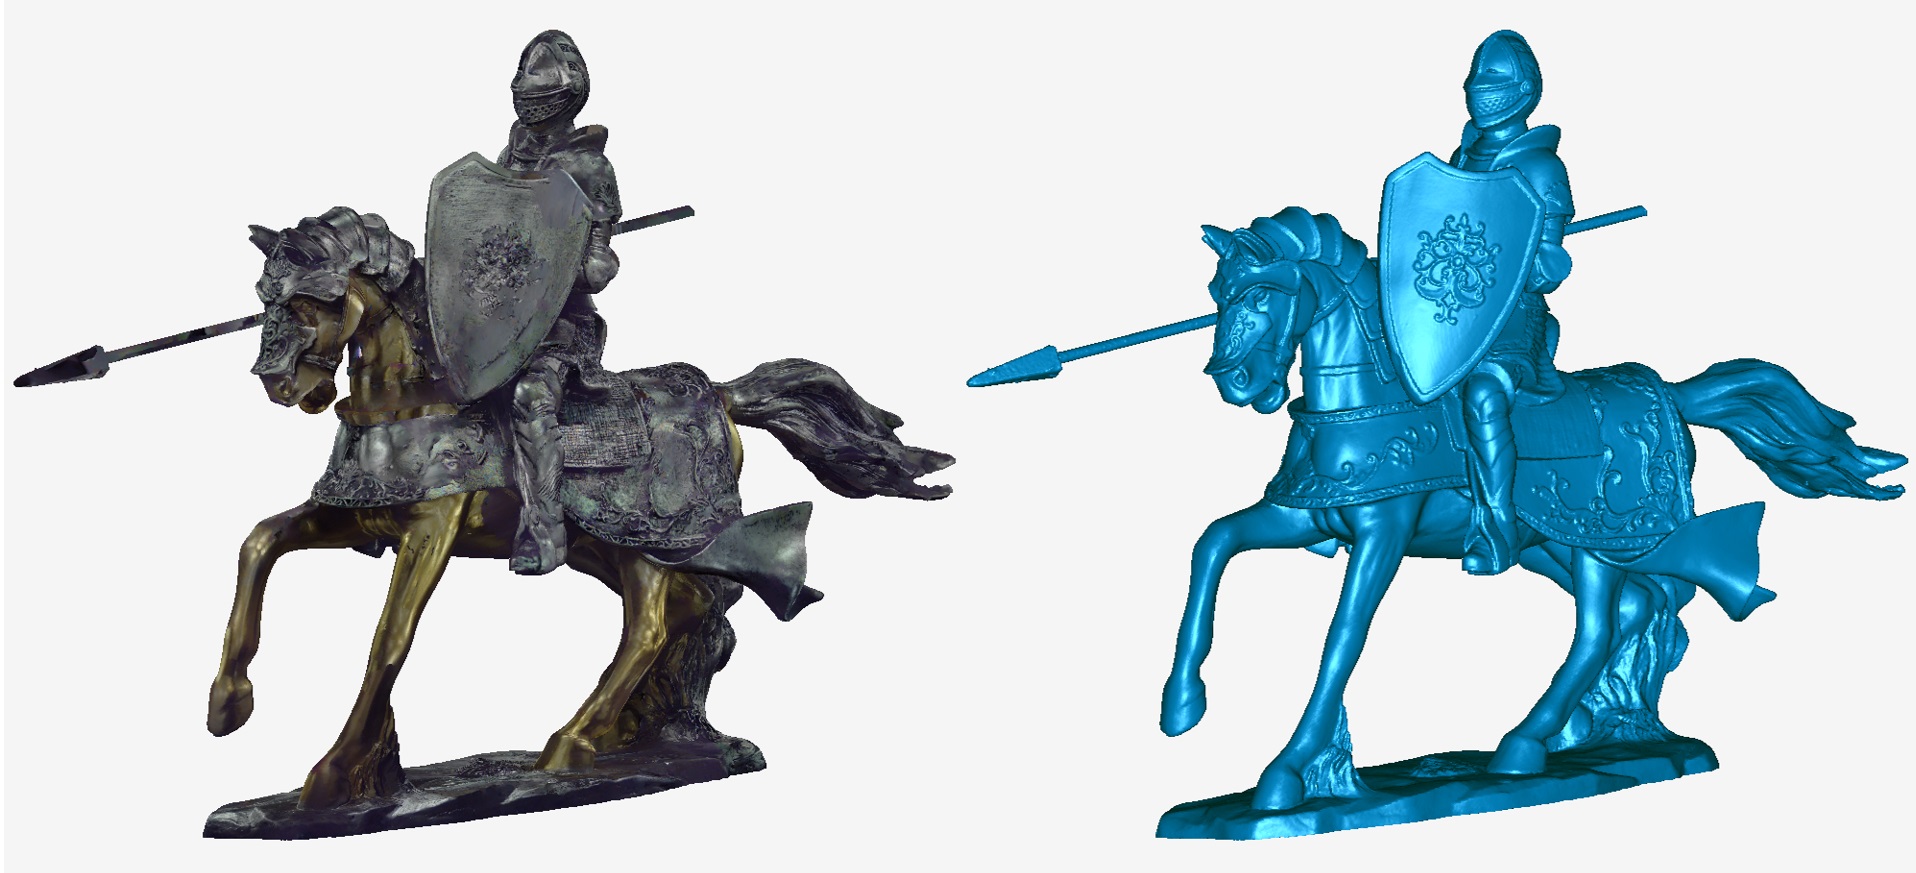
Knight in Armor
Size: 500mmx360mmx140mm
Setting: Geometry Mode, Medium Object, High-Quality, Resolution 0.2mm.
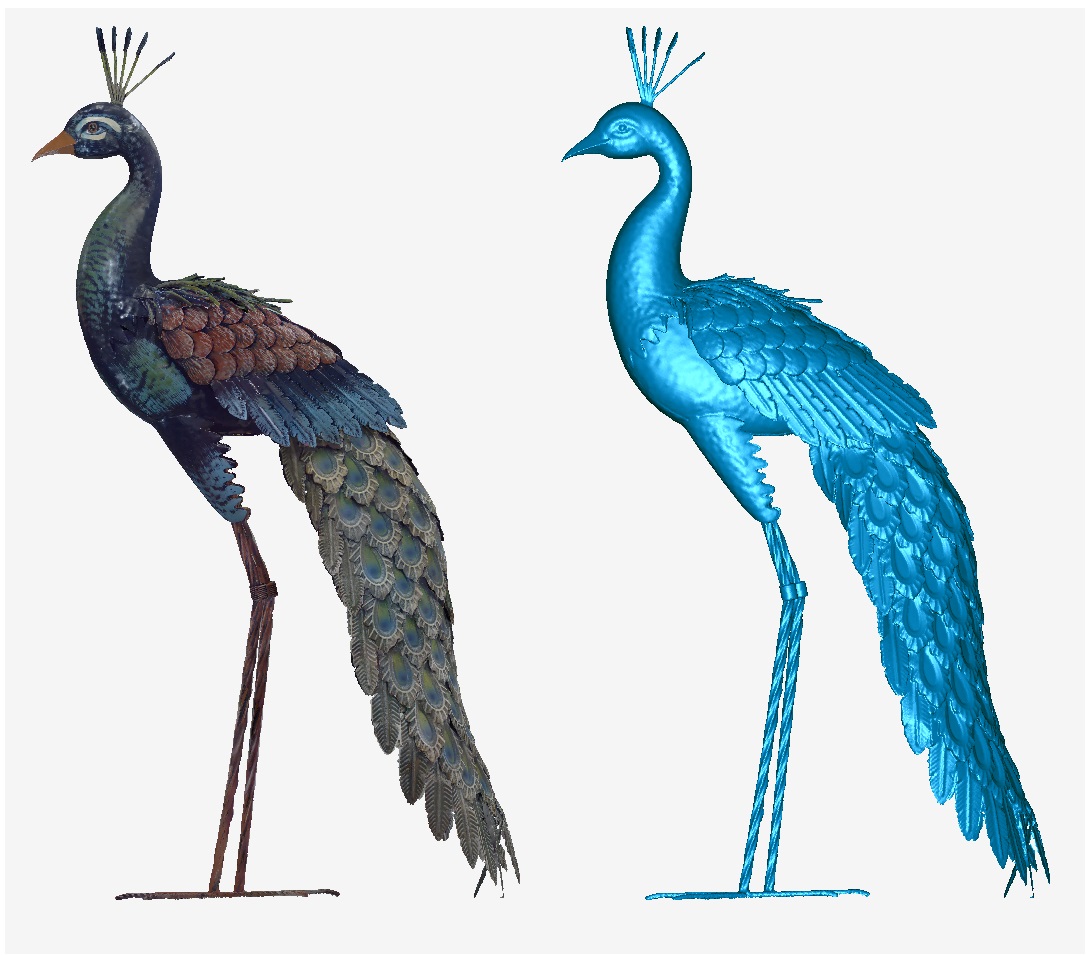
Peacock
Size: 970mmx550mmx250mm
Setting: Texture Mode, Medium Object, High-Quality, Resolution 0.3mm.
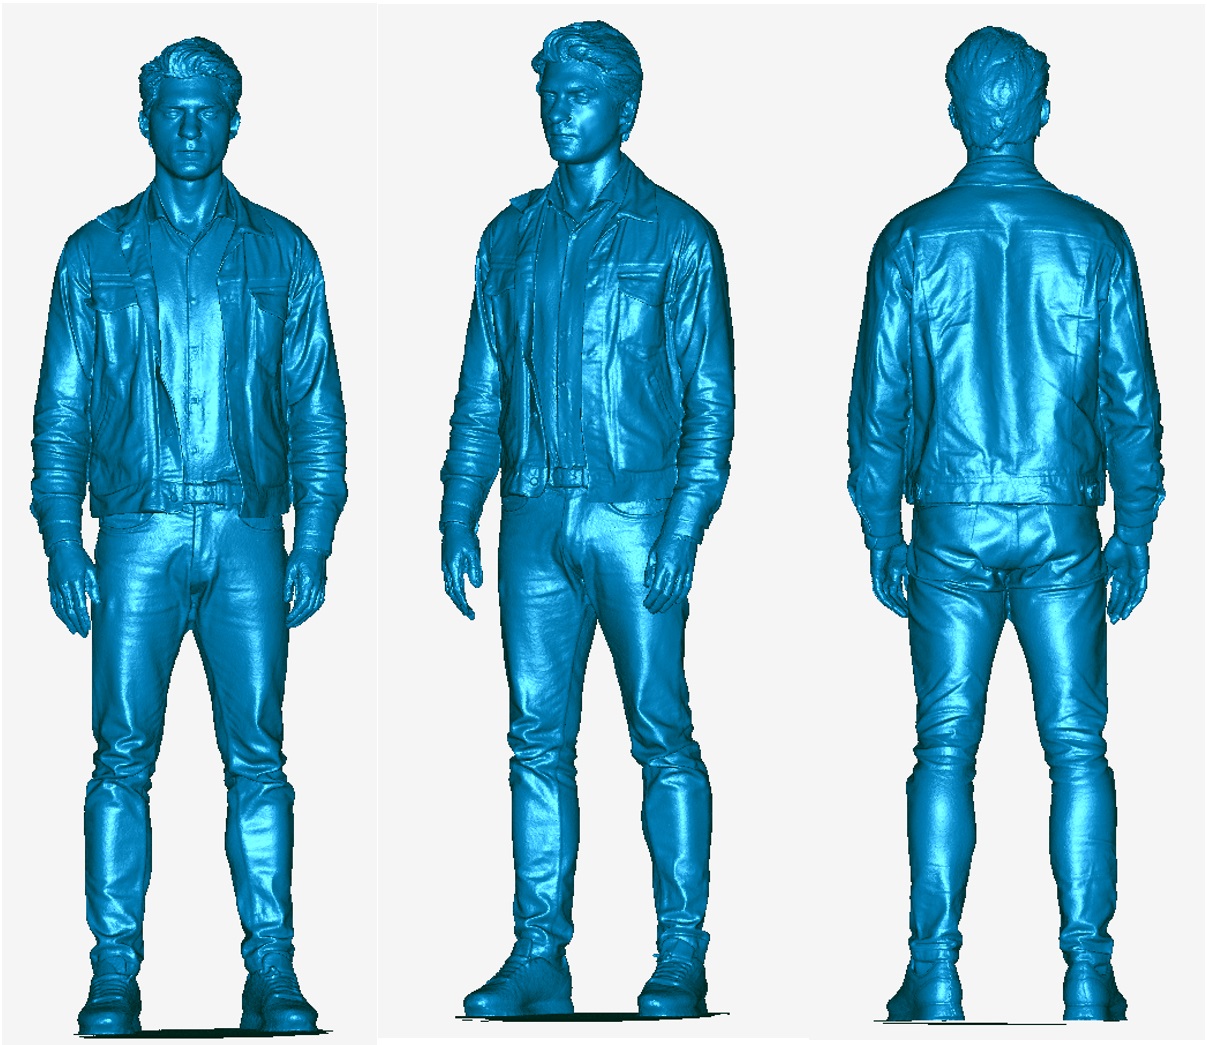
¶ (4) Face
Setting: Geometry Mode, Face, High-Quality, Resolution 0.2mm.

¶ (5) Full body
Recommended scanning setting: Body | Geometry | Fast | Color, Resolution = 1mm.
Note on scanning human body
(1) During the scanning process, the person being scanned and their clothing should remain as still as possible until the scanning is complete.
(2) It is recommended to start scanning from the front face, scanning in the order of the head, chest, waist, and legs, from top to bottom.
(3) If someone can stand on a turntable, it can result in better scanning results.
How long does it take to scan the full body?
If you are familiar with the operation of the scanner, you can complete a full body scan within 2 minutes (i7 cpu, Nvidia 1060 GPU). The time here refers to scanning time, not processing time.
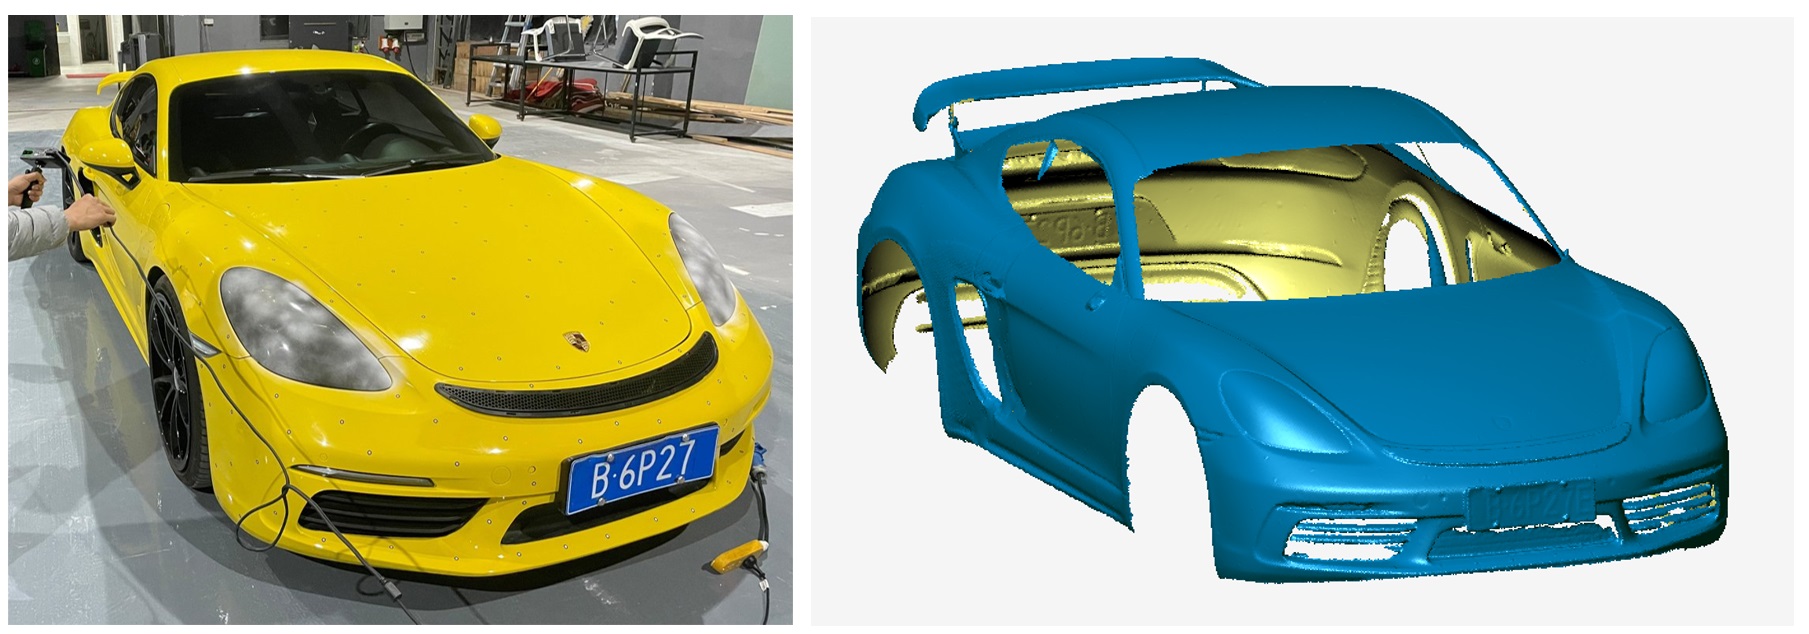
¶ (6) Vehicle
Setting: Marker Mode, Large Object, High-Quality, Resolution 1mm.
¶ (7) Outdoor Scanning
For outdoor scanning, particularly for small to medium-sized objects, we recommend utilizing the fast mode. The structured light in Otter’s fast mode demonstrates superior resistance to sunlight interference. When it comes to large objects, the resistance to interference is nearly equivalent between the fast mode and the high-quality mode.