¶ How Does the i7 Work?
SPARKX i7 3D printer is a machine that builds 3D objects using plastic filament. It converts digital models into physical parts. Its operating principle generally consists of the following steps:
¶ Create or Obtain a Digital Model
First, you need to create a 3D model or obtain an existing digital model. This can be done using computer-aided design (CAD) software, or by downloading models from online repositories or other sources.
¶ Slicing
Next, use slicing software such as Creality Print to slice the digital model into multiple thin layers. The information for each layer is automatically converted into a format the printer can understand—known as Gcode, which instructs the printer on axis movements and speeds during the printing process.
¶ Prepare the Printer
Before starting the print, prepare the printer by loading the filament, installing the build plate, and calibrating relevant parameters to ensure optimal print quality.
¶ Printing
Once everything is ready, the i7 will automatically deposit filament layer by layer onto the build plate, gradually building the object until the print is complete.
¶ i7 Motion System
The i7 uses a Cartesian coordinate motion system with a maximum build volume of 260 × 260 × 255 mm³. Its motion system consists of the following components:
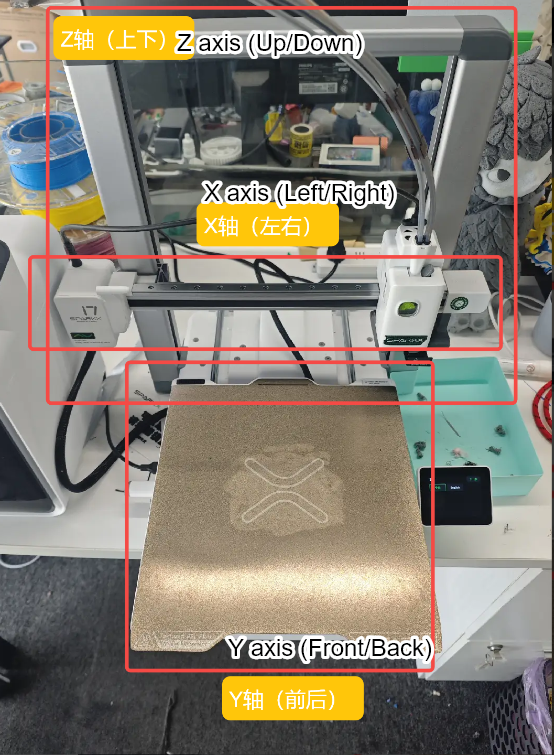
¶ X-Axis Motion System
The X-axis motion system consists of a high-precision linear rail and a horizontal beam. The print head is mounted on the linear rail carriage, which can move smoothly along the horizontal rail. By controlling the left–right movement of the carriage, the print head achieves precise positioning along the X axis.
¶ Y-Axis Motion System
The Y-axis motion system is composed of two high-precision linear rods and the build platform. The build platform is mounted on linear rod carriages that can slide freely along the horizontal guides. By controlling the forward–backward movement of the carriages, the build platform moves accurately along the Y axis.
¶ Z-Axis Motion System
The Z-axis motion system controls the vertical position of the print head relative to the build platform. It consists of a dual linear rod and linear bearing guide assembly, dual lead screw and nut sets, a stepper motor, and a synchronized belt drive system. The two lead screws are mechanically linked via a timing belt driven by the stepper motor, ensuring synchronized motion. In addition, the timing belt is equipped with a quick tensioner and works in conjunction with a belt tension detection algorithm to maintain optimal belt tension. This design ensures precise and stable movement of the print head along the Z axis.
By coordinating the motion of the X, Y, and Z axes, the i7 enables precise three-axis positioning of the print head. These movements are driven by motors and corresponding driver circuits, while the controller reads the print file and issues commands to control the motion paths and speeds during printing.
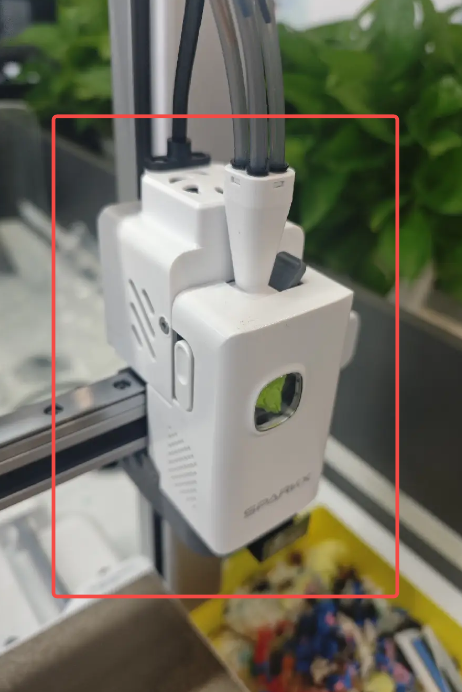
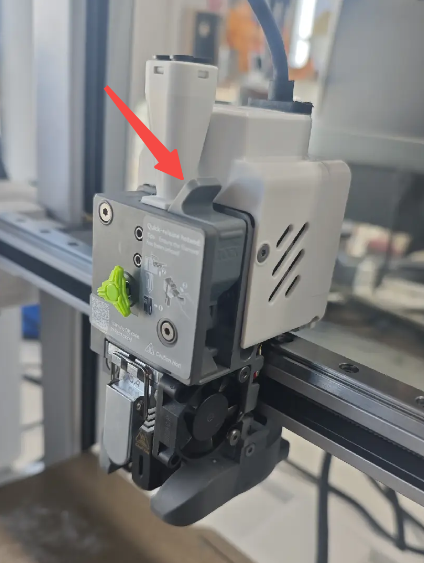
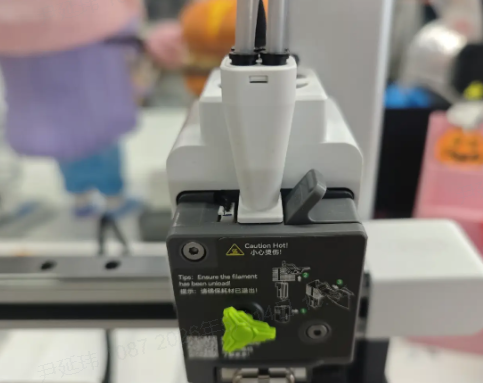
¶ Toolhead Module
The tool head module is one of the key components of the i7. The i7 tool head module mainly consists of the following parts:
|
|
|
¶ Hotend Assembly
The hotend assembly consists of the hotend heating assembly, hotend, silicone sock, and hotend fan, and is the core component of the tool head module. Its function is to heat the filament to a specified temperature, melt it, and deposit it layer by layer to form the printed model.
The i7 features a quick-release hotend with an integrated nozzle and heat break. This integrated design enables significantly faster heating compared to conventional hotends, and allows the hotend to be removed or replaced without the need for tools such as screwdrivers.
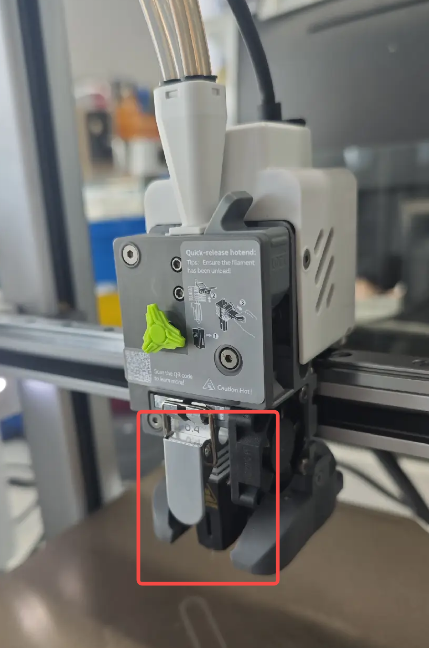
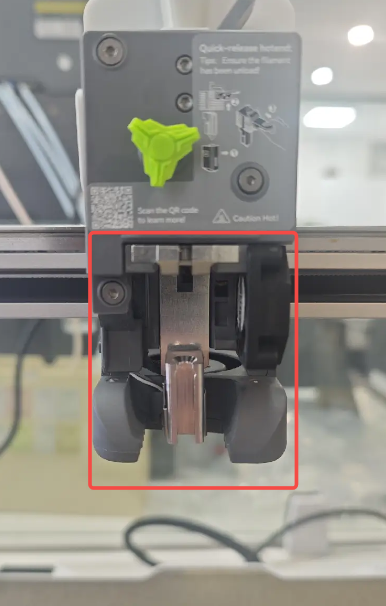
¶ Extruder Assembly
The extruder motor and extruder gears are the key components of the extruder assembly. The extruder motor pulls filament from the spool and feeds it into the hotend, where it is heated, melted, and extruded through the nozzle to create the printed object. Precise control of the filament feed length through the hotend is critical, making the extruder motor one of the core components of a 3D printer.
(Internal structure diagram)
Within the extruder assembly, the latch at this position can be opened to directly inspect filament jams, filament grinding, and filament debris accumulation. This design makes maintenance and cleaning more convenient.
 |
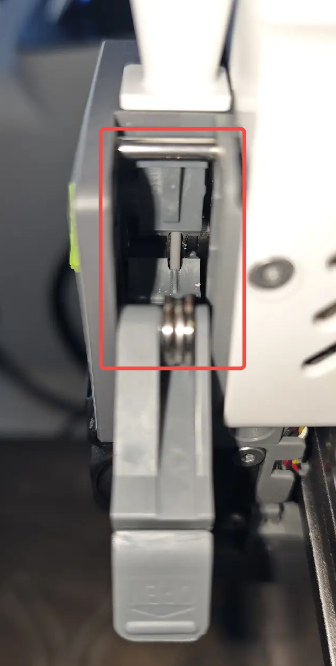 |
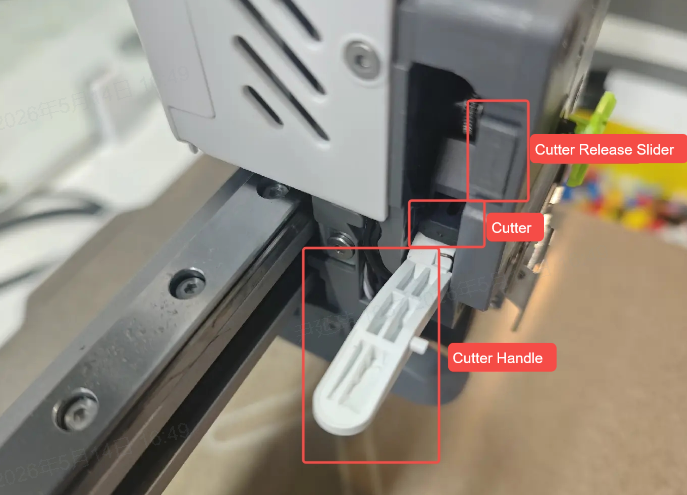
¶ Filament Cutter
The filament cutter handle is mounted on the extruder assembly and is used to secure the cutter and the filament detection magnet. During the cutting process, the cutter is actuated by pressing the handle with the X-axis left-side pin, which drives the blade to cut the filament. A magnet is installed on the side of the cutter, which repels against a corresponding magnet on the tool head. This magnetic repulsion allows the cutter and handle to automatically return to their original position after cutting.
The i7 features a split-design filament cutter, allowing the cutter to be replaced without removing any screws.
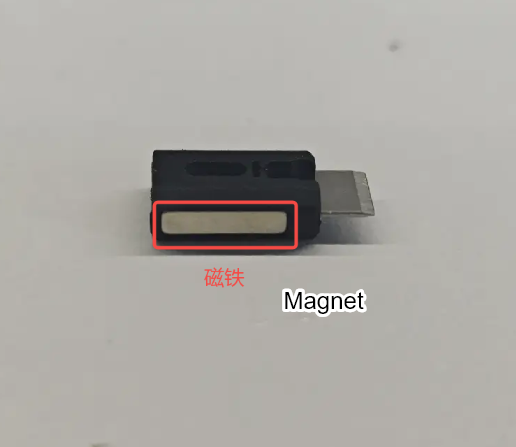
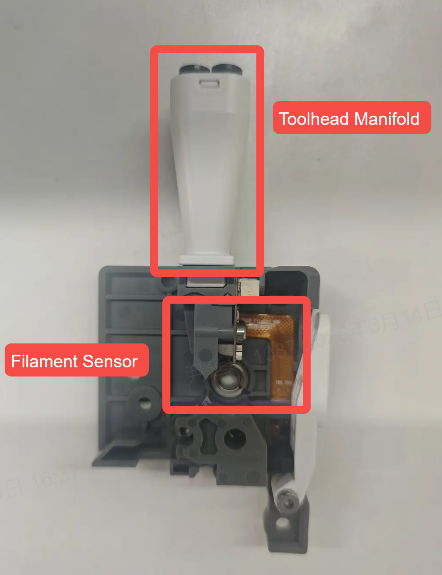
¶ Toolhead Manifold and Filament Sensor
The PTFE tubes are connected to the tool head’s Toolhead Manifold, which secures the four tubes together and allows the tool head to feed up to four different filaments. When used with the multicolor printing module, this enables multi-color printing.
Below the Toolhead Manifold is an Filament Sensor that detects whether filament has entered the extruder gears. If filament is present in the extruder, the baffle is displaced, triggering the optical sensor.
 |
 |
¶ Cooling System
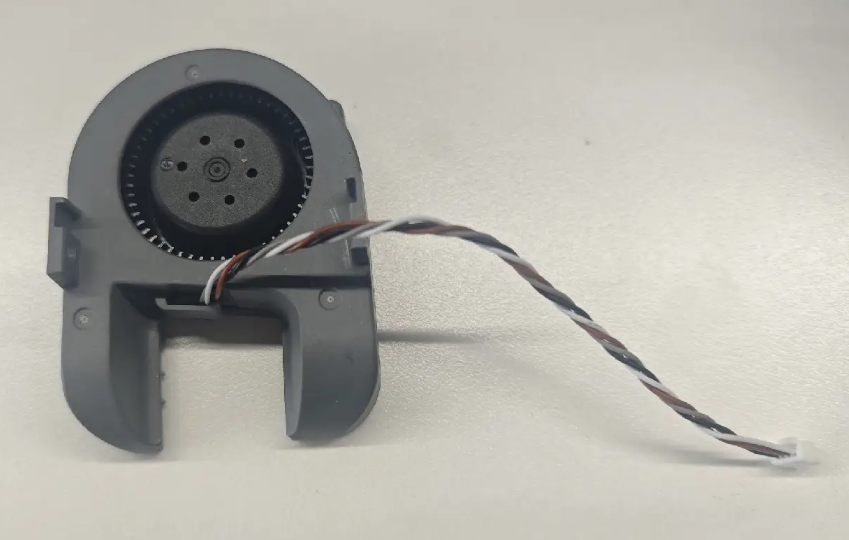
¶ Part Cooling Fan
During high-speed printing, effective cooling of the printed layers is essential. The i7 is equipped with a custom 5015 centrifugal fan with two opposing air outlets, directing airflow precisely near the nozzle to ensure rapid cooling of printed parts.
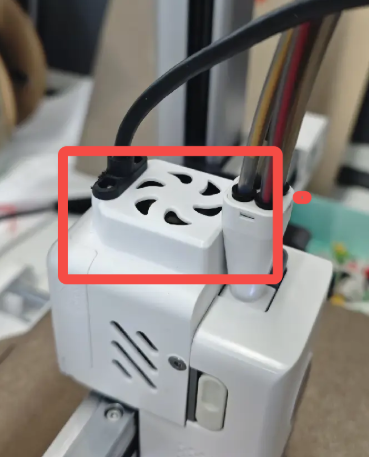
¶ Extruder Motor Fan
The extruder motor generates heat during high-intensity operation, which can conduct along the motor shaft to the extruder gears. This may cause the filament to soften prematurely at the gears, affecting print quality or causing feeding issues. To prevent this, the SparkX i7 is equipped with an extruder motor fan that keeps the motor at an optimal temperature, ensuring stable and reliable printing.
¶ Heated Bed Assembly
The primary function of the heated bed is to warm the print surface, helping the printed layers adhere properly to the build plate. Without heating, the first layer of filament may fail to stick to the bed, causing warping or even detachment of the print during the process. The i7 adjusts the heated bed temperature according to the type of filament used, with a maximum temperature of 100 °C.
Additionally, the heated bed serves as the Y-axis motion component. The Y-axis motor drives the heated bed along the Y-axis via a timing belt, enabling precise Y-axis movement. Combined with the X-axis motion system, this allows the nozzle to move accurately in the XY plane over the bed.
¶ Filament Disposal Assembly and Nozzle Wiping Assembly
¶ Filament Disposal Assembly
The filament disposal assembly efficiently handles waste filament extruded from the nozzle. Its functions include collecting and transporting waste filament to the designated location, ensuring continuous and smooth printing. This assembly is used throughout multiple processes, including printer setup, pause/resume operations, filament loading and unloading, and filament replacement or purging during multi-color printing.
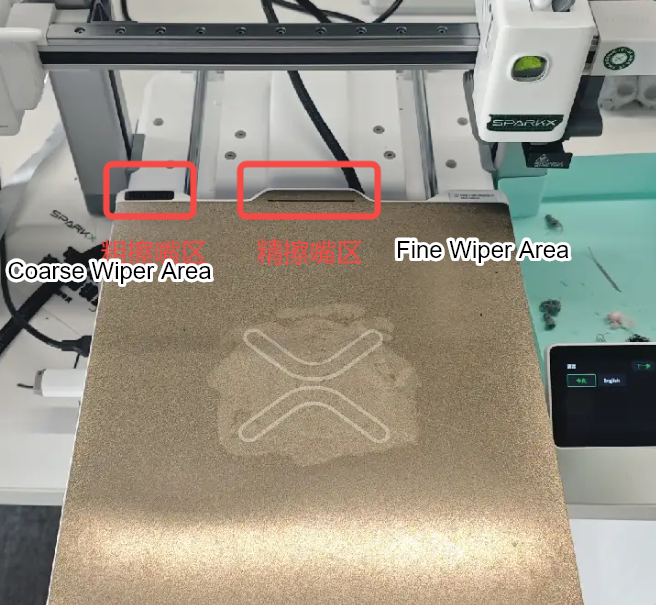
¶ Nozzle Wiping Assembly
The nozzle wiping assembly cleans the nozzle automatically before each print job. The cleaning process includes coarse wiping, which removes residual filament from the hotend, and fine wiping, which cleans the nozzle tip for a smooth finish.
The i7 comes with a pre-installed silicone nozzle wipe set on the heated bed for coarse wiping. Replacing the silicone wipe is part of regular maintenance; replacement parts are available from the official store.
The fine wiping action involves moving the nozzle across a specific area of the build plate. This relies on friction with the build surface to clean the nozzle, so minor wear in this area is normal and should not cause concern.
¶ Print Platform Plate
The i7 comes standard with a textured PEI build plate, made by coating PEI material onto a stainless steel sheet. This provides a unique textured finish on the bottom of printed parts. The build surface is compatible with PLA, PETG, TPU, and other common filaments without the need for adhesives. After printing, allow the build plate to cool completely before removing the print. It is recommended to clean the build plate regularly to maintain optimal adhesion. Avoid touching the plate surface with bare fingers, as skin oils can reduce its adhesion performance.
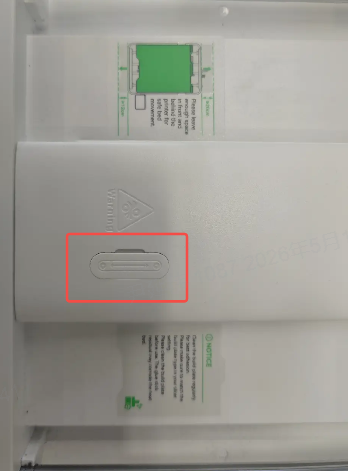
¶ Belt Tensioners
The i7 is equipped with three adjustable belt tensioners. After extended use or if noticeable surface quality issues appear on prints, belts can be retightened to improve performance. For detailed adjustment instructions, refer to the Belt Tensioning Wiki: SPARKX i7 Manual Belt Tension Adjustment
The X-axis belt tensioner is located at the right end of the X-axis. Remove the protective cover to access it.
 |
 |
 |
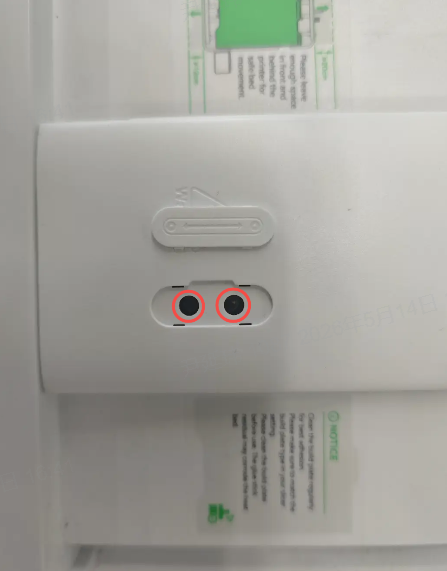
The Y-axis belt tensioner is located on the chassis beneath the heated bed. Move the heated bed to the rear to access it, then remove the protective cover to expose the two tensioning screws.
 |
 |
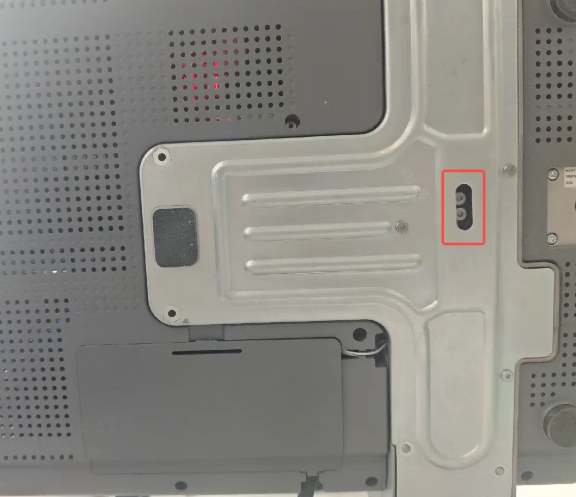
The Z-axis belt tensioner is located at the bottom of the printer. Tilt the printer to access it.
¶ Electrical Components and Key Functions
¶ Mainboard
The SparkX i7 mainboard features a dual-core T113-S4 SoC, which connects to networks via an integrated wireless chip and antenna. It also includes an eMMC for storing firmware and user data during operation. The SoC receives operation commands from the user, parses the G-code, and sends control signals to the lower-level MCUs, which manage the motors, heated bed, and hotend heating.
¶ Camera Module
The i7 is equipped with a camera for remote monitoring of print status. Users can enable time-lapse photography on both the printer and slicing software. AI functions allow detection of spaghetti-like filament errors and missed extrusion. In low-light conditions, the camera’s light can be toggled via Creality Print or the Creality Cloud app on the device page.
¶ RGB Light Strip
An RGB light strip is installed at the front bottom of the i7, which can display print progress as a progress bar. Additionally, the printer offers multiple lighting effects inside the machine. Users can select their preferred effect through the printer’s control panel under Settings → Print Settings → Status Light.