¶ What Is Automatic Calibration?
Automatic calibration allows the printer to use its built-in sensors to automatically adjust key printing parameters—such as Z-axis height compensation, vibration compensation, and cutter calibration—so as to achieve optimal printing conditions without manual intervention. This automated process simplifies manual setup, effectively reduces the risk of human error, and helps ensure consistent print quality through routine calibration.
¶ When to Perform Calibration
To keep the machine in optimal condition, we recommend performing calibration on a regular basis. If you notice any print quality issues, you can also try calibration to restore normal operation.
Automatic calibration is required after performing any of the following actions:
Replacing the cutter assembly
Replacing the hotend, hotend heating components, or the toolhead assembly
Replacing the build plate or the heated bed assembly
Changing the placement or location of the machine
¶ How to Perform Automatic Calibration
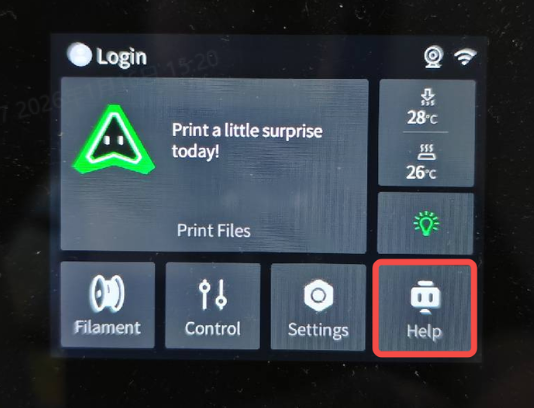
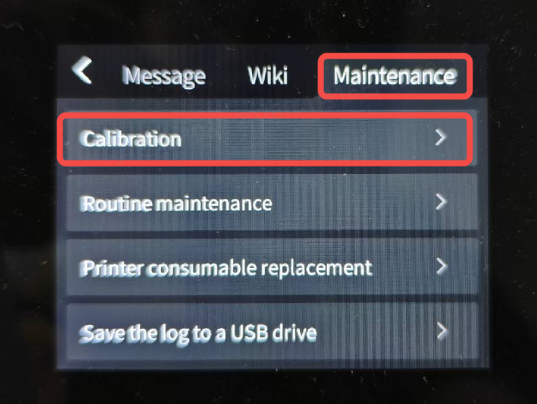
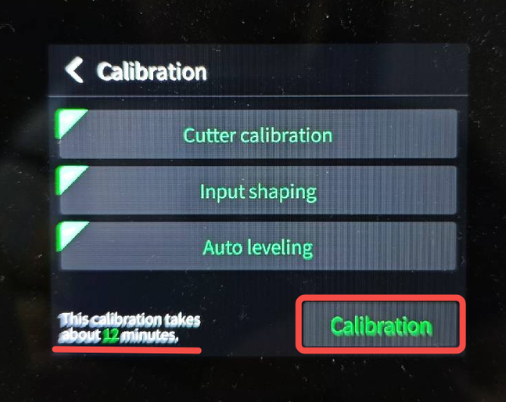
On the printer’s screen, tap Help → Maintenance → Calibration to enter the automatic calibration page. Select the calibration items you want to perform. The estimated calibration time will be displayed at the bottom of the screen. Tap Calibrate to start the automatic calibration process.
 |
 |
 |