¶ New Features
- Support connecting printers via Fluidd.
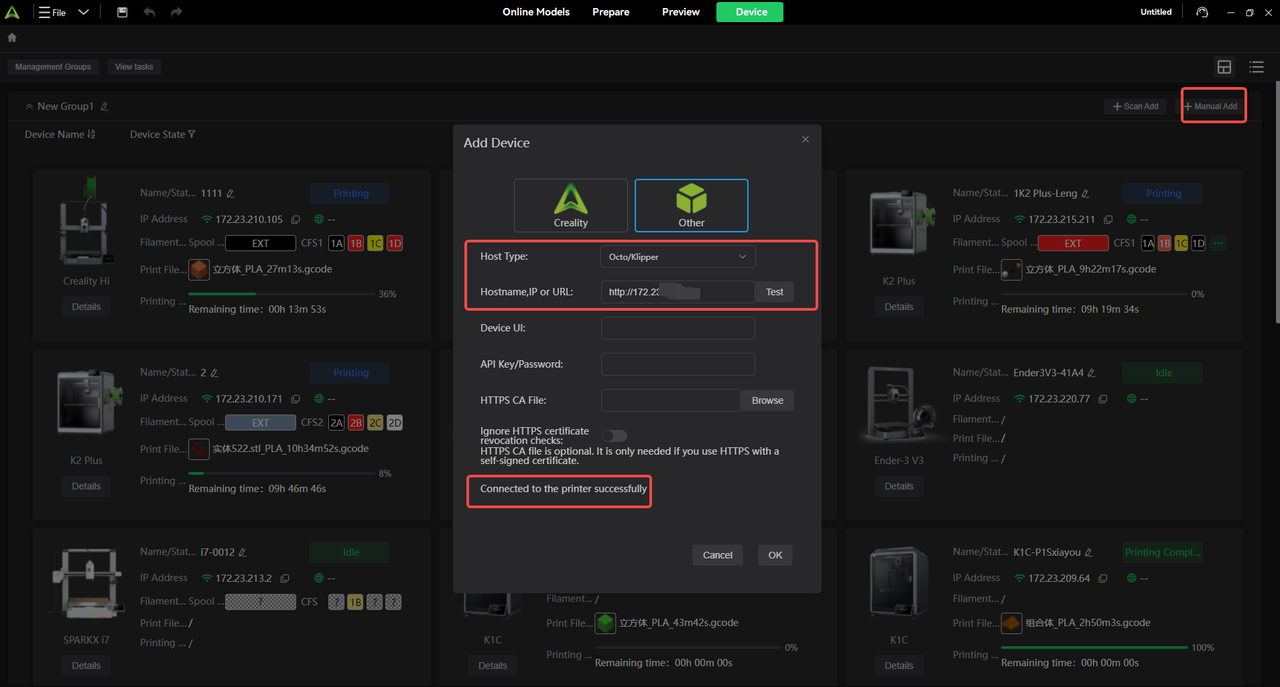
Step 1 In the "Device" menu, select "Manually Add", click "Other", and then choose the host type. In the "Hostname/IP/URL" field, please enter the IP address and port number, then click the "Test" button. The system will display a "Success" or "Error" message.
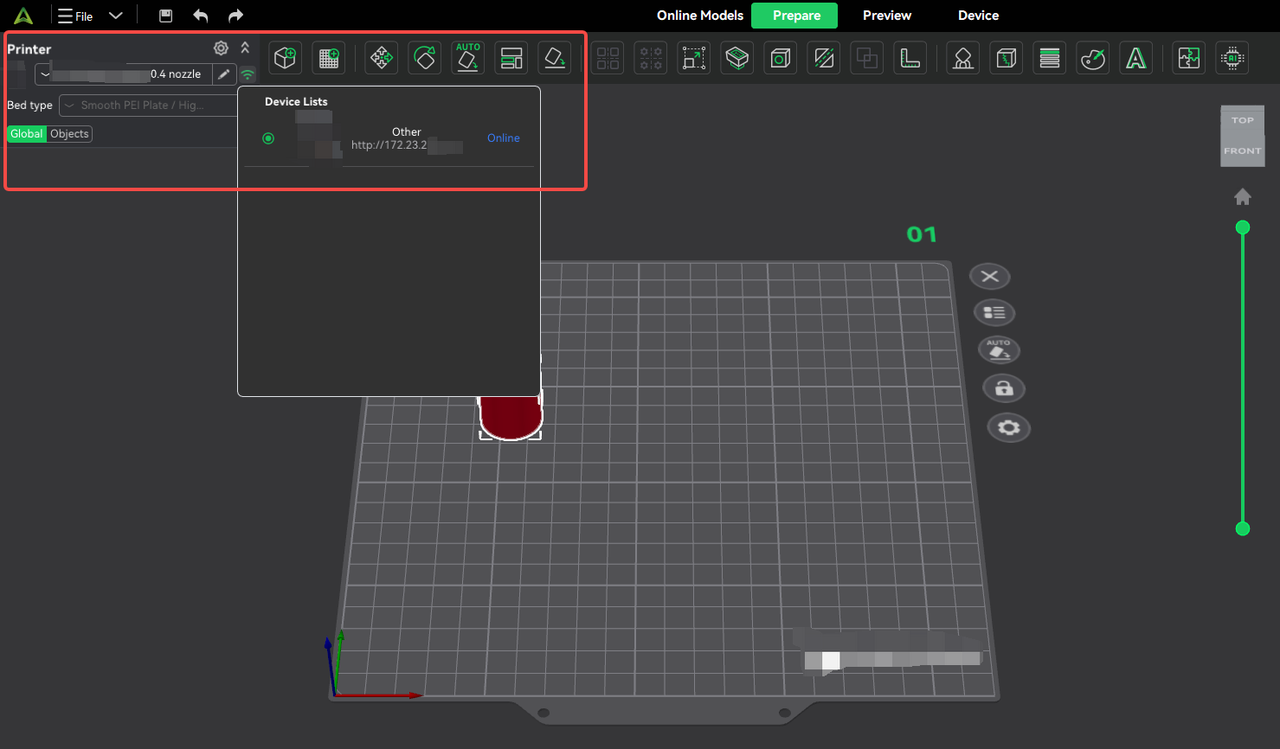
Step 2 Select Printer Preset and Bind the Device
Select Preset: Choose the preset configuration that matches this printer from the list.
Bind Device: Click the Wi-Fi icon next to it and select this device to complete the binding.
Note on Device Information: Due to limitations of such devices, CP cannot read their actual name, filament information, etc. The name cannot be changed, and all devices of this type will be displayed uniformly as "other".
Note: This step follows the same binding process as for existing devices in the current system. You can proceed in the way you are already familiar with.
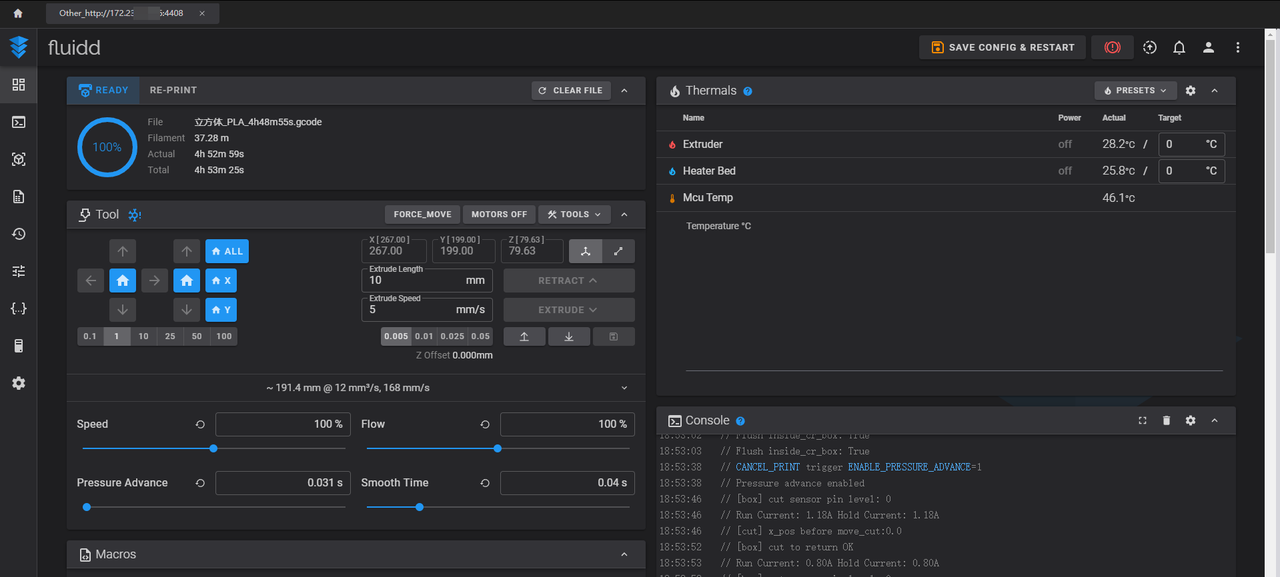
Step 3 Once successfully bound, you can send print jobs to this device. On the device list page, click the details of this device to enter the unified Fluidd device details page.
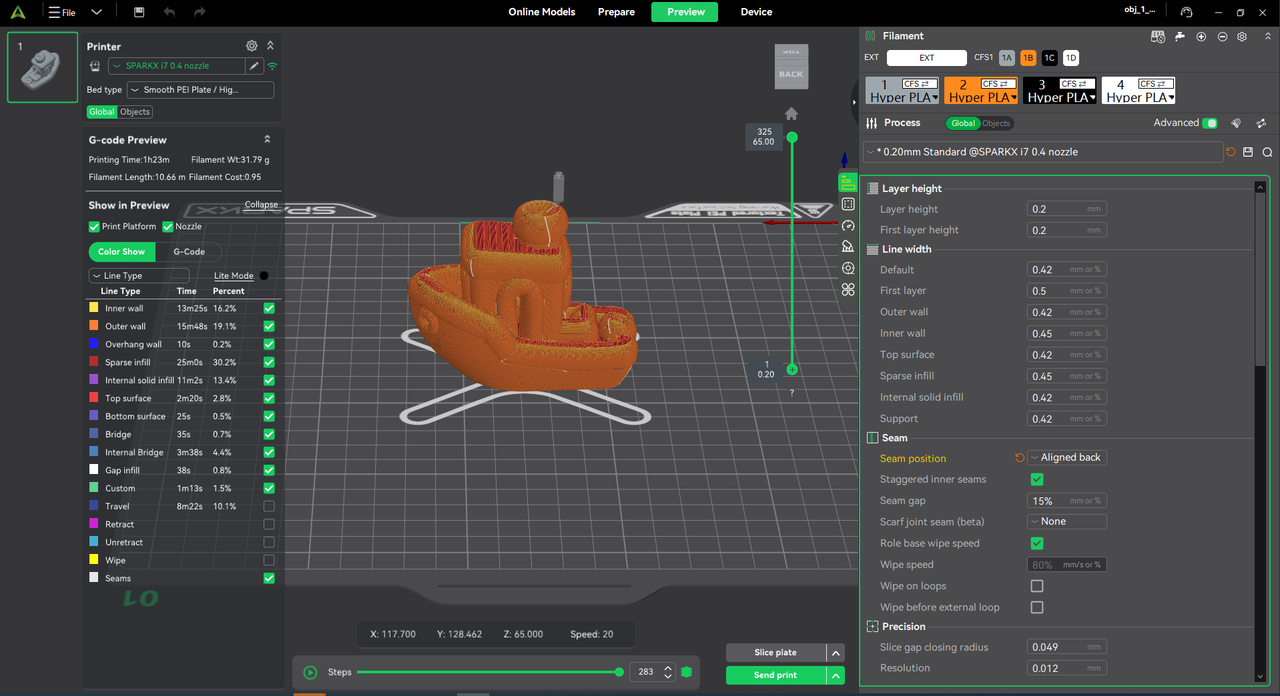
2. This update introduces a new Seam – Back Alignment option, which prioritizes placing outer-wall seams on the back side. It also makes seam placement more stable and predictable, improving front-facing appearance and overall visual consistency. This feature complements existing seam strategies (such as Aligned and Nearest) and is well-suited for models like figurines, decorative prints, and enclosures.
¶ Bug Fixes
- Fixed an illegal access error when selecting Print by Object parameters. Thanks to @Mr P Barnett.
- Fixed an issue where Google accounts could not log in. Thanks to @joaocervo and @DangerouslyMike.
- Optimized travel path behavior when internal bridge flow ratio is set to 0. Thanks to @甘露.
- Fixed embossed text display issues. Thanks to @Yang.
- Fixed an issue where macOS version failed to import 5.X presets.Thanks to@Kirk Cassady.
- Fixed an issue where language settings reverted after restarting the macOS version. Thanks to @Cristian Quadri.
- Fixed an unknown error prompt after installation. Thanks to @Robert Cottrill.
- Optimized filament deletion logic.
- Fixed an issue where models moved outside the build plate when performing undo operations. Thanks to @易水寒.
- Fixed an issue where only part of the models were scaled when box-selecting models on the build plate.
- Fixed an issue where purge volume displayed abnormally in Preview after enabling smooth mode in i7 timelapse. Thanks to @Chris Capasso.
- Optimized the interaction logic of the slicing confirmation dialog.
- Fixed an issue where tree supports were not generated when default line width was set using percentage mode. Thanks to @alphanb.
- Fixed UI compatibility issues on the Device Details page. Thanks to @Michael Hudson.
- Fixed an issue when a printer and a paper printer shared the same IP address, causing abnormal behavior. Thanks to @Petr Goloshchapov.
- Fixed an issue where seam selection could not be unchecked in the Preview page.
- Fixed device page display compatibility issues in some languages. Thanks to @Dan Nilsson.
- Fixed an issue where Creality Cloud grouping did not prompt login when not signed in.
- Fixed an issue where, with Preview LOD enabled, increasing Top Z Distance caused visible layer breaks after slicing.
- Optimized the low triangle count of the built-in sphere model.
- Fixed a UI layout issue in the Filament Settings section on the Device Details page at 1920×1200 resolution.