¶ Timelapse Functionality Introduction
Time-lapse photography is a special video recording technique that compresses a long 3D printing process into a short video, making it easier to share the entire model printing journey.
¶ 1. Introduction to Time-lapse Mode in Creality Print
In Creality Print, when you enable time-lapse photography, the machine’s camera takes a snapshot at the end of each layer. Once the print is complete, all snapshots are compiled into a time-lapse video.
There are three time-lapse modes available: Off, Smooth Mode, and Traditional Mode. This feature has been optimized specifically for the Creality Hi printer, as detailed below.
Due to its structural design, the Creality Hi printer moves the heated bed back and forth to control the Y-axis. During printing, the bed shifts horizontally, which means the model also moves within the frame.
For a proper time-lapse effect, the bed should remain fixed in the horizontal plane, with only the Z-axis changing. To achieve this, the Creality Hi moves the bed to a fixed position and parks the nozzle at the purge chute before each snapshot. After the photo is taken, it returns the nozzle above the model to continue printing.
Both Traditional Mode and Smooth Mode use this mechanism. However, if the time-lapse function is not enabled in the printer firmware, these movements will not be executed during actual printing.
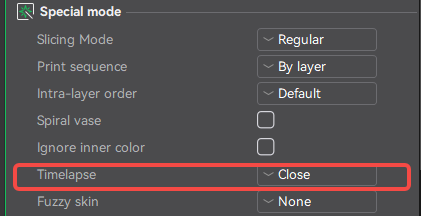
¶ 1.1 Off
By default, the time-lapse mode in Creality Print is set to Off.

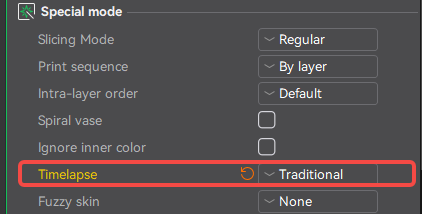
¶ 1.2 Traditional Mode
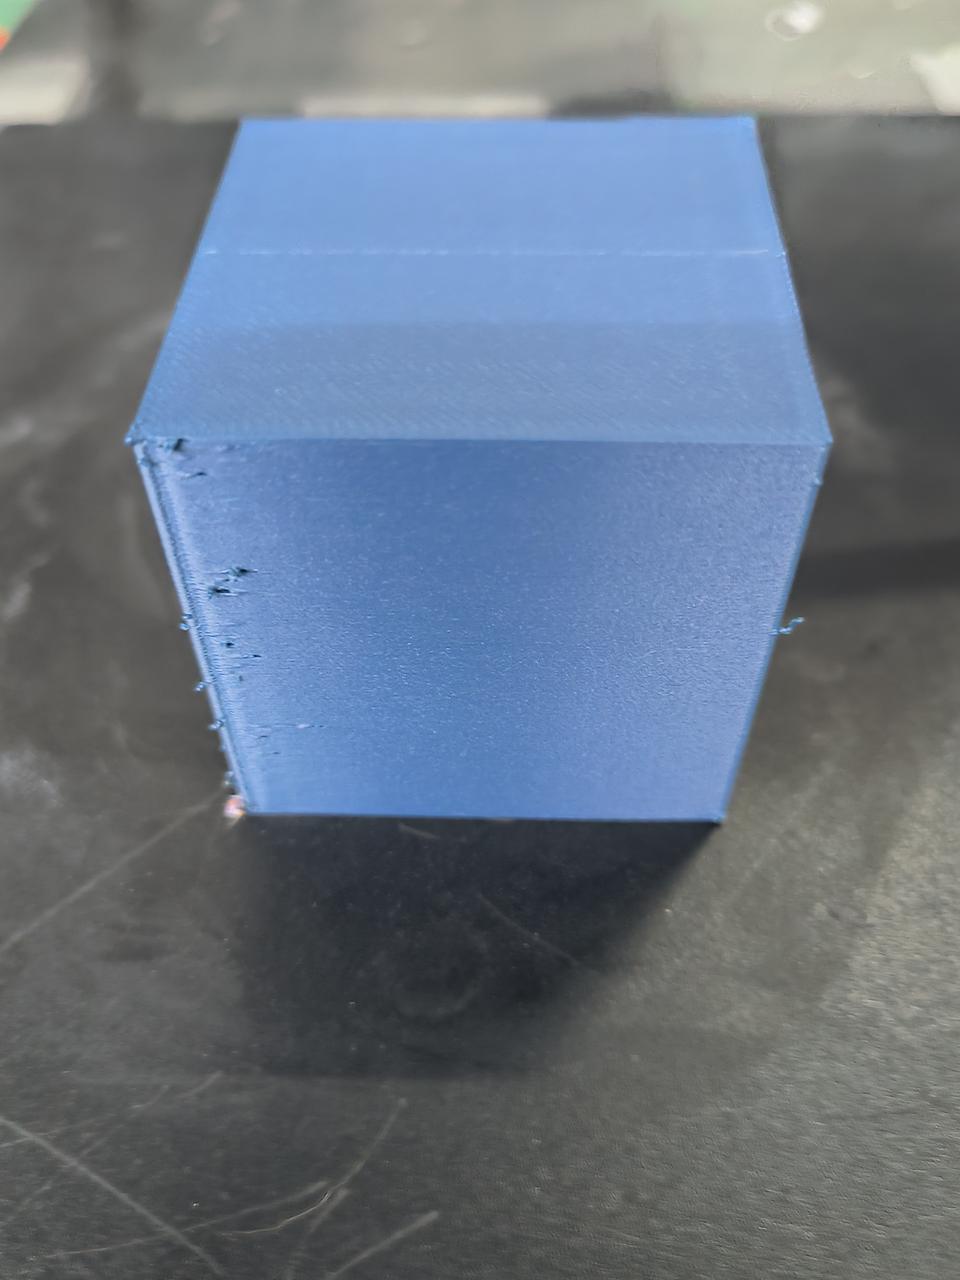
In Traditional Mode, the printer pauses after each layer to capture a snapshot. This pause often causes oozing or stringing, since no prime tower is used to absorb the extrusion defects.
As a result, visible print quality artifacts are inevitable in this mode. Therefore, Smooth Mode is recommended instead of Traditional Mode.

¶ 1.3 Smooth Mode
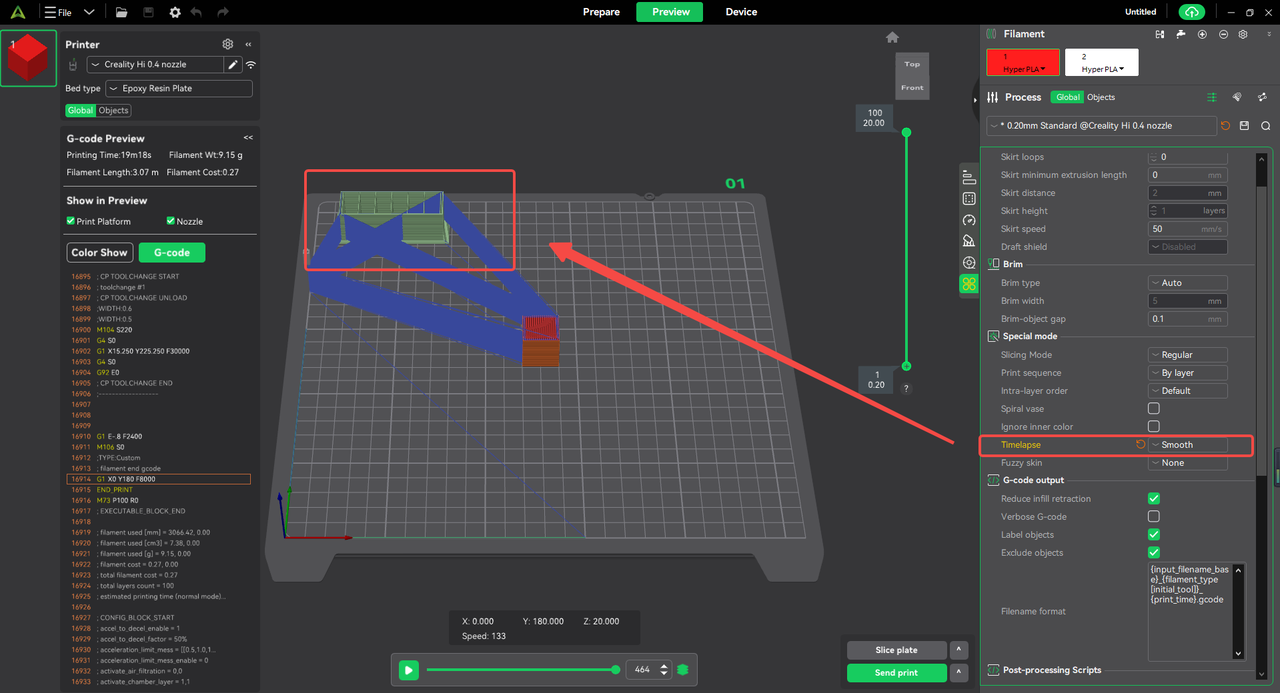
In Smooth Mode, a prime tower is automatically generated by default. After each snapshot pause, the nozzle first prints on the prime tower before resuming the model print. This ensures that any oozing or extrusion defects caused by the pause are absorbed by the prime tower rather than the model itself.
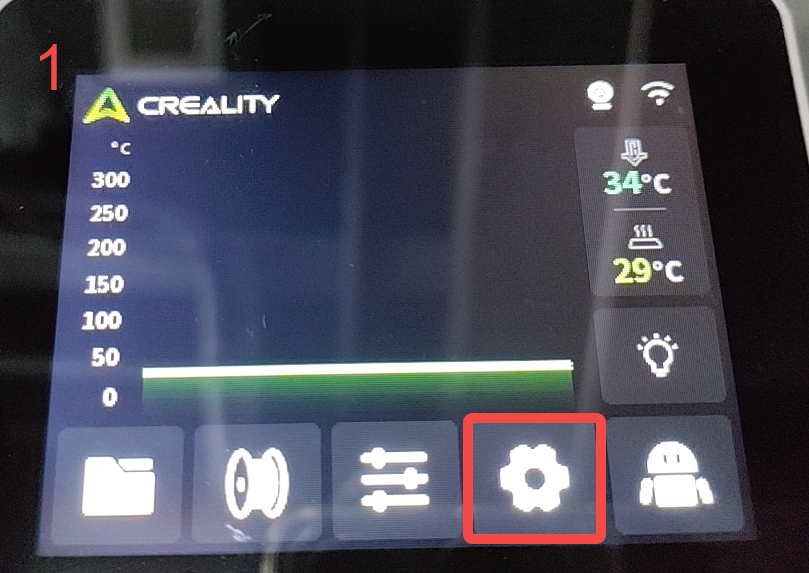
¶ 2. How to Enable Time-lapse
¶ 2.1 Creality Print Settings
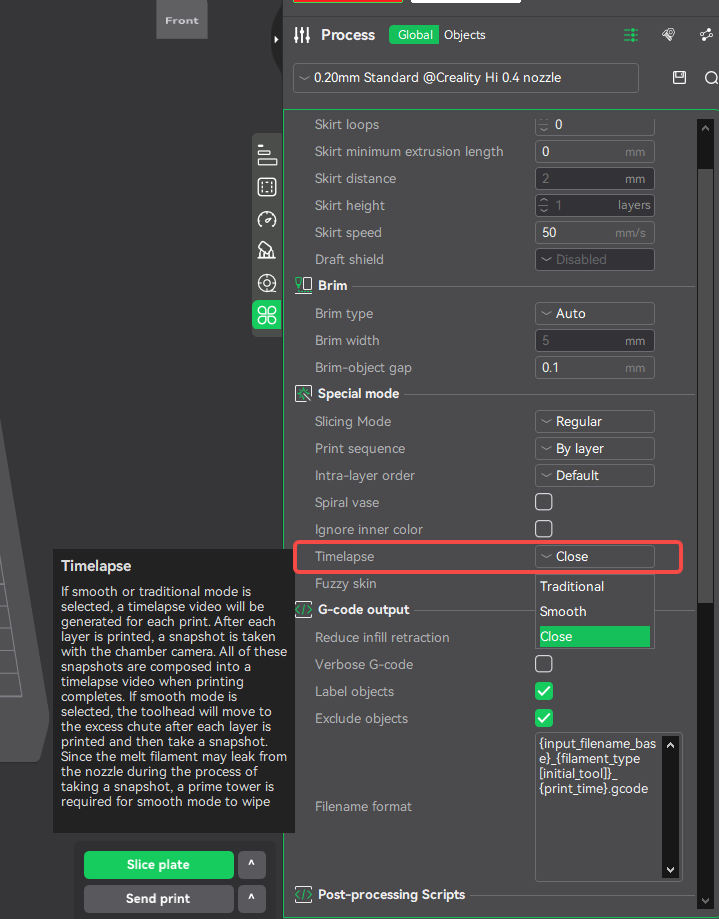
In the Creality Print menu bar, navigate to Other → Special Mode → Timelapse.

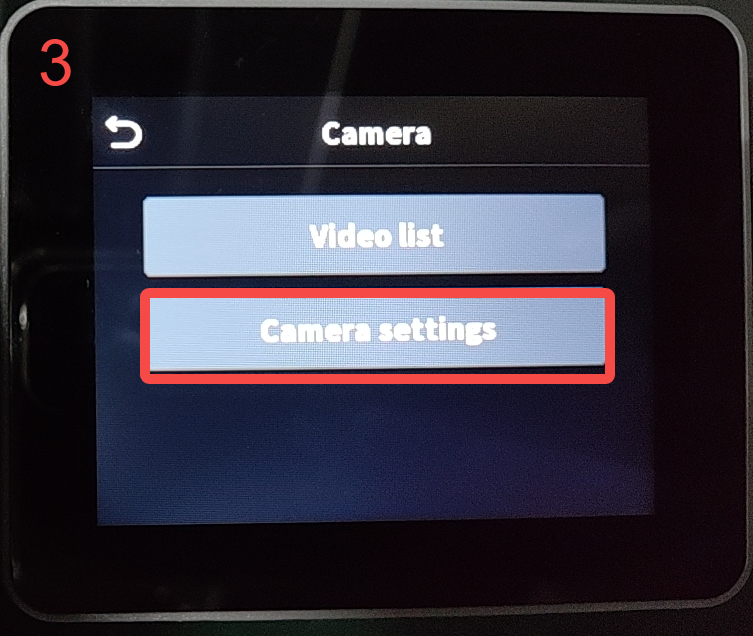
¶ 2.2 Creality Hi Printer Firmware Settings
On the printer touchscreen, navigate to: Settings → System → Camera → Camera Settings, and check if Time-lapse is enabled. (This setting is enabled by default.)


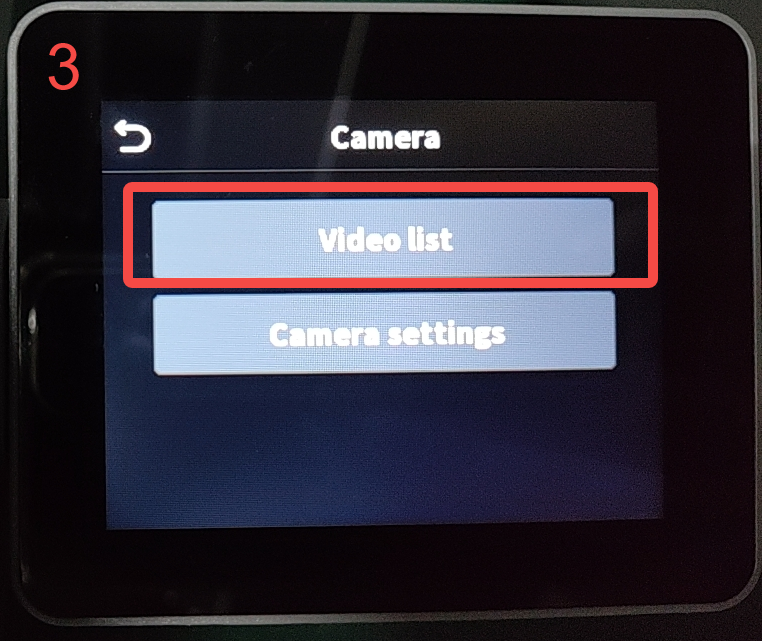
¶ 3. Storage Location of Time-lapse Videos
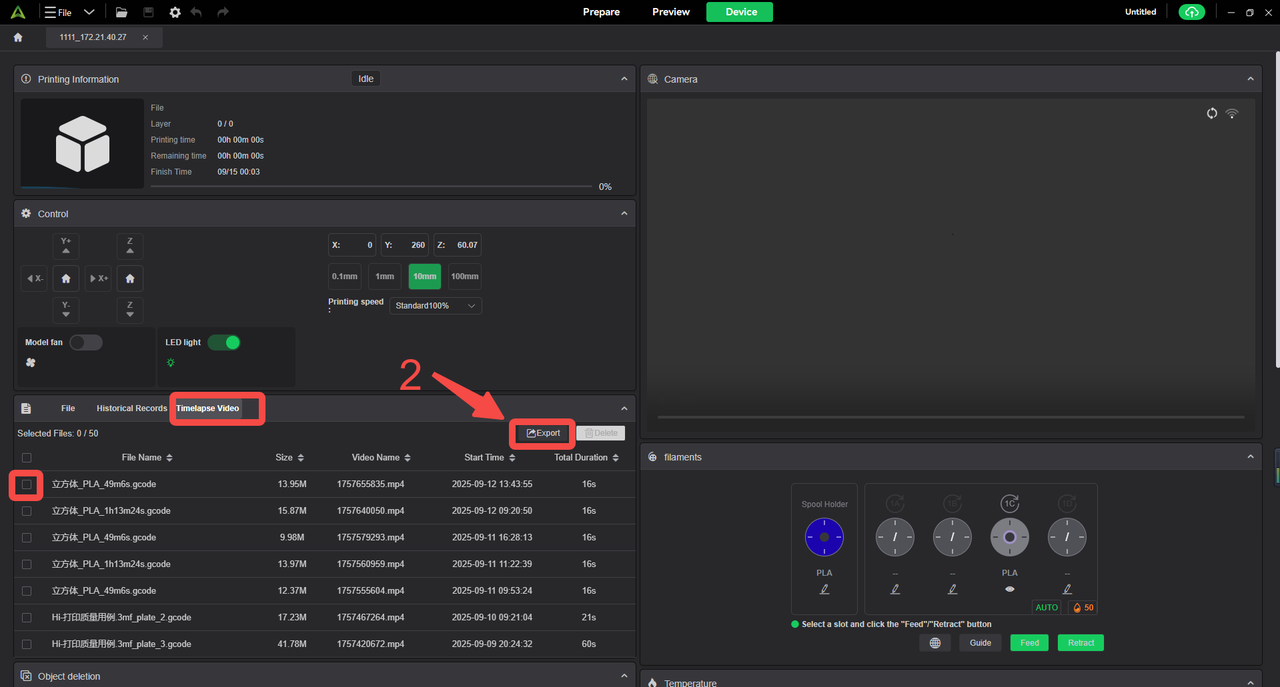
¶ 3.1 In Creality Print Device Page
After the print is completed, the generated time-lapse video can be found under the device page in Creality Print.
Navigate to Printer Device → Details → Time-lapse video, select the file, and export it. Wait for the export to finish.

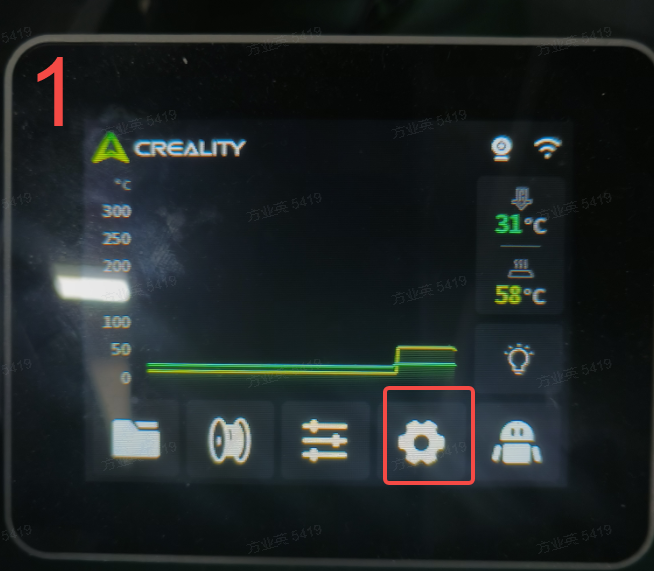
¶ 3.2 On the Creality Hi Printer Firmware
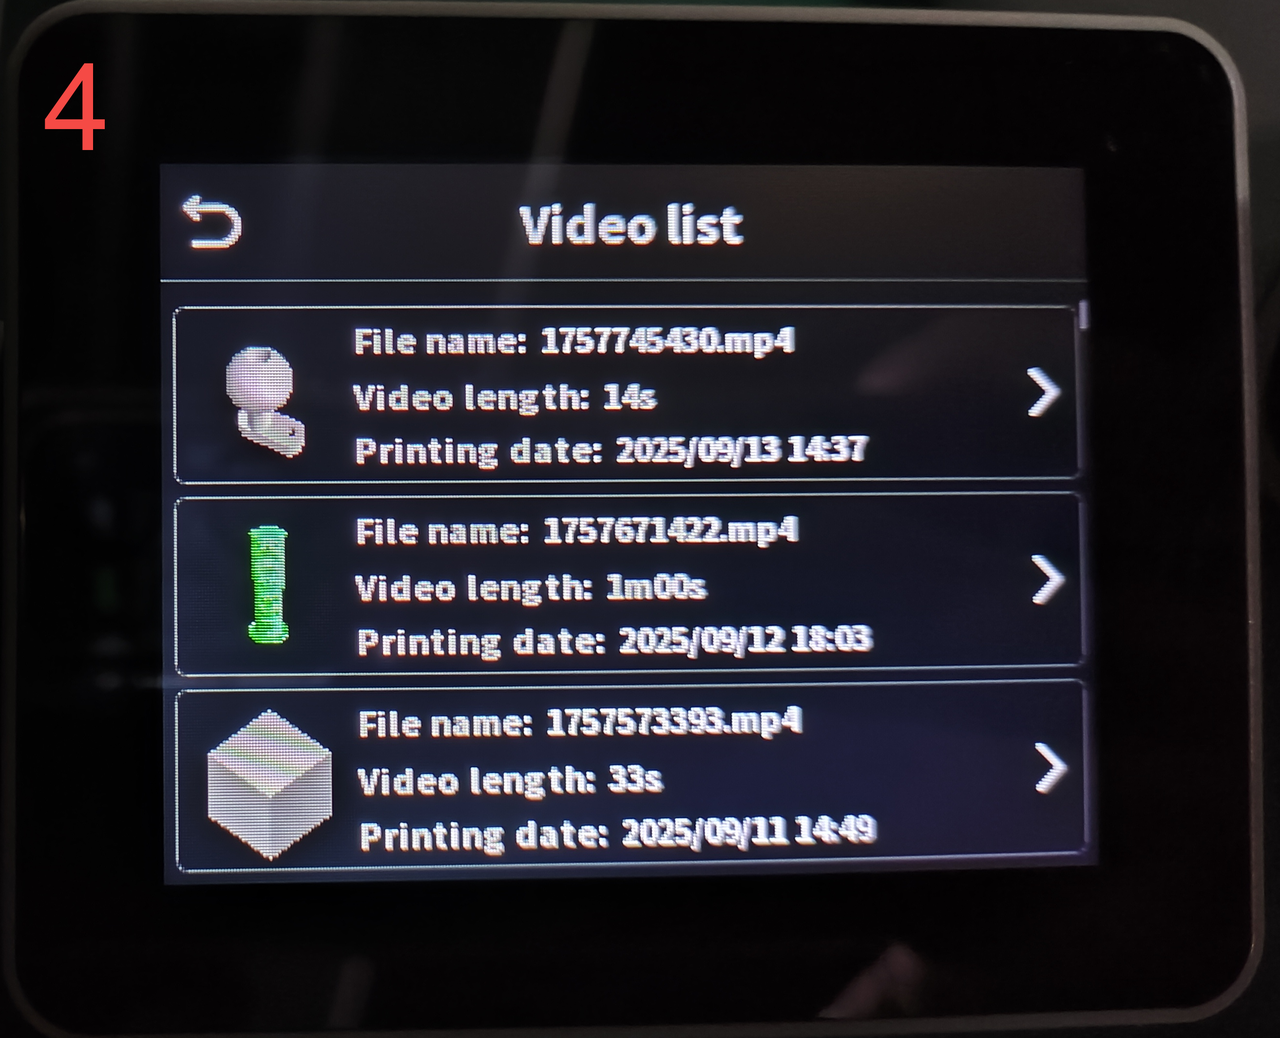
After printing, the time-lapse video is saved under: Settings → System → Camera → Video List.
From there, you can select and export the video file.

¶ 4. FAQs
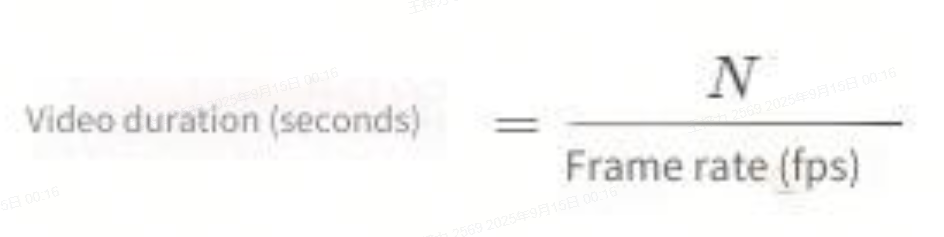
¶ 4.1 How is the video length related to print duration?
The time-lapse video length is independent of the actual print time. It only depends on the total number of layers (N) and the frame rate (15 fps).
¶ 4.2 From which layer does the time-lapse start?
Currently, the firmware begins generating time-lapse videos only after the 45th layer. Models with fewer than 45 layers will not generate a time-lapse.
¶ 4.3 Why is the live preview darker during printing?
To ensure consistent brightness throughout the time-lapse, exposure is locked during recording. This prevents flickering due to environmental light changes.
If you start printing in a bright environment and later the ambient light dims (e.g., day to night), the locked exposure may cause the live preview to appear darker.
¶ 4.4 Creality Hi Firmware compatibility for time-lapse
Time-lapse optimization in Creality Print is only available for Creality Hi firmware version 1.1.0.48 and later.
On version 1.1.0.47 and earlier, the Traditional and Smooth modes will still show continuous bed and nozzle movement in the video. For best results, please update your firmware.
¶ 4.5 Priority of time-lapse Controls
The printer’s firmware setting is the final control authority.
If disabled on the printer, time-lapse will not run, regardless of Creality Print settings.
If enabled only in Creality Print while the printer firmware setting is off, the printer will execute the unoptimized capture logic.