¶ 1. What is a preset?
A preset, in simple terms, refers to a combination of parameters. When we use slicing software to slice and print 3D models, we need to set many parameters, such as printing speed, temperature, filling density, etc. A preset is a set of solutions that set these parameters in advance according to different needs.
¶ 2. What presets does Creality Print have?
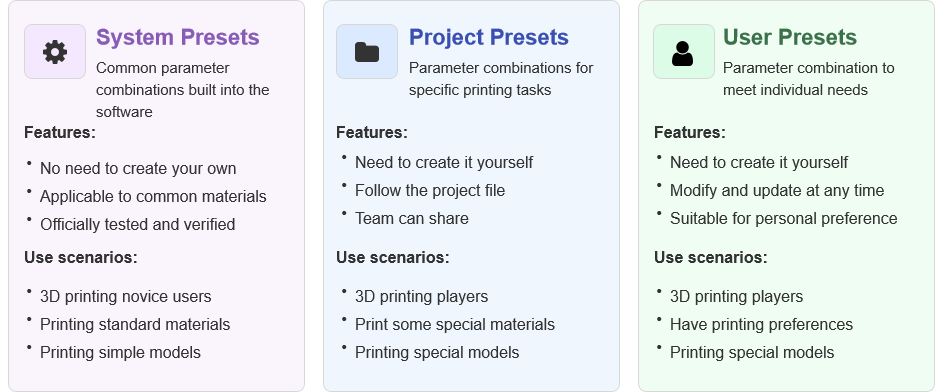
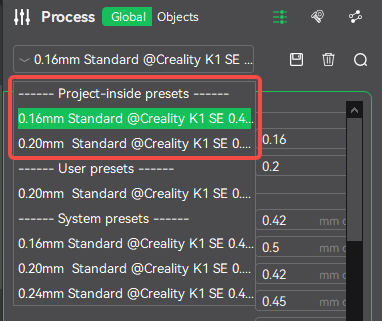
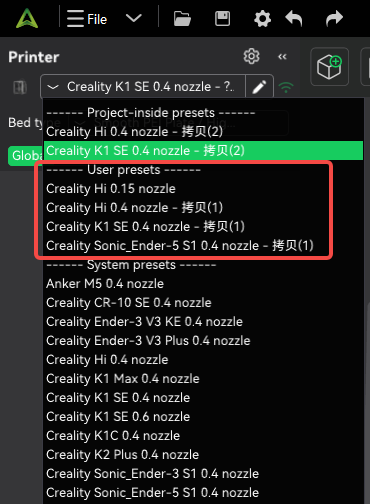
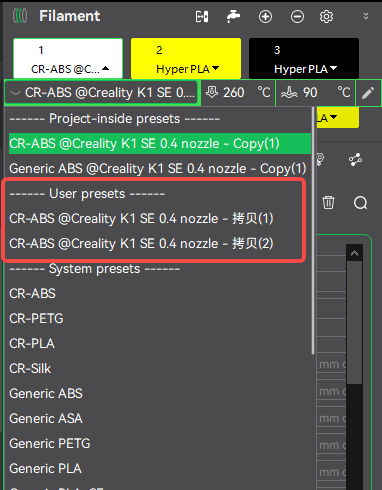
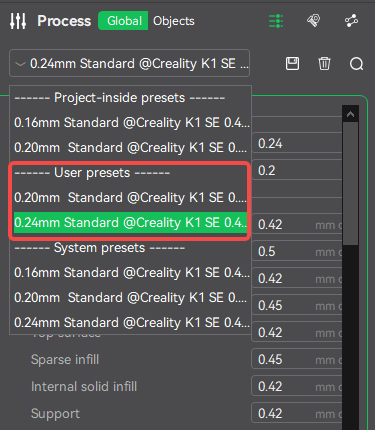
Currently, Creality Print has 3 types of presets: system presets, project presets, and user presets.
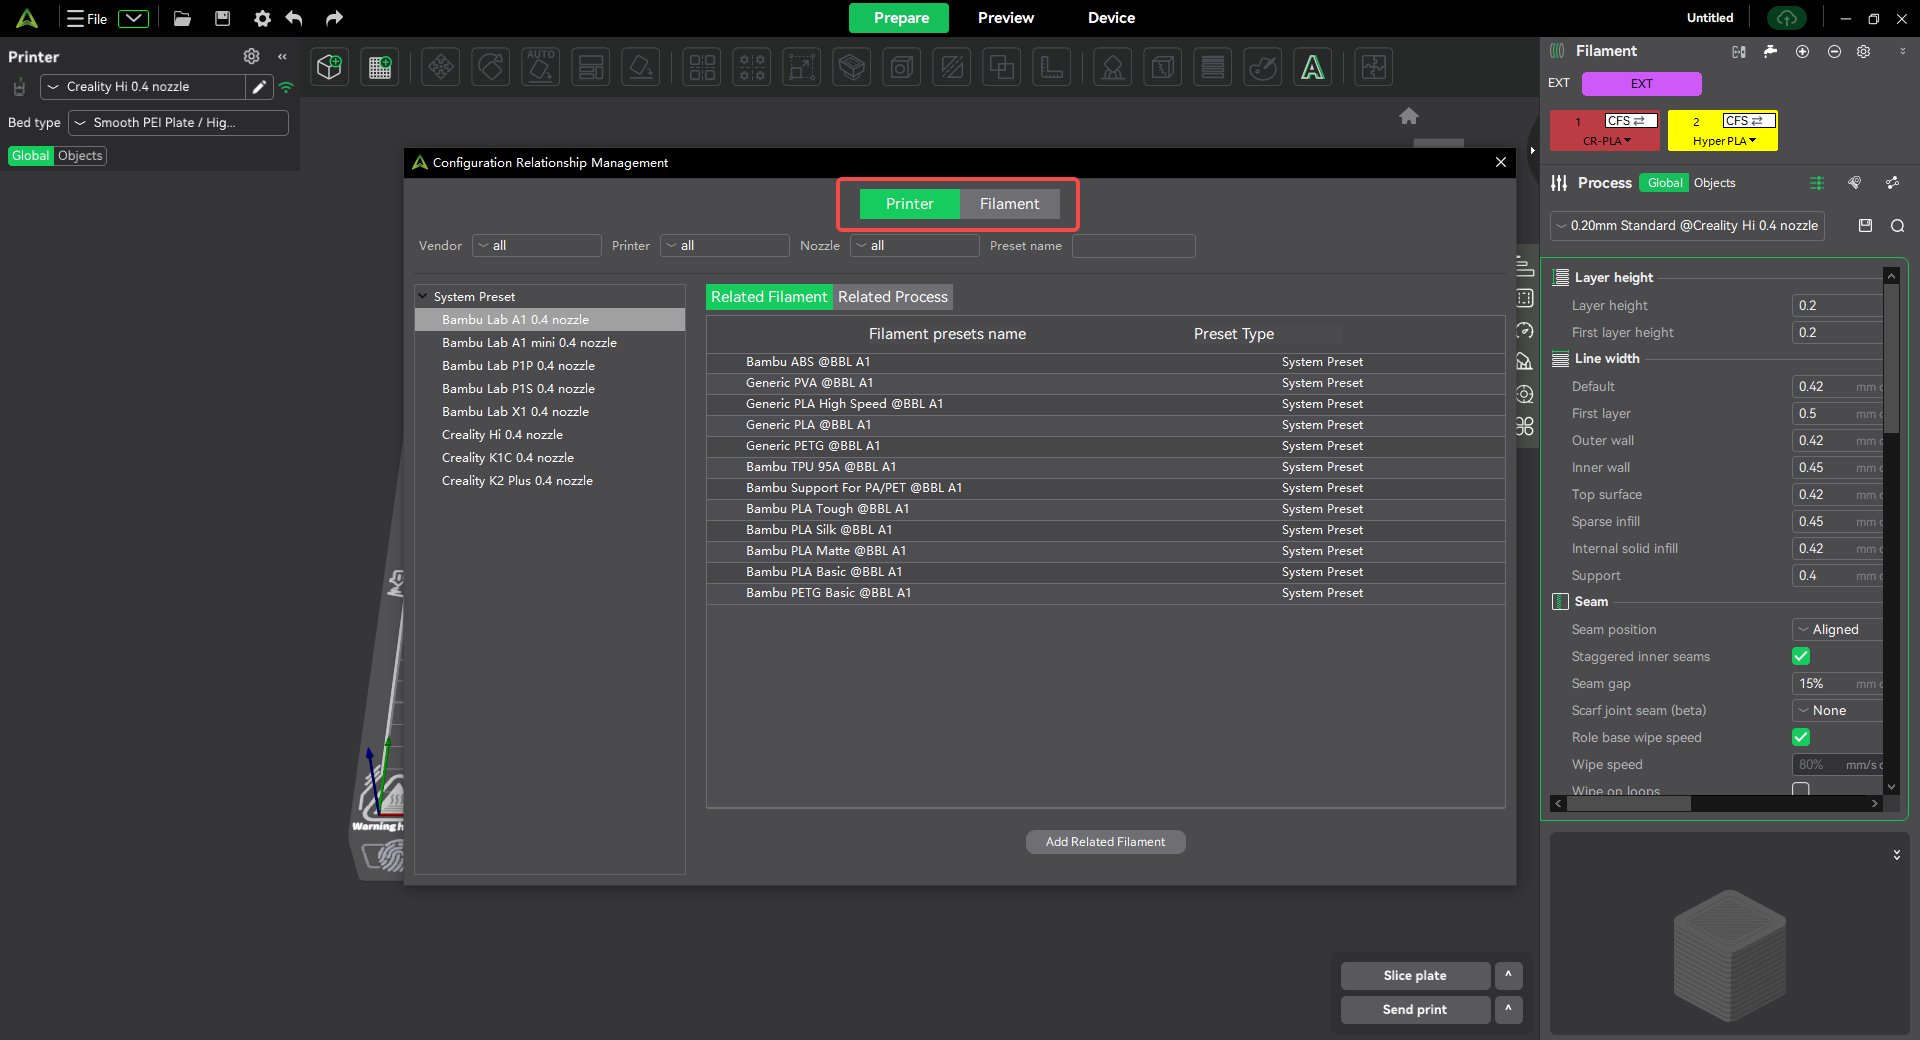
¶ 3. Preset association relationship
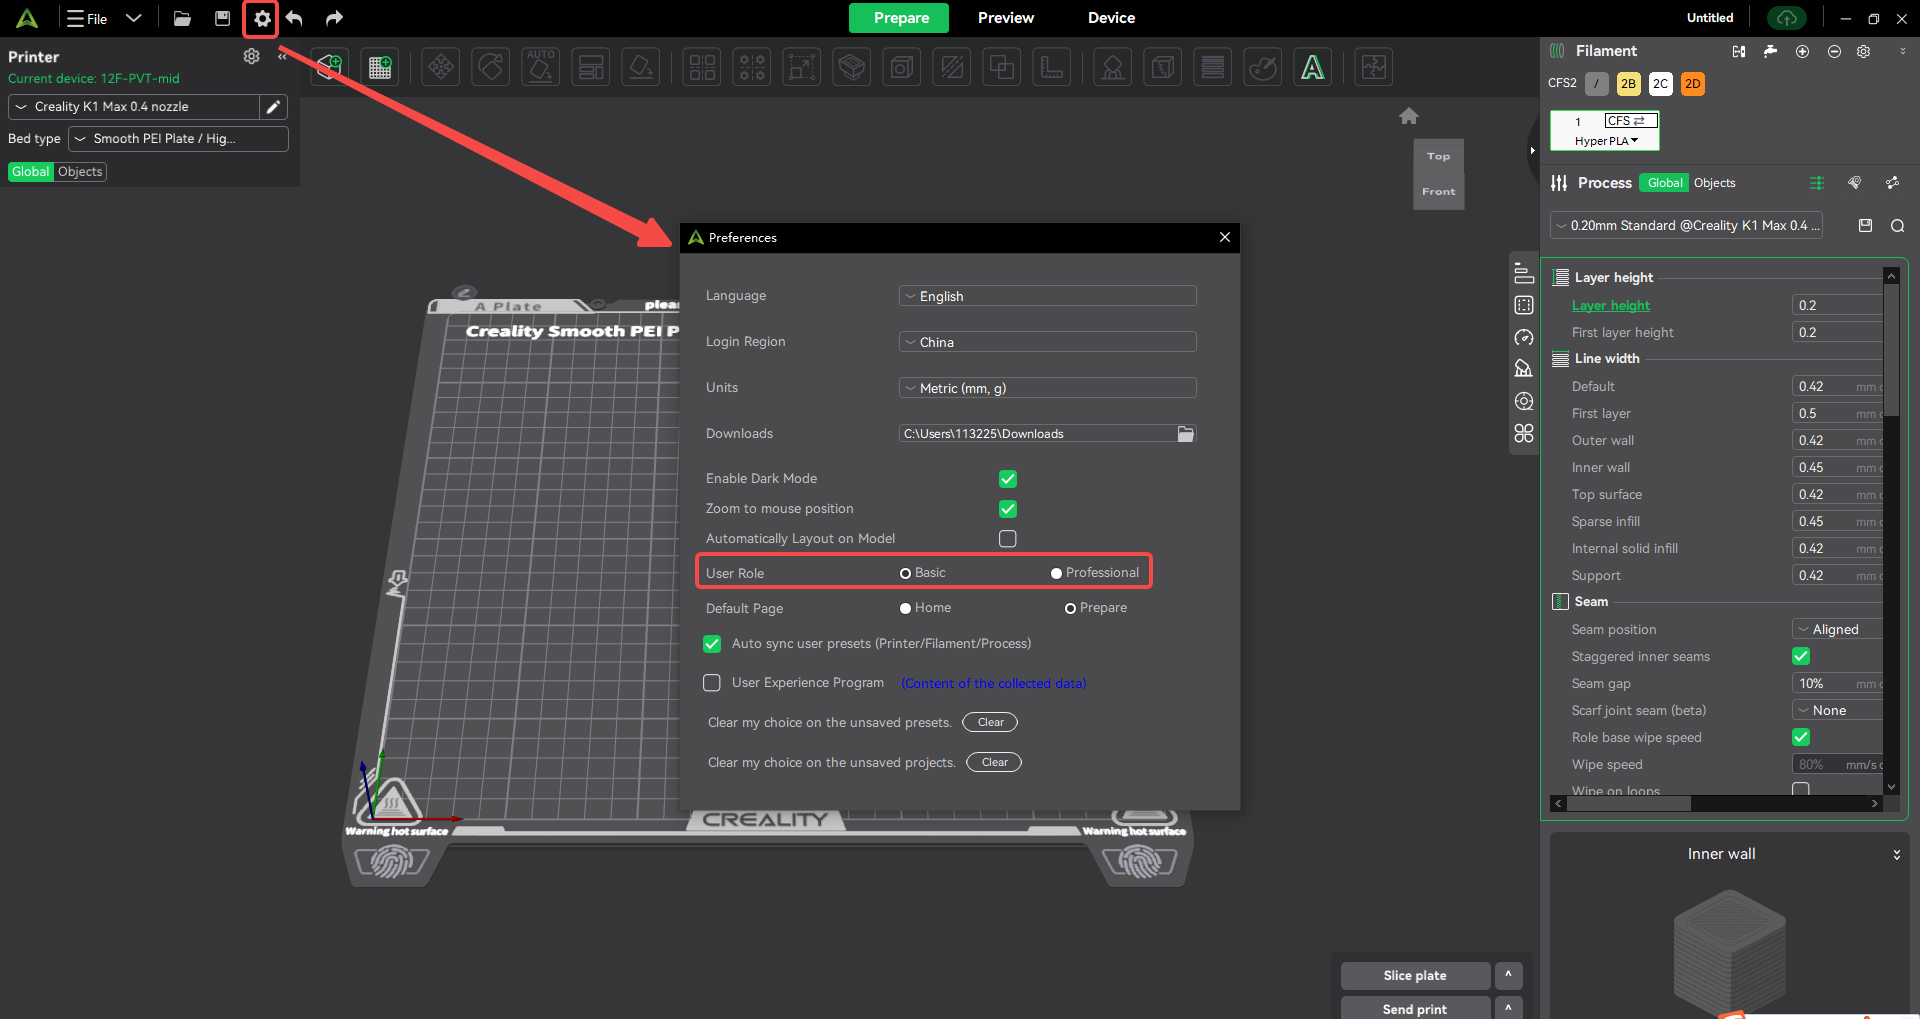
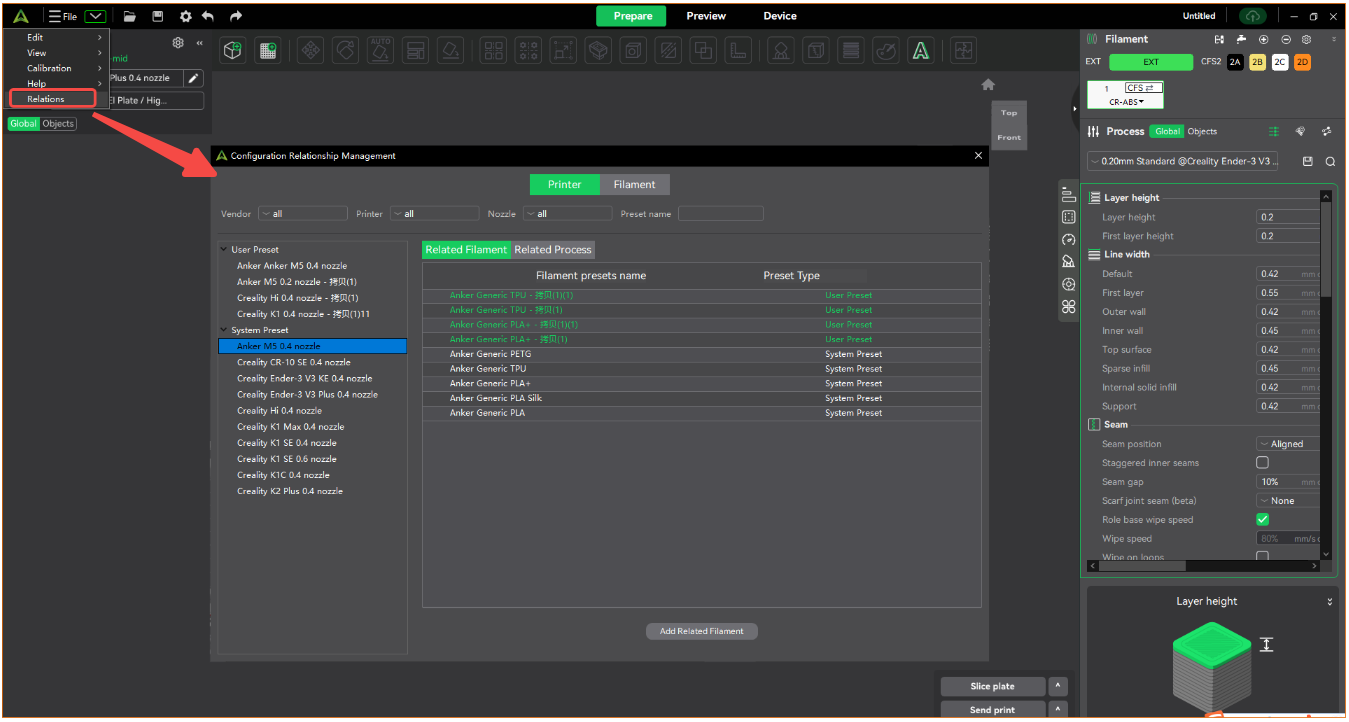
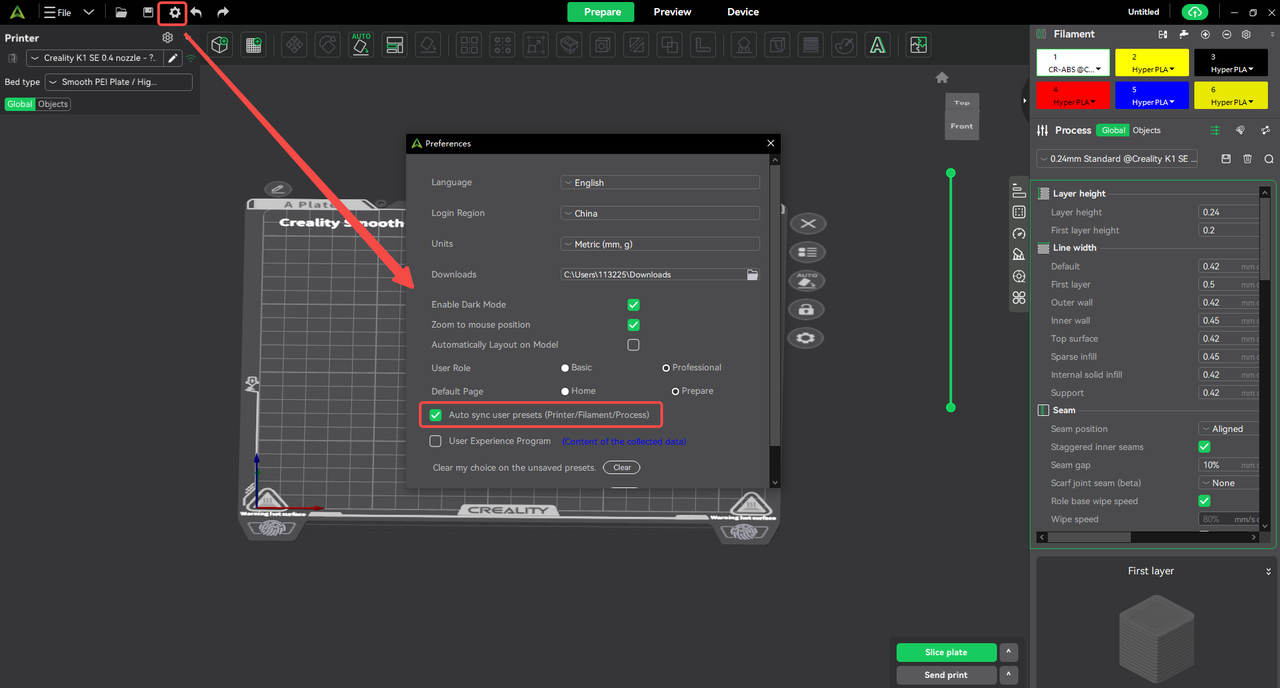
If you select "Expert" as the role on the [Preferences] page, you can use the association preset function. If you select "Basic" as the role, you cannot use the association preset function.
¶ 4. System presets
¶ 4.1 Definition
System presets refer to the general parameter combinations built into the software, which are suitable for basic printing needs. System presets cannot be deleted.
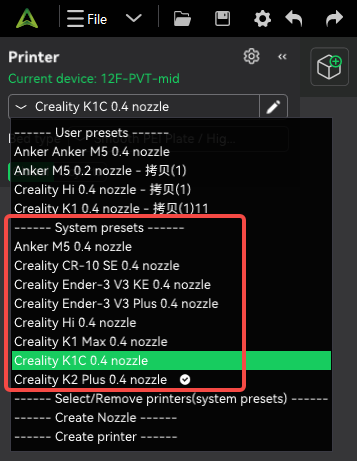
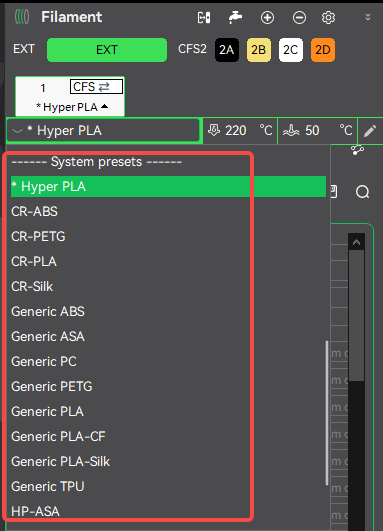
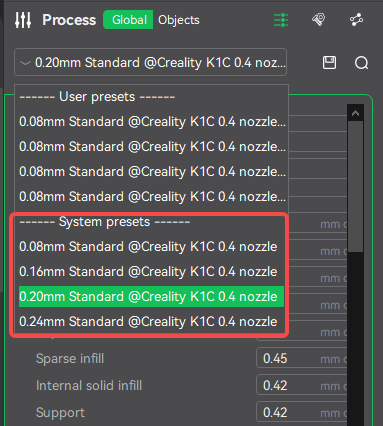
¶ 4.2 Classification
There are 3 types of system presets, namely printer system presets, filament system presets, and process system presets.
¶ 4.3 Preset function
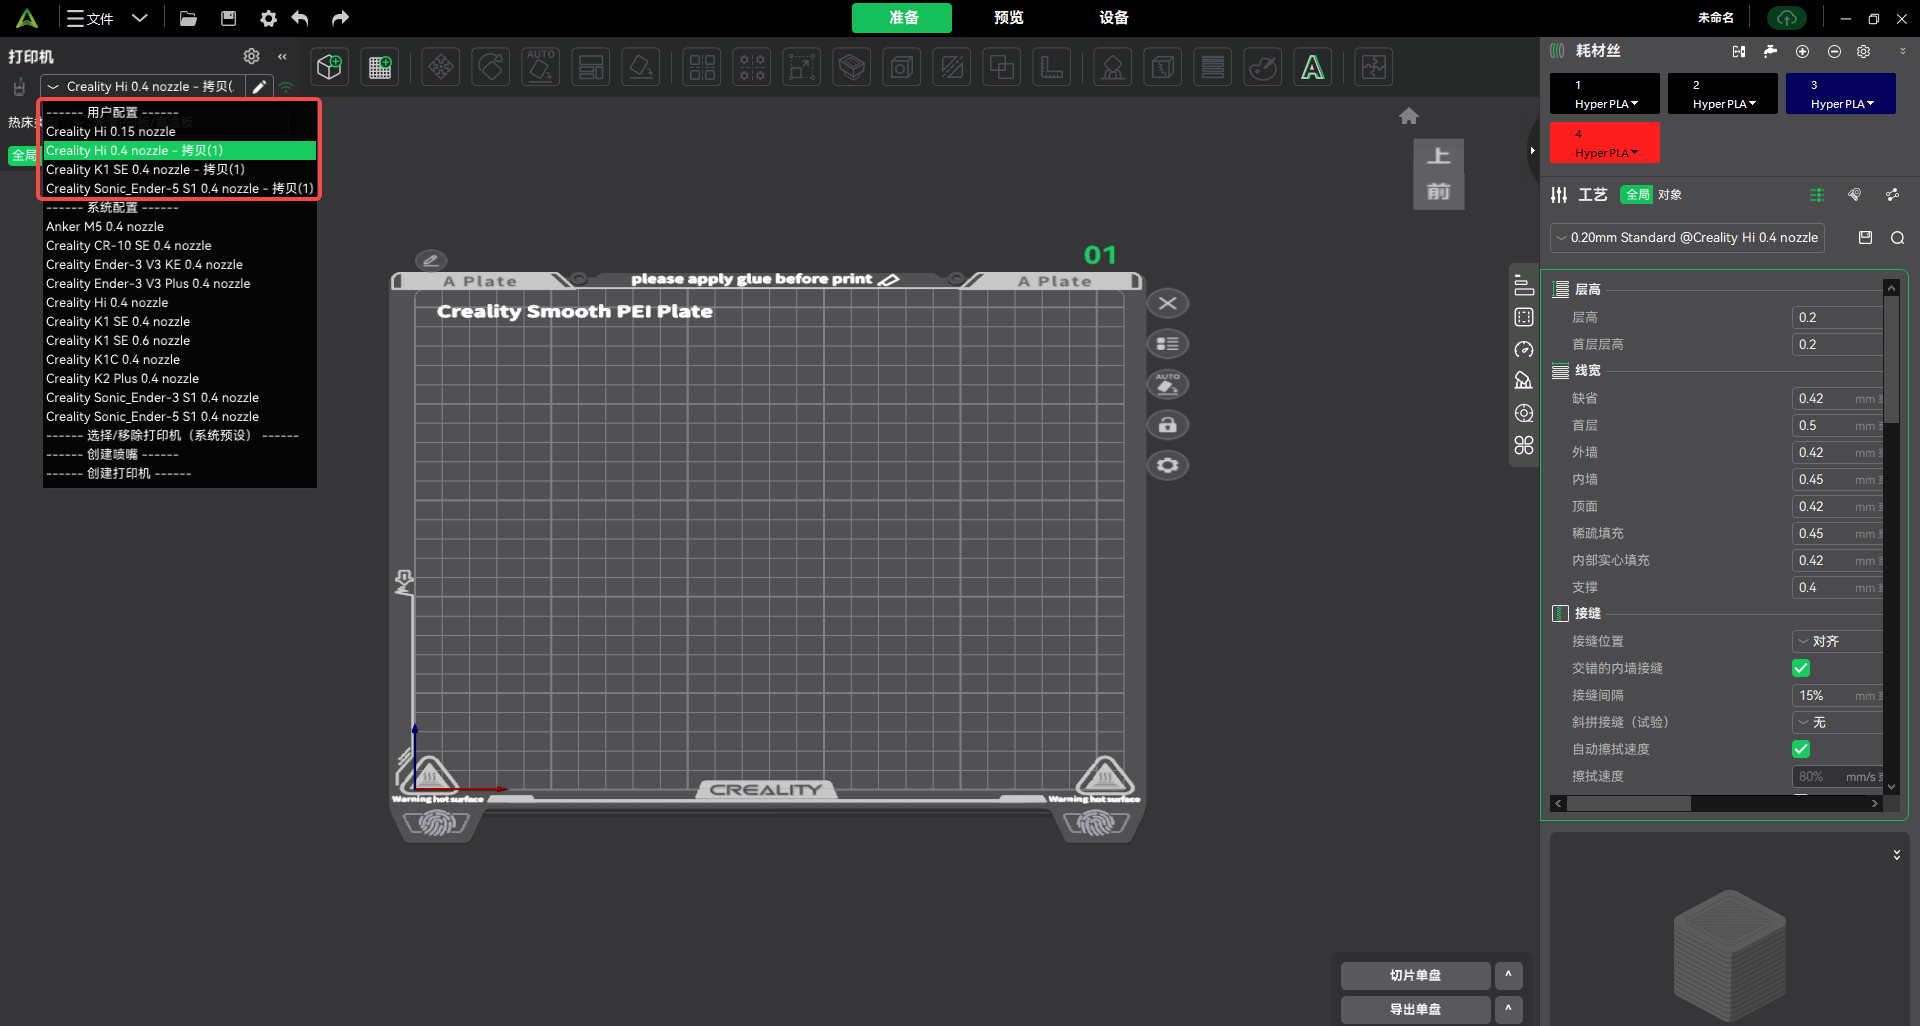
¶ Add system preset
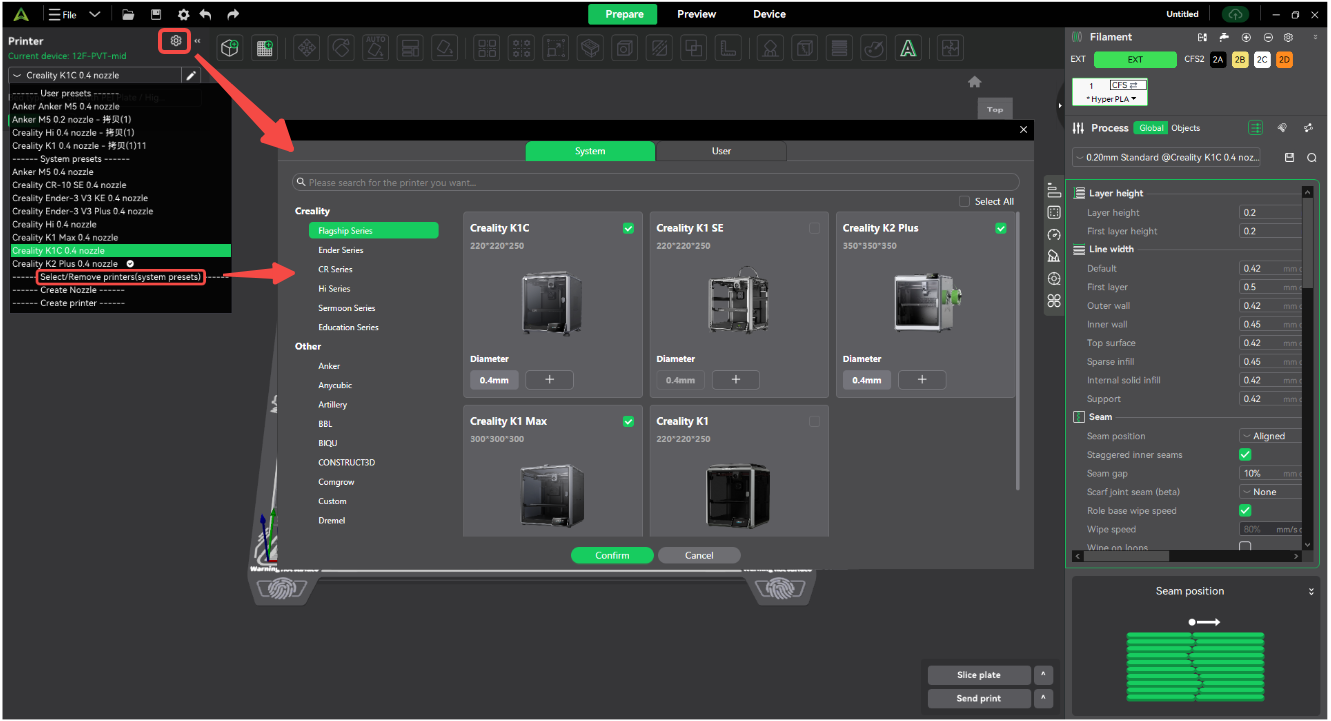
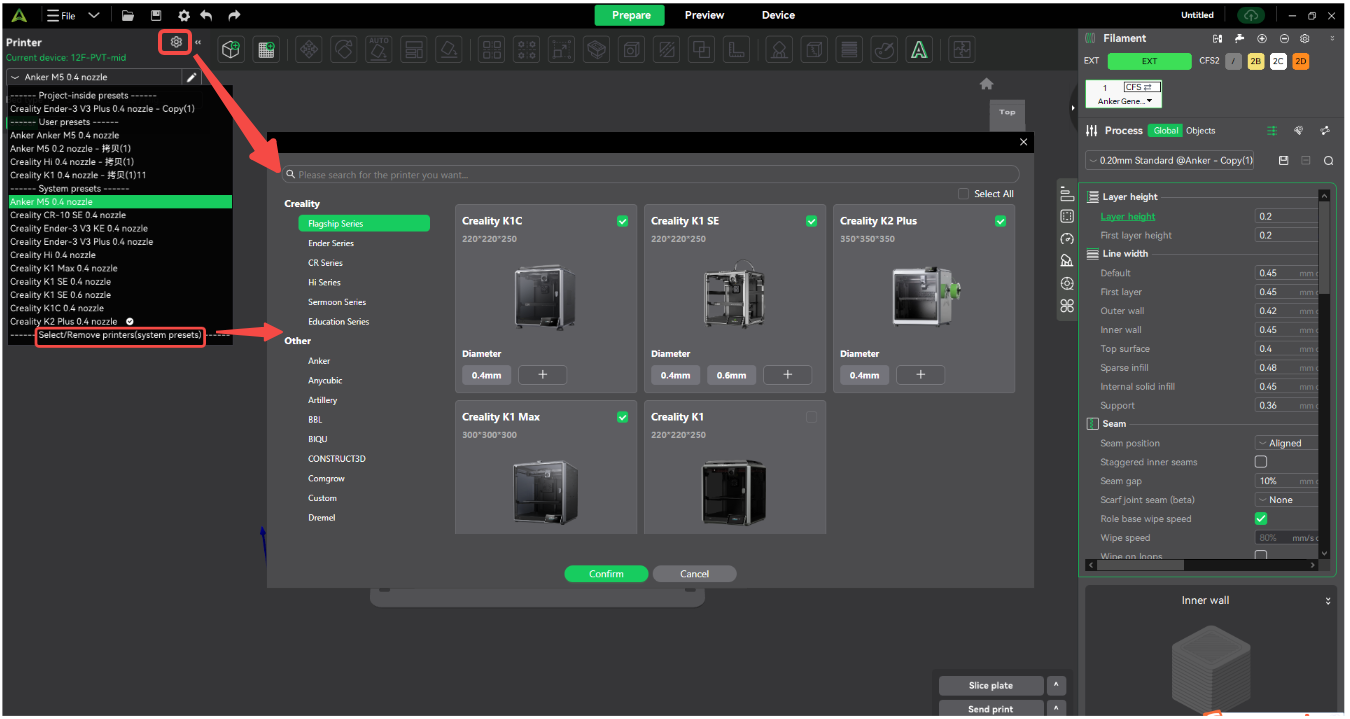
- Add [Printer_System Preset]
Operation steps: Click "Select/Remove Printer (System Preset)" or the "Gear Icon" of the printer to pop up the Printer Preset pop-up window, select the "System" option (no need to select it for basic mode), check the printer you need under this option, and click "Confirm" to successfully add [Printer_System Preset].
¶ Delete system presets
Printer system presets, filament system presets, and process system presets cannot be deleted.
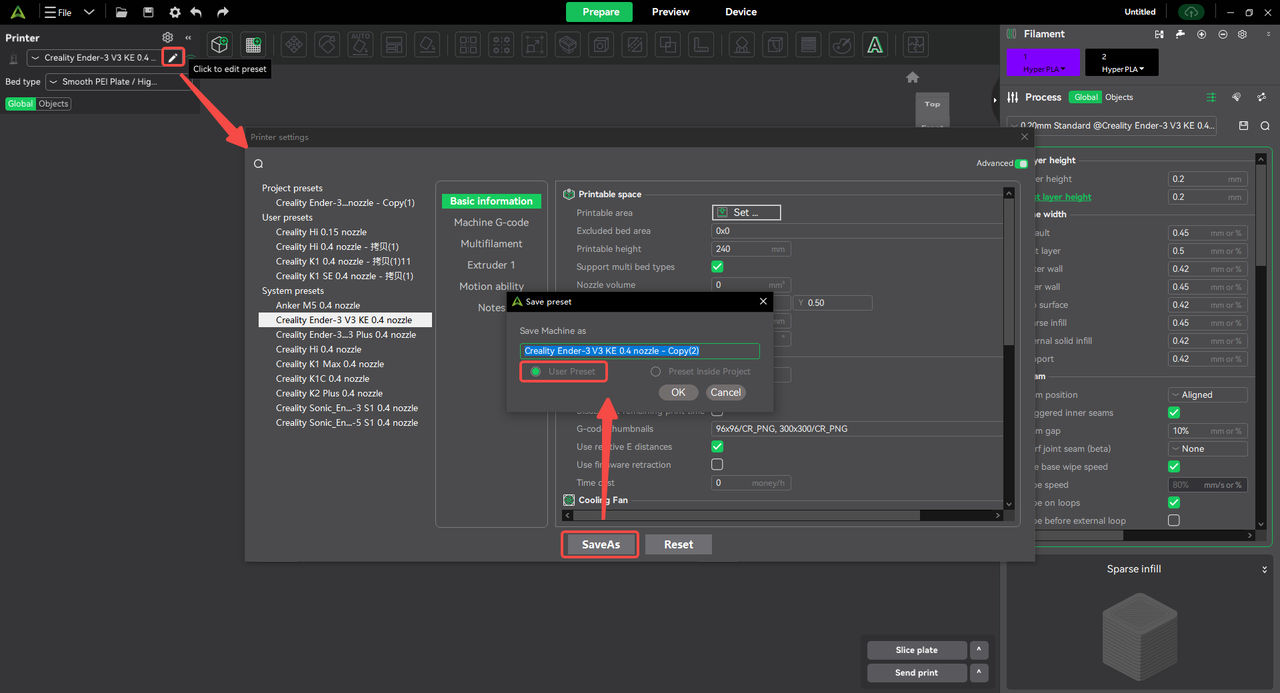
¶ Save system preset as
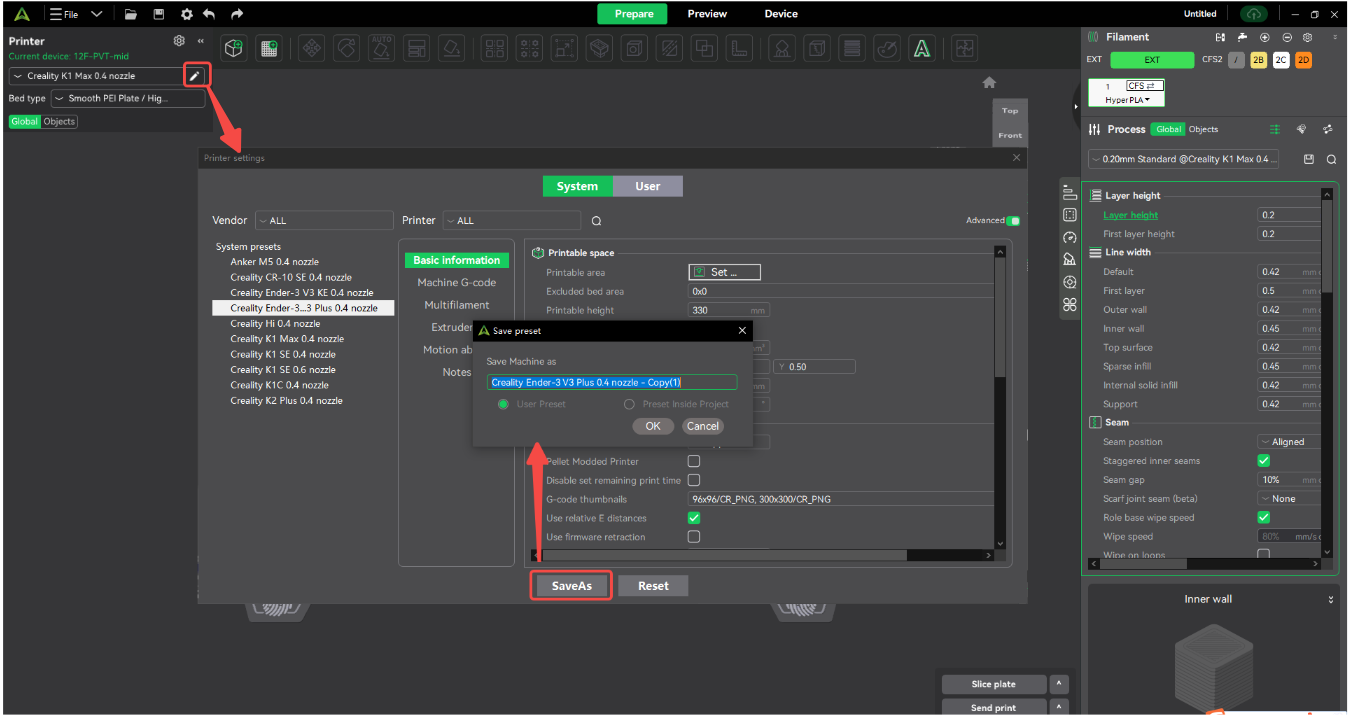
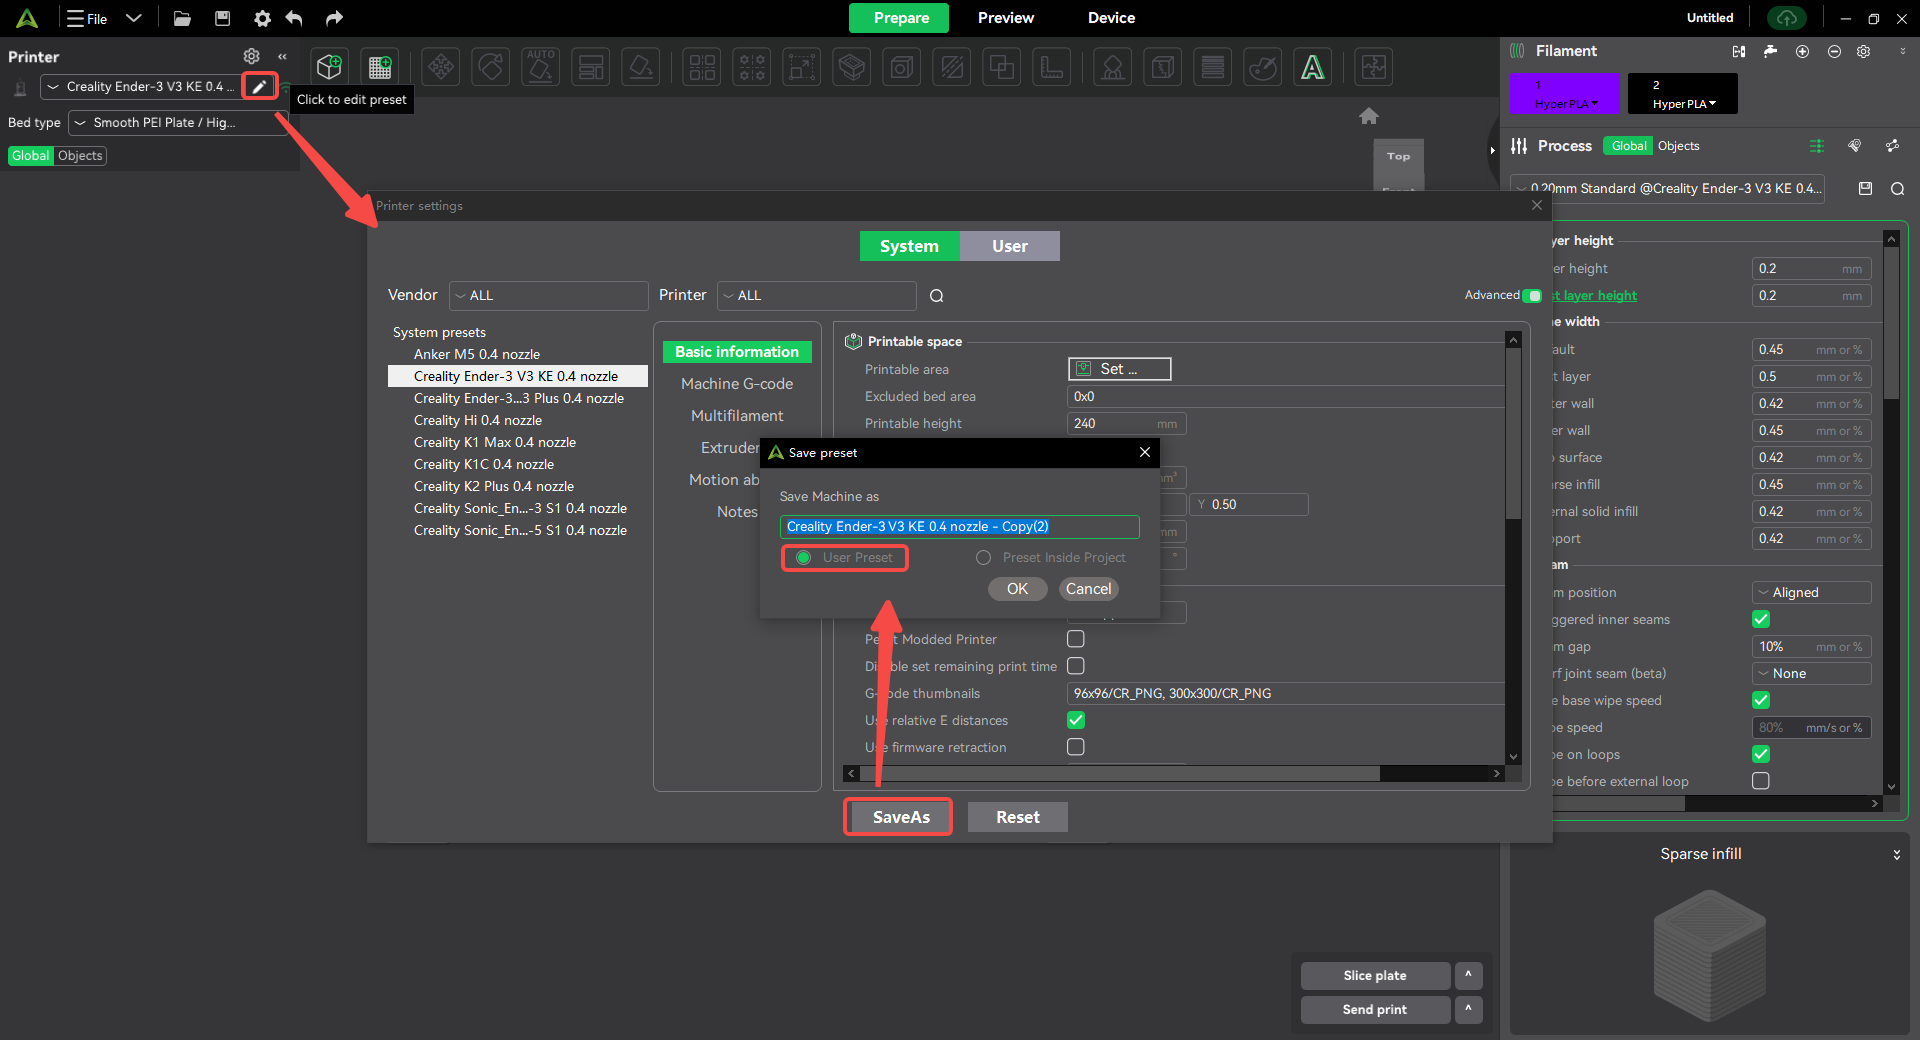
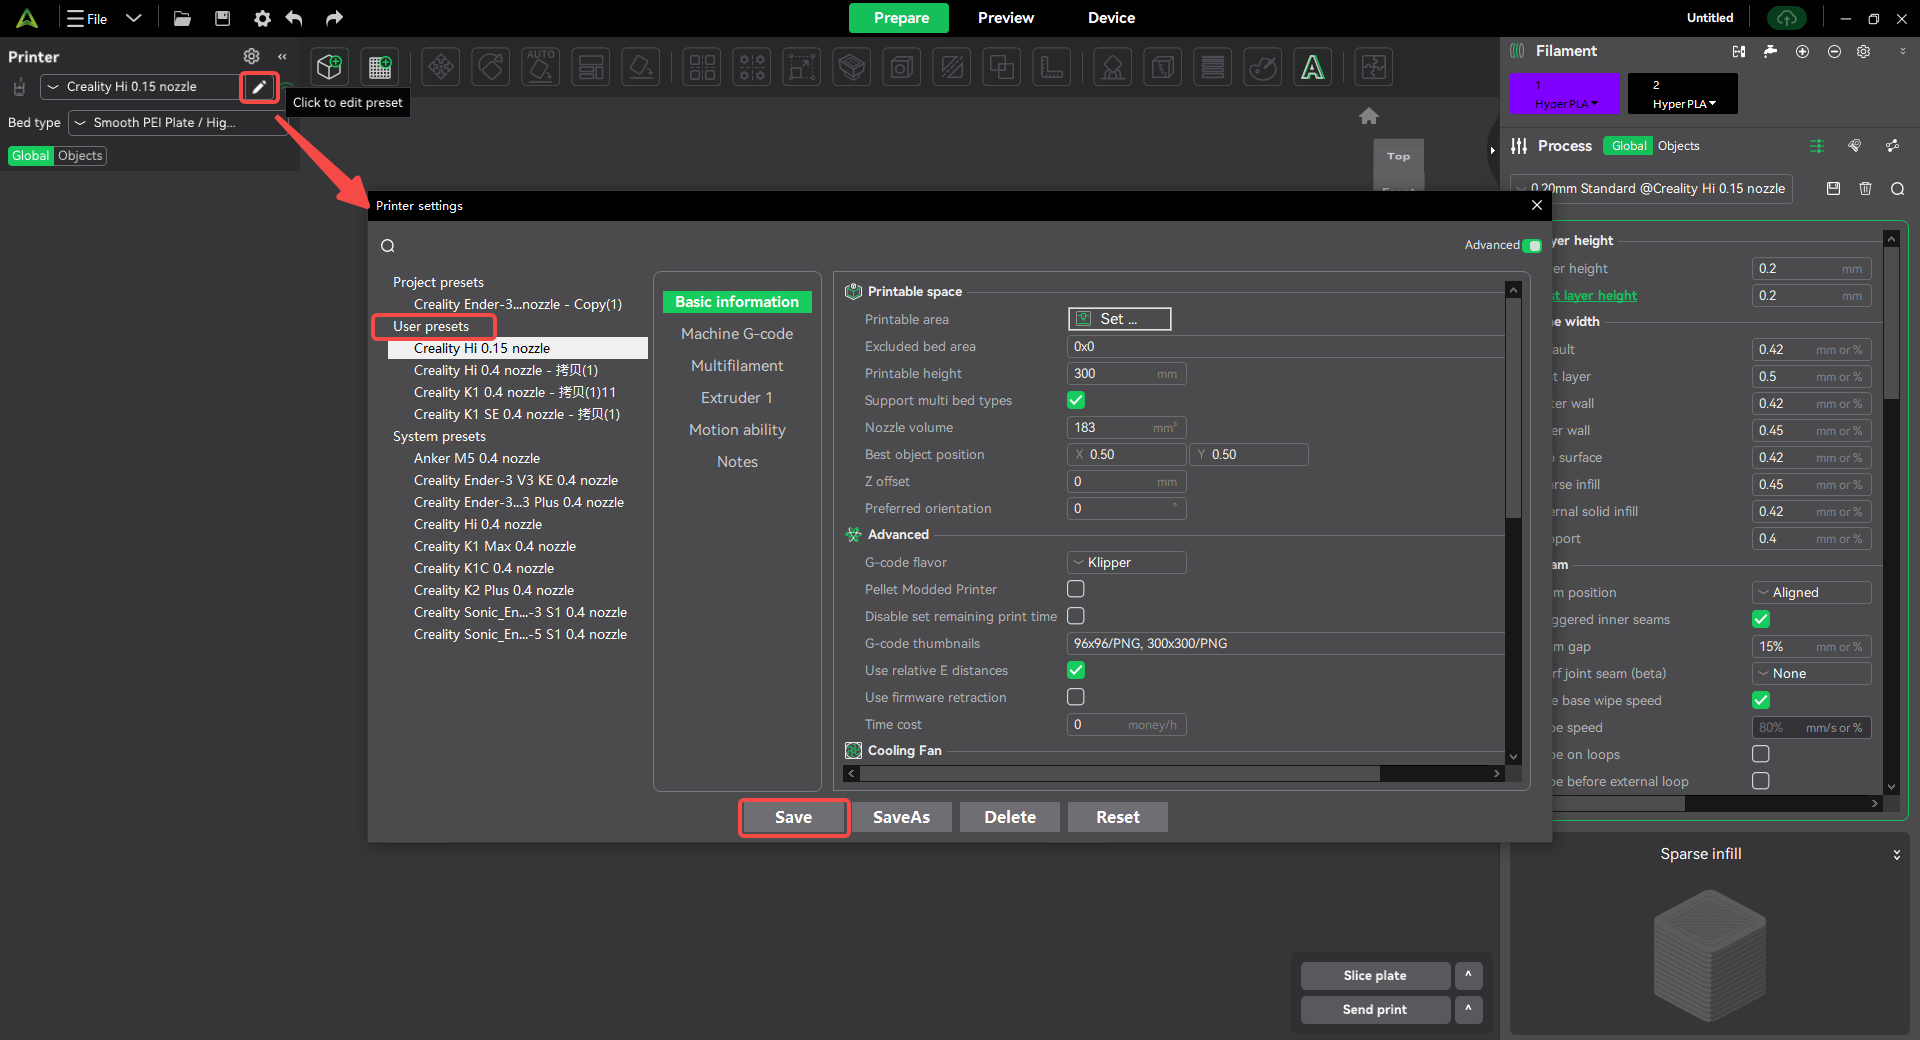
Take [Printer_System Preset] as an example, the operation of saving preset as is as follows:
Click the "Edit icon" of the printer to pop up the printer preset editing pop-up window, select the "System" option (no need to select the basic mode), select the printer preset you want to edit under this option, and click "Save As" after modification to save it as another type of preset.
¶ 5. Project Presets
¶ 5.1 Definition
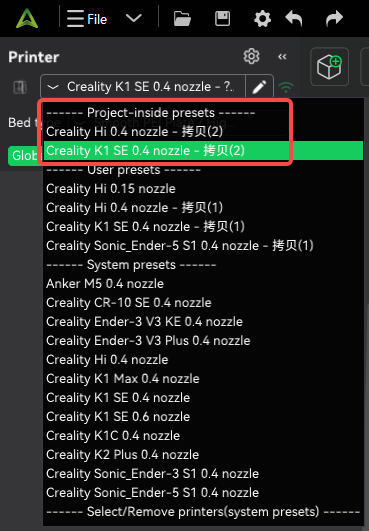
Project presets refer to the combination of parameters applied to project files, which have excellent flexibility and portability. Not only can they be stably stored on a single computer device, but they can also be migrated to other computer devices along with the project, providing great convenience for cross-device operation of the project.
¶ 5.2 Classification
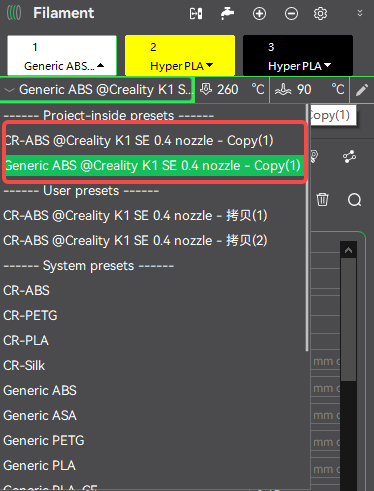
There are 3 types of project presets, namely printer project presets, filament project presets, and process project presets.
¶ 5.3 Preset function
¶ Add project preset
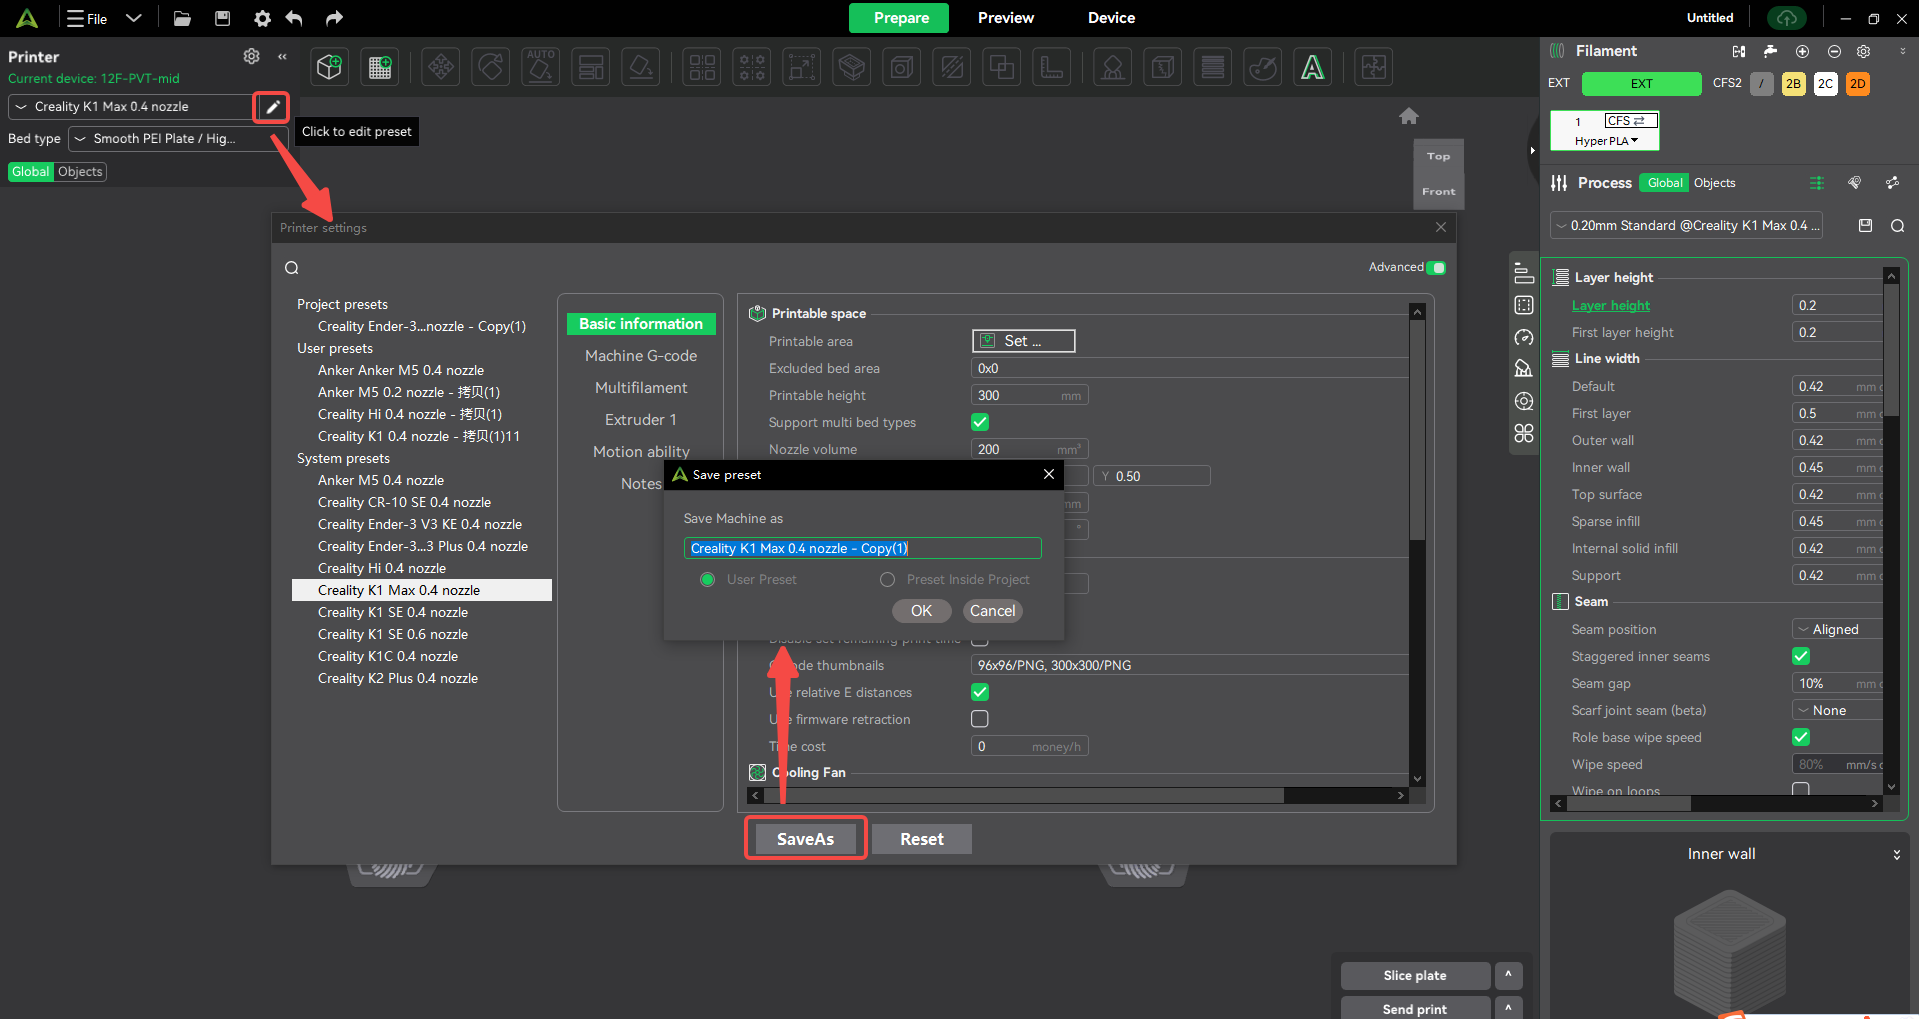
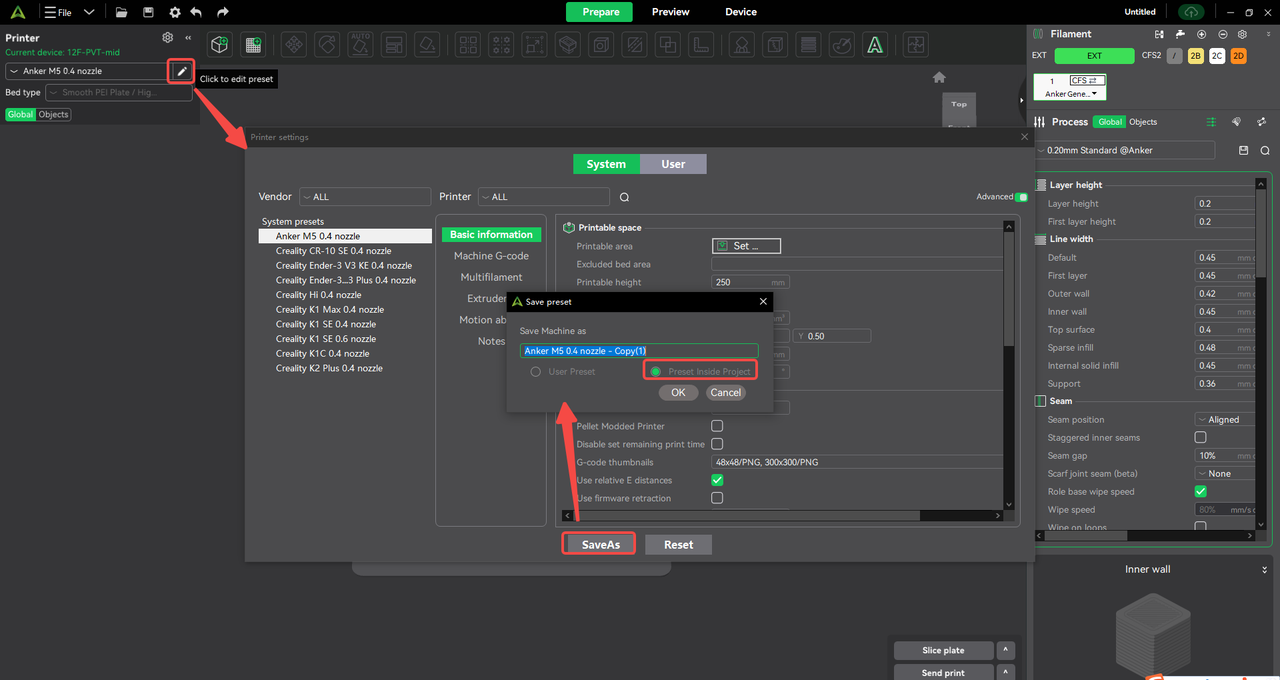
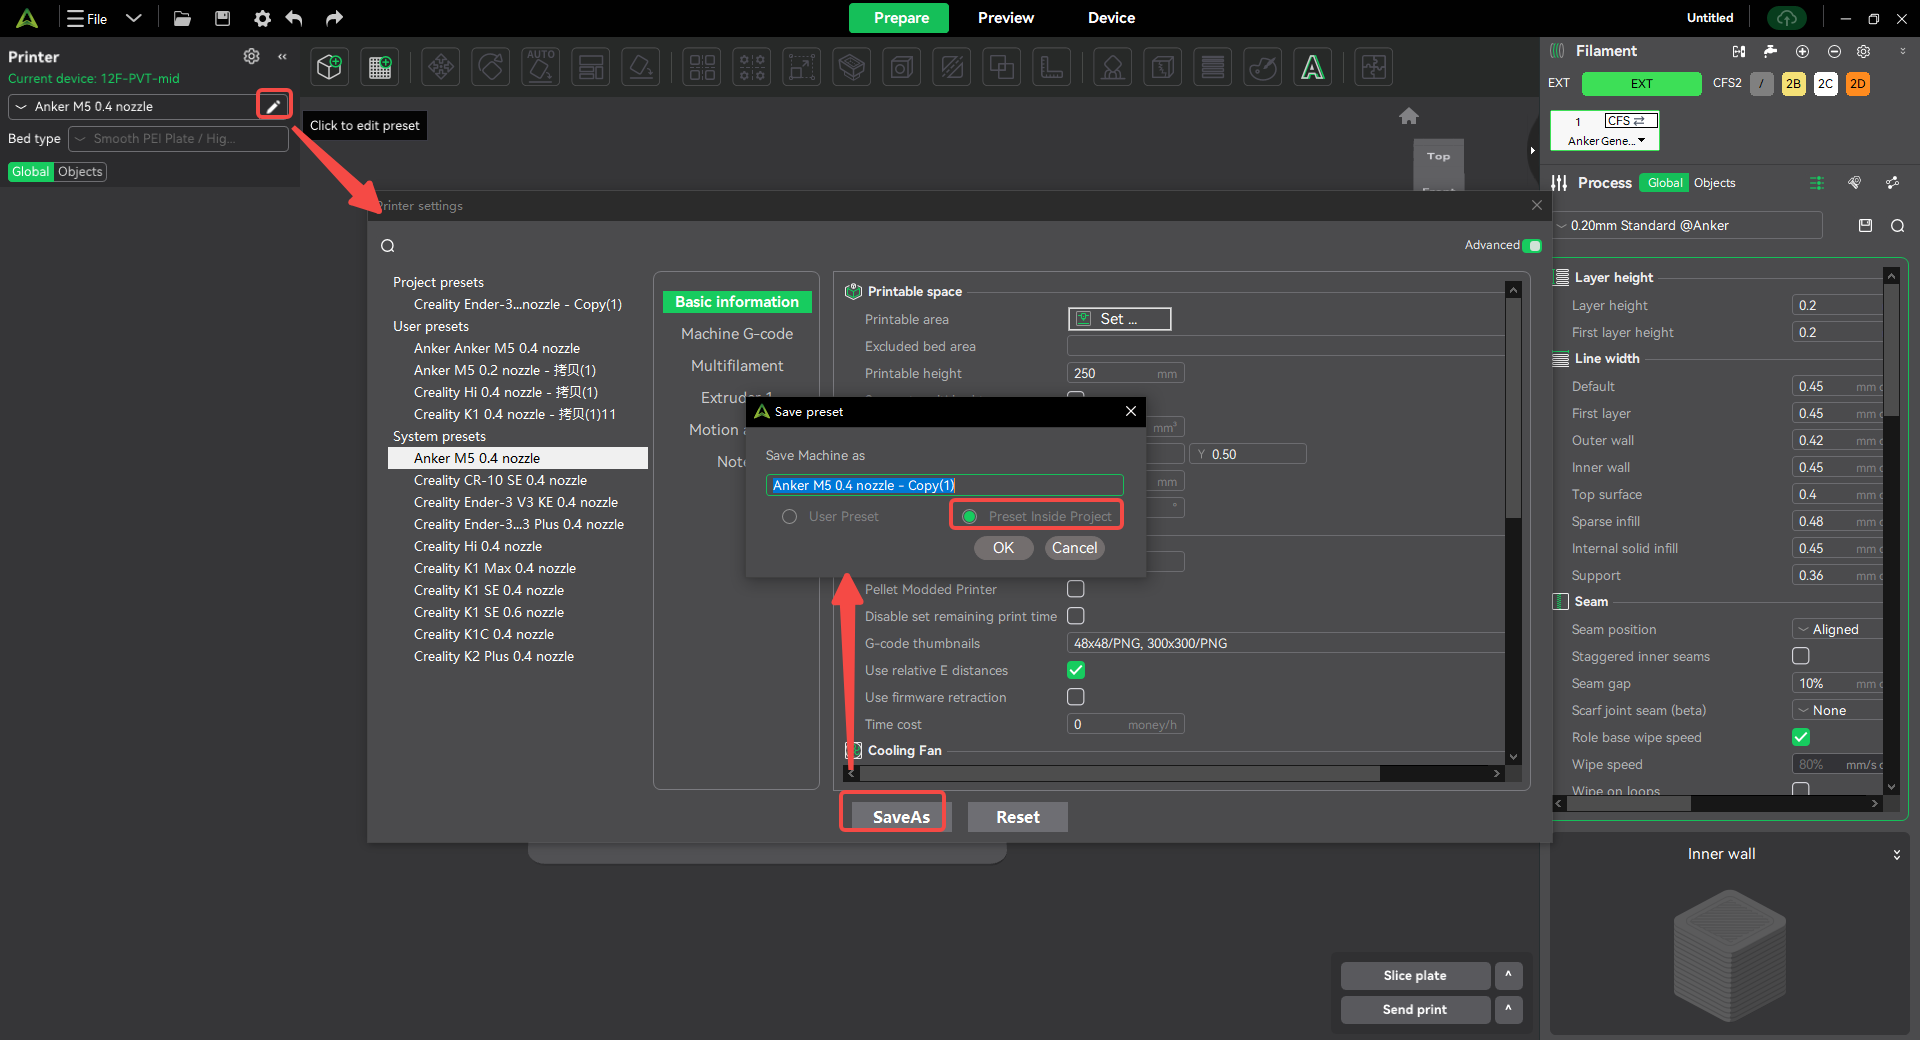
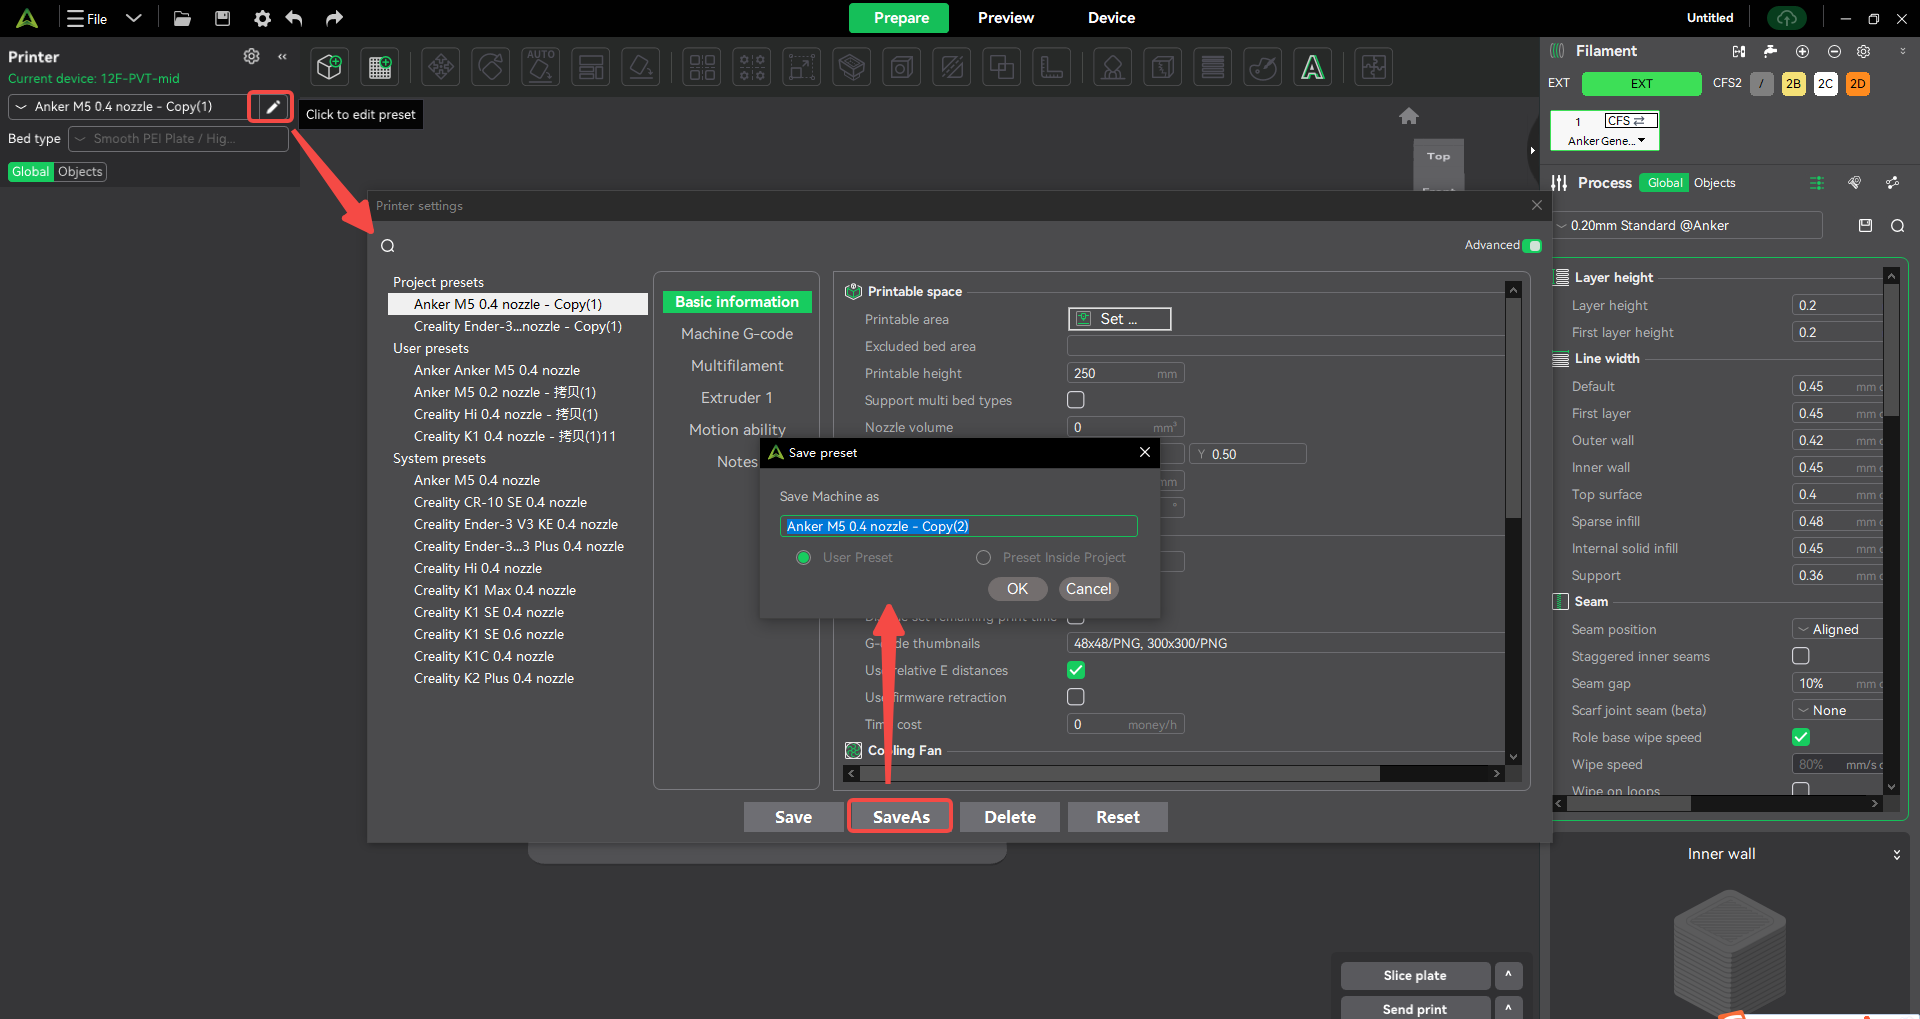
Take [Printer_System Preset] as an example, the operation of adding project preset is as follows:
Click the "Edit icon" of the printer to pop up the printer preset editing pop-up window, select the "System" option (no need to select the basic mode), select the printer preset you want to edit under this option, click "Save as" after modification and select "Project Preset" to generate [Printer_Project Preset].
¶ Save project preset as
Take [Printer_Project Preset] as an example, the operation of saving preset as is as follows:
Click the "Edit Icon" of the printer to pop up the printer preset editing pop-up window, select the "User" option (no need to select the basic mode), select the printer preset you need to edit under this option, and click "Save As" after modification to save it as another type of preset.
Note: [Process_Project Preset] does not support the Save As function.
¶ Save project presets
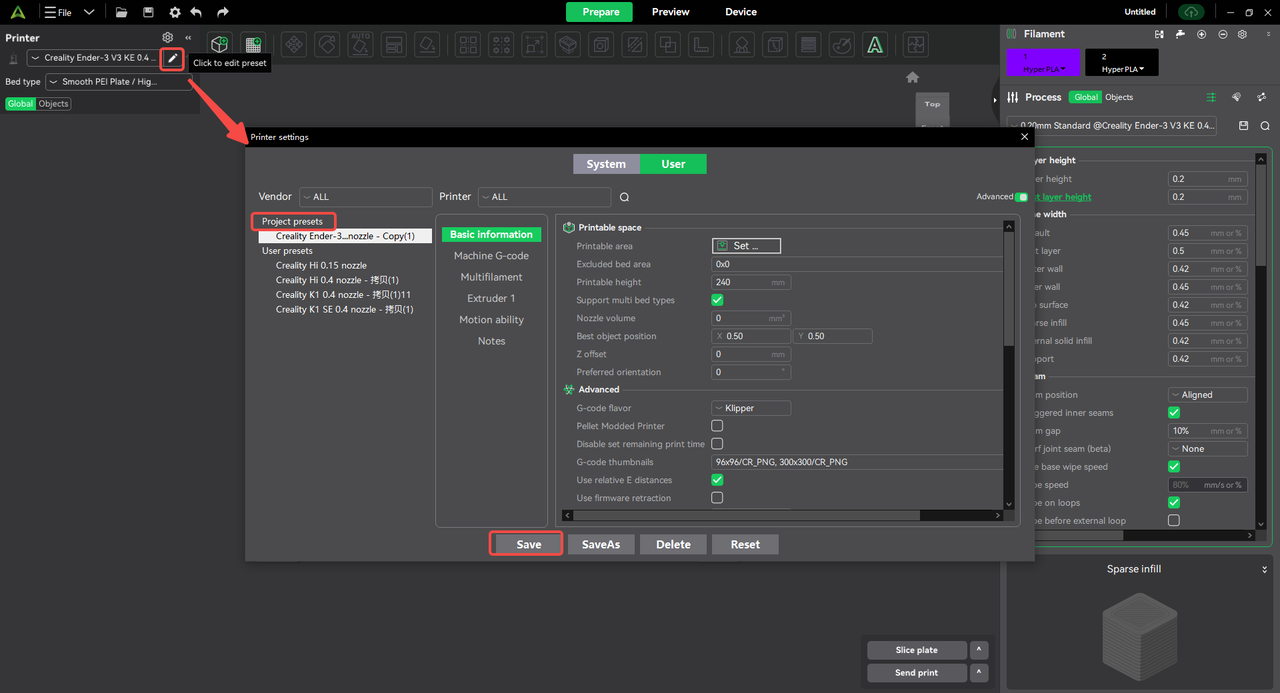
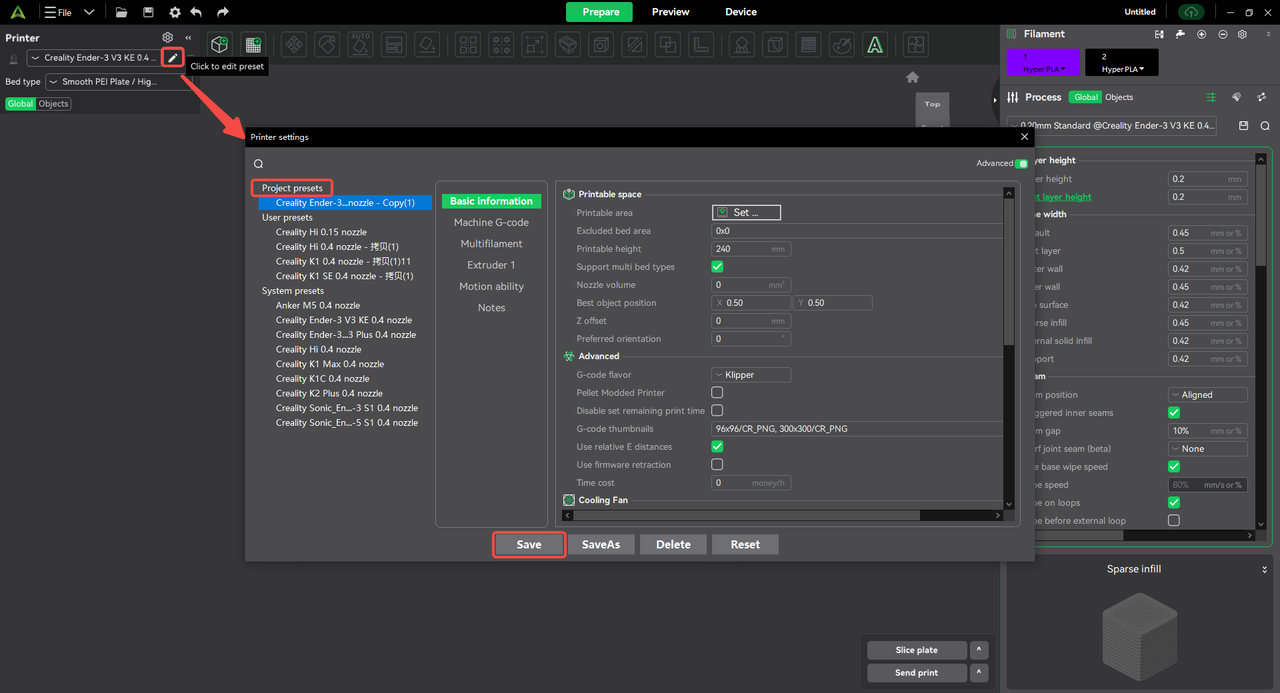
Take [Printer_Project Presets] as an example, the operation of saving presets is as follows:
Click the "Edit Icon" of the printer to pop up the printer preset editing pop-up window, select the "User" option (no need to select the basic mode), select the printer preset you need to edit under this option, and click "Save" after modification to save the project preset.
¶ Delete project presets
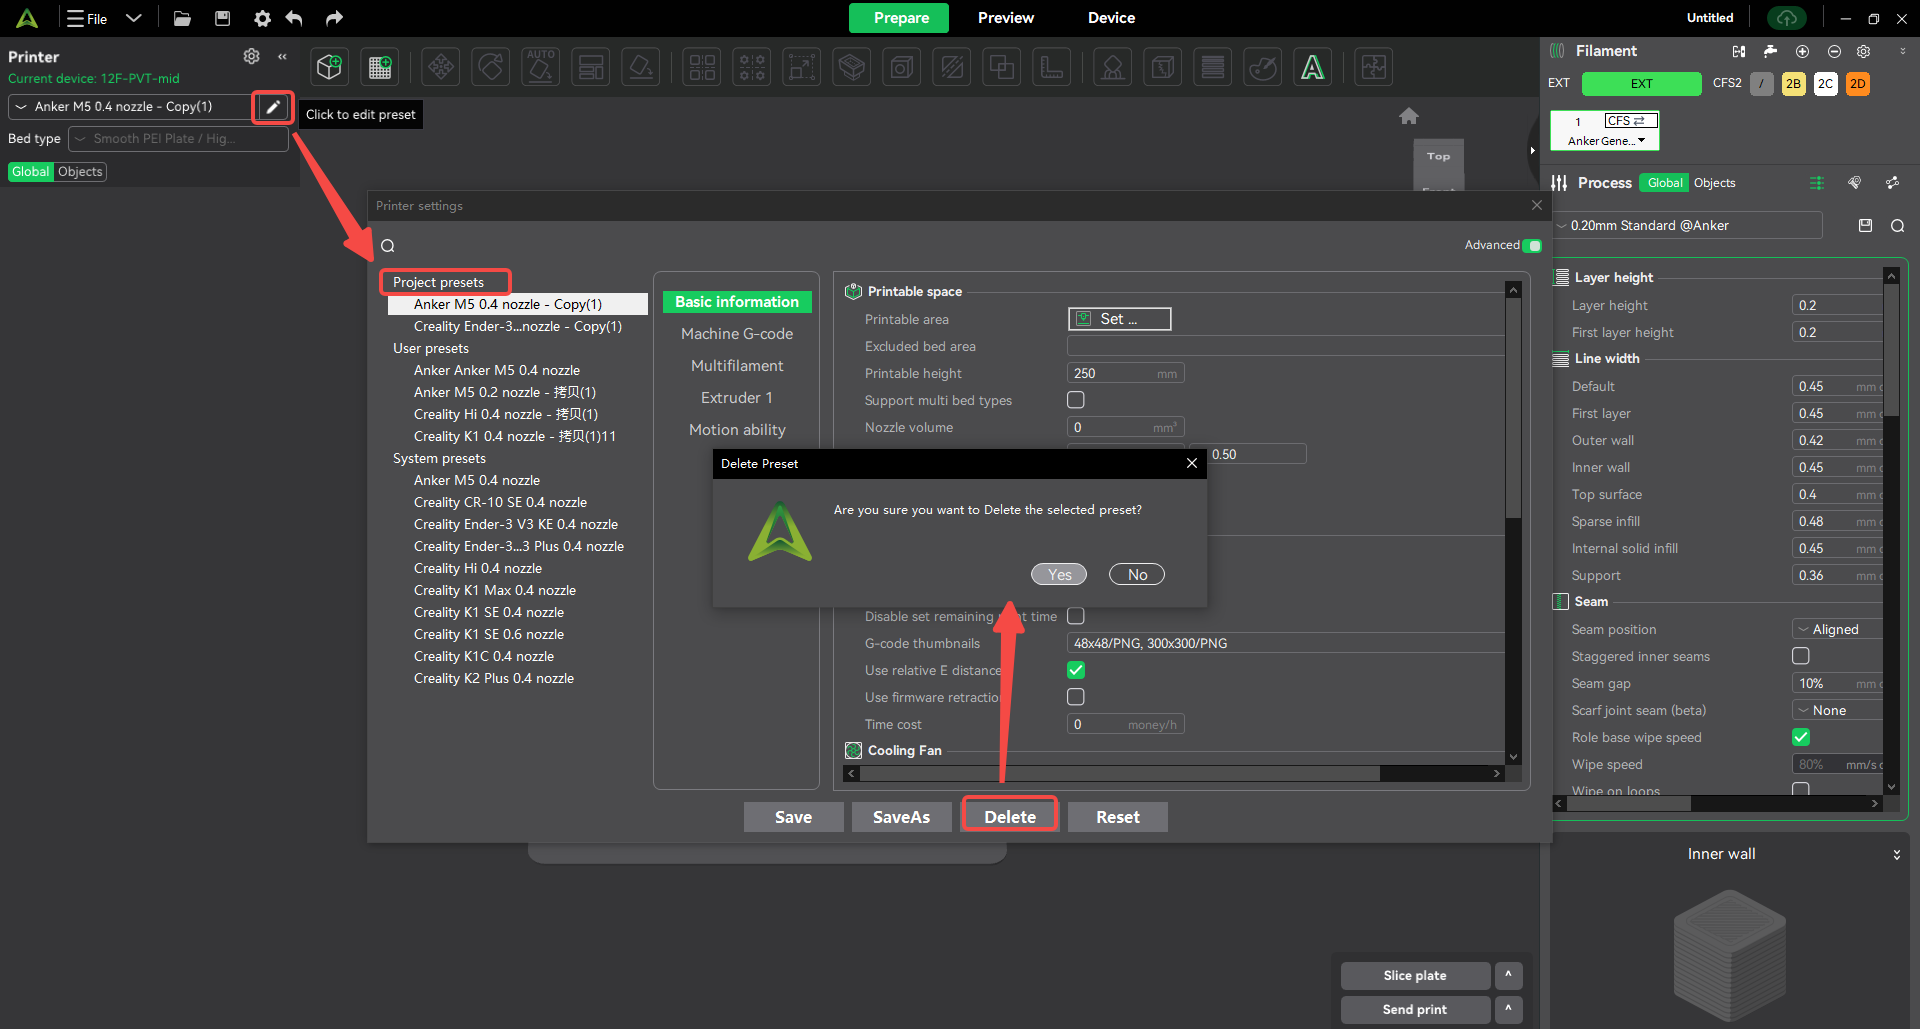
Take [Printer_Project Presets] as an example, the operation of deleting presets is as follows:
Click the "Edit Icon" of the printer to pop up the printer preset editing pop-up window, select the "User" option (no need to select it for basic mode), select the printer preset you want to delete under this option, click "Delete" and confirm to delete the preset.

¶ 6. User presets
¶ 6.1 Definition
User presets are parameter combinations saved after user customization based on system presets to meet user personalized setting needs.
¶ 6.2 Classification
There are 3 types of user presets, namely printer user presets, filament user presets, and process user presets.
¶ 6.3 Preset function
¶ Add user preset
Take [Printer_System Preset] as an example, the operation of adding a preset is as follows:
Click the "Edit icon" of the printer to pop up the printer preset editing pop-up window, select the "System" option (no need to select it for basic mode), select the printer preset you want to edit under this option, click "Save as" after modification and select "User Preset" to generate [Printer_User Preset].
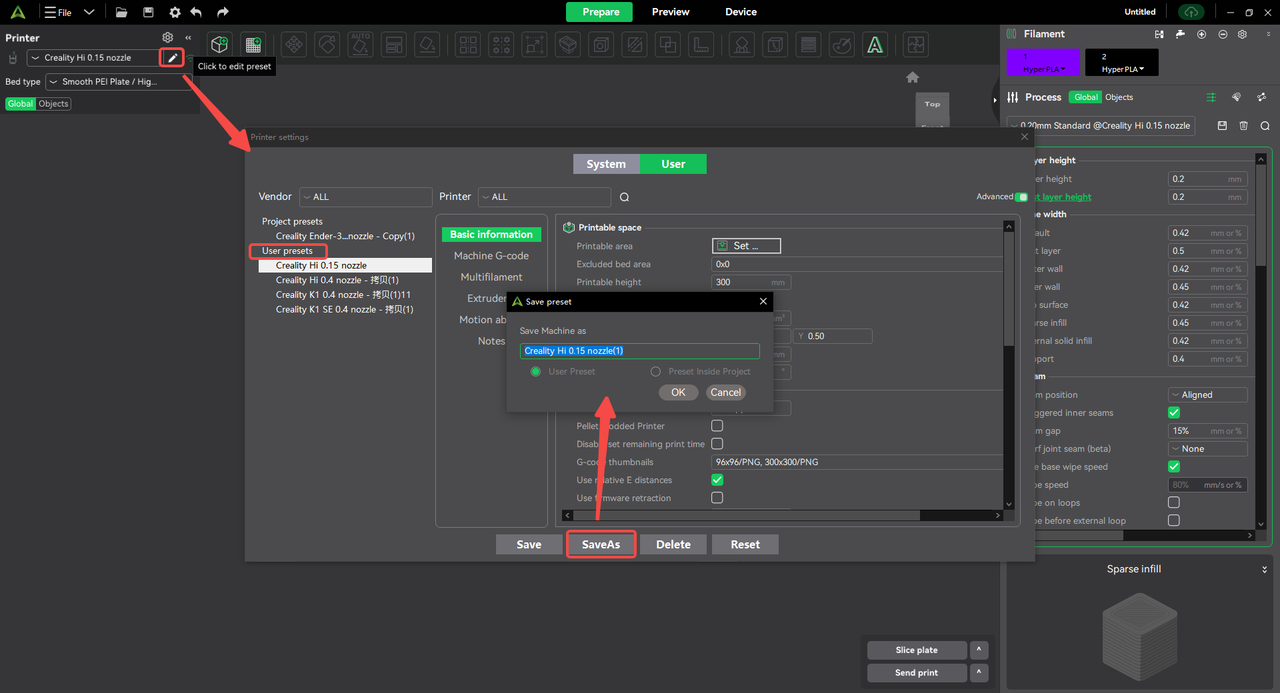
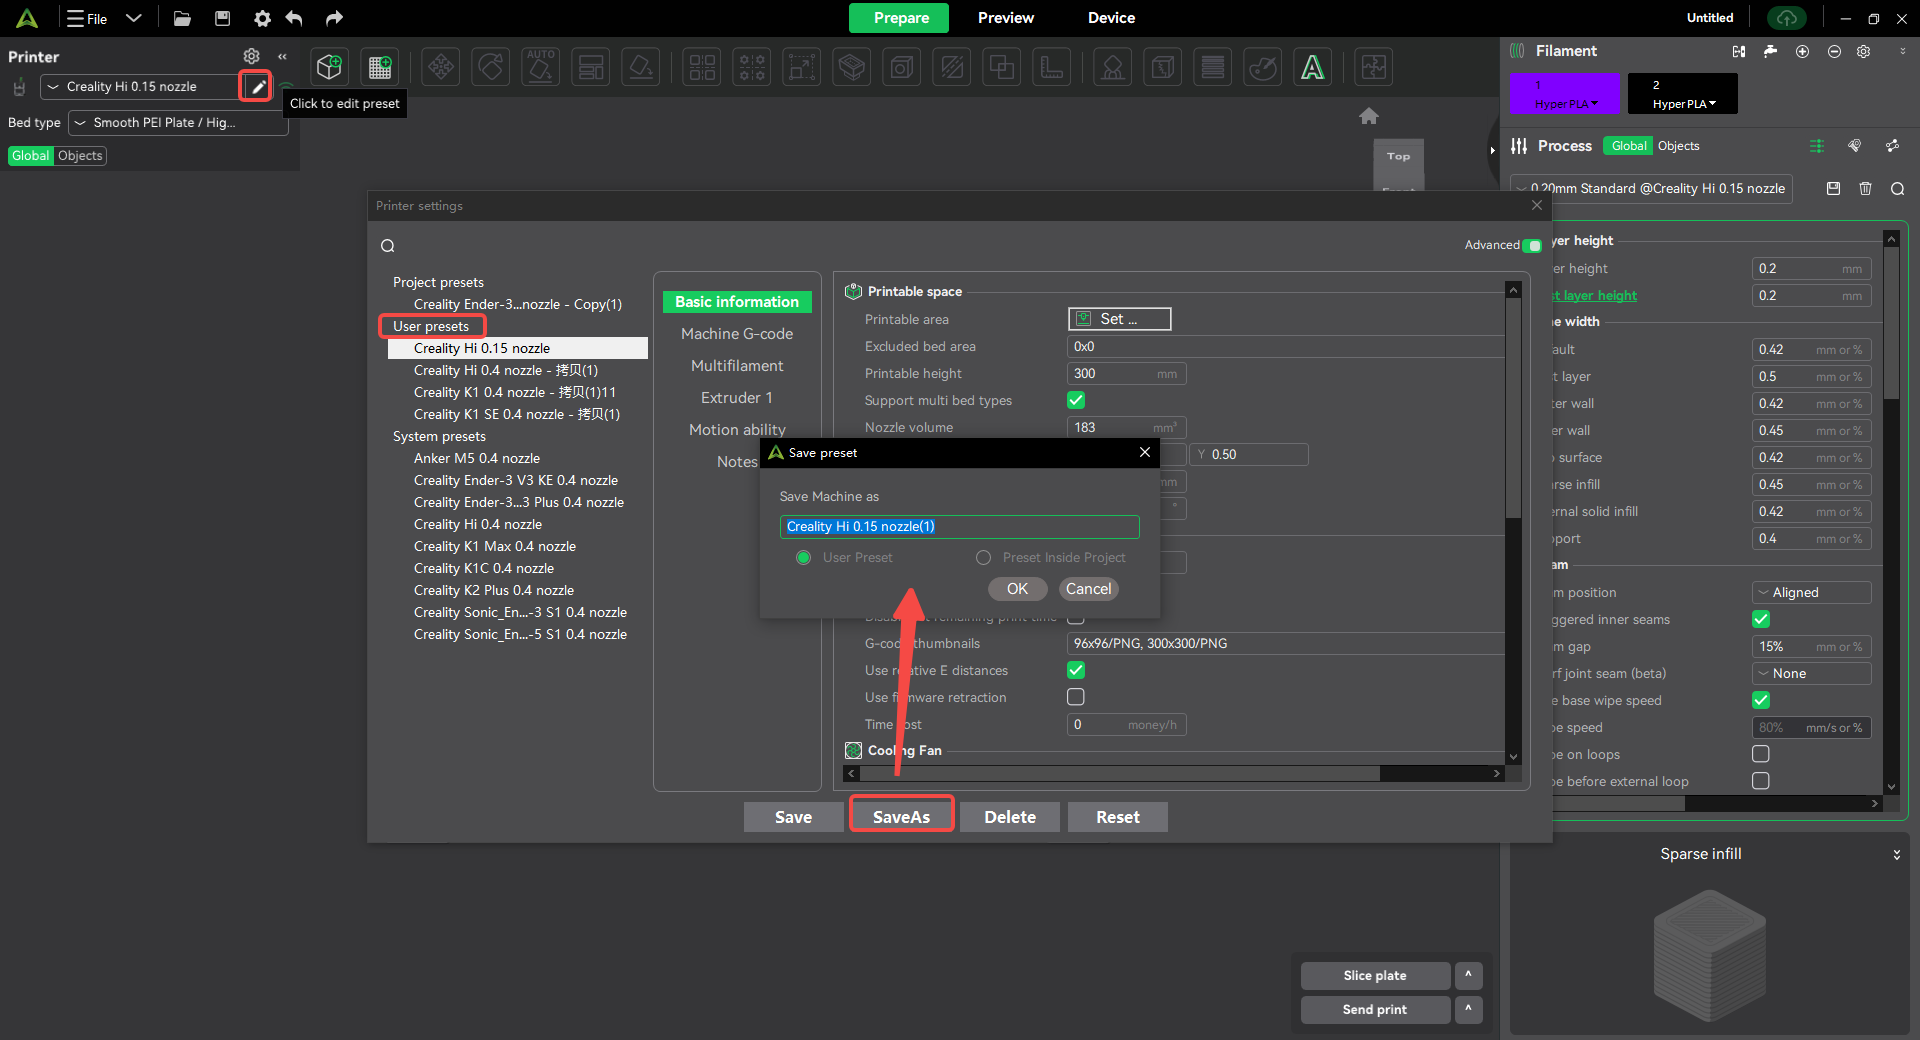
¶ Save user preset as
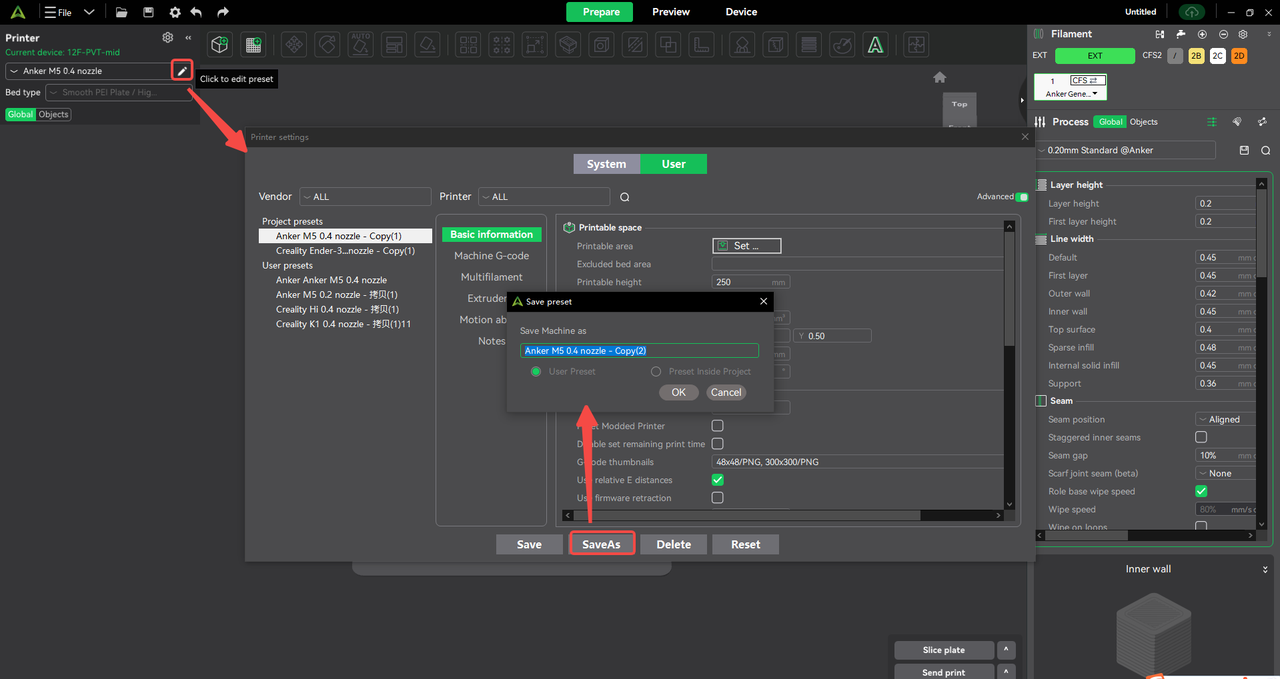
Take [Printer_User Preset] as an example, the operation of saving preset as is as follows:
Click the "Edit icon" of the printer to pop up the printer preset editing pop-up window, select the "User" option (no need to select the basic mode), select the printer preset you need to edit under this option, and click "Save as" after modification to save it as another type of preset.
Note: [Process_Project Preset] does not support the Save As function.
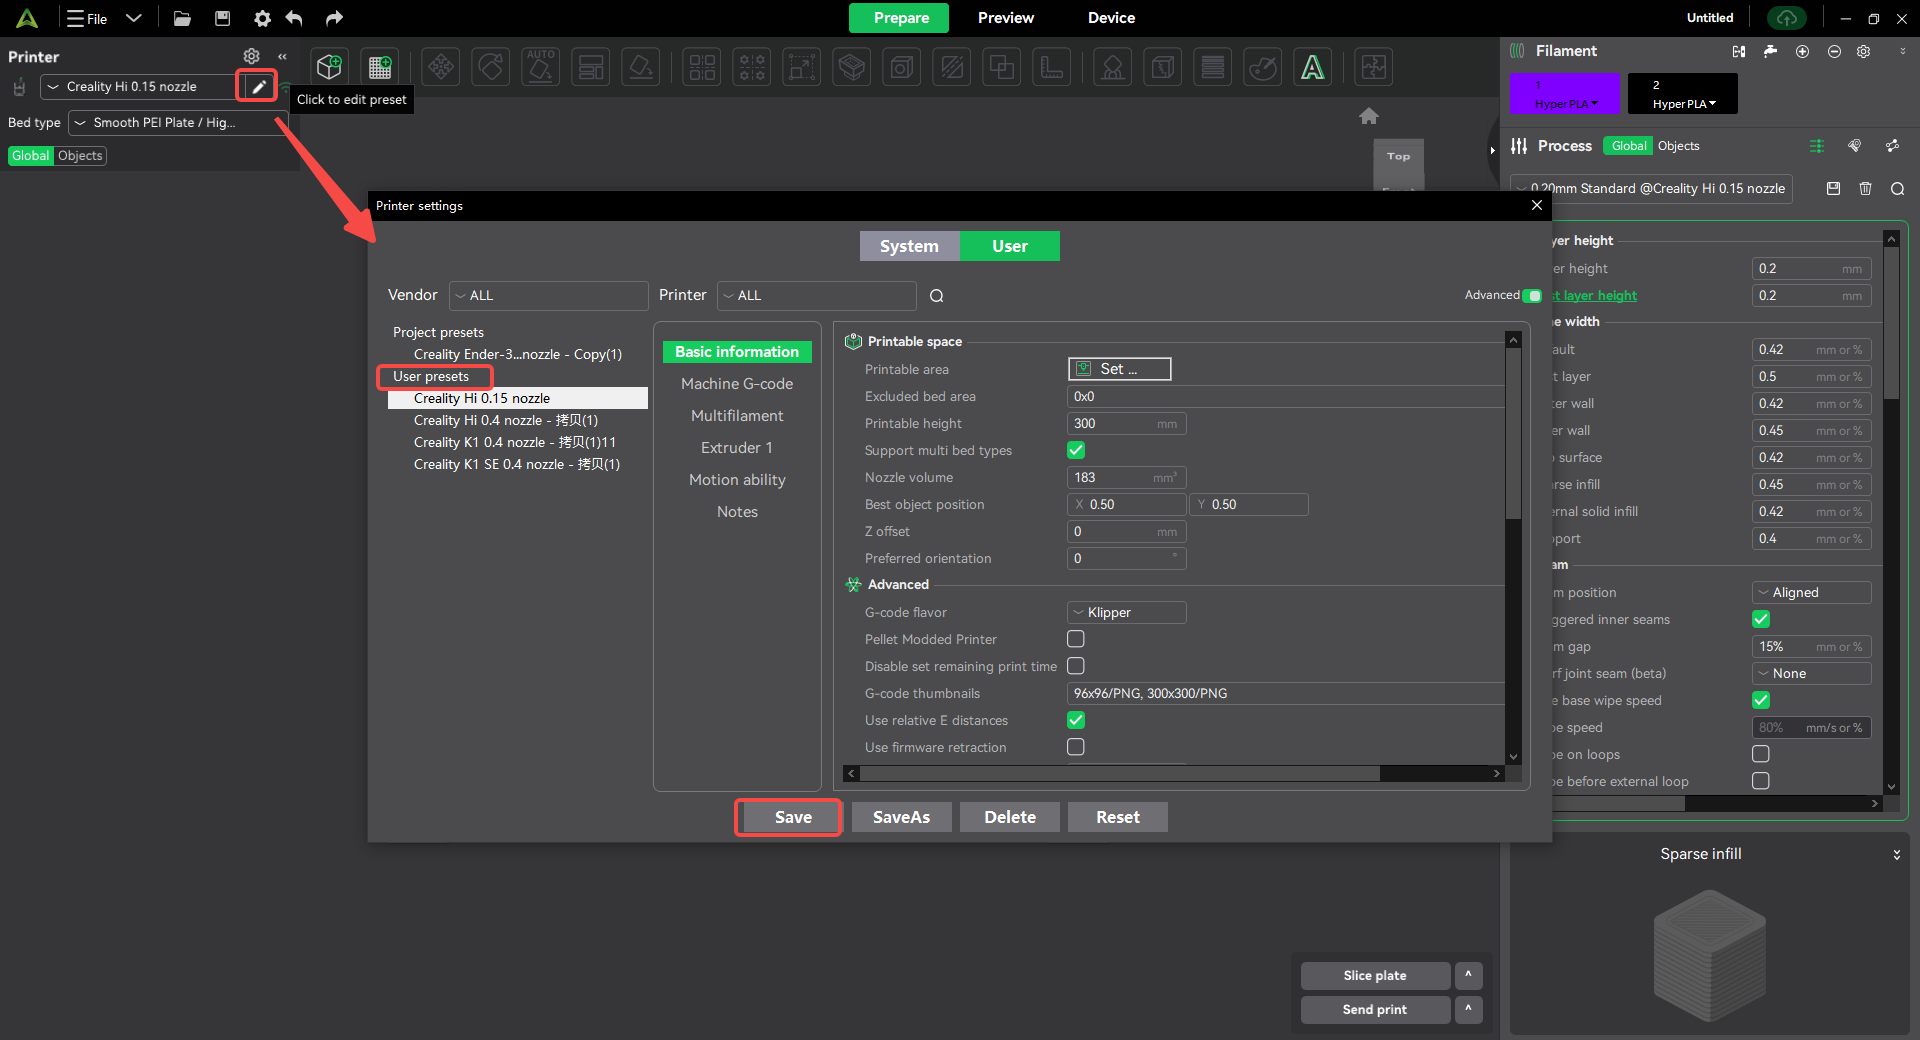
¶ Save user presets
Take [Printer_User Presets] as an example, the operation of saving presets is as follows:
Click the "Edit Icon" of the printer to pop up the printer preset editing pop-up window, select the "User" option (no need to select it for basic mode), select the printer preset you need to edit under this option, and click "Save" after modification to save the user preset.
¶ Delete user presets
Take [Printer_User Presets] as an example, the operation of deleting presets is as follows:
Click the "Edit Icon" of the printer to pop up the printer preset editing pop-up window, select the "User" option (no need to select it for basic mode), select the printer preset you want to delete under this option, click "Delete" and confirm to delete the preset.


¶ 6.4 Local/Account User Presets
¶ Not logged in to an account
When not logged in to an account, the user preset data displayed by the software is the user preset stored locally on the computer.
¶ Login account & uncheck Sync presets
When you log in to an account but uncheck Sync presets, the user presets displayed by the software are the account presets stored locally on the computer. Check "Sync presets" to upload local data to the cloud.

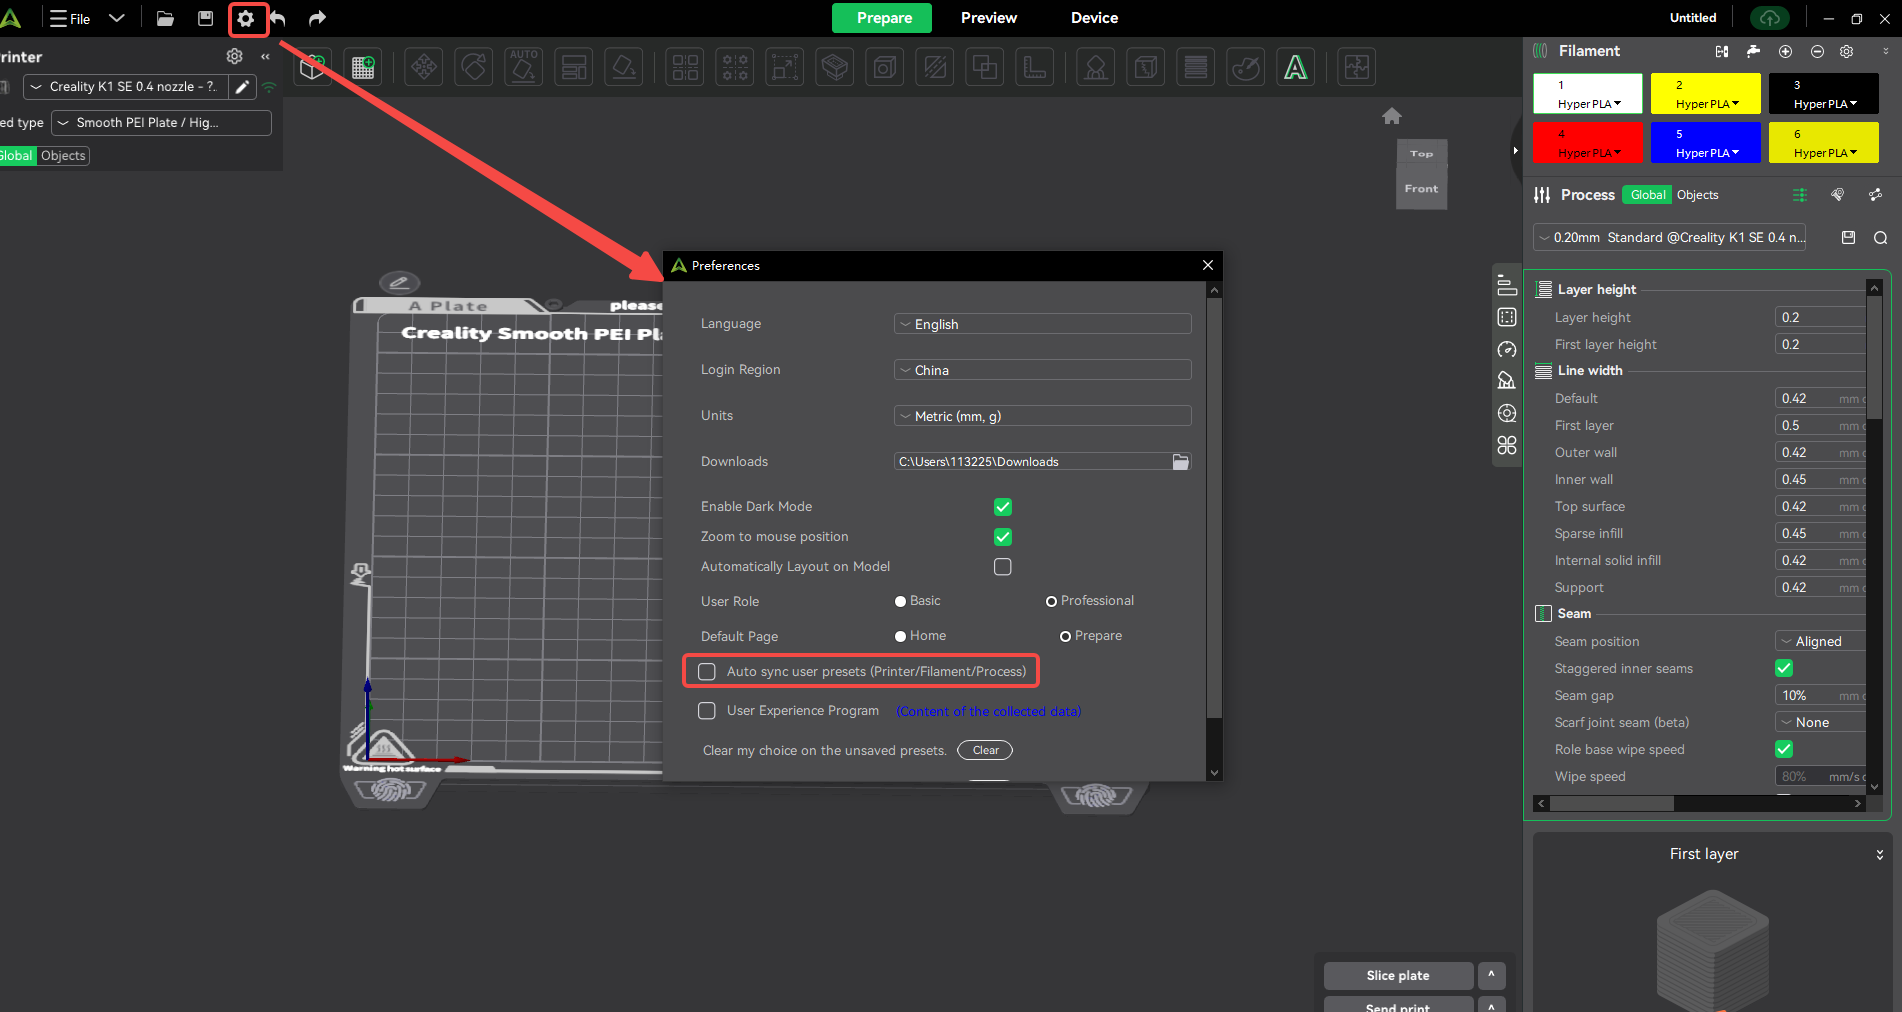
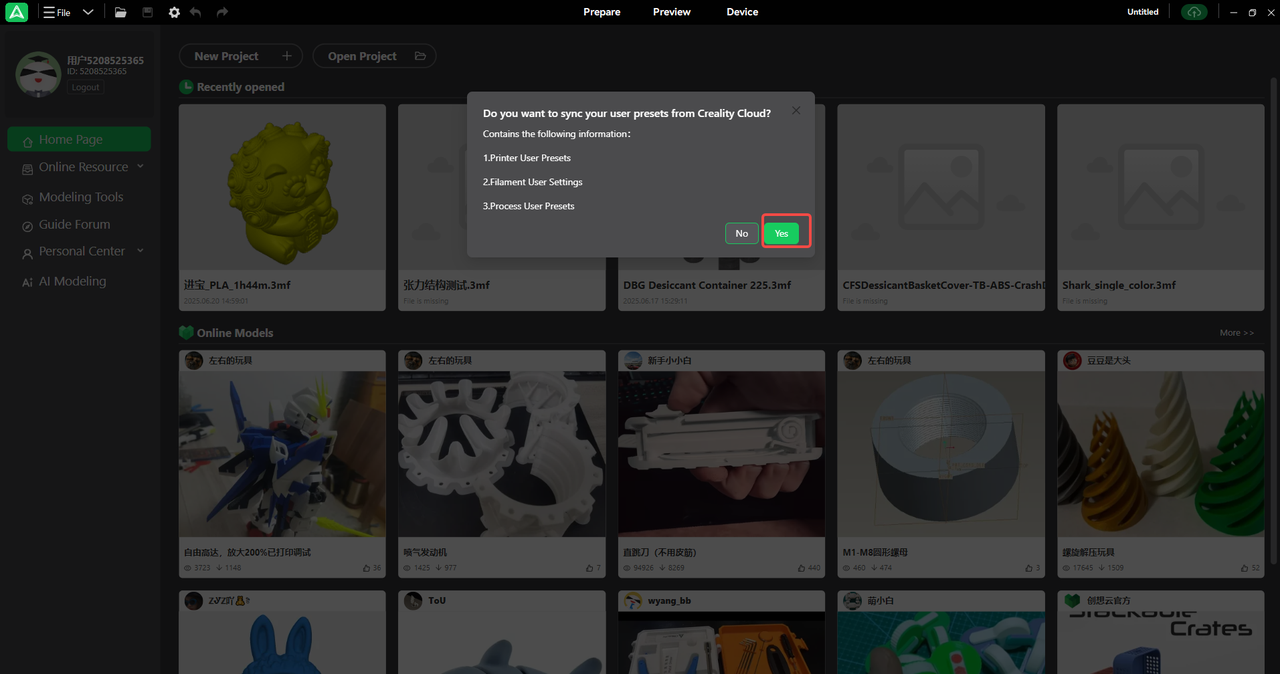
¶ Login account & check sync preset
When you log in to an account and check sync preset, the user preset data displayed by the software is the account preset data.
¶ 7. FAQs about presets
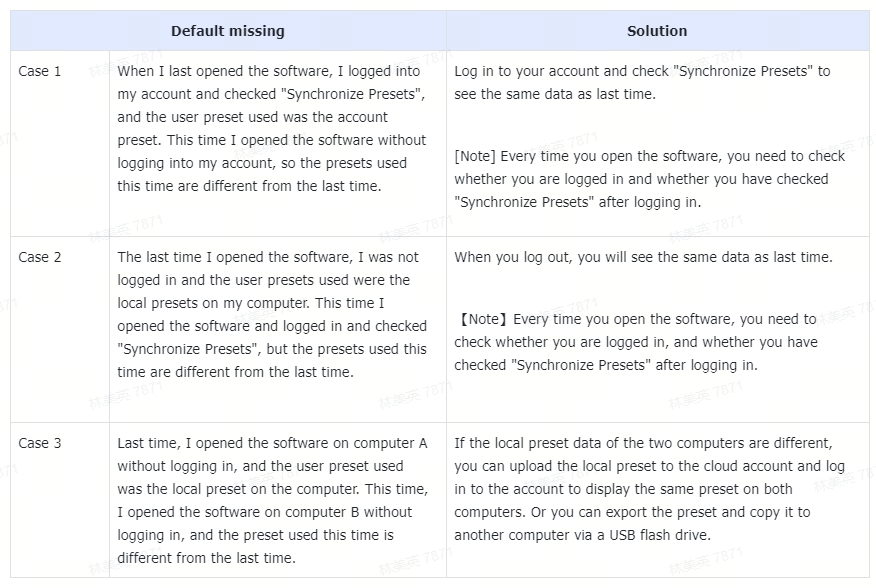
¶ 1. User presets disappeared?
Common situations and solutions for missing presets are as follows:
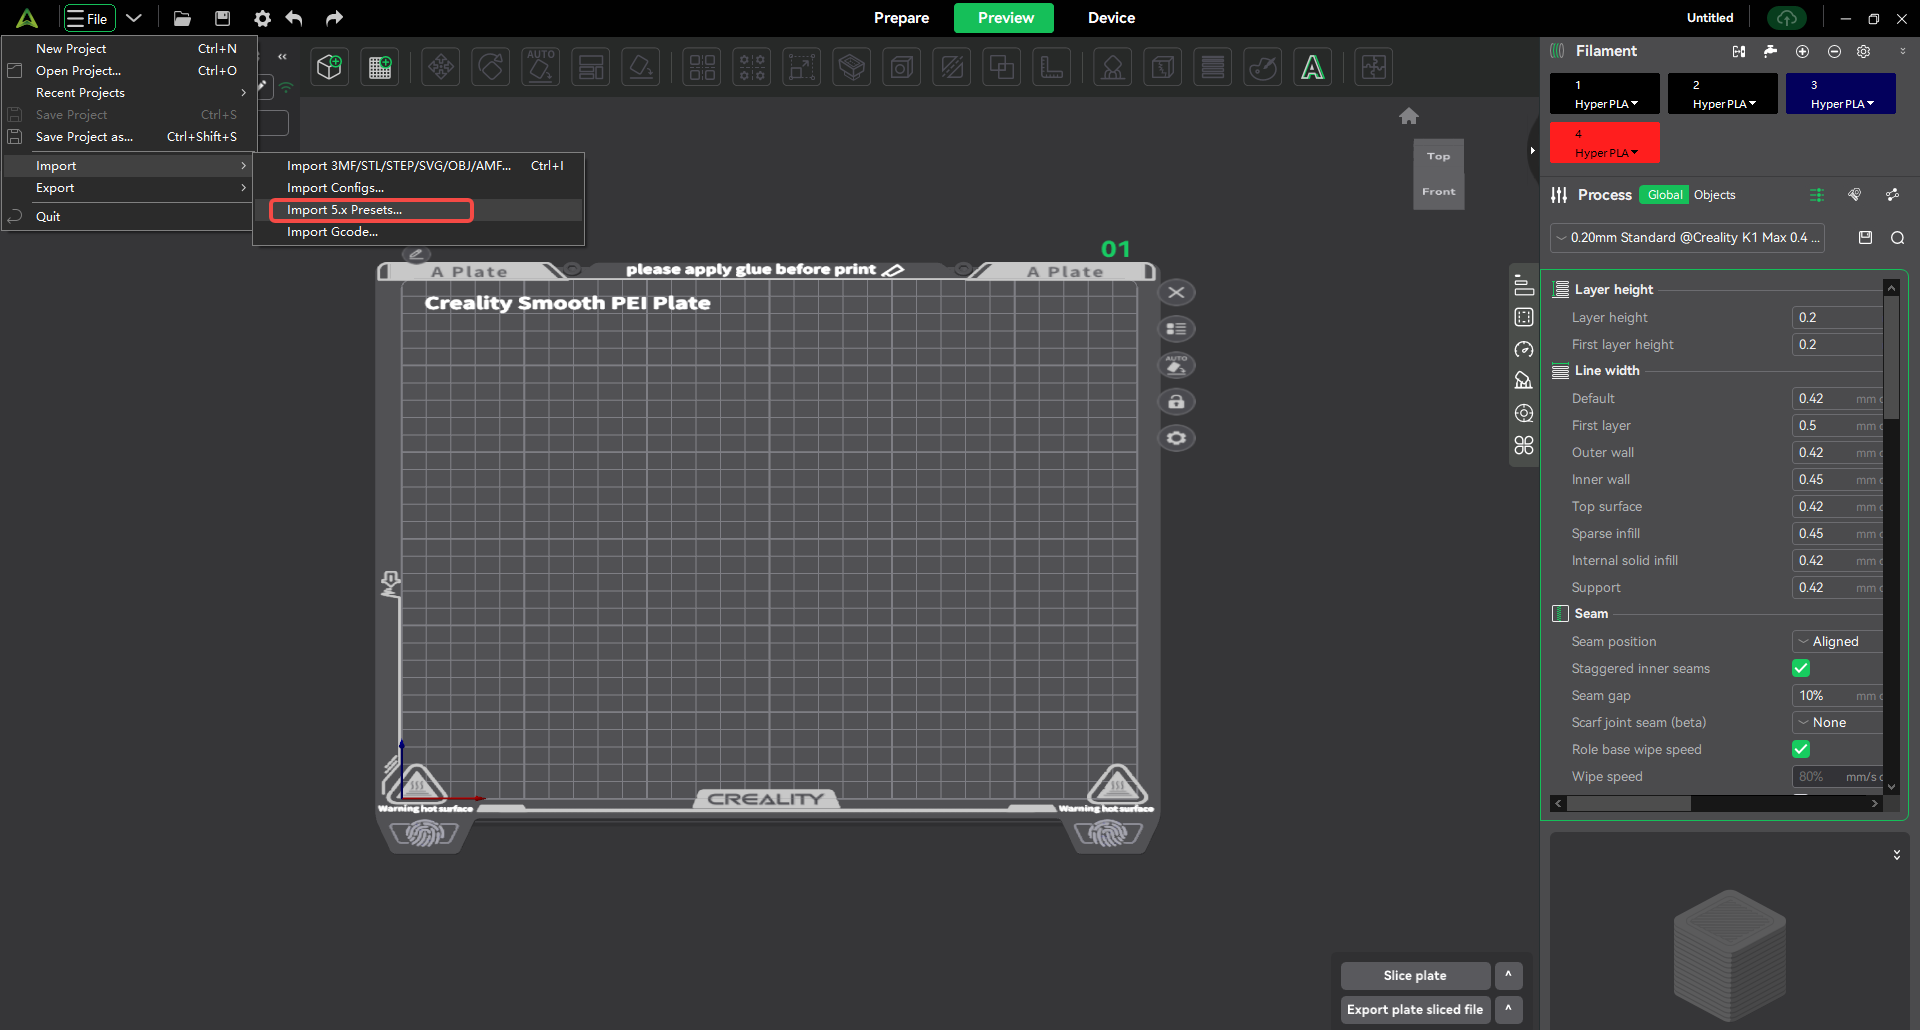
¶ 2. When updating from 5.x to 6.x, the presets of 5.x are not migrated to 6.x.
Since the 6.x software cannot adapt to the presets of 5.x for the time being, when upgrading from 5.x to 6.x, you need to manually import the presets of 5.x into 6.x. Click the "Import 5.x Presets" button to import the presets.