¶ Step 1 - System Requirements
Windows 7 or higher
Mac OS X v10.15 or higher
Intel® Core 2 or AMD Athlon® 64 processor; 2 GHz or faster processor
OpenGL 4.0-capable system
Recommend 8GB RAM, at least 4GB
2.0 GB or more of available hard-disk space
¶ Step 2 - Download & Installation
Download Creality Print
Install Creality Print by following the step by step guide
¶ Step 3 - Setup Wizard
¶ Step 4 - First Print
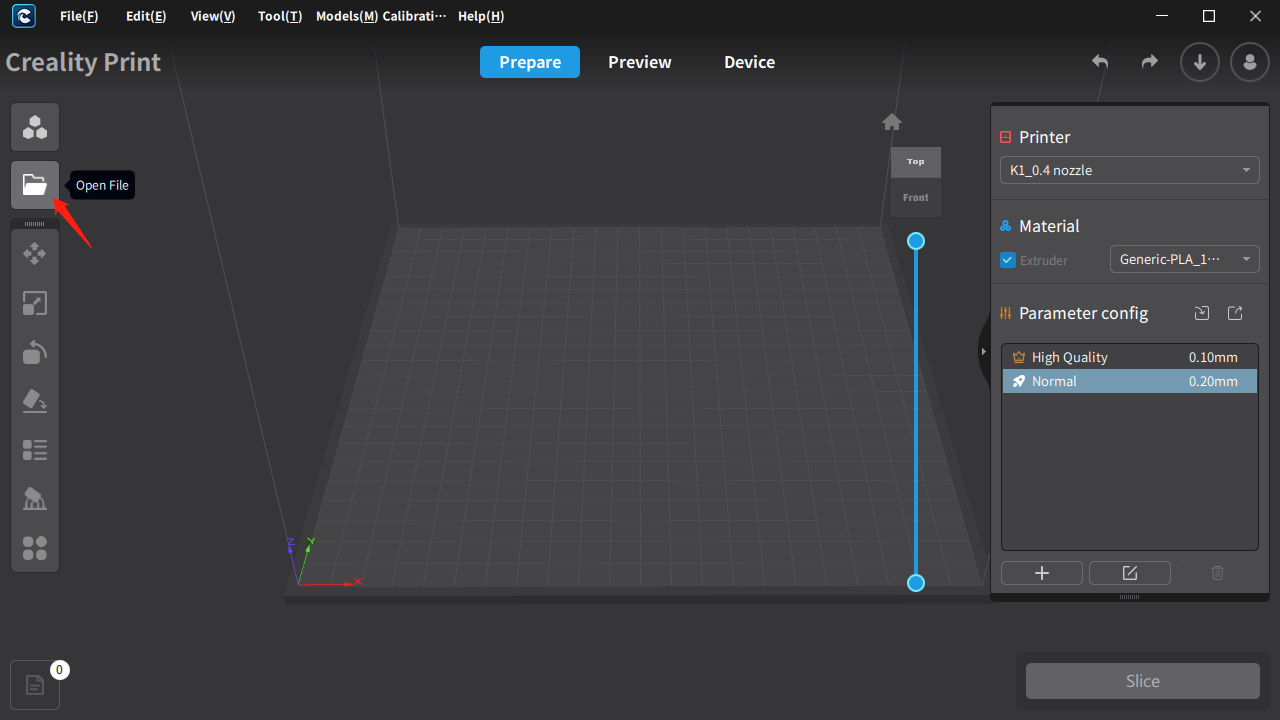
¶ Load a model file
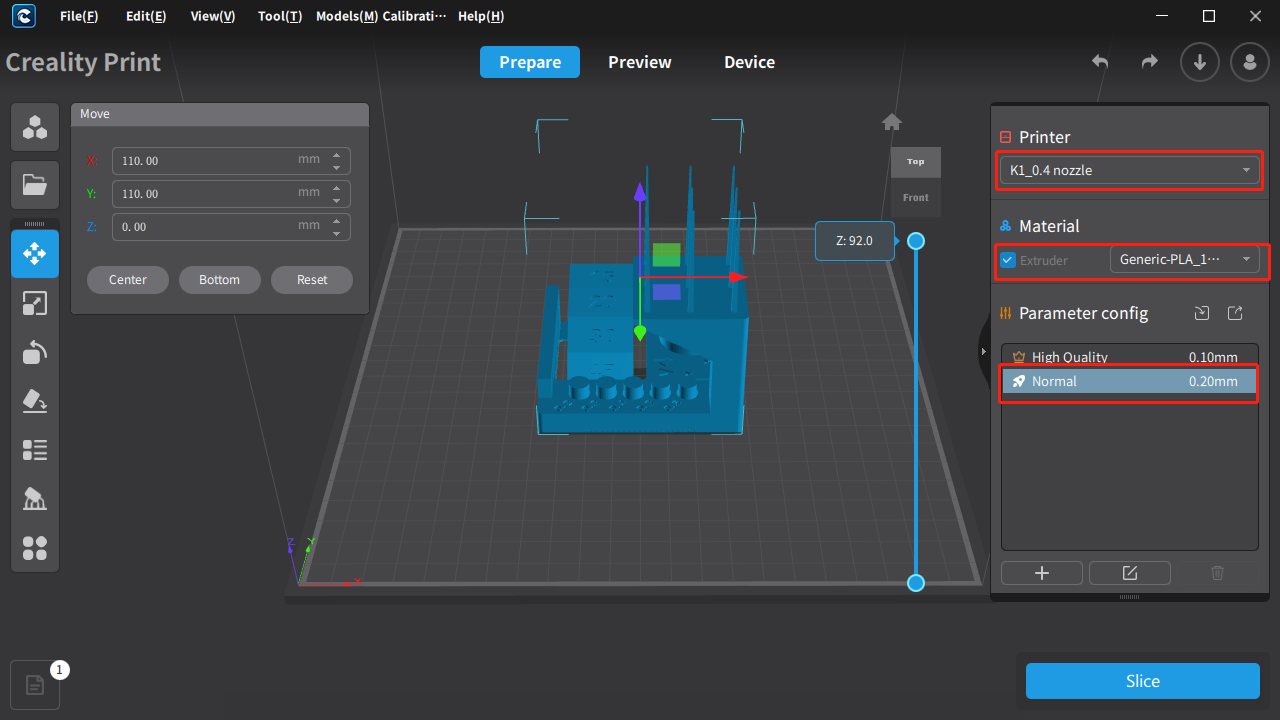
¶ Select Printer/Material/Process presets
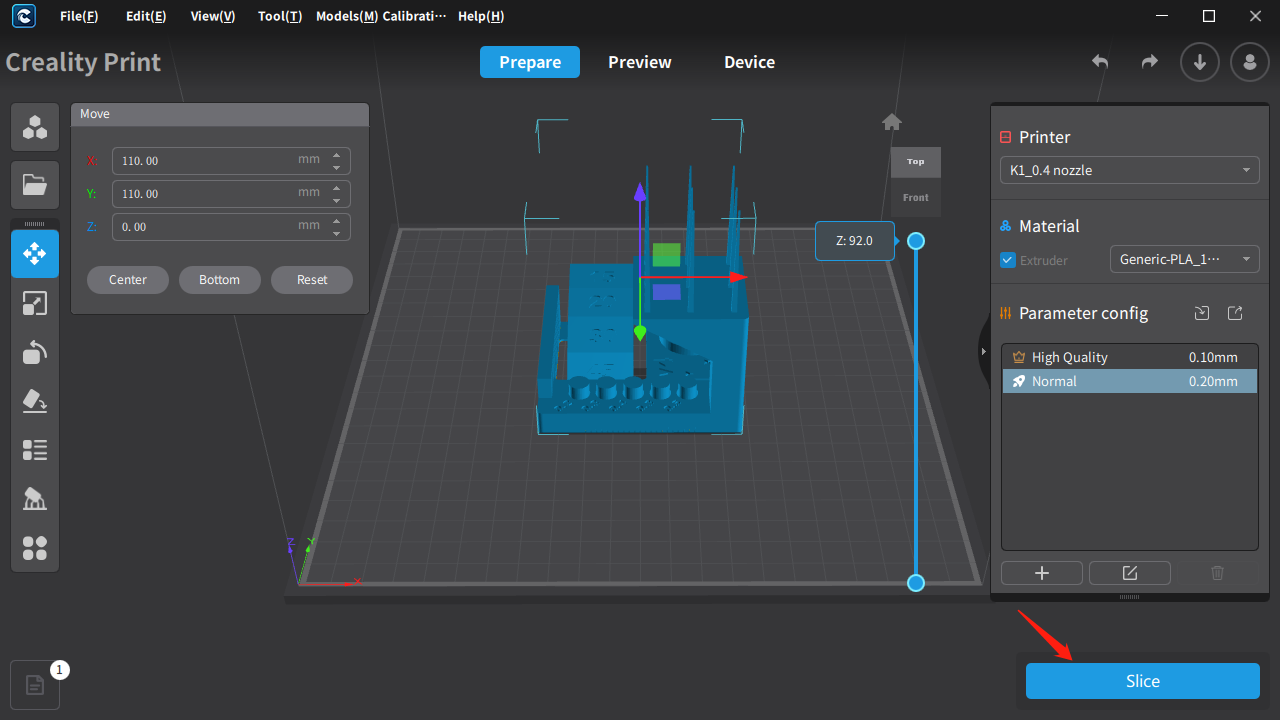
¶ Click the "Slice" button
Once done, click on the “Slice” button located on the bottom hand right of Creality Print. This will generate a .gcode file which is the file format used for the printer to be able to print the model.
Once done, the slicer will take you to the Preview pane which will show you what the sliced model looks after processing the .stl file. The histogram on the right hand side will also show you information on the printing times for each parameter of the print.
¶ Send print job via WLAN or SD Card
To send the print job to the printer via WLAN, click “LAN Printing” on the bottom right-hand corner. This will prompt a pop-up window with a quick preview of the model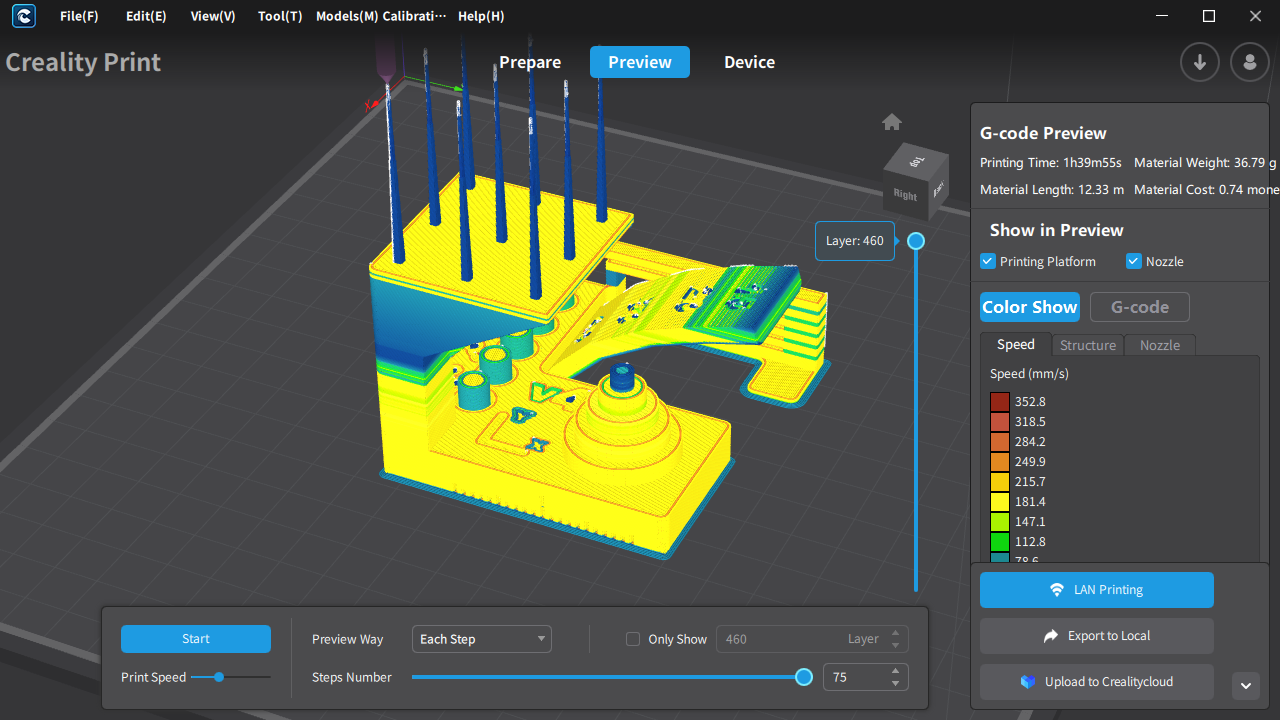
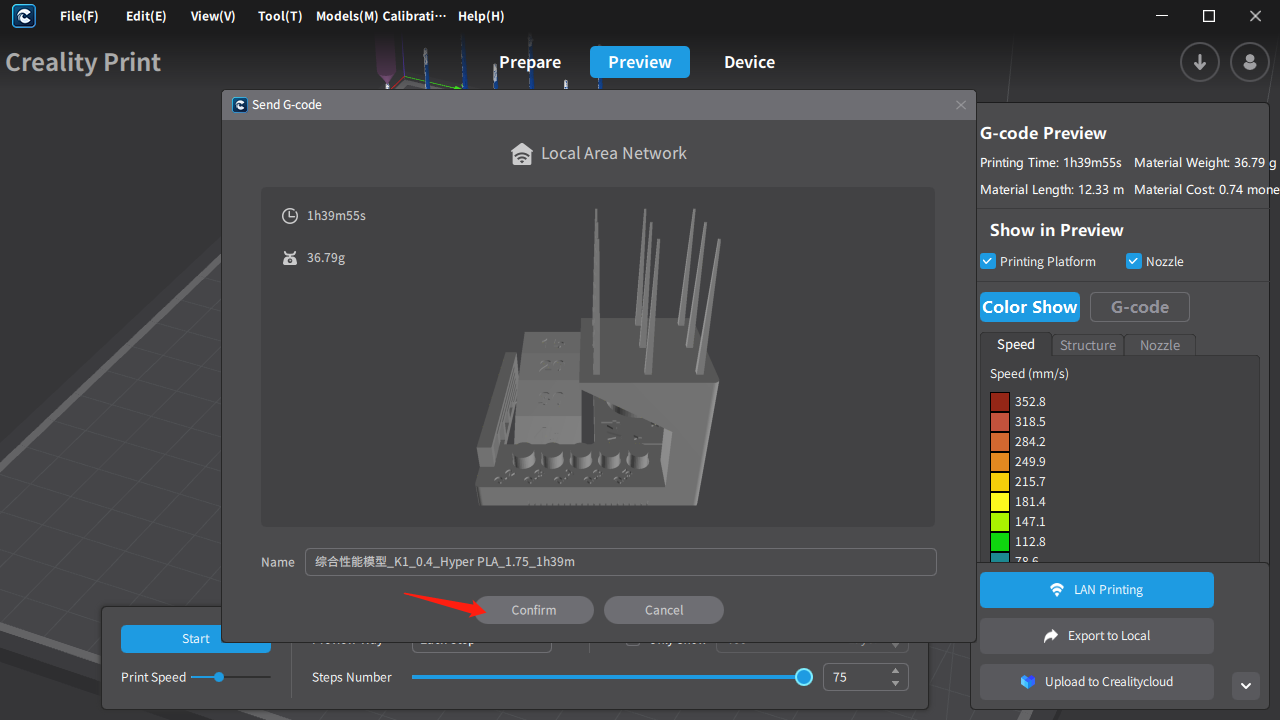
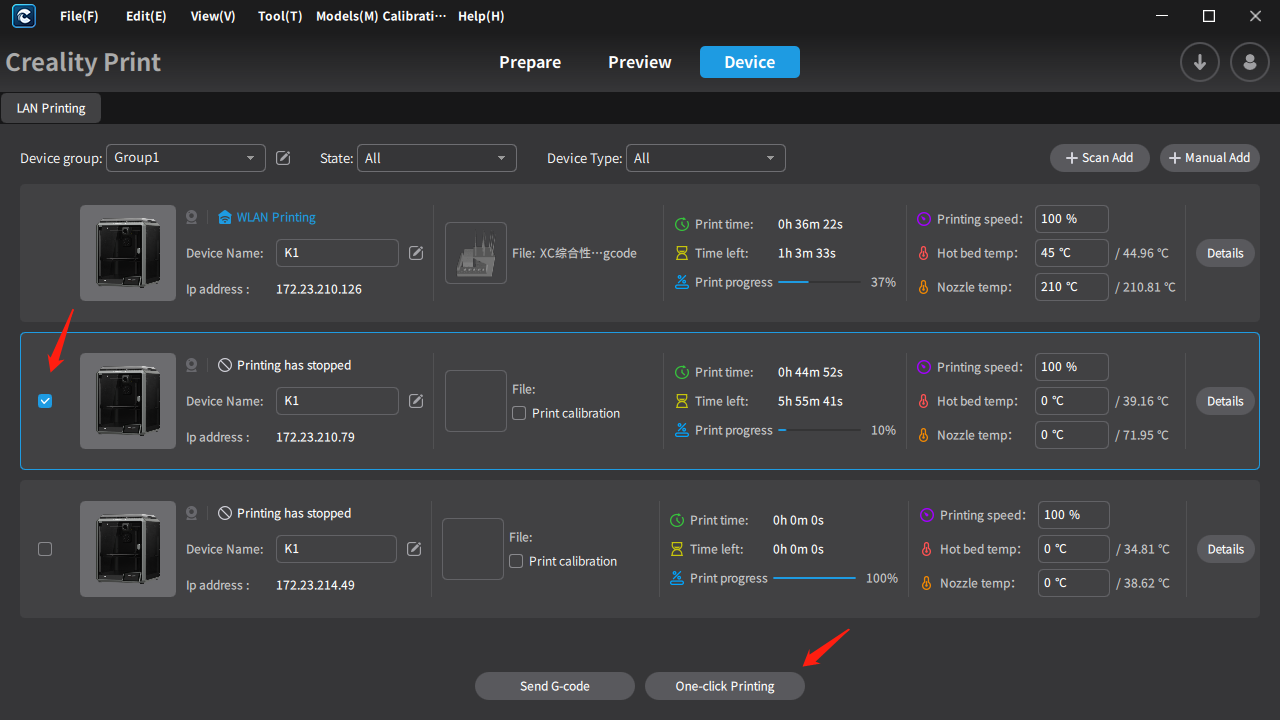
click “Confirm” go to printer select page and you will also give you the option to choose whether or not you want the printer to perform certain functions like calibration, etc before the print starts.
¶ Step 5 - Remote control
Going to the “Device” panel on your slicer will allow you to control and monitor the print remotely in real time. If you have a camera installed in your machine, you can also watch a live feed of the print remotely