Note: Different router setup steps may be different, but the method is common. This document uses the WMA302 model of TP-LINK as a guide. For reference purposes only.
¶ Warm Reminder:
Tip is for reference only, if the problem can not be solved by the individual,
you can contact customer service (cs@creality.com) to help solve.
¶ Step One
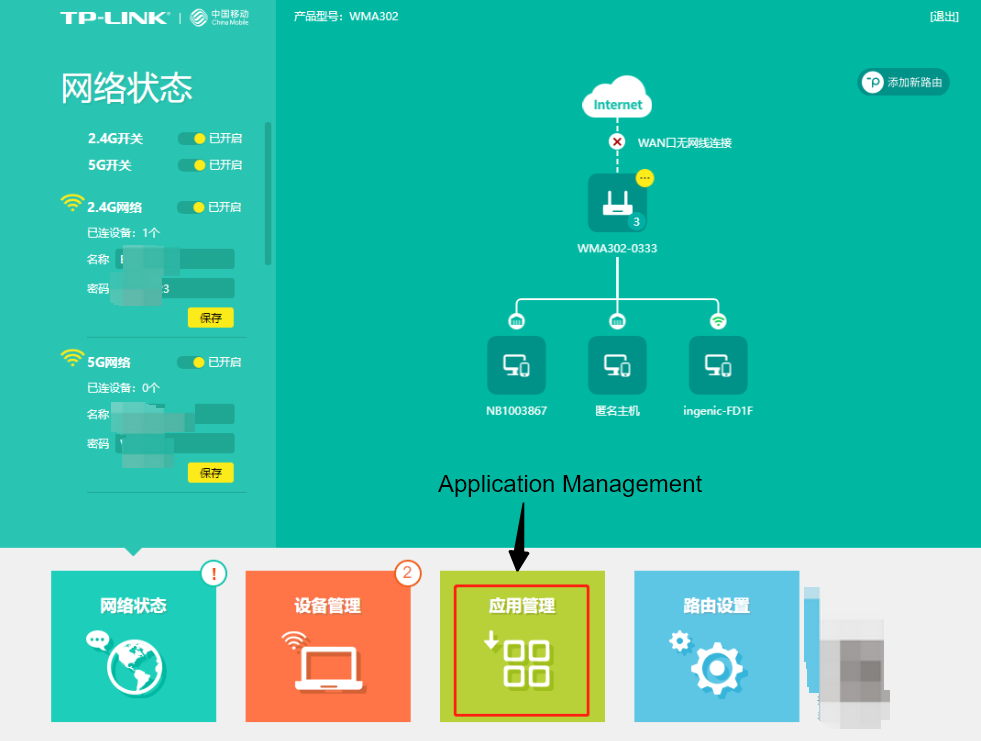
- Log in to the TP-LINK management page and go to Application Management.
¶ Step Two
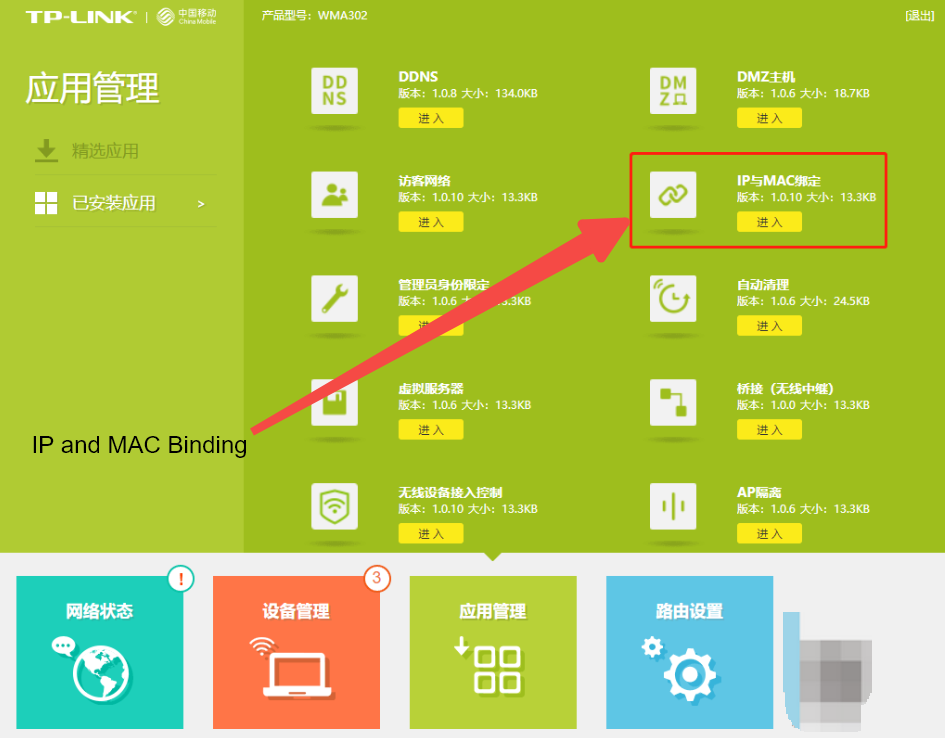
2.Then access the IP-MAC Binding function.
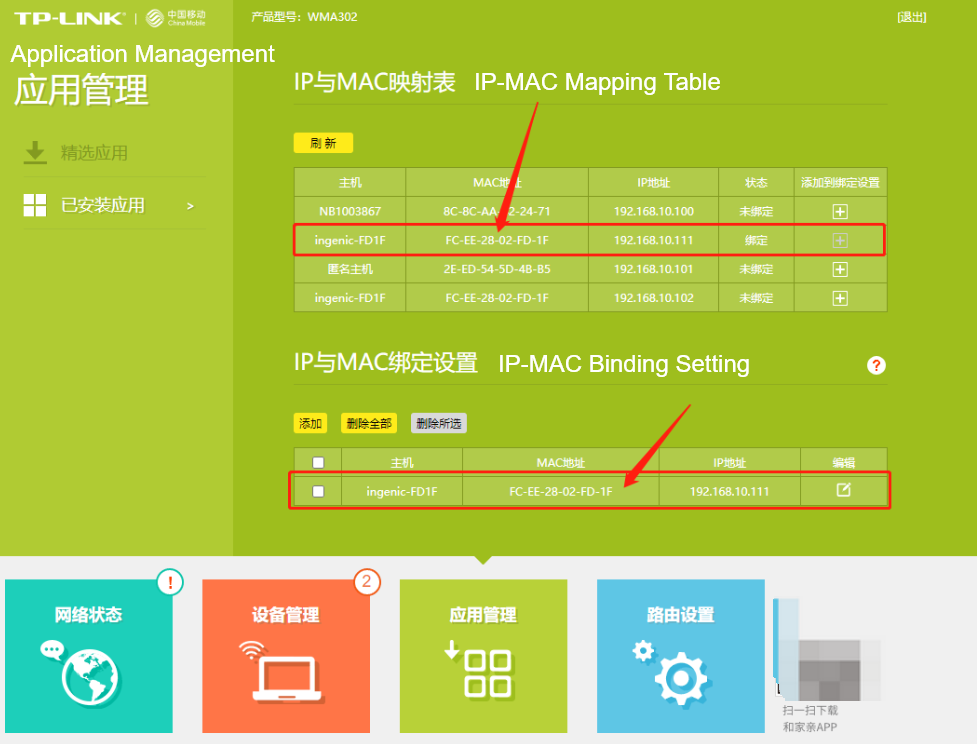
¶ Step Three
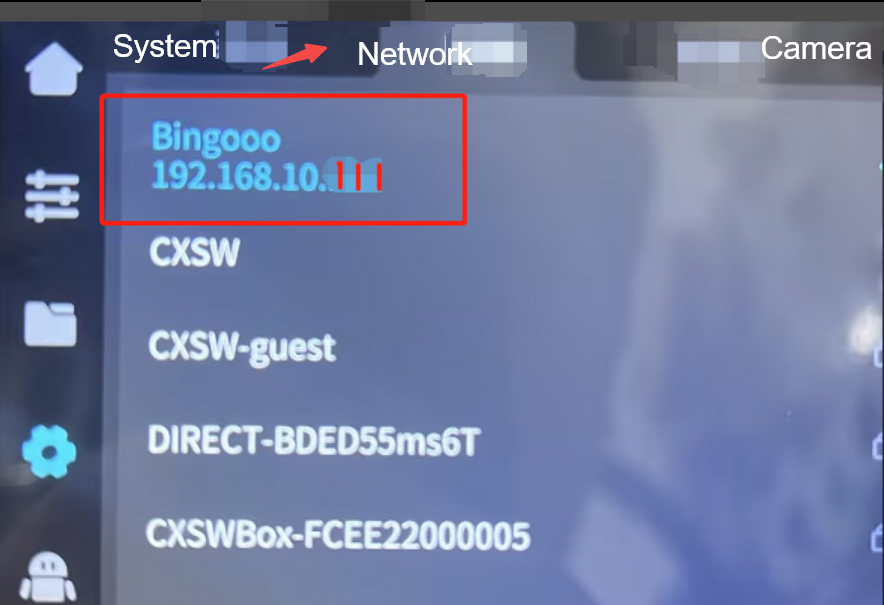
- The printer connects to the TP-LINK router through WIFI until the printer obtains the IP address.
¶ Step Four
- Find the printer in the "IP-MAC Binding" function of the router through the IP address, and click the + button of "Add to binding Settings" to bind it.

¶ Step Five
- After the binding is successful, you can view that 192.168.10.111 is bound to the MAC address FC-EE-28-XX-XX-XX (Printer network identity code) on the management page. Subsequently, this IP address can only be used by this printer, thus fixing the IP address.
¶ Step Six
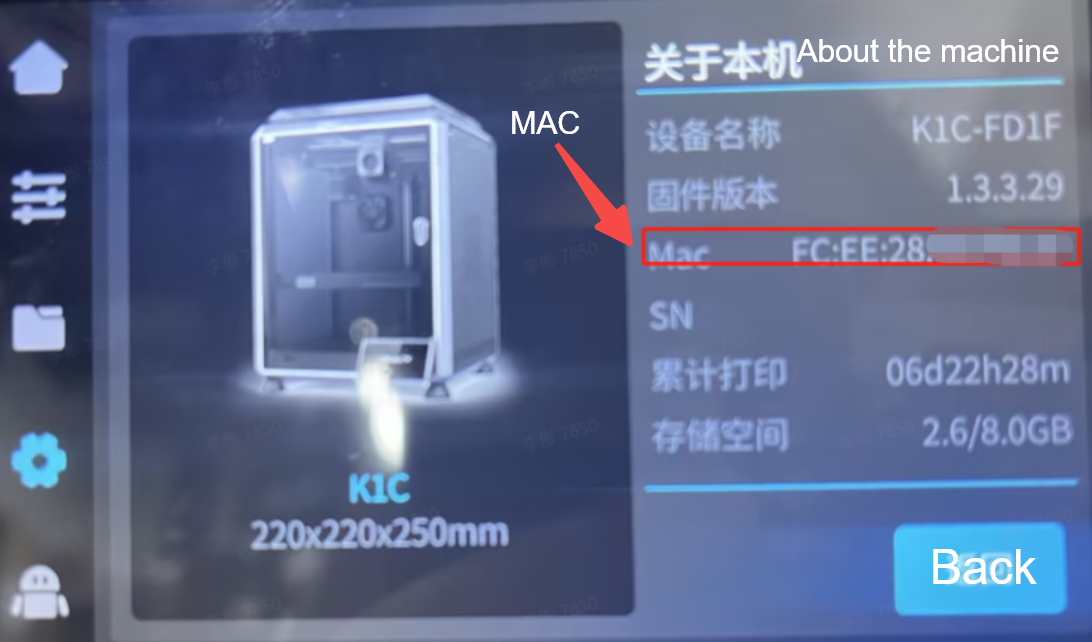
- In the preceding method, the system automatically assigns IP addresses and then binds them. But some customers want to give themselves an IP for the machine to use, do not automatically assign the machine. That could happen here, too. Assuming we know the MAC address of the machine. This can be viewed in the machine Settings "About the machine".
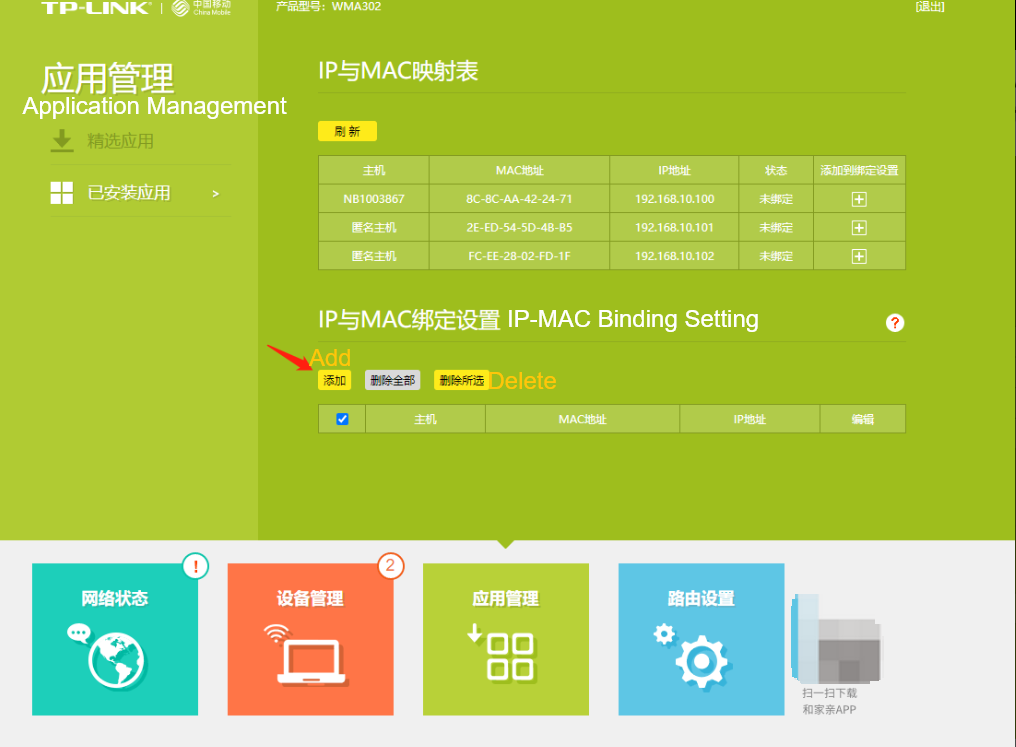
¶ Step Seven
- Obtain the MAC address code of the machine. The "IP-MAC Binding" function of the router management background is displayed. Click the "Add" button in "IP-MAC Binding Settings.
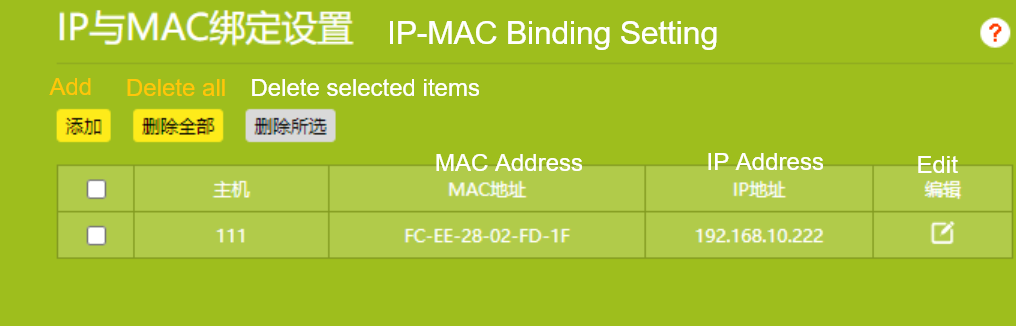
¶ Step Eight
- Customize the host name and enter the MAC address of the machine: FC-EE-28-XX-XX-XX. Enter the IP address to be bound: 192.168.10.222. Finally click the "Save" button.
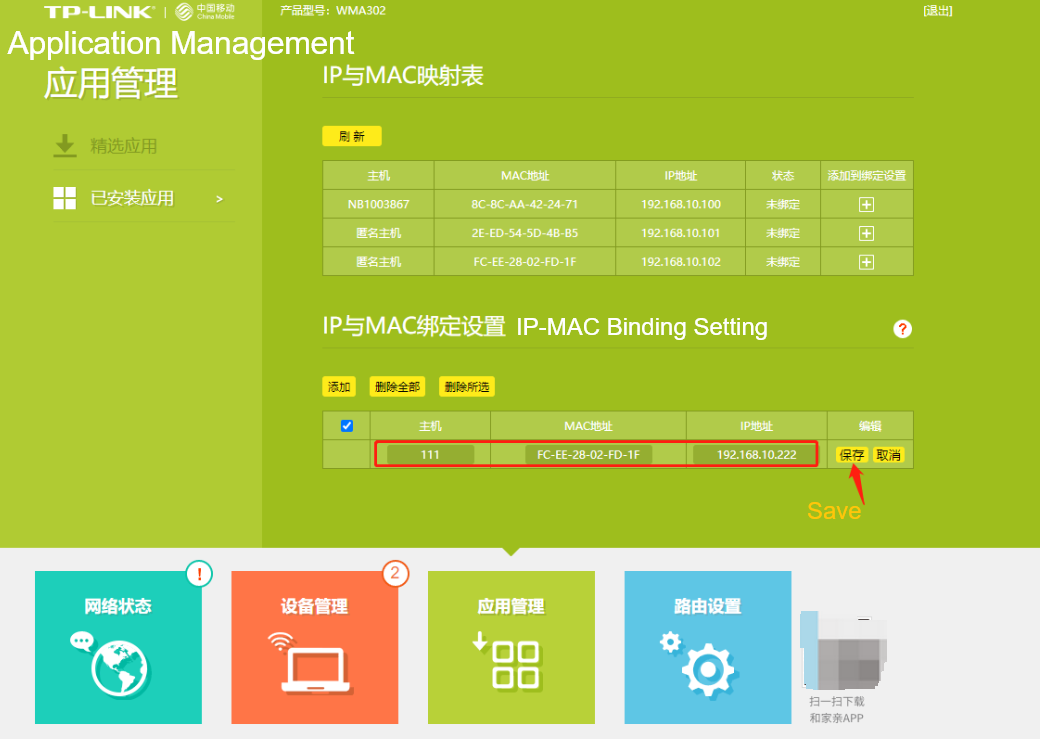
¶ Step Nine
- After the storage is saved, you can view the bound machine information in "IP-MAC Binding Settings".
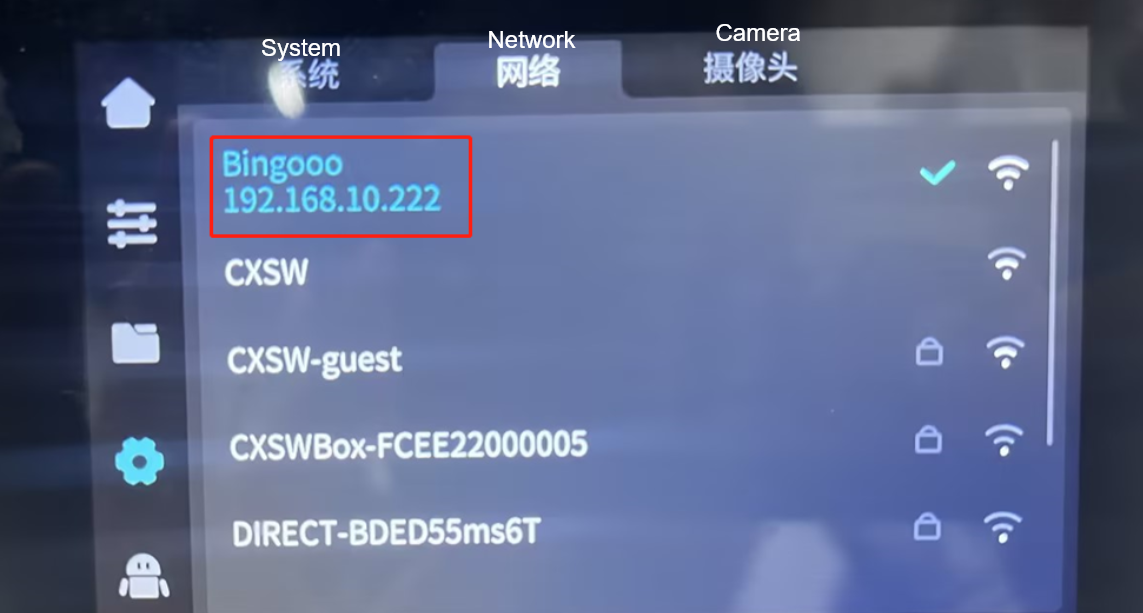
¶ Step Ten
- Finally connect the machine to the router's WIFI signal. Check whether the IP address of the authentication machine is 192.168.10.222.