¶ What is AI Tool-CubeMe?
AI Tool-CubeMe, a new AI feature on Creality Cloud Web that enables you to turn any photo into a mini chibi-style 3D figure. Simply upload a photo, stylize it instantly, and turn it into a 3D model using Image-to-3D., and print it with your Creality 3D printer. In just a few clicks, you can create your own playful, collectible mini-me!
¶ 🚀Highlights
- Stylize Image: Upload your photo and let AI-CubeMe turn it into a fun cartoon-style image.
- Choose Your Style: Pick from Sitting Cutie, Chibi Cartoon, or Clay Style to match your personal vibe.
- Image to 3D: Turn your favorite stylized image into a 3MF model ready for 3D printing.
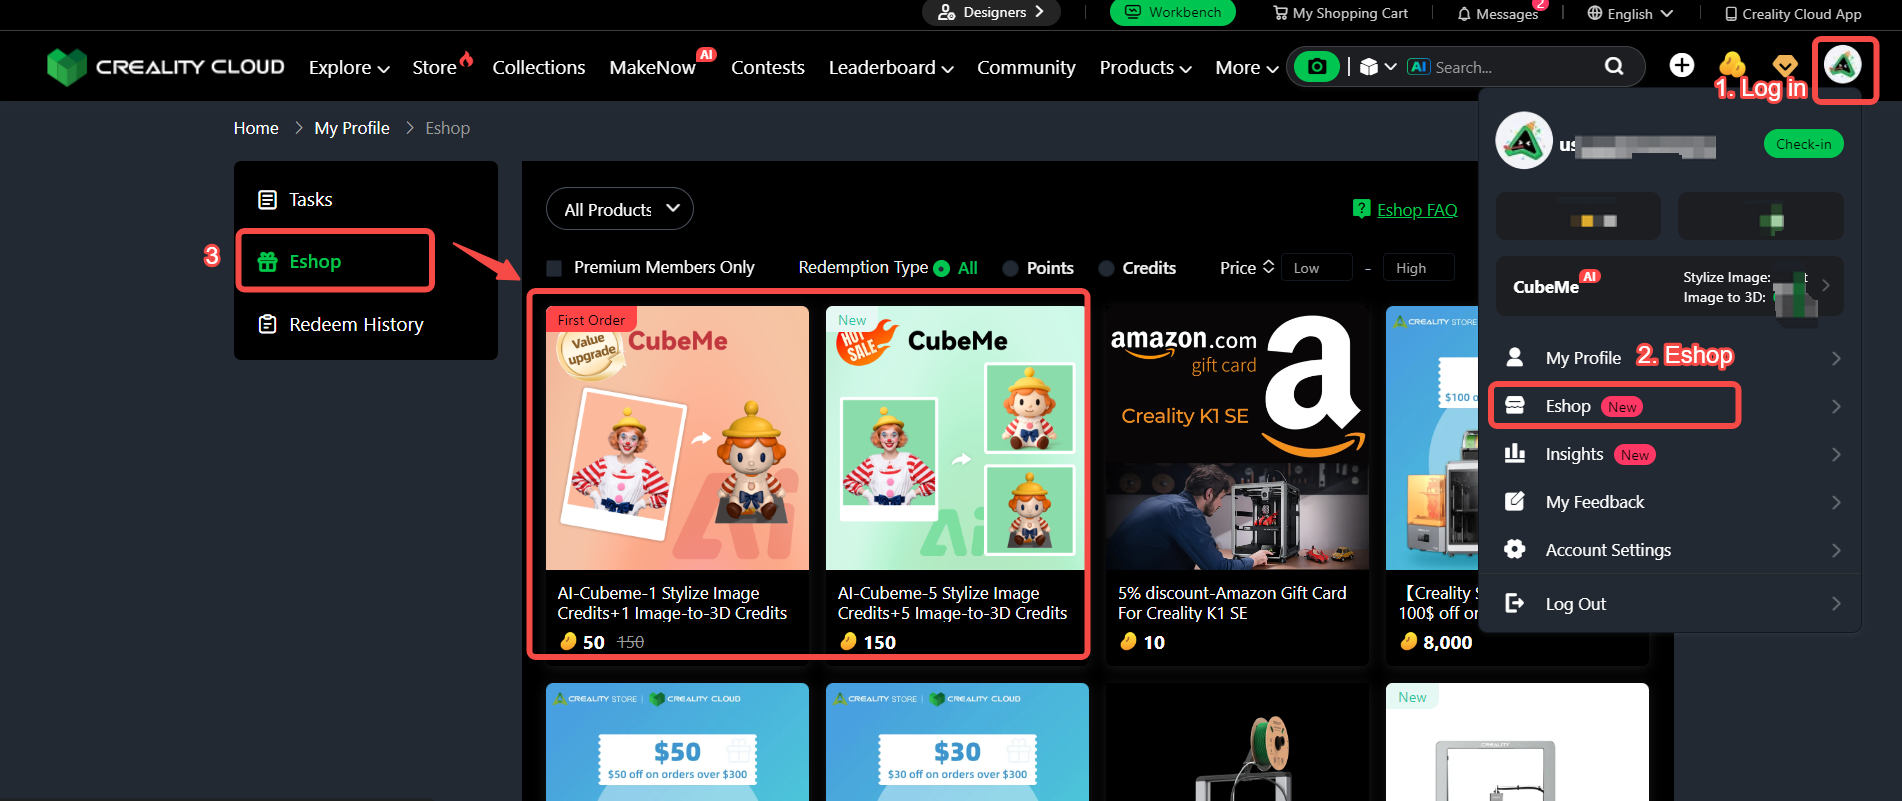
¶ 🎁 How to Get It: Available in Eshop (All Sites)
To make it easier for everyone to try CubeMe, we’ve launched two special packs:
👉Starter Pack
Redeem 50 Points to get 3 Stylized Image generation attempts.
✨ Perfect for exploring different styles before diving in.
👉Advanced Combo Pack
Redeem 500 Points to get 5 Stylized Image + 5 Image to 3D generation attempts.
🔥 Enjoy the full creative journey: photo → Stylized Image → Image-to-3D → 3D printed figurine.
📌 How to Redeem? Creality Cloud App/Web → Eshop → Select AI-CubeMe package → Start creating.
¶ 🛠️ How It Works
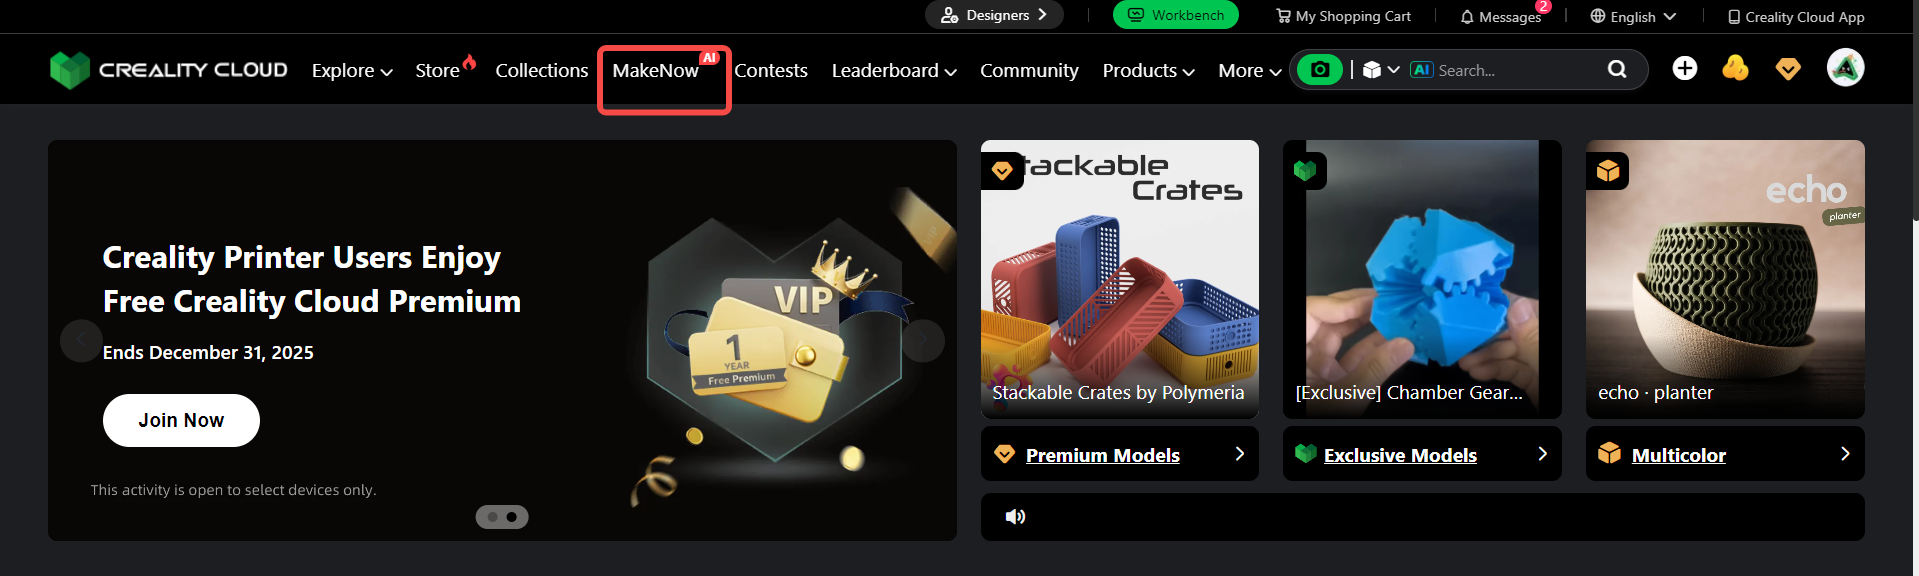
¶ 👉 Method 1: Creality Cloud Web
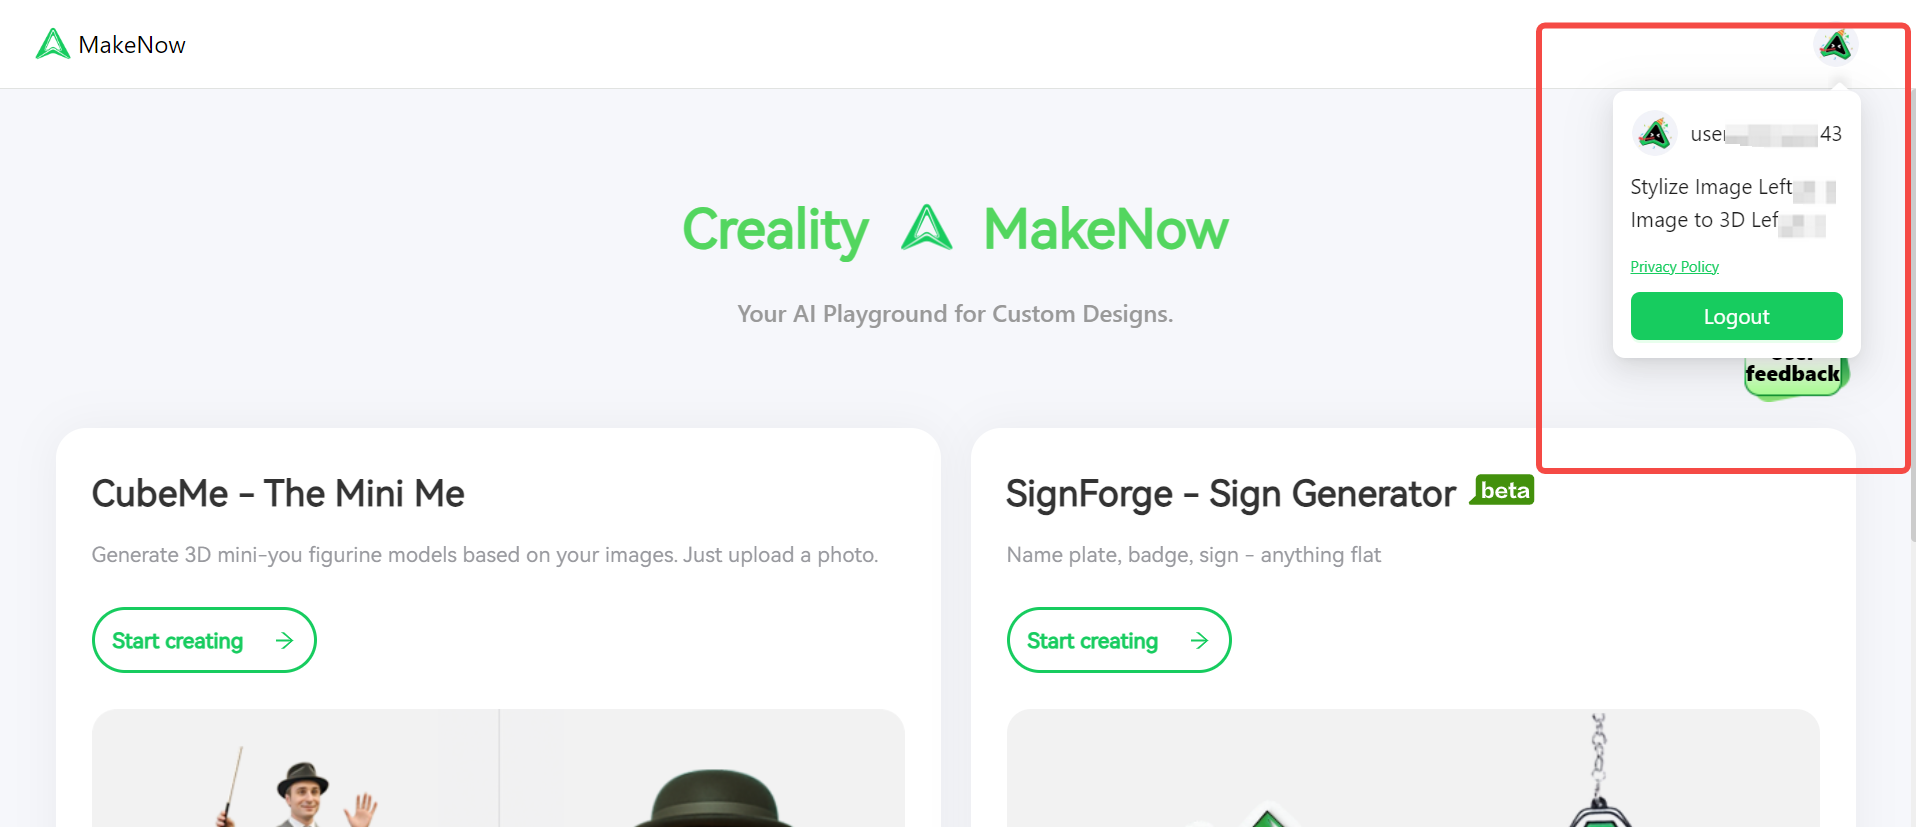
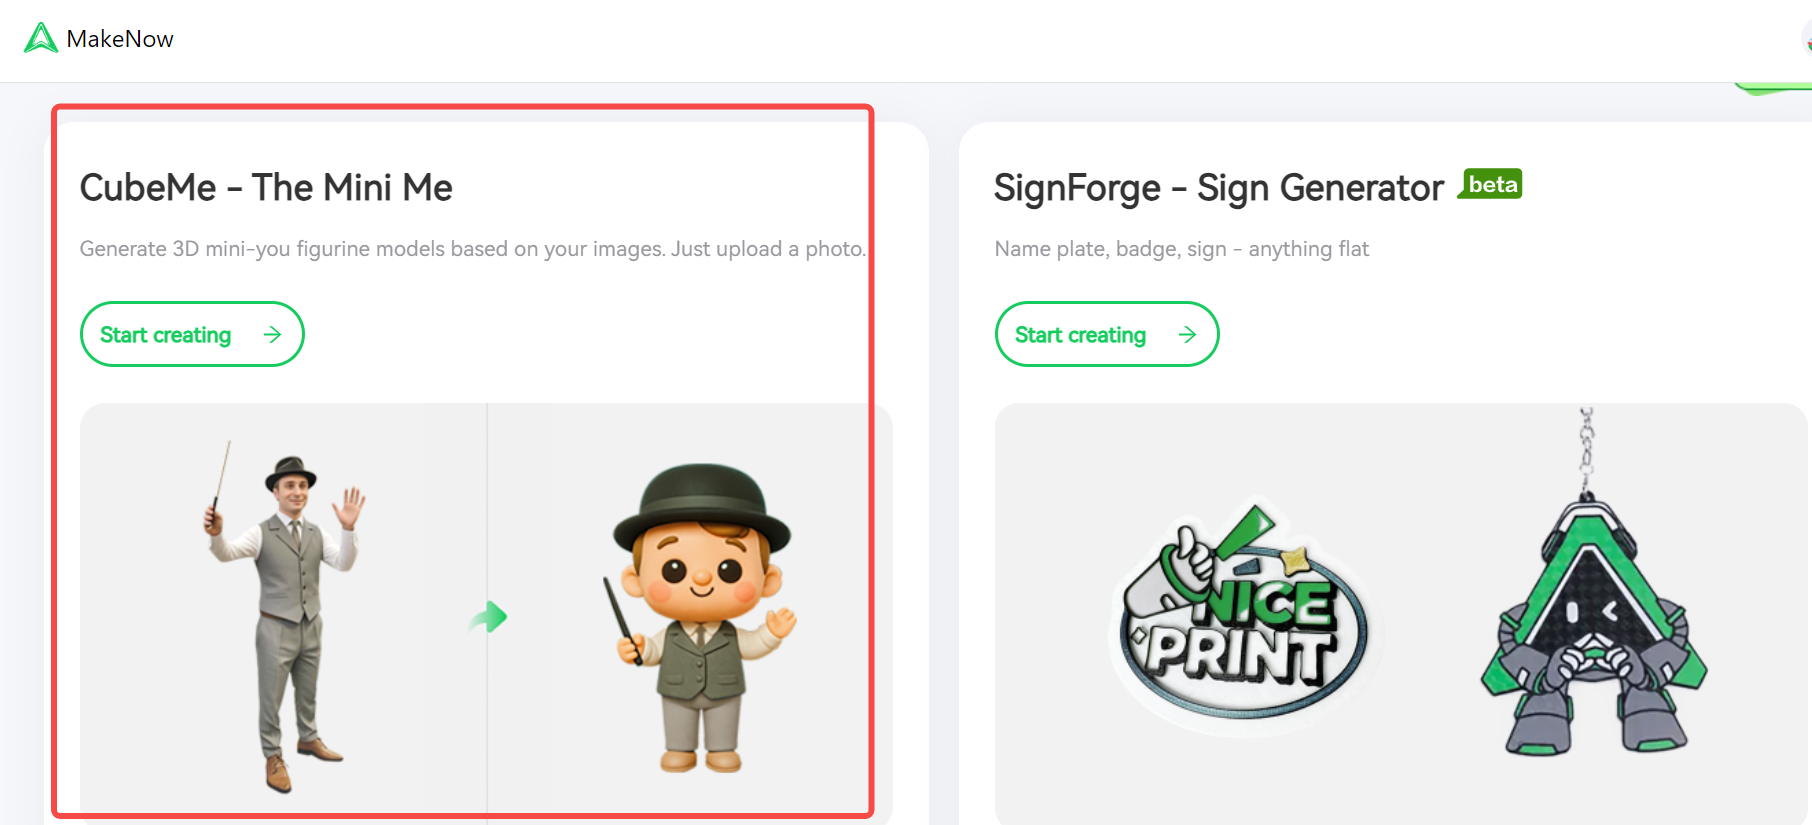
Step 1: Open Creality Cloud Web, go to the top navigation bar, and click MakeNow → CubeMe.
Step 2: Upload a 2D photo → pick your favorite style (e.g., Sitting Cutie, Clay, Mini Collectible) → click Generate Stylized Image.
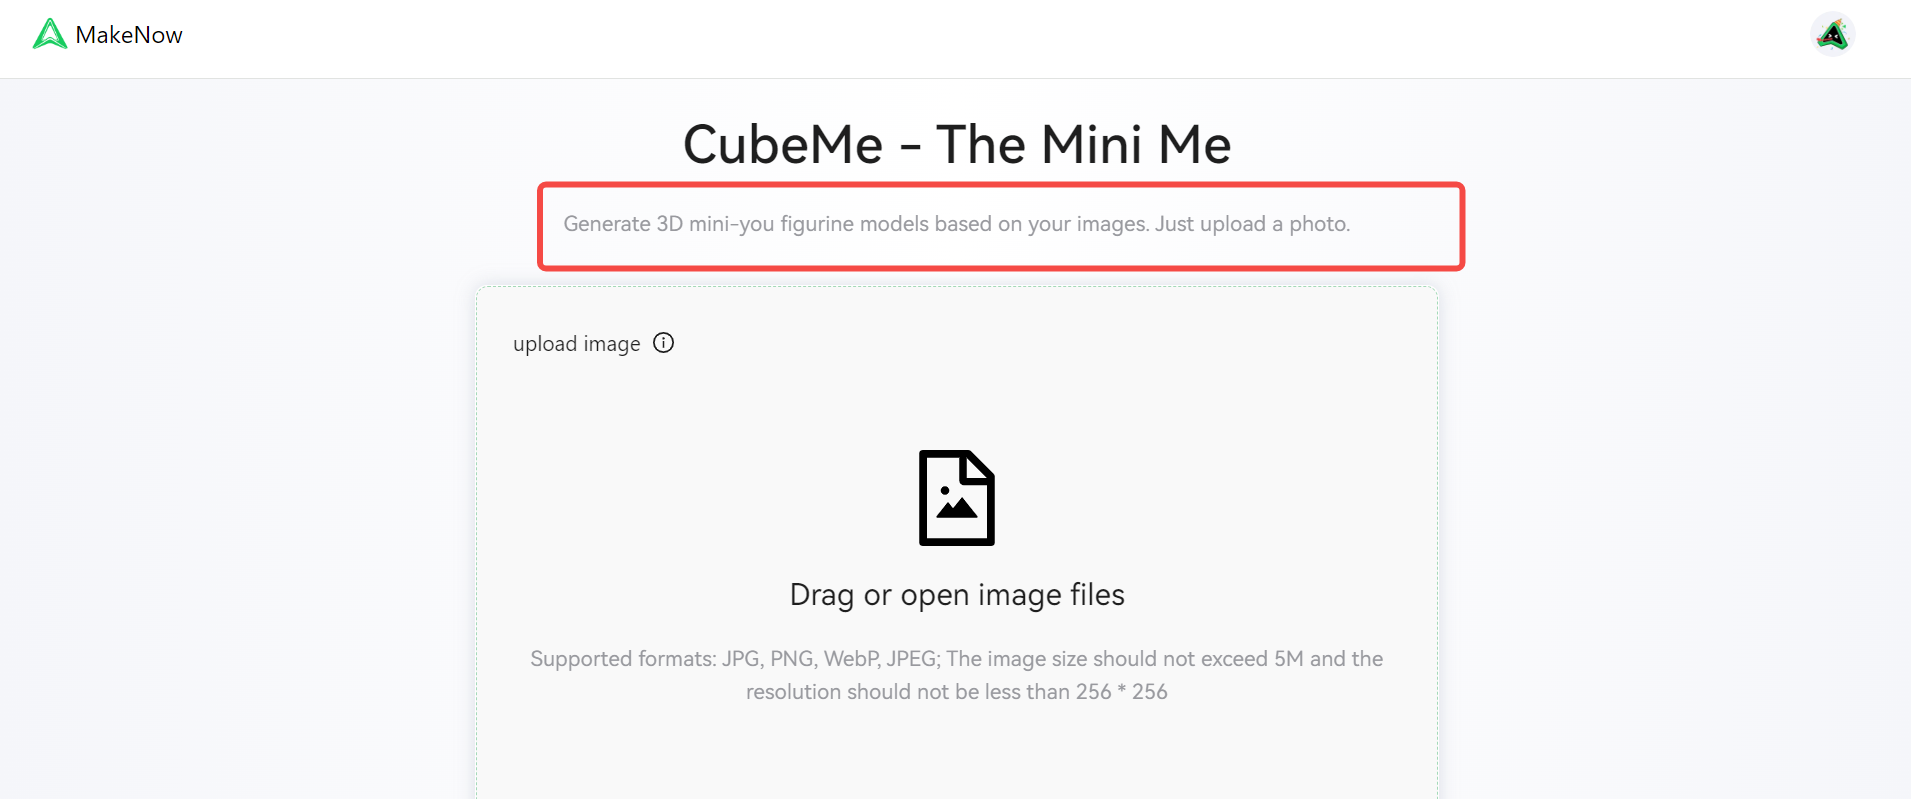
Step 3: Select your favorite image → click Image to 3D → create a 3MF file with default colors and device settings.
💡 Tip: Want to tweak the colors? Open the 3MF file in Creality Print and use the coloring tools. (Skip this step if you’re satisfied with the default settings.)
Step 4: Download the 3MF file → upload it to Creality Cloud (How to Upload .3MF Files to Creality Cloud?) → scan the QR code in the app to connect your device → slice using your printer settings → print via cloud → bring your mini-me to life!
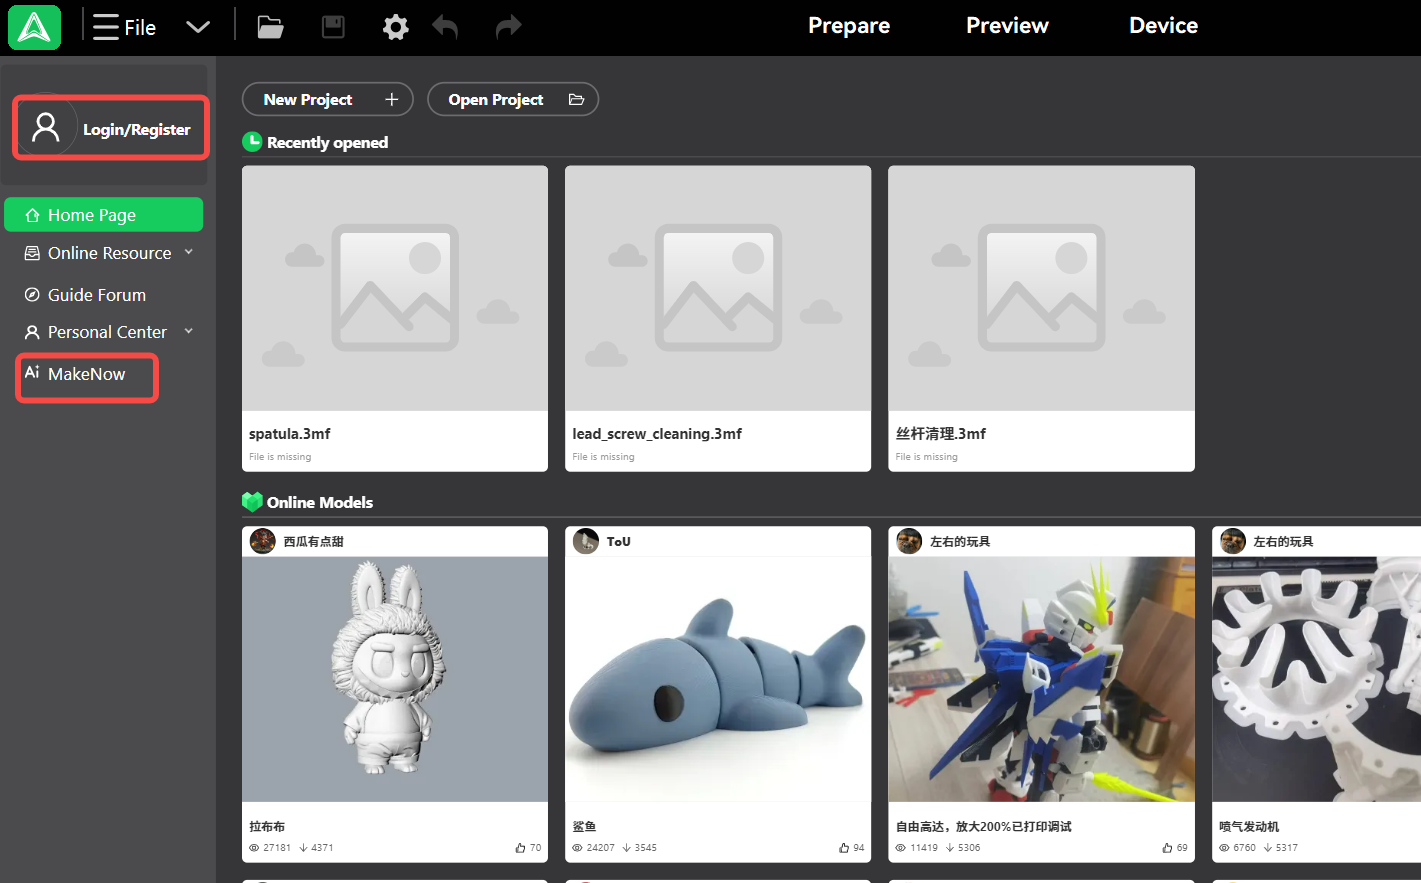
¶ 👉 Method 2: Creality Print
Step 1: Open Creality Print and log in to your Creality Cloud account. (If you haven’t installed it yet, download Creality Print first.)
Step 2: Click the LOGO in the top-left corner → go to Profile → select MakeNow → CubeMe from the left menu.
Step 3: Upload a 2D photo → pick your favorite style (e.g., Sitting Cutie, Clay, Mini Collectible) → click Generate Stylized Image.
Step 4: Select your favorite image → click Image to 3D → create a 3MF file with default colors and device settings.
💡 Tip: Want to tweak the colors? Open the 3MF file in Creality Print and use the coloring tools. (Skip this step if you’re satisfied with the default settings.)
Step 5: Select the preset settings and filament → slicing → connect to your printer via IP address → send the file to your Creality 3D printer → print locally
¶ 📌 Note:
- Each generation consumes one try, so please keep track of your remaining attempts.
- This AI-tool is currently only available on Creality Cloud Web and Creality Print; it is not supported on the App.
- The generated 3MF files include default printer settings. If these do not match your actual printer model, adjust the device presets before slicing to ensure optimal print quality.
¶ 🎨 Recommended Creation Ideas
- Unique Avatars: Turn your mini-me into a fun, personal profile avatar.
- Collectible Toys: Print a full set of cute chibi mini-figures to collect.
- Personalized Gifts: Surprise your friends with custom figurines.
- DIY Scenes: Build fun dioramas with multiple characters.
¶ ❓FAQ
¶ Q1: How can I get generation attempts?
A: Redeem packs in the Eshop: 3 Stylize Image generation attempts or 5 Stylize Image + 5 Image to 3D generation attempts.
¶ Q2: Do generation attempts expire?
A: Yes, they’re valid for 30 days after redemption.
¶ Q3: Why can’t I redeem the “3 Stylize Image” pack?
A: It’s a one-time starter offer per user.
¶ Q4: Why can’t I redeem the “5 Stylize Image + 5 Image to 3D” pack?
A: Each user can redeem this pack only once per day.
¶ Q5: How long does generation take?
A: - Stylized Image: 10–30 seconds- Image to 3D: 1–3 minutes
¶ Q6: What image formats are supported?
A: jpg, png, webp, jpeg (max 5MB, min 256×256 pixels)
¶ Q7: What kind of photos should I upload?
A: Single-person, frontal face, and clean backgrounds are recommended.
¶ Q8: What content is restricted?
A: Images containing political figures, weapons, or sensitive content are not supported.
¶ Q9: What styles can I choose?
A: Sitting cutie, Chibi cartoon, Clay Style, No Style, Other.No Style: upload an existing image (person, cartoon, doll, etc.) → go straight to Image to 3D (doesn’t consume Stylize Image generation attempts).
Other: add custom prompts to create unique images.
¶ Q10: Can I upload a stylized image directly to generate a 3D model?
A: Yes. Uploading a stylized image and choose No Style during style selection. This will skip stylized Image generation and allow you to proceed directly to Generate Model.
¶ Q11: Will using “No Style” deduct Stylized Image generation attempts?
A: No. Choosing No Style does not consume Stylized Image generation attempts. The system will display the uploaded image directly, and you can confirm whether to generate the 3D model.
¶ Q12: When are generation attempts deducted for Stylized Image and Image to 3D?
A: One generation attempt is deducted once you confirm Generate Stylized Image or Generate Model and your task enters the queue.
¶ Q13: Can I cancel after confirming “Generate Stylized Image” or “Generate Model”?
A: Yes. Once your task is in the queue, you can select Cancel Queue at any time to stop the process, and the generation attempt will be refunded.
¶ Q14: Will my generation attempt be refunded if I cancel the queue?
A: Yes. If you select Cancel Queue, the task will be canceled, and any generation attempt deducted when confirming the task will be refunded.
¶ Q15: Will my generation attempt be refunded if Stylized Image or Image-to-3D fails?
A: Yes. If the generation fails due to network issues or other reasons, the system will automatically refund the deducted generation attempt.
¶ Q16: Where can I find my generated projects?
A: Once a task is initiated, a project is automatically created. You can find all project files under My Projects at the bottom of the CubeMe generation page. You can scroll to view them.
¶ Q17: How many projects can I create? What if I reach the storage limit?
A: You can save up to 30 projects in My Projects. Once the limit is reached, you won’t be able to generate new Stylized Images or 3D models. You can delete old projects using the options menu in the top-right corner of each project.
¶ Q18: Can I duplicate a project?
A: Yes. CubeMe allows you to duplicate both Stylized Image and 3D model projects. In My Projects, click the Duplicate option in the top-right menu of a project to create a copy, which you can then edit.
¶ Q19: What if I’m not satisfied with my Stylized Image or 3D model? Can I regenerate?
A: Yes. Before confirming the model in the Model Preview screen, you can regenerate:Stylized Image: In Stylized Image History, select Regenerate.
3D Model: In Stylized Image History, select Generate Model. Please note: regenerating will deduct the corresponding generation attempts again.
¶ Q20: Does regenerating deduct generation attempts?
A: Yes. Each time you regenerate a Stylized Image or 3D model, the system will deduct the corresponding generation attempt.
¶ Q21: Can I modify my model’s colors if the results aren’t satisfactory?
A: After confirming the model, CubeMe automatically maps colors based on the preview. You can edit colors in the Colors panel on the left:Color: Click a color to adjust using HEX, RGBA, or the slider.
Number of Colors: Options include Auto Map, Single Color, 4 Colors, or 8 Colors; colors will merge automatically as needed.
Color Regions: To remove unwanted areas, click the × next to a color to merge it into another region. For large-scale color changes, CubeMe works well; for finer adjustments, use Creality Print.
¶ Q22: How many colors can be mapped at most?
A: For accuracy in 3D printing, CubeMe maps no more than 10 colors per model.
¶ Q23: Why does the generated model include a base?
A: If the original image has shadows at the bottom, the generated model may include a base. We recommend selecting images without bottom shadows.
¶ Q24: Can I adjust the model’s position, orientation, or size?
A: Yes. Open the model in CubeMe, select Adjust in the left toolbar, and use the sliders or input values to modify position, rotation, and scale.
¶ Q25: Why does the generated model sometimes appear lying down or have raised parts?
A: AI model generation has some randomness, so occasional irregularities may occur.
¶ Q26: Can I export my model?
A: Yes. After editing, choose Export:Download: Save as a 3MF file for use in any compatible software.
Open in Creality Print: Directly open the file in Creality Print.
¶ Q27: What if I close the generation page during Stylized Image or 3D model generation? Will my project be lost?
A: No. Once the generation task starts, it continues on the backend. You can check My Projects to view and edit the project after generation is complete.
(Article from Creality Cloud: CubeMe Is Here: Ready to See Your Photo in 3D?)