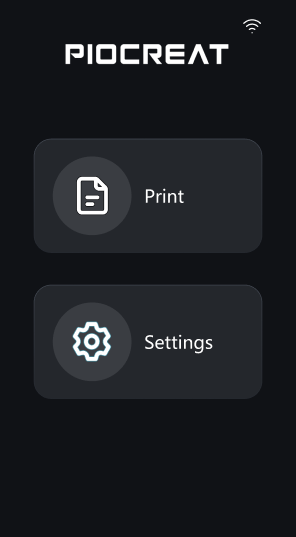
¶ I. PioNext Ultra Main Screen Interface Overview
¶ 1. Main Screen Interface
This is the main interface of the PioNext Ultra resin printer, providing access to printing operations and printer settings. Please be aware that due to constant firmware improvements, the UI you see might look a little different from this guide.
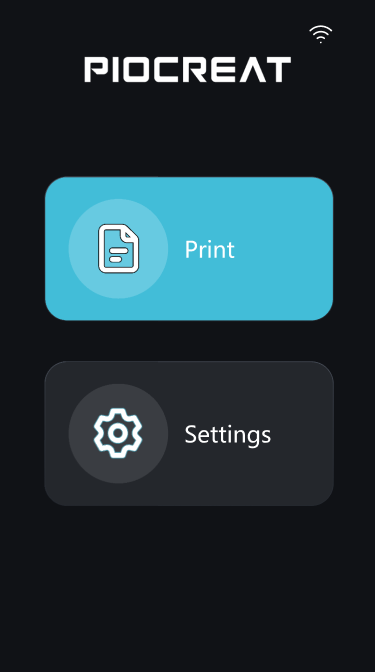
¶ 2. Top Status Bar Icons Description
¶ WiFi Icon:
![]() :No WiFi connection.
:No WiFi connection.
![]() :WiFi connected.
:WiFi connected.
![]() :Strong WiFi signal.
:Strong WiFi signal.
![]() :Medium WiFi signal.
:Medium WiFi signal.
![]() :Weak WiFi signal.
:Weak WiFi signal.
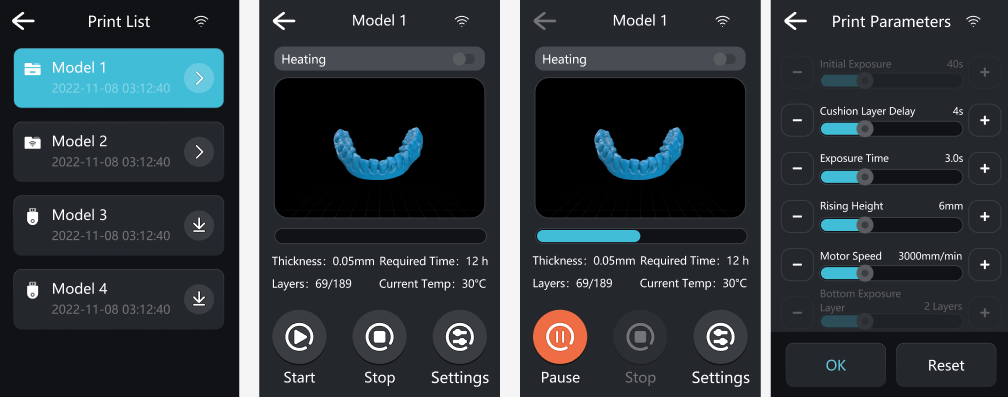
¶ II. Print Menu:
- Print: Enter the printing workflow to select files and manage print jobs.
⑴ File: Browse and select model files stored on the device's internal storage or USB drive for printing. - Print Operation Options:
⑴ Pause/Continue: Click “Pause” to temporarily stop the printing process. After clicking, the button will change to “Continue.” Click “Continue” to resume printing from the paused position.
⑵ Stop: Terminate the current print job. A confirmation prompt will appear to prevent accidental operation.
⑶ Adjust: Fine-tune printing parameters during the process (e.g., exposure time, motor speed). Recommended for professional and experienced users.
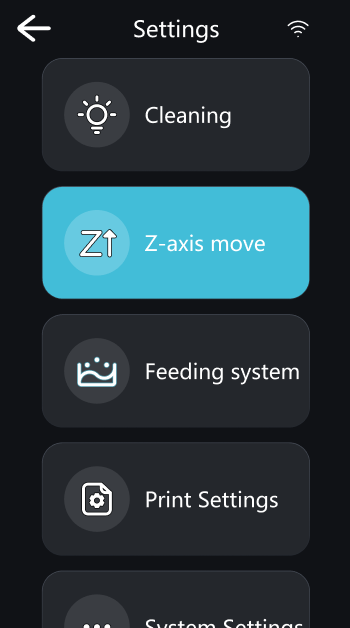
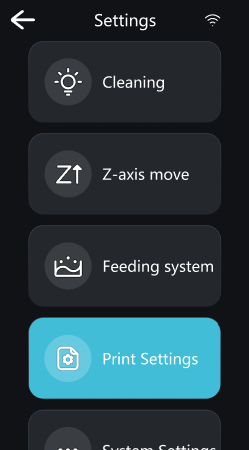
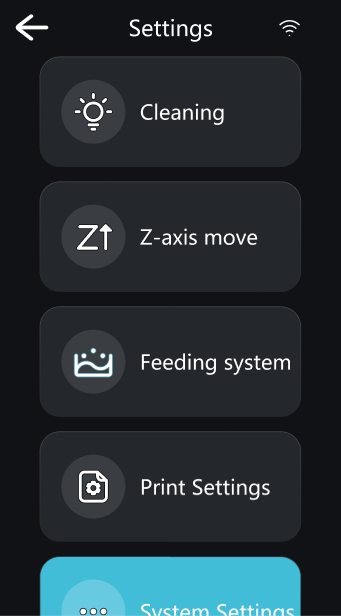
¶ IV. Settings Menu:
-
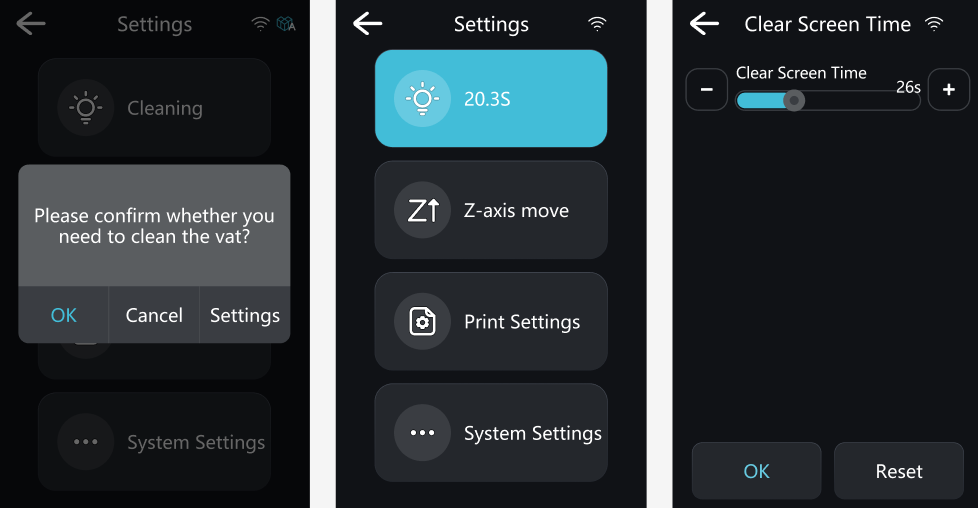
Cleaning: Start full-screen exposure to solidify any remaining resin in the vatin, aim to clean impurities. This function can also be used to check whether the screen has any dead pixels. Enable Cleaning, the system will prompt you to select whether to clean the trough and configure settings.
⑴ Settings:Set the exposure duration for cleaning.
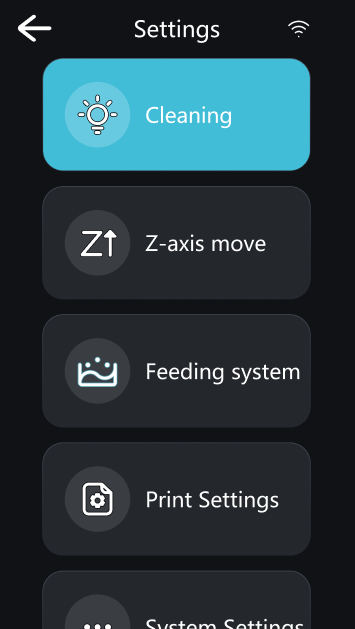
-
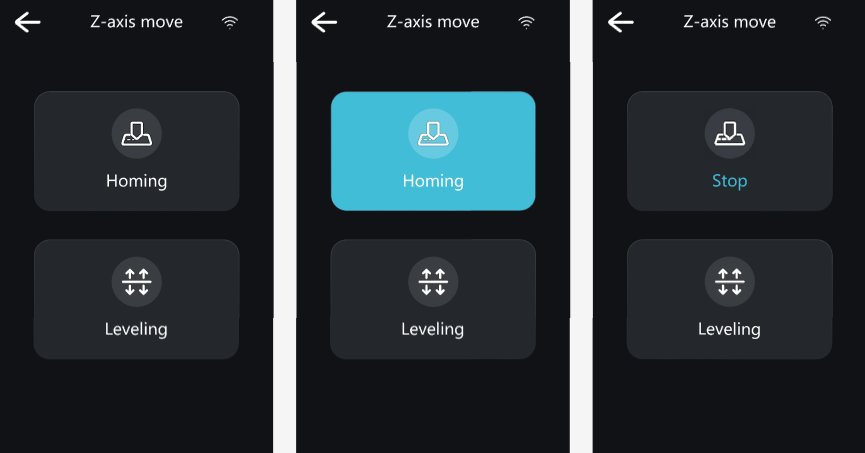
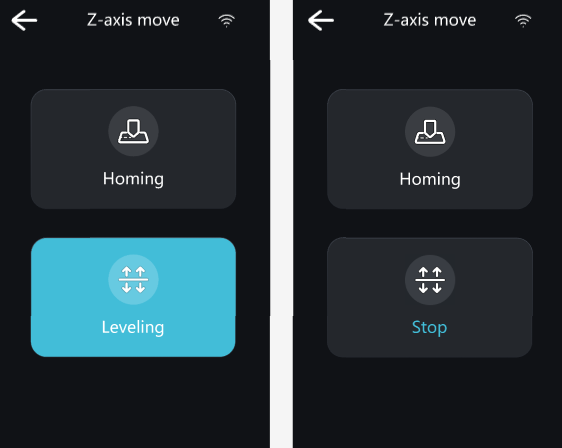
Z-axis Movement:Manually control the movement of the Z-axis, typically during maintenance and leveling.
⑴ Reset Position:When clicked, the Z-axis will return to the machine’s initial zero position. During operation, the button changes to “Stop,” which can be clicked at any time to interrupt the motion.
⑵ Leveling:When clicked, the Z-axis first performs a homing operation, then automatically lowers to the leveling position. During operation, the button changes to “Stop,” which can be clicked at any time to interrupt the motion.
-
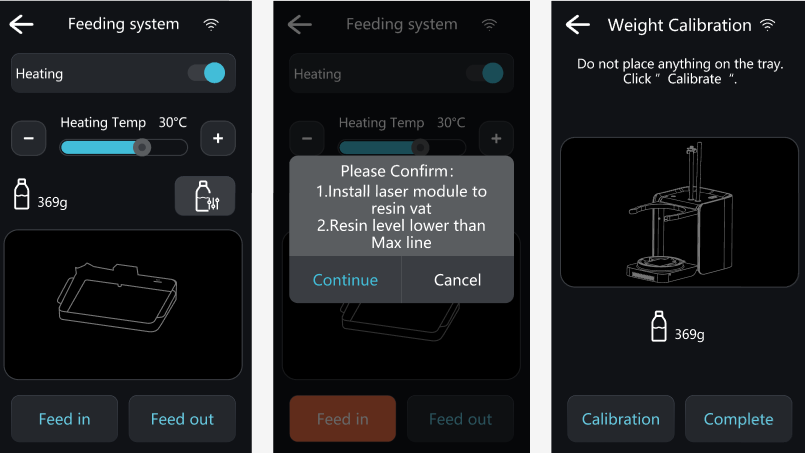
Feeding System:Control and configure the AFU (Auto Feed Unit).
⑴ Heating Temperature: Set the target heating temperature for the AFU module.
⑴ Heating : Turn the AFU heating function on or off.
⑴ Weight Calibration: The weight calibration button is located to the right of the weight display which is used to calibrate the resin weight.
⑴ Feed in/out: Manually control the AFU module to supply or retract resin.

-
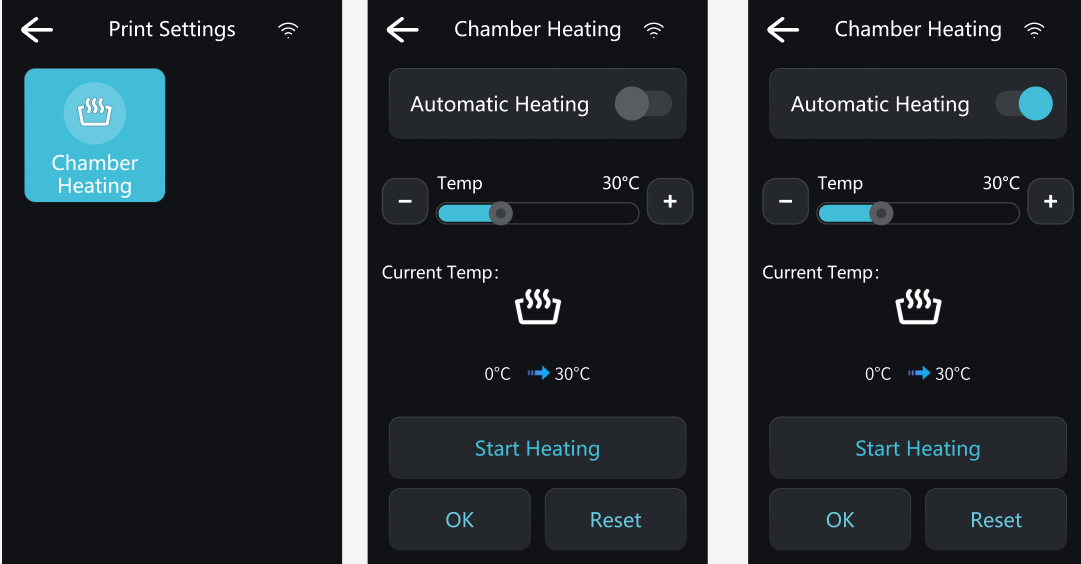
Print Settings:Used to enable or disable functions related to the printing process.
⑴ Chamber Heating: The chamber temperature can be adjusted, and automatic heating during printing is supported.
① Automatic Heating During Printing: When enabled, the chamber will be automatically heated to the set temperature during the printing process.
② Temperature: Users can manually control the on/off status of the fan as needed to adapt to different usage scenarios.
③ Start Heating: Click to start heating the chamber to the set temperature.
④ OK: Confirm that the parameter modifications have been completed.
⑤ Reset: Reset the temperature parameters to their default values.
-
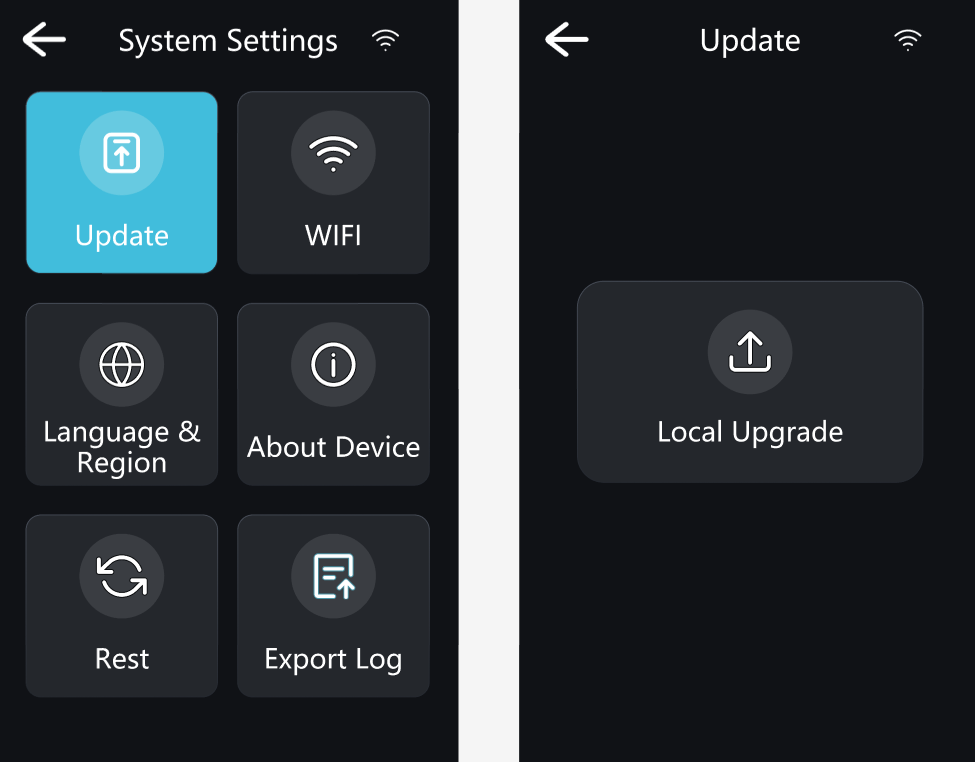
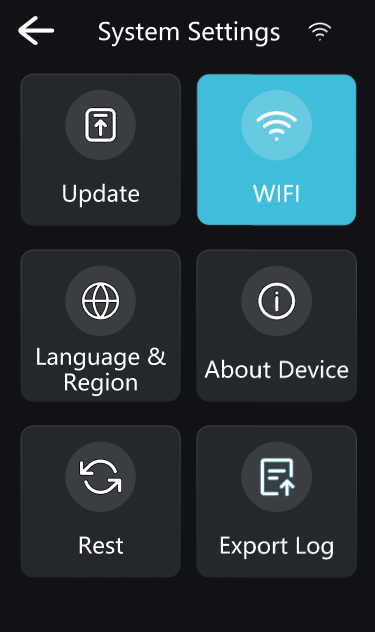
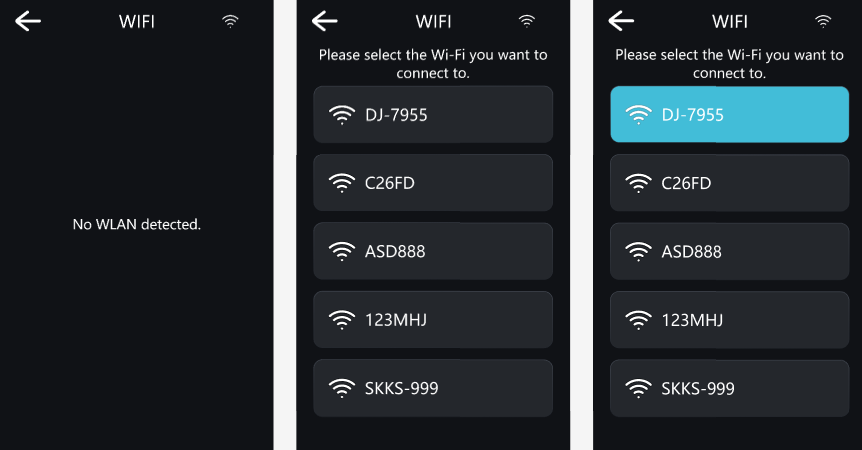
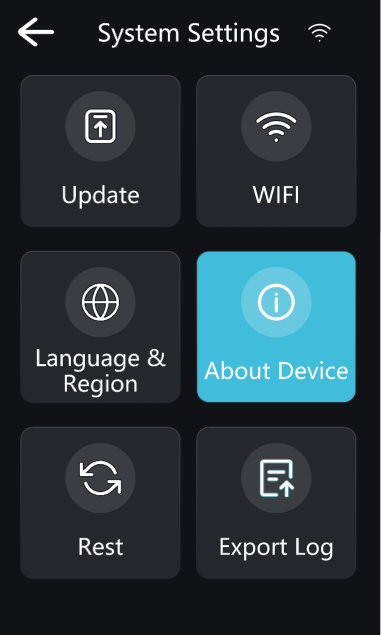
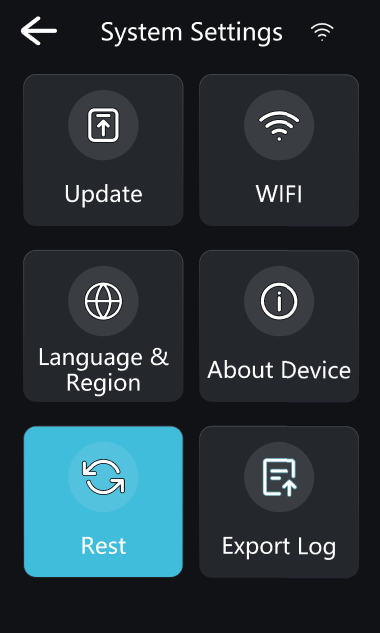
System Settings:Provides options to configure the network, set the language and region, upgrade firmware (local upgrade & online upgrade), view device information, and restore factory settings.
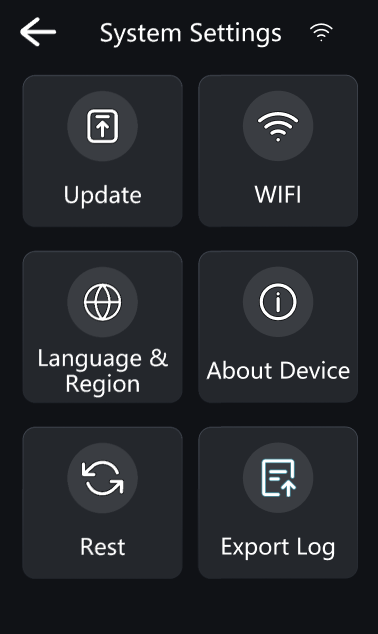
⑴ Update: Update the device firmware.
① Local Upgrade:Manually update by inserting a USB drive containing the firmware file.
② OTA:Automatically detects and installs official firmware updates when the device is connected to the internet.
⑵ WIFI: Search, select, and connect to a WiFi network.
⑶ Language & Area:Set the display language and region. To ensure proper Creality Cloud service, the region setting should match the registration region of your Creality Cloud account.
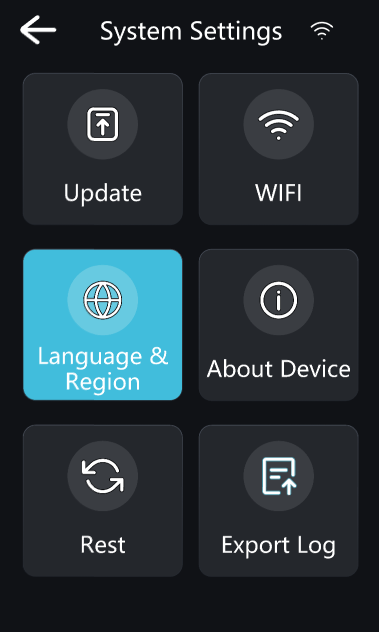

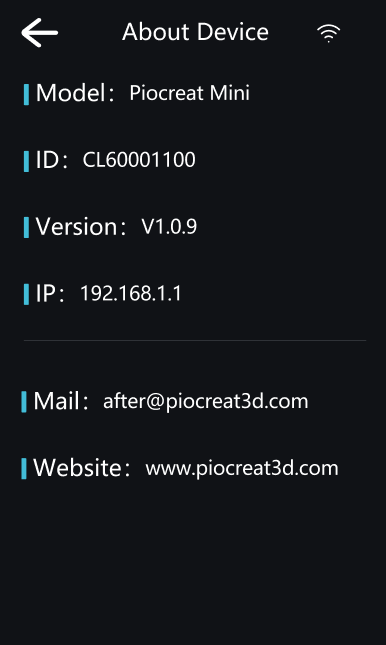
⑷ About Device:View core device information, including: Model, Device Unique ID, Firmware Version, Official Contact Phone Number, Official Support Email, Official Website and IP Address.
⑸ Reset: Erase all user settings and personal data, restoring the device to its original factory state.
⑹ Export Log: Export system operation logs to a USB drive, primarily used by technical support for troubleshooting.
