¶ I. Pre-Printing Preparation
¶ Operating Environment:
Operation should be performed in a well-ventilated area away from light to avoid prolonged inhalation of volatiles.
¶ Required Equipment & Materials:
Printing Equipment: PioNext Mini 3D Printer, Clean Build Platform, Clean Resin Tank (including ACF Release Film).
Storage device: USB drive (recommended capacity 16GB or below, formatted to FAT32).
Printing Material: Ceramic Crown Resin.
¶ Post-processing Tool:
Personal Protection Equipment: Gloves, masks, and safety goggles.
Cleaning Tools: Scraper, Lint-Free Cloth, Tissue, Anhydrous Ethanol (Industrial Alcohol).
¶ II. Slicing Tutorial
Import the designed model file into the official slicing software, Piocreat Box.
Download link: https://www.piocreat3d.com/software/
Example Model:
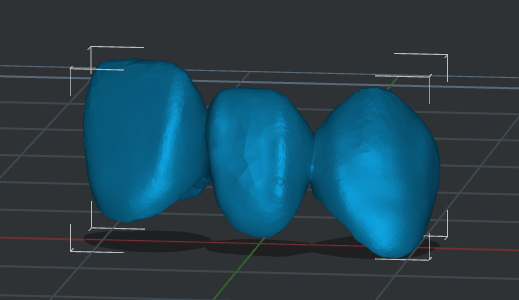
¶ Model Placement
¶ Single Model Placement:
Purpose: To achieve better print quality for the model's functional and aesthetic surfaces.
Operation:
Use the "Rotate" function of the software to adjust the selected model to the appropriate rotation angle by rotating the X, Y, and Z axes
Placement Method:
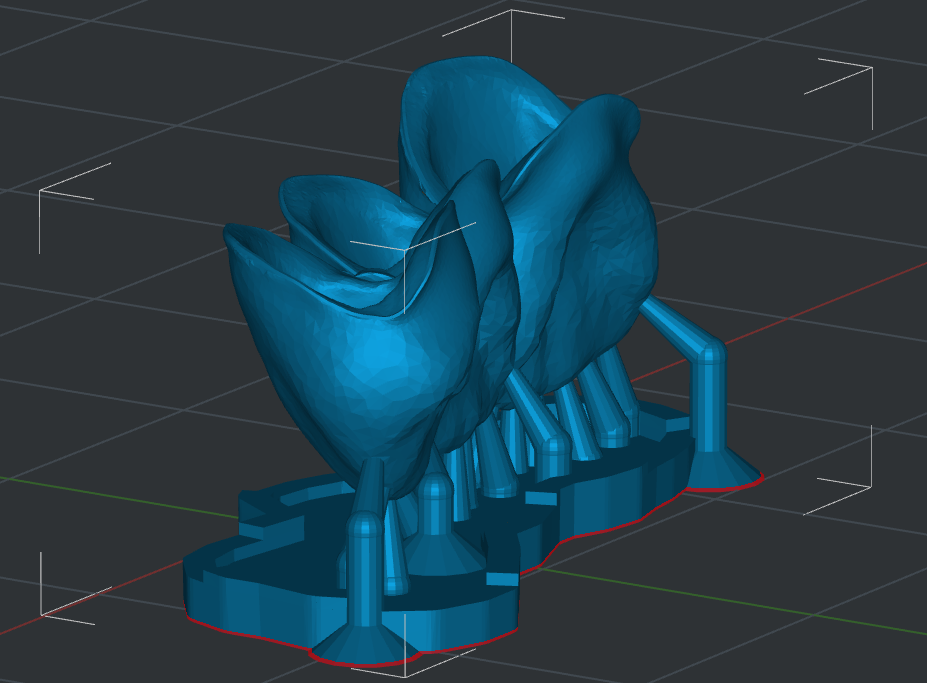
- When printing crown and bridge models, adjust the model orientation to minimize the requirement for support structures. In most cases, the occlusal surface or incisal edge surface shall be oriented to the platform.
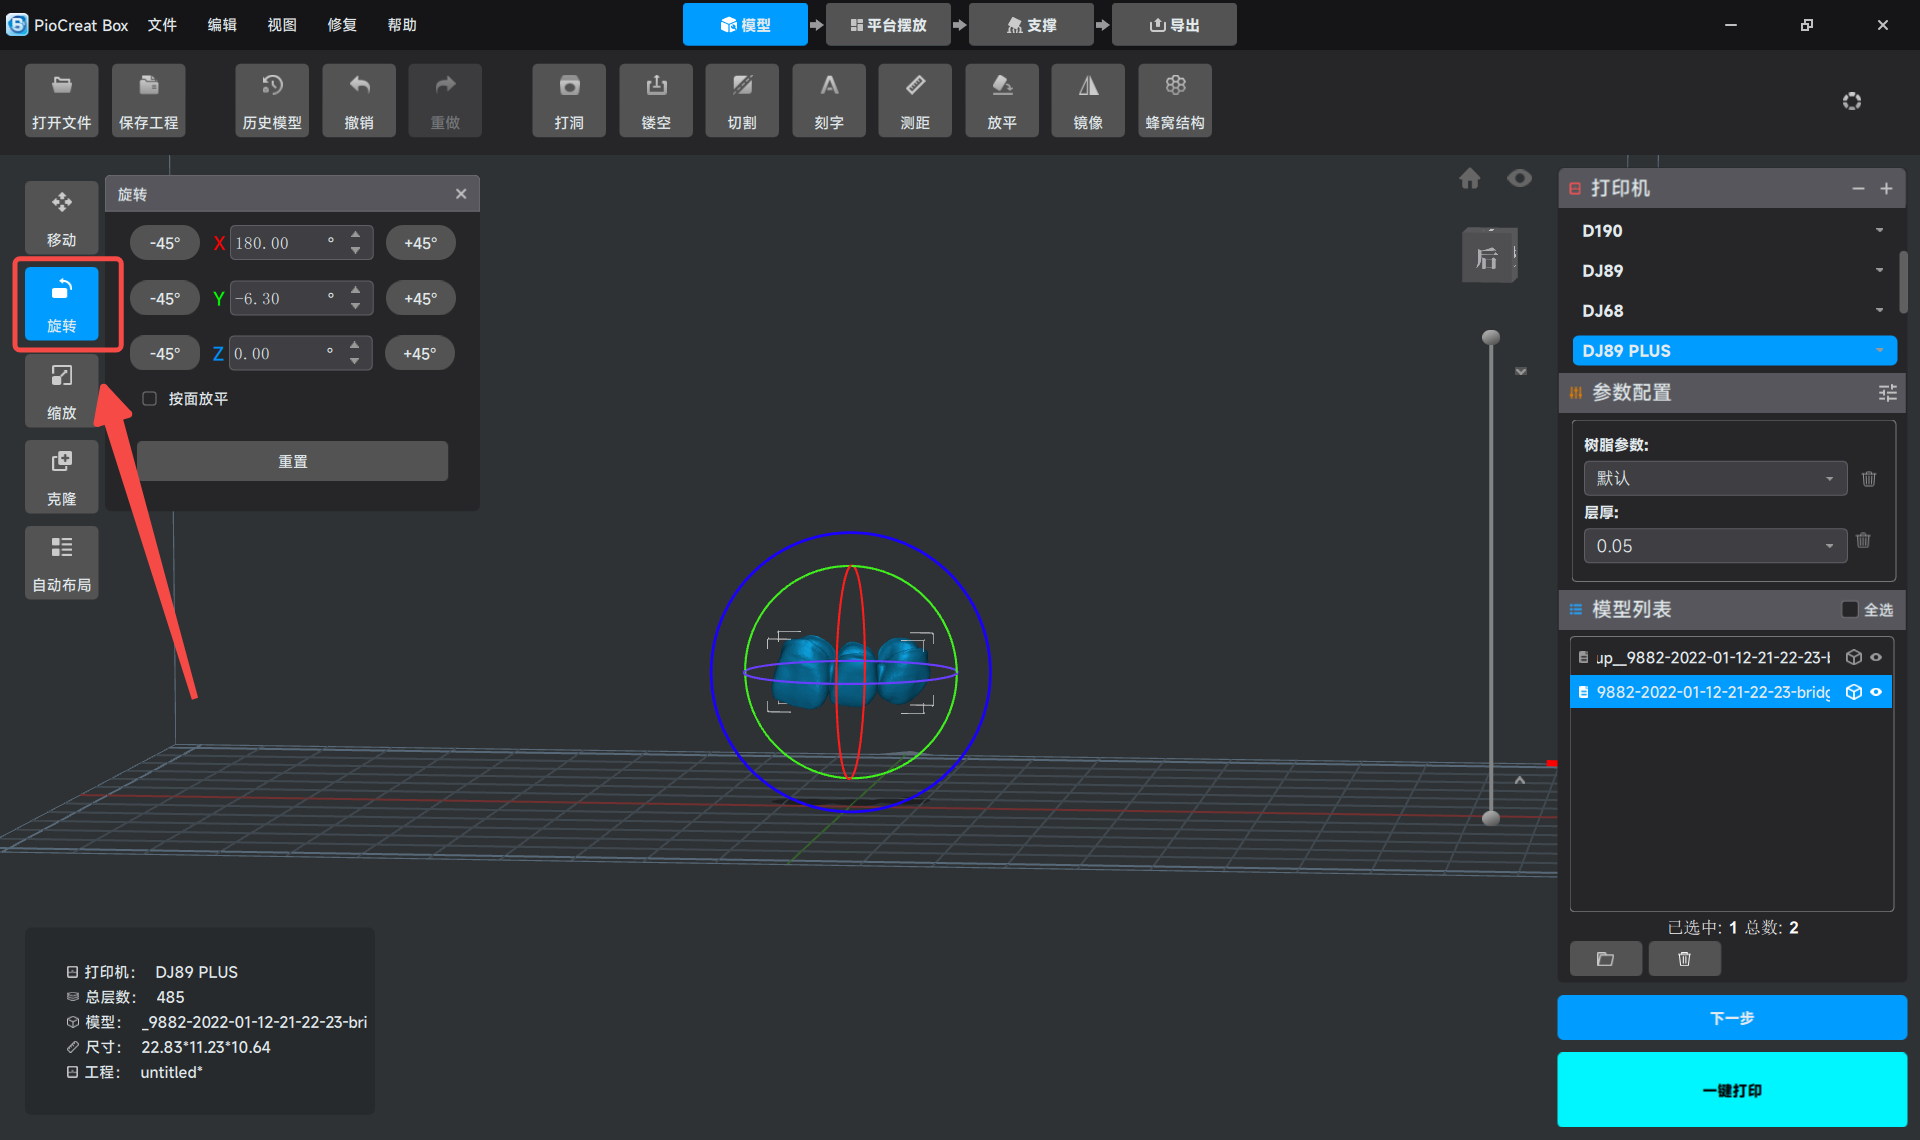
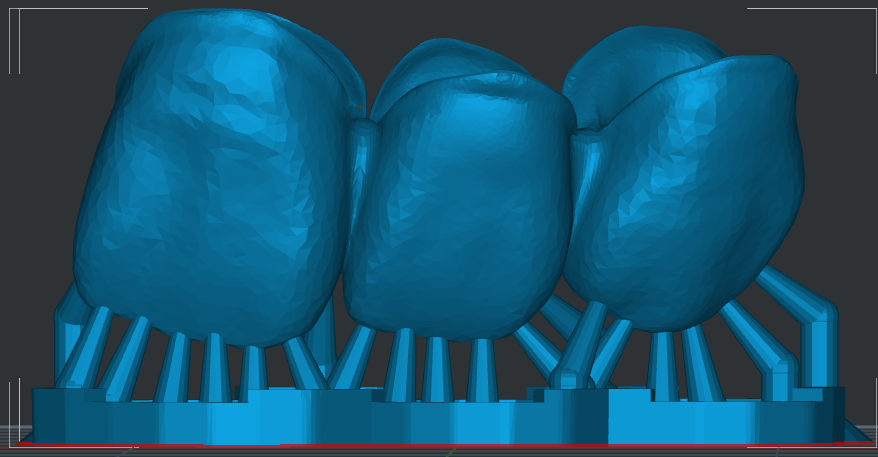
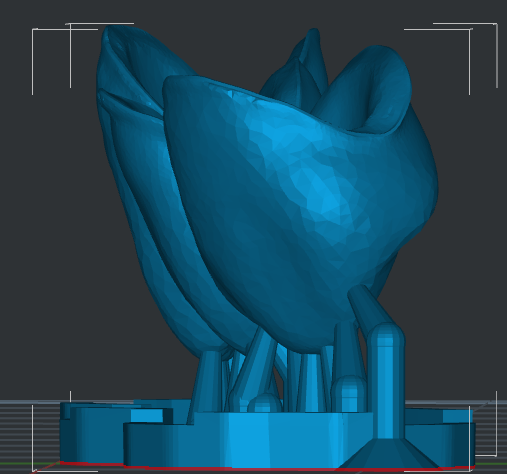
Placement Example:

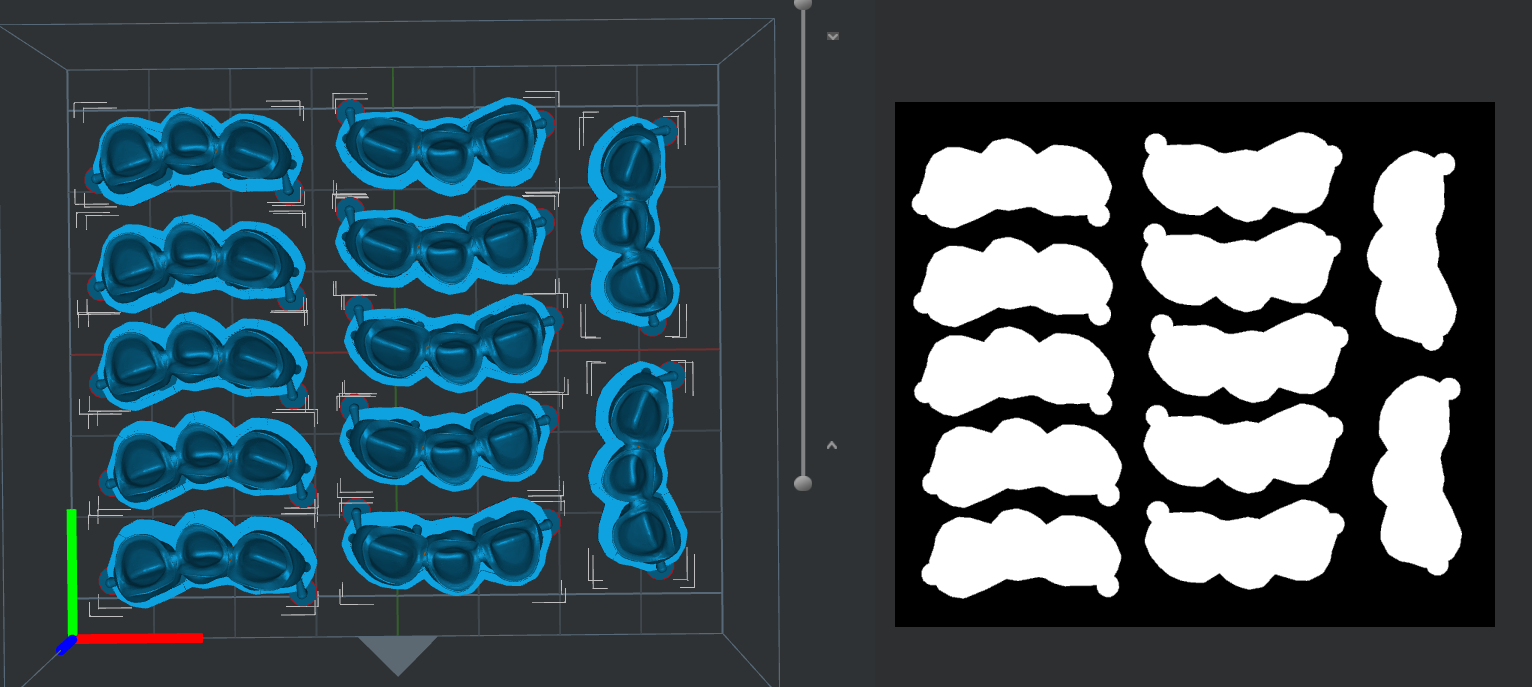
¶ Batch Placement:
When batch printing is required, you can refer to the following placement positions and parameters:
- PioNext Mini: Number of layouts (regular size), 8-12 pieces per plate.
¶ Print Parameters
The following parameters are the recommended printing parameters for using ceramic crown resin, specifically tailored to common models of light-curing printers. These parameters were obtained under experimental conditions (temperature 23±2℃, humidity 50%±20%), so please adjust them according to the actual printing situation.
Resin for ceramic dental crown models:
Layer Thickness /mm |
Initial Exposure Time /s |
Exposure Time /s |
Rising Height /mm |
Motor Speed mm/min |
Light-off delay /s |
Bottom Exposure Layer |
Dual Pattern |
|---|---|---|---|---|---|---|---|
| 0.05 | 15 | 1.7 | 5 | 900 | 1 | 2 | Fast(405nm) |
| 0.1 | 15 | 2 | 5 | 900 | 1 | 2 | Fast(405nm) |
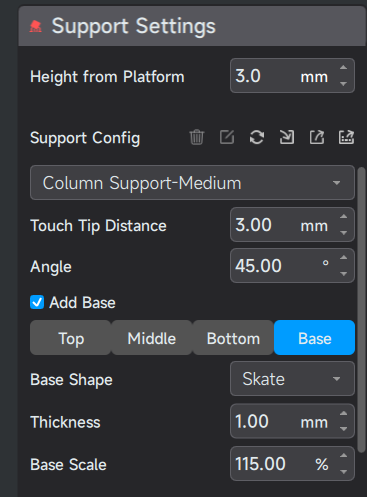
¶ Support Settings
Objective: Add auxiliary support structures to the model to prevent deformation and detachment during printing, and assist in the formation of complex structures and delicate parts.
Please refer to the following steps.
- Enter the "Support" settings page.
- Select the "Height from Platform". For this model, we use 3mm, and the lift height can be customized.
- Select support type: Medium
- The "Touch Tip Distance" of the support is recommended to be set between 2-4mm. The larger the model format, the higher the density should be (e.g., choose 3mm). We choose Medium support and select a density of 3mm.
- Click the "All" option under "Auto Support" to automatically generate support. (As shown in the figure)
- Use the layer preview function to check the support distribution and determine whether manual supplementation is required.
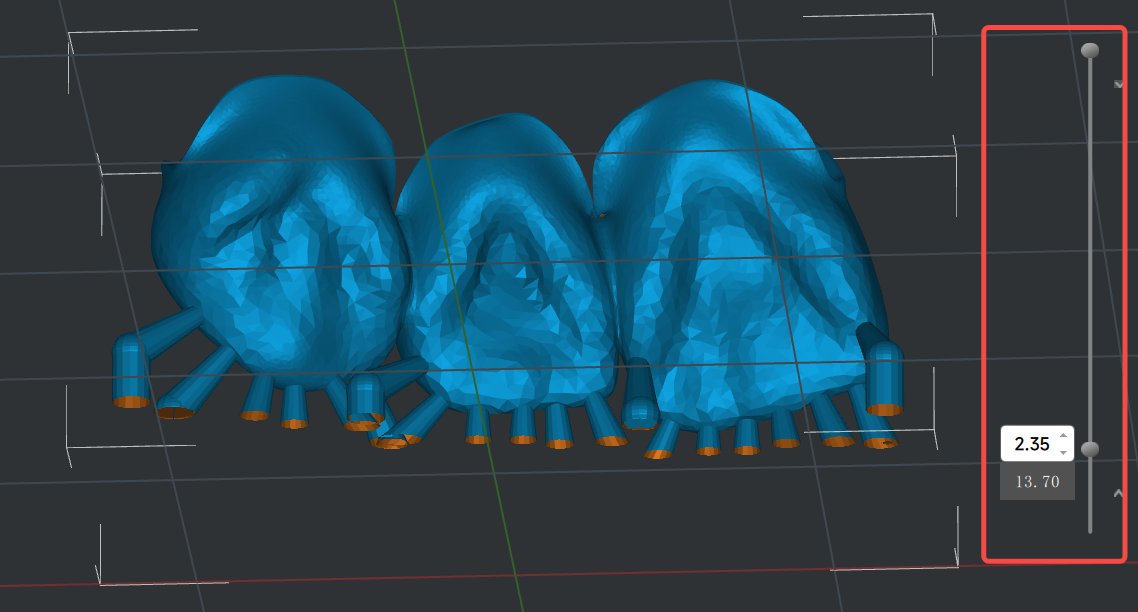
-
You can use the toolbar on the right to add, edit, or delete supports.
-
Support Inspection Principle
① Add: Check the lowest part of the model and overhanging areas to ensure that all low points have sufficient support.
② Deletion: Check the critical surfaces, fine structures, and functional contact surfaces of the model, and remove all unreasonable supports that affect the appearance, accuracy, or usability. -
Notes for Adding Support on Crown and Bridge Models:
① Add support structures carefully, with emphasis on overhangs and protruding areas.
② For precise control, consider manually add the support.
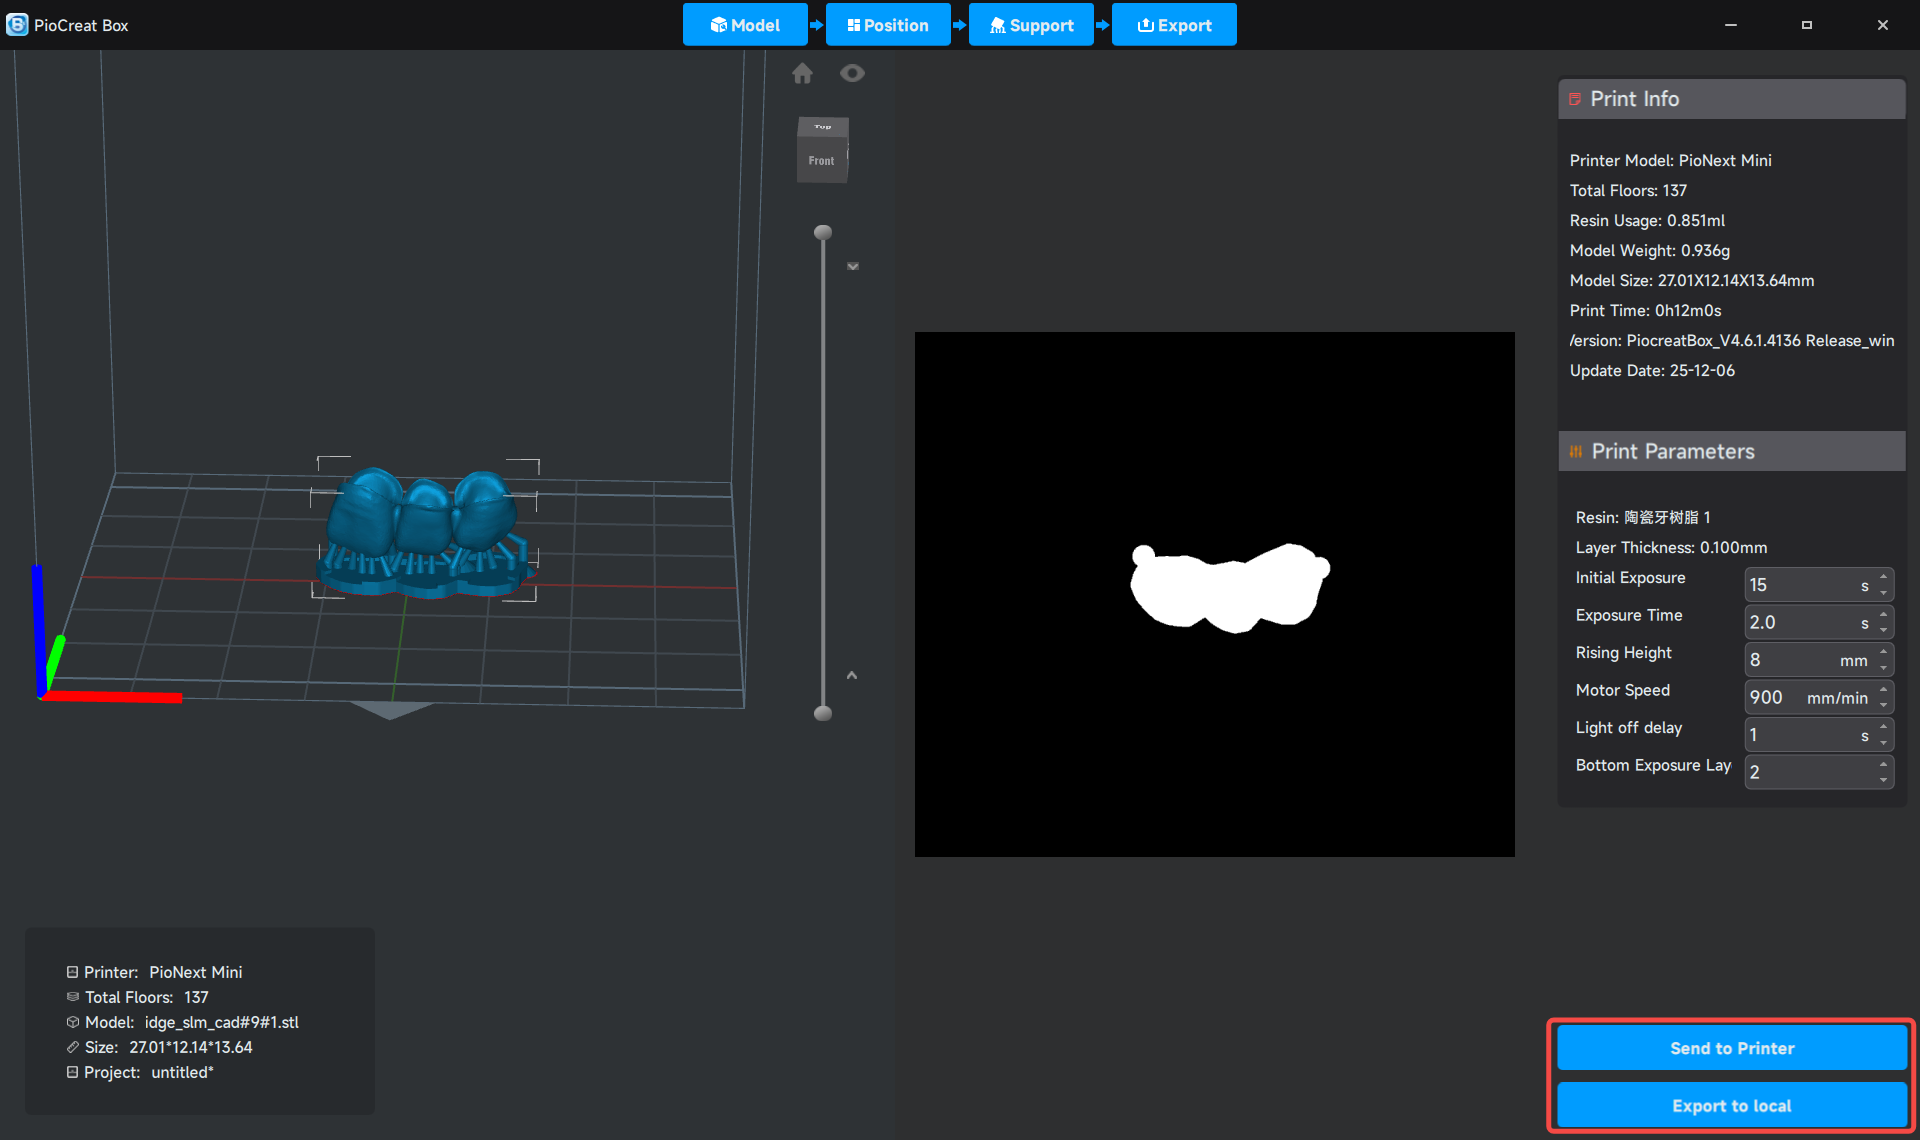
¶ Save the Slicing file, ready for printing
After adjusting the model, it can be sliced and saved.
This operation can be performed in the lower right corner of the slicing software, as shown in the figure
- Send to Printer: The printer needs to be connected to Wi-Fi, and the computer device where the slicing software is located needs to be on the same Wi-Fi as the printer. Print starts by sending it to the printer via the network.
- Export to Local: First save the slicing software to local storage, copy it to a USB drive, insert the USB drive into the printer's interface, and then you can start printing.
- Note: It is recommended that the U disk capacity be 16GB or less and formatted to FAT32 format
¶ III. Print operation
¶ Resin Preparation:
Shake the resin bottle for 1-2 minutes to ensure thorough mixing. If the room temperature is below 20°C, it is recommended to preheat the resin bottle by soaking it in warm water (below 40°C) or use the built-in heating function of the printer. Low temperature can cause the resin to become viscous, affecting print quality.
¶ Equipment Inspection:
- Check and clean the forming platform and the material trough to ensure there are no debris left from the previous print.
- Check the surface of the print screen for dirt and residual resin cured material. Use a lint-free cloth and alcohol to clean the printer's LCD screen, ensuring there is no dust, stains, or resin residue.
- Check the release film of the hopper to ensure it is flat, undamaged, and in a taut state.
¶ Printing starts:
- Send the sliced file to the printer via USB or network.
- Before clicking Print, double-check that parameters such as layer thickness and exposure time are set correctly.
- Start printing.
- Be sure to close the printer lid to prevent the resin from being affected by environmental ultraviolet rays and to reduce the spread of resin odor.
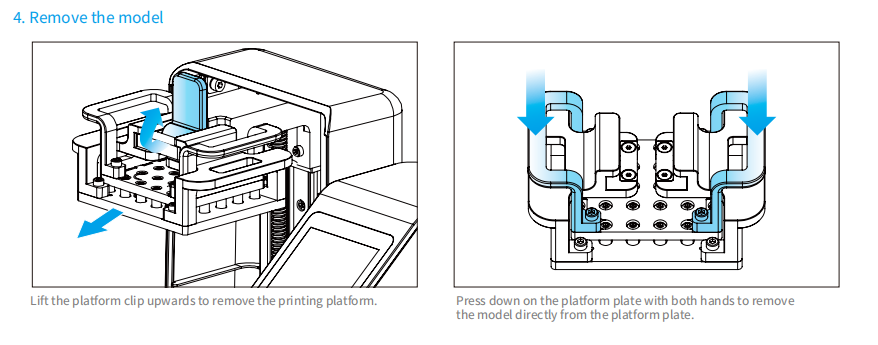
¶ IV. Remove the Model
¶ Standard Operation:
After printing is completed, please wear protective gloves. Remove the build platform and use the platform's quick-release structure to remove the model.
¶ V. Post-processing Flow
¶ Cleaning:
- Use a lint-free cloth or cotton swab to directly dip in 95% industrial alcohol and wipe the surface and interior of the ceramic tooth, cleaning all surface resin. Do not use an ultrasonic cleaner or alcohol spray for cleaning.
¶ Drying:
- Use an air gun to thoroughly blow dry the ethanol on the model surface, as well as all holes and gaps, from top to bottom and at various angles.
- Key: Ensure the model is completely dry with no liquid residue on the surface.
¶ Demolition of supports:
- Before model solidification, use support removal pliers or sprue cutters to carefully remove all support structures from the model.
- At this time, the resin still has toughness, making the support easier to remove cleanly and less likely to damage the model body.
¶ Post-curing treatment (for PioNext Mini model reference)
- Set parameters:
- Curing time: Select 5-10 minutes.
- Start Curing: Open the curing box on the right side of the machine, press it inward, the curing box will pop out. After placing the model, press it inward again to reinstall the curing box. Click Start Curing.
¶ Complete and Save
- Drying and Inspection: After curing is completed, remove the model and check if it is fully cured.
- Final treatment: If necessary, use sandpaper or a grinding tool to lightly sand the support points to make the surface smoother.
- Storage: Store the models in a dark and dry environment, and avoid collisions between models. Collisions and friction between models can easily cause scratches, affecting the appearance and accuracy. It is recommended to use individual packaging or separate storage.