¶ Falcon T1 UV Flat-engraving Glass Tutorial
This tutorial is suitable for users who are performing vector or bitmap planar engraving on glass surfaces for the first time
¶ 1.Preparation Before Engraving
(1)Before starting the carving, please prepare the following items and materials in advance
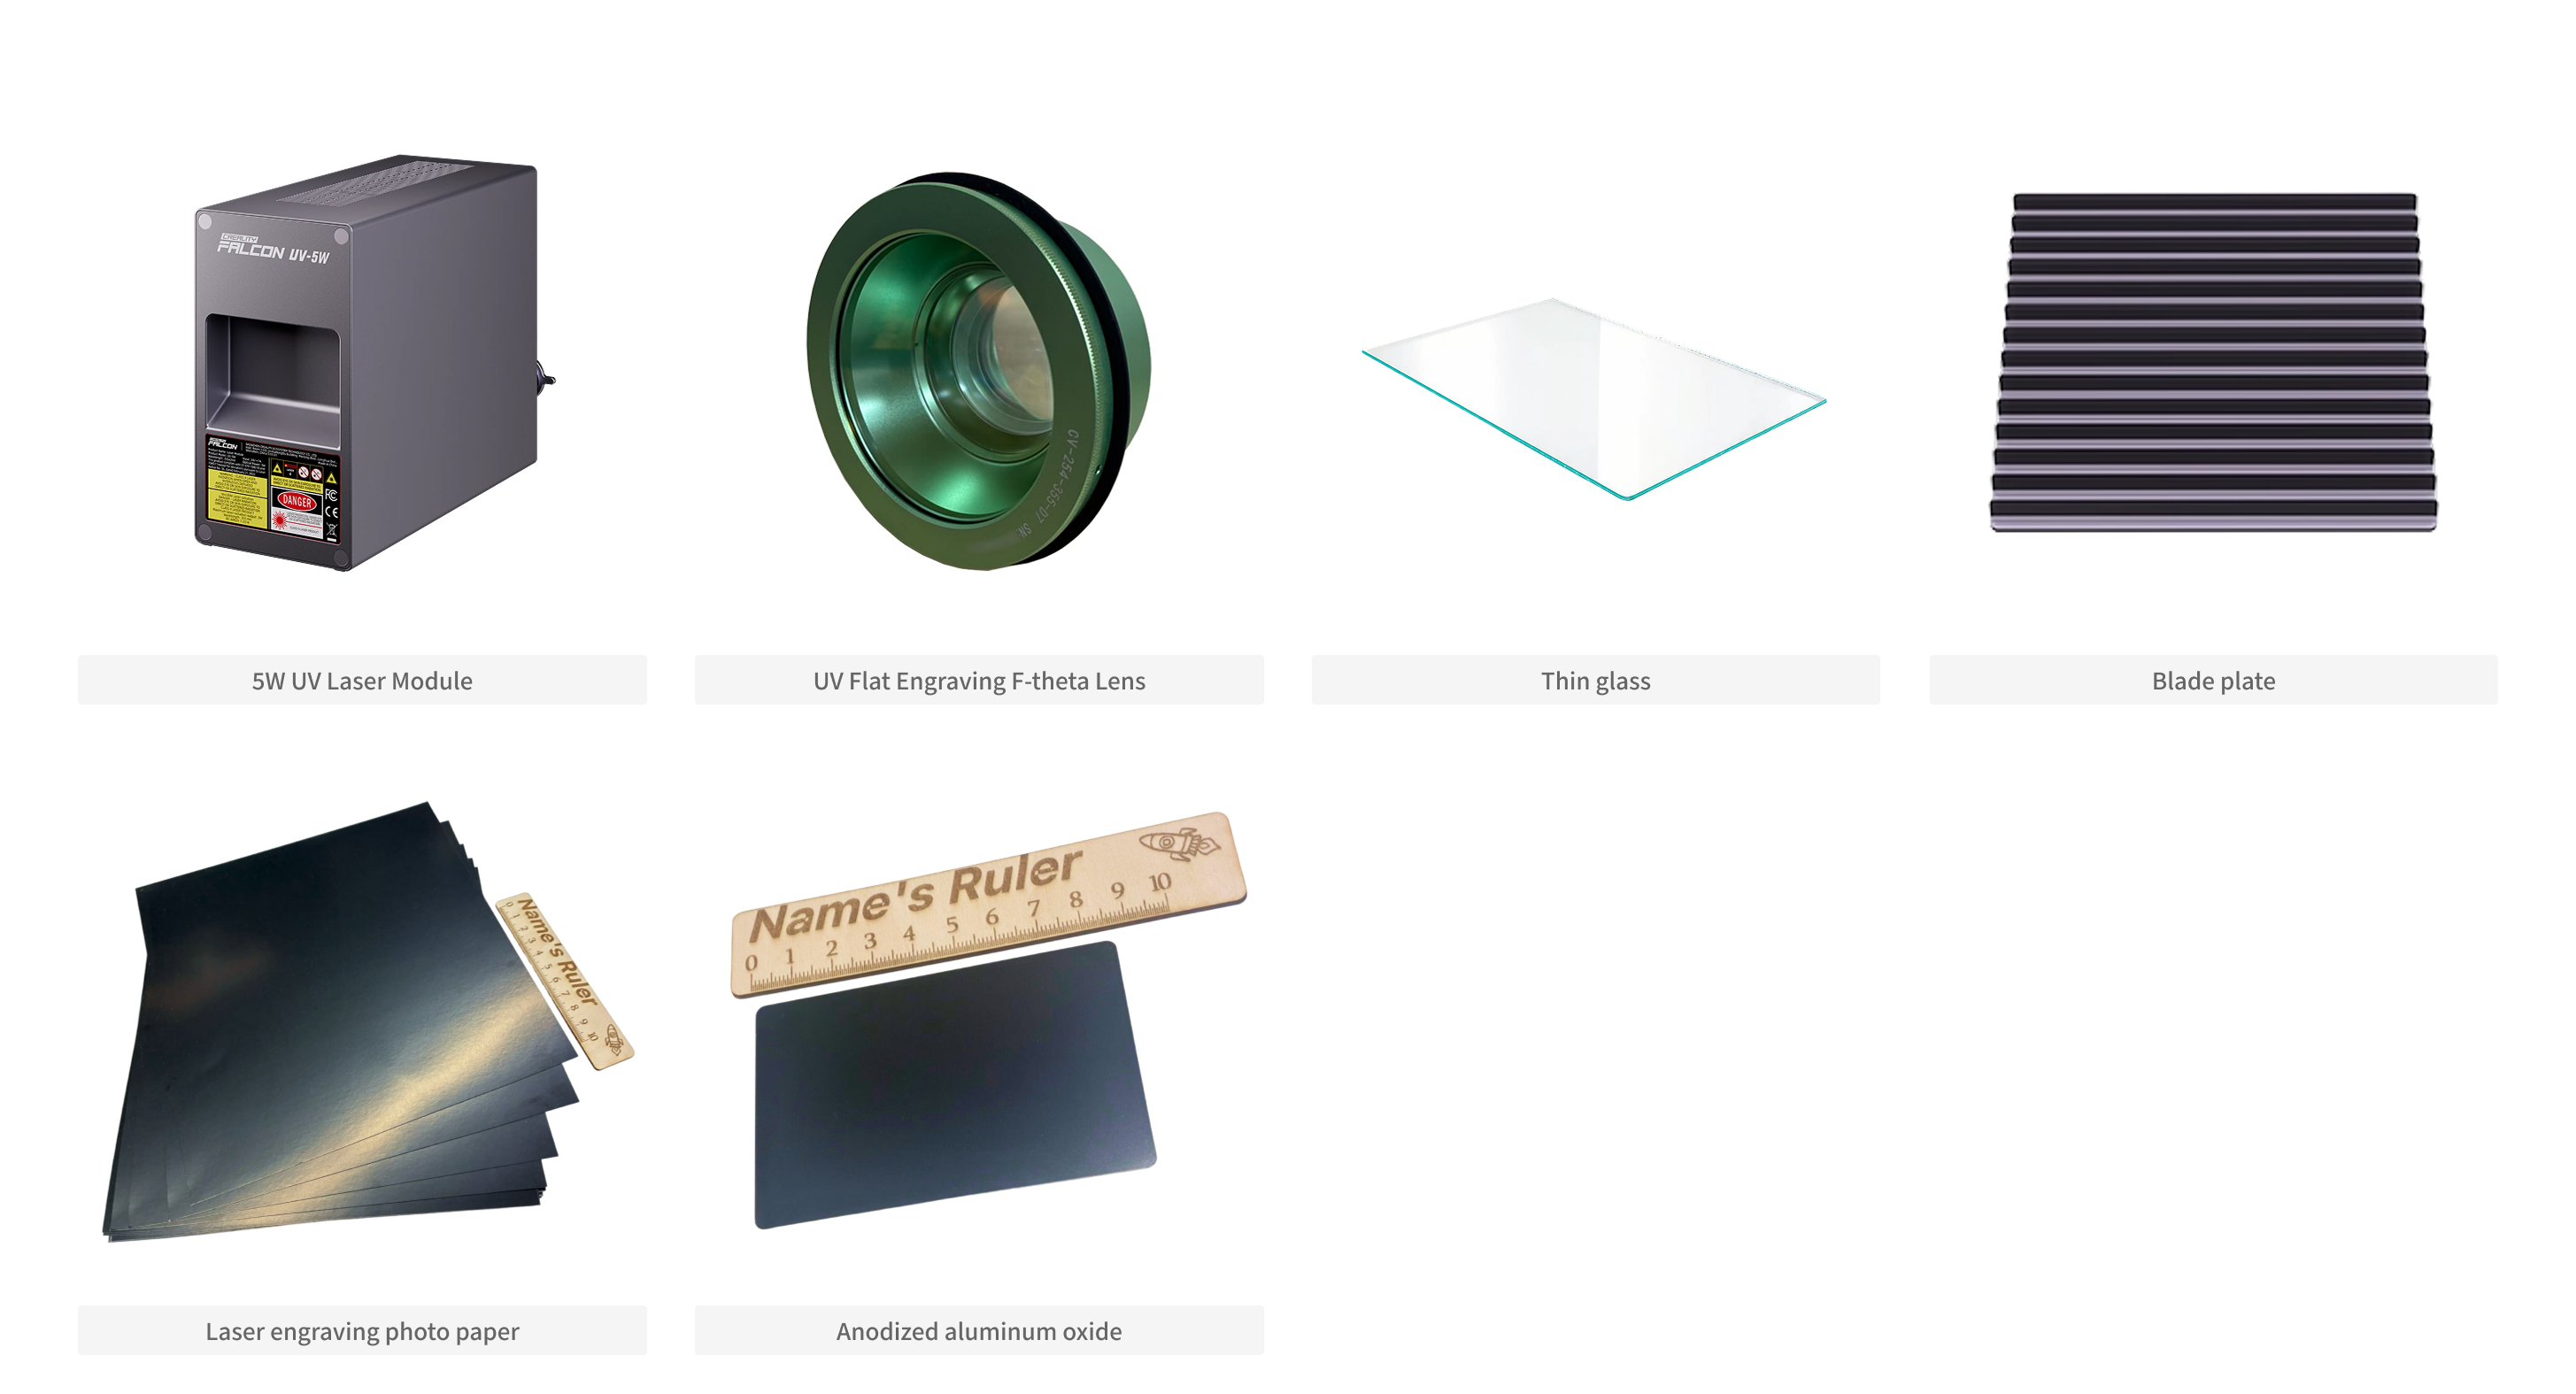
The device is powered on, and the 5W UV laser module and the UV flat engraving F-theta lens (green) have been correctly installed.If it does not match or the module needs to be replaced, please first check the tutorial for replacing the moduleEnsure that the firmware has been upgraded to the latest version (V1.1.29 or higher)
¶ (2)Software Installation & Engraving Parameter Preparation
Falcon Design Space Software download address , it is recommended to update to version V1.9.5+ ,Get Parameters fromCorresponding parameter library
Falcon Design Space (FDS) Example Files: (Provided with the Tutorial)
Graphic Fill Engraving Bitmap Glass Engraving Text Character Glass Engraving
¶ (3)Install Laser Module and F-theta Lens
Install the UV laser and the flat engraving F-theta lens (green), ensuring they are securely installed and properly connected.
- Link to the Operation Guide for Replacing the Laser Module: Replace laser module Operation Guide
- Link to the Operation Guide for Replacing the F-theta lens: Replace F-theta lens Operation Guide
¶ (4)Calibration
- Kind reminder: Please turn off the air purifier during the calibration process to avoid strong wind interference causing the calibration card to shift position.
Complete the following three calibrations in sequence:(1) Laser Module Calibration (2) Auto Focus Calibration (Skippable) (3) F-theta lens Calibration
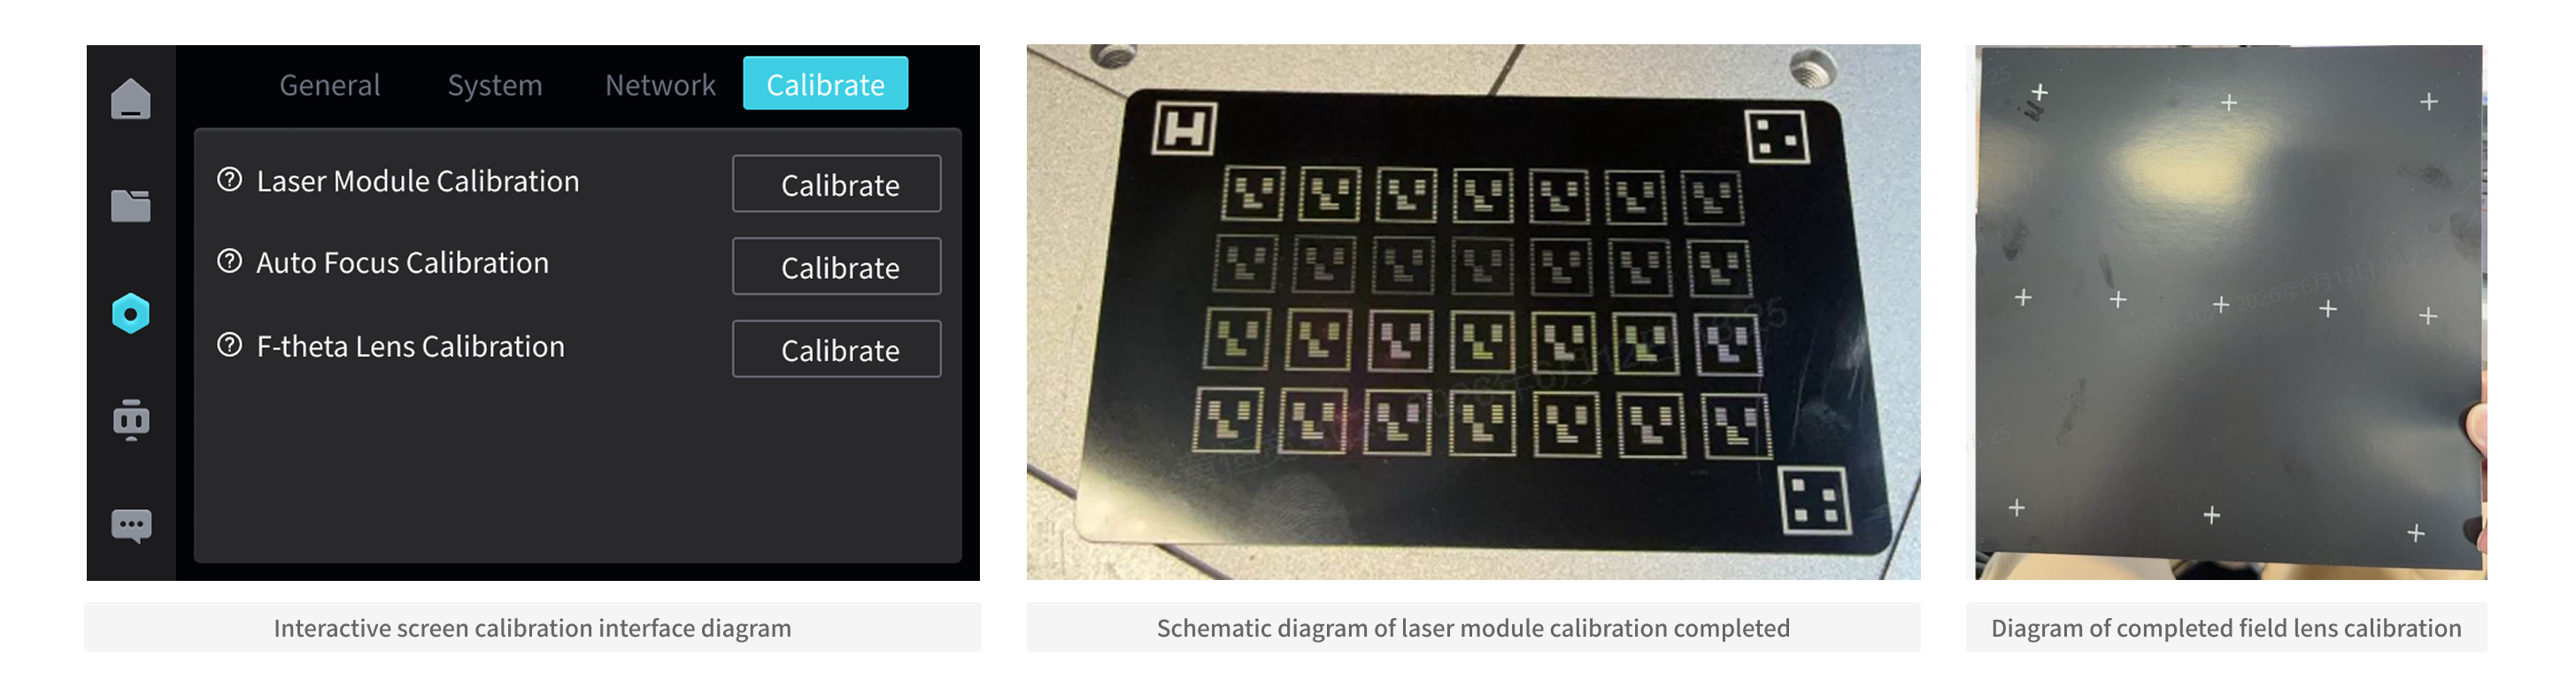
Link to detailed calibration tutorial:Falcon T1 UV Laser Module + UV Flat Engraving F-theta Lens (green) Specialized Calibration Guide
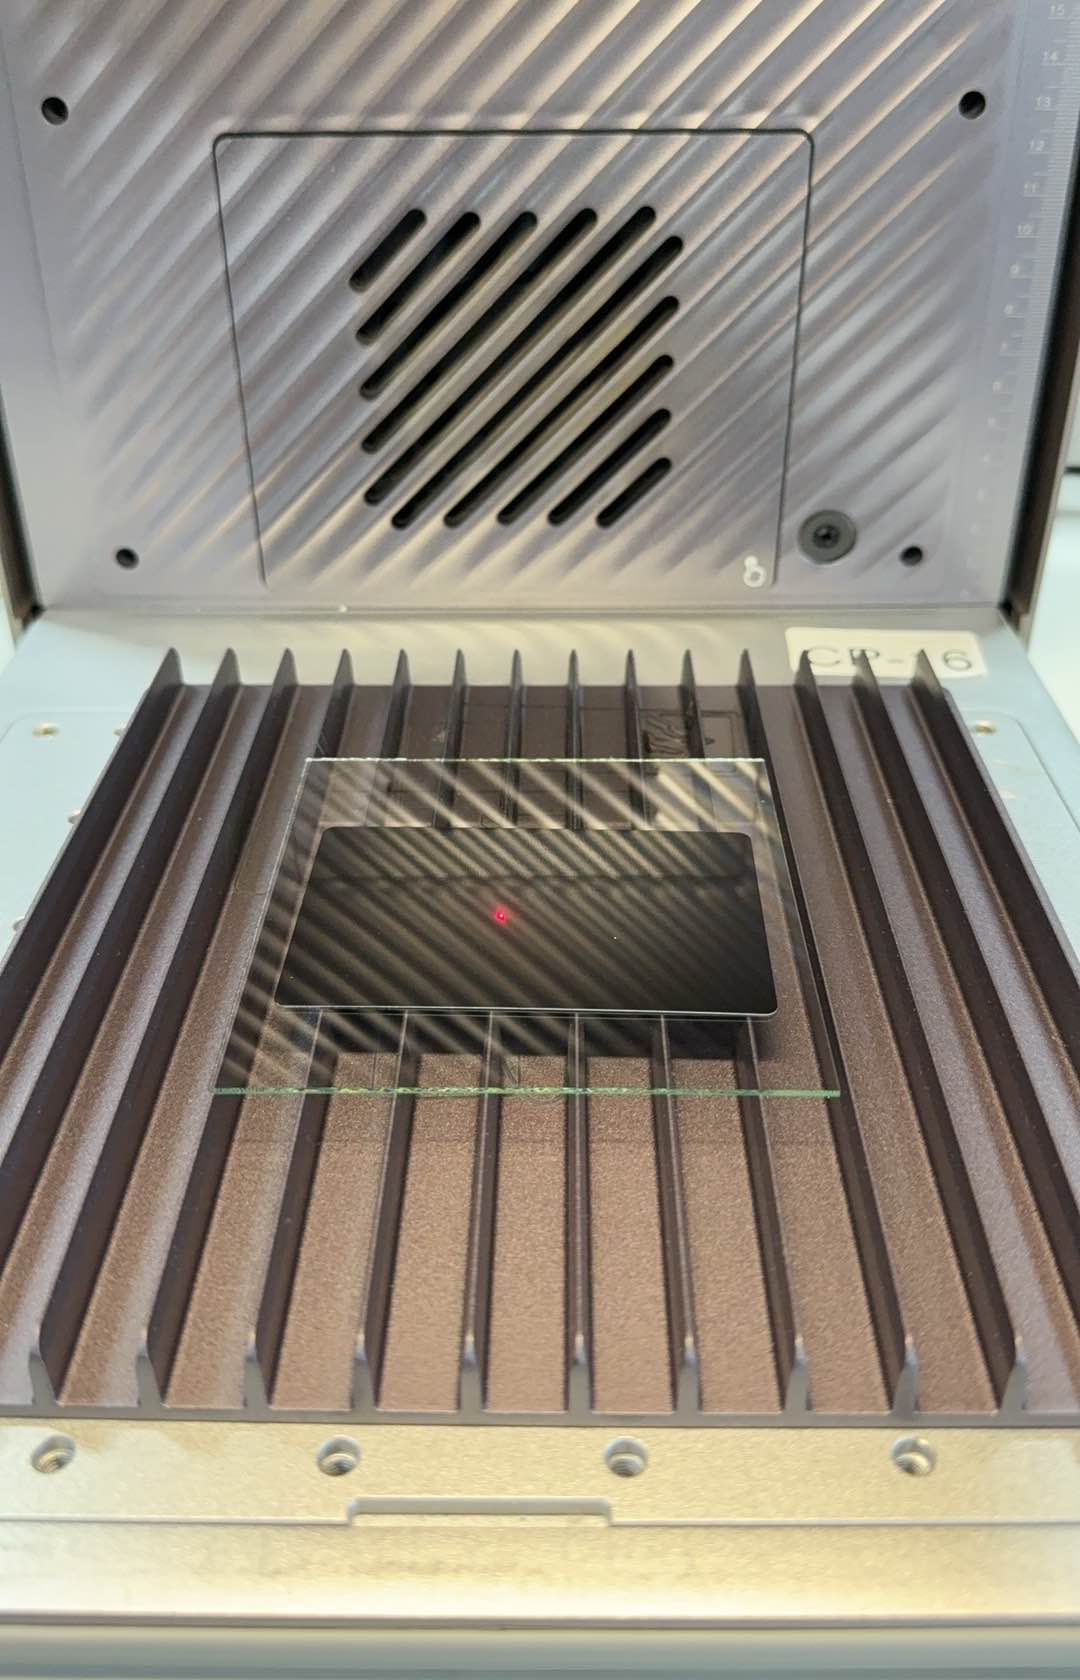
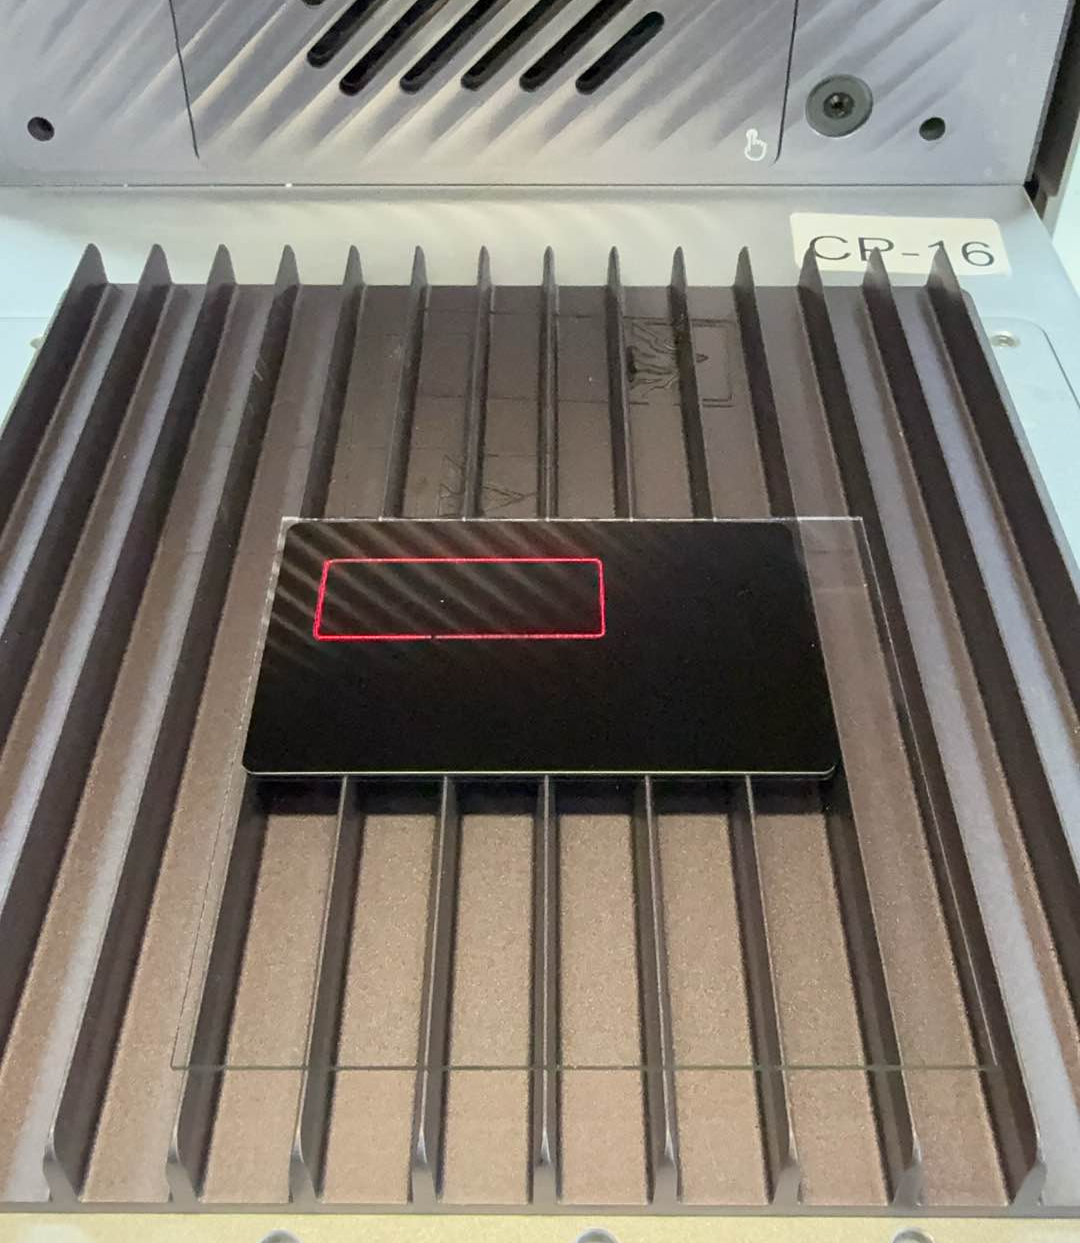
¶ 2.Place Accessories and Materials
(1) Place the blade strip plate on the workbench.(2) Place the thin glass sheet at the center of the engraving area.
Since glass is light-transmissive, an anodized aluminum sheet shall be affixed to the glass surface for autofocus positioning.
¶ Focus adjustment
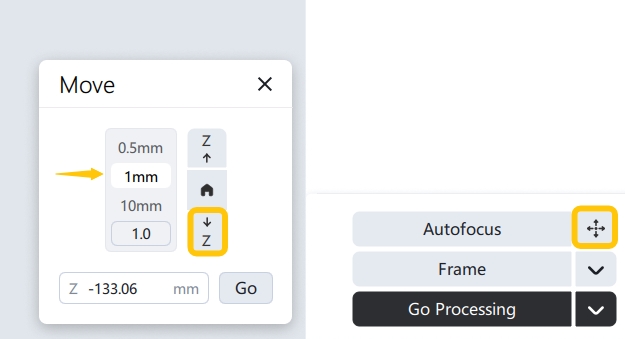
(1) Click on "Autofocus" in Falcon Design Space (FDS) software.
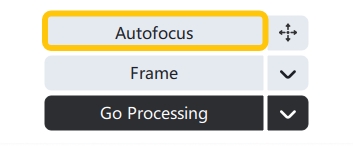
(2) After autofocus is completed, manually move the Z-axis downward by 1-2mm (this step is for fine-tuning the focus to ensure accurate engraving depth).
¶ Edit the file, align the border, and position alignment
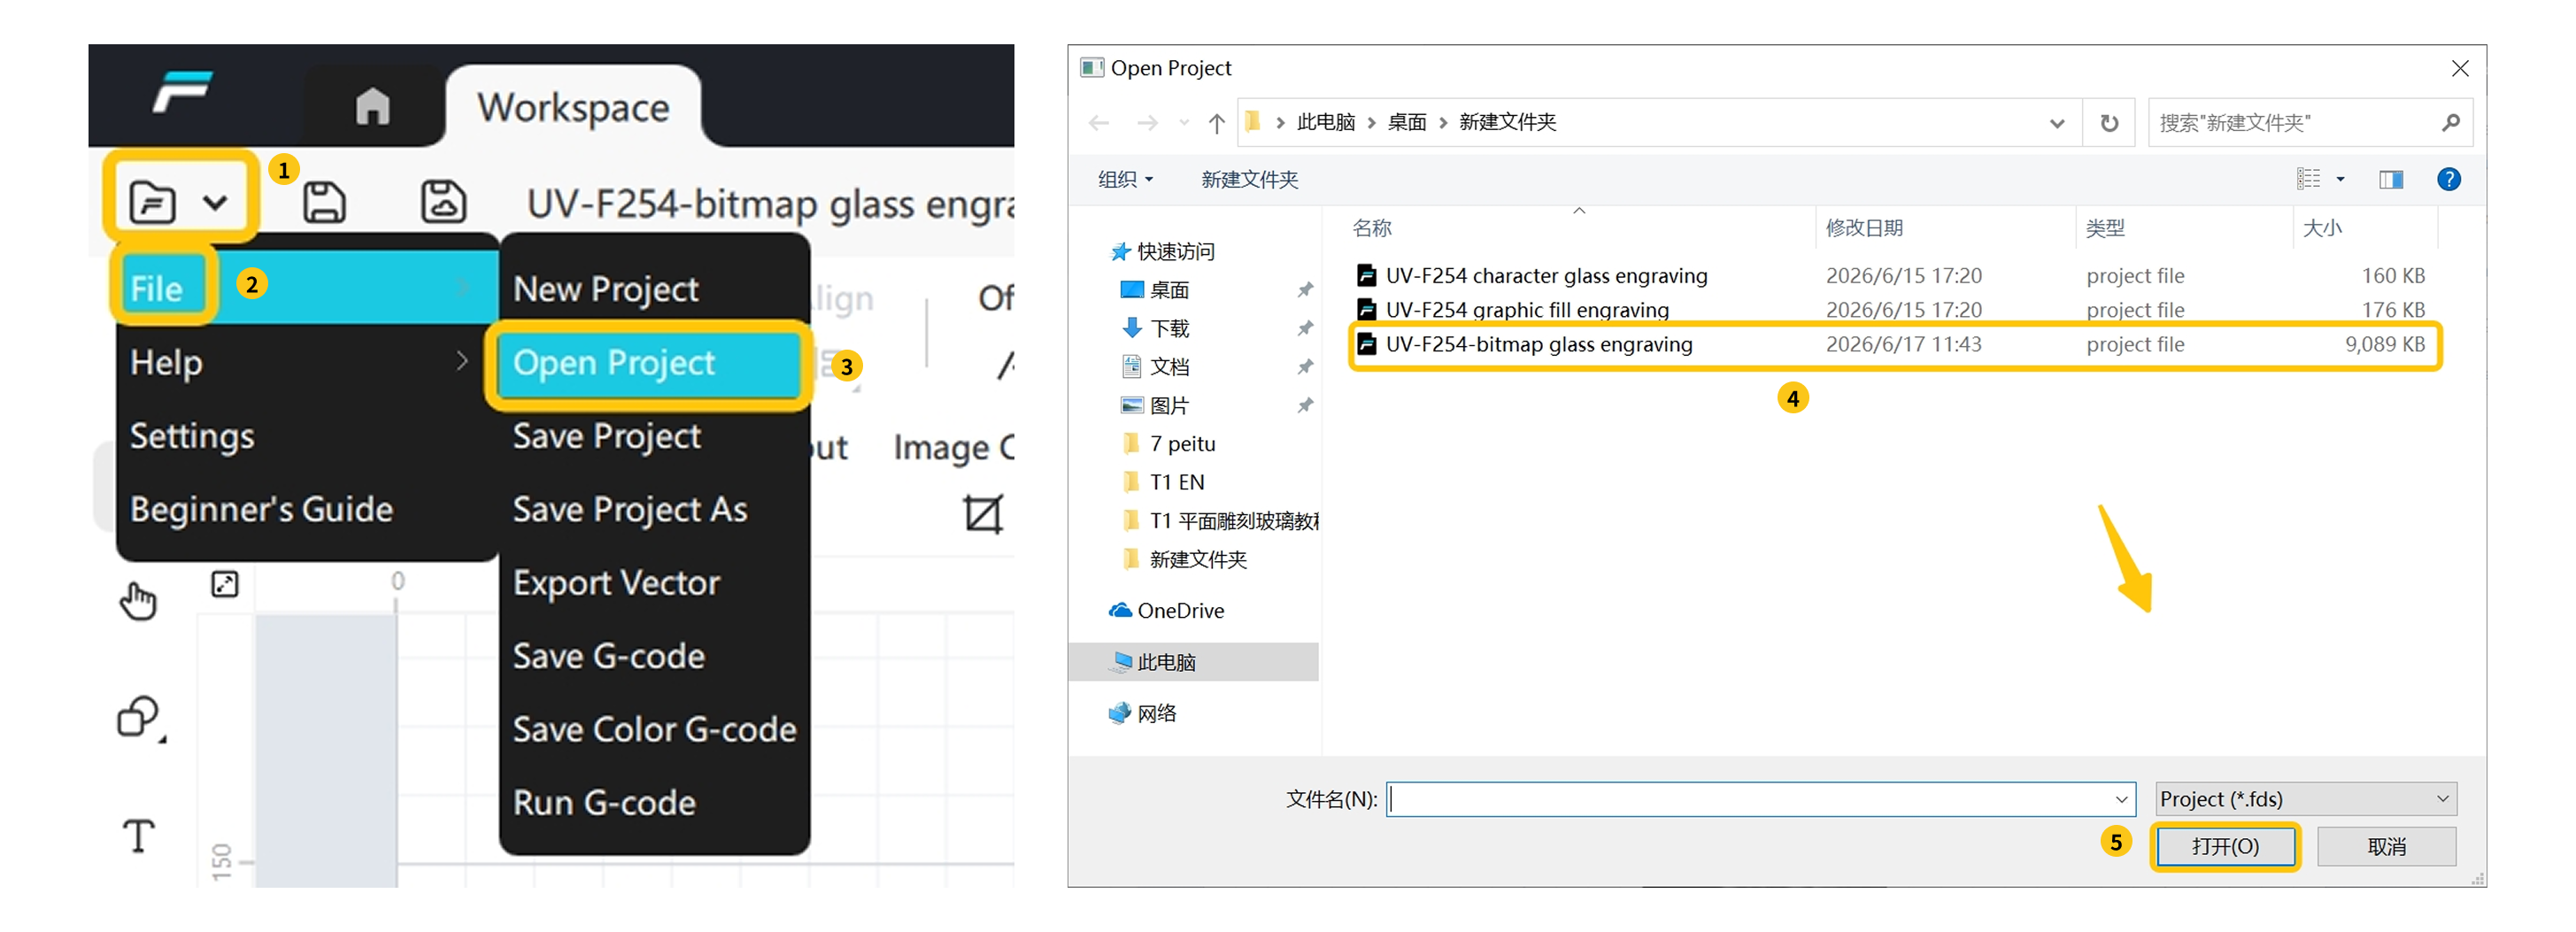
(1) Open and edit the file to be engraved in Falcon Design Space (FDS).
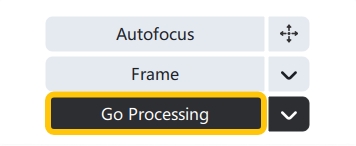
(2) Click "Frame" , and confirm that the engraving area is aligned with the glass position.
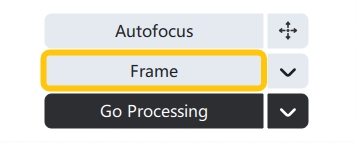
(3) After alignment is completed, click "Stop Framing" .
(4) Remove the anodized aluminum sheet on the surface (used only for focusing and must be removed during engraving).
¶ 3.Start processing
After confirming that the above steps are correct, click "Go Processing" and wait for the engraving to complete.
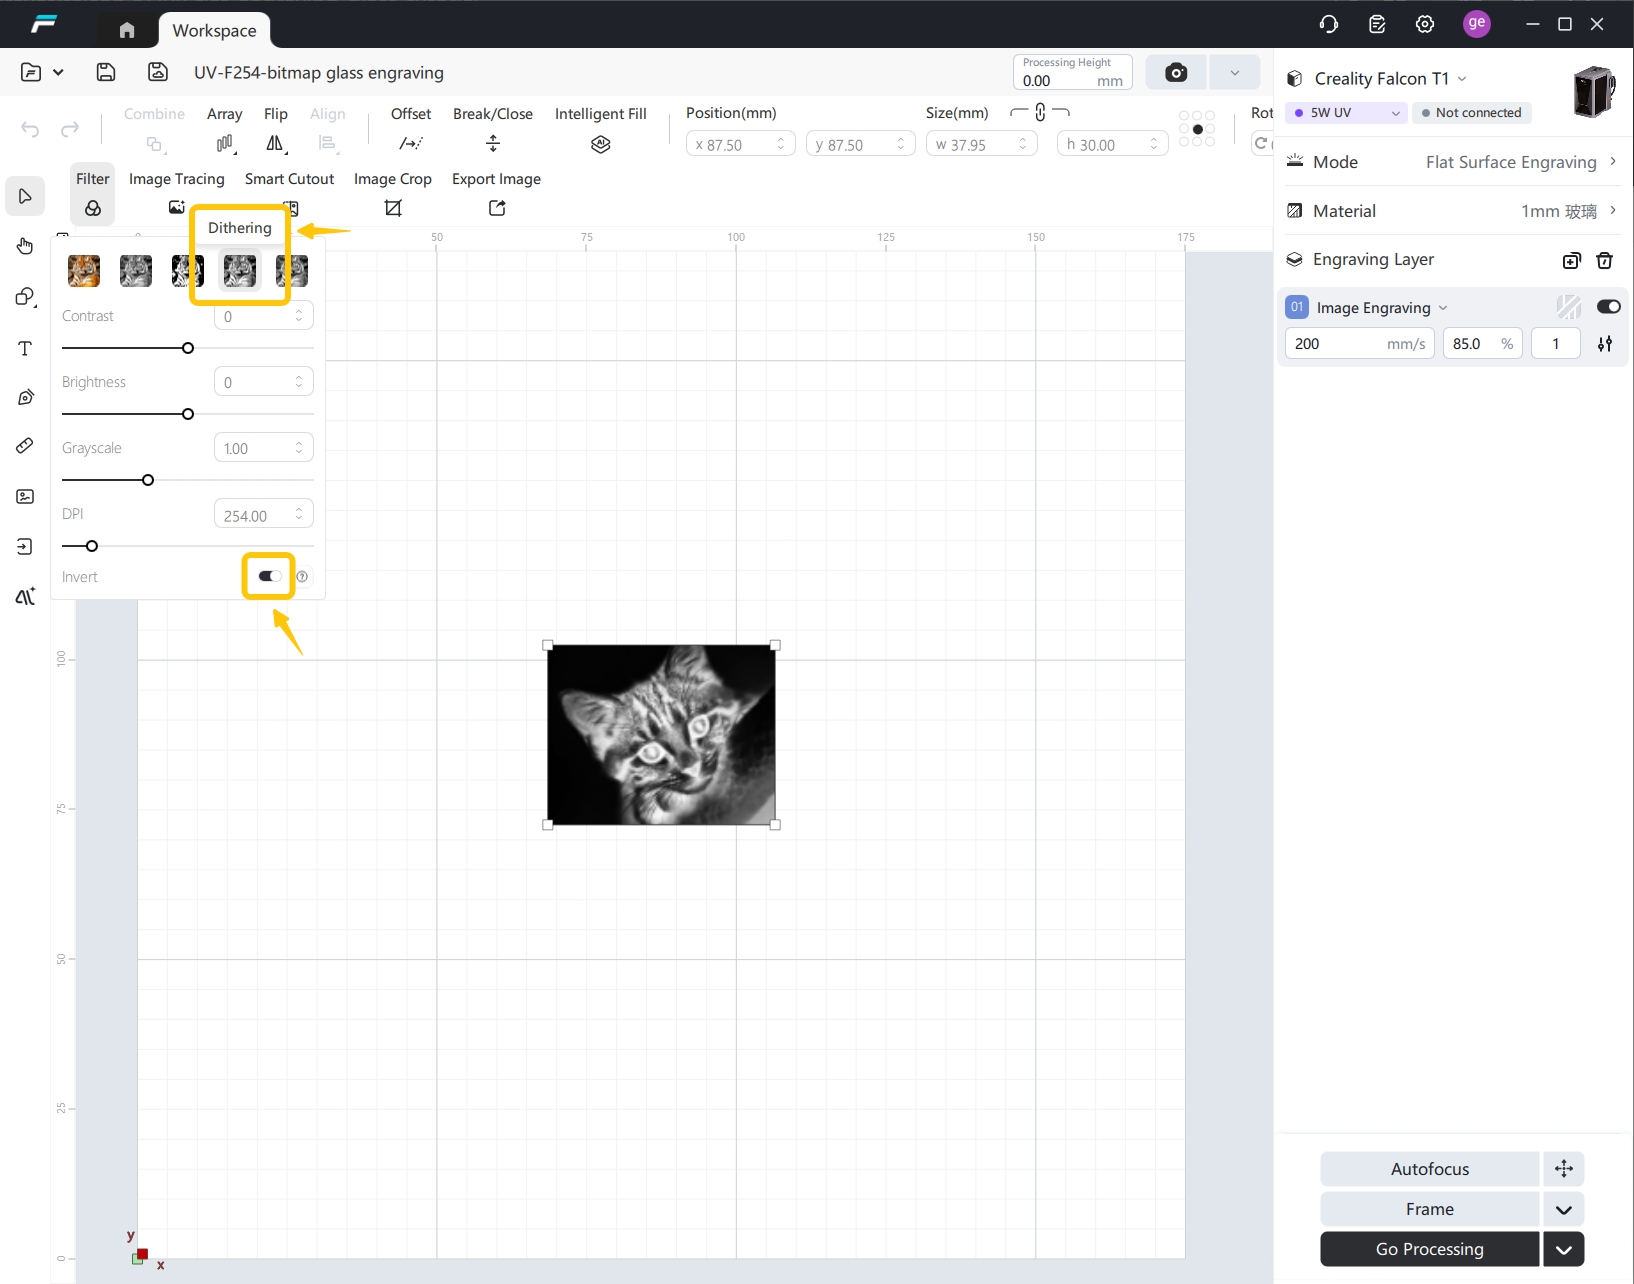
¶ 1.Glass Engraving Bitmap
Must select Dithering filters and check Invert Colors
¶ 2. Focus Finding Tips for Large-Format Glass Engraving
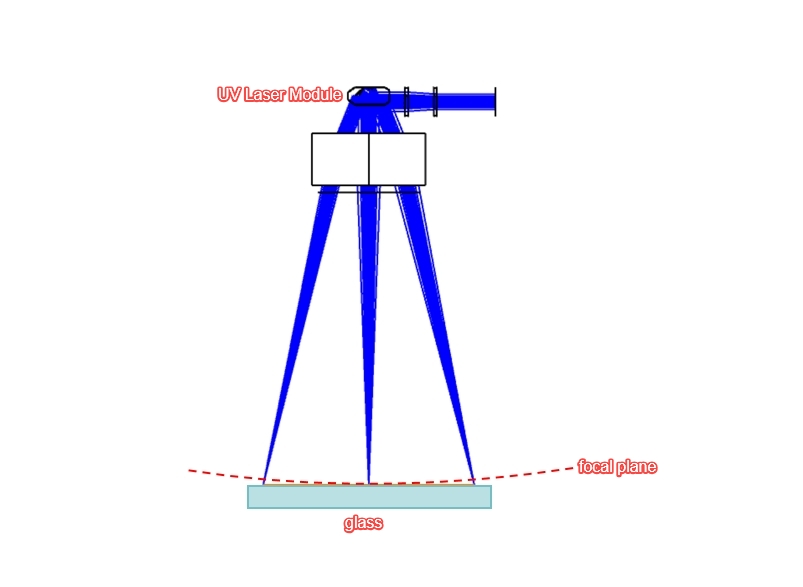
Glass is a transparent material and highly sensitive to focus during engraving. To focus accurately, place an opaque aluminum sheet or other opaque material on the glass surface for auxiliary focusing.F-theta scan lenses feature field curvature on their focal plane. For optimal engraving results, perform engraving within the central area of the working field (<100 mm). If engraving beyond the 100 mm range yields poor results, lower the Z-axis height incrementally (1 mm per adjustment) to test for the ideal focus position. The total downward offset of the focus will generally not exceed 4 mm.
¶ 4.Verification
After the carving is completed, please verify the results according to the following criteria:
(1) Pattern integrity: The engraved pattern is consistent with the design document, with no defects or offsets.
(2) Clarity: Lines are clearly distinguishable, and the canary release transition in the bitmap area is uniform.
(3) Surface condition: The glass surface has no cracks or abnormal ablation marks.
If the carving effect is not satisfactory, please refer to the following common troubleshooting directions:
| Phenomenon | Possible Reasons | Recommended handling |
| Pattern Offset | The walking frame is misaligned or the workpiece moves during the machining process | Realign and secure the workpiece |
| Shallow engraving | Z-axis has not been manually adjusted down by 1mm | Manually lower 1mm after confirming focus |
| Bitmap effect is abnormal | Jitter filter not selected or invert colors not checked | Check bitmap parameter settings |
| Pattern Blurred | F-theta lens calibration is inaccurate | Reperform F-theta lens calibration |
¶ 5. Troubleshooting Guide for Glass Engraving
Before surface engraving, confirm that you have installed an F-theta lens dedicated to surface engraving.
Place the material as close to the center of the worktable as possible and ensure its surface is flat.
Set processing parameters according to the standard recommended values of the machine for superior engraving results.
Glass requires high focusing precision. Fine-tune the focus to achieve accurate alignment.
Tempered glass and laminated glass are not suitable for engraving. If ordinary glass still delivers unsatisfactory results, purchase official test glass samples.
Tip: Perform trial engraving on scrap material before formal processing to reduce defective products.