¶ Falcon T1 3D Relief Tutorial
¶ 1. Prepare the depth map
1. What is a depth map?
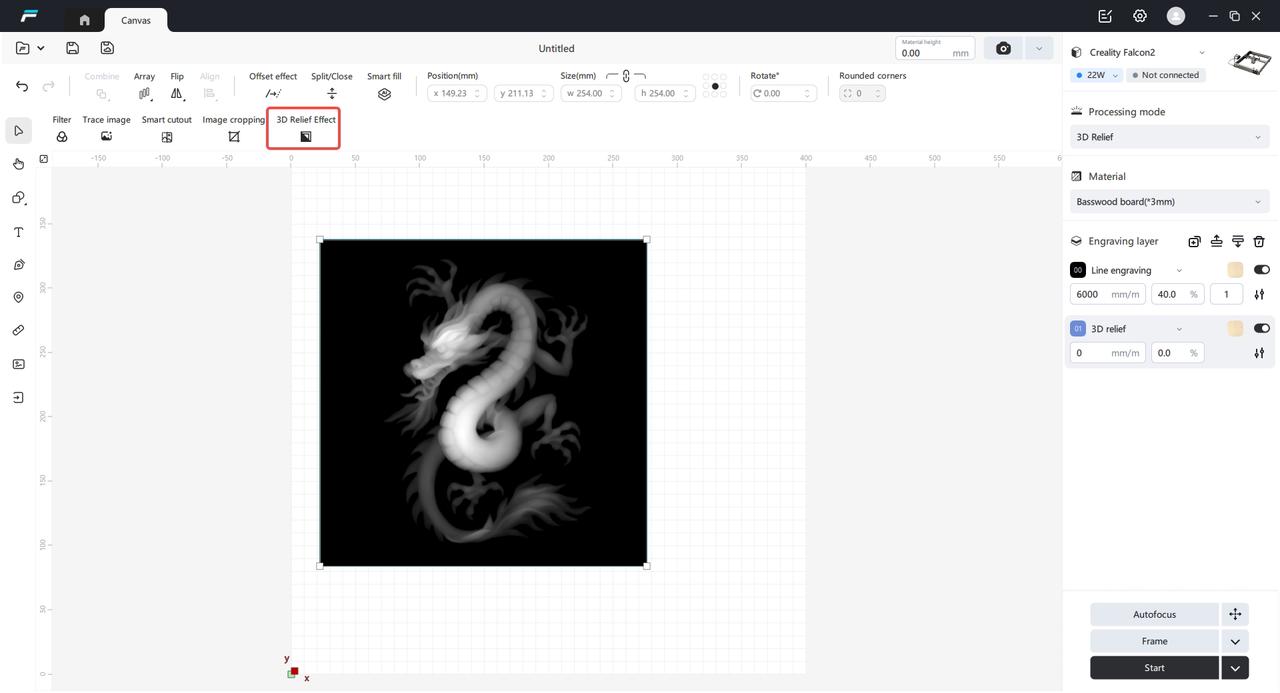
Relief processing requires a depth map as the processing object. The following image is a depth map, where each pixel value in the image represents the distance between a point in the scene and a certain viewpoint. White pixels represent the part of the scene closest to the viewpoint (white is the raised part), and black pixels represent the farthest part of the scene (black is the recessed part)

2. Create a depth map
1) AI Filter to Generate Depth Map: Enter the home page, click on the AI Filter, upload an image that visually requires a 3D effect, select the embossed depth map filter, and click Generate

2) Import a 3D file to generate a depth map: Select the 3D relief processing mode, click the import button, and use the file explorer to select a 3D format file


¶ 2. How to Emboss
1. The principle of relief
The principle of laser engraving relief is mainly based on the interaction between laser and materials and precise control technology, which is specifically as follows:
a) High-energy focusing: Laser is a beam with high energy density. Through an optical focusing system, it can be focused onto a very small area on the material surface, resulting in an extremely high energy density in this area and causing an instantaneous temperature increase.
b) Material Vaporization and Ablation: After the material absorbs laser energy, the local temperature rapidly rises above the boiling point, causing the material to vaporize or decompose, and it is removed in the form of steam, tiny particles, etc., forming an ablation pit.
c) Precise control of ablation amount: By controlling parameters such as the pulse energy, pulse width, repetition frequency, and action time of the laser, precisely control the ablation amount of each tiny area on the material surface.
d) Selection of relief light sources: It is recommended to use Fiber for metal or stone slab relief, Diode will cause charring on wooden boards during relief, and UV can perform relief on wooden boards without charring.
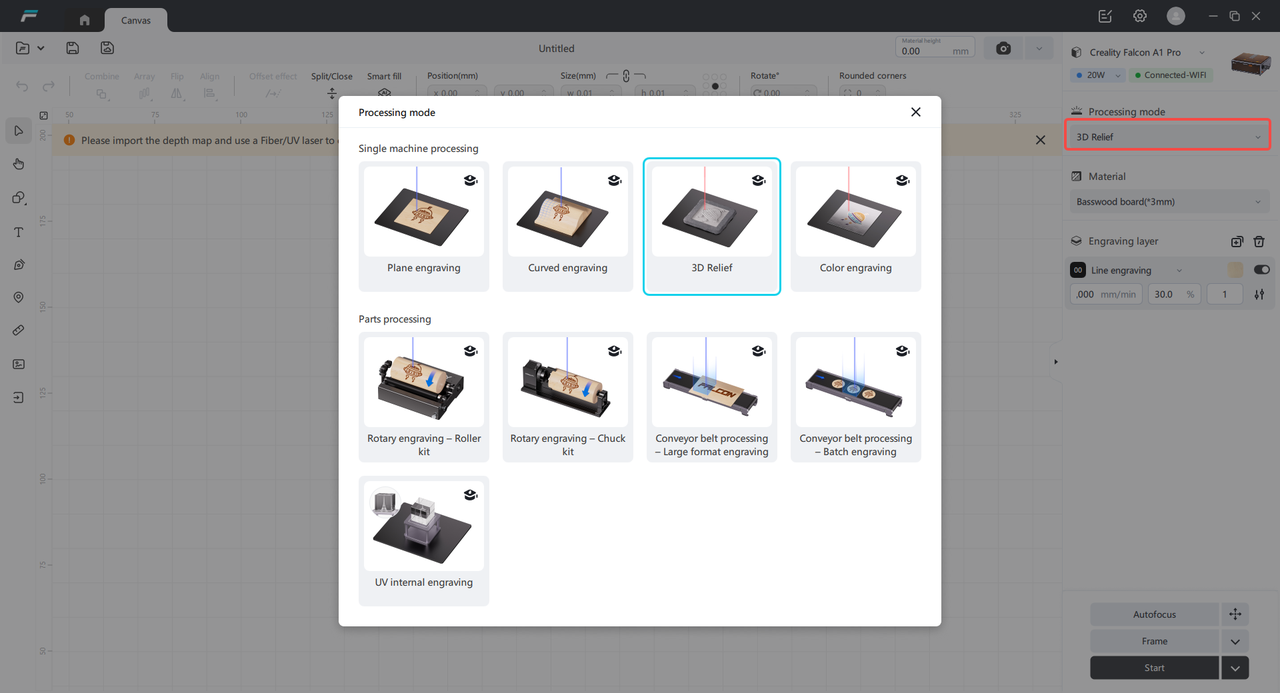
2. Select the relief processing mode and import the depth map
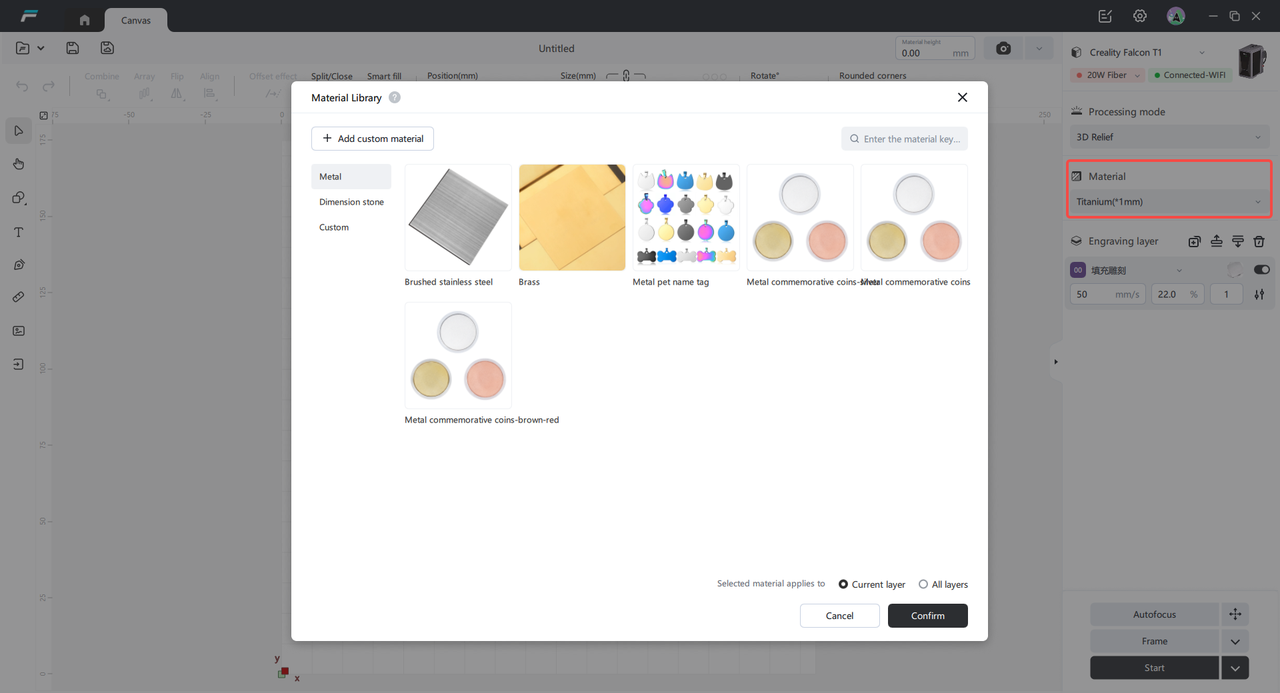
3. Select relief materials
The material library preloads materials that support relief for the current light source. After selecting a material, the relief parameters will be automatically filled.
4. Relief Parameter Description
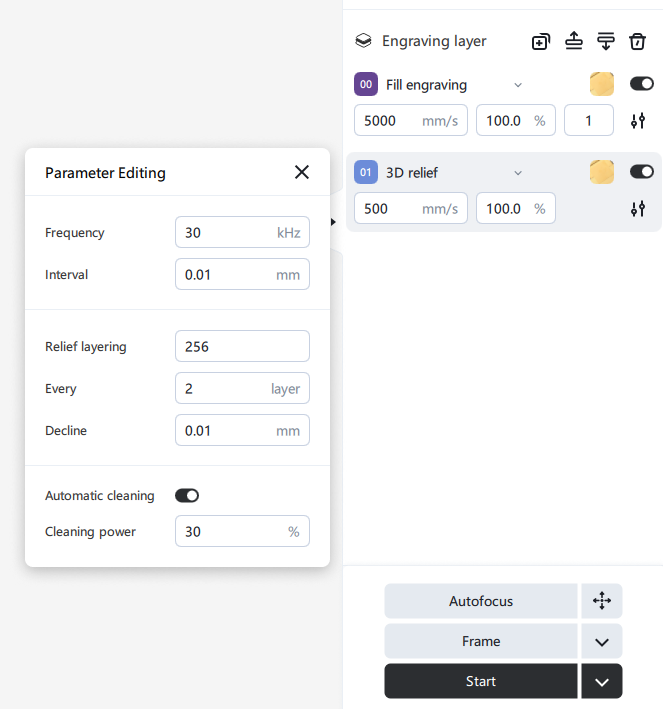
Power: The greater the power, the deeper the carving depth.
Speed: During processing, the moving speed of the laser spot along the processing path. The smaller the speed, the longer the laser spot stays on the material, and the deeper the engraving depth.
Frequency: Frequency refers to the number of times a fiber infrared laser emits laser light per second. The higher the frequency, the faster the laser emission speed, but the lower the peak power.
Spacing: The number of engraved lines per centimeter. The smaller the spacing, the higher the clarity of the image, but the processing time required will also increase.
Number of layers: The more layers, the deeper the carving depth, with a value range of [1-512].
Descend N mm every N layers: The automatic descent of the Z-axis helps with laser focusing, ensuring that the laser acts on the focal point with the strongest energy.
Automatic Cleaning: After input, it will automatically clean the full width once every 5 layers to prevent metal oxidation and blackening. It is recommended to fill in for metal material reliefs.
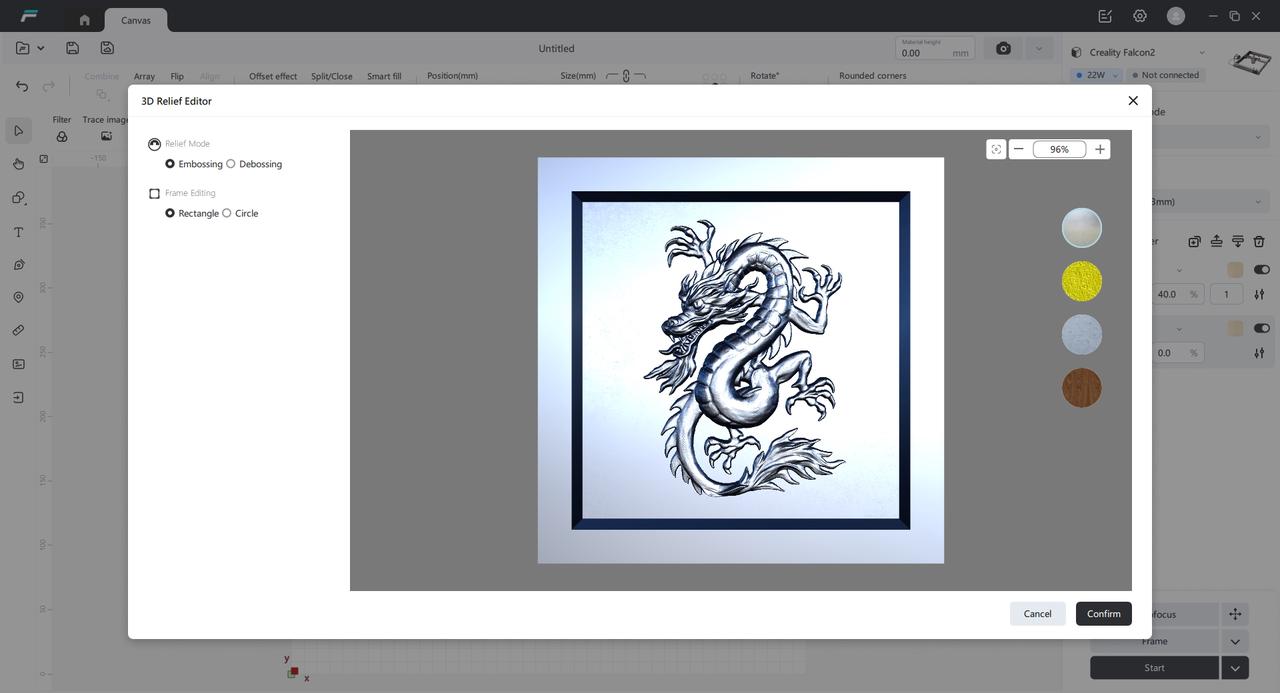
5. Preview the embossed effect
Select the depth map, click the "3D Relief Effect" button in the image editor to open the relief effect editor. Inside the pop-up window, you can preview the relief effect, set embossed or engraved relief, and modify the outer frame shape.
6. Start relief processing
Click Auto Focus, Trace Border, Remove Processing, preview the engraving area, and then start processing
¶ 3. Precautions for Relief
1. Relief carving has the risk of cutting through, so it is recommended to reduce the number of carving layers for thinner materials
2. Relief carving generates a large amount of dust. Please clean the fan and machine promptly after carving is completed.
3. For tasks involving lightweight materials or long-duration relief work, it is recommended to secure the materials to prevent them from moving.
4. The generation of Gcode for relief images and the carving process take a long time. It is recommended to reduce the size of the image for carving.