¶ Applicable to Falcon A1/Falcon A1 PRO
¶ Tools Required
Hexagonal screwdriver (1.5mm, 2mm, 2.5mm, 3mm specifications)
New upper door panel assembly
Gloves (optional, to prevent hand cuts)
Tweezers (for organizing cables)
¶ Safety Precautions
Before operation, disconnect the device power and unplug the power cord.
Handle with care to prevent damage to cables or circuits.
¶ Operation Steps
¶ Step 1: Remove the Old Door Panel
¶ Disconnect the camera cable
- Open the camera protection cover.
- Locate the camera module cable, press the buckles on both sides of the cable socket, and slowly pull out the cable.

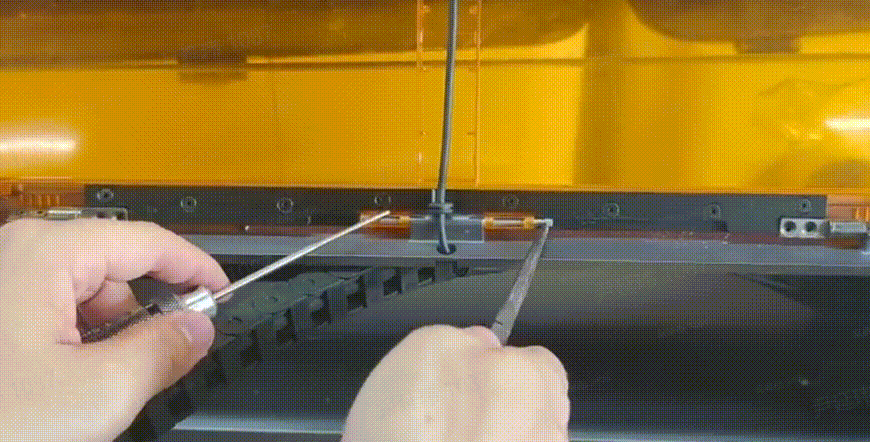
¶ Remove Upper Door Panel Fixing Screws and Hinge
- Use Phillips screwdriver to remove the fixing screws (usually 4-8 pieces) of the upper door panel, keep the screws safe.
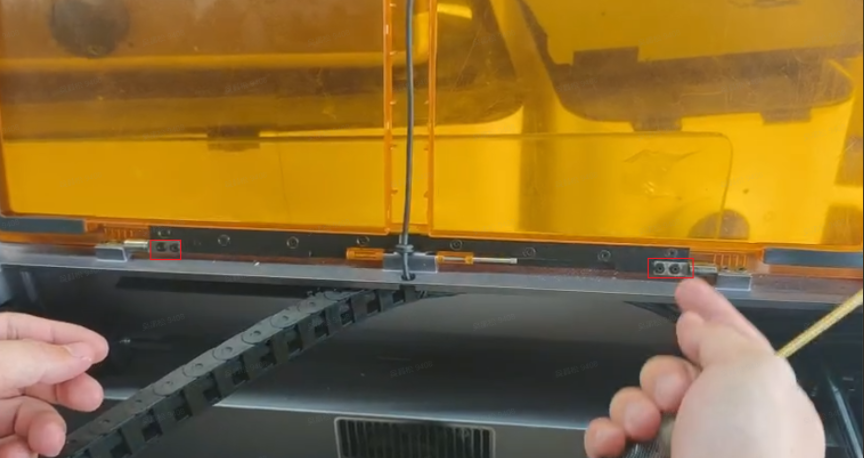
- Use a long-handle screwdriver to push out the "hinge" connecting the upper door panel and rear frame, then remove the hinge by hand or pliers. (Note: Some device hinges are difficult to remove, you can use pliers to grip out slowly)


- Gently lift the door panel to expose internal cables.
¶ Remove Old Door Panel
- Completely remove the old door panel, check if there are any residual adhesive pads or screws to clean.
¶ Step 2: Install New Door Panel
¶ Locate New Door Panel

Remove and transfer the upper buffer strips, left and right buffer strips, left and right bottom reinforcement parts, and camera module from the old door panel to the new one.
Align the new door panel with the upper mounting slot of the machine, ensure screw holes align.
Note: There are magnets at the positions marked by black arrows, please contact customer service (cs@creality.com) for new magnets.
¶ Connect Camera Module
Insert the camera cable from the new door panel into the corresponding socket on the camera PCBA board (be careful to the direction, don't reverse the terminals), secure the camera protection cover.
¶ Secure Door Panel
Initially tighten all screws with screwdriver (don't lock them). Adjust door panel position to level, then fully tighten screws.
¶ Step 3: Function Testing
¶ Power Test
- Reconnect power and turn on.
- Enter device settings, check if camera is recognized (if live preview is supported, observe if image is clear).
- Test if laser head moves smoothly without collision.
¶ Troubleshooting for Common Issues
Camera Not Working: Check if cable is reversed or loose, if so, reinstall the cable.
Door Switch Detection: Ensure upper door closing detection triggers normally. If not triggering, check if magnets are installed correctly.
Uneven Door Panel: Adjust screw tightness or check if door panel is warped. (Adjust the tightness of 4 screws at positions shown in the image below)
After completing these steps, the device can be used normally.
¶ Friendly reminder
If you still haven't resolved the issue after following the steps in this document, or if you encounter any difficulties during the process, you can click the right corner of the wiki page online support to contact our after-sales team for more help.