¶ ⚠️ Important Note: This laser module is NOT suitable for engraving mirror materials (like polished metal, mirror acrylic etc.)!
¶ Phenomenon Description
After initiating the "engraving" command: homing, preview, running engraving, no blue laser from the laser module.
 |
 |
|
¶ Cause Analysis
Loose wiring
Safety doors are closed
Memory card or Gcode file is corrupted
Firmware error
The laser module is damaged
Motherboard is damaged
Engraving lenses, mirrors, and reflective materials
¶ Troubleshooting
1. Check if the wiring from motherboard to laser module is loose, reconnect if necessary
2. During the engraving process, ensure that the safety doors (i.e., the front door and top cover of the enclosure) are properly closed. At this point, the power indicator light (green light) on the laser module will turn on.

3. Memory card or Gcode file corruption
3.1 Test if engraving with test file on memory card works normally, test file Gcode downloads as follows
Cura_Engrave & Cut for 10W.gcode
3.2 If memory card test is normal, possible issues with engraver software settings:
Laser power setting: Confirm laser power in software is not zero or too low
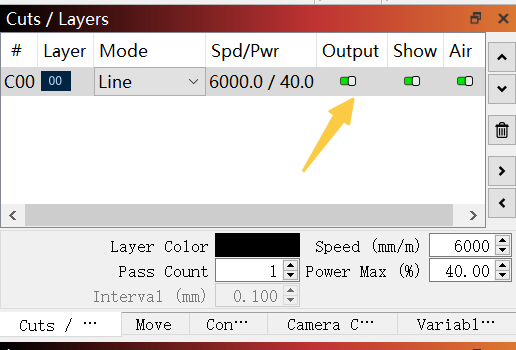
Engraving parameters: Check if engraving speed, power and other parameters are reasonable, verify Cuts/Layers settings are enabled (as shown below)
If memory card test is normal, possible fault with laser module and control board, please contact cs@creality.com.
4. Reflash the motherboard firmware, you can download the file directly.
Motherboard Firmware downloads
5. Check if laser module nozzle and lens are damaged.
6. Check if the control board connection is loose or damaged. (no need to consider if lights are normal).
7. If you have engraved mirror surfaces or reflective materials previously, the laser module may have caused damage.
If the above steps are ineffective, please connect the engraving machine to your computer. Use Lightburn/Falcon Design Space to control "homing" and "engraving," and record a complete video of the "homing-preview-engraving" process and share the bideo to customer service (cs@creality.com). The after-sales technical team will provide you with technical support.