lightBurn Connection Guide
¶ Operating Steps
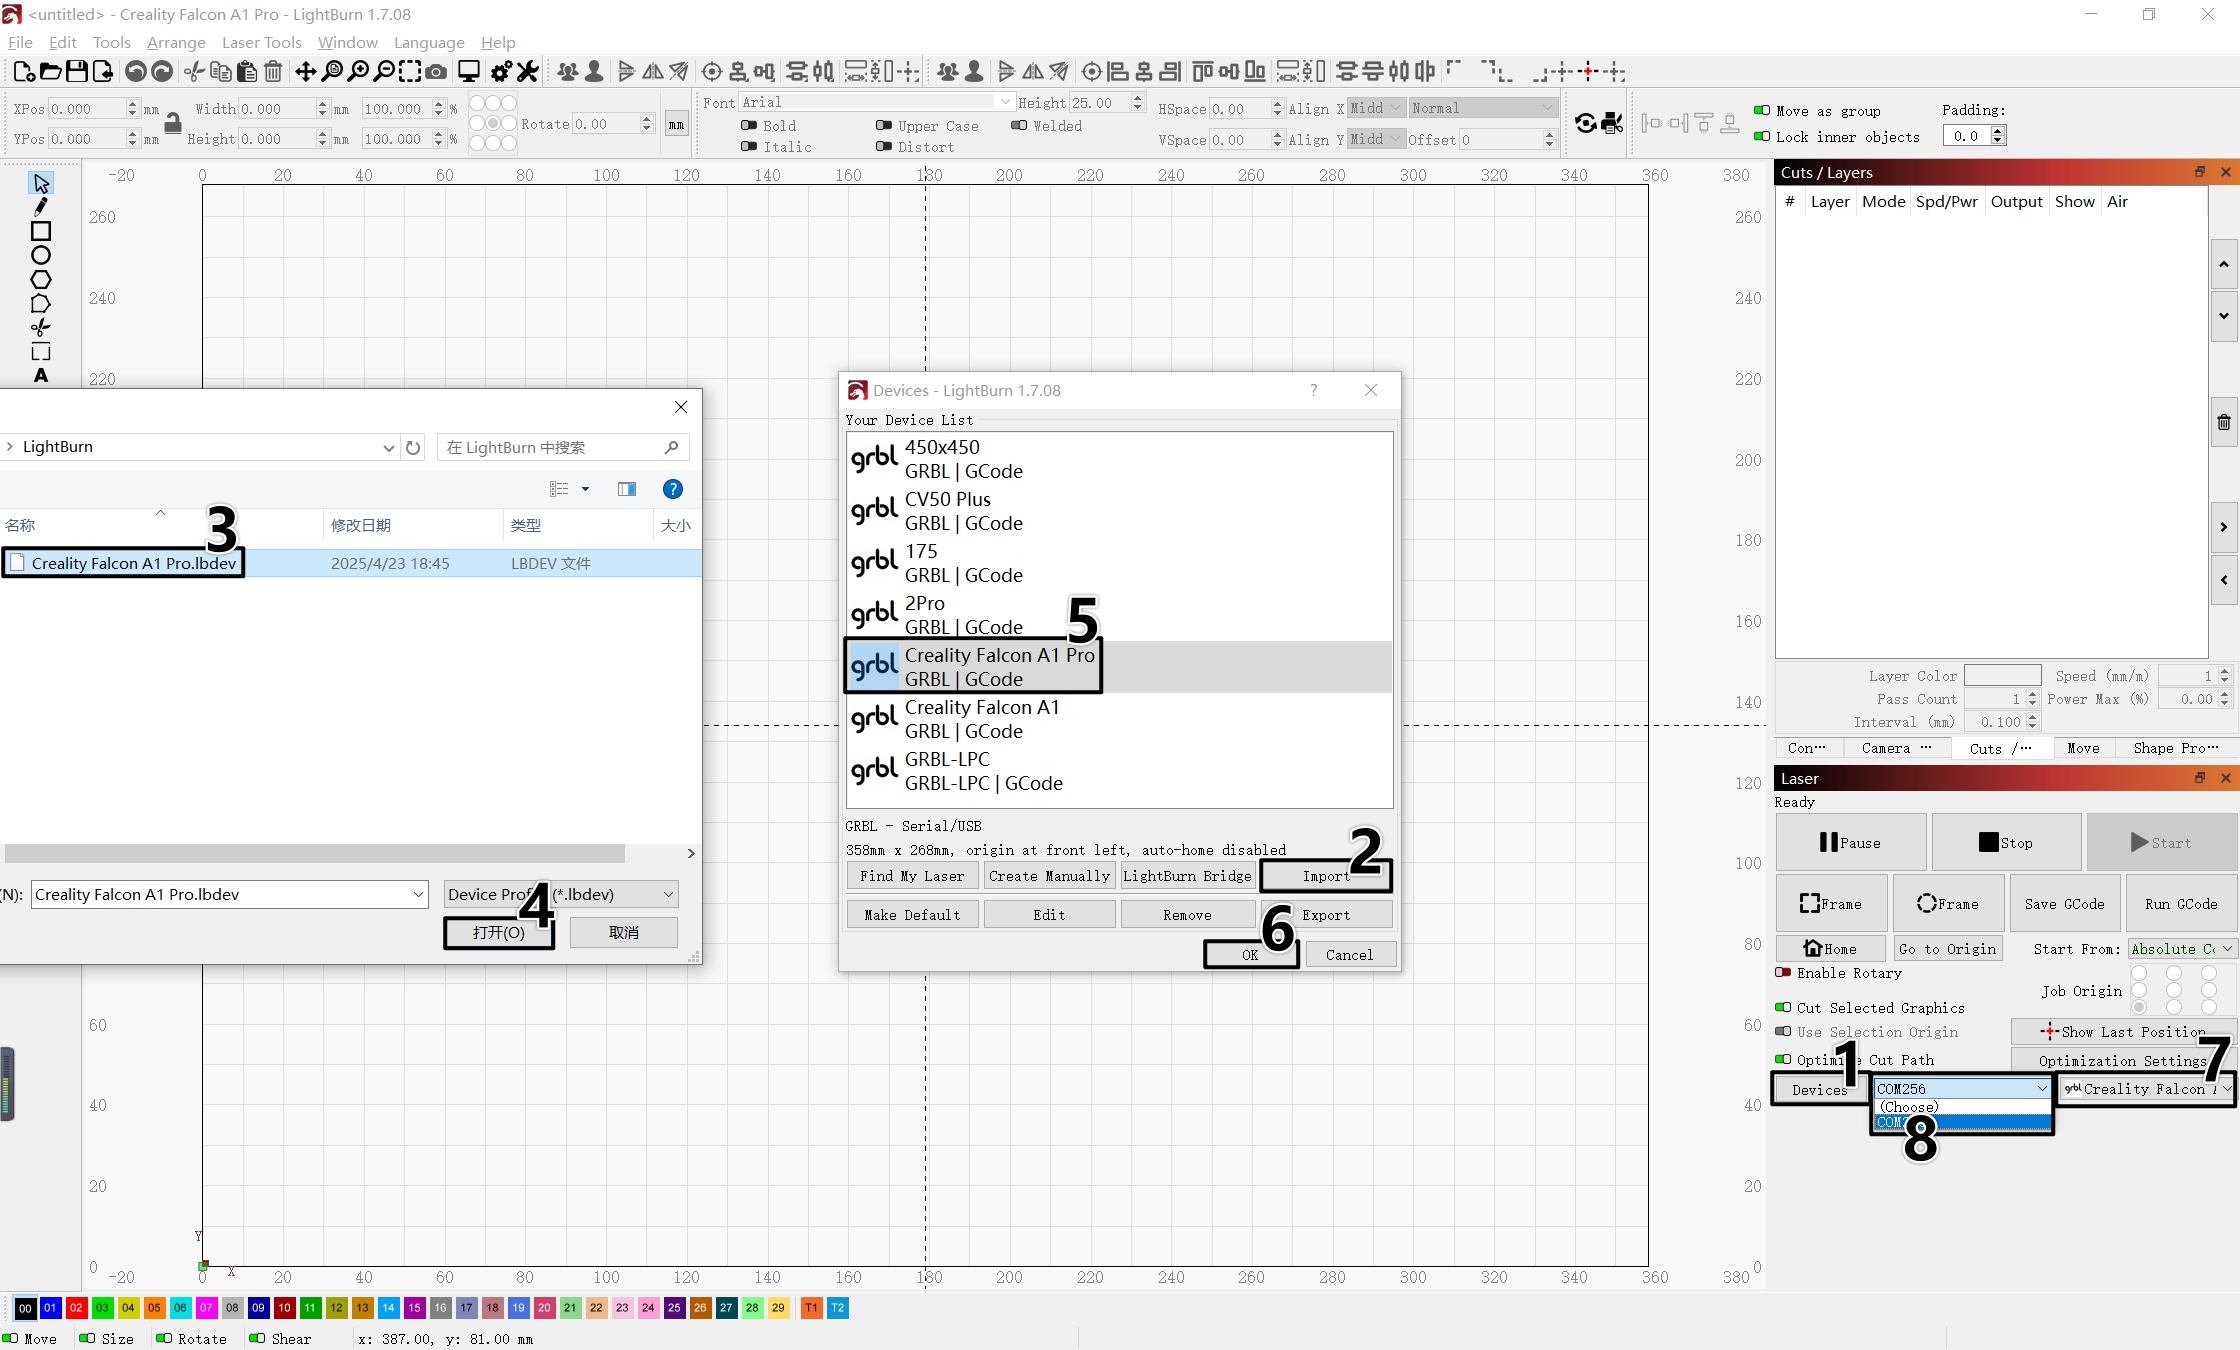
- Select [Devices] to enter the device page.
- Select [Import] to import LightBurn configuration file.
- Select the provided [Creality Falcon A1 Pro.lbdev] configuration file.
- Open.
- Select the imported [Creality Falcon A1 Pro] device.
- Select [OK] to confirm.
- Confirm if the device is selected as [Falcon A1 Pro] device.
- After selecting the correct COM port, the command bar in LightBurn will display device information indicating successful connection.
For LightBurn version 1.7.08 or lower, use /falcon_a1_pro.lbdev , you can find Auto Focus, Home and Z Home in [Consols].
For LightBurn version 2.0.00 or higher, use /falcon_a1_pro_(lightburn_2.0.00+).lbzip , you can find Auto Focus, Home and Z Home in [Macros].

¶ If connection fails:
- Verify if the machine is powered on normally and CH340 driver is installed.
- Connect the Type-C end of the data cable to the computer Type-C port on the A1 Pro machine.
- If you are unsure about the COM port, you can plug and unplug the device to check for updates, or check through the "Device Manager" on your computer.