¶ Falcon A1 Pro Laser Module Cooling Fan Cleaning Process
Laser Module Cooling Fan Cleaning Process
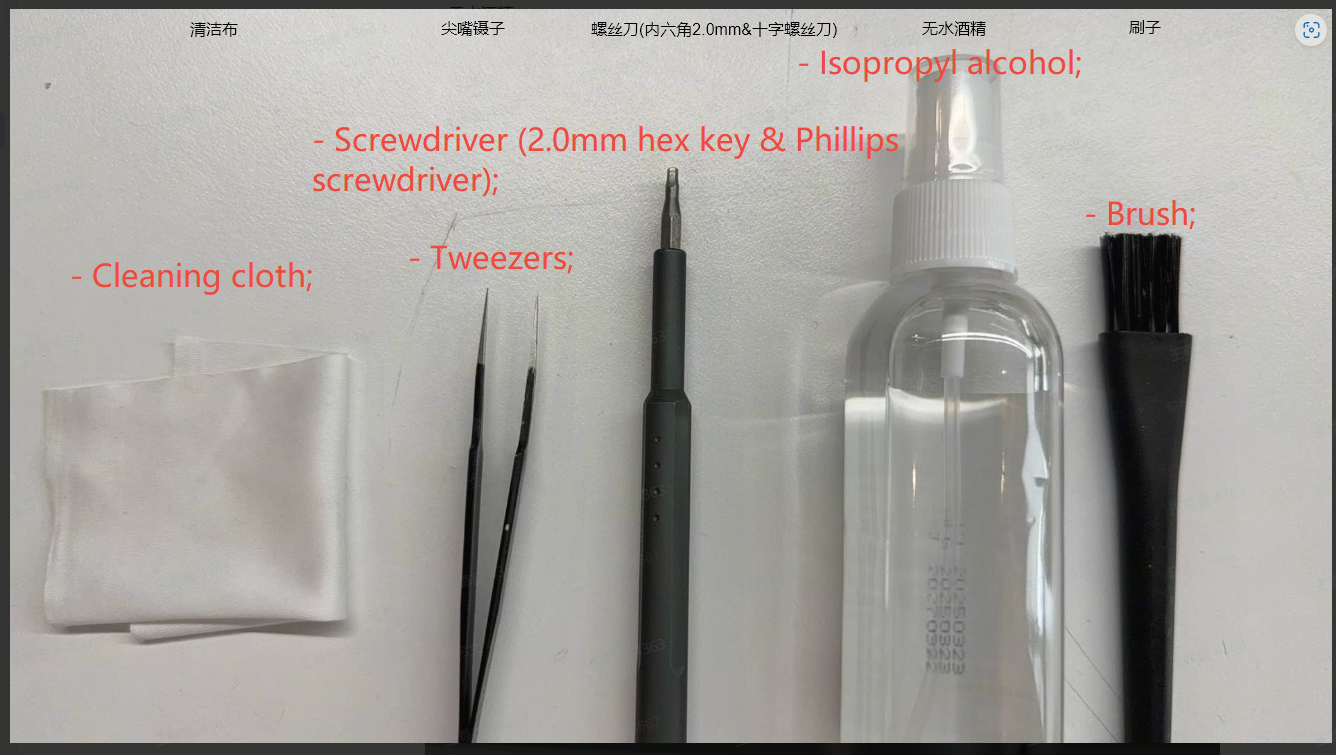
¶ Prepare tools
Cleaning cloth;
Tweezers;
Screwdriver (2.0mm hex key & Phillips screwdriver);
Isopropyl alcohol;
Brush;
¶ Operating Steps
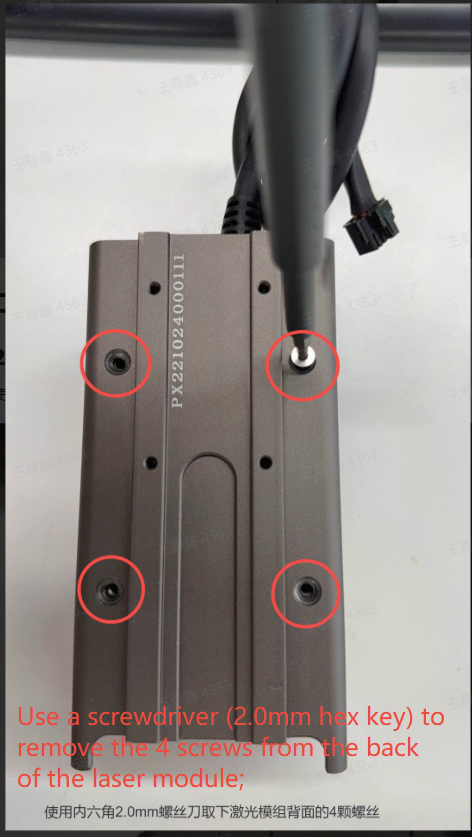
2.1 Remove the 4 screws on the back of the laser module;
Use a screwdriver (2.0mm hex key) to remove the 4 screws from the back of the laser module;
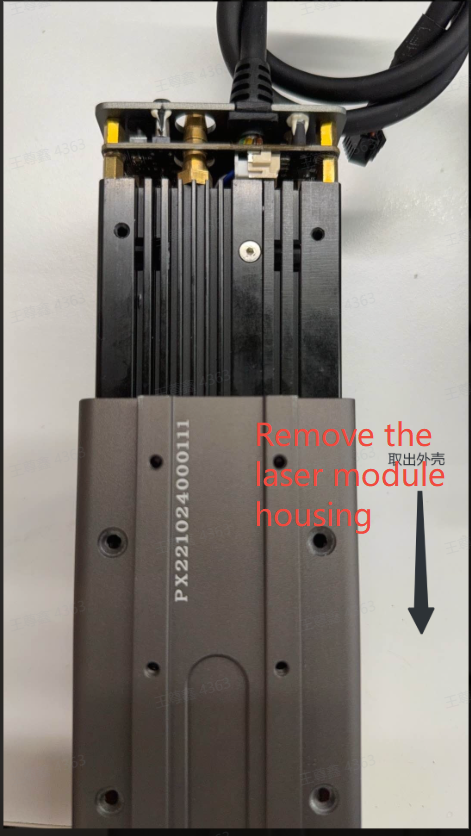
2.2 Remove the laser module housing
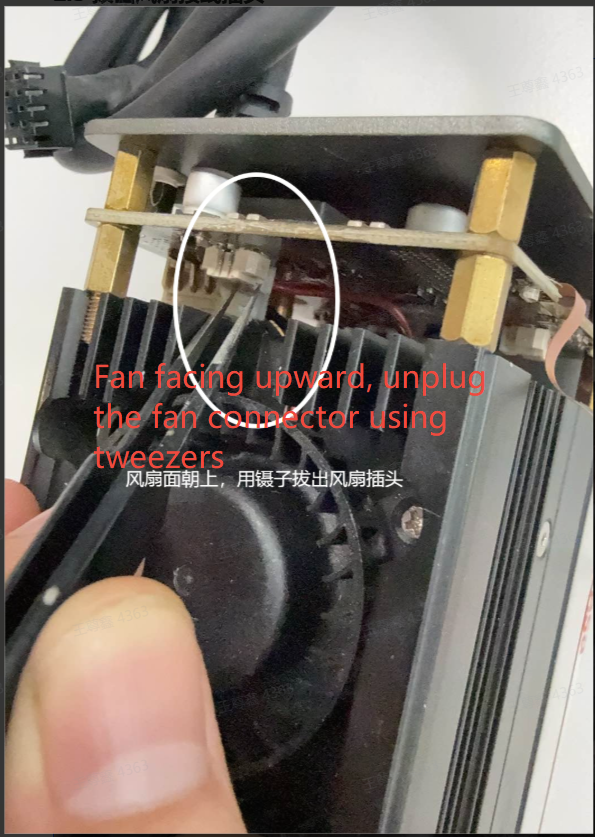
2.3 Remove the fan wire connector
With the fan facing up, use tweezers to pull out the fan wire connector. If there is red glue on the connector, remove the glue with tweezers first before pulling out the connector.
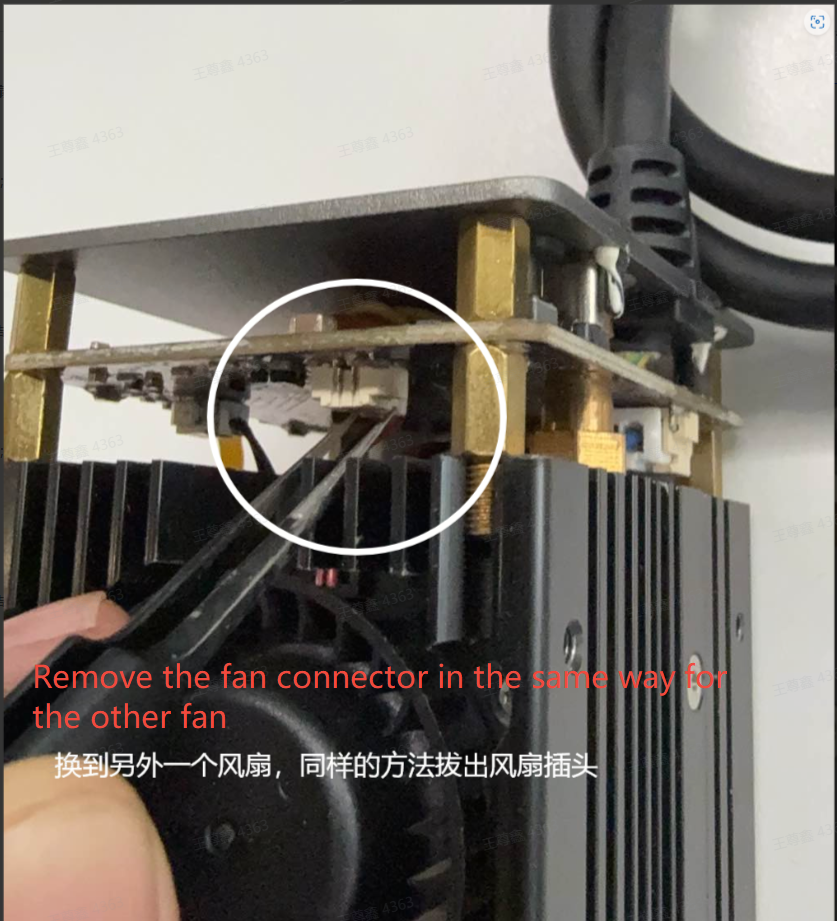
2.4 Unplug another fan connector
(Move the laser module to the other side with the fan facing up, use tweezers to unplug the fan connector; Note: the left fan connector plugs into the connector on the right side of PCB; the right fan connector plugs into the connector on the left side of PCB; It is recommended to unplug both fan connectors before proceeding to remove the fans)
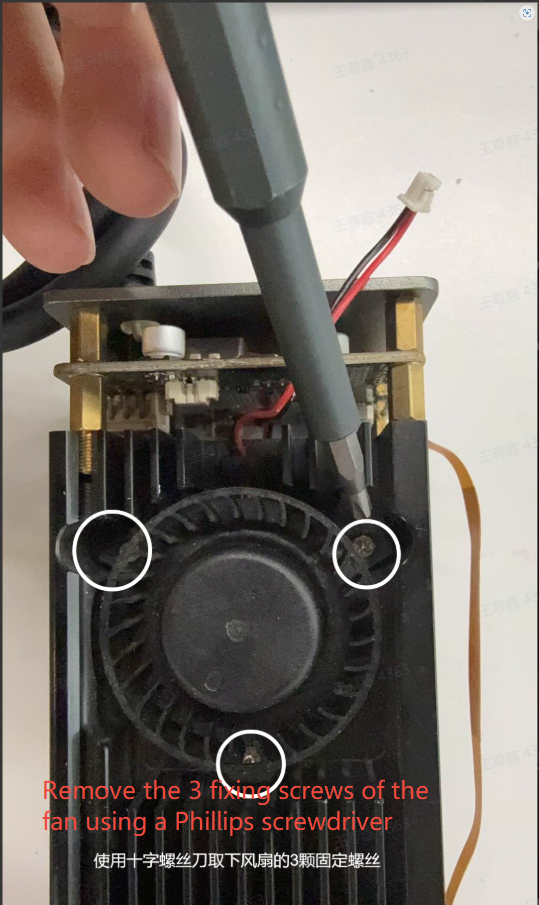
2.5 Remove the 3 mounting screws of the fan
Use a Phillips screwdriver to remove the 3 mounting screws from the fan;
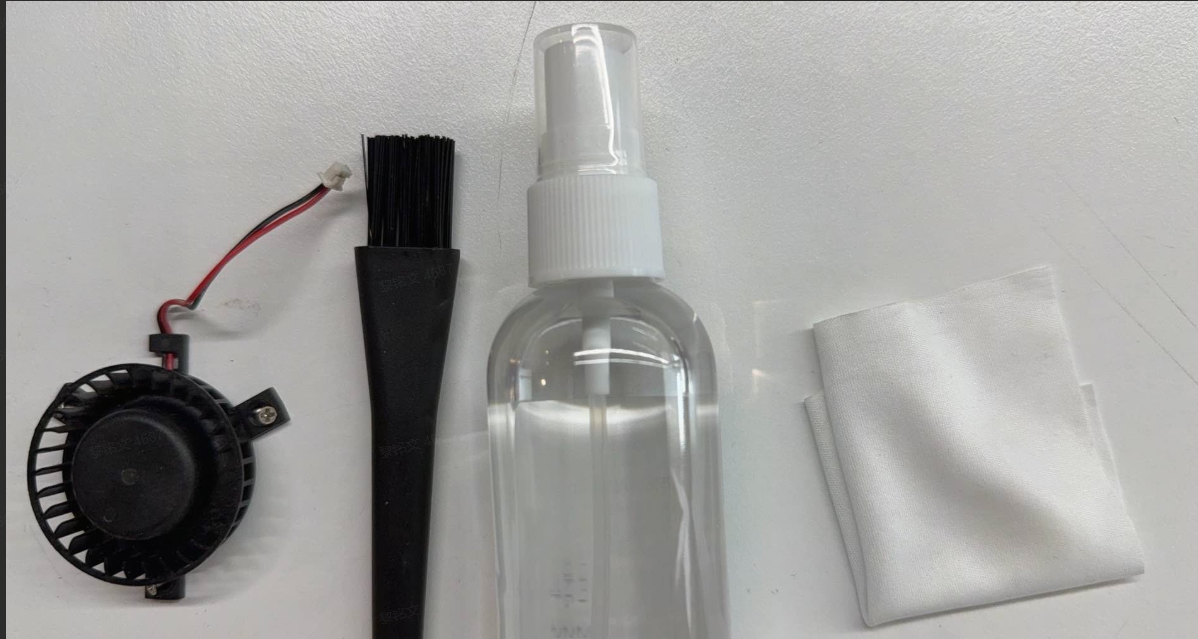
2.6 Remove the fan and clean it with anhydrous alcohol
Spray anhydrous alcohol on the dirty areas of the fan, clean the fan blades with a small brush, then wipe the dirty areas with a cleaning cloth. Note: Do not use alcohol containing water to avoid circuit short circuit.
2.7 Reassemble the Laser Module
Note: When installing the fan cable connectors, connect the left fan connector to the socket on the right side of the PCB; connect the right fan connector to the socket on the left side of the PCB;
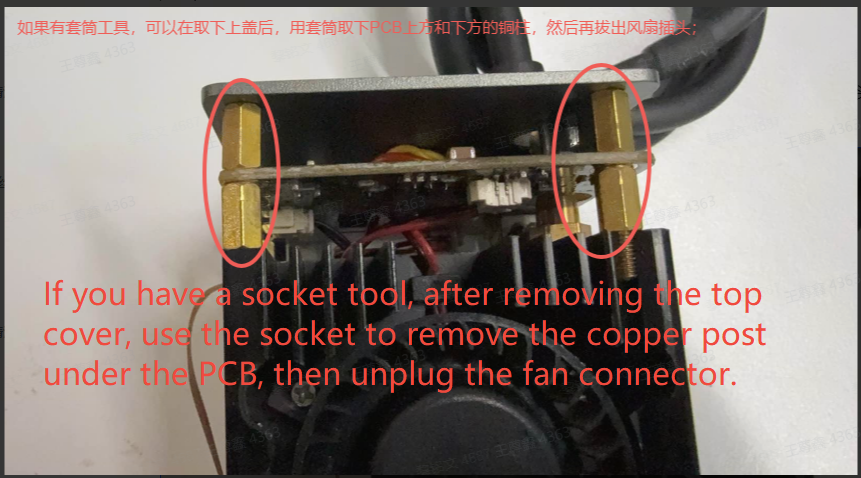
¶ Other Methods to Remove the Fan
If you have a socket tool, after removing the laser module cover, you can use the socket to remove the copper pillars above and below the PCB, then unplug the fan connector. This method is simpler to operate. Be careful not to damage the components on the PCB during operation.