¶ 1. Issue Description
Falcon Design Space (FDS) cannot detect the camera, the camera feed is unavailable, or a related error message appears.
¶ 2. General Troubleshooting Steps
¶ Step 1: Check Computer Permissions and Drivers
1. Check Camera Permissions
- Windows: Go to Settings → Privacy & security → Camera. Make sure camera access is enabled and that Falcon Design Space is allowed to access the camera.
- macOS: Go to System Settings → Privacy & Security → Camera and check whether Falcon Design Space has been granted camera access.
2. Check and Repair Camera Drivers
- Windows: Open Device Manager and check whether any warning icons appear under Imaging devices or Cameras. If necessary, update or reinstall the driver.
- macOS: Use appropriate system utilities or third-party tools to check whether the camera is recognized by the operating system.
3. Check Falcon Design Space Settings
- Check the software version: Make sure Falcon Design Space is updated to the latest version. If you are using an outdated version, uninstall it and reinstall the latest version.
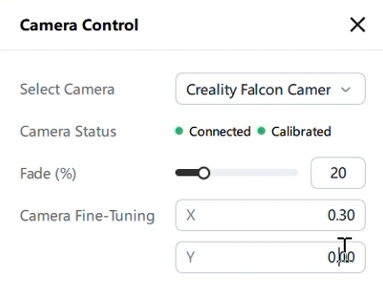
- Check the camera connection status: Click the drop-down menu next to the camera icon at the top of the workspace, then select Camera Control to confirm that the camera is connected.
¶ Step 2: Check for Hardware Issues
1. Completely close all laser engraver-related software, including Falcon Design Space and LightBurn.
2. Make sure the machine is powered on and connected to the computer using a USB data cable.
3. Open the built-in camera application on your computer.
4. Check whether the external Creality Falcon Camera is detected, and try switching to it.
Interpret the test results as follows:
Case A: The computer detects the camera and displays the camera feed normally.
This indicates that the camera hardware and USB connection are generally functioning properly. The issue is more likely related to Falcon Design Space settings, system permissions, or software compatibility. Return to Step 1 for further troubleshooting.
Case B: The computer cannot detect the external camera, and only the built-in camera appears in the system camera device list.
The issue may be related to the USB connection or the internal camera cable. Please record the test results and provide relevant screenshots or videos. Send them to our support team at support@crealityfalcon.com for further inspection.
If the issue persists after completing the steps above, Falcon A1C and Falcon A1 Pro users can continue troubleshooting by following the steps provided for their respective models below. For other models, please get in touch with our support team support@crealityfalcon.com for further assistance.
¶ 3. Falcon A1 Pro Camera Troubleshooting
¶ 3.1 Symptoms
1. Auto-Focus Not Working: The machine cannot perform the auto-focus operation properly.
2. Error Message on the Touchscreen: When you tap the auto-focus function on the touchscreen, a "Camera Not Detected" message appears along with error code 07002002.
3. Camera Cannot Be Accessed by Computer Software: The camera cannot be accessed through either Falcon Design Space or LightBurn, and error code 07002002 appears.
¶ 3.2 Troubleshooting Steps and Solutions
¶ Step 1: Check the Camera Connection and Power Supply
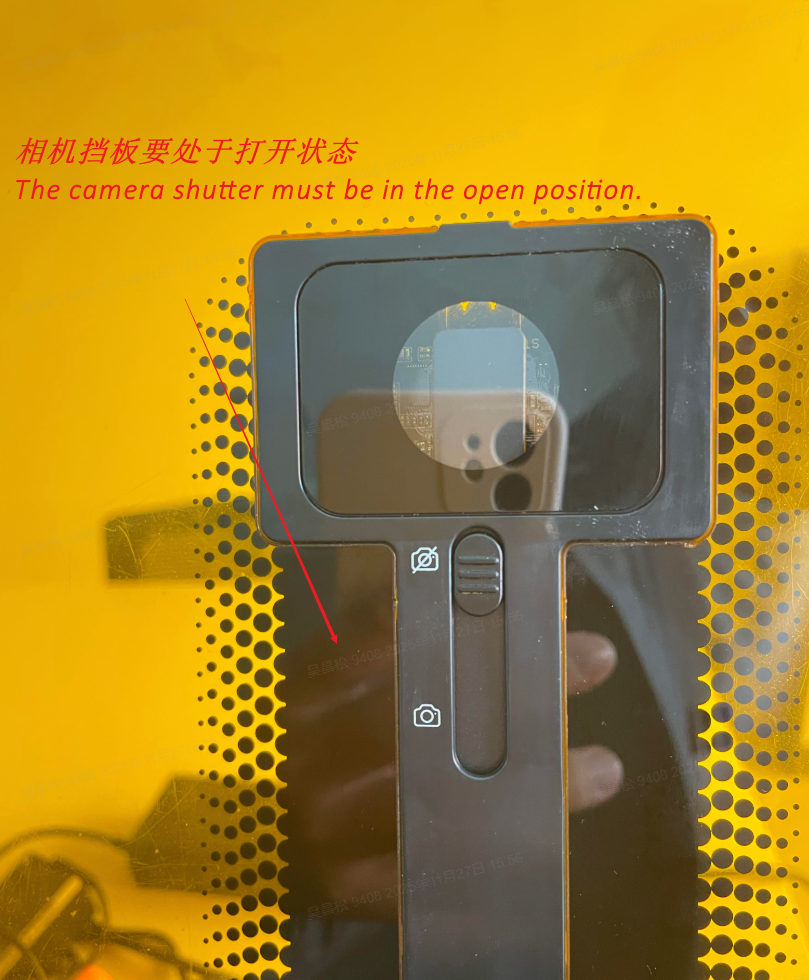
1. Make sure the physical camera shutter is open.
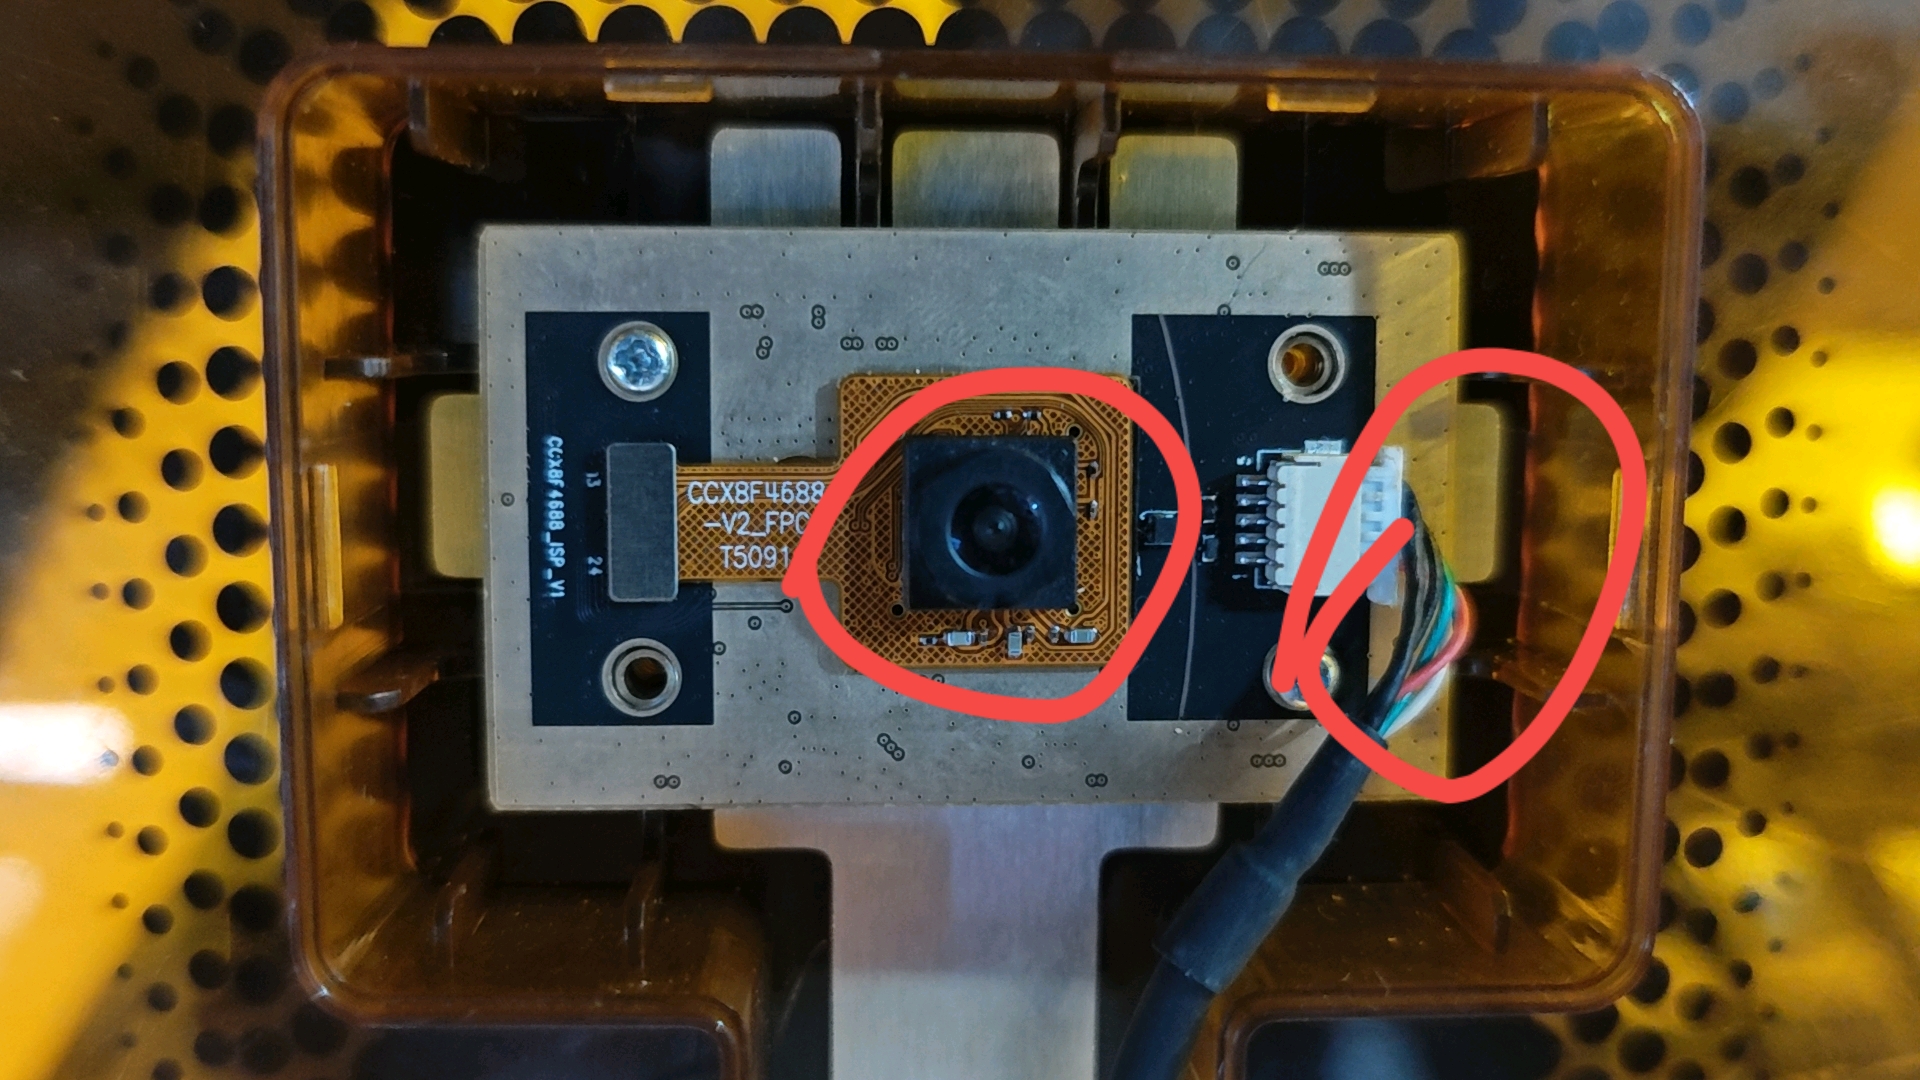
2. Make sure the camera cable is securely connected to the motherboard. If necessary, disconnect and reconnect the cable.
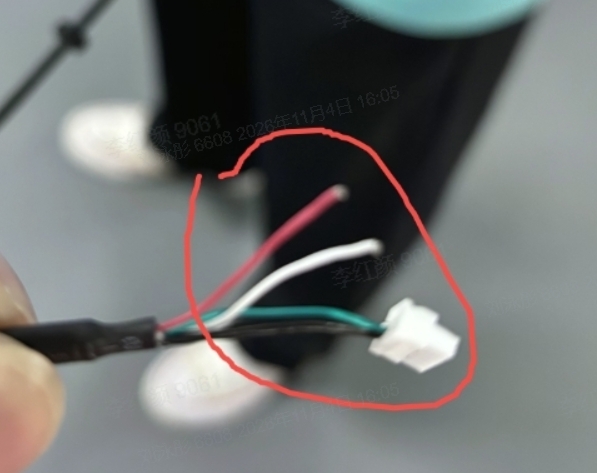
3. Check the camera cable for bends, breaks, or other visible damage. If any damage is found, try replacing the camera cable.
4. Turn off the machine and disconnect it from the power supply. Remove the right side panel of the enclosure and check the camera connector and terminals on the motherboard for loose connections, disconnections, or damage.
5. Check whether the machine is receiving power properly. Pay particular attention to the status of the following indicator lights: Power indicator, Start indicator and internal enclosure LED lights.
¶ Step 2: Camera Test
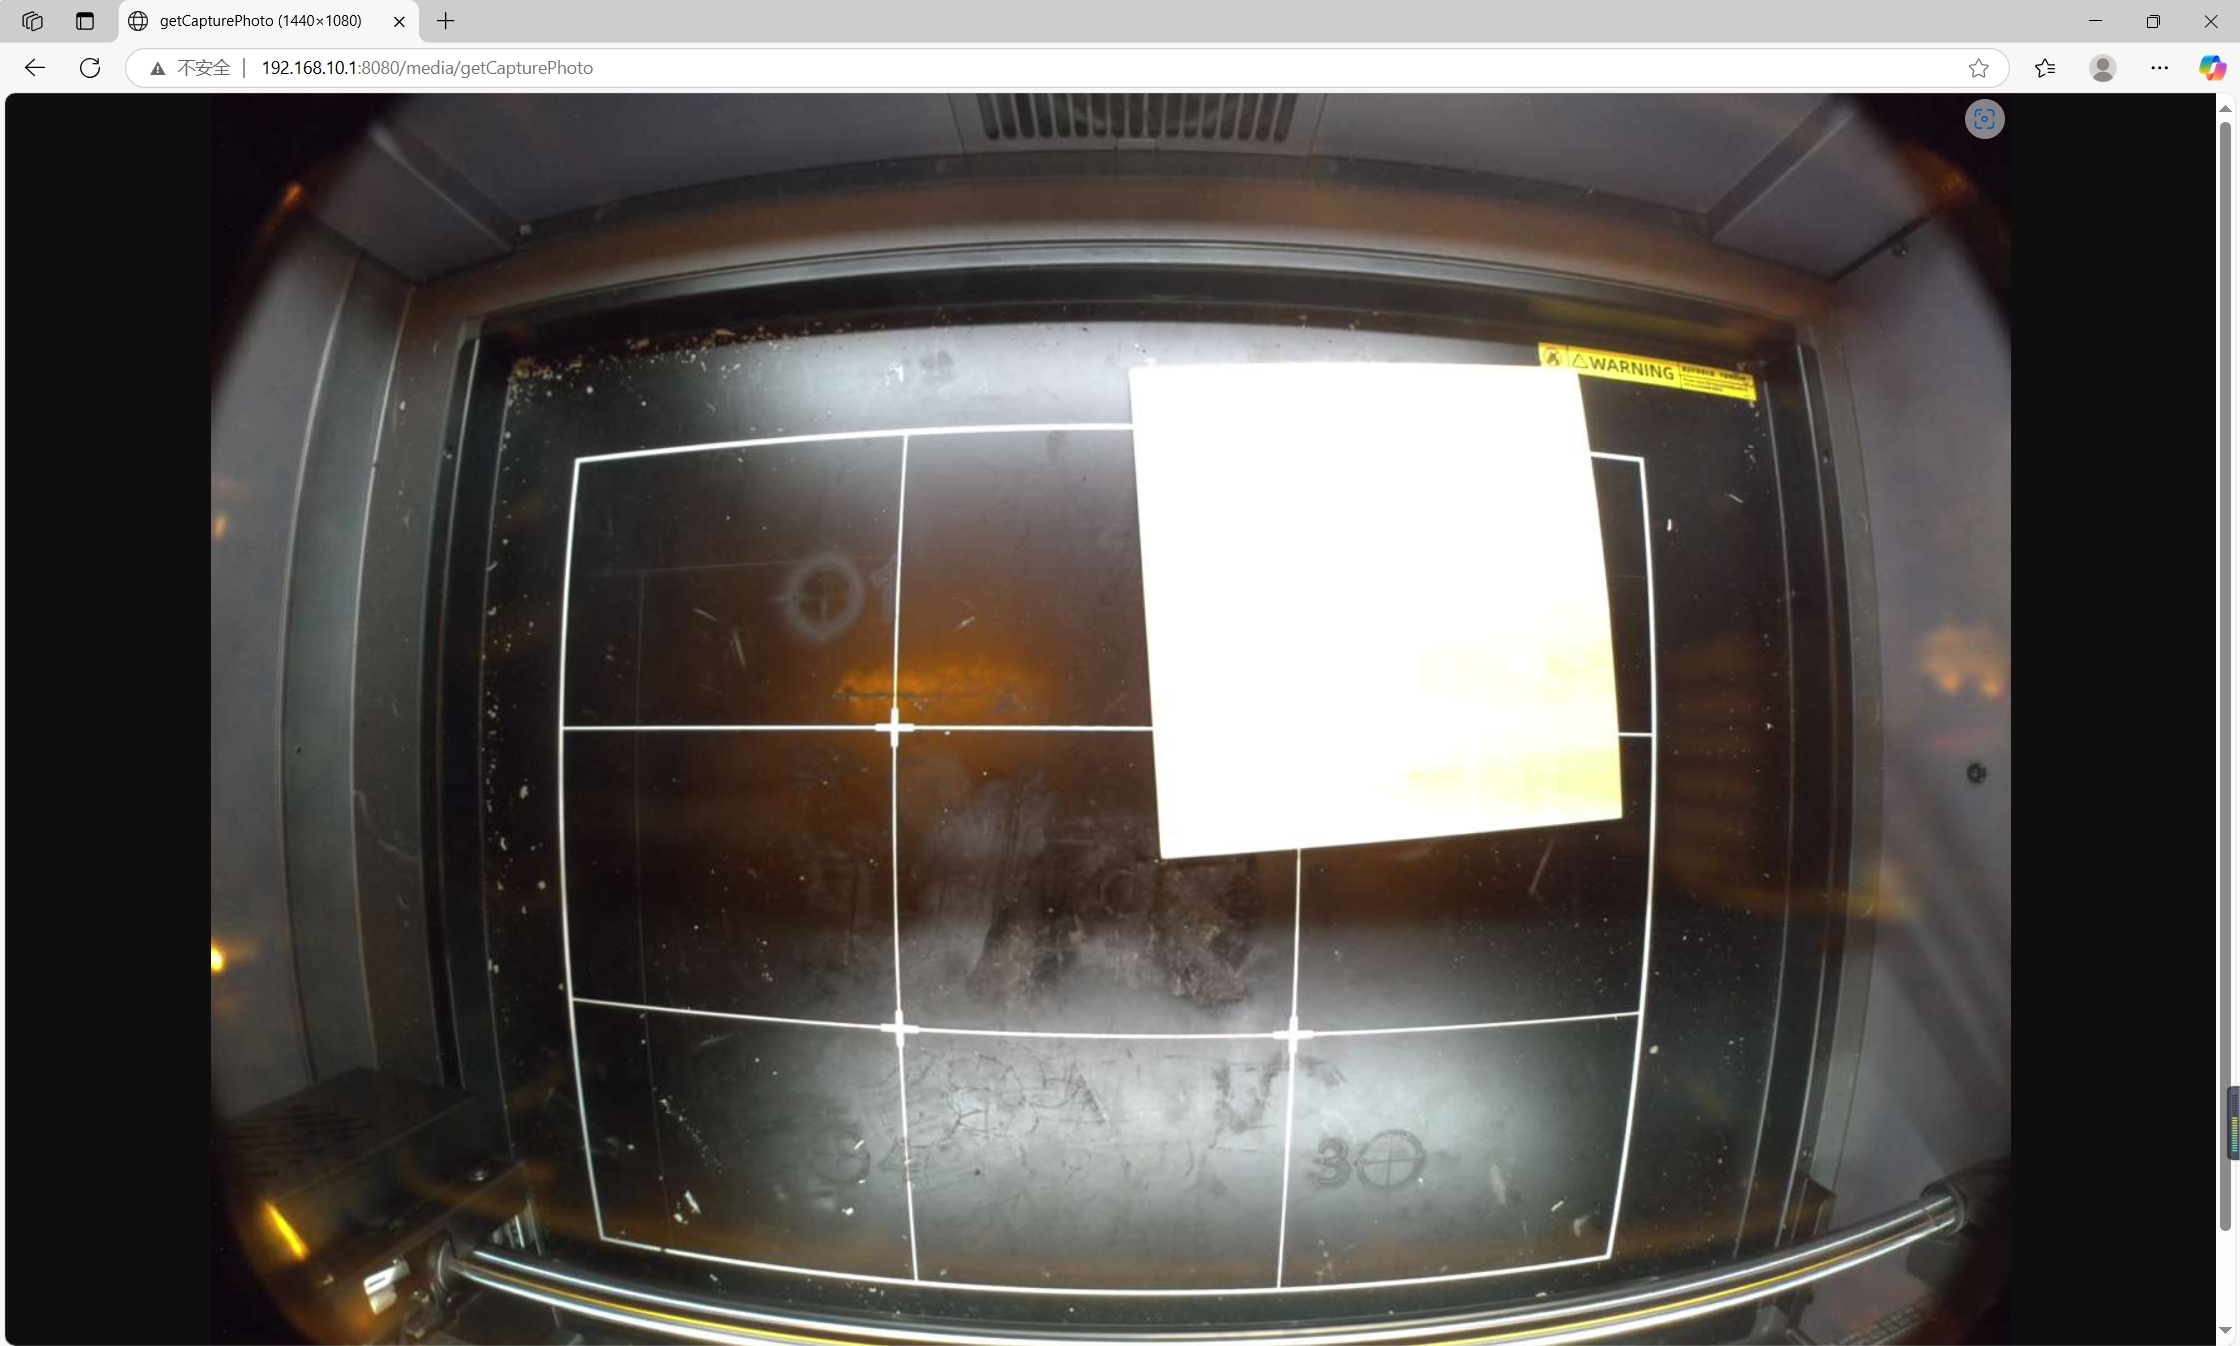
If the issue cannot be identified after completing the steps above, you can connect the camera to another computer for an independent test. You can also access the camera through a browser to further check whether the camera itself is functioning properly.
1. Connect the camera to another computer and make sure its power supply and connection are working properly. Open a web browser and enter the following test address in the address bar:
http://192.168.10.1:8080/media/getCapturePhoto
Open the address and check the response returned by the camera interface.
2. If the browser successfully returns and displays a photo, this indicates that the camera can respond to photo capture requests and that its basic functions are working properly.
3. If the browser returns the following response:{"errorcode":-1,"payload":{"errorMsg":""}}This indicates that the camera interface failed to complete the photo capture request. The camera may have a hardware issue. Please provide the test results and relevant screenshots or videos to our support team at support@crealityfalcon.com for further inspection.
¶ 4. Falcon A1C Camera Troubleshooting
Note: The standard white Falcon A1C (without AI Camera) does not come equipped with a camera from the factory. Therefore, it is normal for Falcon Design Space to be unable to detect a camera on this model, and no camera troubleshooting is required. Before proceeding, please confirm that your Falcon A1C is the version equipped with an AI Camera.
¶ 4.1 Common Symptoms
| Error Message / Symptom | Description |
|---|---|
| "No camera was detected" | A pop-up message appears in the Falcon Design Space workspace. This may indicate that the device is not equipped with a camera or that the Type-C port is occupied. |
| "Please connect the camera" / "Please connect the device and camera to use this feature" | A prompt appears when checking the camera status or performing camera calibration. |
| The camera appears in the menu, but a connection cannot be established | The camera option is visible in the software interface, but the preview screen remains black or the connection fails. |
| WiFi mode works normally, but the camera option disappears after switching to USB mode | The camera cannot be detected when connected via USB. Further troubleshooting of USB camera detection is required. |
¶ 4.2 Troubleshooting Steps and Solutions
¶ Step 1: Check the Connections
1. Make sure the camera shutter is open. Check that the physical camera shutter is in the open position. A closed shutter may block the camera or prevent it from functioning properly.
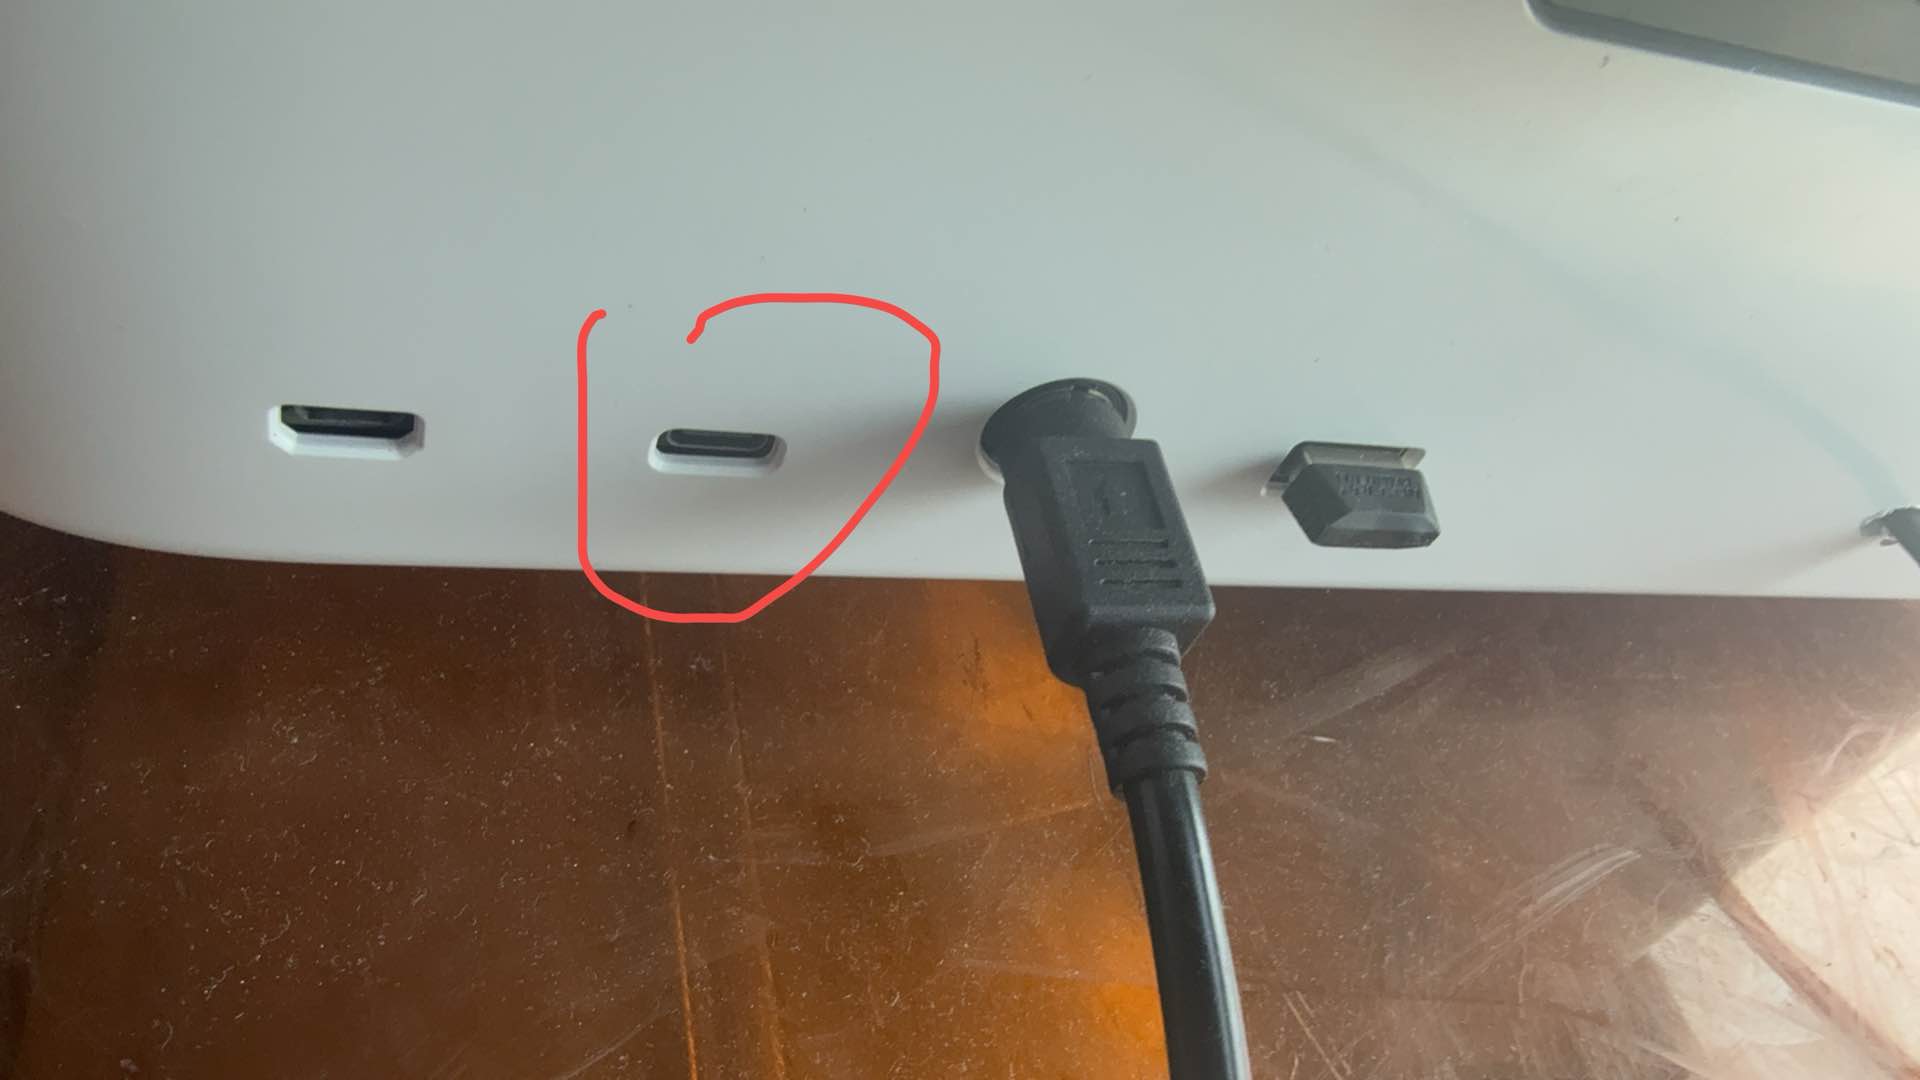
2. Check the USB cable. We recommend using the original USB cable. Avoid using USB hubs or docking stations.
Desktop computers: Connect the device to a native USB-A port on the rear of the computer.
Laptops: Prioritize using the built-in USB ports on the laptop.
3. Use the adapter correctly. If your computer only has USB-C ports, use a USB-A to USB-C adapter that supports data transfer. Make sure the adapter is connected to the computer, while the USB-A end of the data cable is connected to the device. Do not plug the USB-A to USB-C adapter into the device.
4. Check for USB port conflicts. Close any other laser engraving or control software that may be occupying the device's USB port, such as LightBurn or LaserGRBL. Keep only Falcon Design Space running.
After completing these checks, reconnect the device and see whether Falcon Design Space can detect the camera.
¶ Step 2: Perform a Hardware Self-Test
Use your computer's built-in camera application to determine whether the issue is related to Falcon Design Space or the device's hardware and connections.
1. Completely close all laser engraving-related software, including Falcon Design Space, LightBurn, and other applications.
2. Make sure the device is powered on and connected to the computer via a USB data cable.
3. Open the camera application built into your computer's operating system.
4. Check whether the external Creality Falcon Camera is detected, and try switching to it.
Interpret the Test Results:
Case A: The computer detects the camera and displays the image normally.
This indicates that the camera hardware and USB connection are generally functioning properly. The issue is more likely related to Falcon Design Space settings, system permissions, or software compatibility. Return to Steps 2 and 3 for further troubleshooting.
Case B: The computer cannot detect the external camera, and only the built-in camera appears in the system's camera device list.
The issue may be related to the USB connection or the internal camera cable. Proceed to Step 5 to inspect the internal connections.
¶ Step 3: Inspect the Internal Connections
Important: Before disassembling the device, turn it off and unplug the power cable to ensure that it is completely disconnected from the power supply.
1. Turn off the device, unplug the power cable, and disconnect the USB data cable.
2. Remove the right side panel of the enclosure to locate the camera cable connector on the mainboard.
3. Check whether the camera cable is securely connected to the mainboard. If necessary, disconnect and reconnect the cable.
4. Inspect the cable for bends, breaks, physical damage, or other visible defects. If the cable is damaged and the device is still under warranty, please email our customer support team at support@crealityfalcon.com to request a free replacement cable.
5. Check the camera connector and terminals on the mainboard for looseness or damage.
6. Also inspect the camera adapter connector on the laser module. Make sure it is securely connected and reconnect it if necessary.
7. After confirming that all connectors are properly connected, reinstall the enclosure panels, reconnect the power supply, and turn on the device to test the camera.
¶ Step 4: Check Firmware and Software Versions
If the issue persists after completing the previous steps, further check the device firmware and Falcon Design Space software versions.
1. Check the device firmware version. Make sure the device is running the latest firmware. If an update is available, follow the official instructions to complete the firmware update.
2. Test the camera again after updating. If the camera works normally in WiFi mode but cannot be detected in USB mode after the update, try powering off and restarting the device. Then reconnect the USB data cable and camera connectors.
3. Record the version information and contact customer support for further assistance. If the issue started after a firmware update, record the firmware versions before and after the update, the Falcon Design Space software version, and a detailed description of the issue, provide the troubleshooting results along with relevant screenshots or videos, and email them to our customer support team at support@crealityfalcon.com for further investigation.