¶ Check the Camera Connection Status
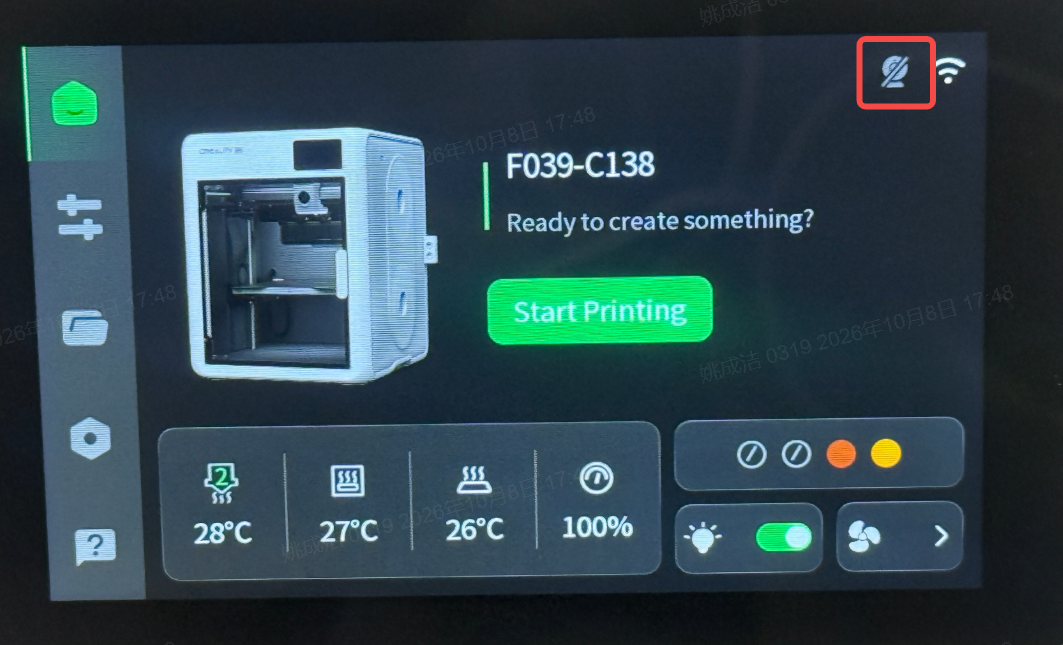
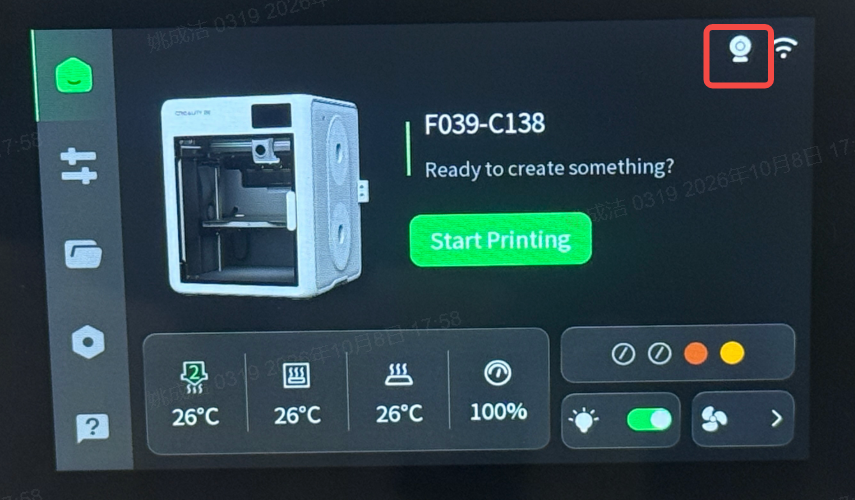
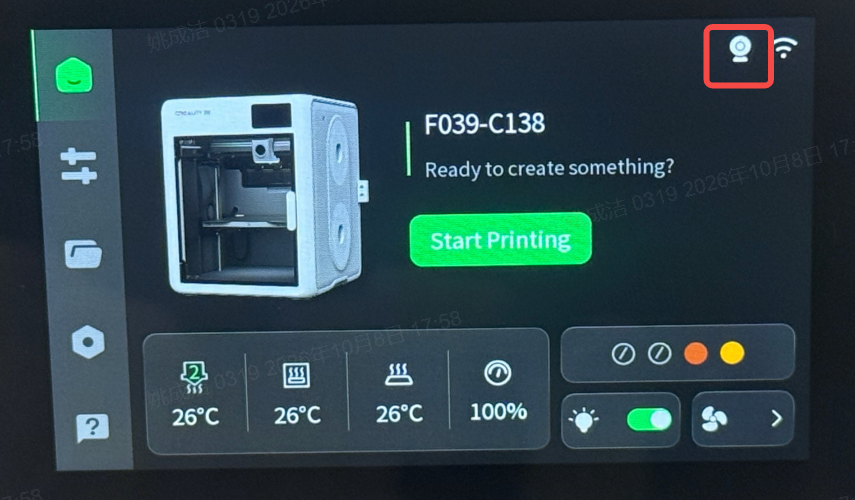
Check the camera icon on the home screen of the printer's built-in touchscreen to determine whether the camera is connected.
¶ Scenario 1: Camera Shows as Disconnected
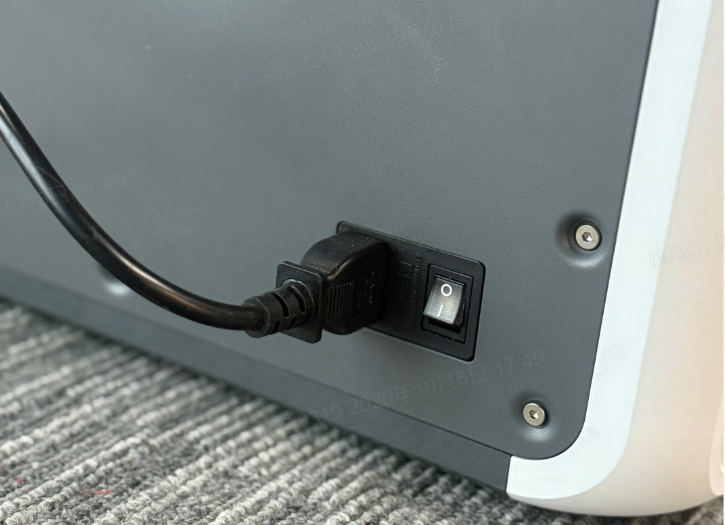
¶ Step 1: Turn Off the Printer
Power off the printer before performing any maintenance.
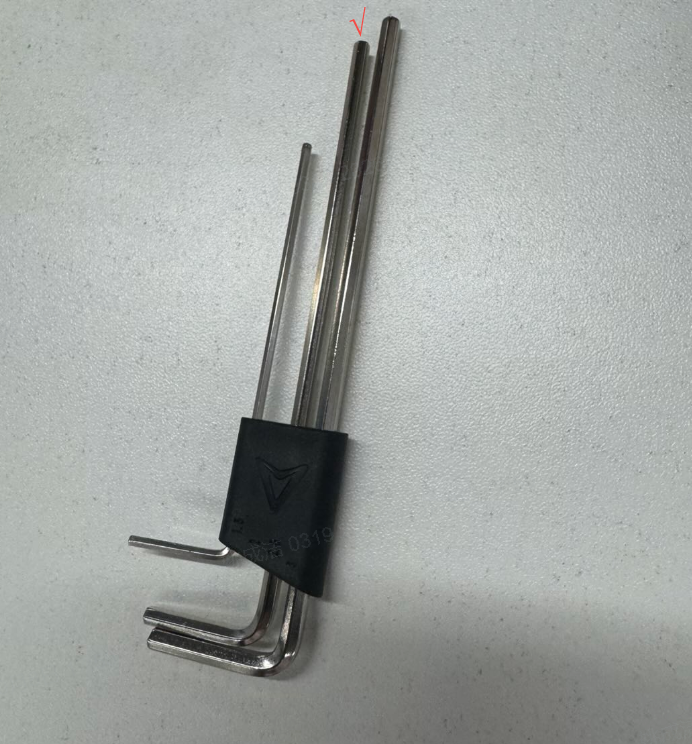
¶ Step 2: Prepare the Required Tools
Select the Allen wrench marked with a check mark in the image
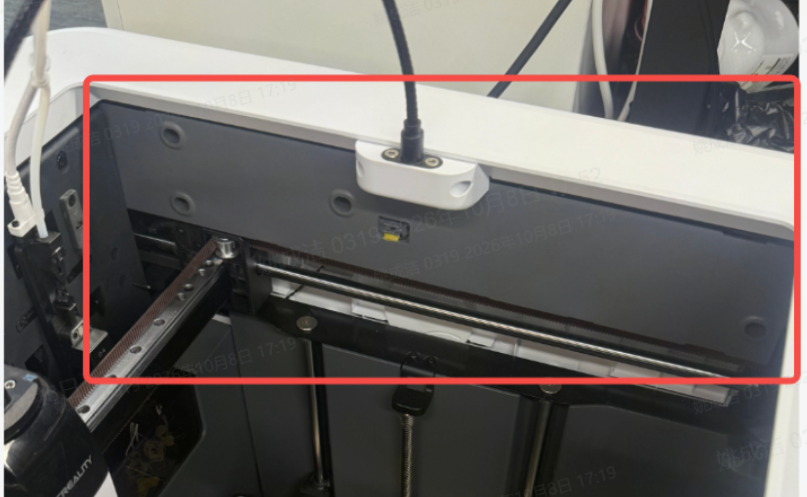
¶ Step 3: Remove the Inner Rear Panel Near the Camera
Remove all four screws securing the inner rear panel.
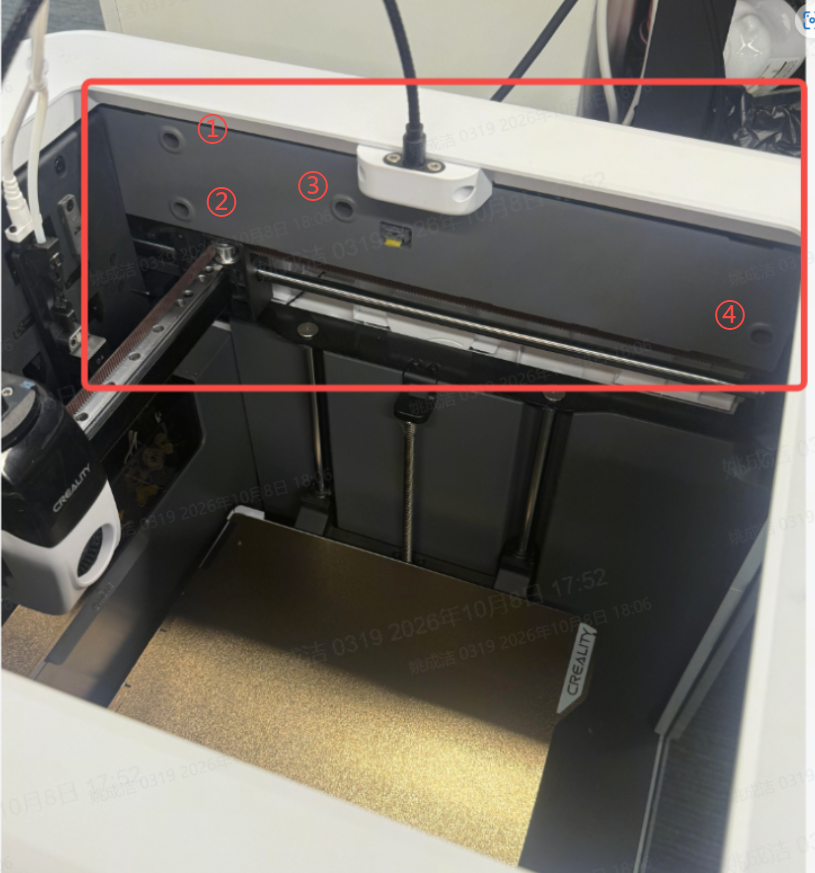
¶ Step 4: Locate the Camera Cable
After removing the panel, locate the camera connection cable
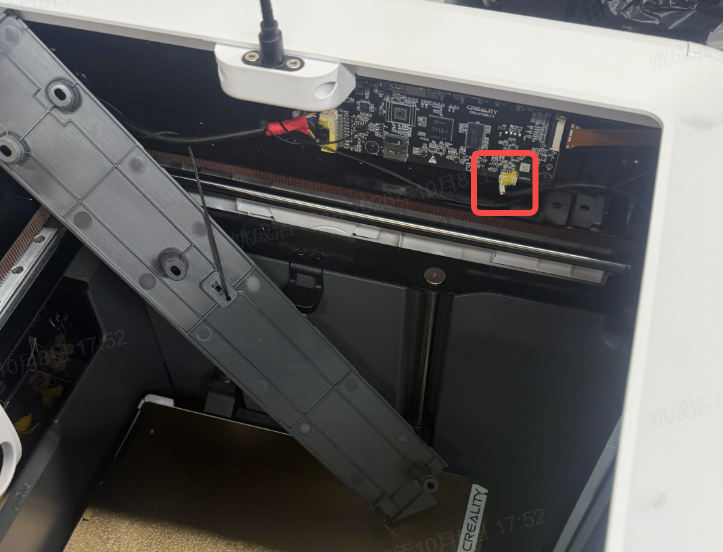
¶ Step 5: Carefully Disconnect the Camera Cable
The connector is secured with yellow adhesive. Apply gentle force when disconnecting the cable to avoid damaging the connector or wires.
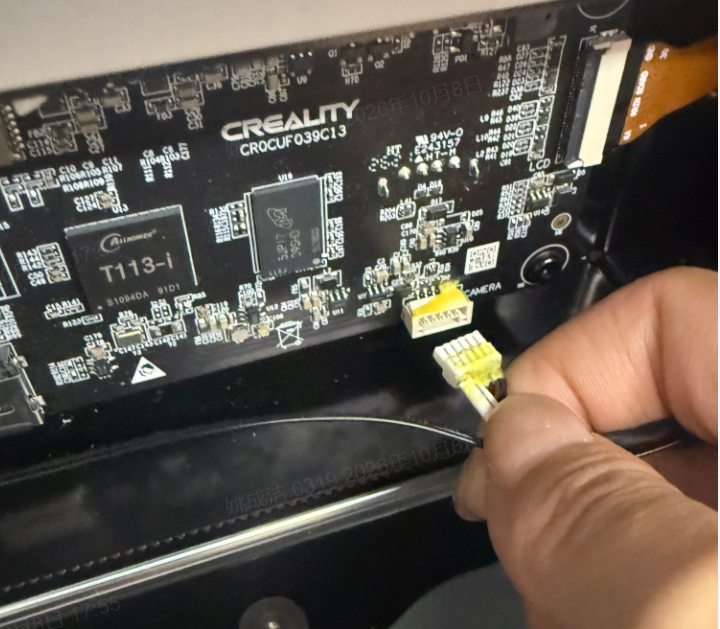
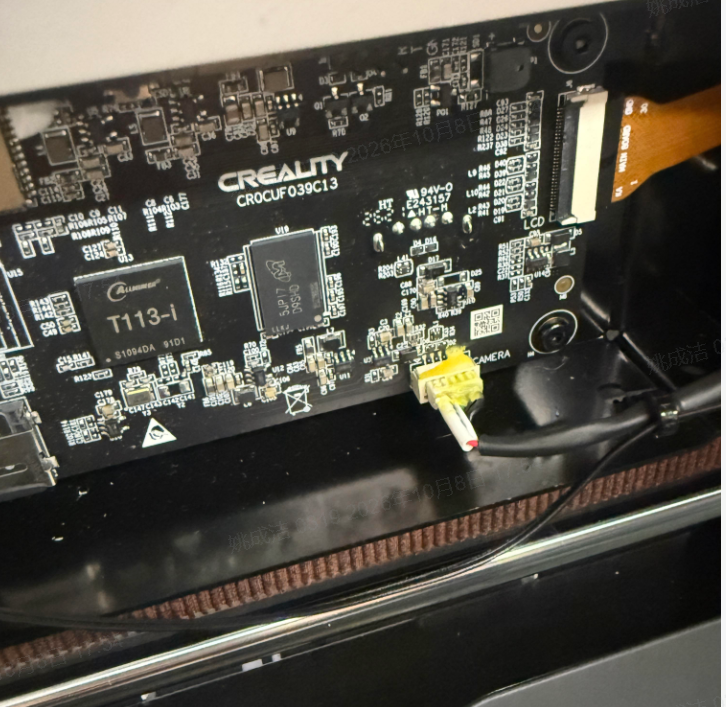
¶ Step 6: Reconnect the Camera Cable
Unplug the cable and firmly reconnect it, ensuring that the connector is fully seated in the port.
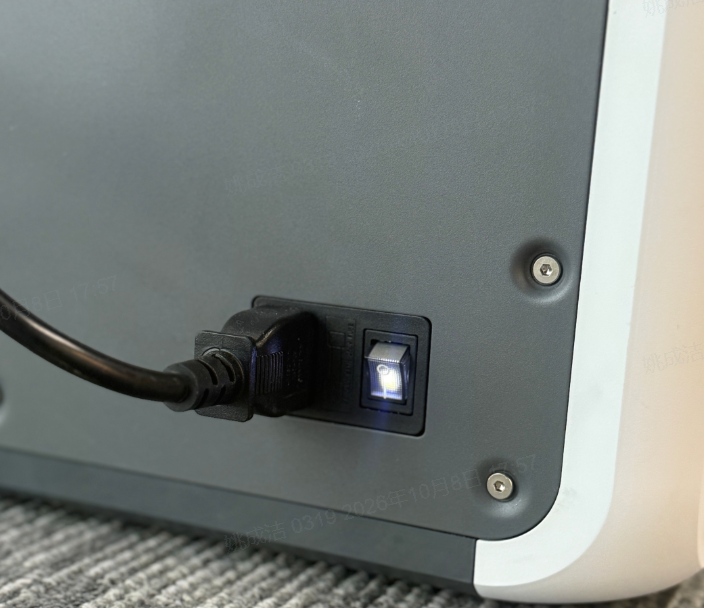
¶ Step 7: Turn On the Printer
Power on the printer after reconnecting the camera cable.
¶ Step 8: Verify the Camera Connection Status
Check the camera icon in the upper-right corner of the touchscreen to confirm whether the connection has been restored.
¶ Step 9: Reinstall the Inner Rear Panel
Once the camera connection is restored, reinstall the inner rear panel and secure it with the four screws.
¶ Scenario 2: Camera Shows as Connected but No Video Is Displayed
¶ Step 1: Check the Camera Feed
¶ Confirm whether the camera feed is unavailable in both the Creality Cloud app and the slicing software.
¶ Step 2: Export Firmware Logs
Use a USB flash drive to export the printer's firmware logs for further troubleshooting and analysis.