¶ Tools
Hexagonal wrench
Thermal paste
New hotend kit
¶ Replacement Steps
Before replacement, please retract the filament from the extruder and move the hot bed to the bottom.
¶ Disassembly
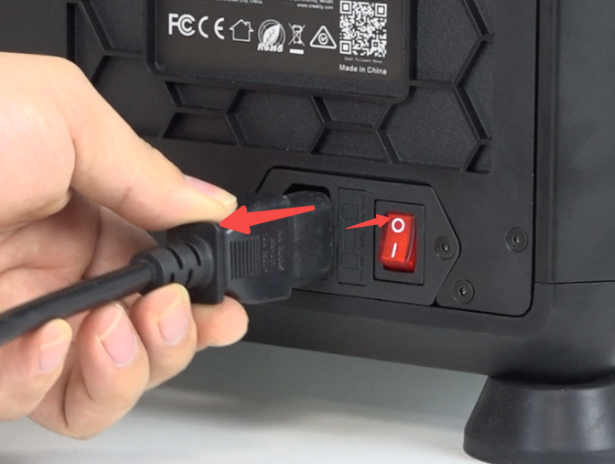
Power off and unplug the power cord.
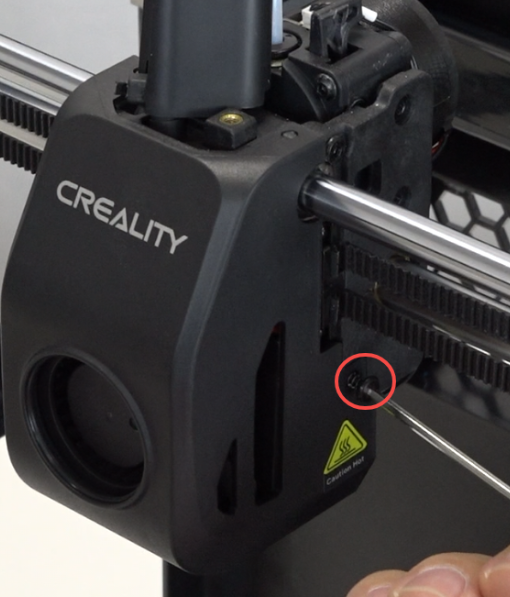
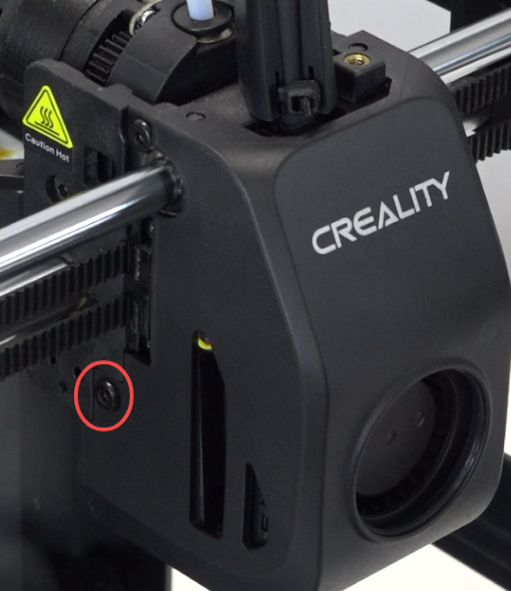
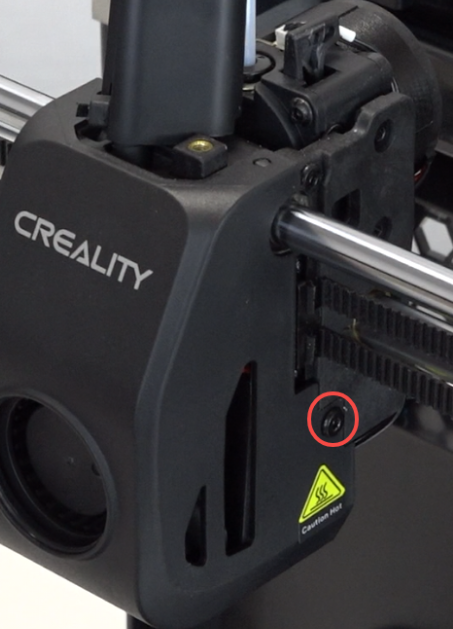
Use the hexagonal wrench to remove the screws securing the front guide.
 |
 |
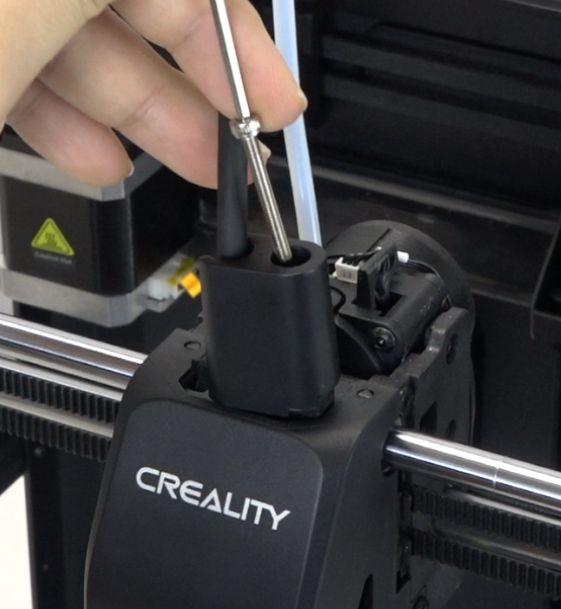
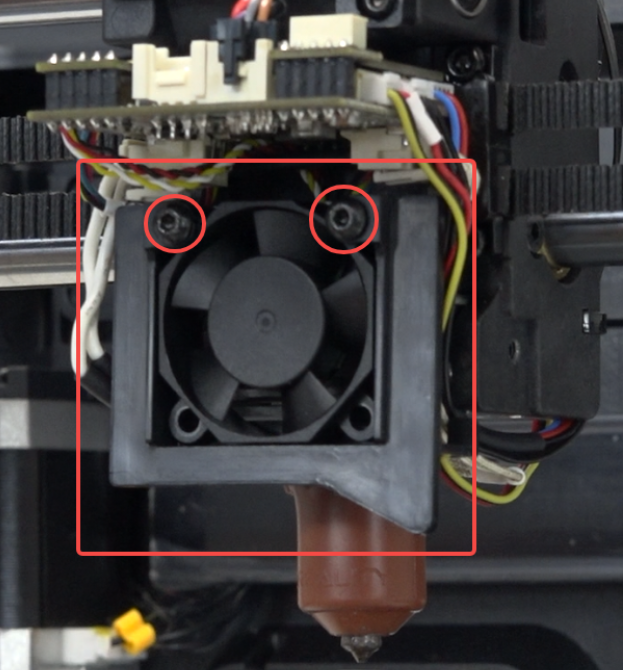
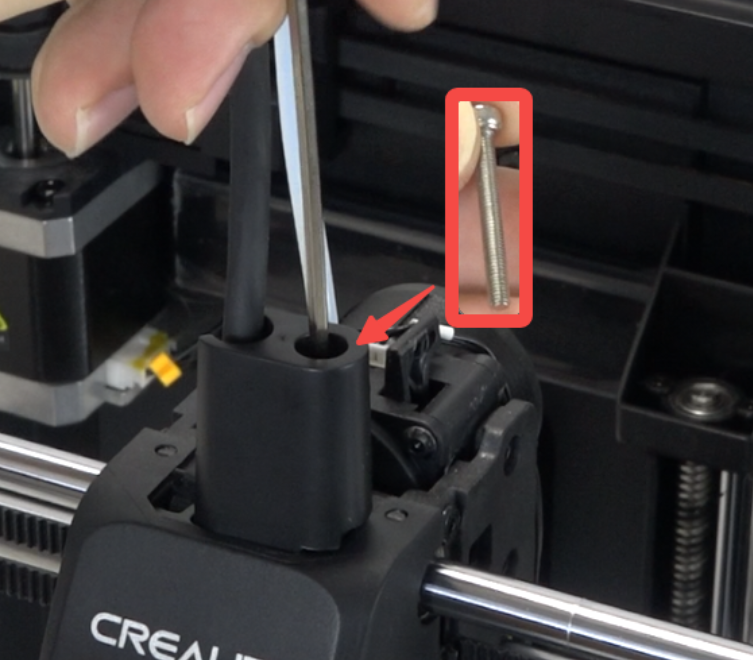
Use the hexagonal wrench to remove the 2 screws on both sides of the nozzle cover.
 |
 |
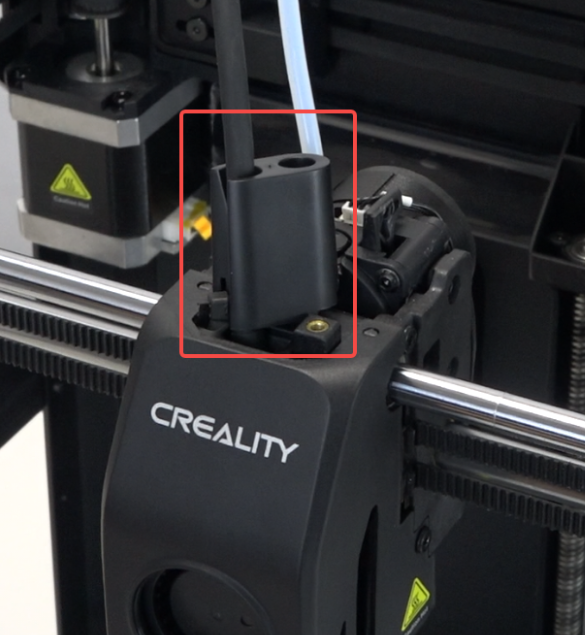
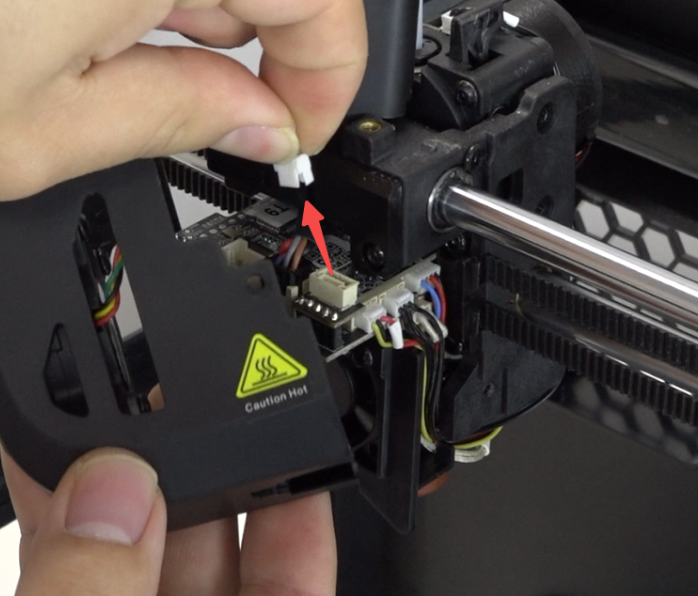
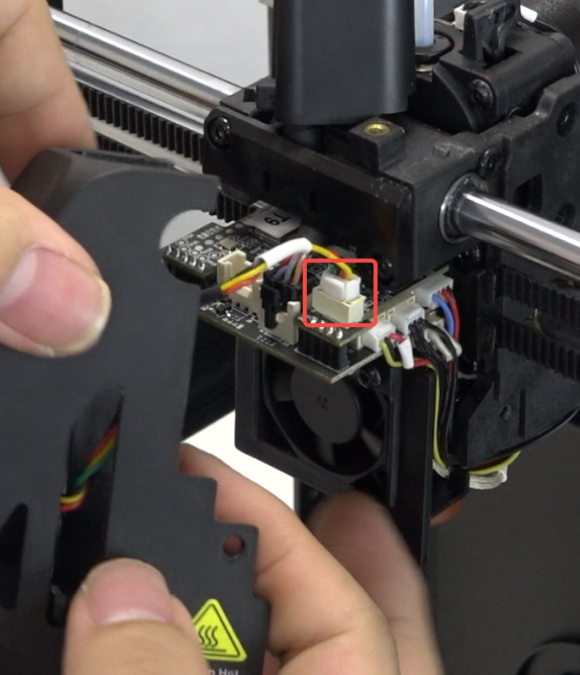
Unplug the model fan cable and remove the nozzle cover.
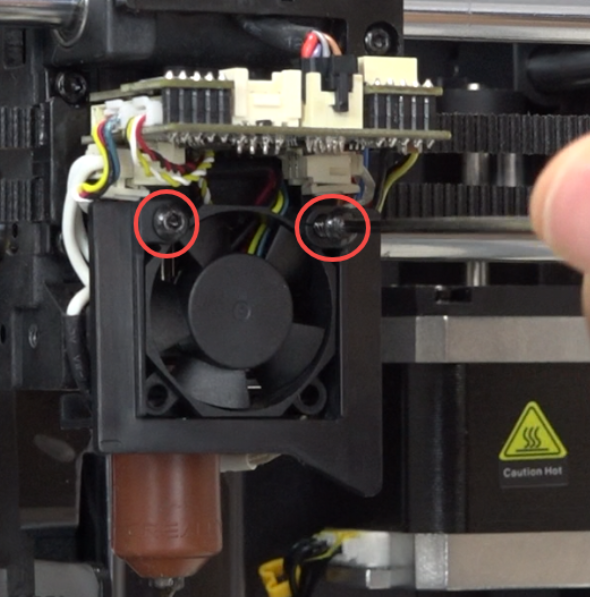
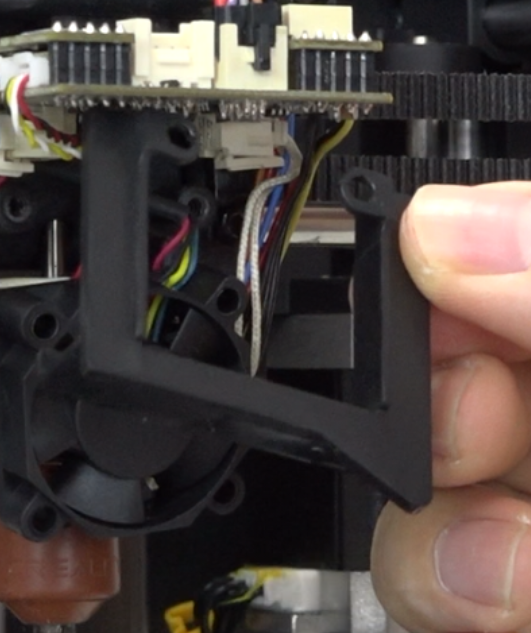
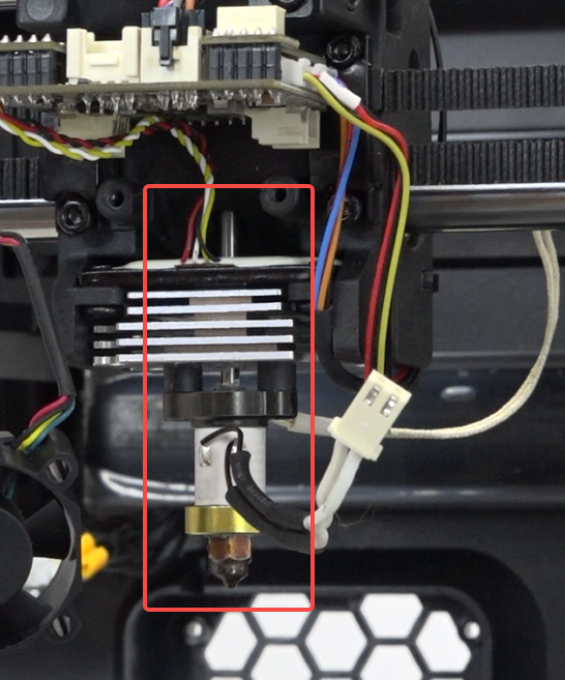
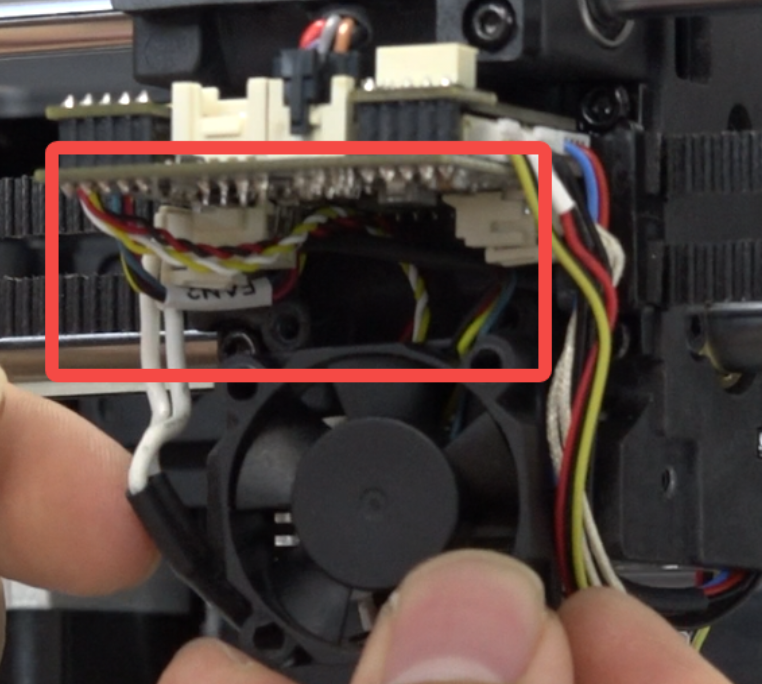
Use the hexagonal wrench to remove the 2 screws securing the heat break fan, and remove the heat break fan bracket.
 |
 |
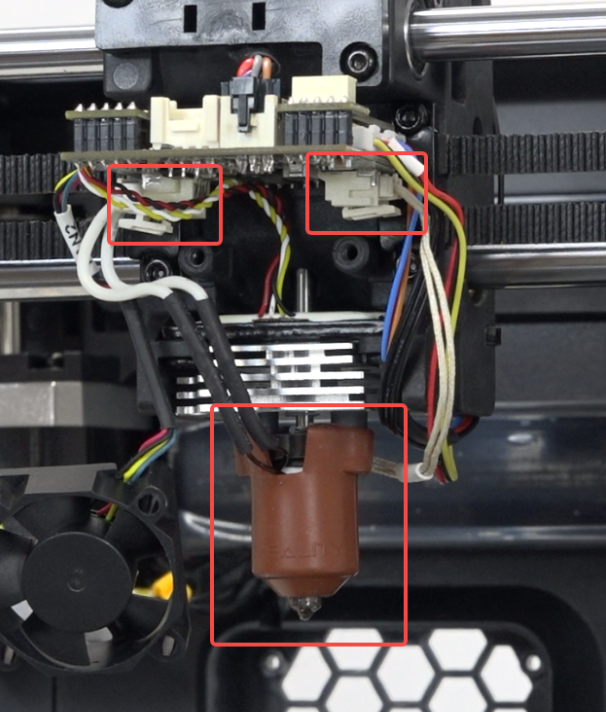
Unplug the heater wires and thermistor wires.
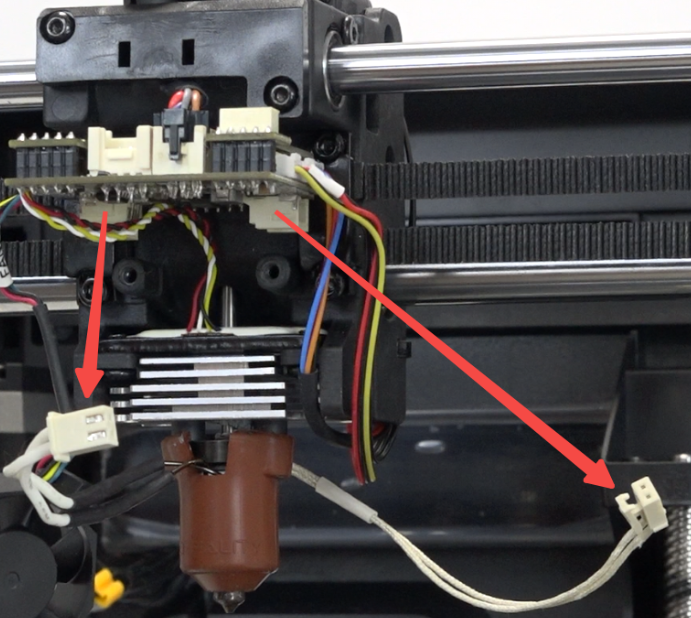
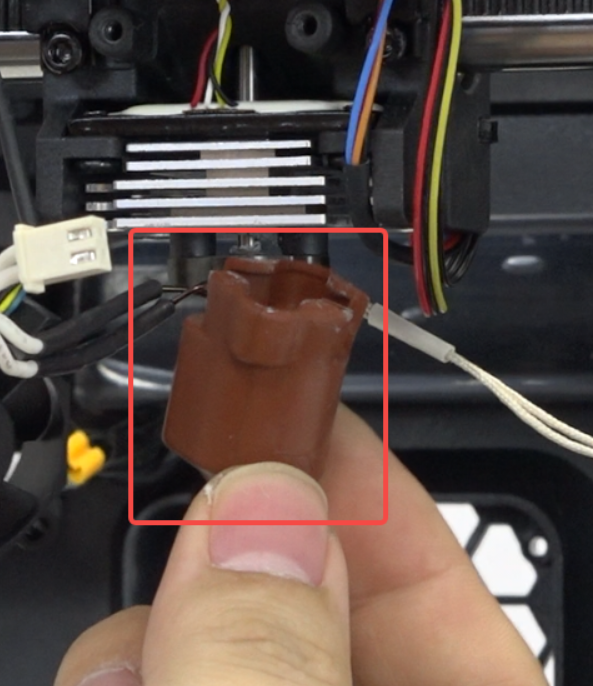
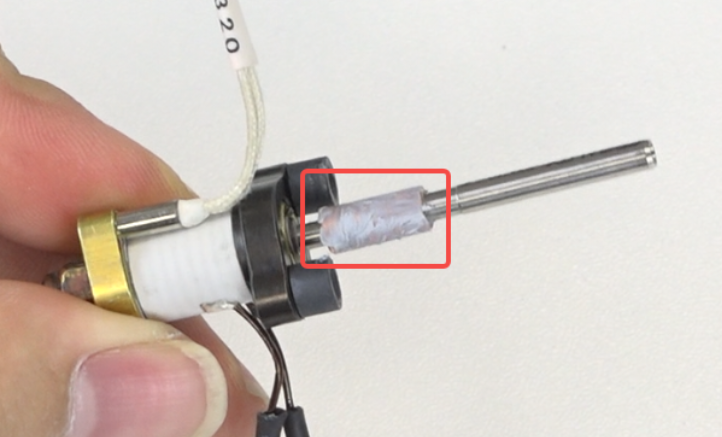
Remove the silicone sleeve.
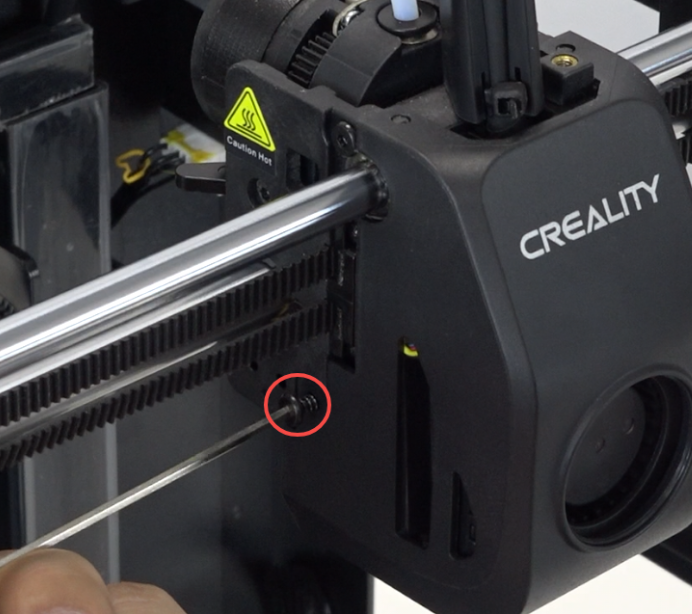
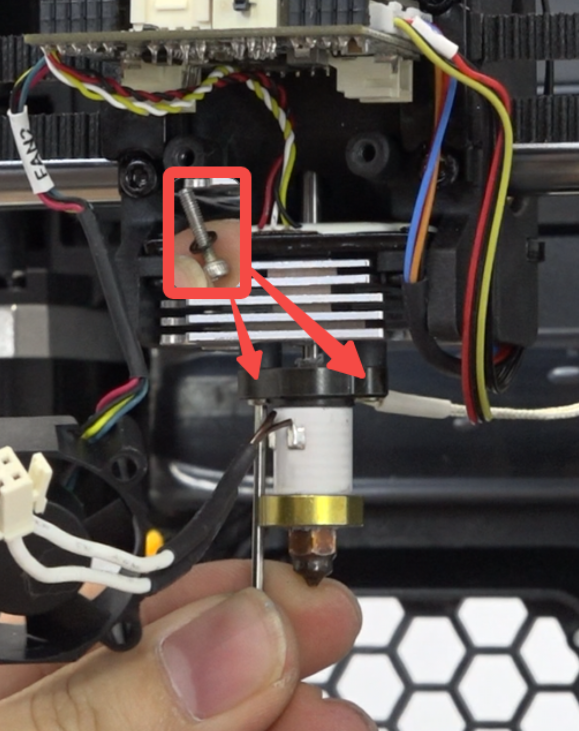
Use the hexagonal wrench to remove the 2 screws securing the hotend kit.
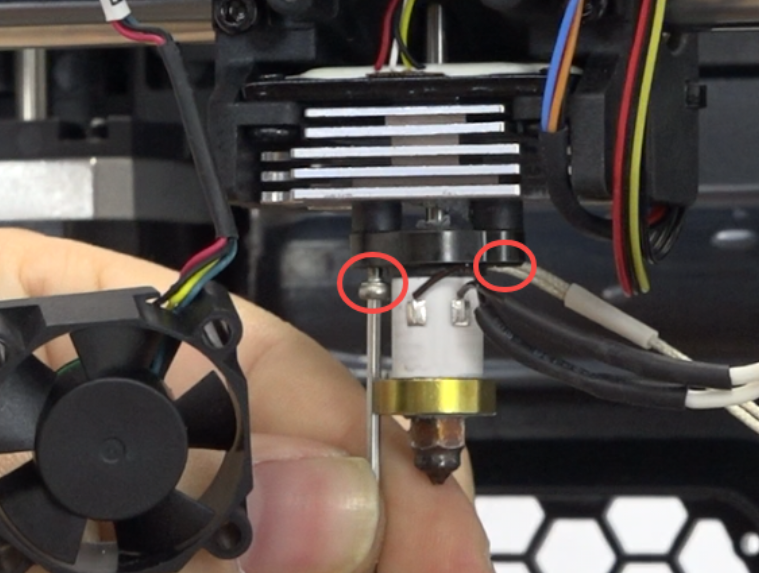
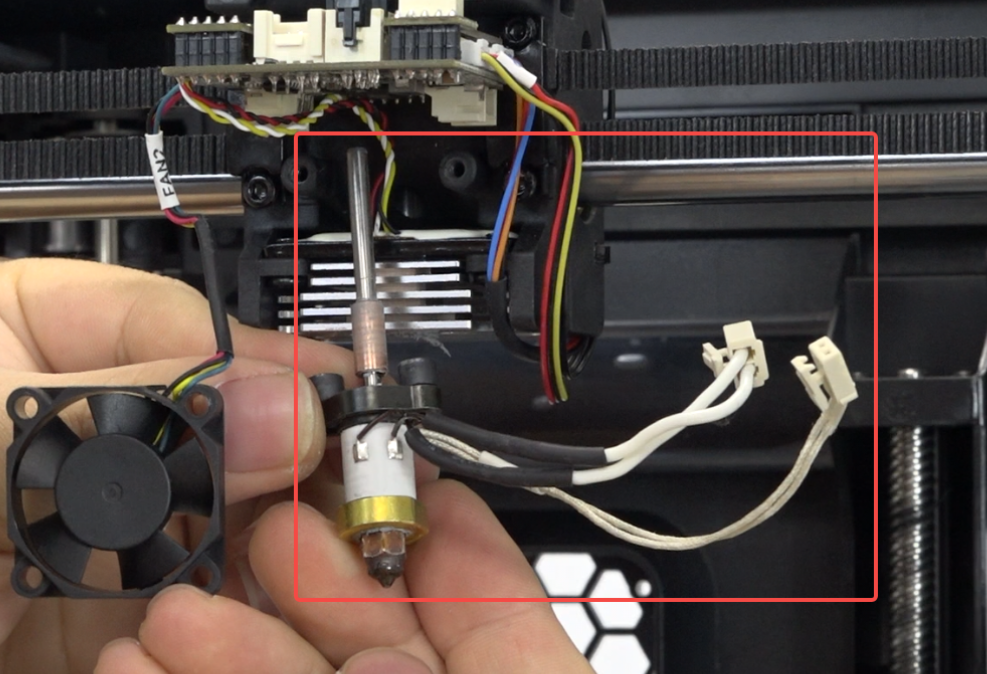
Pull out the hotend kit downward.
¶ Installation
Apply thermal paste to the heat break of the new hotend kit.
Insert the new hotend kit into the heat sink.
Use the hexagonal wrench to tighten the 2 screws securing the hotend.
Note: The screws have washers.
Connect the heater wires and thermistor wires, and put on the silicone sleeve.
Organize the heat break fan wiring.
Place the heat break fan bracket and use the hexagonal wrench to tighten the 2 screws securing the heat break fan.
Insert the model fan cable.
Install the nozzle cover and use the hexagonal wrench to tighten the 2 screws on both sides.
 |
 |
Position the front guide correctly and use the hexagonal wrench to tighten the 1 screw securing the front guide.
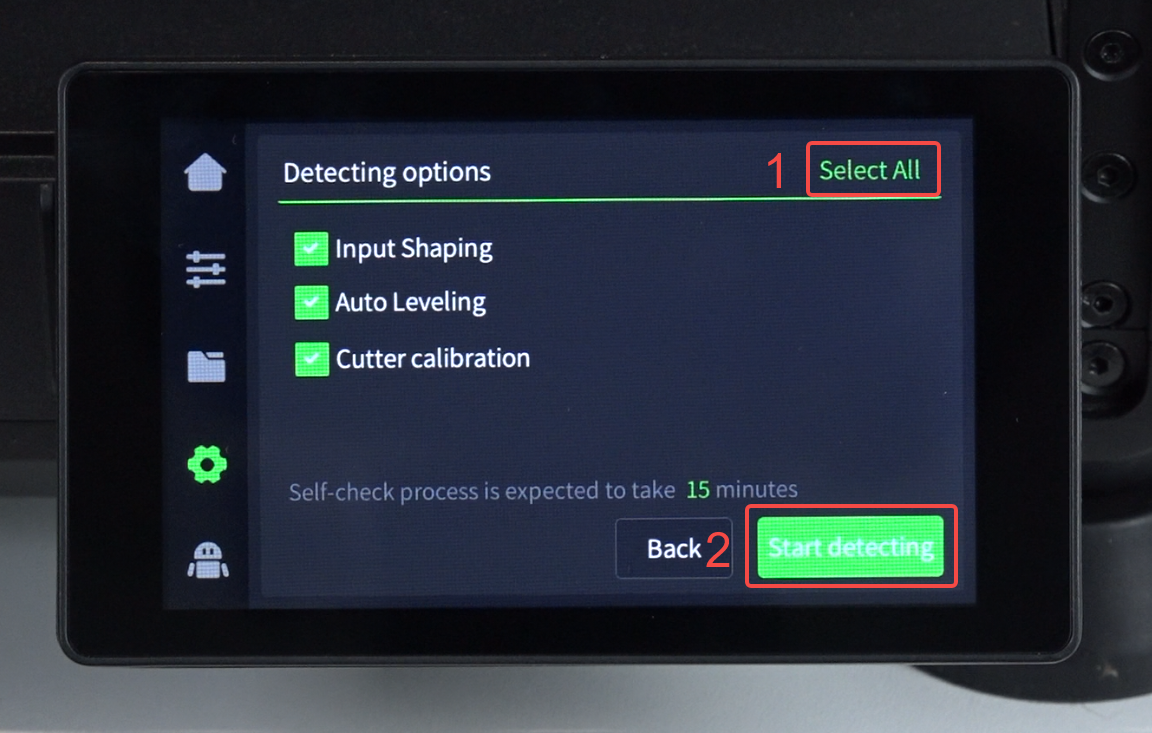
¶ Device Self-check
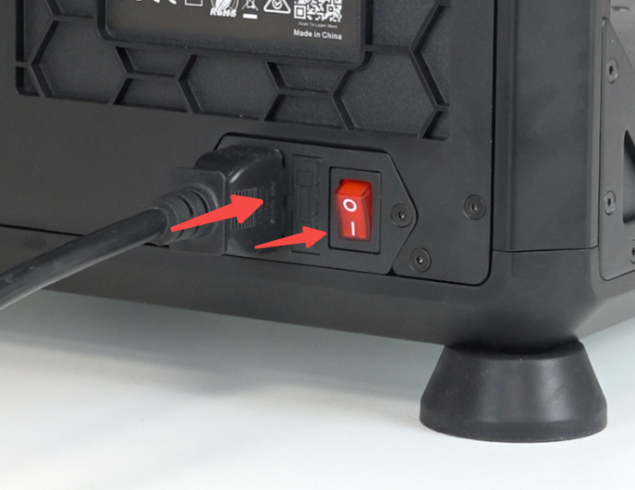
Plug in the power cord and turn on the power.
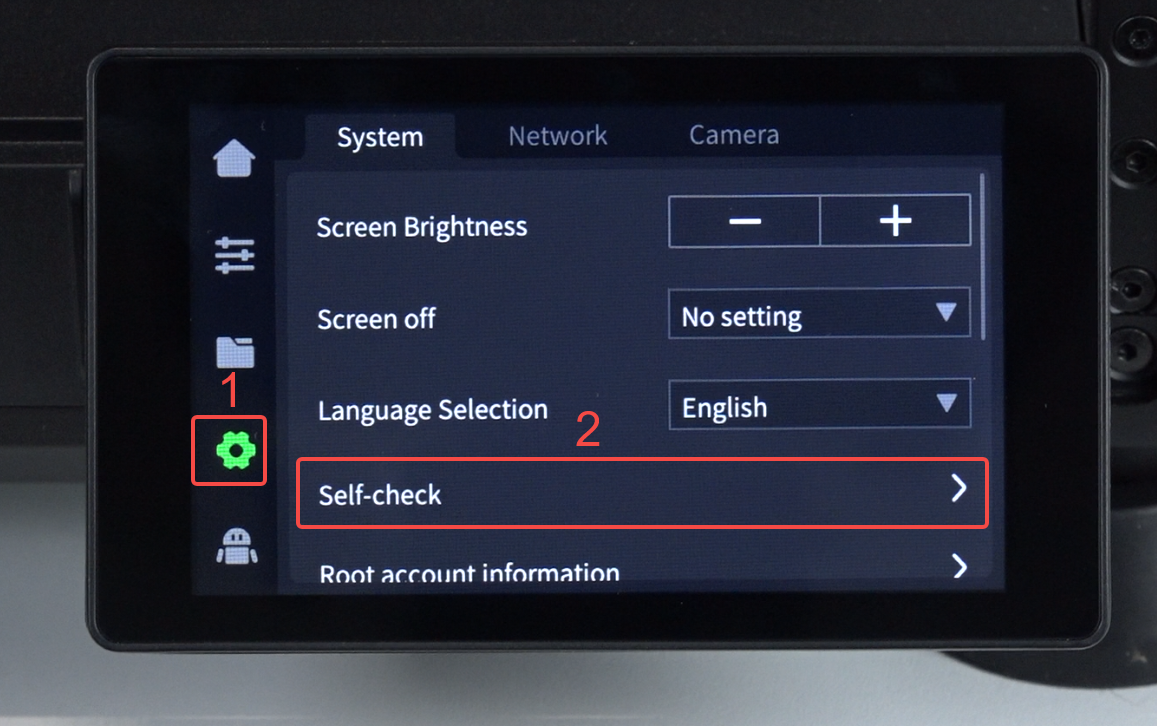
Click "Settings" - “System”- "Self-check" - "Select All" - "Start detecting", wait for self-check to complete.
 |
 |