¶ Video Tutorial
¶ Tools
Hexagonal wrench
Cutting plier
Flat-head screwdriver
New motherboard
¶ Replacement Steps
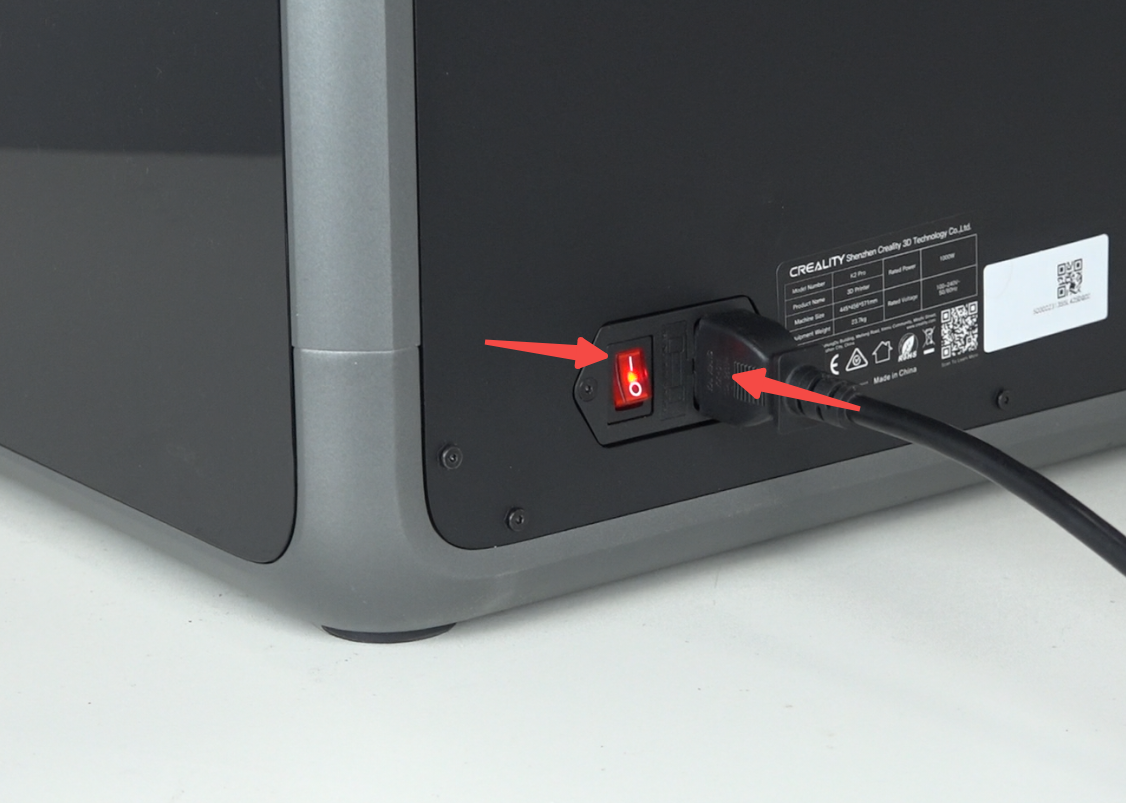
Power off and unplug the power cord.

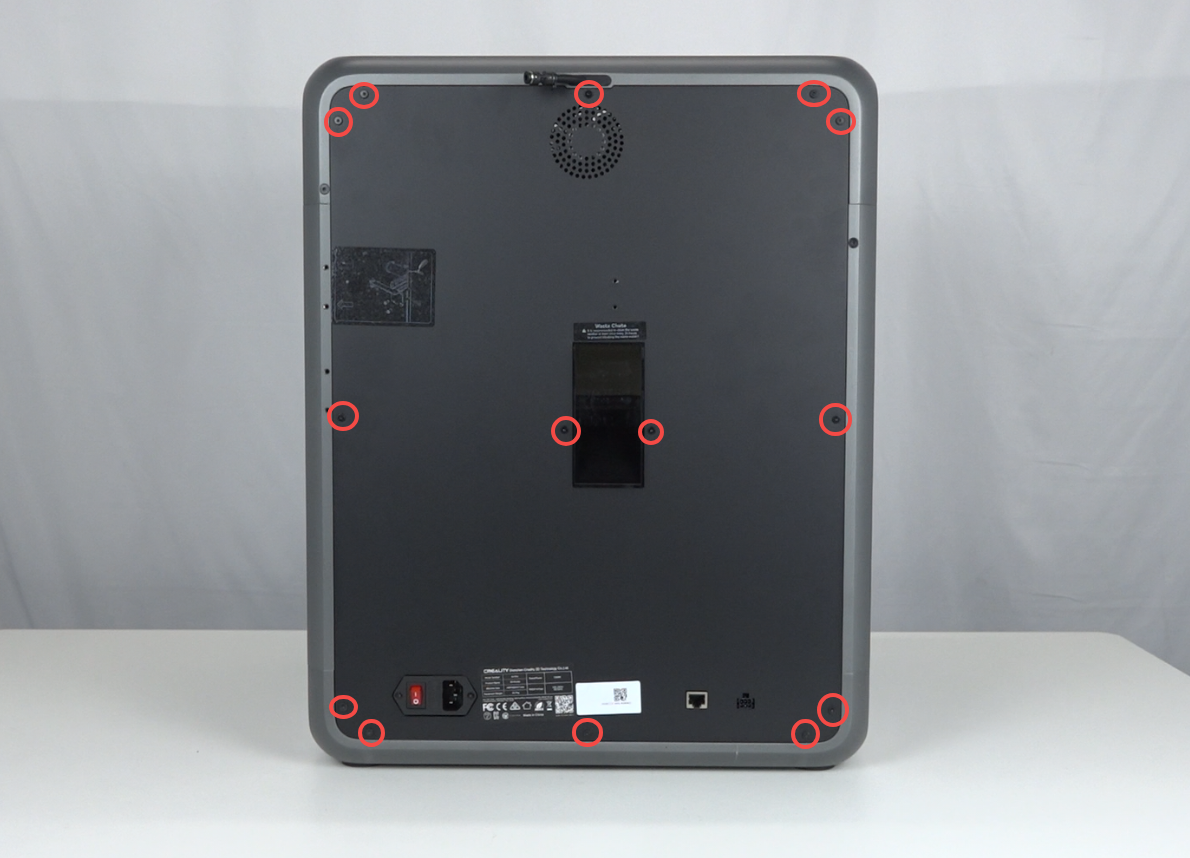
Use hexagonal wrench to remove 14 screws from the back panel

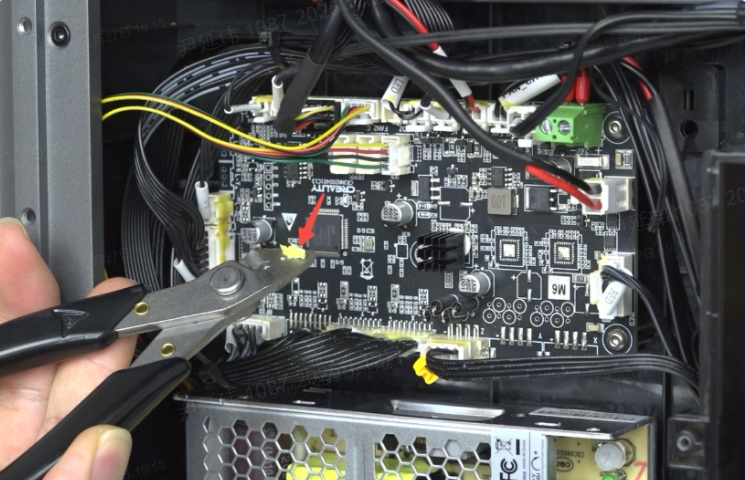
Use cutting plier to clean the yellow glue on the motherboard, be careful not to cut any wires
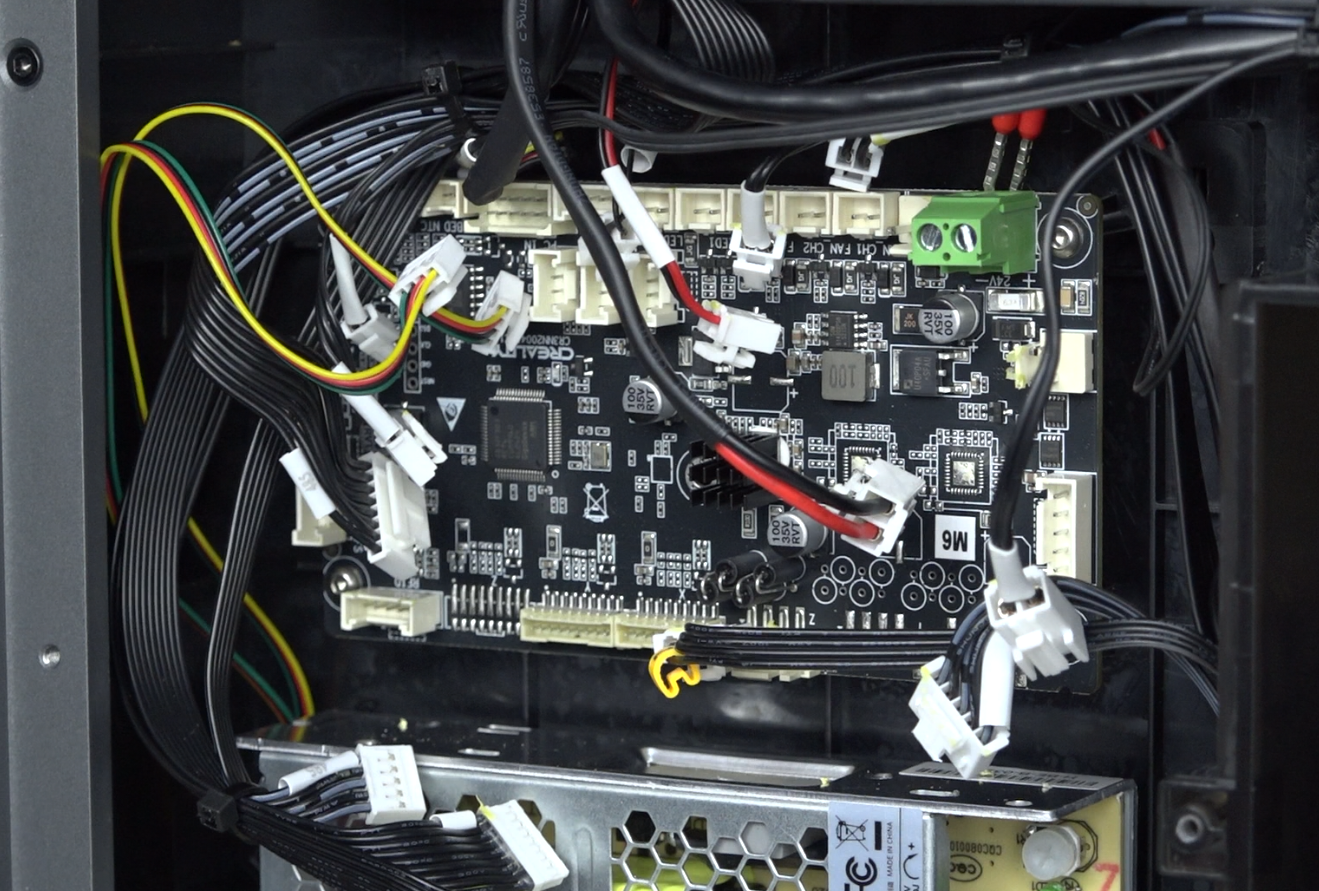
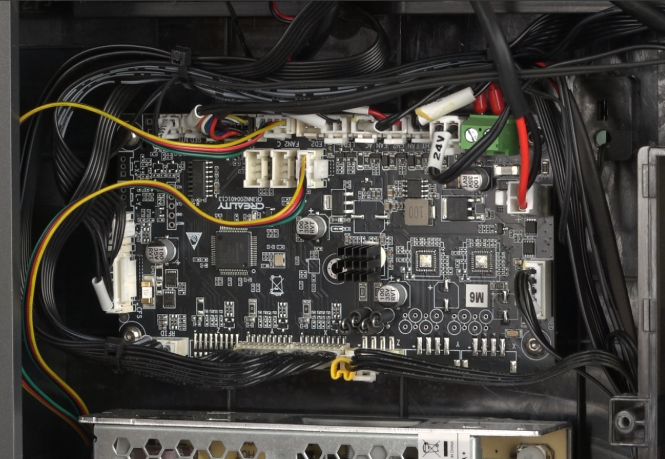
Unplug all connections from the motherboard.
Do not pull the wires forcefully. The connectors have latches - press the latch and then pull out. It's recommended to take photos before unplugging for reference.
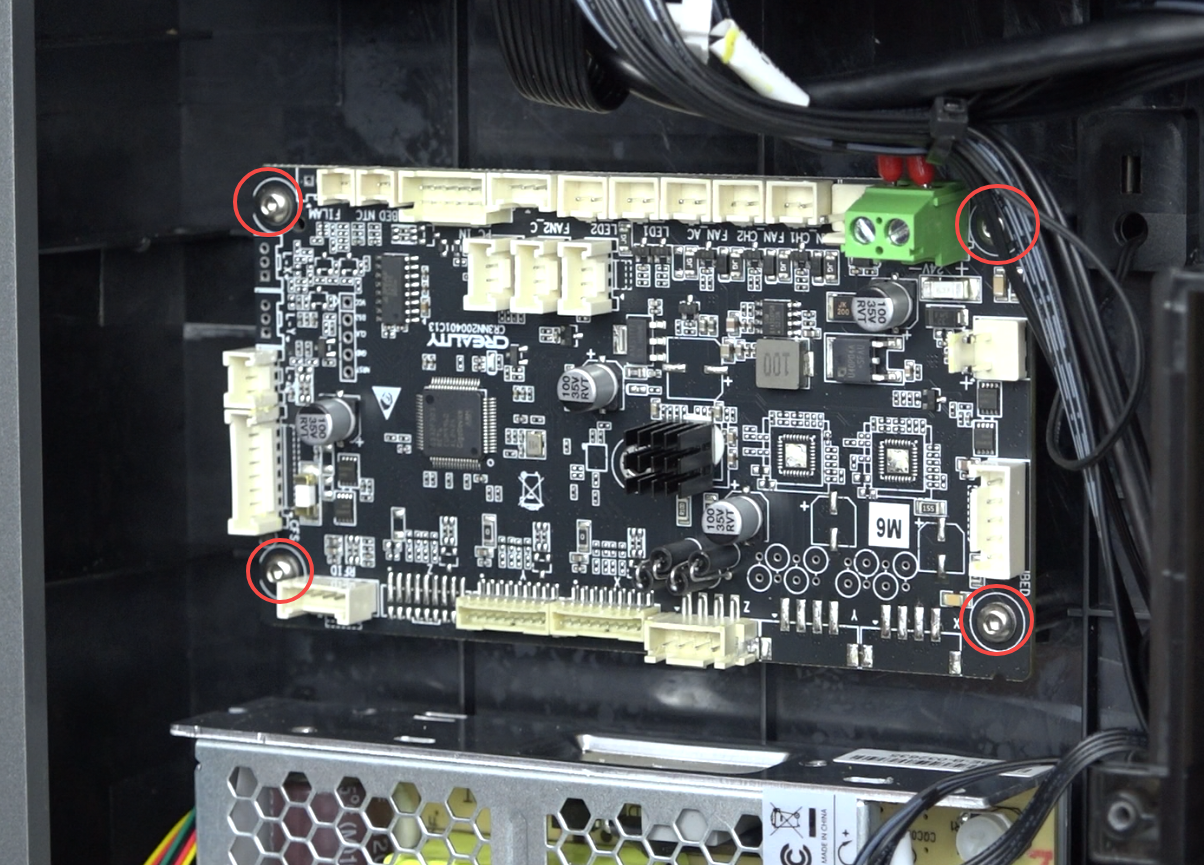
Use hexagonal wrench to remove 4 screws securing the motherboard
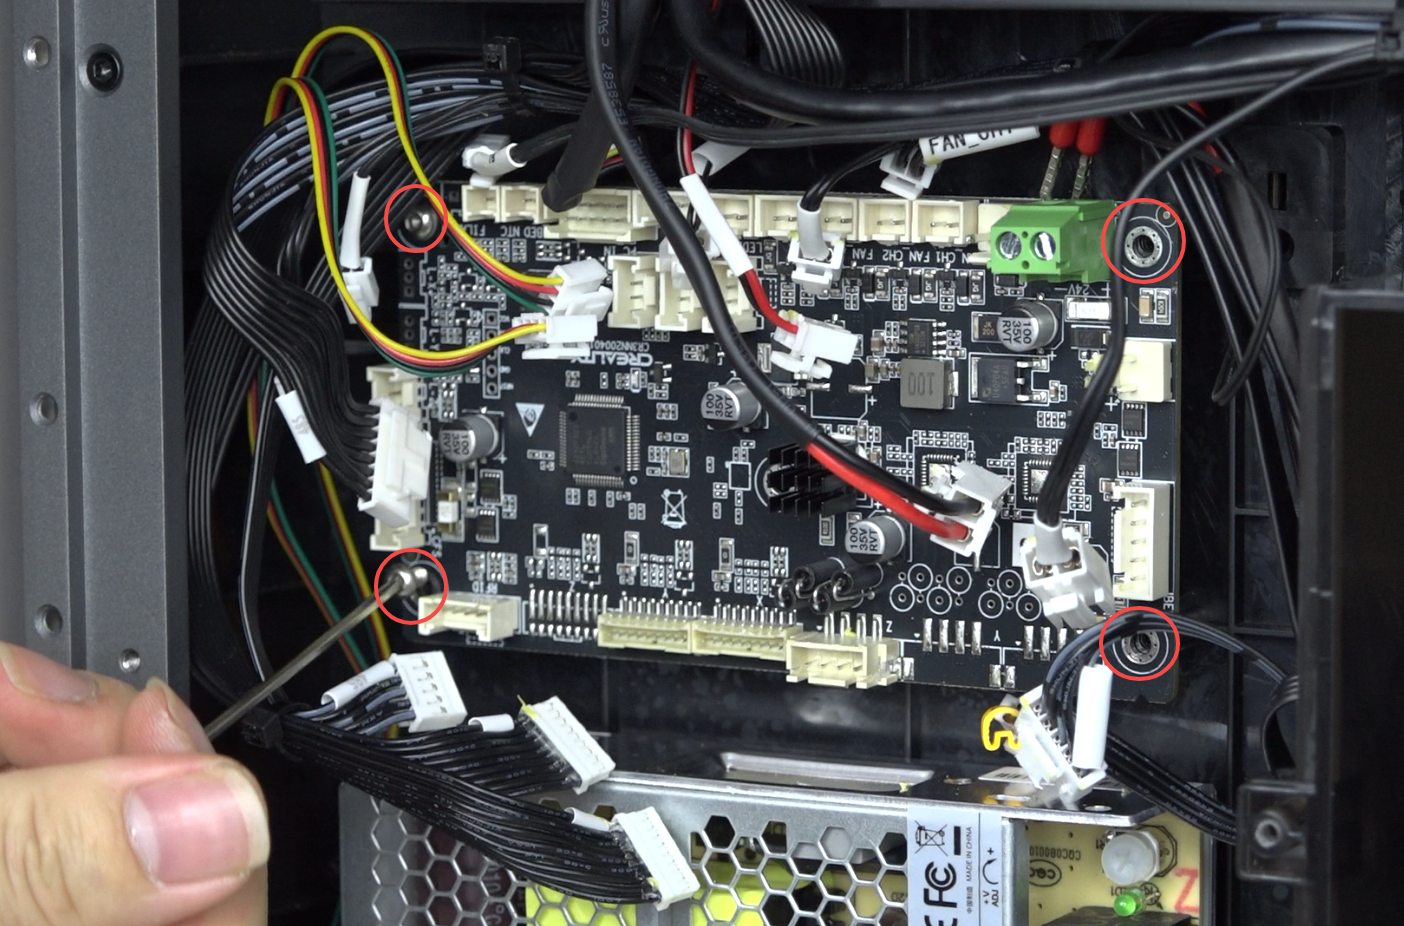
Remove the motherboard

¶ Installation
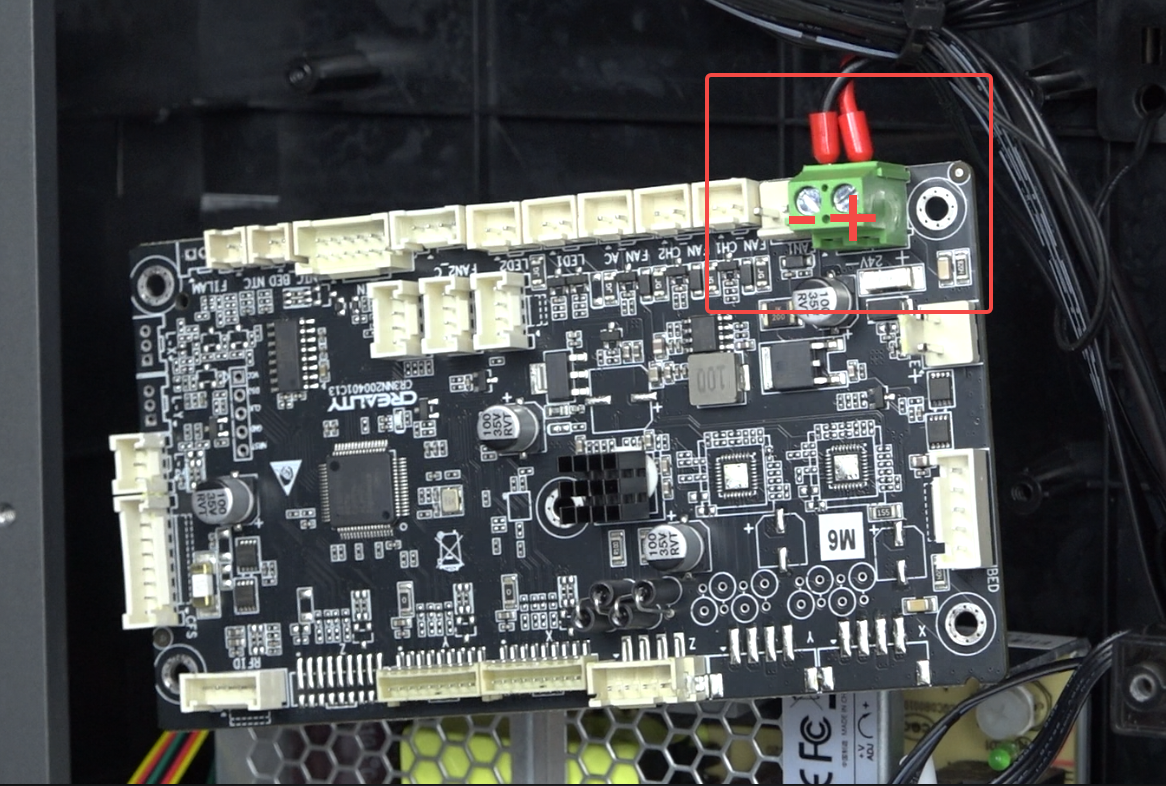
Install the new motherboard, first connect the 24V power cable (black on left, red on right), use flat-head screwdriver to tighten the securing screws.
Position the motherboard, align the screw holes, use hexagonal wrench to tighten the 4 securing screws
Connect all cables according to the wiring diagram

Place back panel and tighten screws with hexagonal wrench
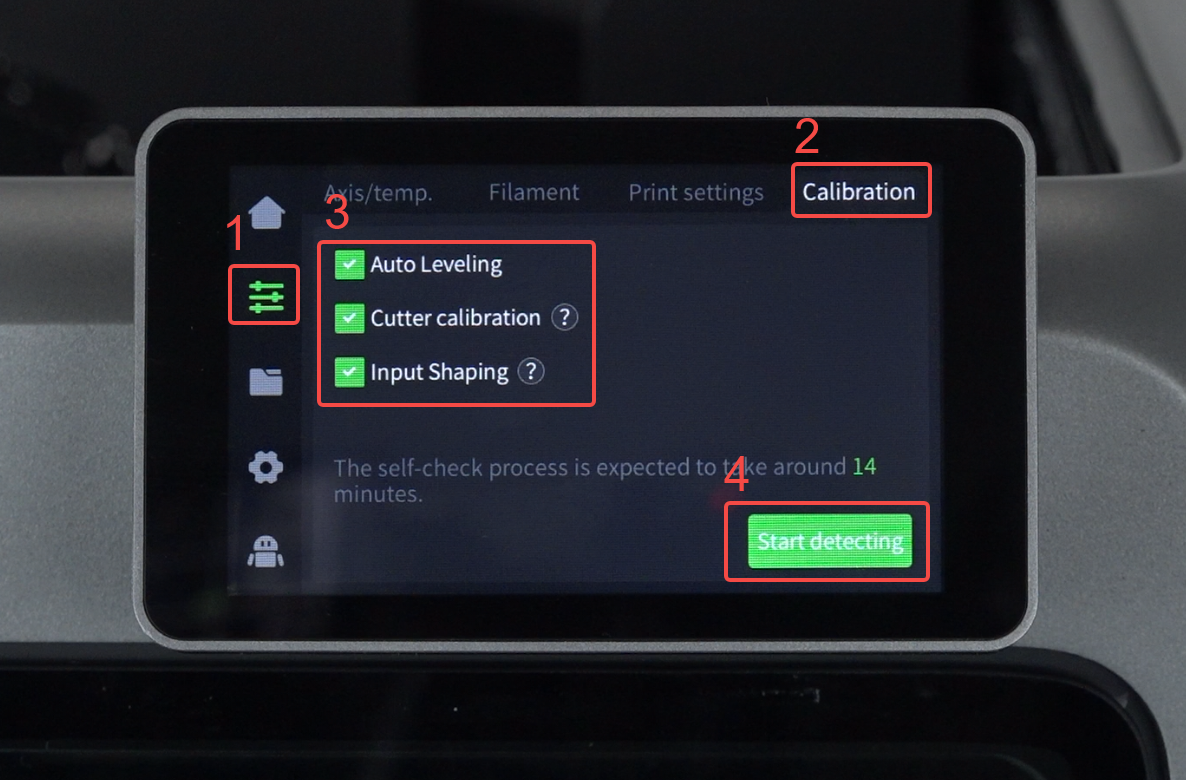
¶ Device Self-Check
Plug in power cord and turn on
Click "Prepare" - "Calibration" - "Select All" - "Start", wait for device calibration to complete