¶ 1. Load Filament
¶ Step One
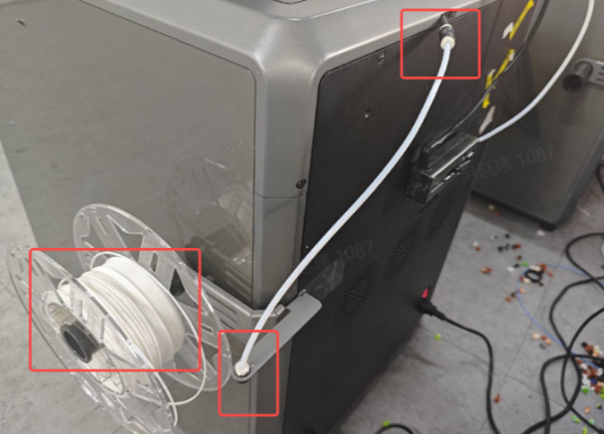
Place the filament on the external spool holder and ensure the PTFE tube from the spool holder is connected to K2 Plus printer.
¶ Step Two
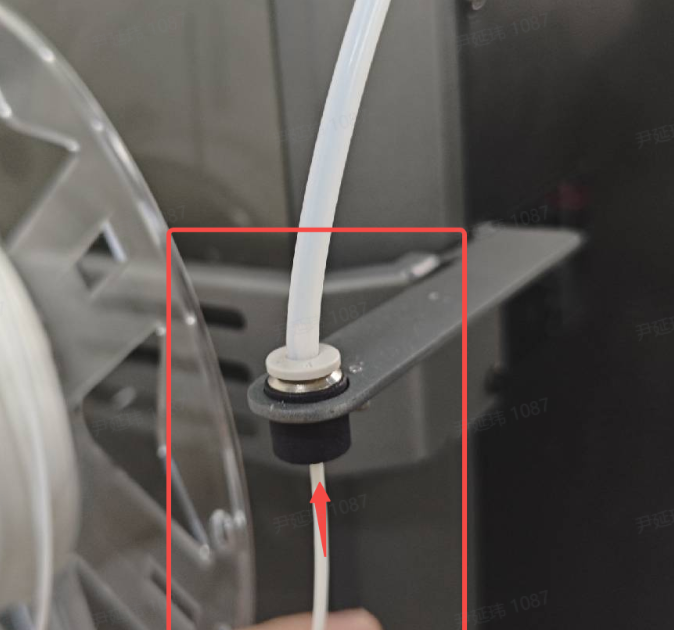
Insert the filament into the PTFE tube from the spool holder, gently pushing it through until it cannot go any further.
¶ 1.1 Edit Filament Information
¶ Non-RFID Filament
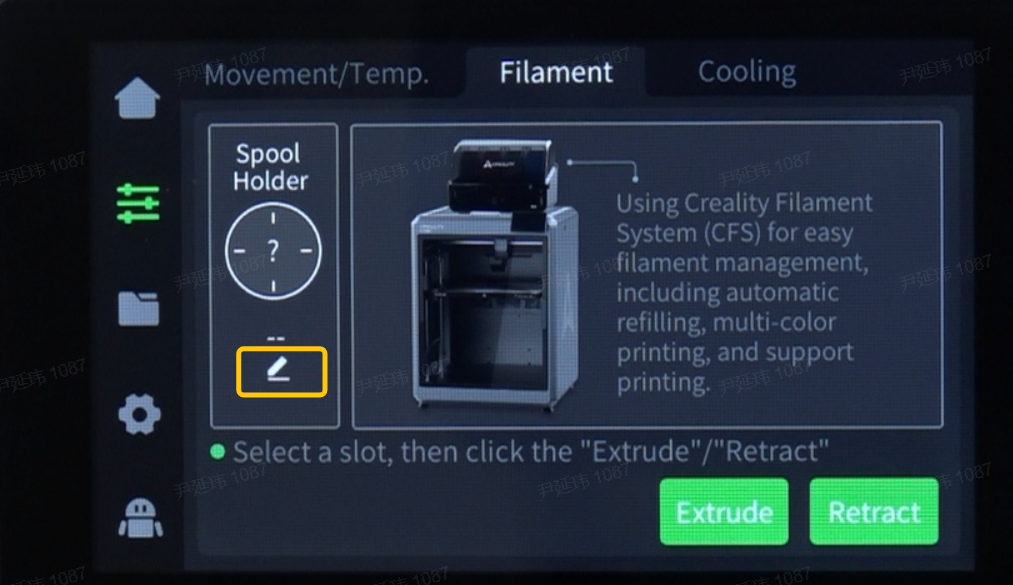
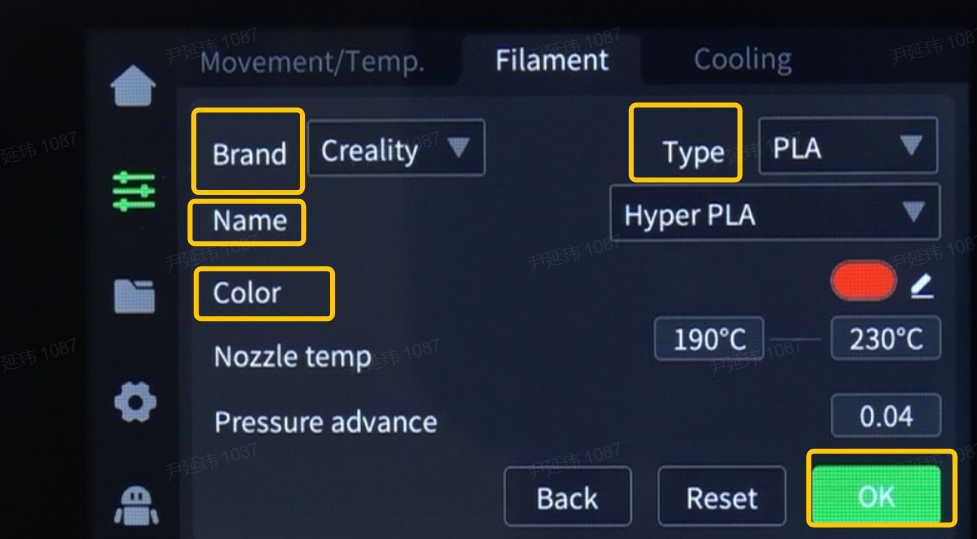
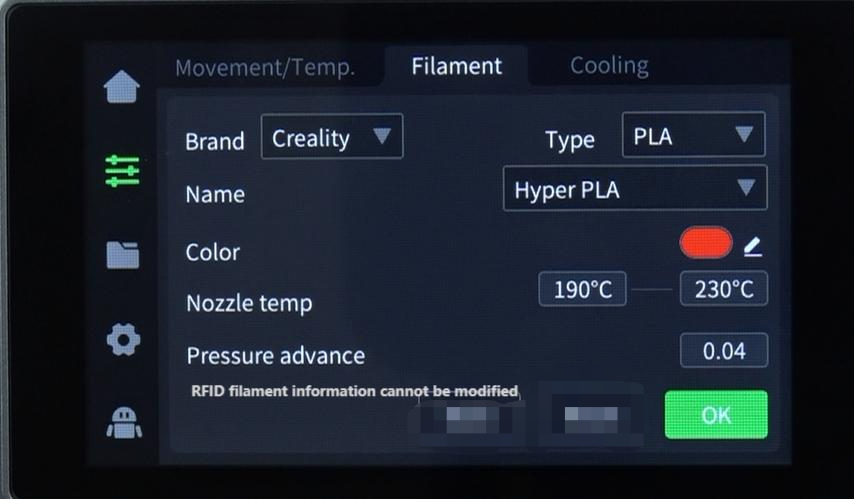
On the filament page, click the edit button below "Spool Holder", and set the filament brand, filament type, and filament name respectively. Finally, set the filament color and click "OK" to save.
¶ RFID Filament
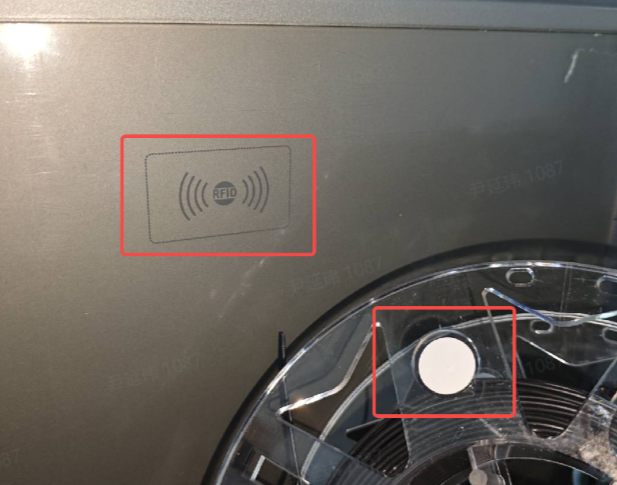
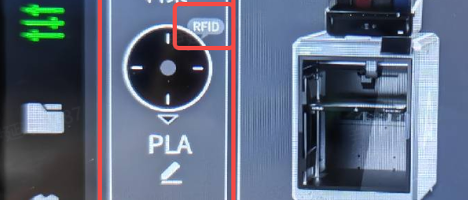
When using RFID filament, place the chip on the filament over the scanning area on the side panel. The printer will automatically read the filament information. No editing is required. At this point, clicking the "edit" button below will display the automatically recognized filament information, but you can still manually modify it. After modification, the "RFID" indicator on the filament page for the spool holder will disappear.
¶ 1.2 Extrude Filament
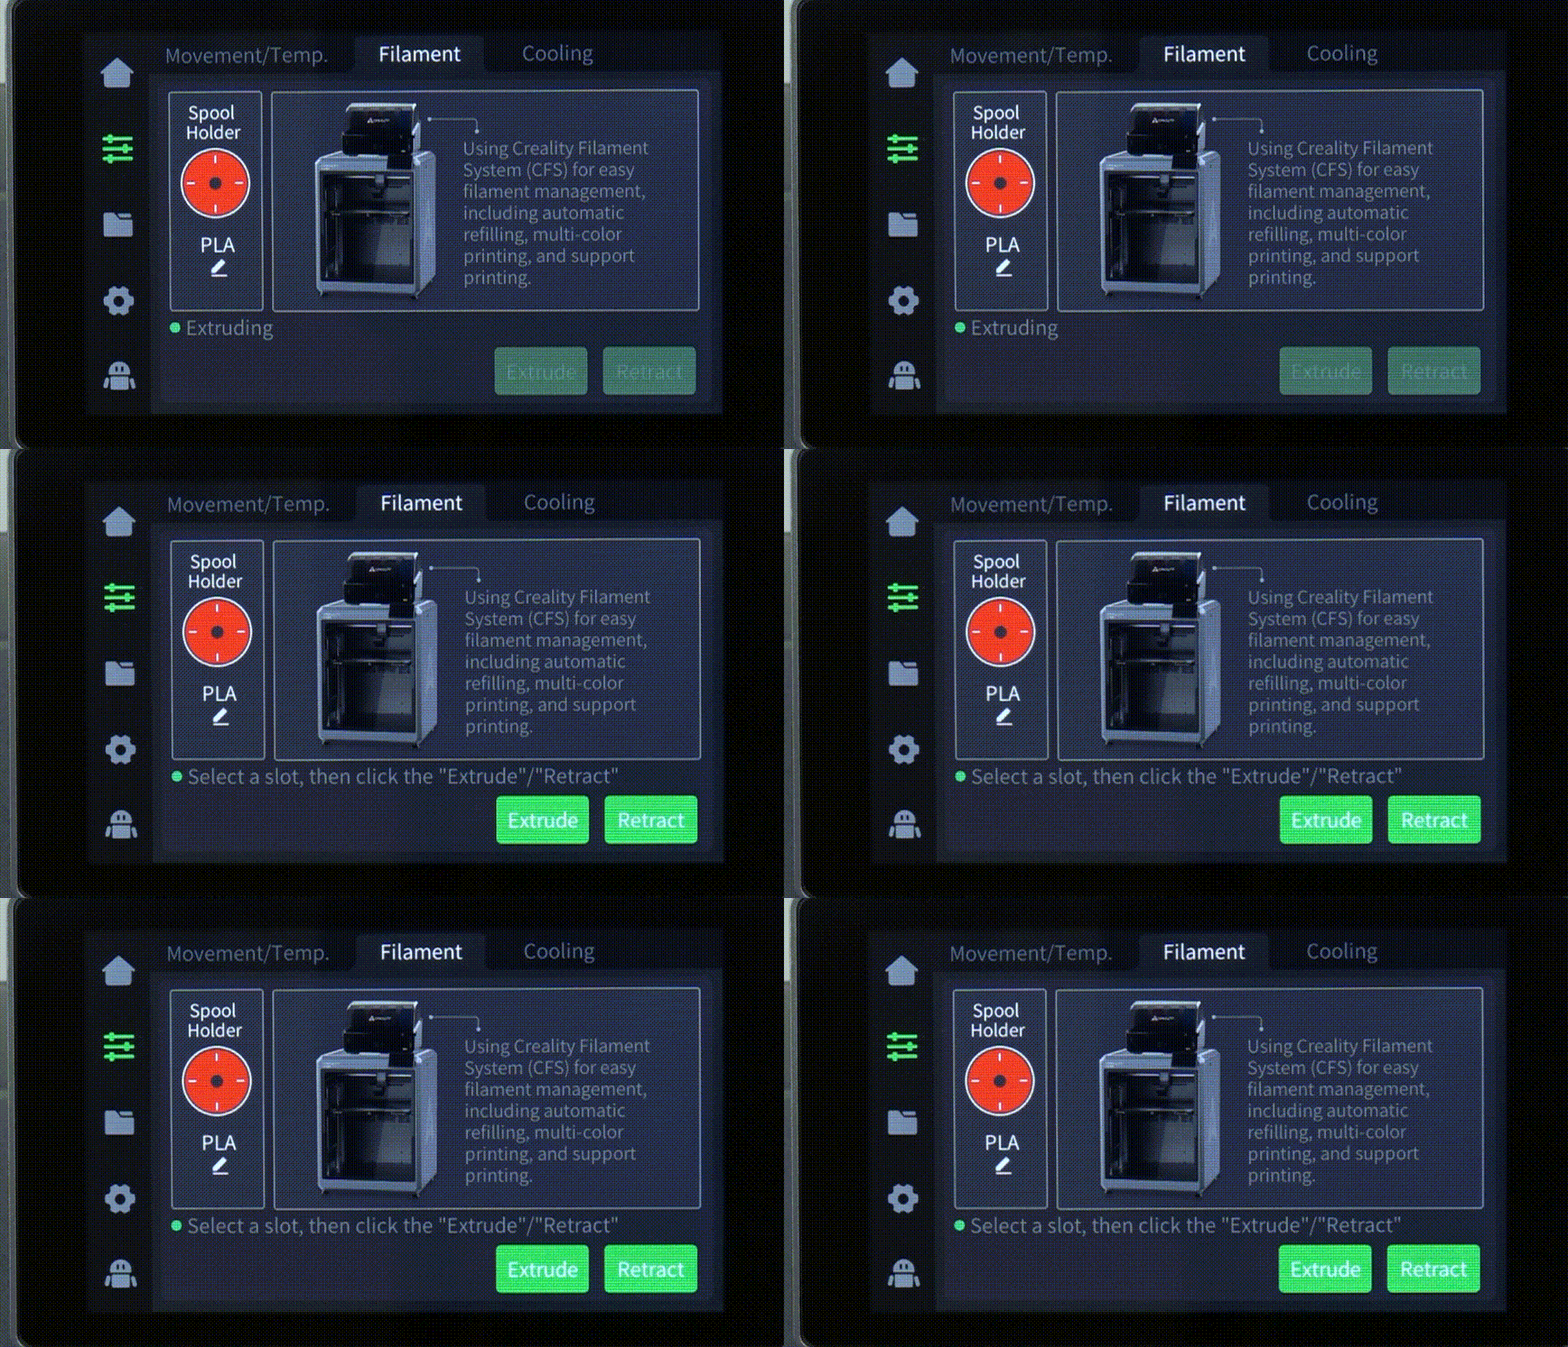
On the filament page, click "Extrude"
Observe the nozzle - if filament is extruding, wait for the "Extrude" button to illuminate. If no filament is extruding, gently push the filament from the PTFE tube at the back towards the extruder, then click "Extrude" again.
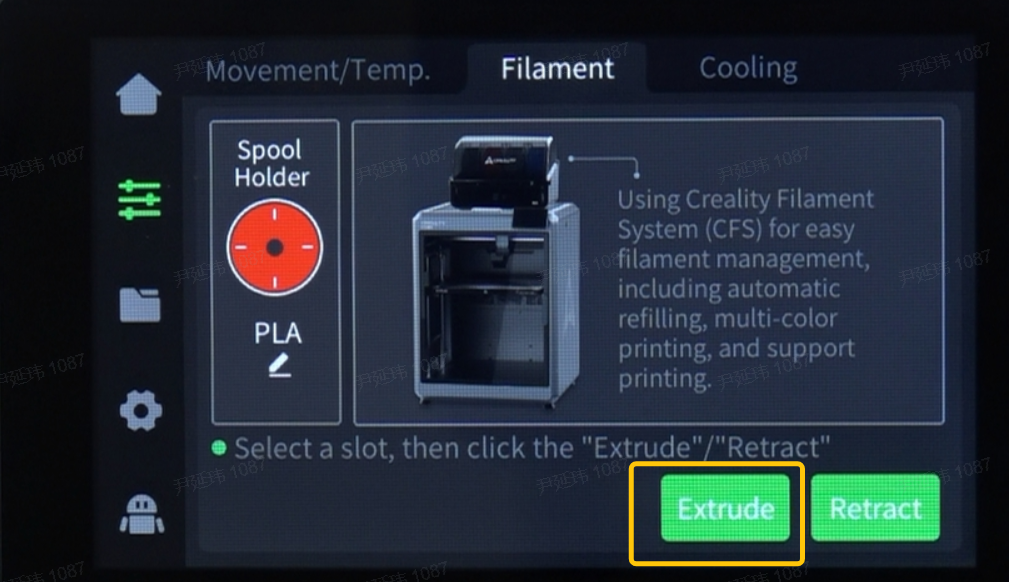
After clicking "Extrude", the nozzle will heat up to the set temperature before loading filament. The "Extrude"/"Retract" buttons will be grayed out during loading.
.png)
¶ 2. Unload Filament
¶ Step One
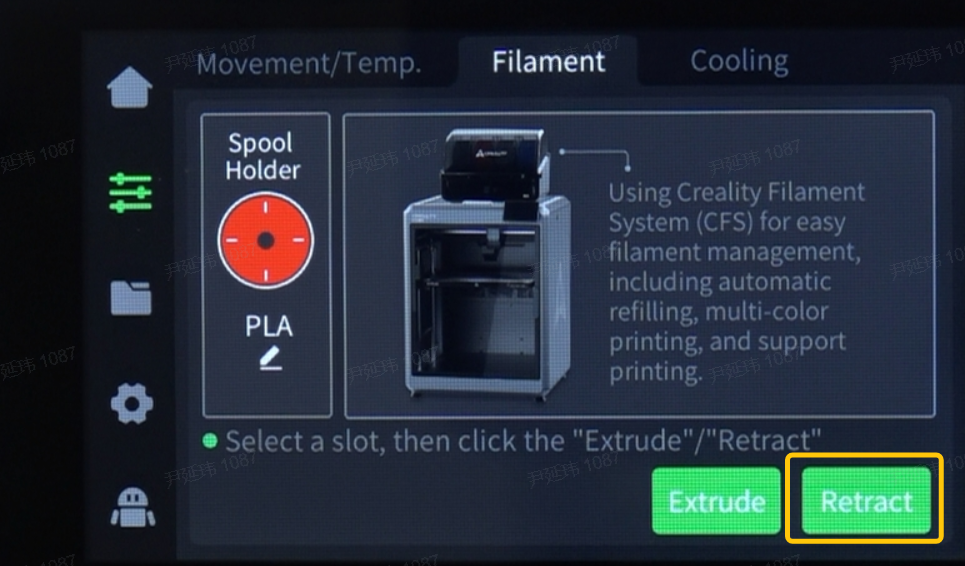
On the filament page, click "Retract". The extruder will move to the front-left to cut the filament, then retract it. The "Retract" button will illuminate when retraction is complete.
After clicking "Retract", the nozzle heats up, the filament is cut, and then retracted. The "Extrude"/"Retract" buttons gray out during this process.
¶ Step Two
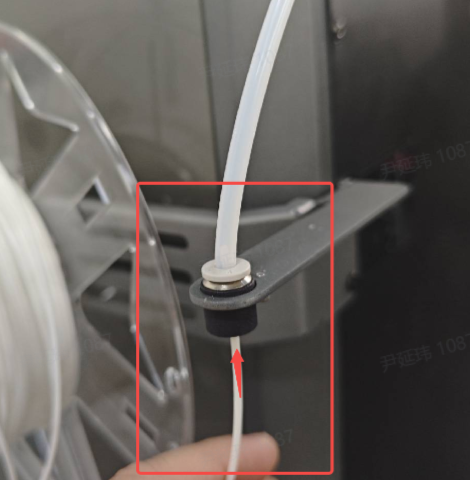
Once the "Retract" button illuminates, you can pull out the filament from the PTFE tube.
¶ 3. Replace Filament
- Ensure printing is paused or stopped. On the filament page, click "Retract". The extruder will move front-left to cut the filament, then retract it. The "Retract" button illuminates when retraction is complete.
After clicking "Retract", the nozzle heats up, cuts the filament, and then retracts it. The "Extrude"/"Retract" buttons gray out during this.
-
Once the "Retract" button illuminates, you can pull out the old filament from the PTFE tube.
-
Feed the new filament into the spool holder PTFE tube, gently pushing until it cannot go further.
¶ 4. Modify Old Filament
¶ 4.1 For Non-RFID Filament
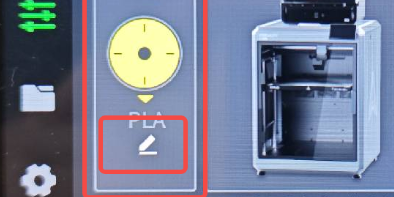
On the filament page, the spool holder filament information is still old. Click the edit button and set the new filament brand, type, name and color. Click "OK" to save.
¶ 4.2 For RFID Filament
Place the filament chip near the side panel scanning area to auto-detecting the settings - no editing required. Clicking edit will show the refilling settings, but you can still modify them. Modifying removes the "RFID" label.


¶ 4.3 Extrude filament
On the filament page, click "Extrude". Observe the nozzle - if filament is extruding, wait for the "Extrude" button to illuminate. If there is no loading, gently push filament from the rear PTFE tube towards the extruder and click "Extrude" again.
After clicking "Extrude", the nozzle will heat up before loading filament. The "Extrude"/"Retract" buttons gray out during extruding.
¶ 4.4 Start to print
Once filament loading is complete, you can resume printing.