¶ Tools
H2.0 hexagonal wrench
New strain gauge
¶ Location
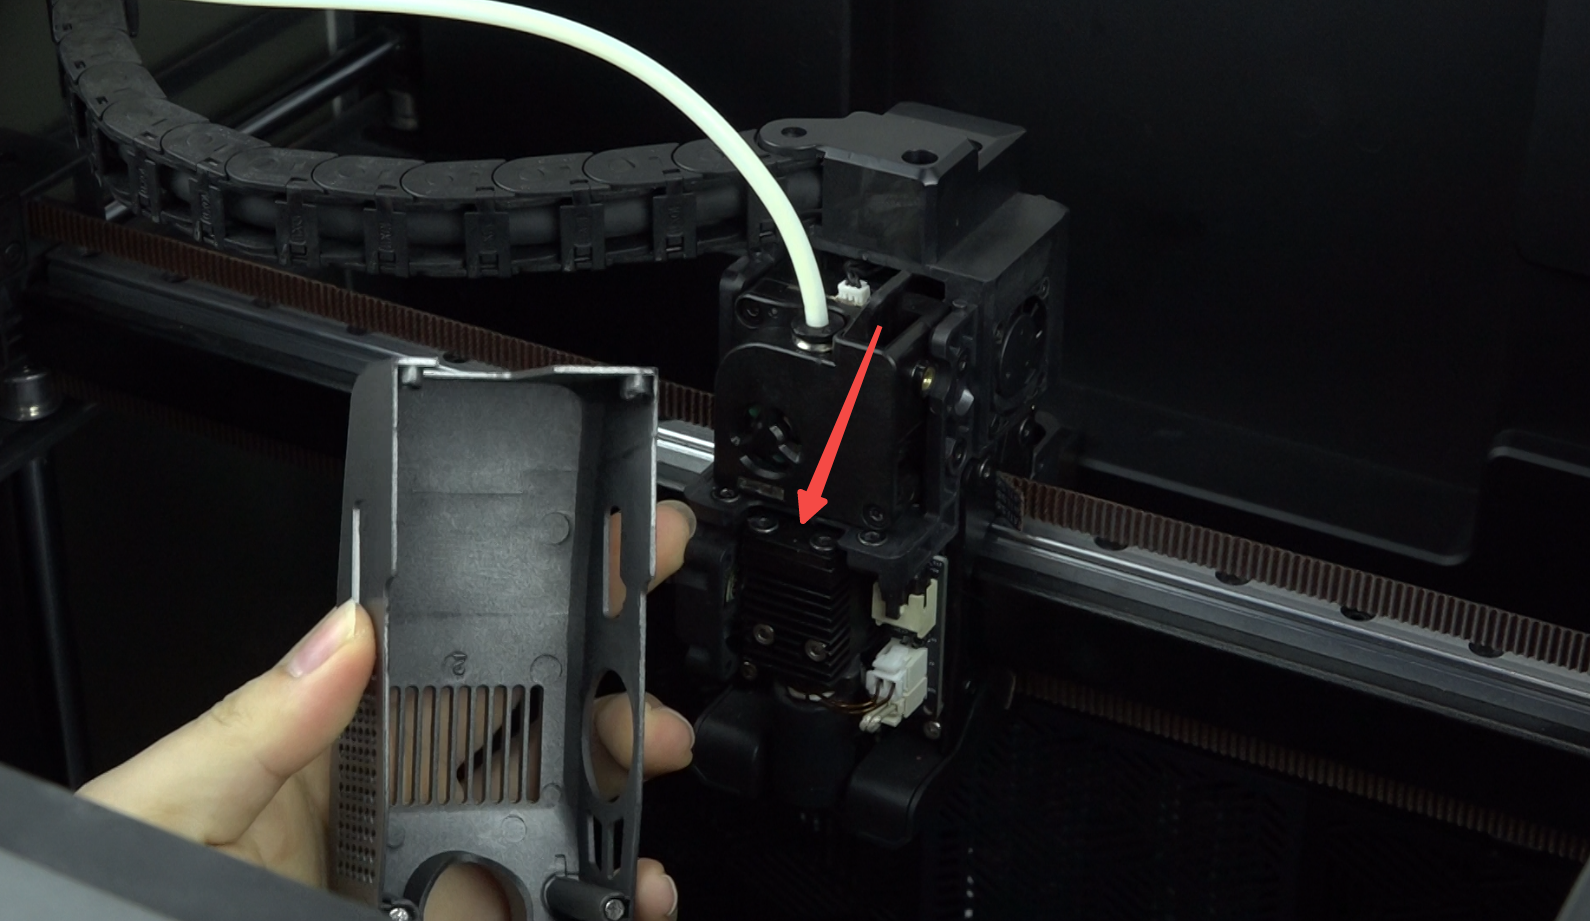
The strain gauge is installed on the printhead assembly
¶ Steps
¶ 1. Unload filament and power off
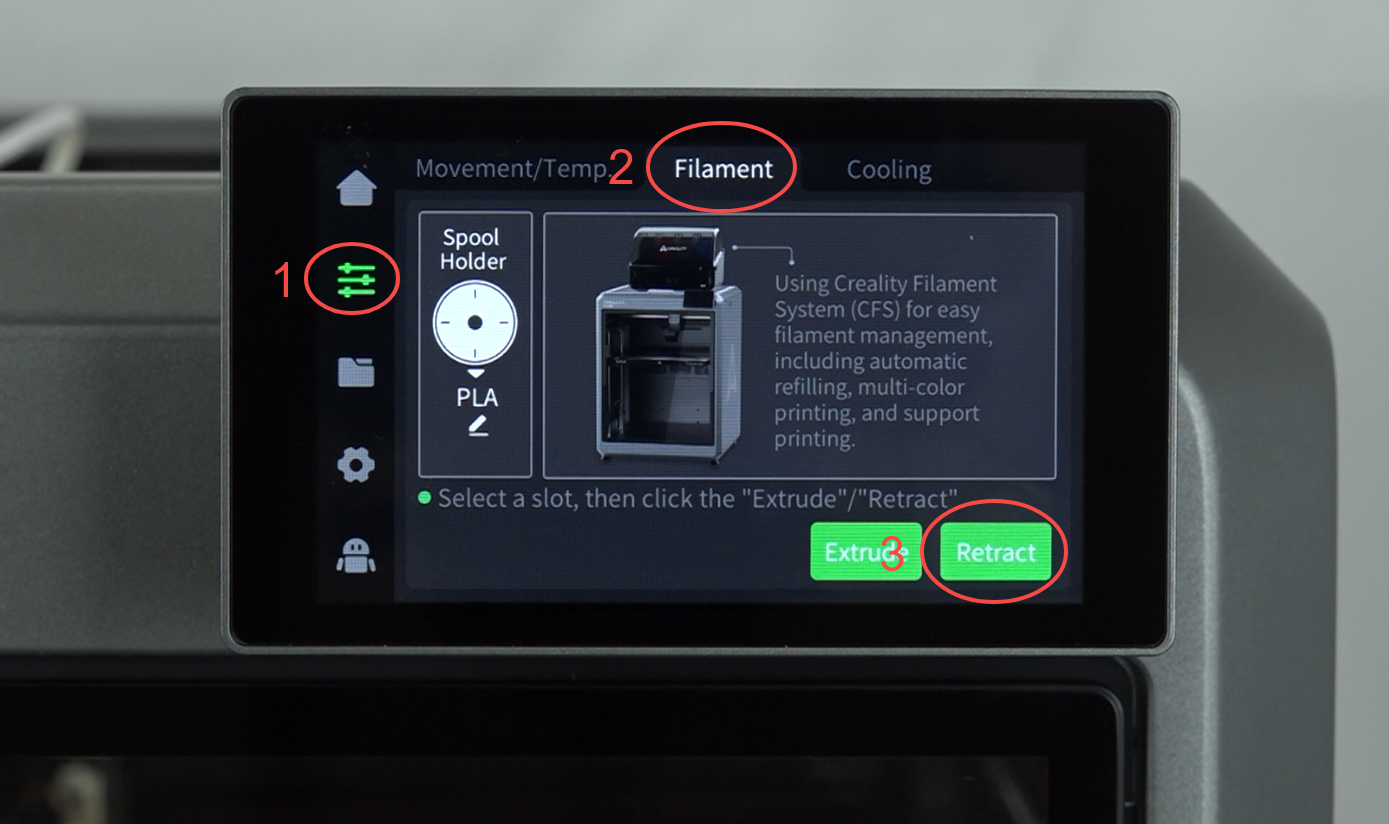
1.1 Click Prepare - Filament - Retract
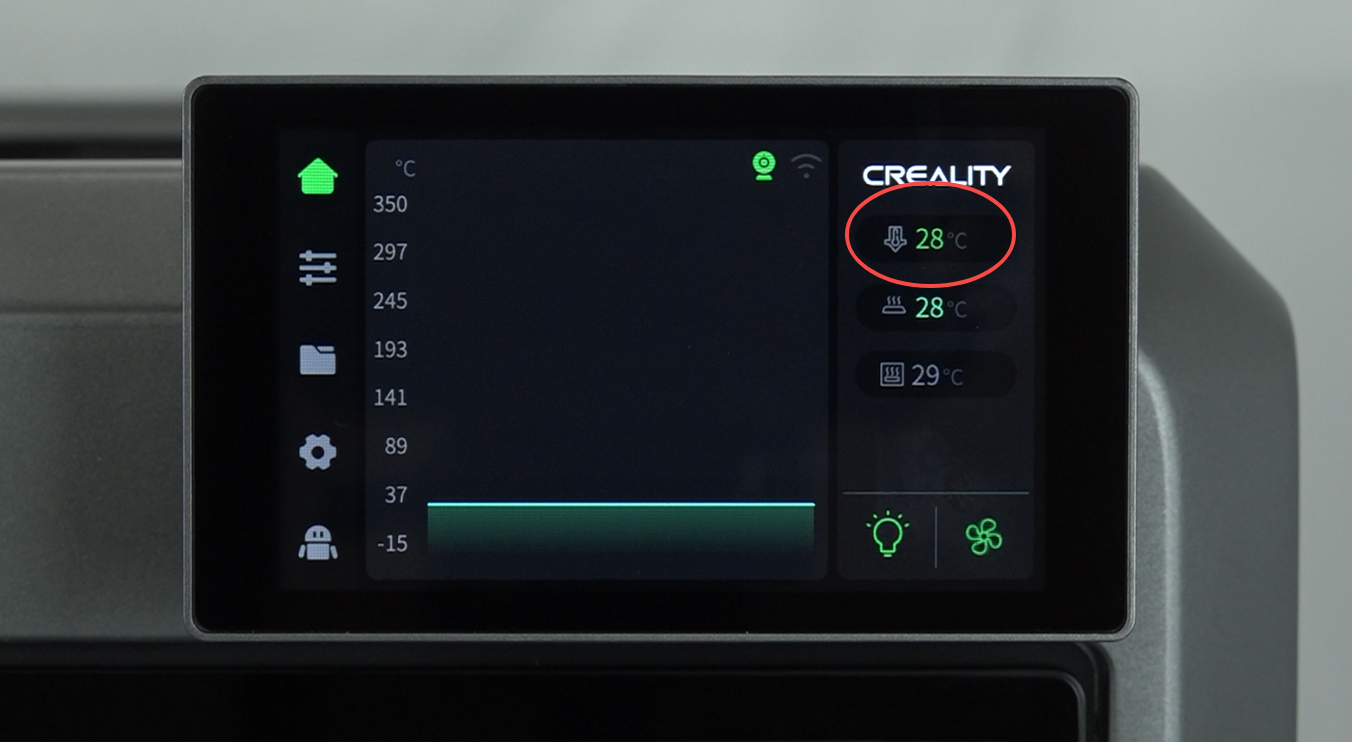
1.2 Wait for the nozzle temperature to drop to 50°C, then power off and unplug the power cord.
¶ 2. Disassemble the upper part of the hotend assembly
2.1 Use the hexagonal wrench to remove three M2 screws on the drag chain cover.
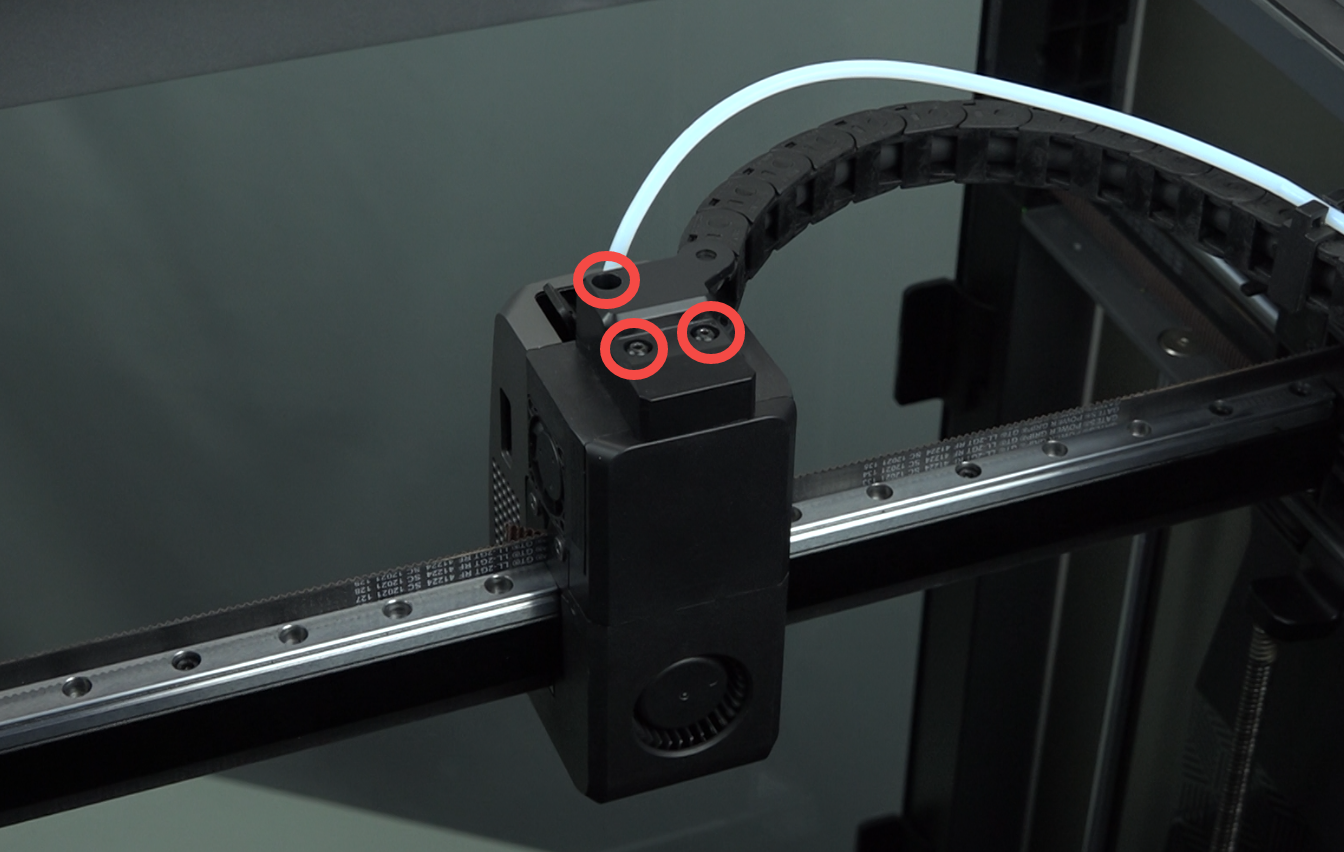
2.2 Remove the drag chain cover.
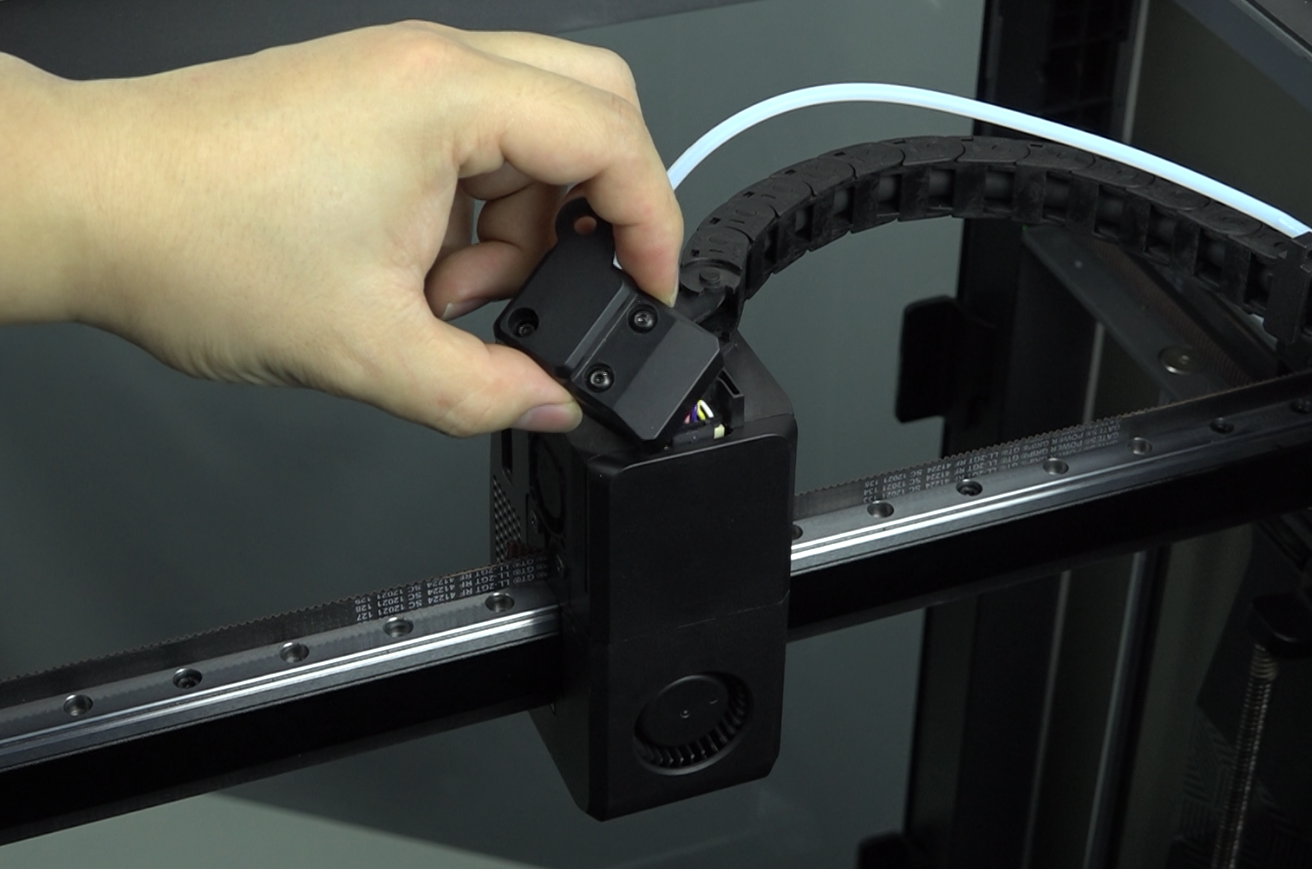
2.3 Remove the hotend plate protective cover.
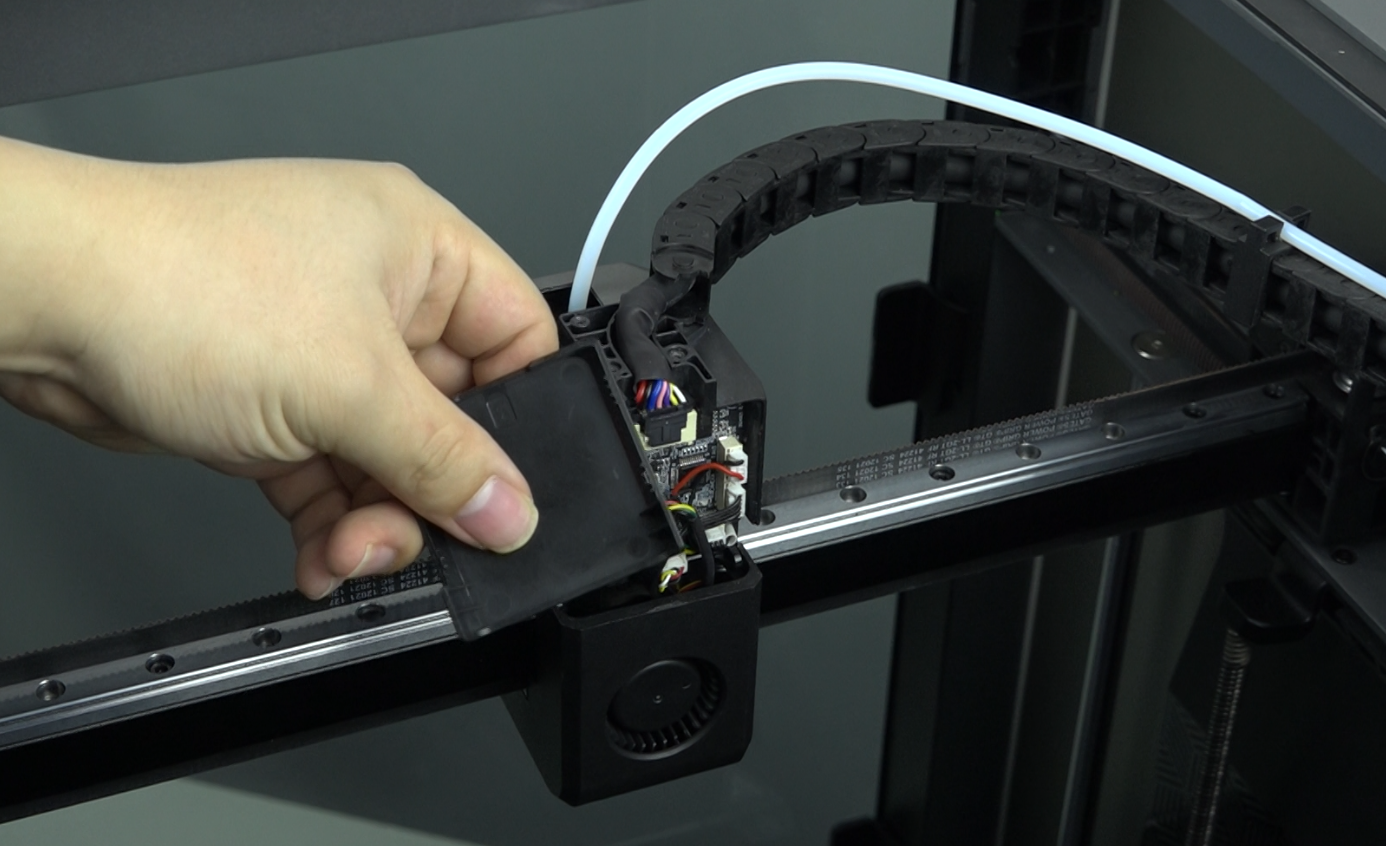
2.4 Unplug the hotend cable, model fan cable and nozzle camera cable.
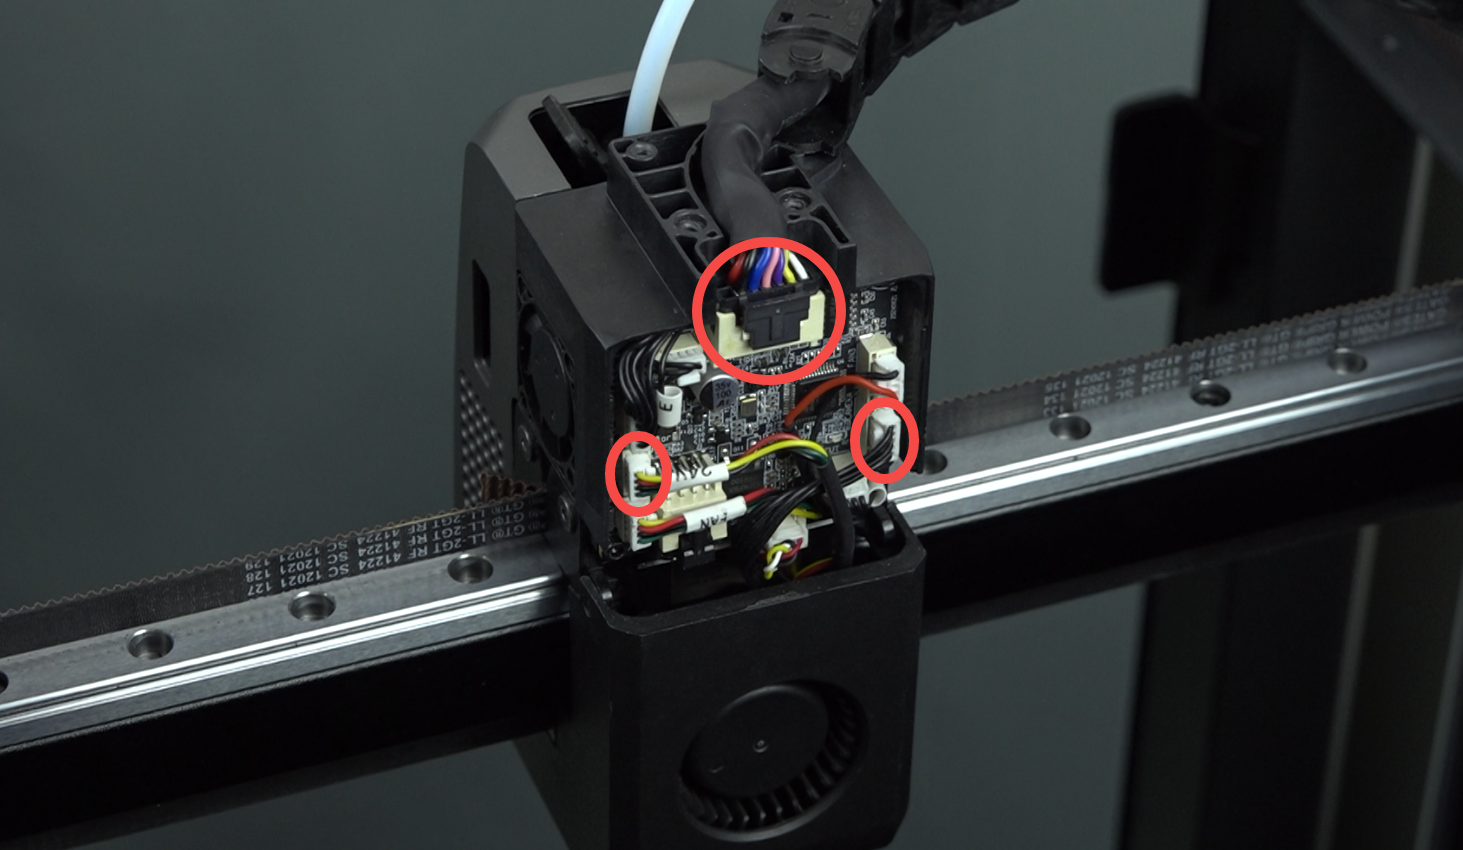
2.5 Remove the magnetic cover of the extruder.
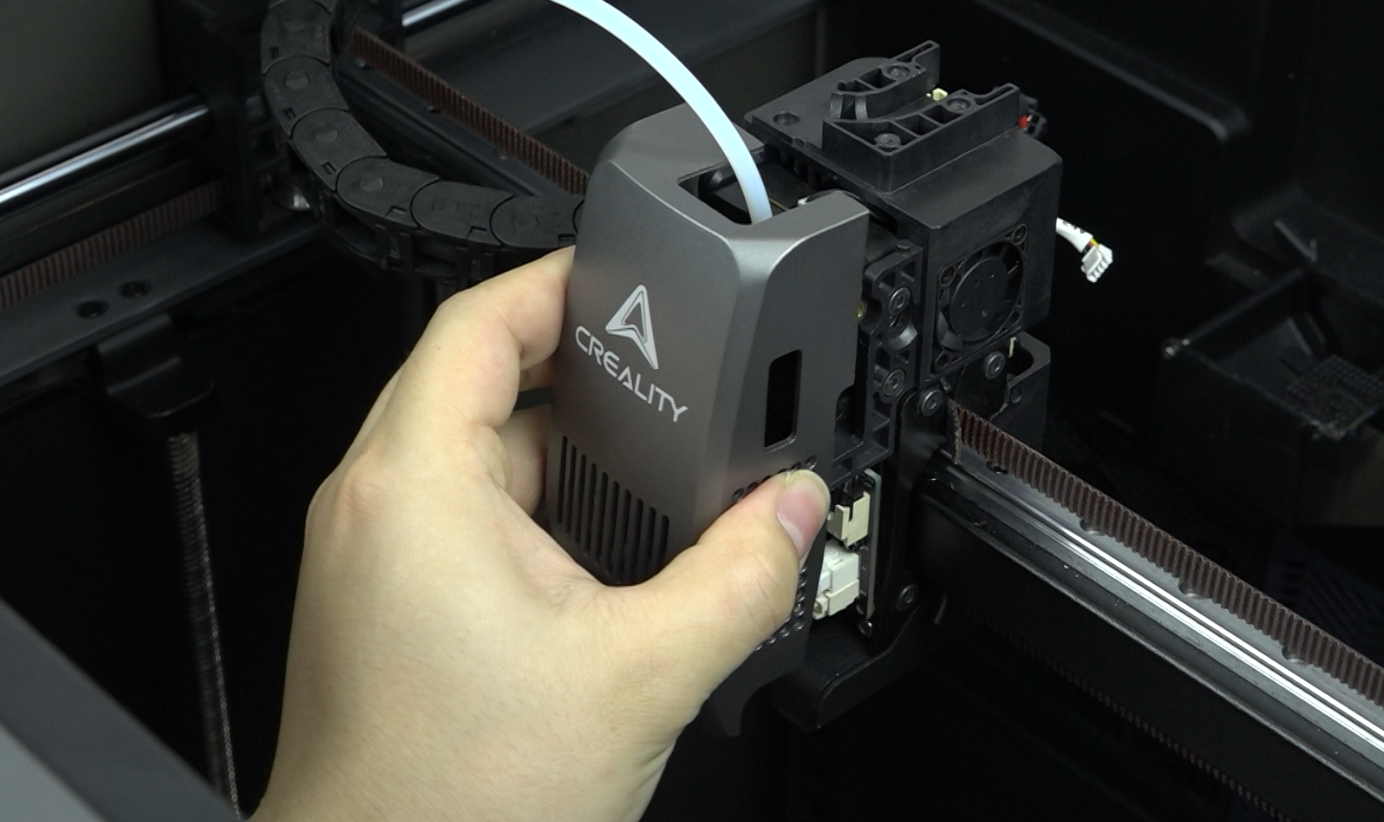
2.6 Press the tube connector and pull out the PTFE tube.
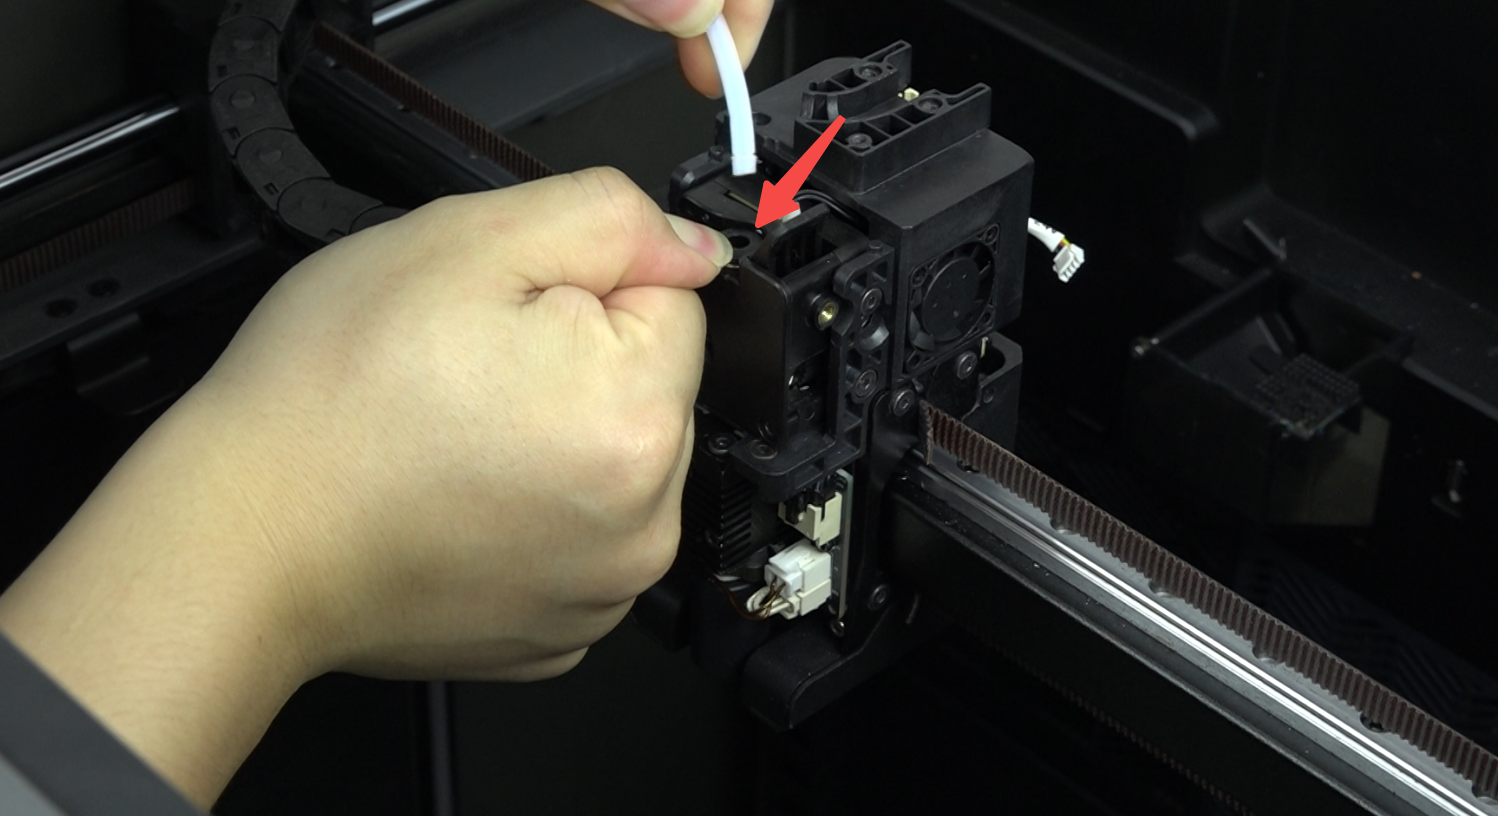
2.7 Use the hexagonal wrench to remove six screws (three on each side) fixing the upper part of the printhead assembly.
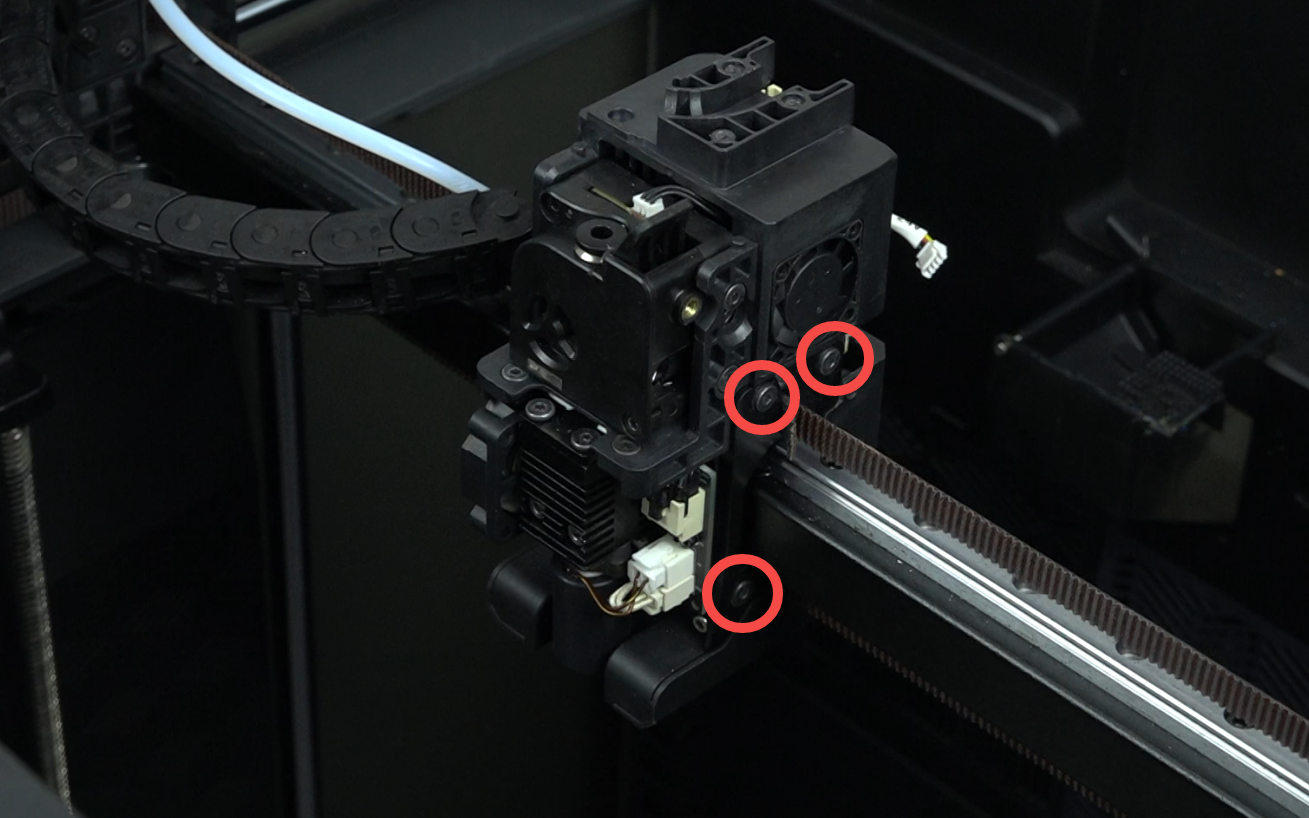
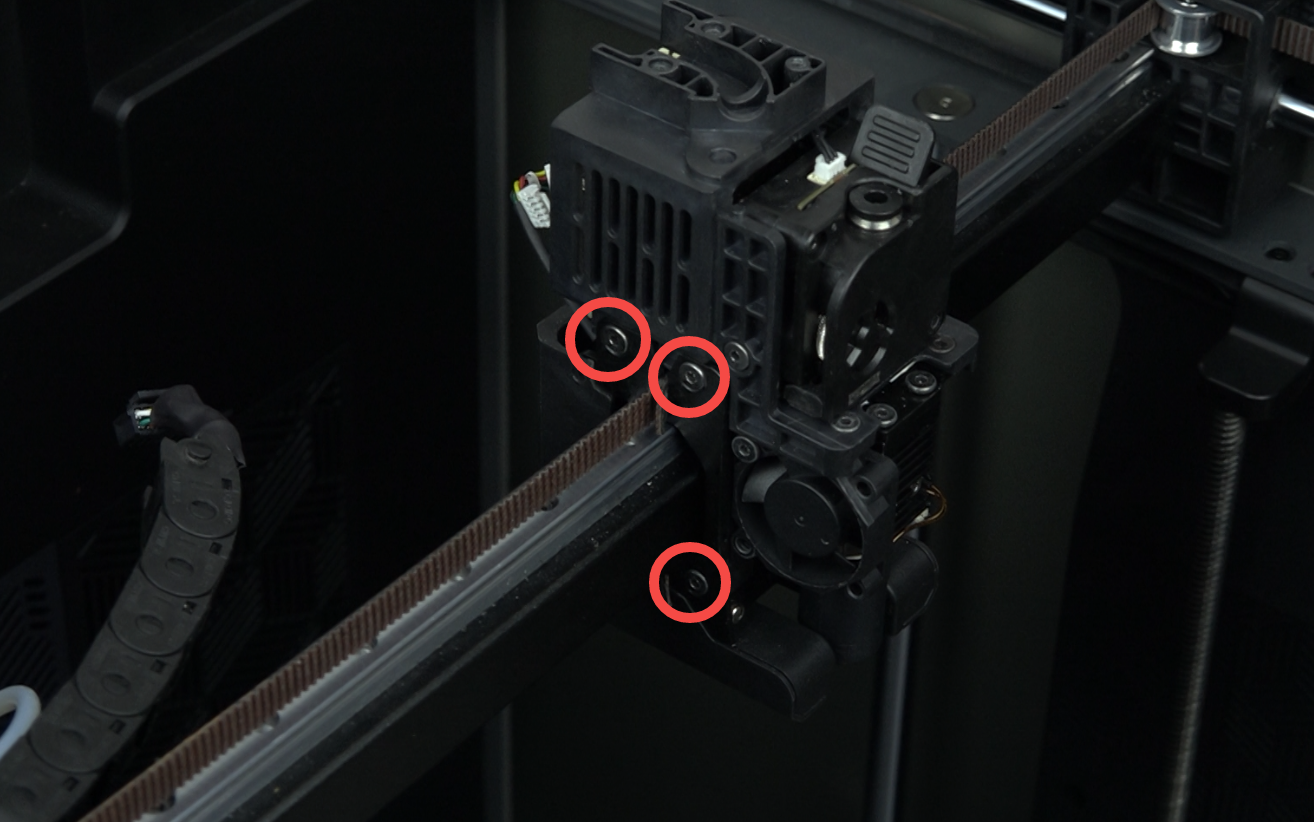
2.8 Remove the upper part of the printhead assembly.
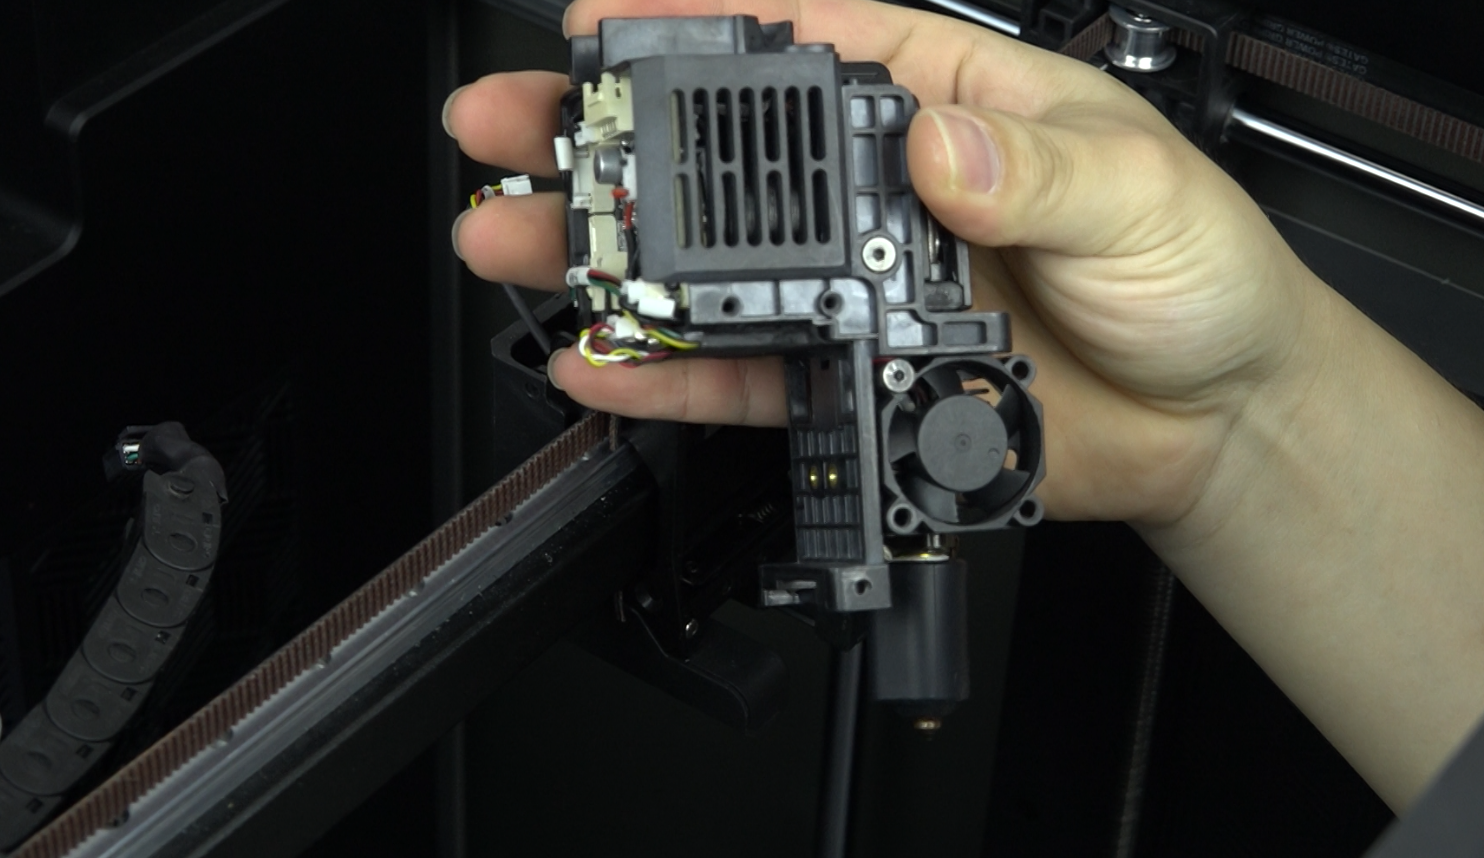
¶ 3. Remove the damaged strain gauge
3.1 Unplug the filament break detection cable.
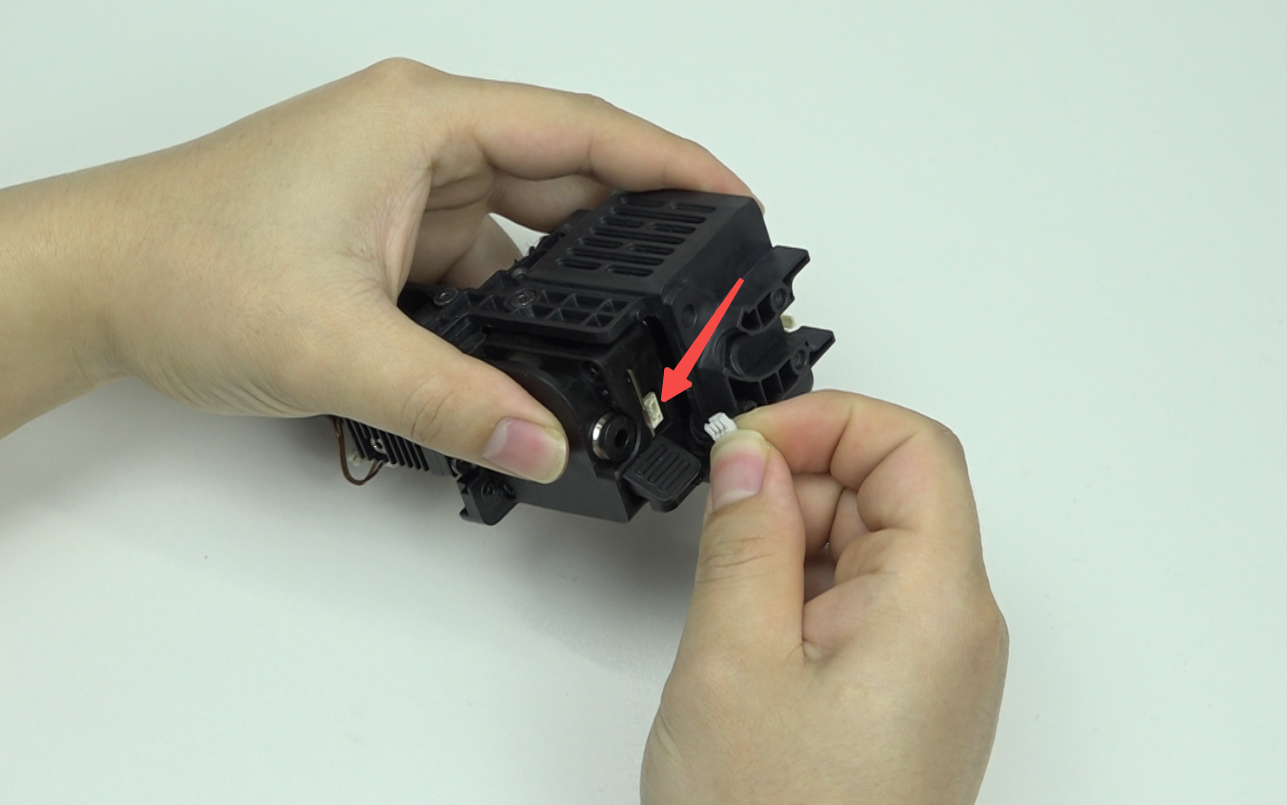
3.2 Use the H2.0 hexagonal wrench to remove three M3 screws (one on the left, two on the right) fixing the extruder assembly.
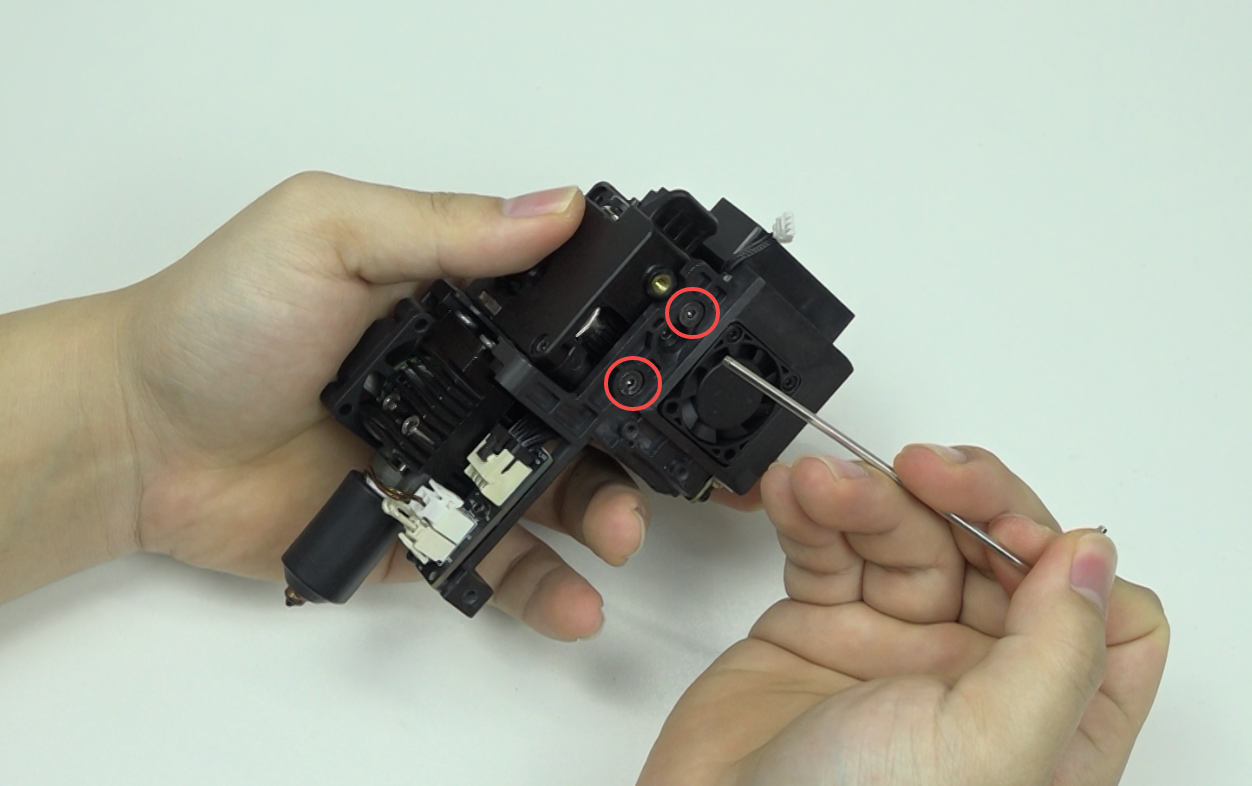
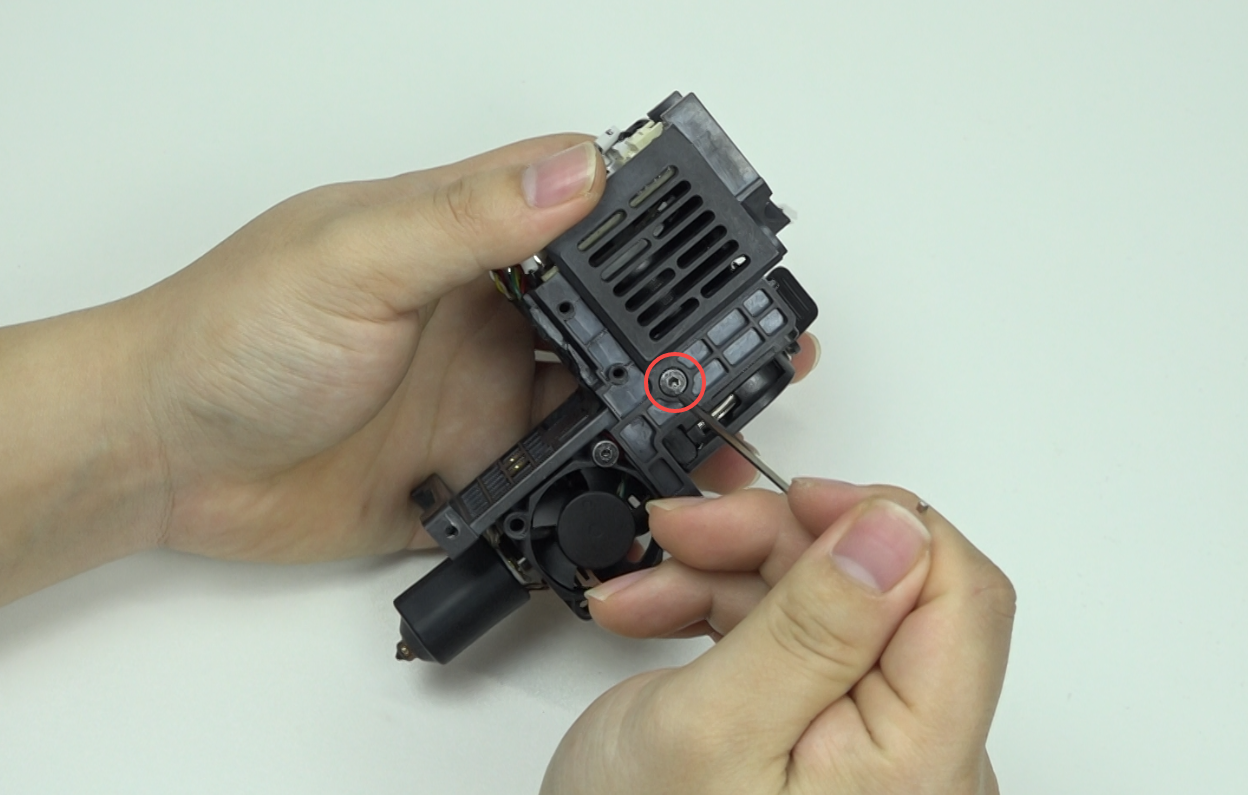
3.3 Use the H2.0 hexagonal wrench to remove two M3 screws fixing the extruder
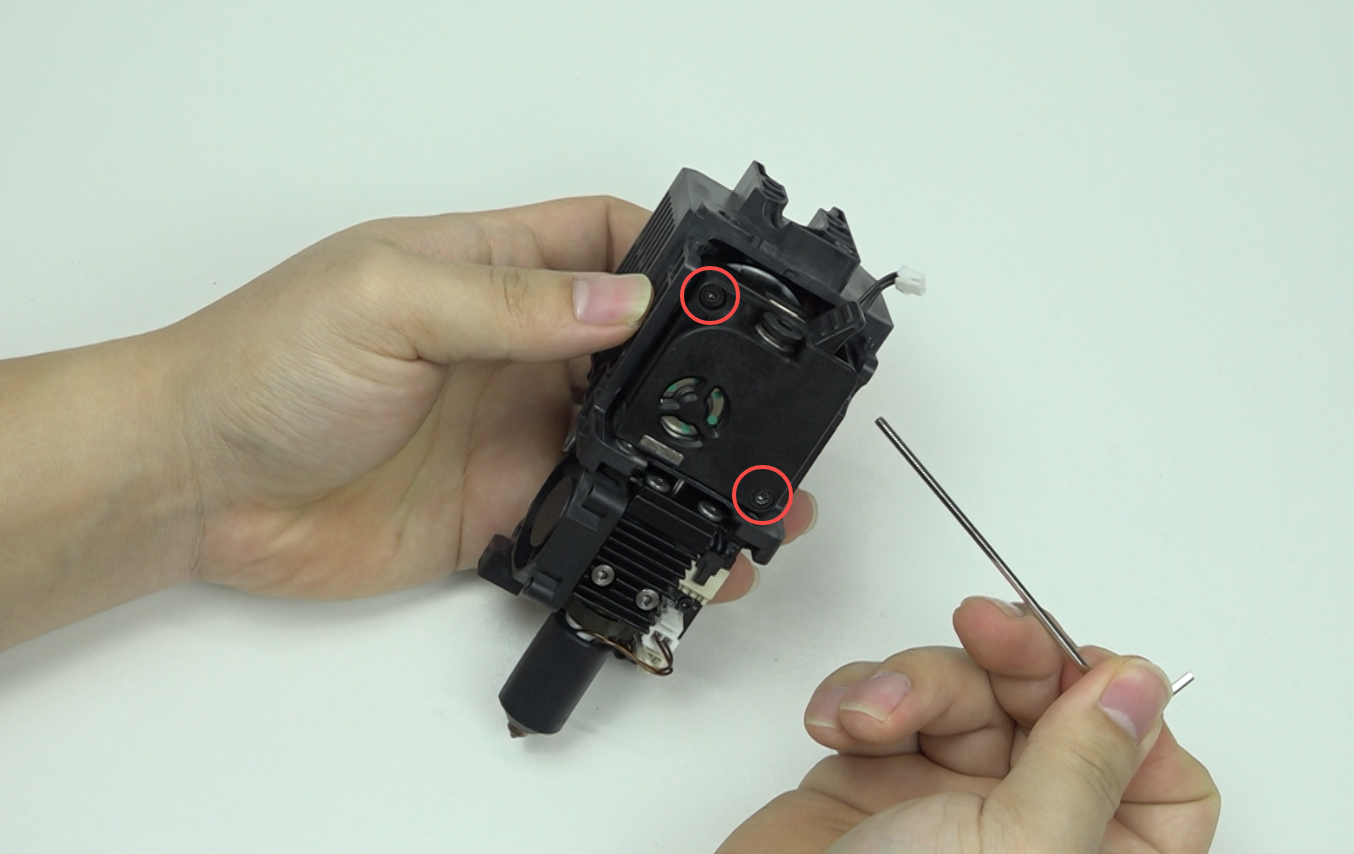
3.4 Slowly pull out the extruder assembly. Note: do not pull hard to avoid breaking the cutter cable
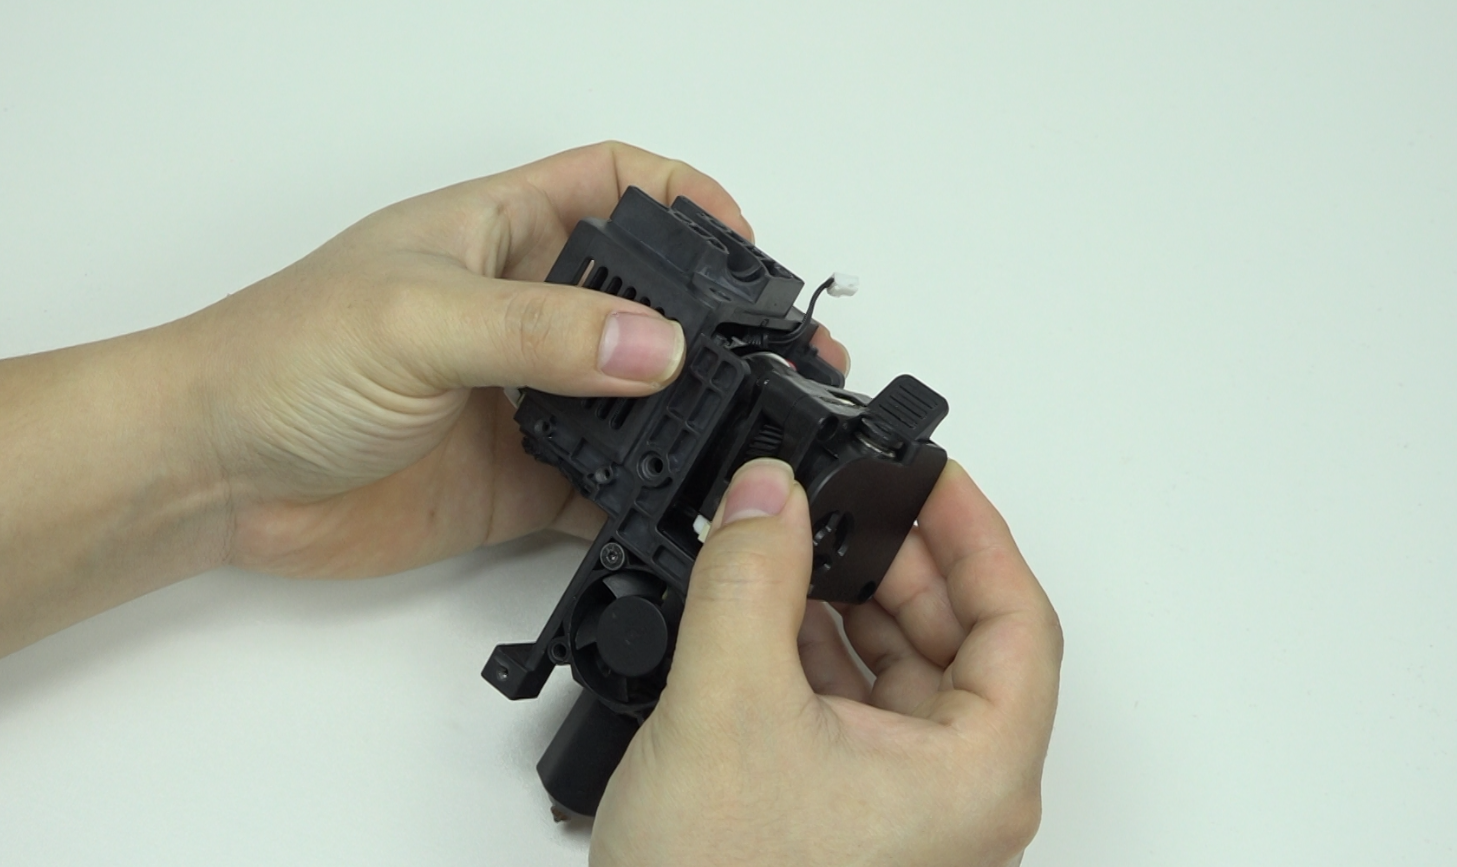
3.5 Separate the extruder from the extruder motor. Note: squeeze the extruder clamp and move slowly to avoid breaking the cutter cable
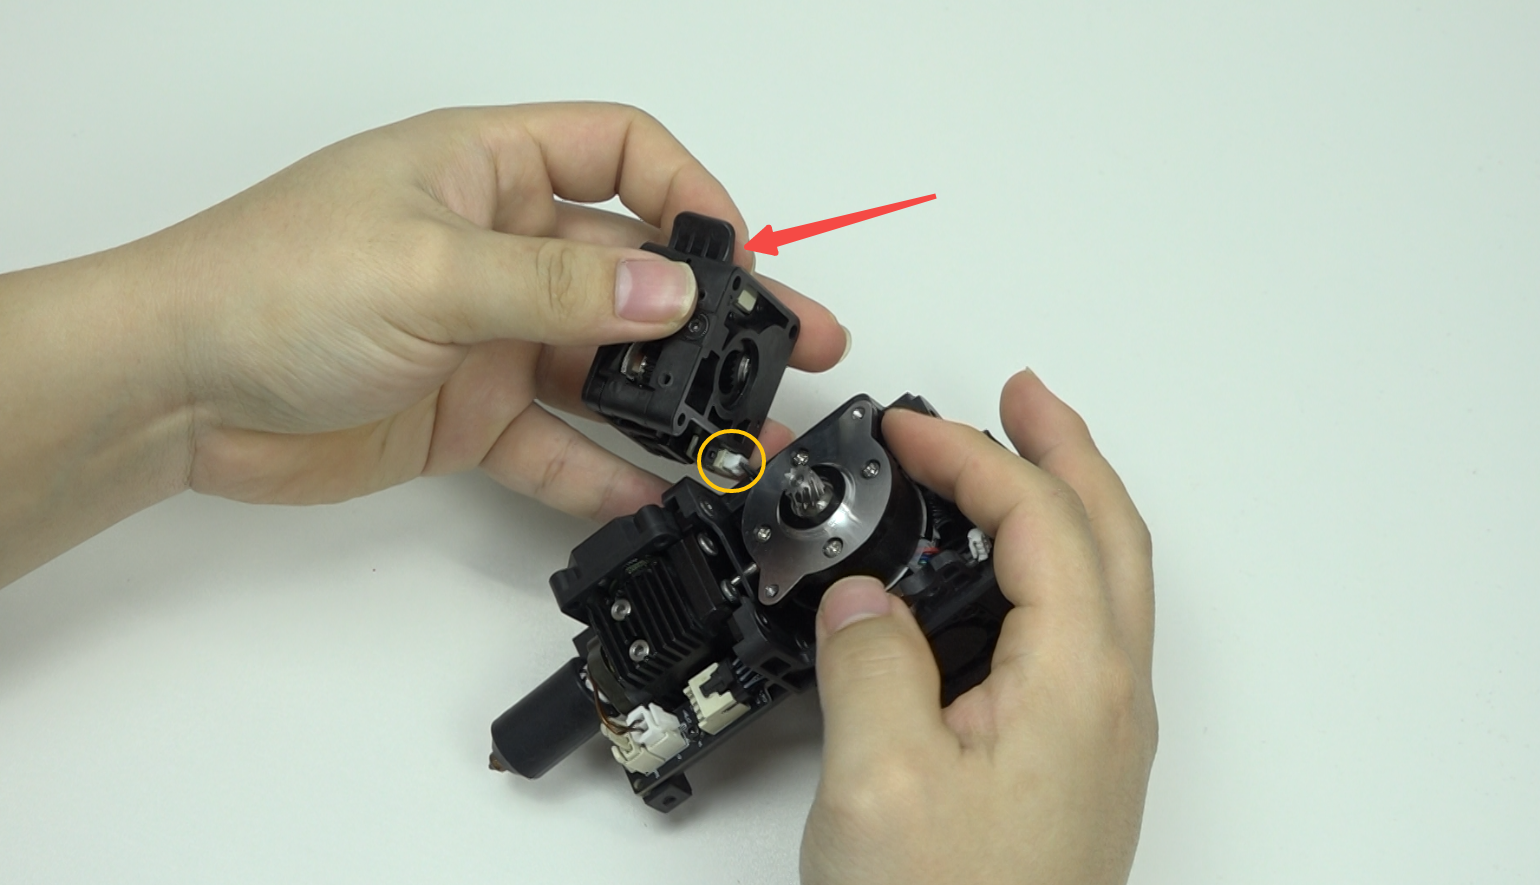
3.6 Unplug the cutter cable
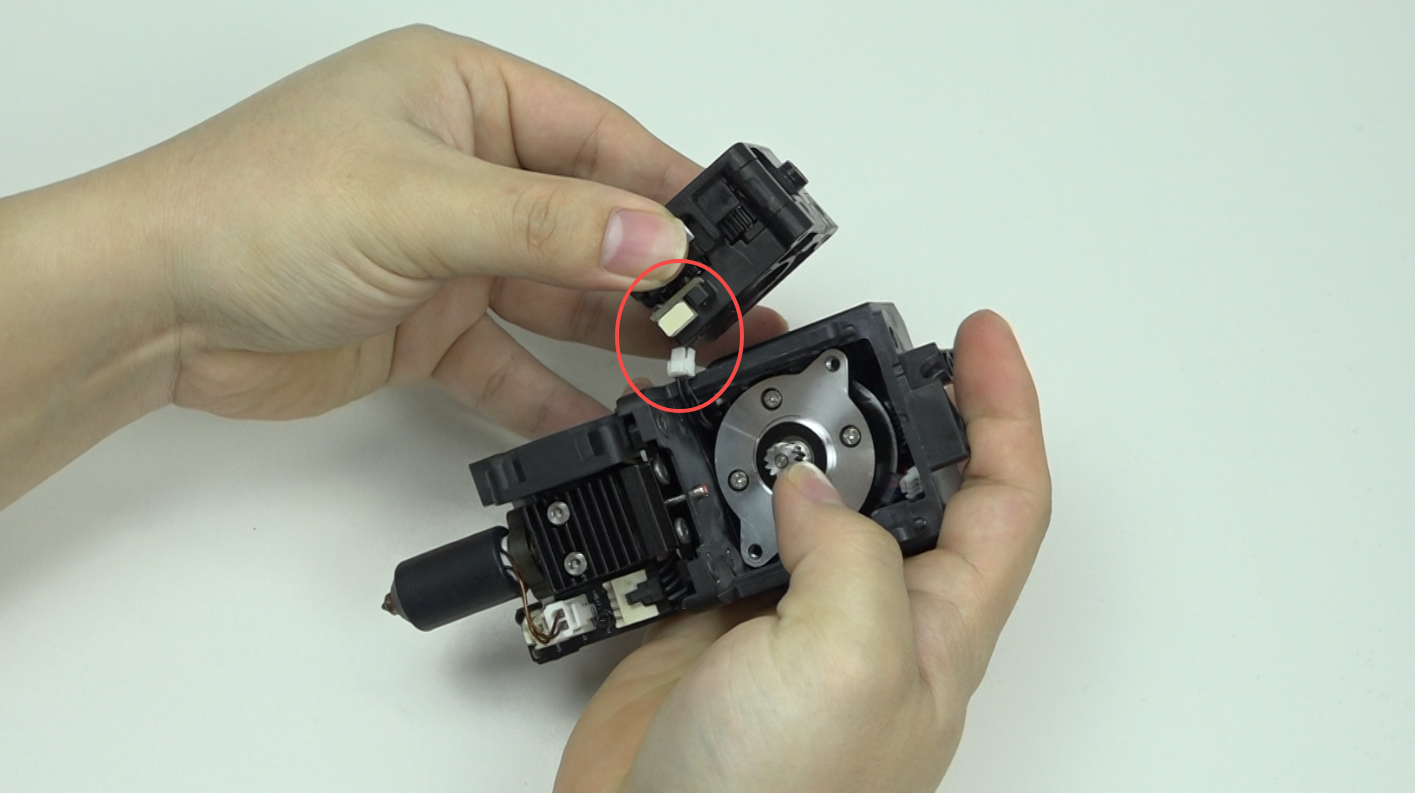
3.7 Unplug the hotend cable
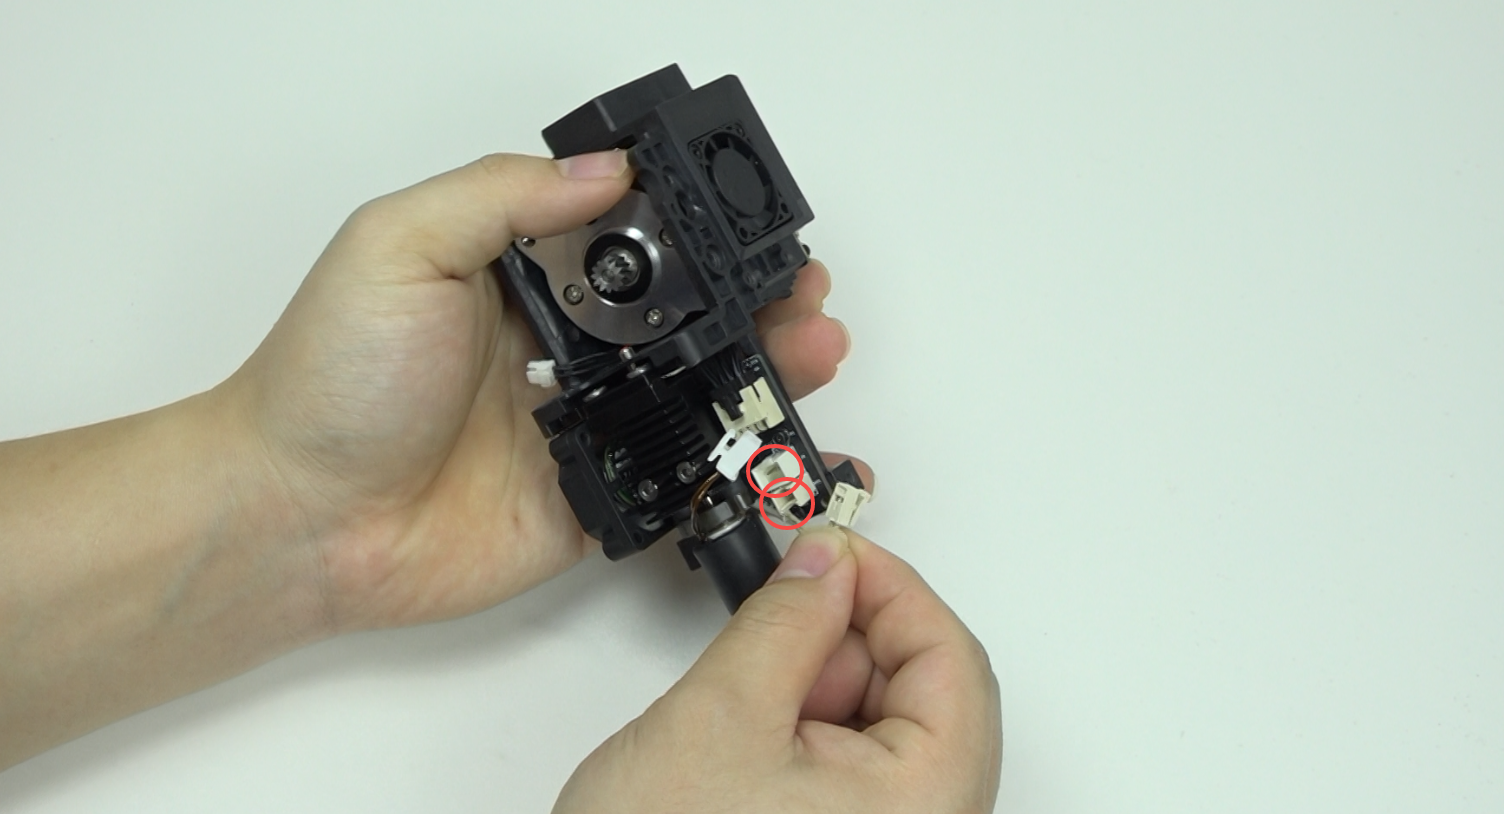
3.8 Use the H2.0 hexagonal wrench to remove four M3 screws on the hotend
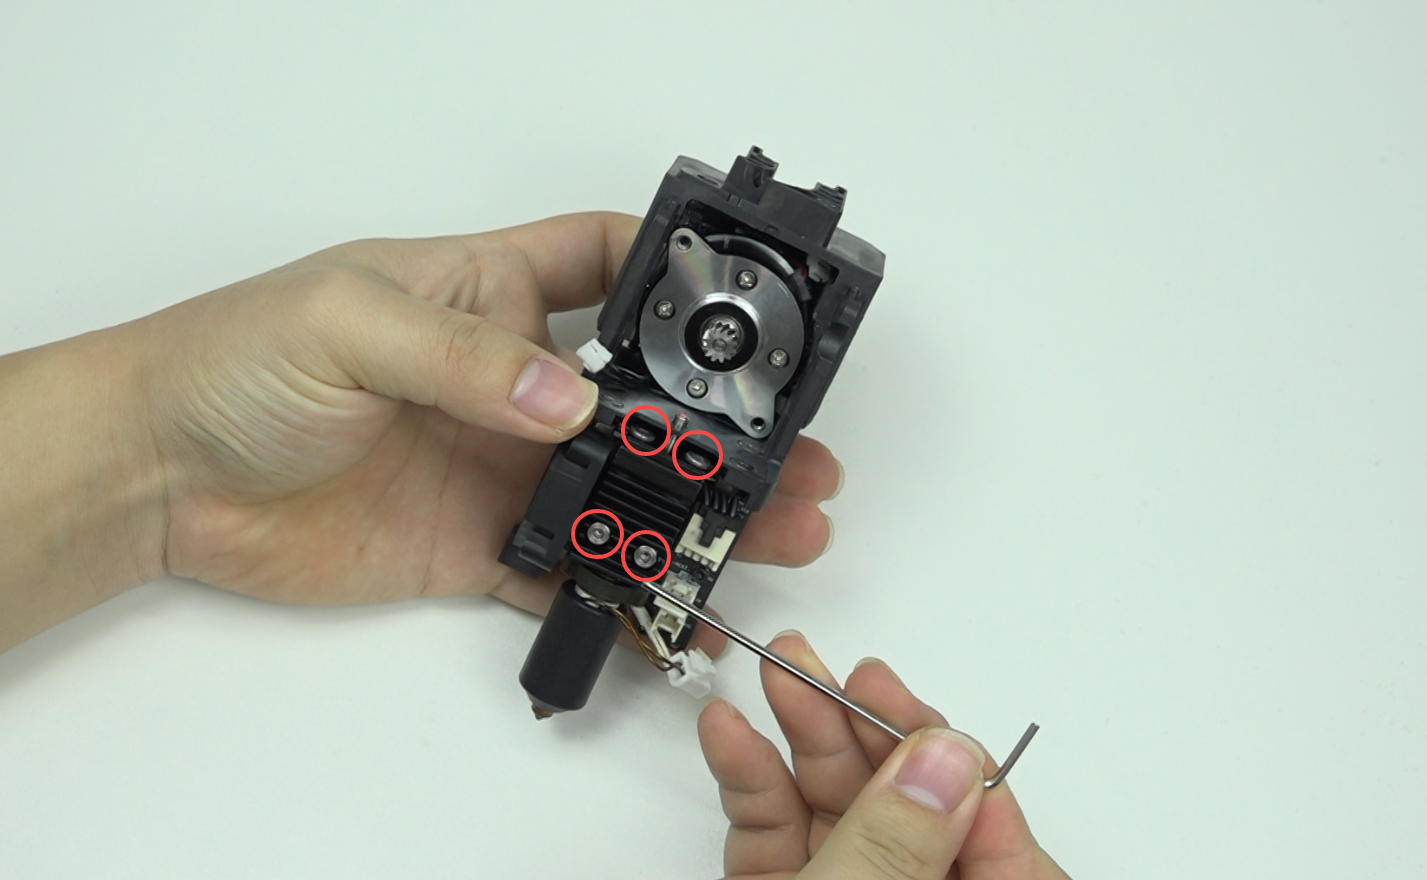
3.9 Remove the hotend
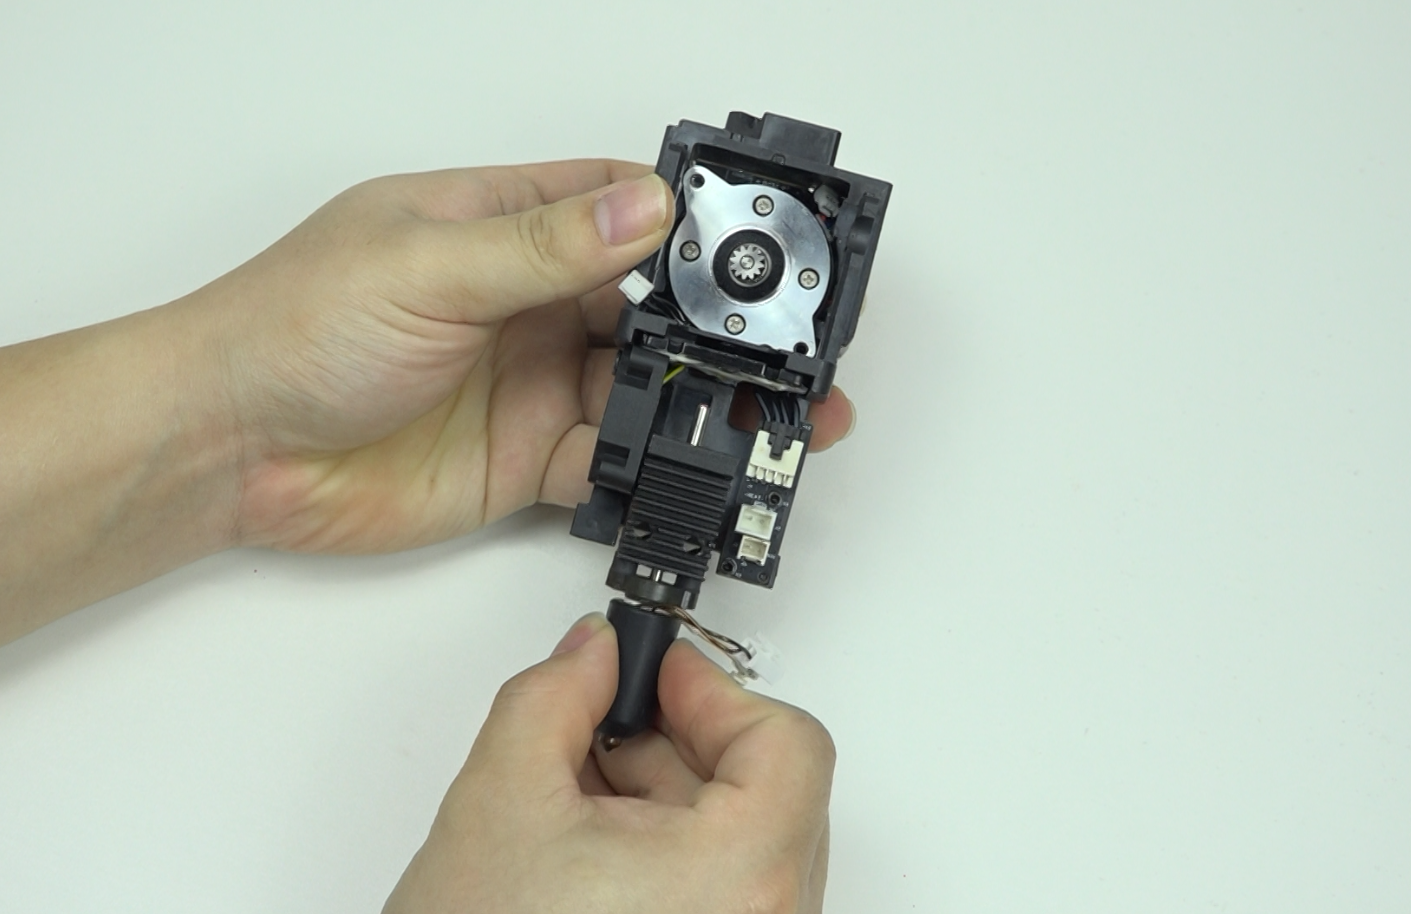
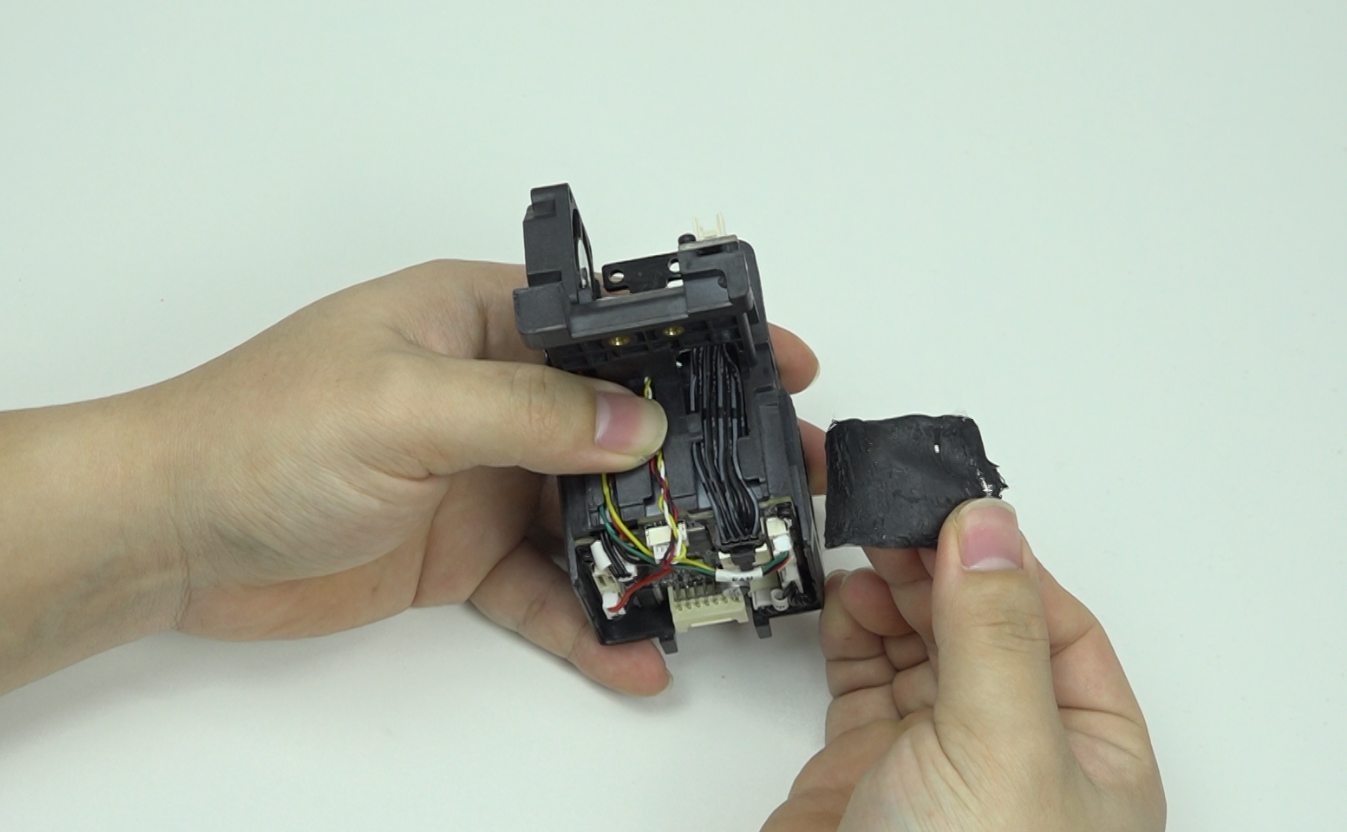
3.10 Peel off the adhesive tape
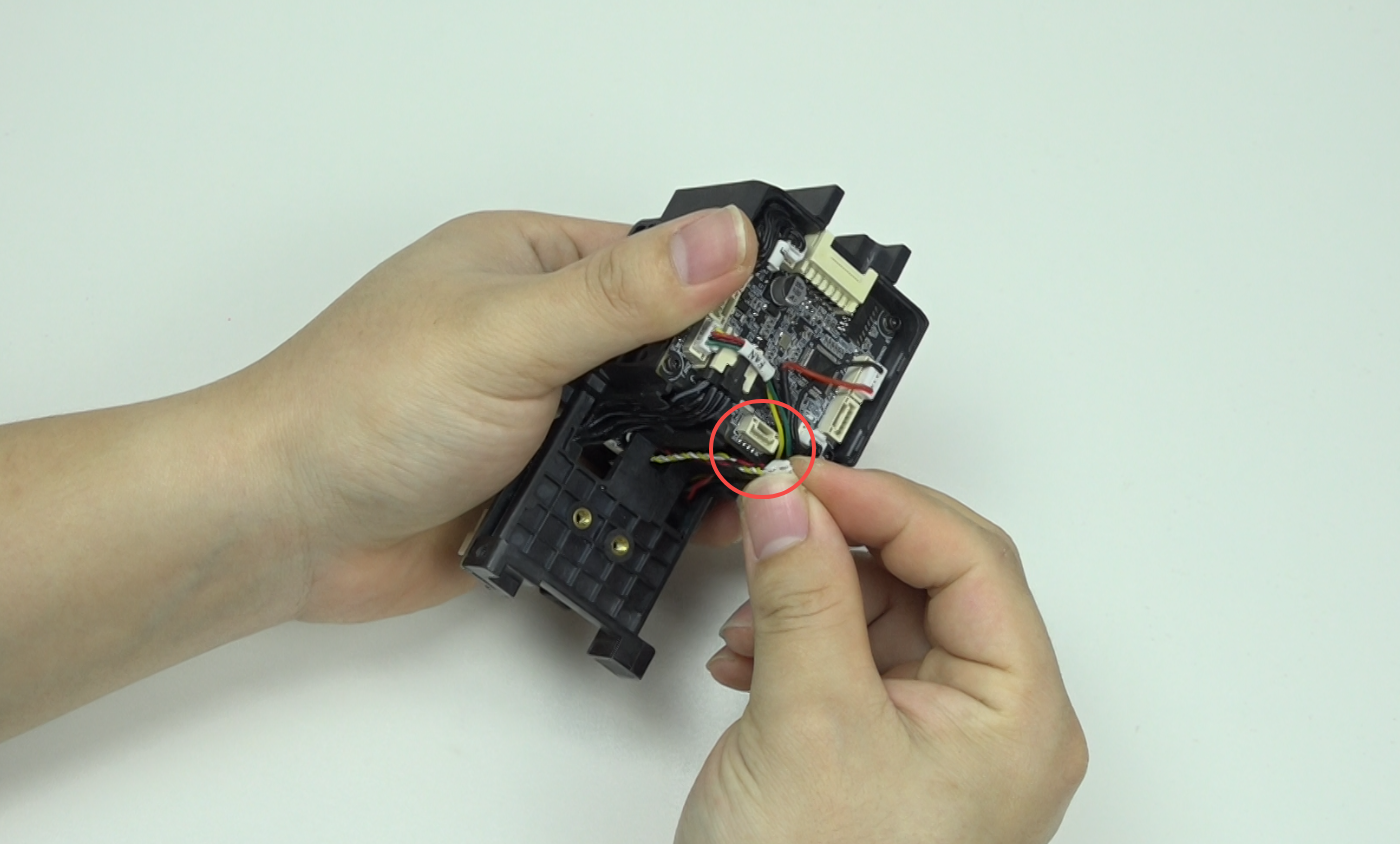
3.11 Unplug the strain gauge cable
3.12 Use the H2.0 hexagonal wrench to remove four M3 screws fixing the strain gauge
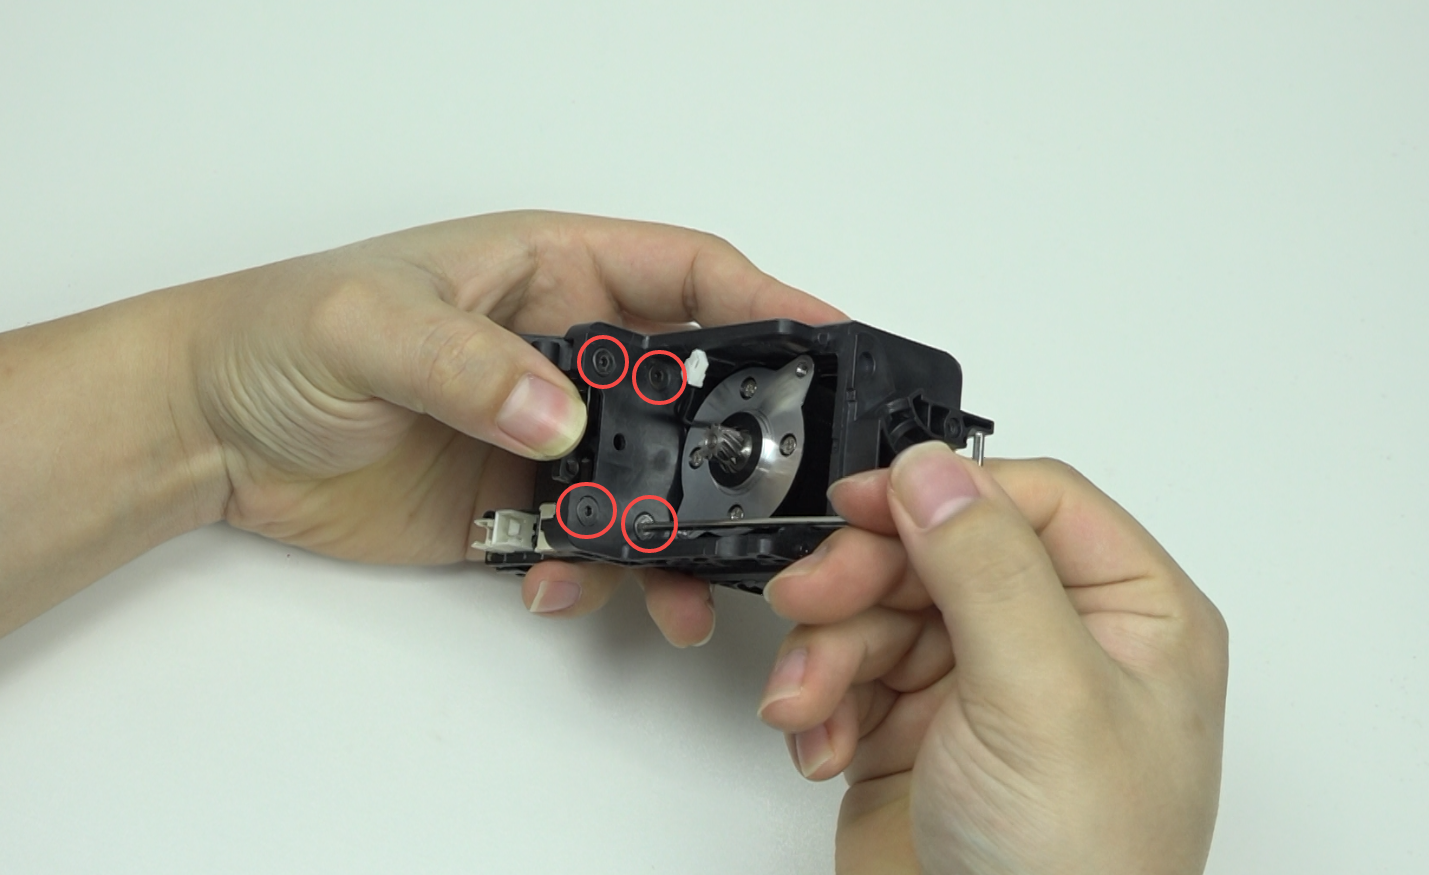
3.13 Remove the damaged strain gauge, note: pull the cable terminal vertically out of the hole

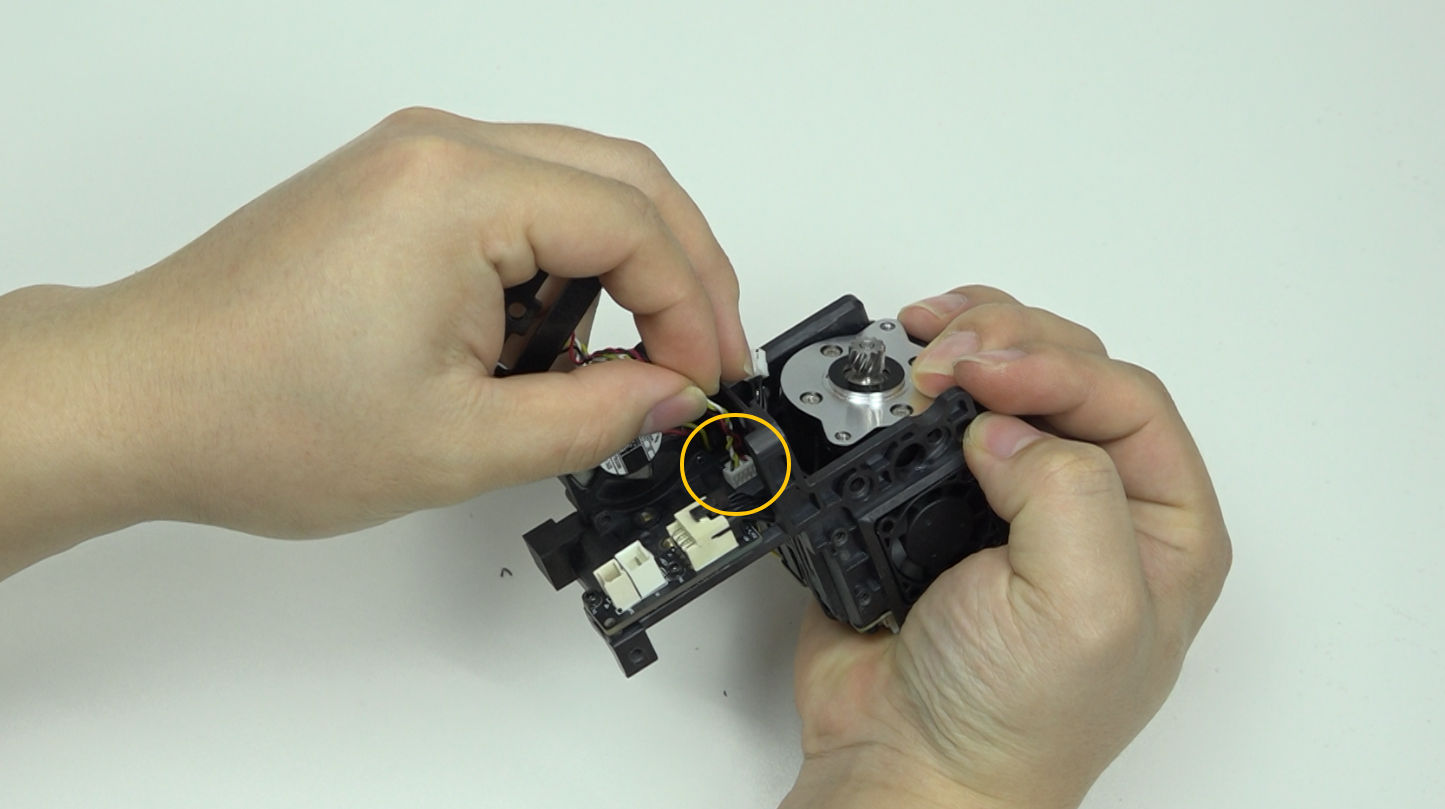
¶ 4. Install the new strain gauge
4.1 Install the new strain gauge, note: insert the cable terminal vertically into the hole, with the white glued side facing down and the black flat side facing up.
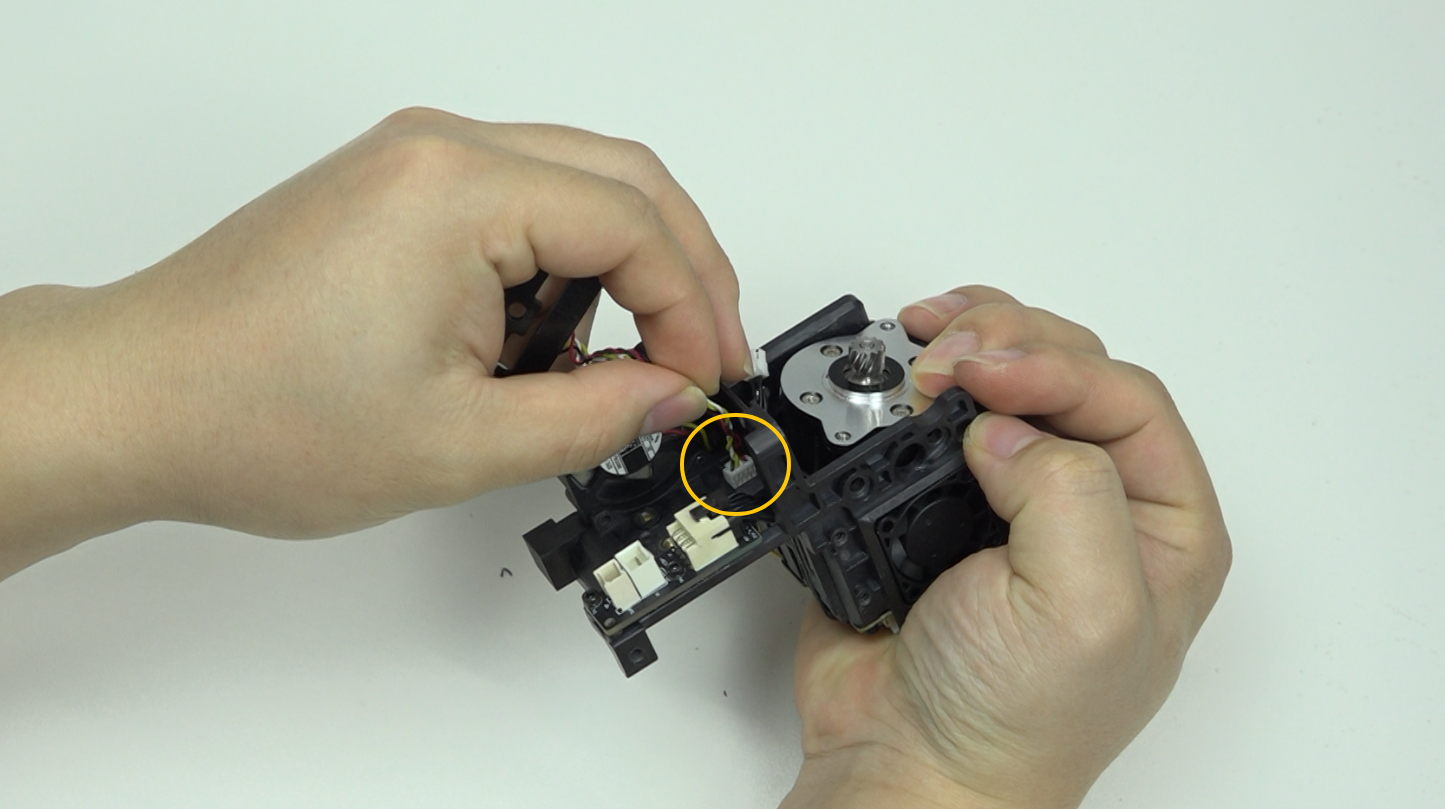
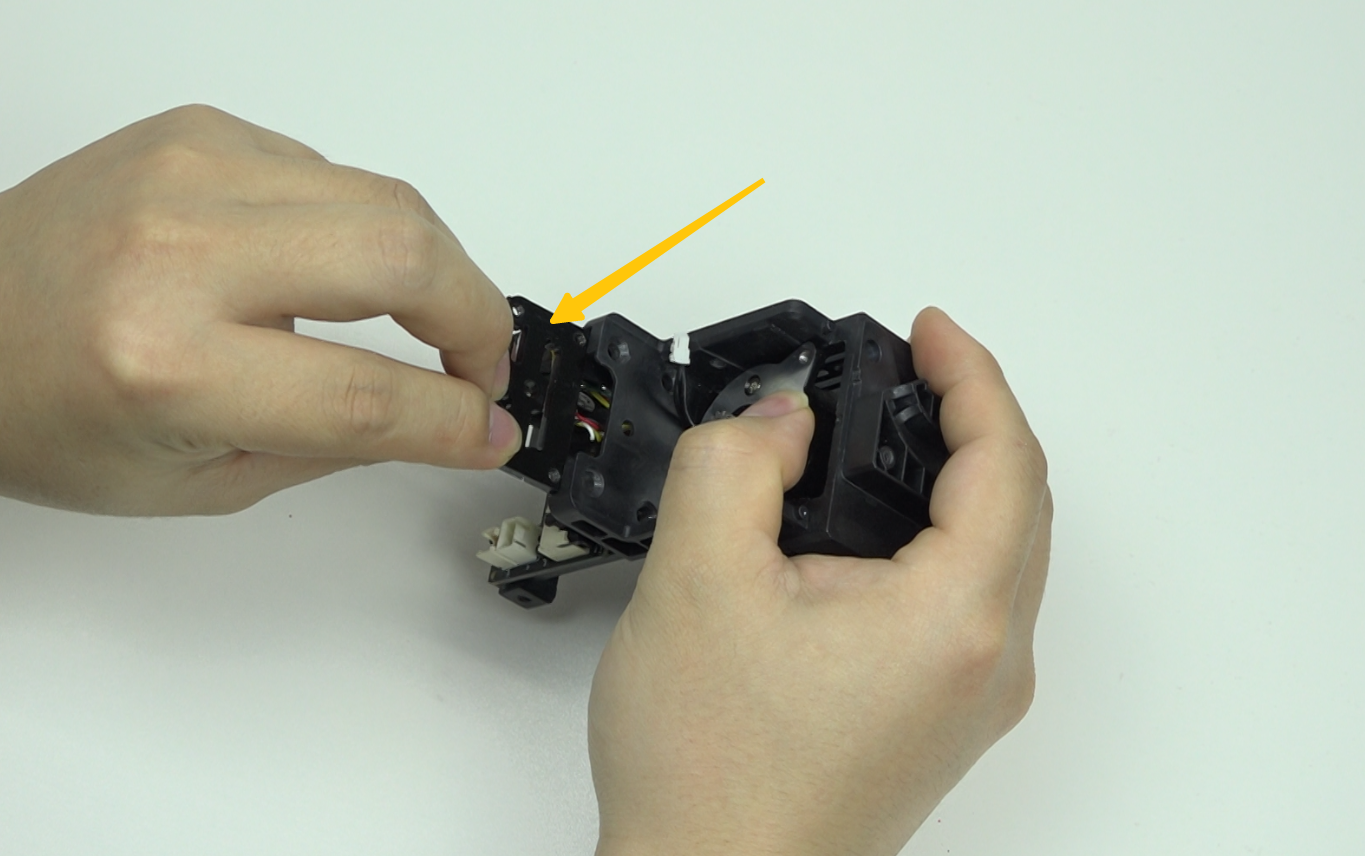
4.2 Use the H2.0 hexagonal wrench to install four M3 screws fixing the strain gauge
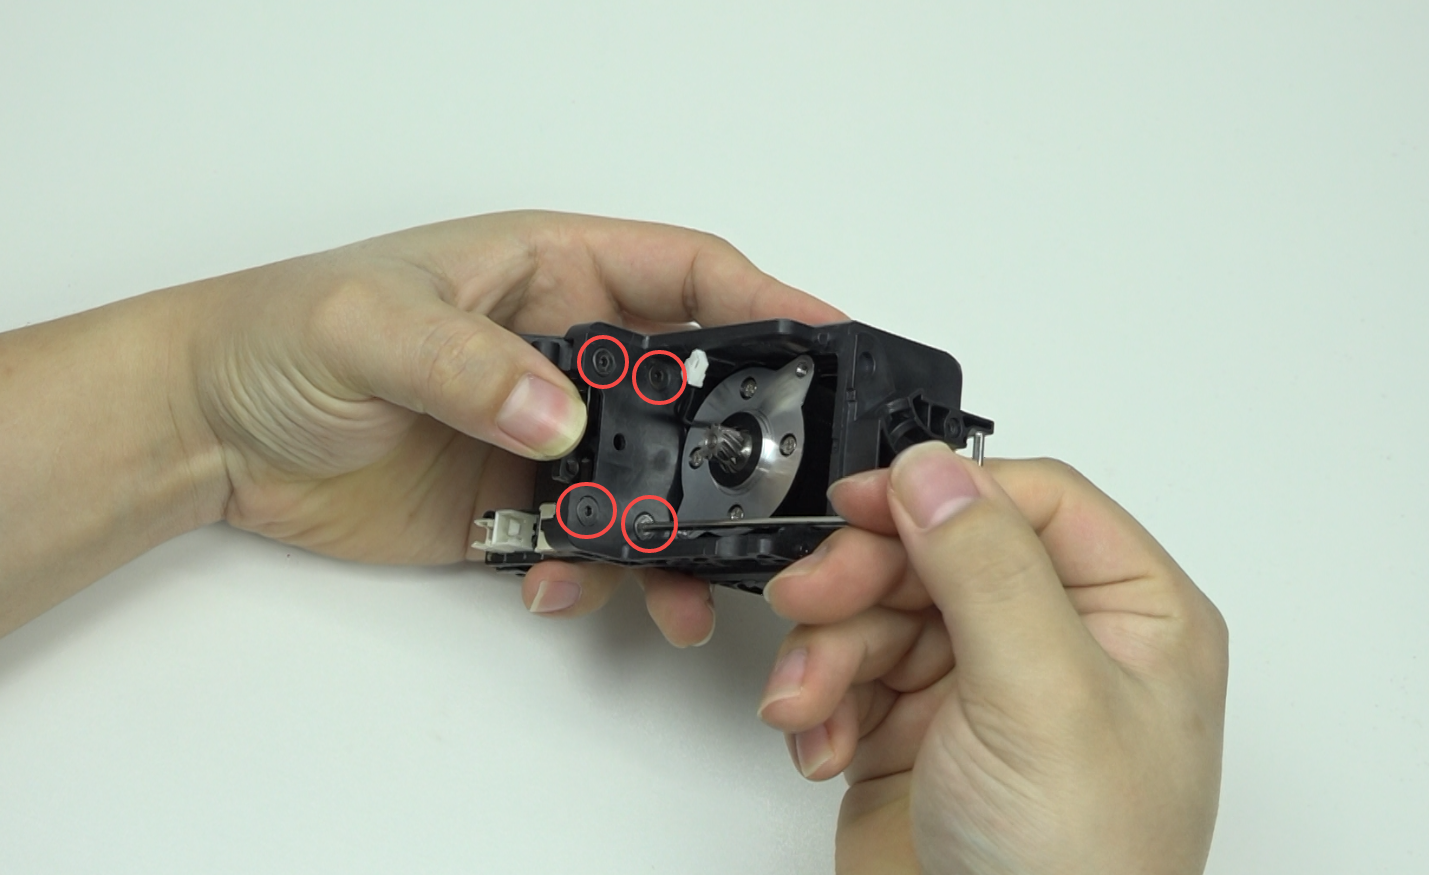
4.3 Insert the strain gauge cable
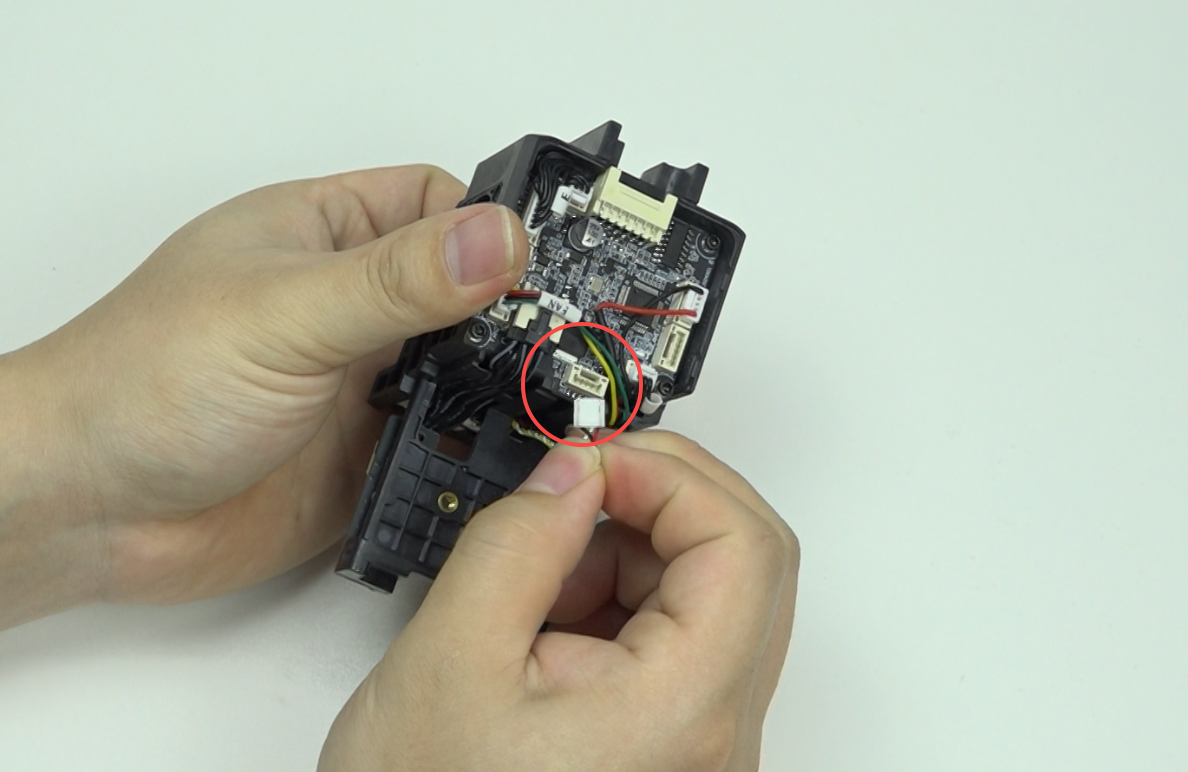
4.4 Apply adhesive tape
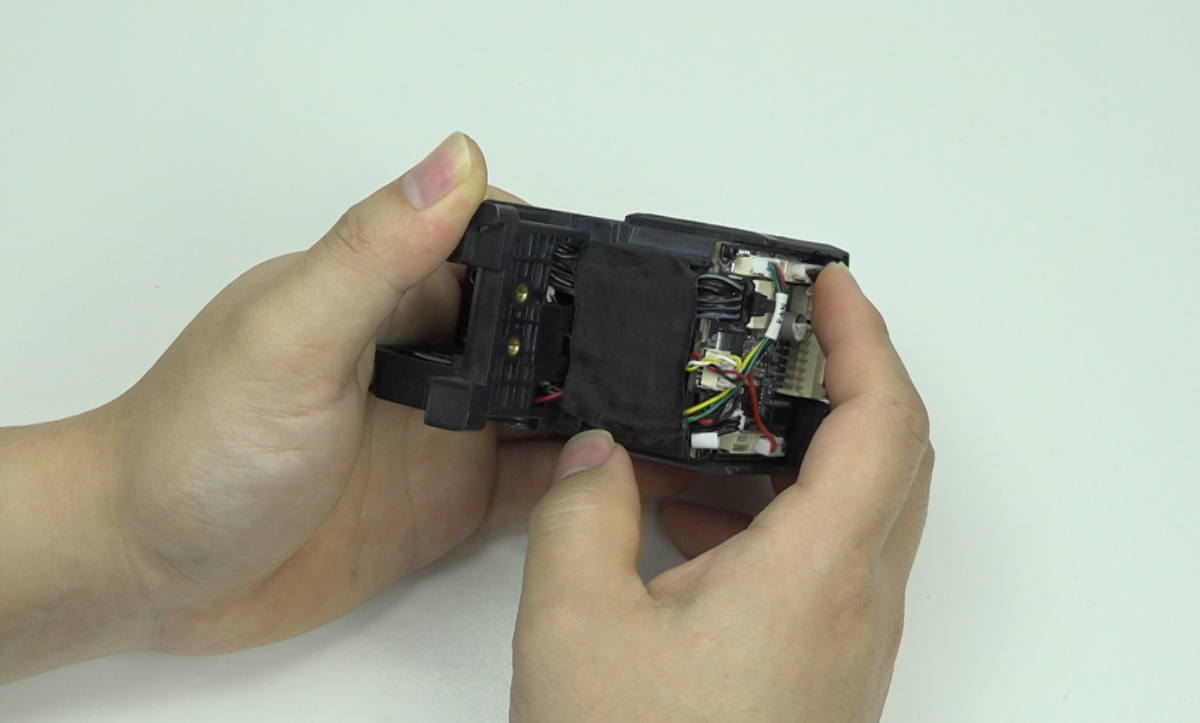
4.5 Install the hot end. Note: insert the heat break into the hole
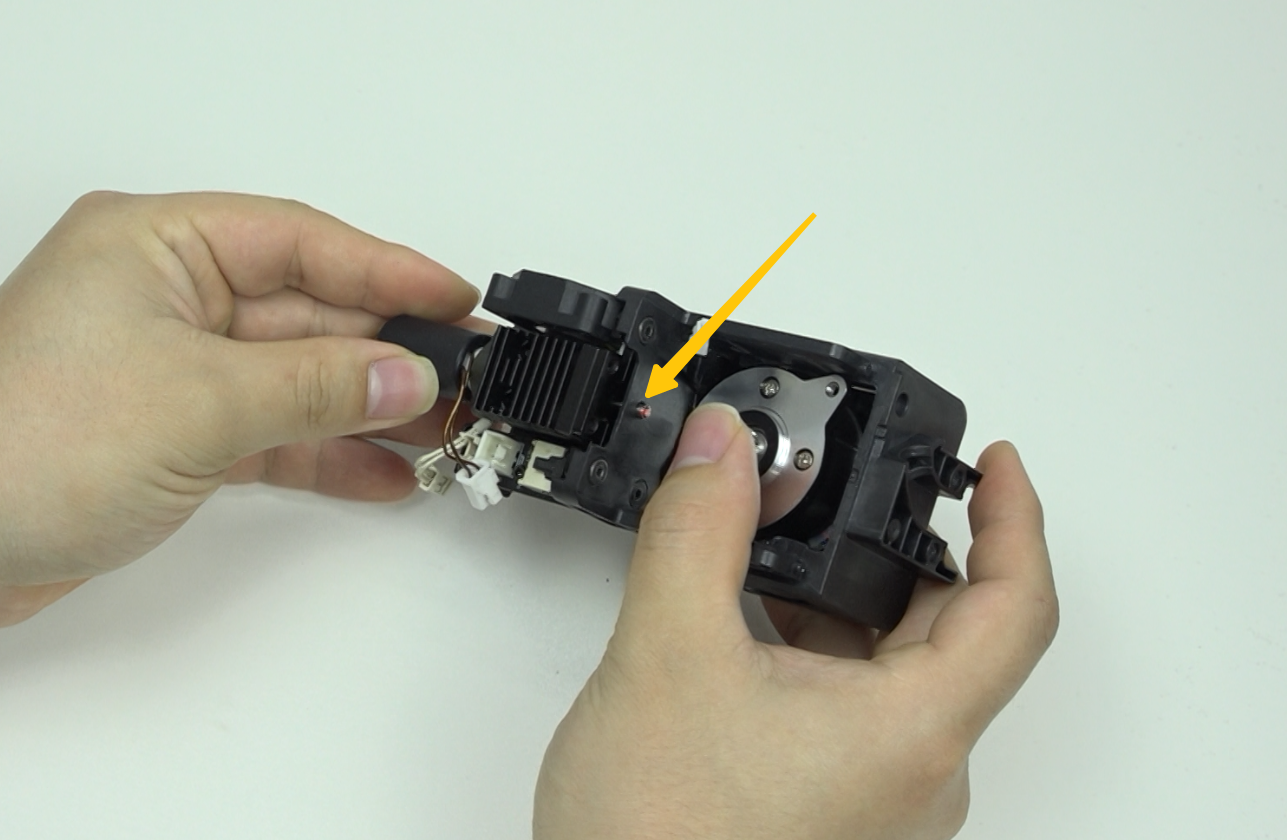
4.6 Use the H2.0 hexagonal wrench to install four M3 screws on the hotend
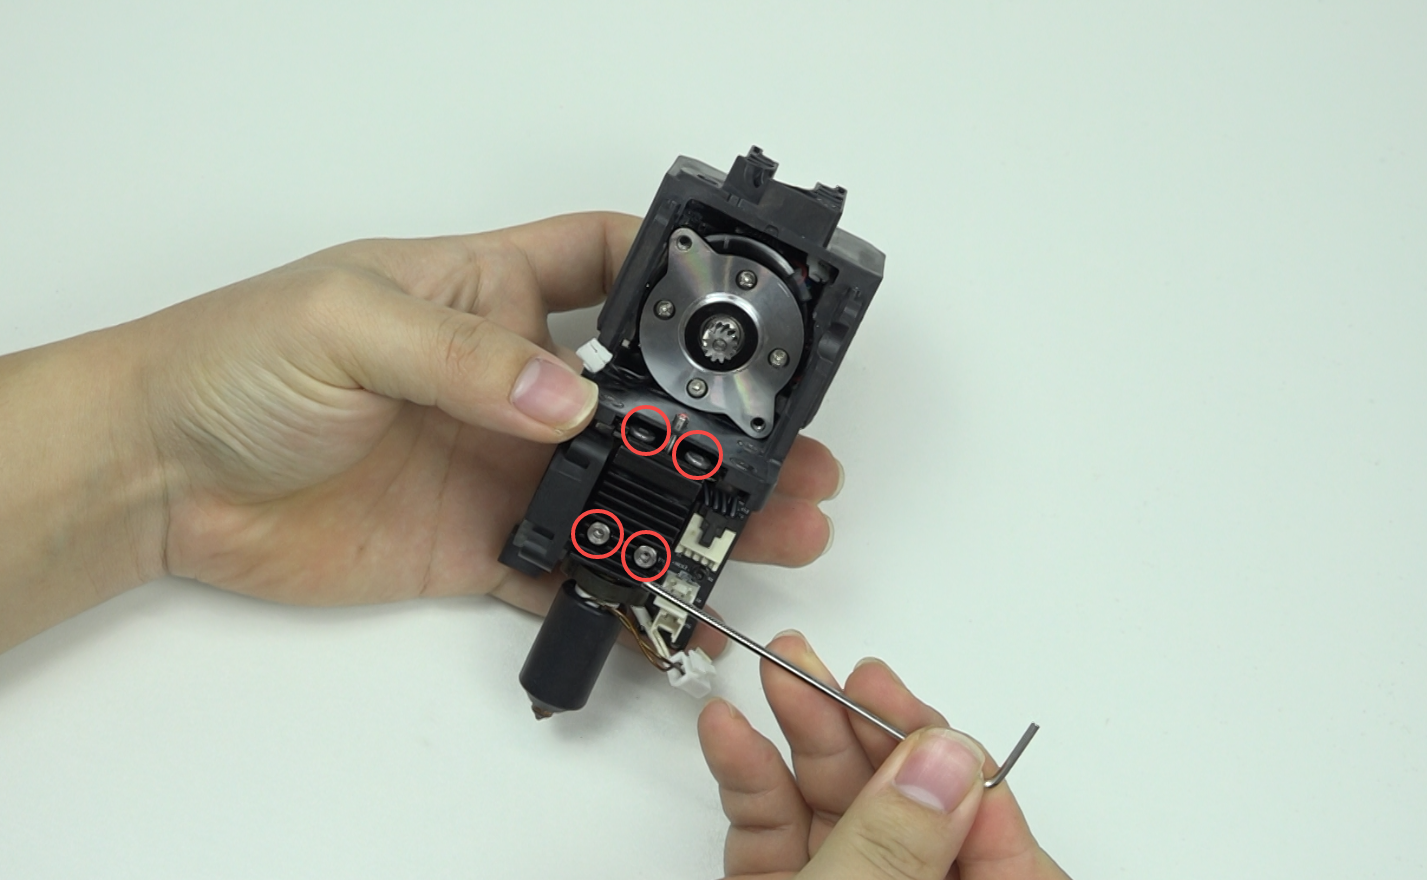
4.7 Plug in the hotend cable
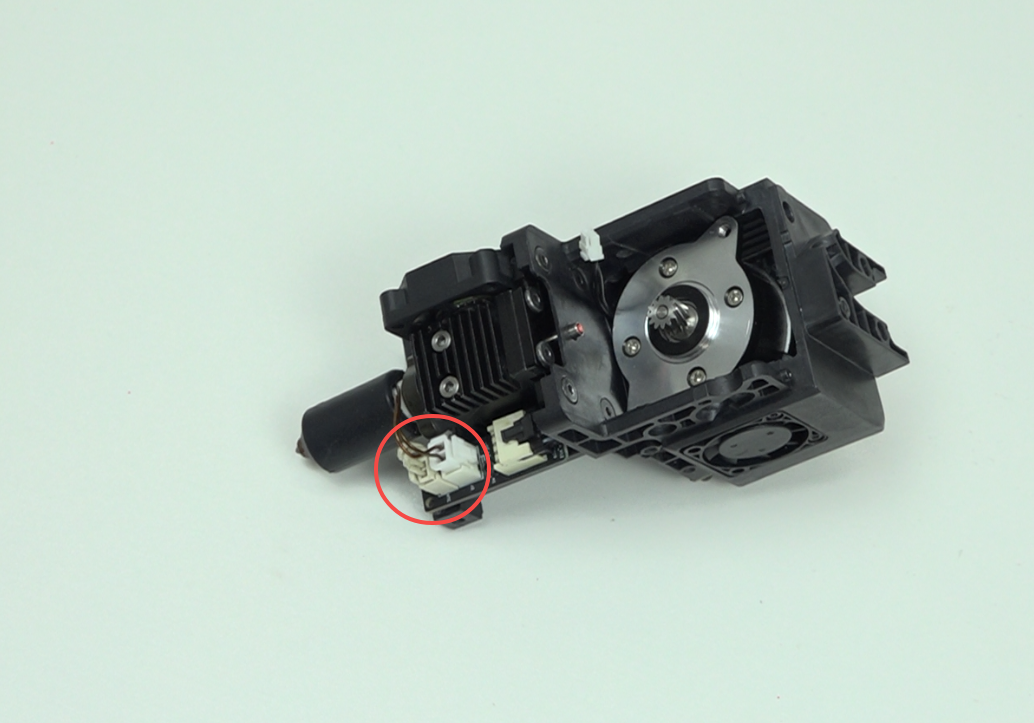
4.8 Plug in the cutter cable, note: pull out the filament break detection wire
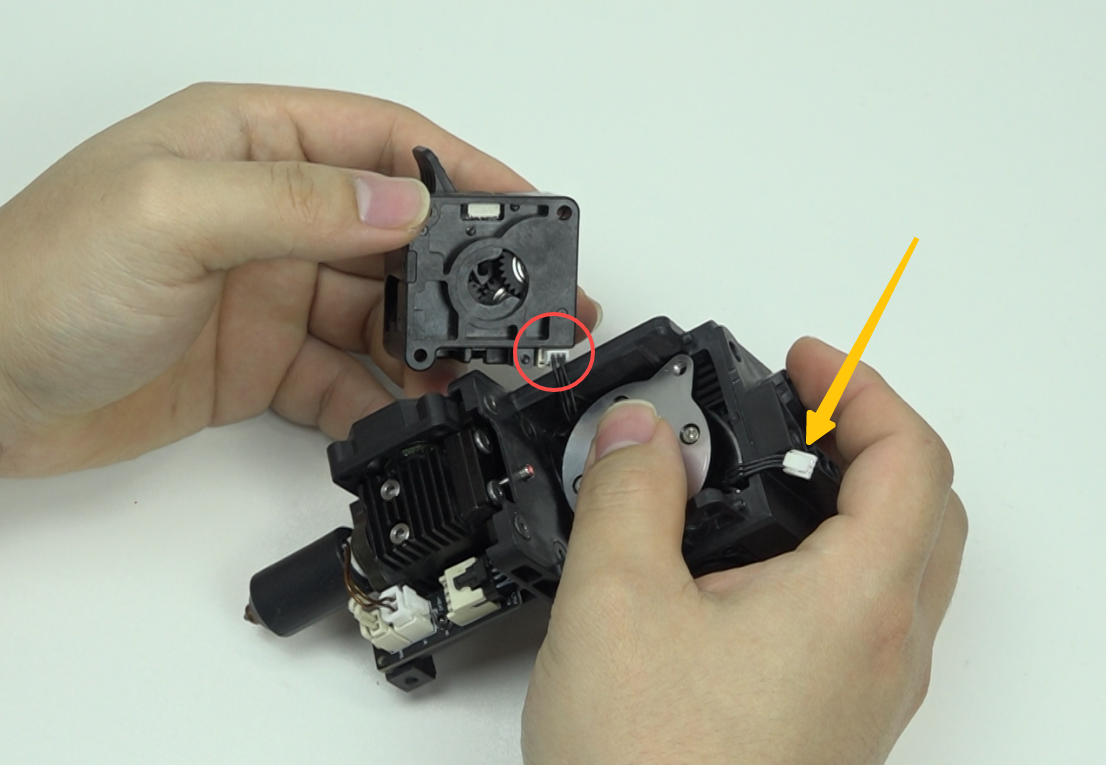
4.9 Combine the extruder and extruder motor, note: squeeze the extruder clamp.
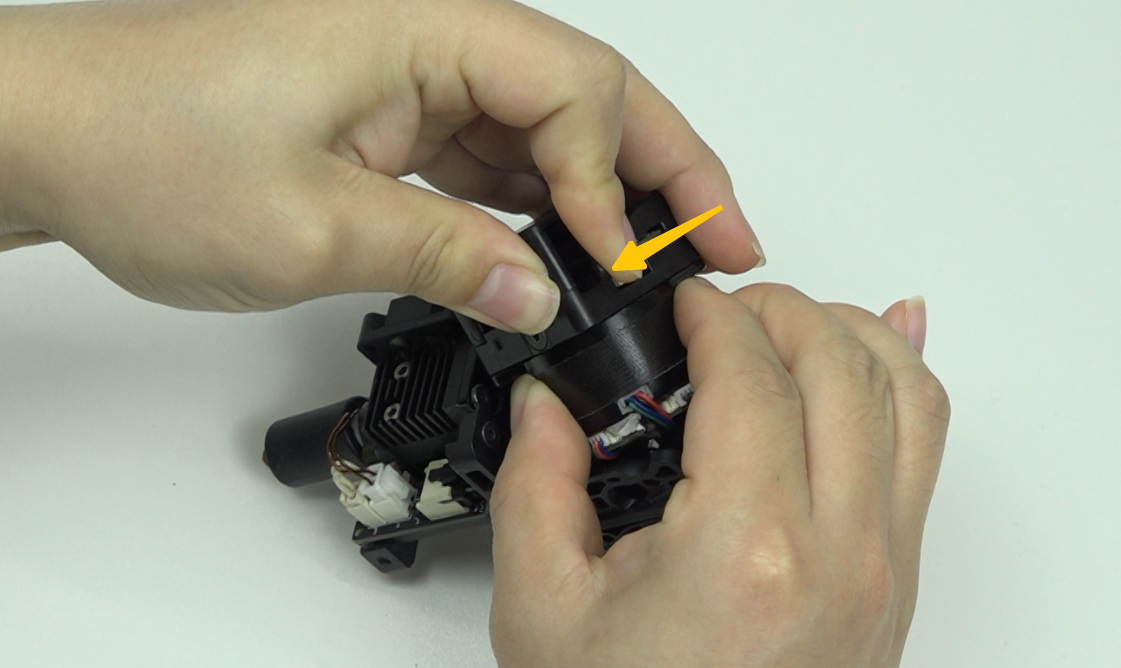
4.10 Place the extruder assembly
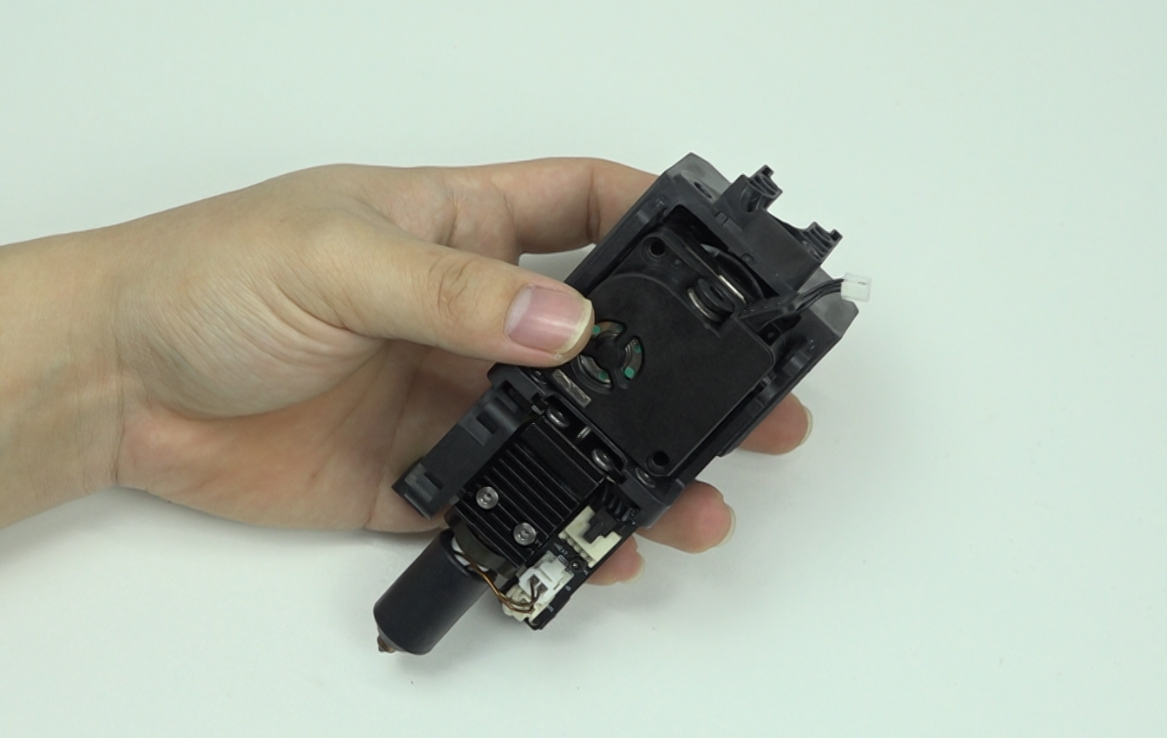
4.11 Use the H2.0 hexagonal wrench to install two M3 screws fixing the extruder
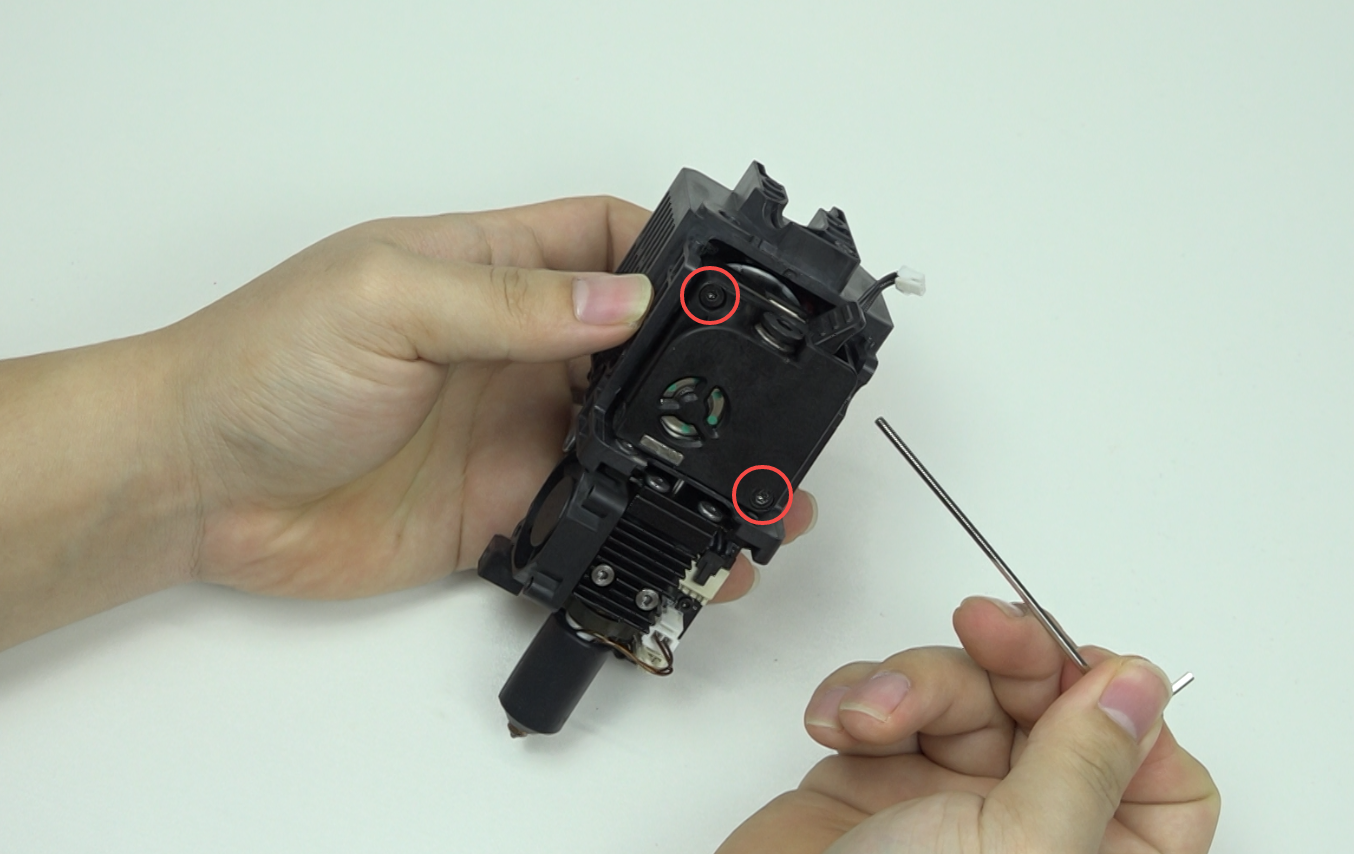
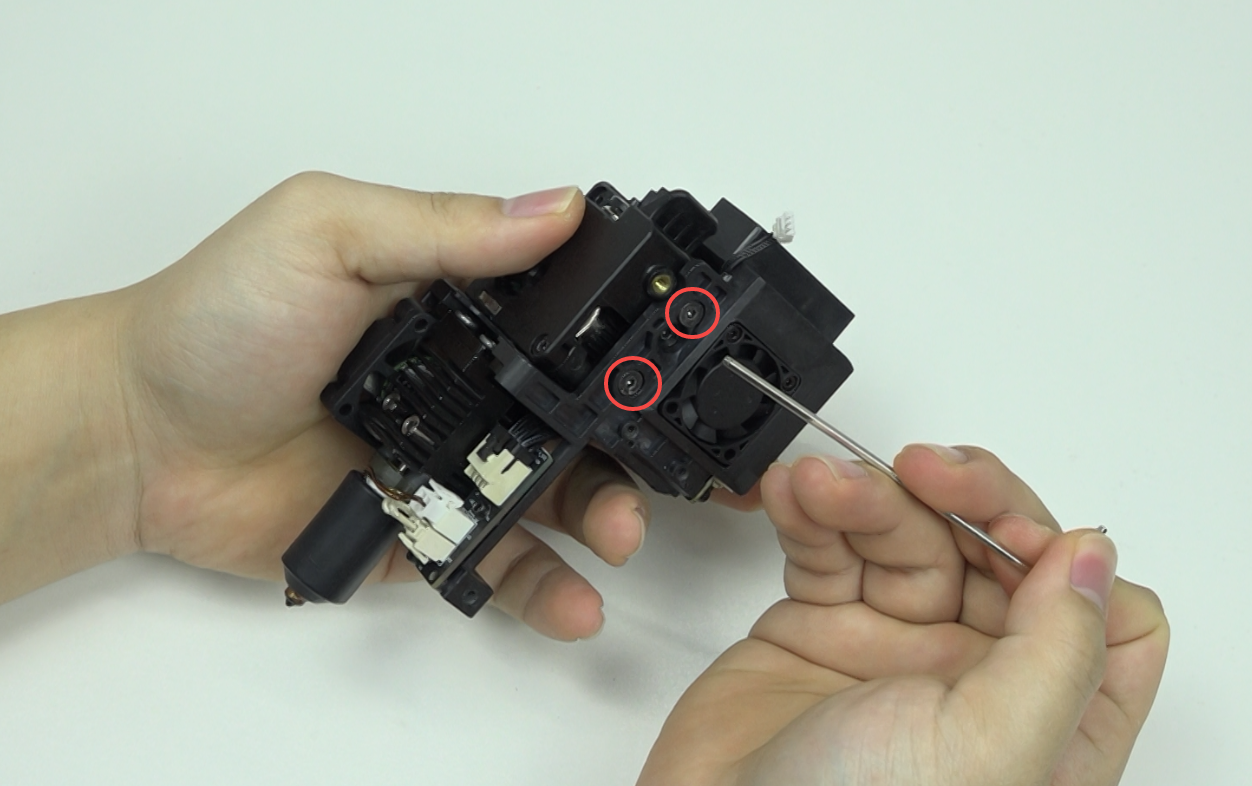
4.12 Use the H2.0 hexagonal wrench to install three M3 screws (one on the left, two on the right) fixing the extruder assembly
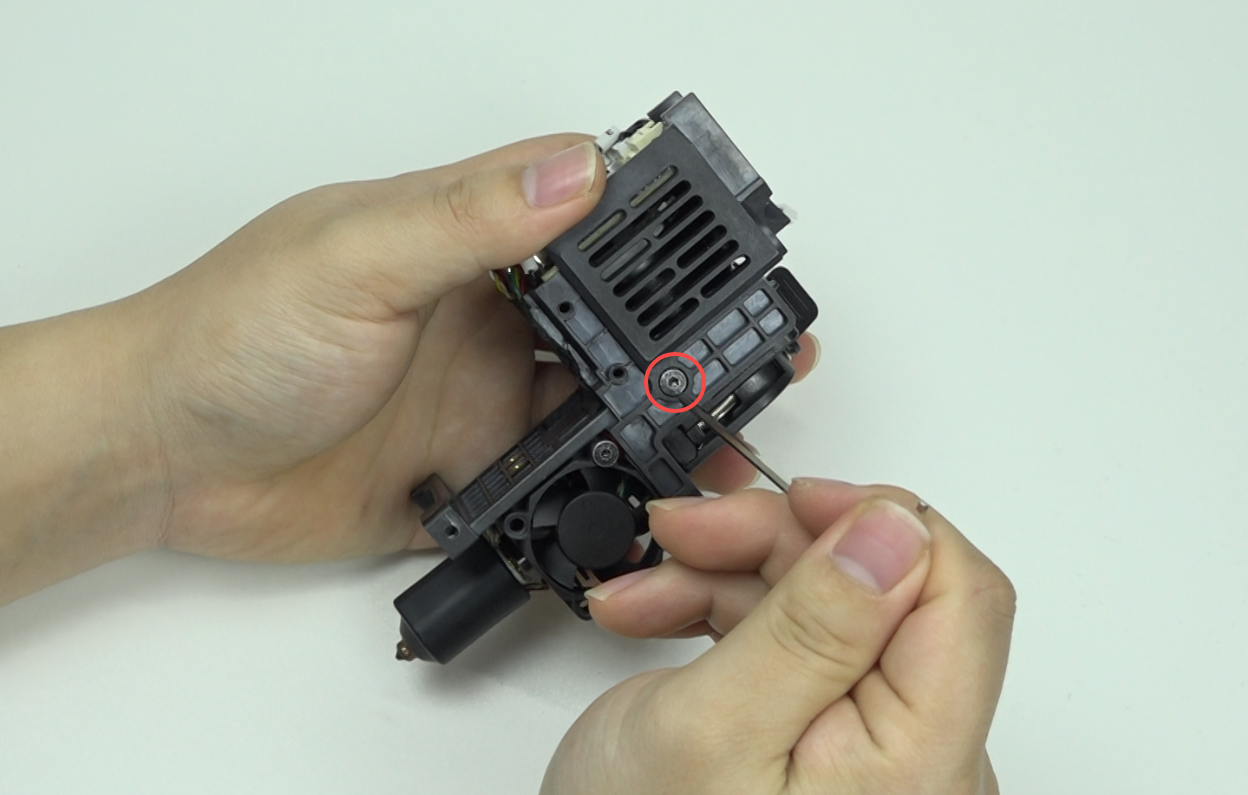
4.13 Plug in the filament break detection cable
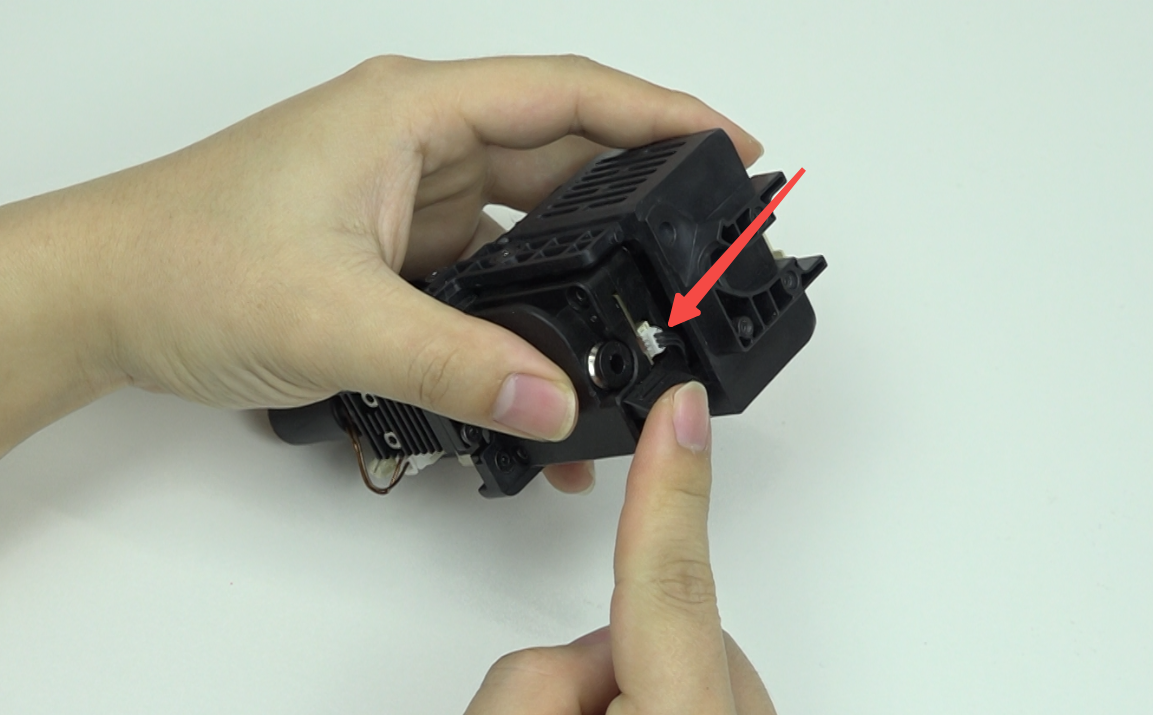
¶ 5. Install the upper part of the hotend assembly
5.1 Place the upper part of the hotend assembly on the X-axis mounting bracket, be careful not to squeeze the model camera cable and model fan cable.
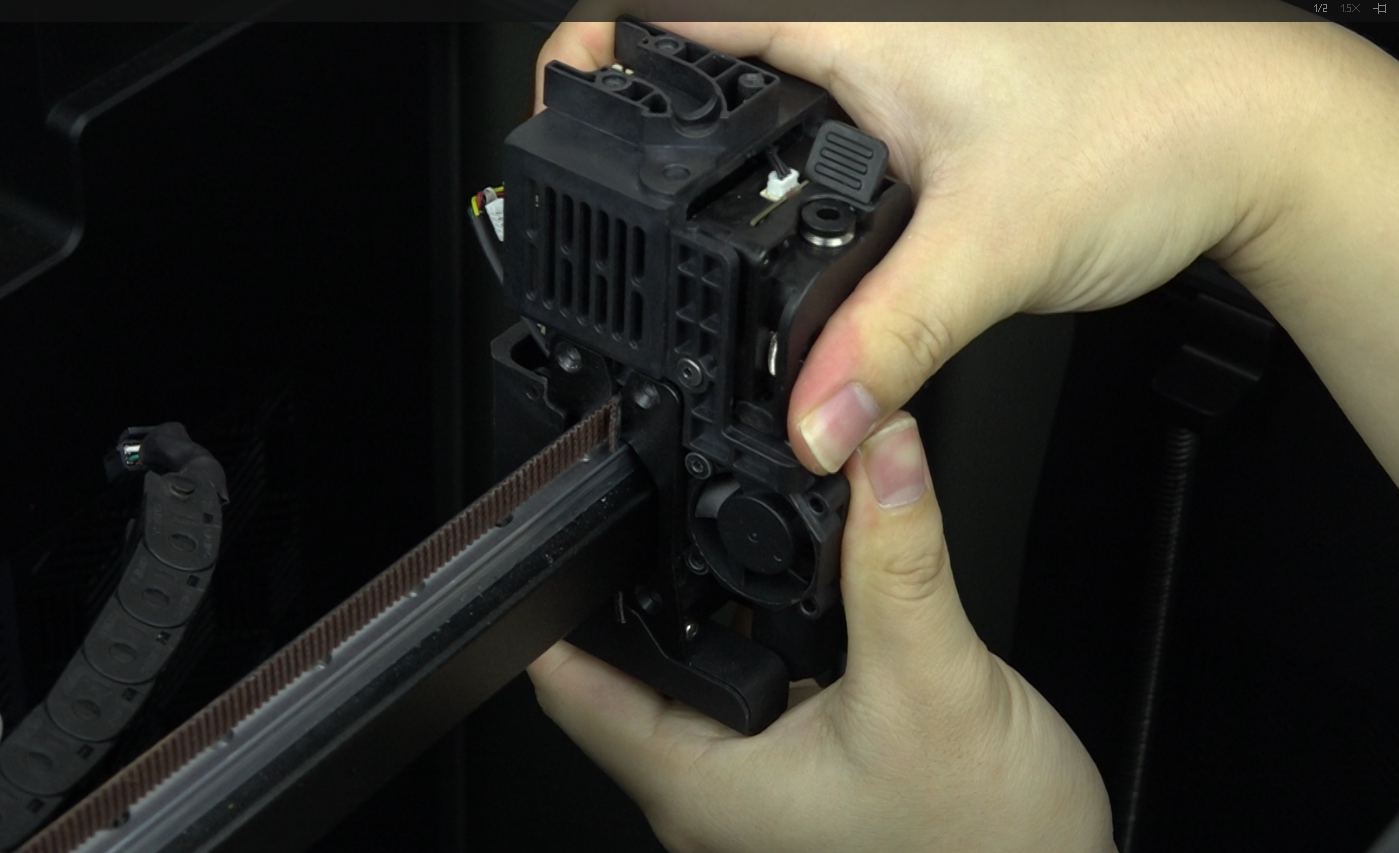
5.2 Use the hexagonal wrench to install six screws (three on each side) fixing the upper part of the printhead assembly.
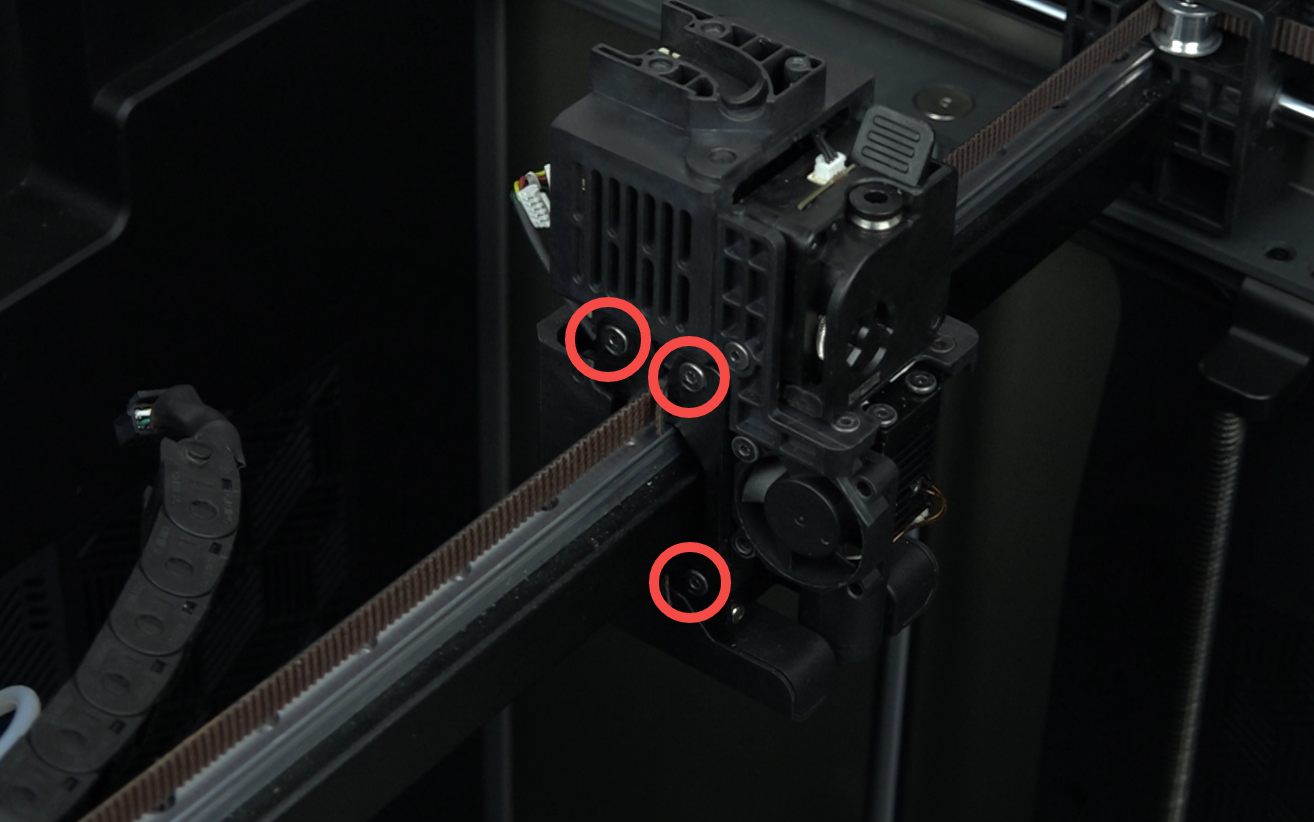
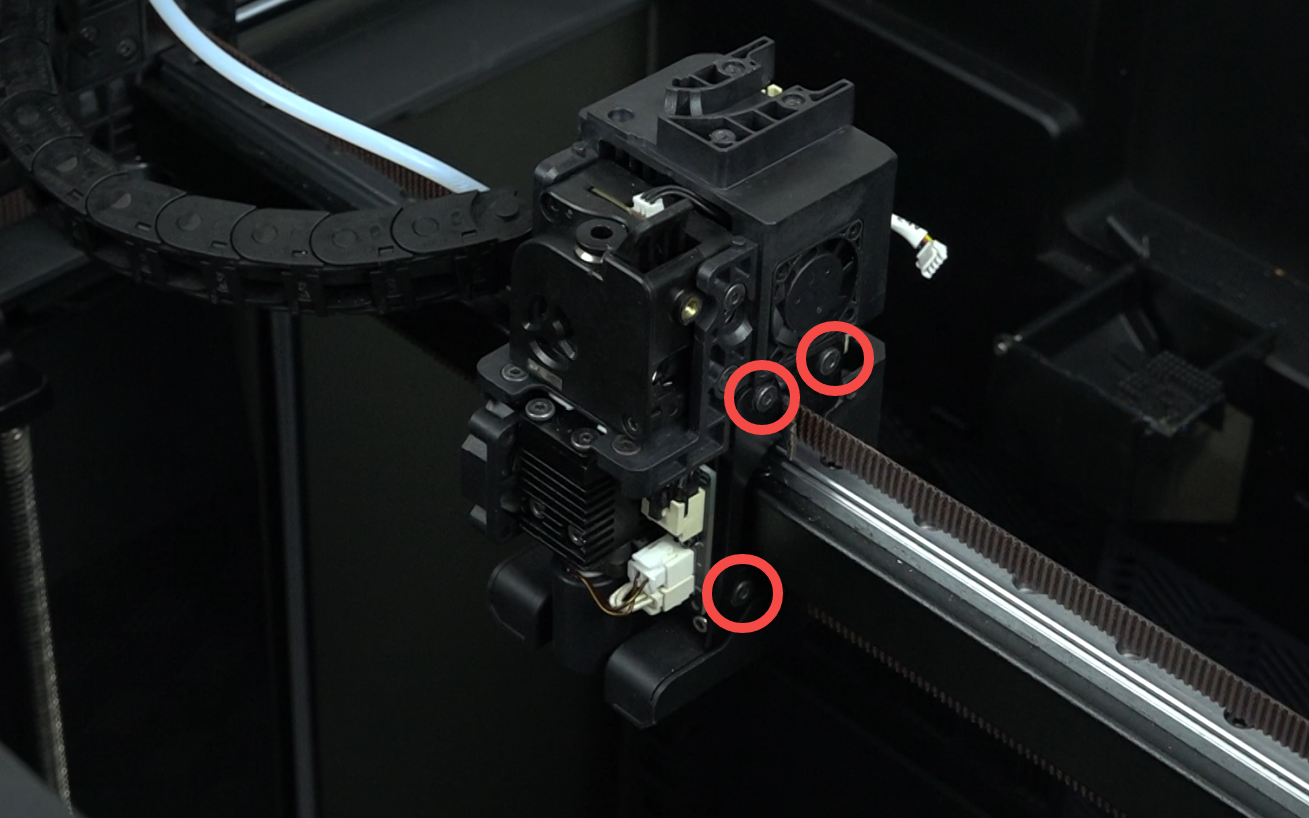
5.3 Plug in the printhead cable, model fan cable and nozzle camera cable
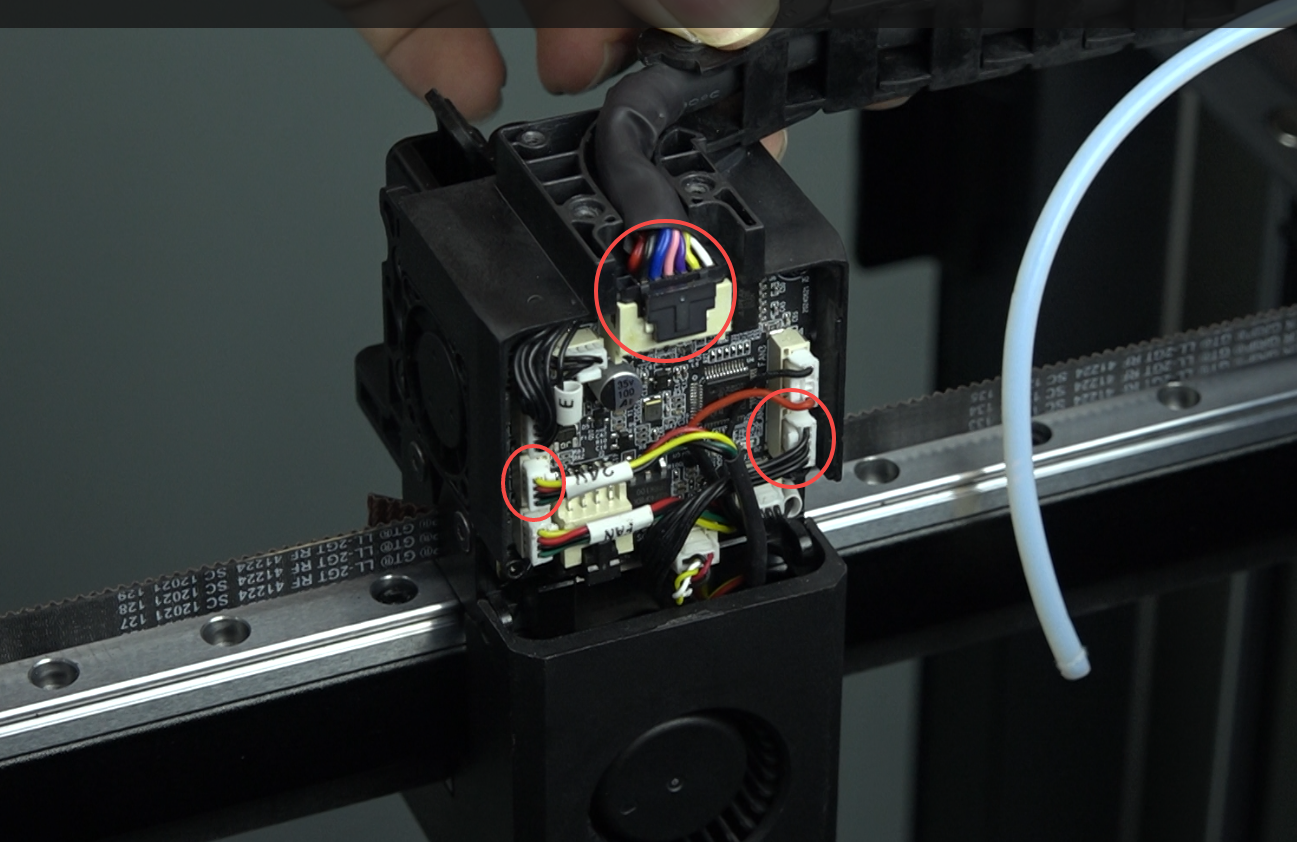
5.4 Install the drag chain cover, make sure to align the holes
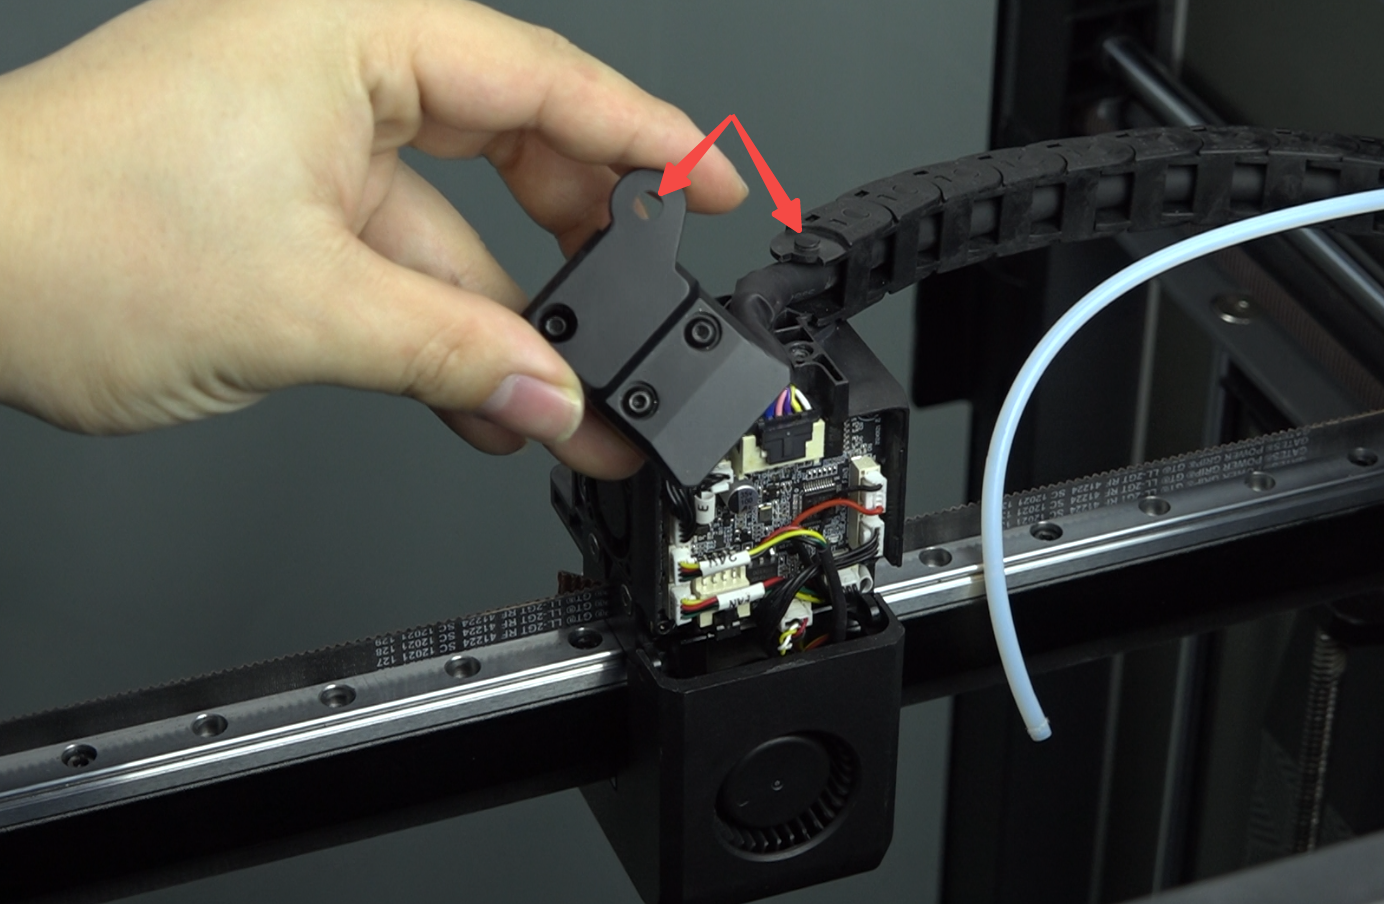
5.5 Use the hexagonal wrench to install three M2 screws on the drag chain cover
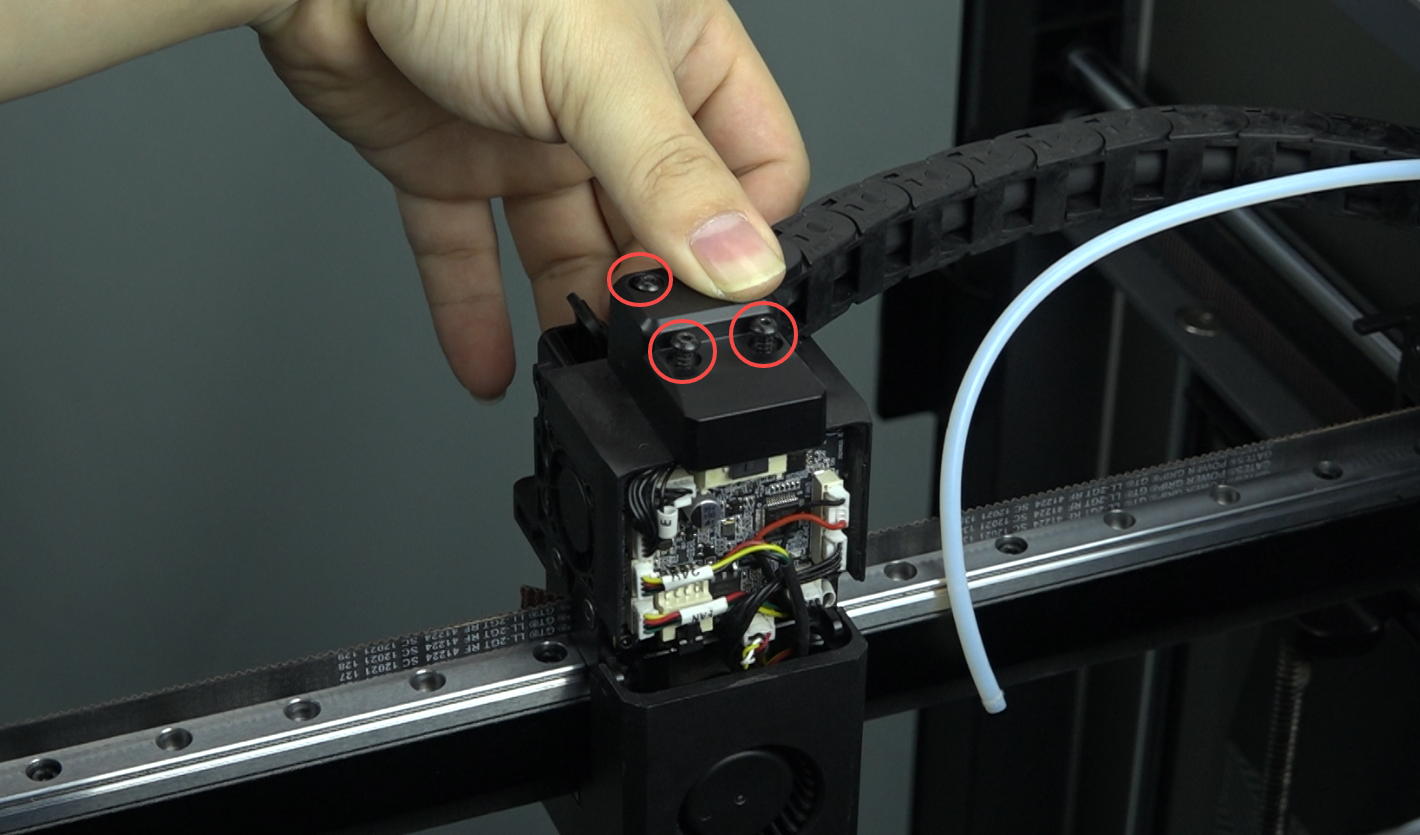
5.6 Install the hotend plate protective cover
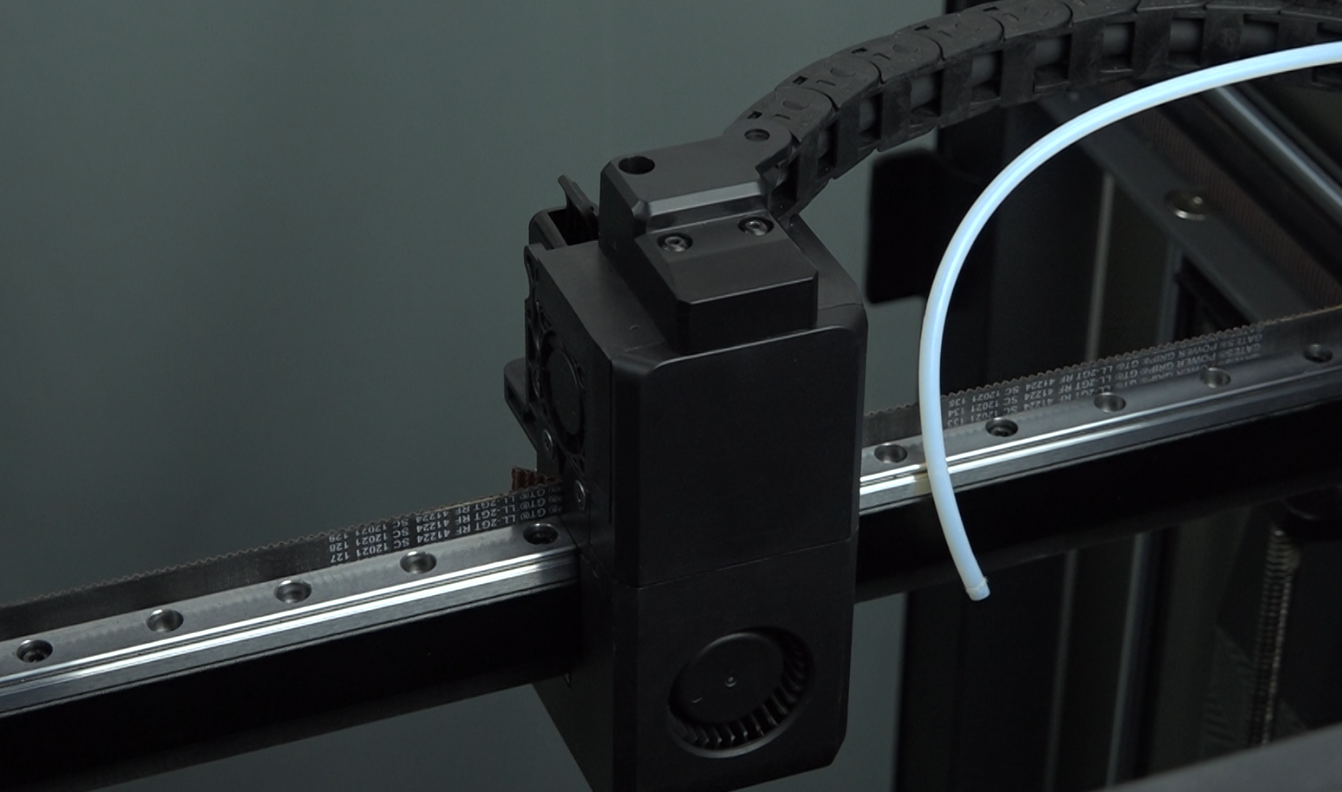
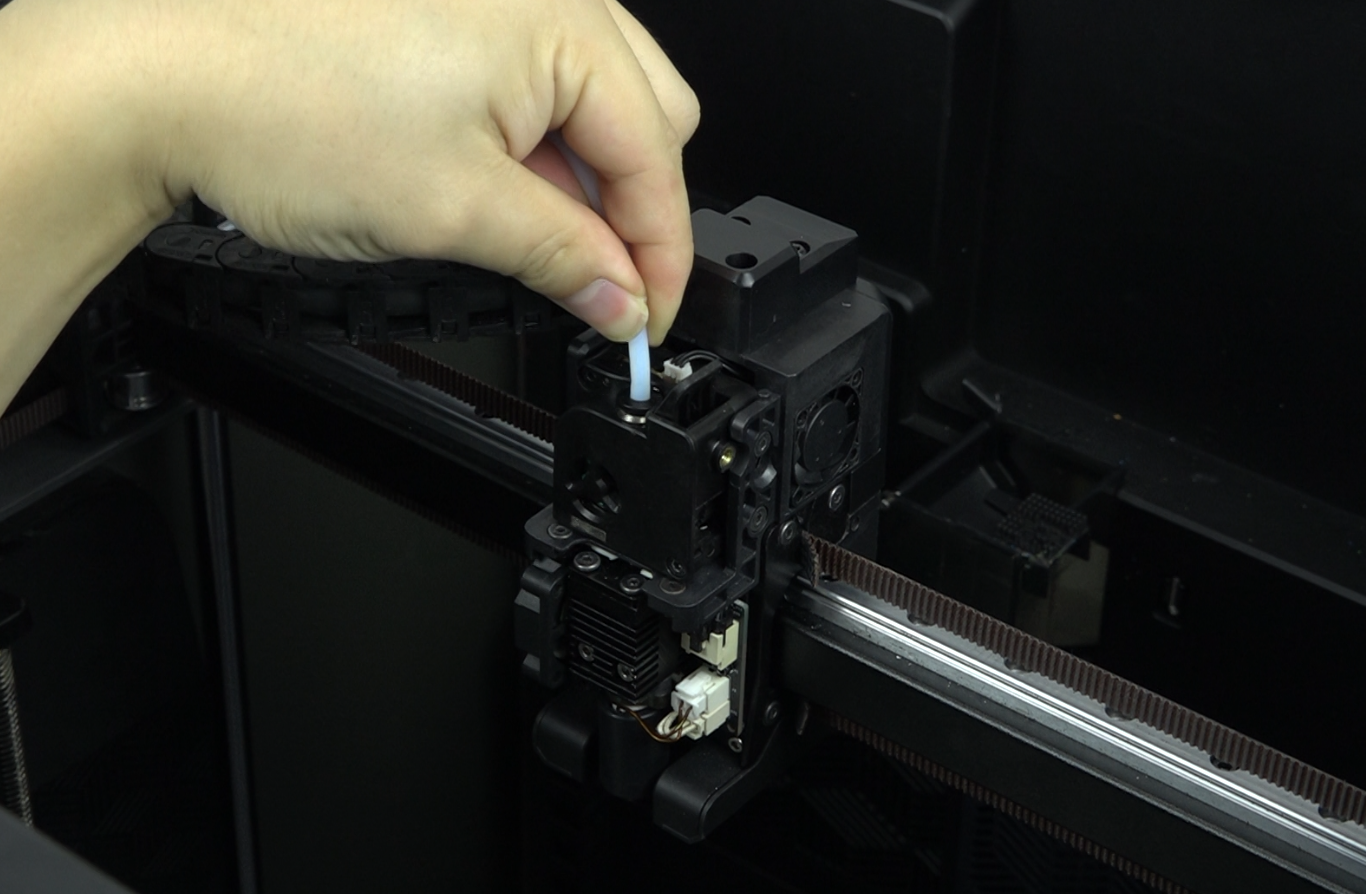
5.7 Insert the PTFE tube
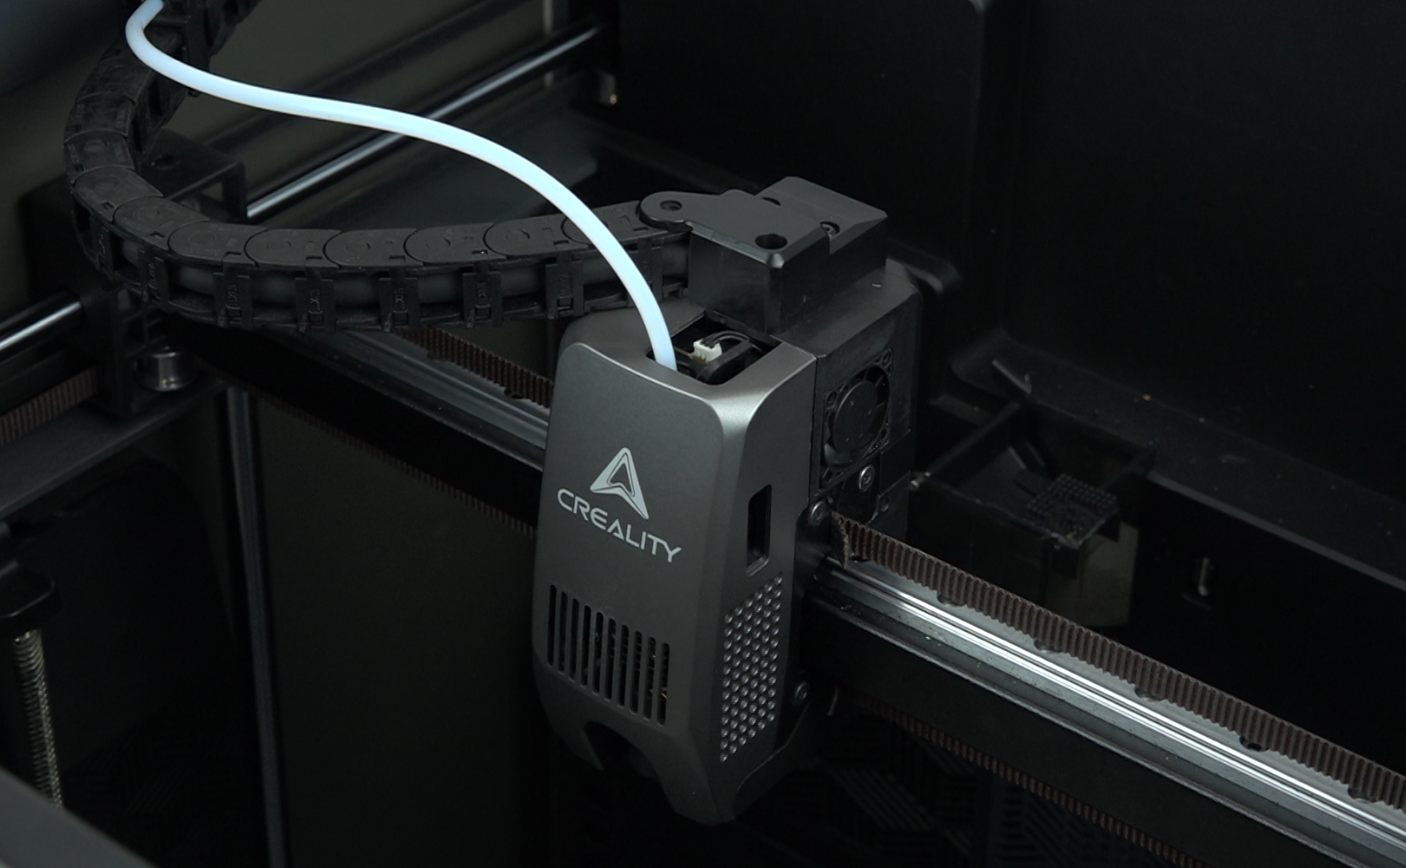
5.8 Install the magnetic cover of the extruder
¶ 6. Device self-test
Plug in the power cord, turn on the device
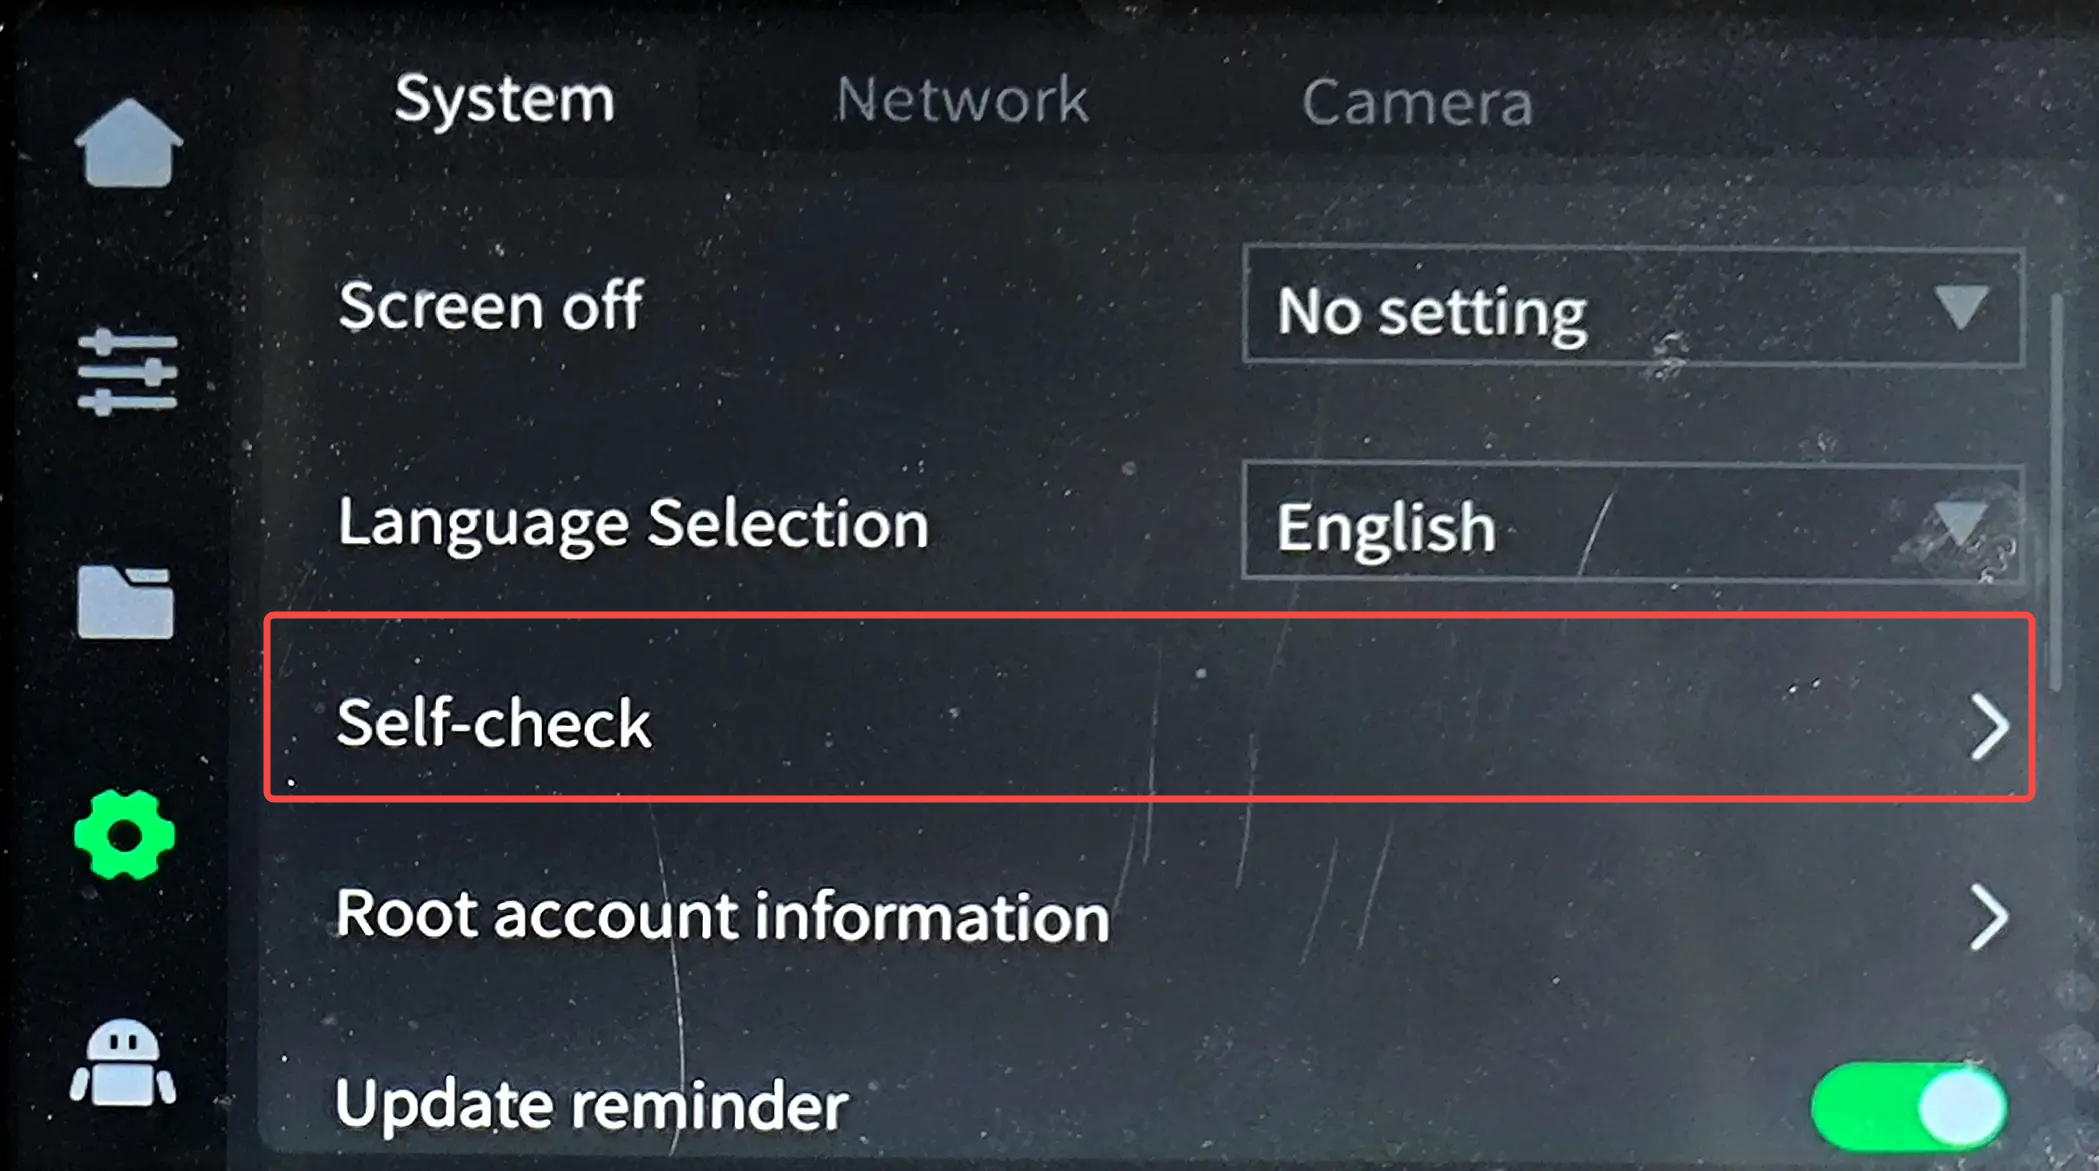
Click Settings - Self-check
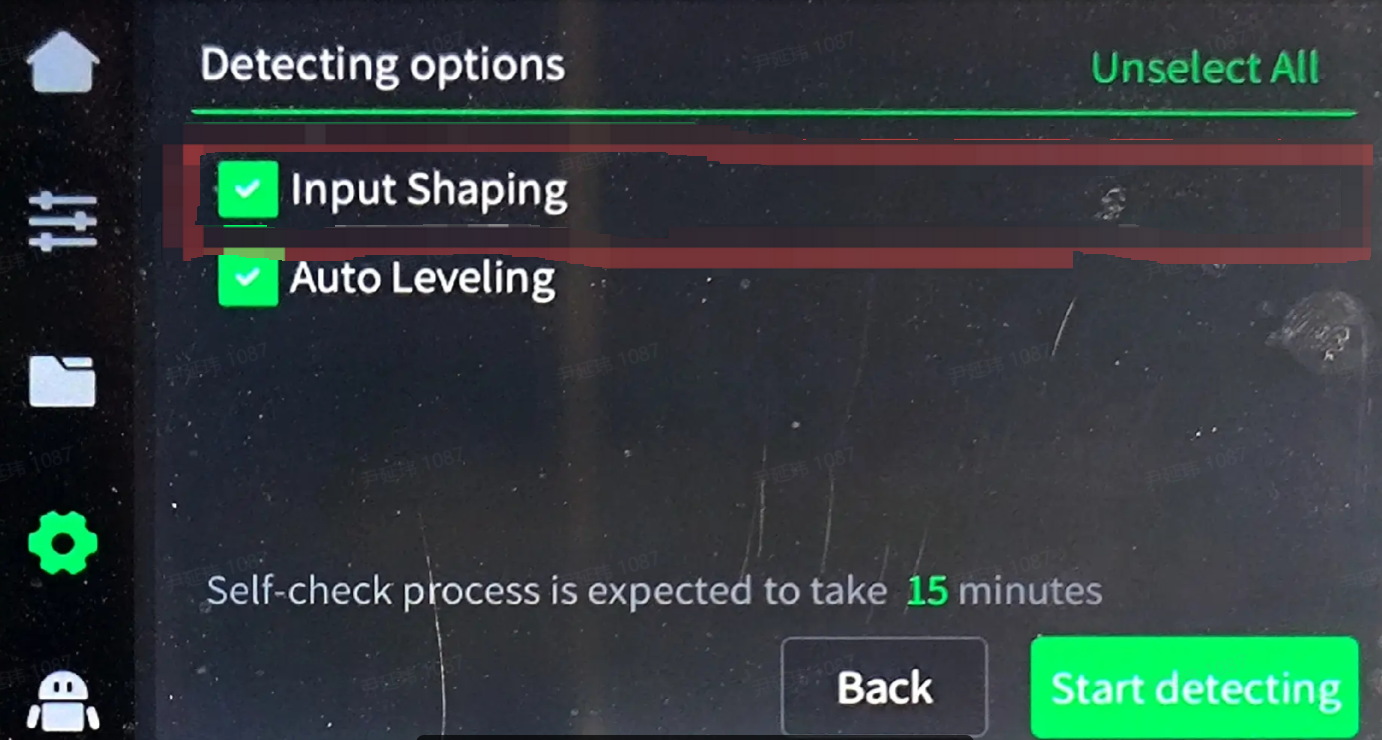
Select All - Start detecting
¶ Video Tutorial
Replace Strain Gauge
https://youtu.be/FQnuMHAcapM