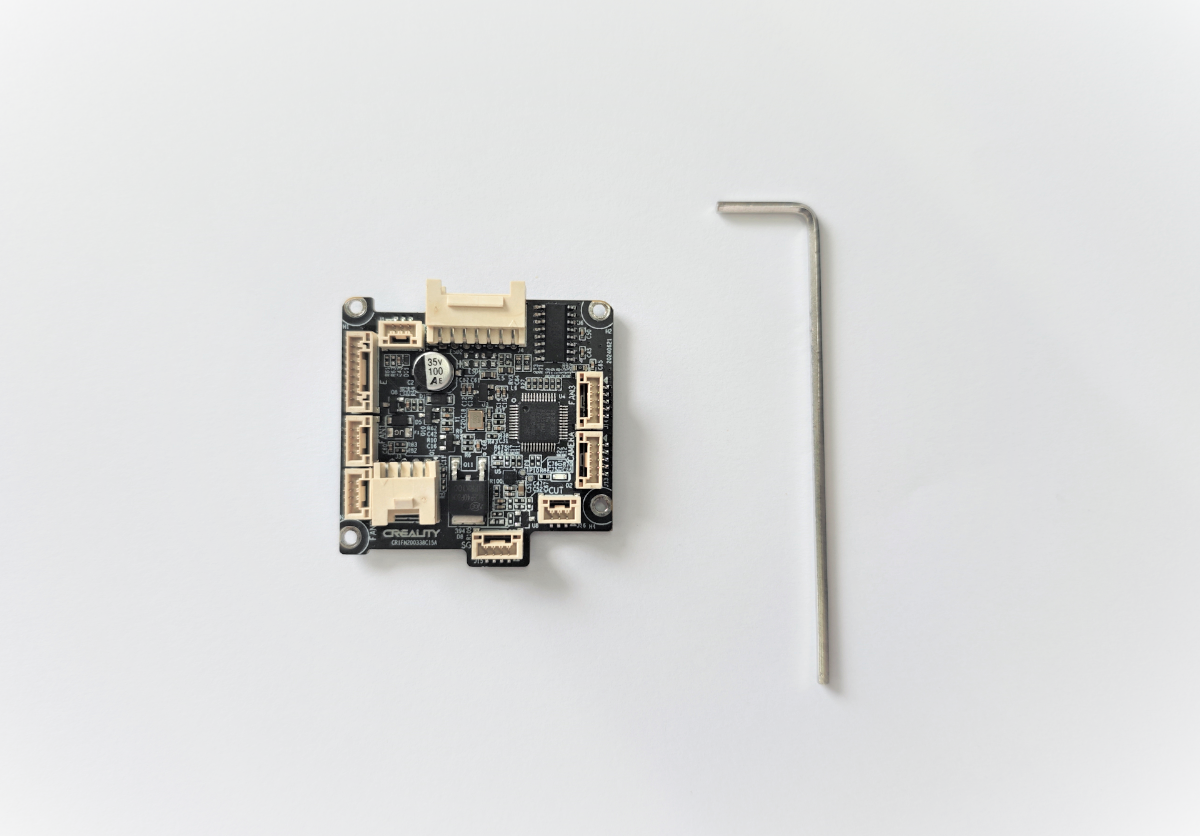
¶ Tools
H2.0 hexagonal wrench
New hotend circuit board
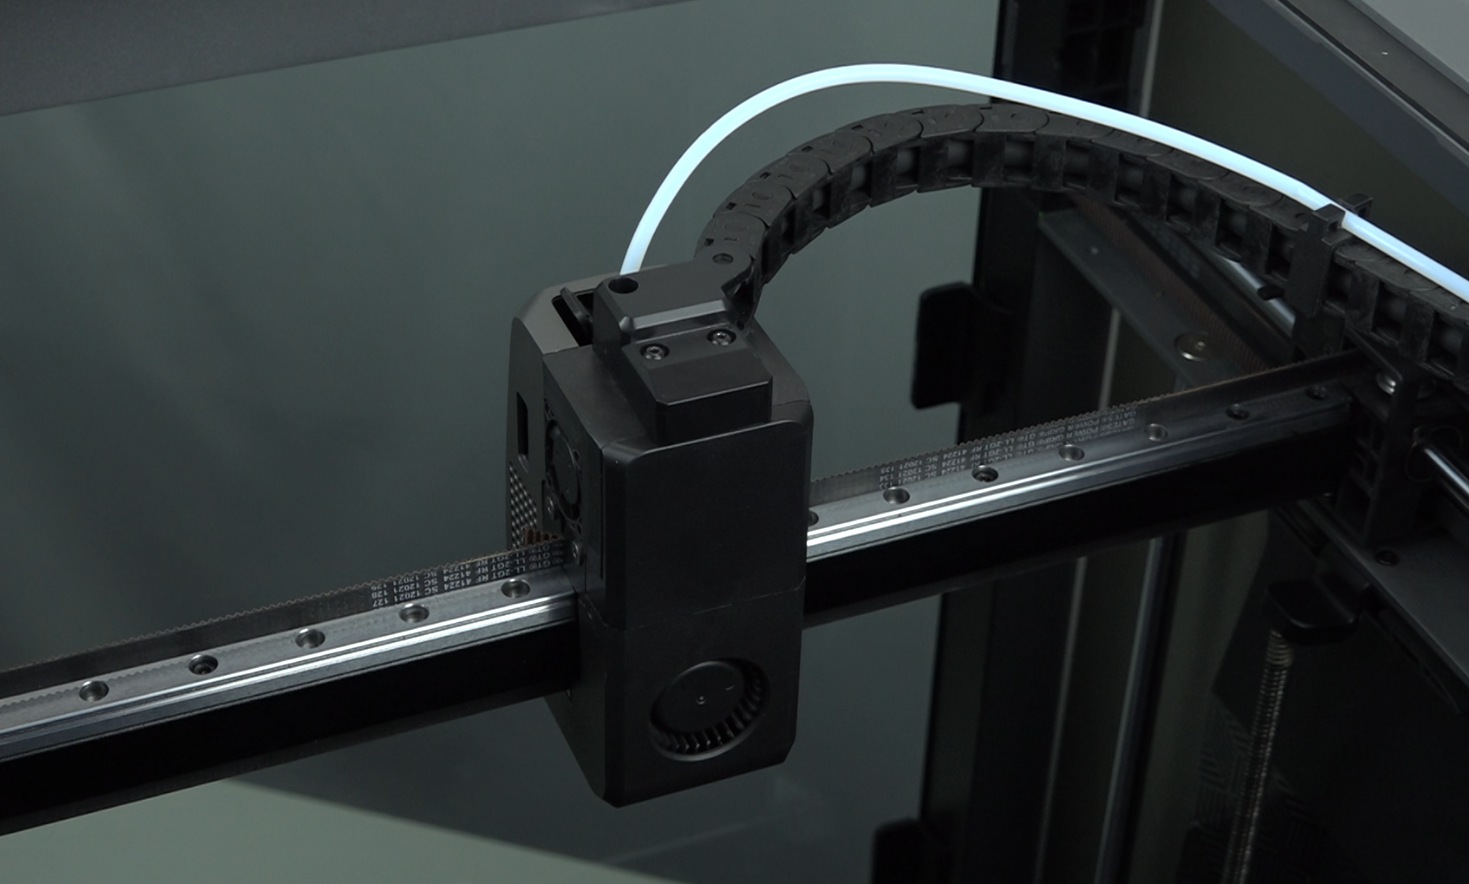
¶ Position
The hotend circuit board is installed behind the hotend assembly.
¶ Steps
¶ 1. Power off
1.1 Turn off the power and unplug the power cord.
¶ 2. Disassemble the upper part of the hotend assembly
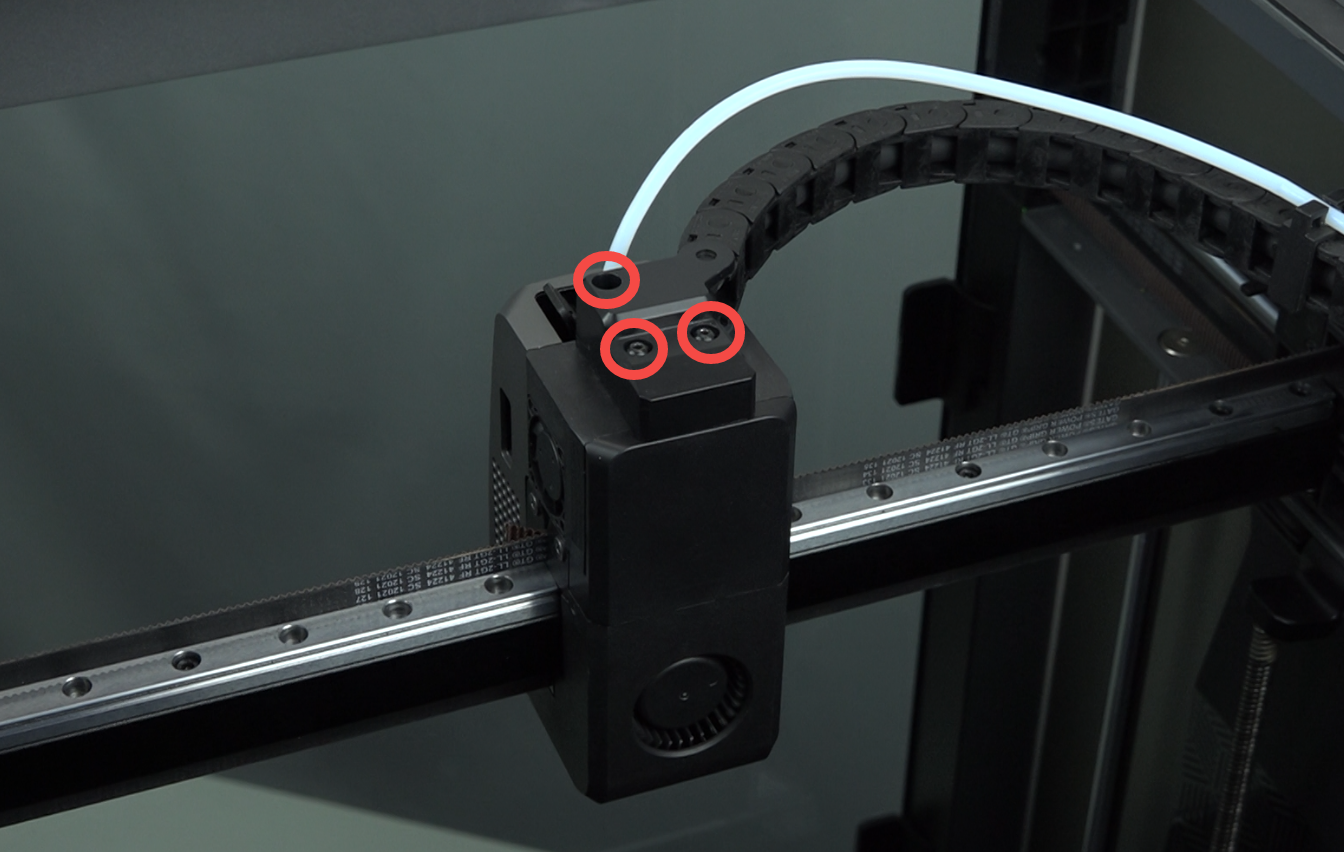
2.1 Use the hexagonal wrench to remove the three M3 screws on the drag chain cover.
2.2 Remove the drag chain cover.
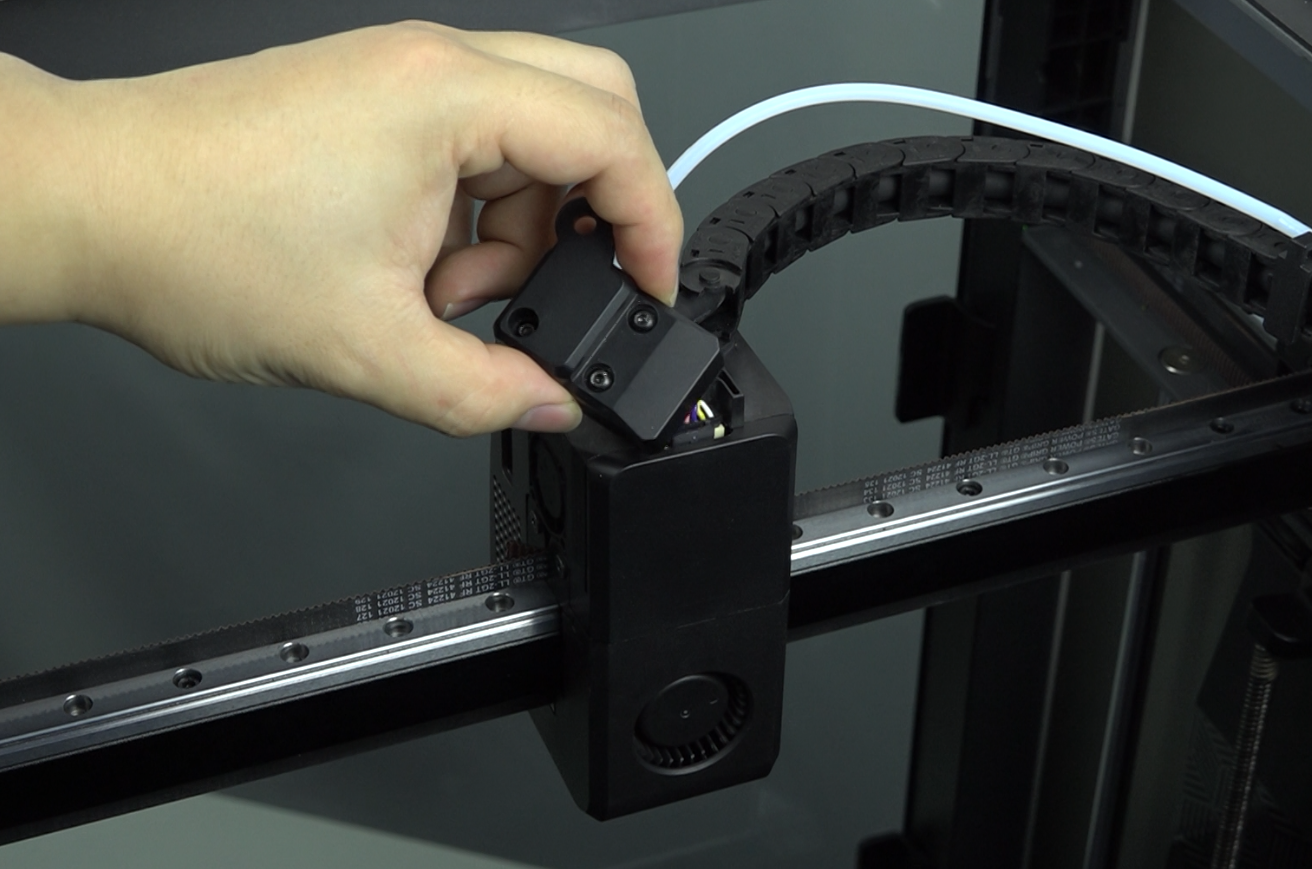
2.3 Remove the protective cover from the hotend circuit board.
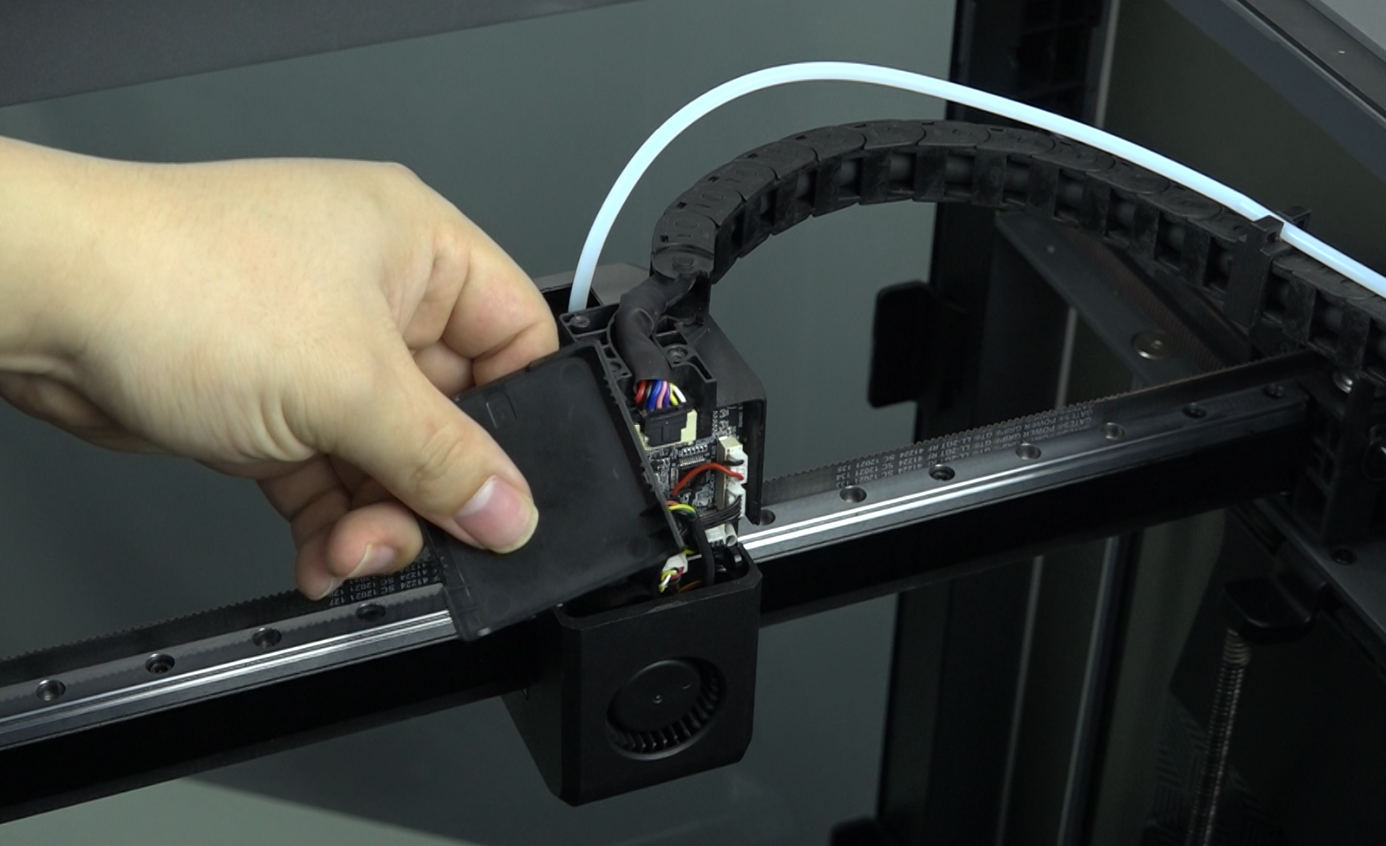
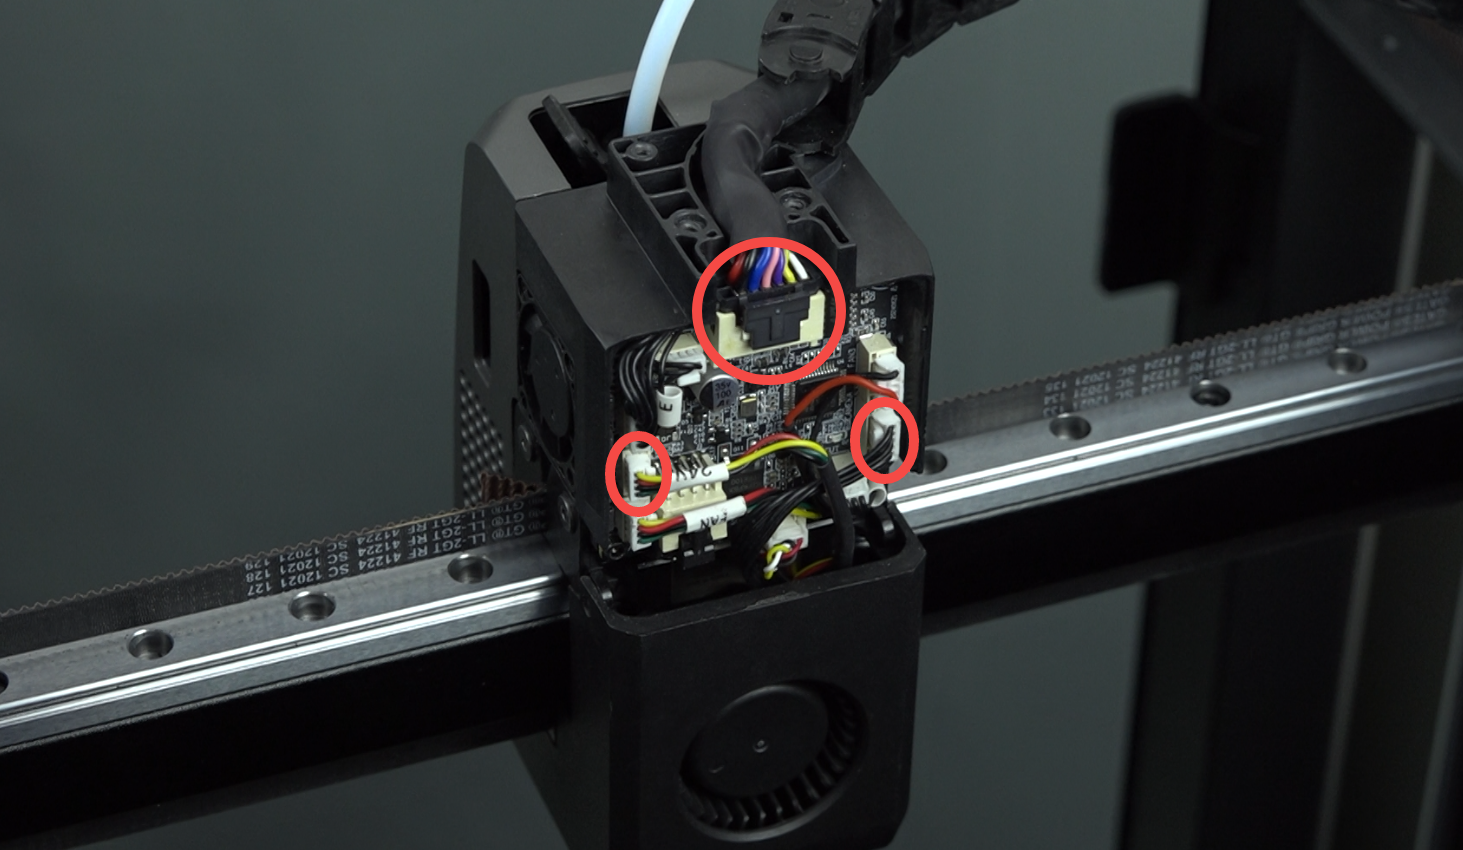
2.4 Unplug the hotend cable, model fan cable and model camera cable.
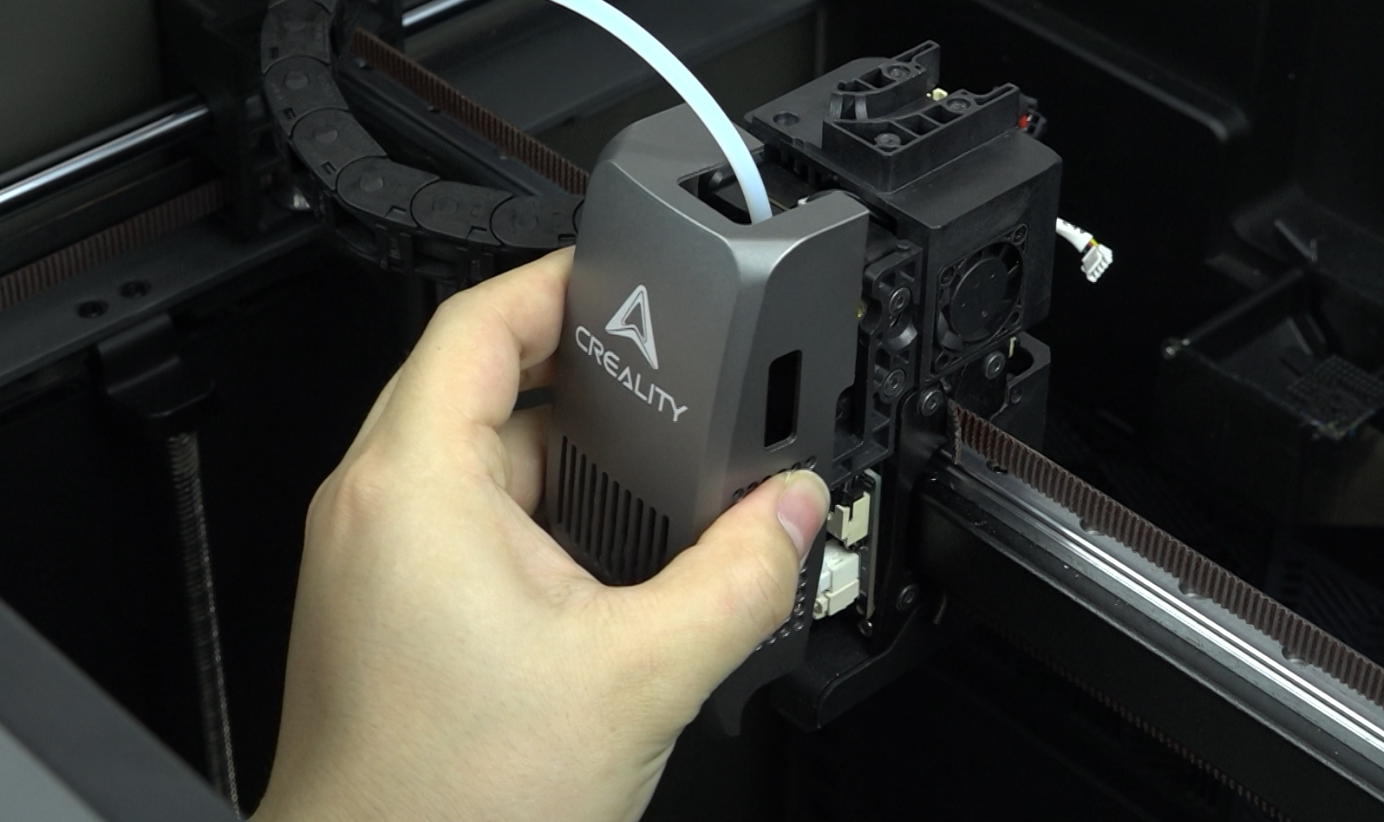
2.5 Remove the magnetic cover of the extruder.
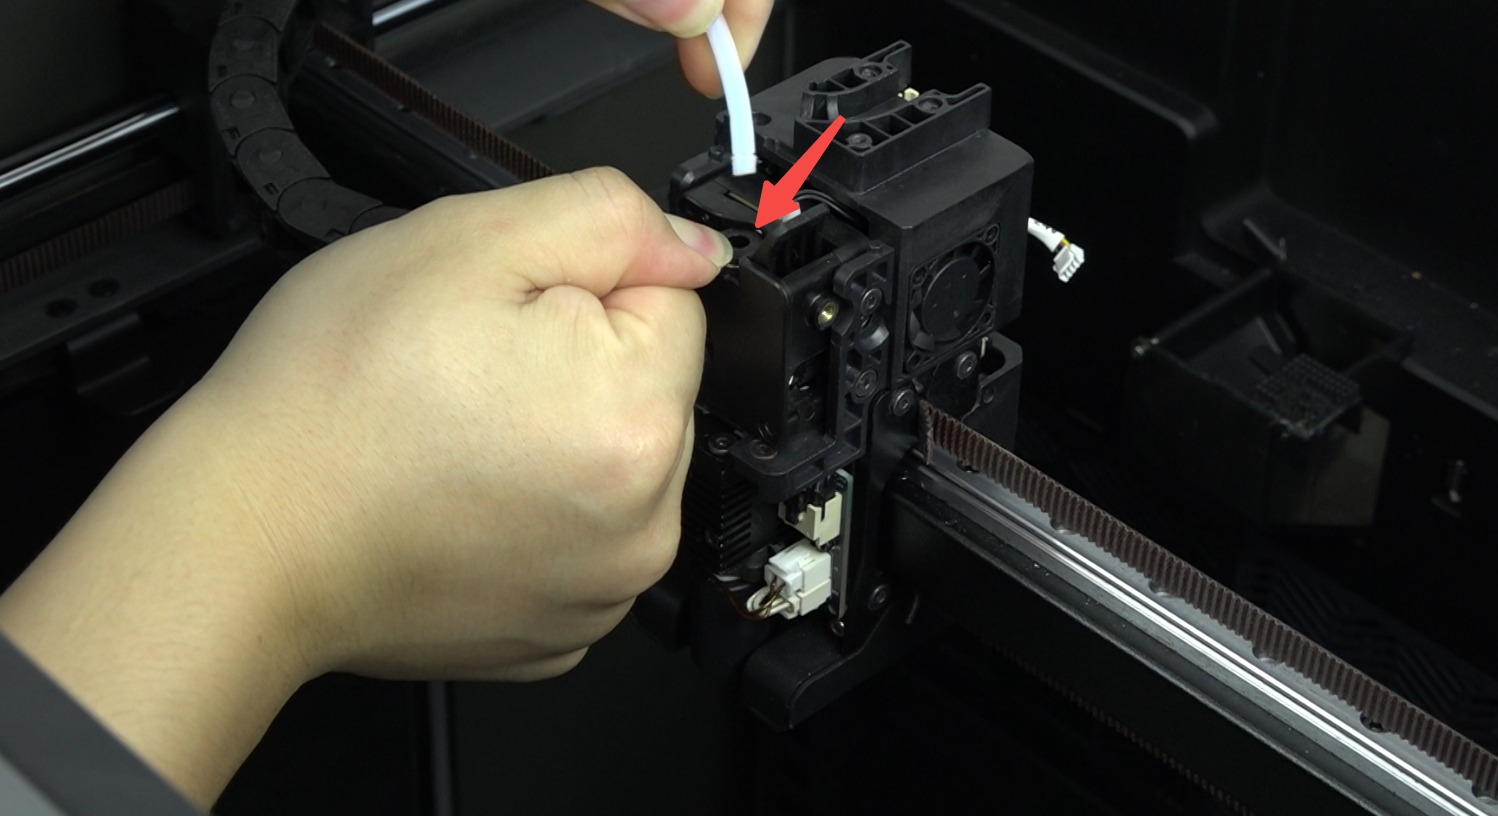
2.6 Press the tube connector and pull out the PTFE tube. If there is filament, please cut it with cutting pliers.
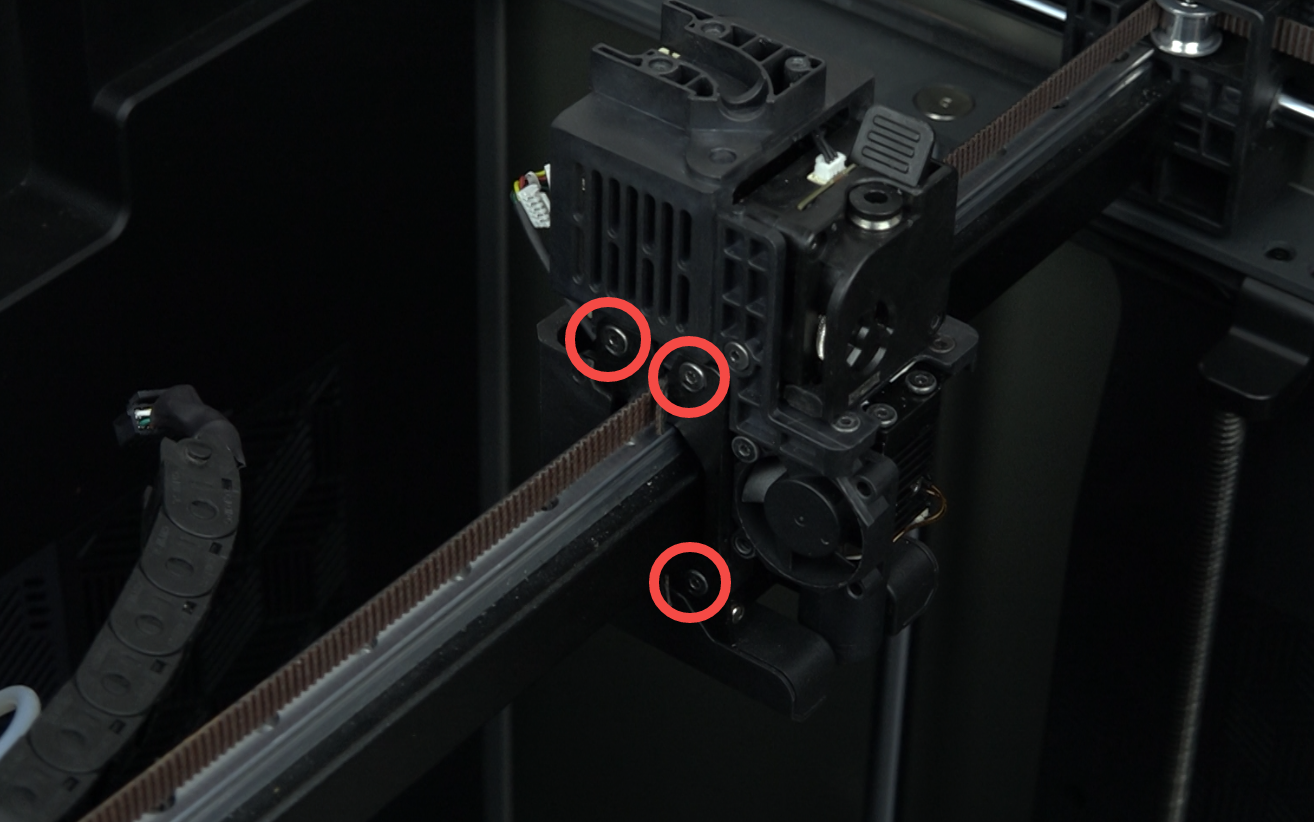
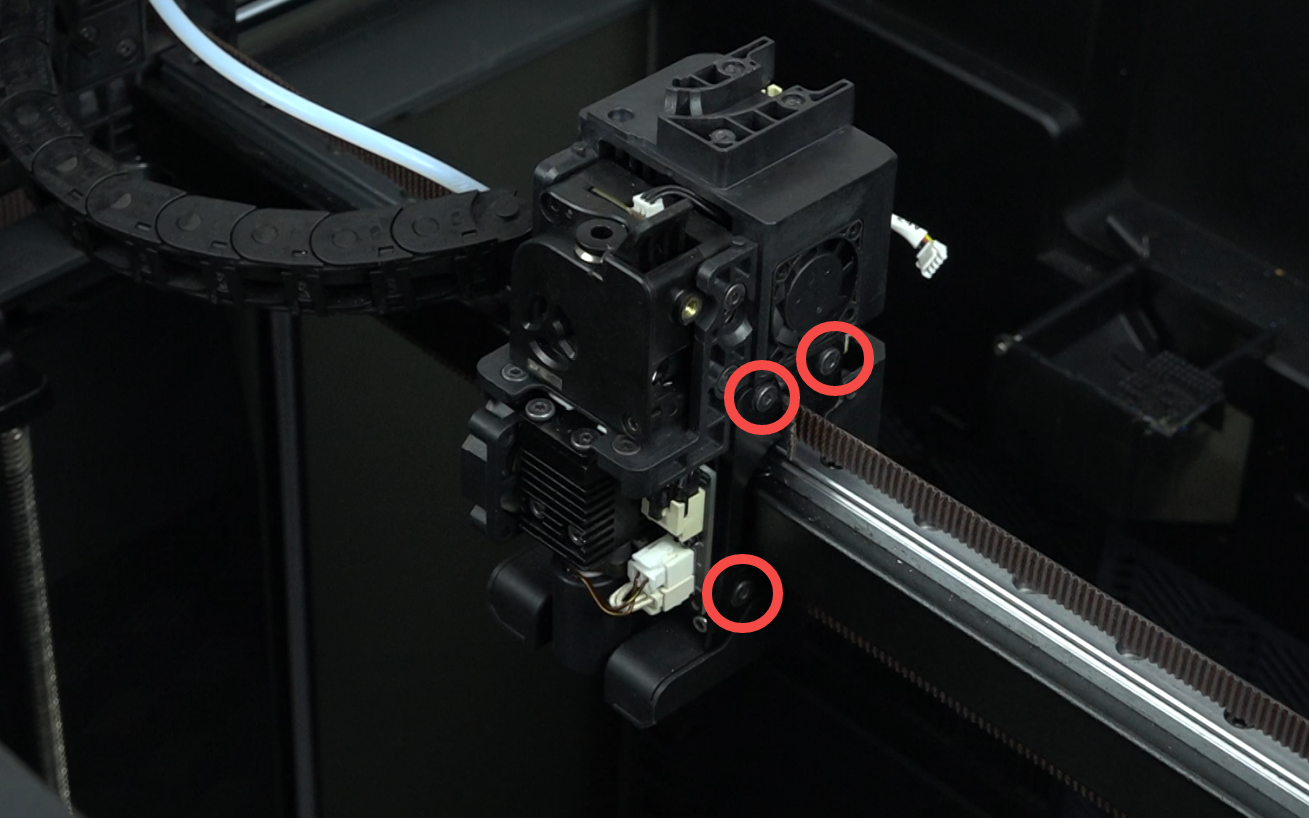
2.7 Use the hexagonal wrench to remove the six M3 screws (three on each side) that secure the upper part of the hotend assembly
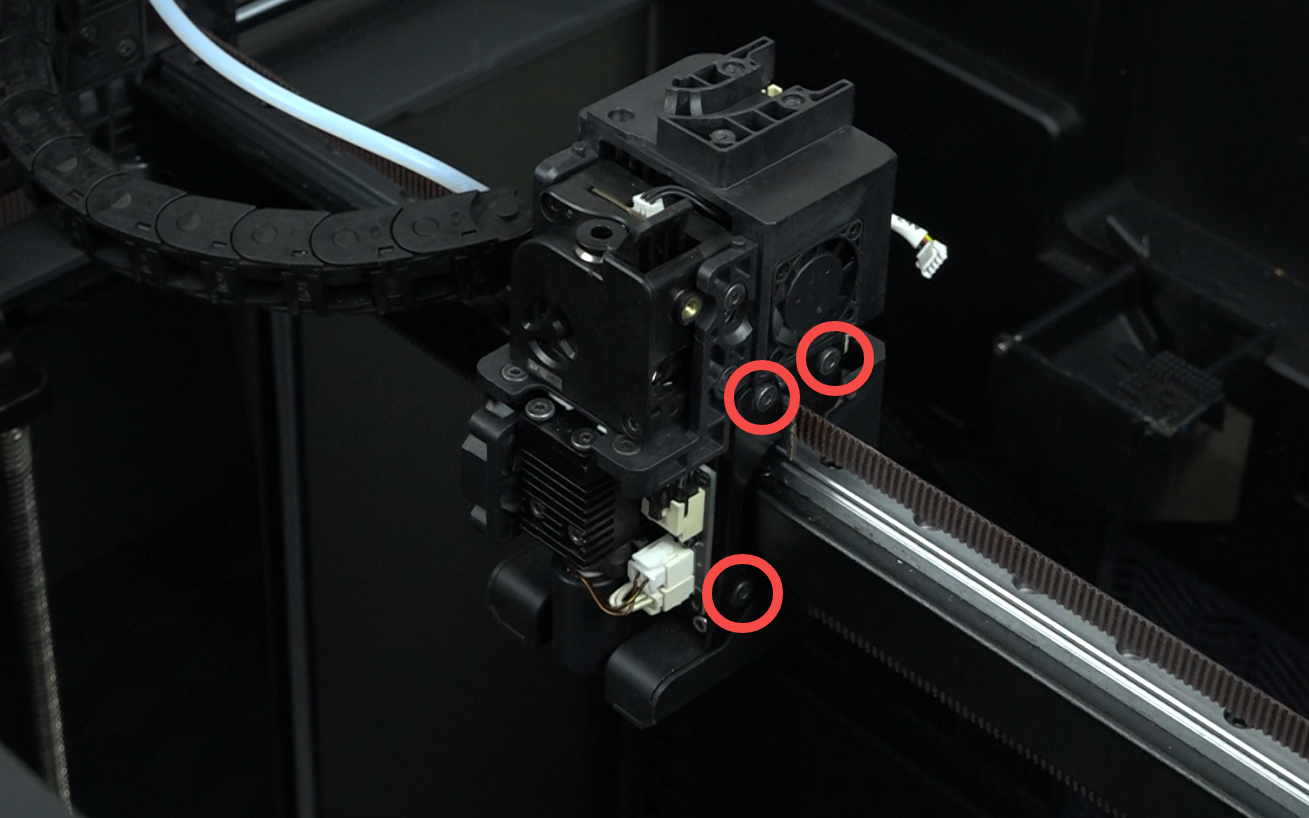
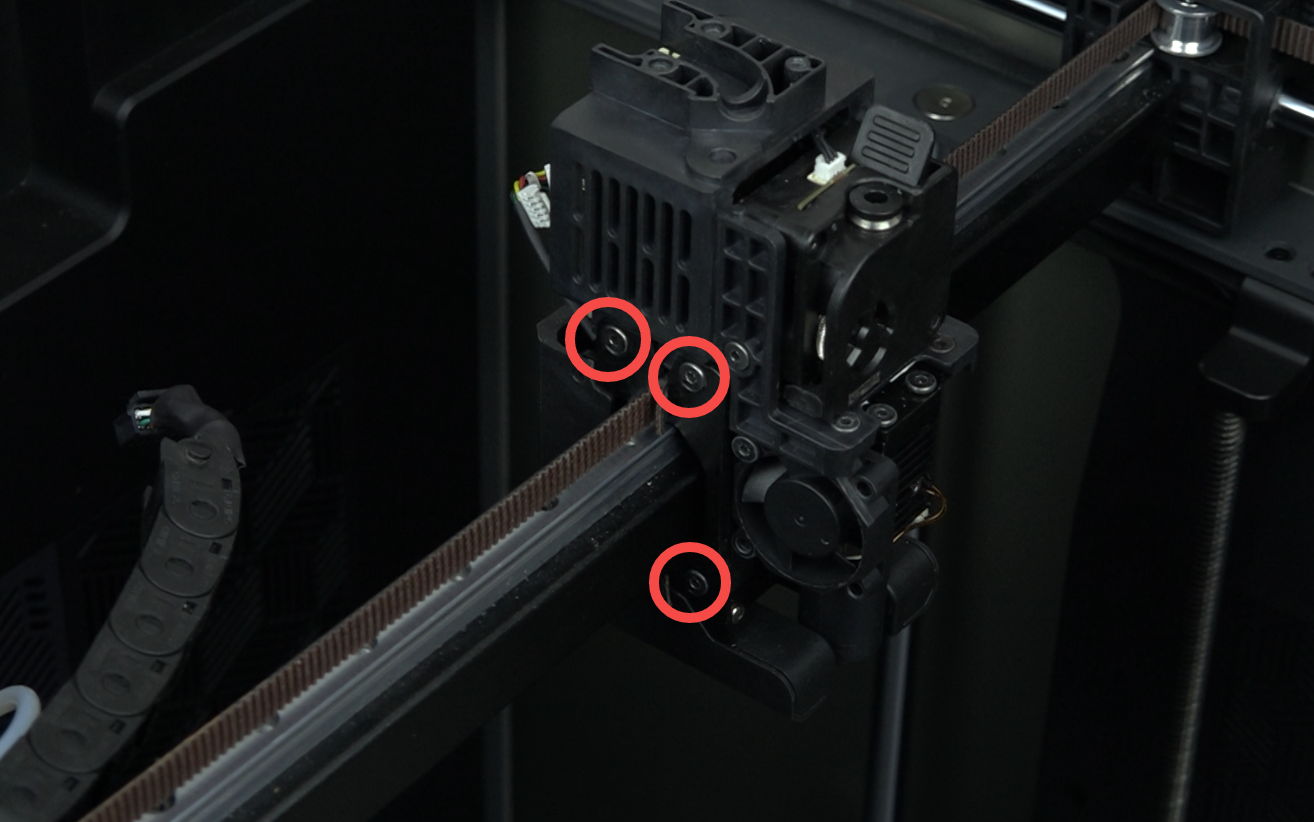
2.8 Remove the upper part of the hotend assembly
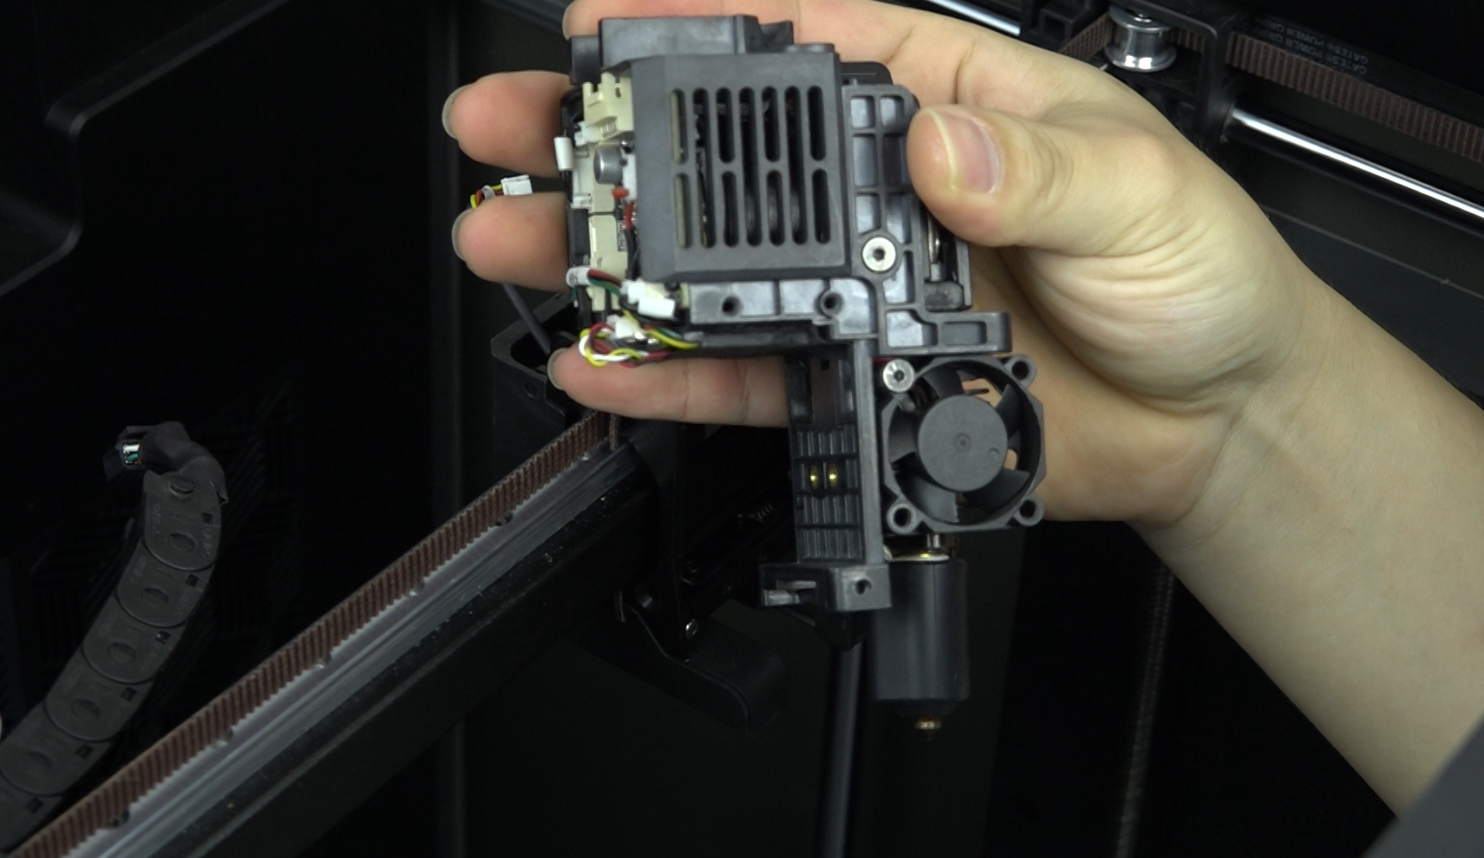
¶ 3. Remove the damaged hotend circuit board
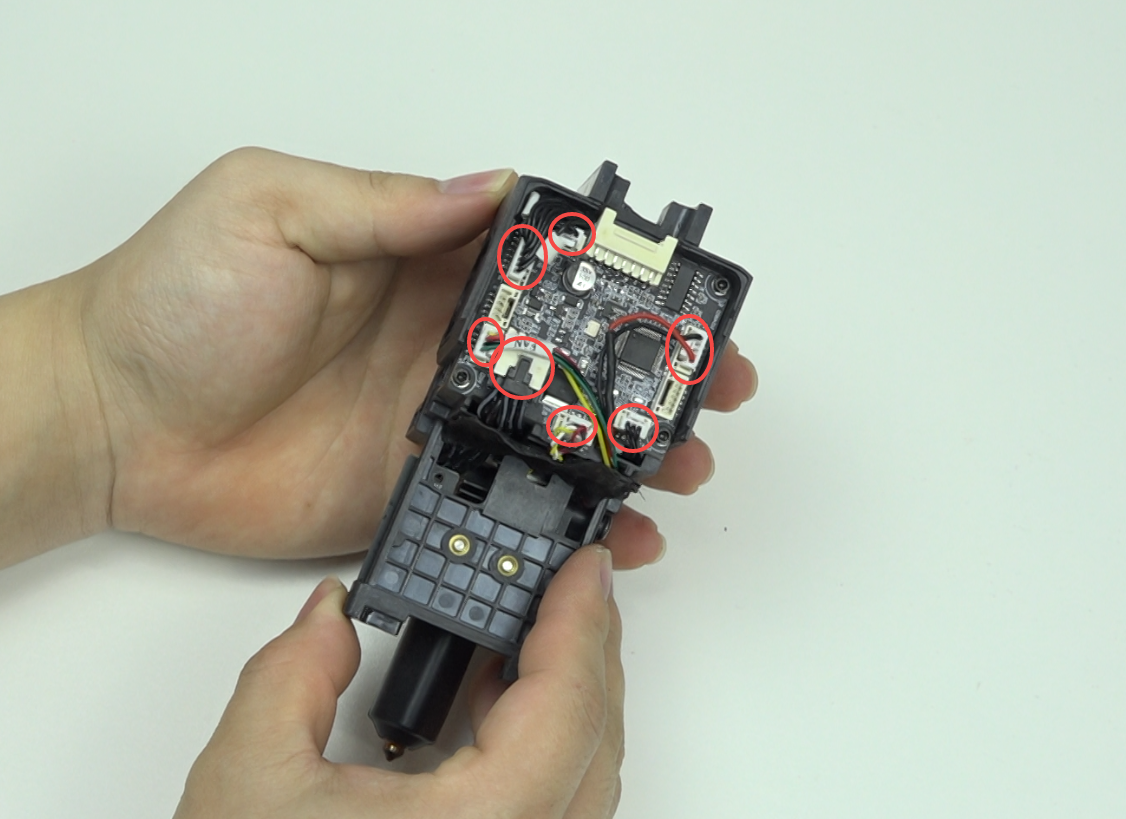
3.1 Unplug all cables from the hotend circuit board
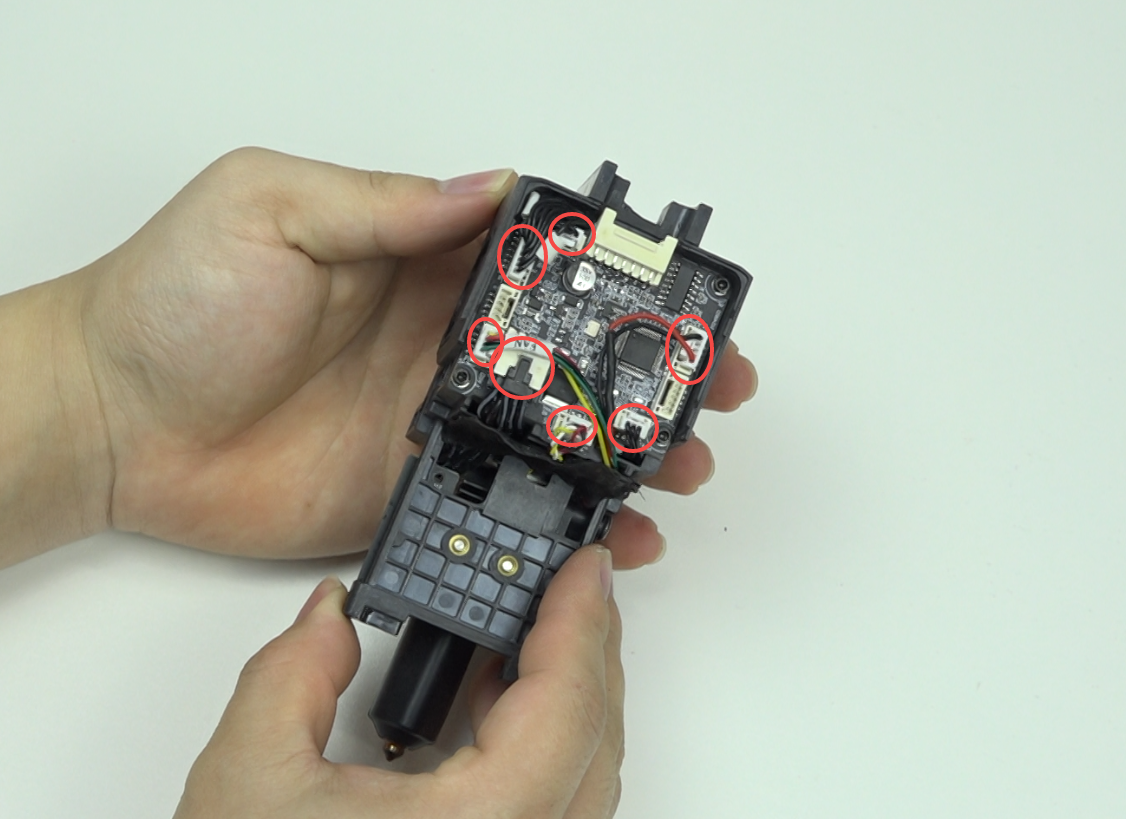
3.2 Use the hexagonal wrench to remove the four M2 screws on the printhead board
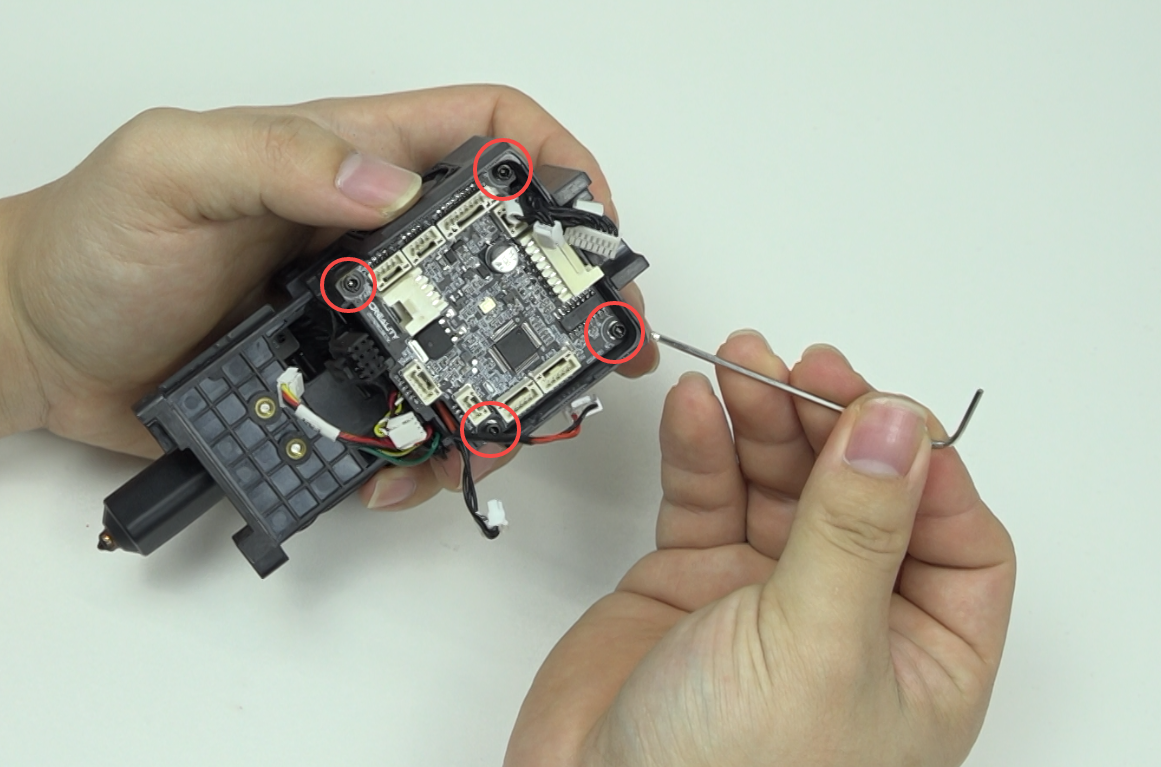
3.3 Remove the damaged hotend circuit board
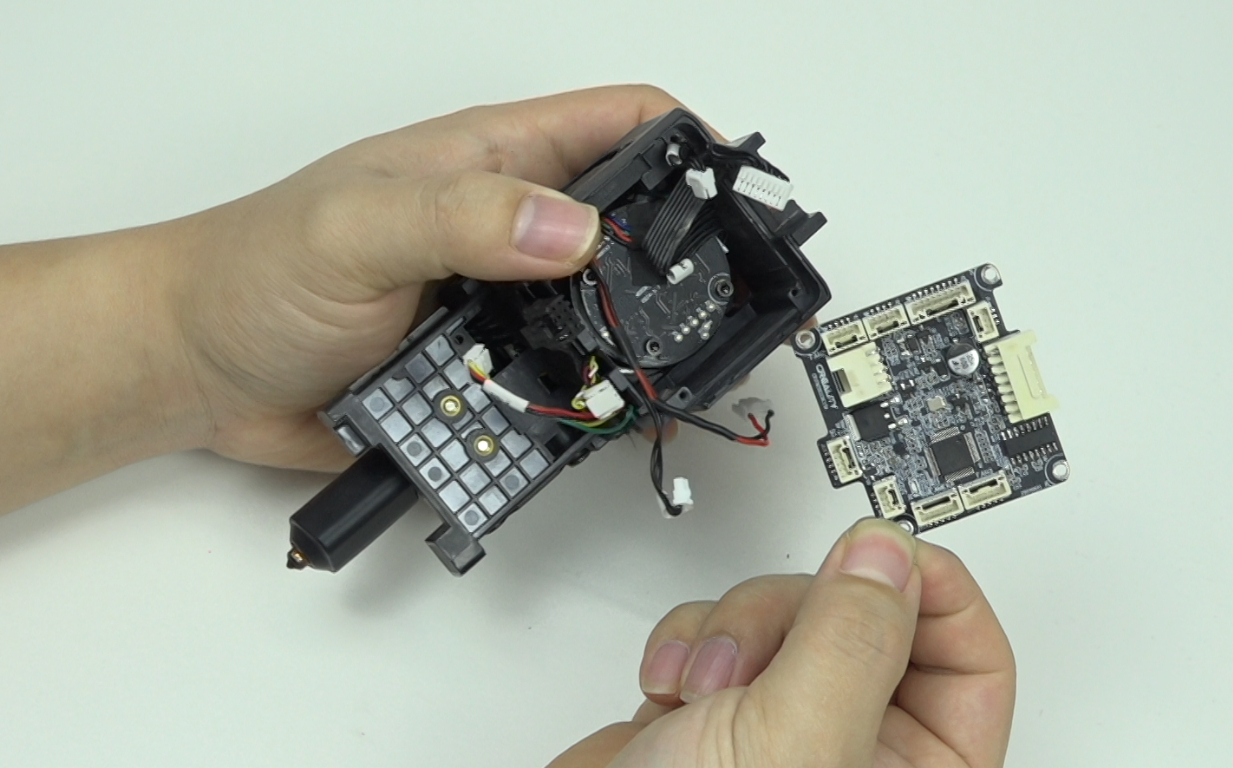
¶ 4. Install the new hotend circuit board
4.1 Install the new hotend circuit board, pay attention to the orientation and cable management position, do not squeeze the cables
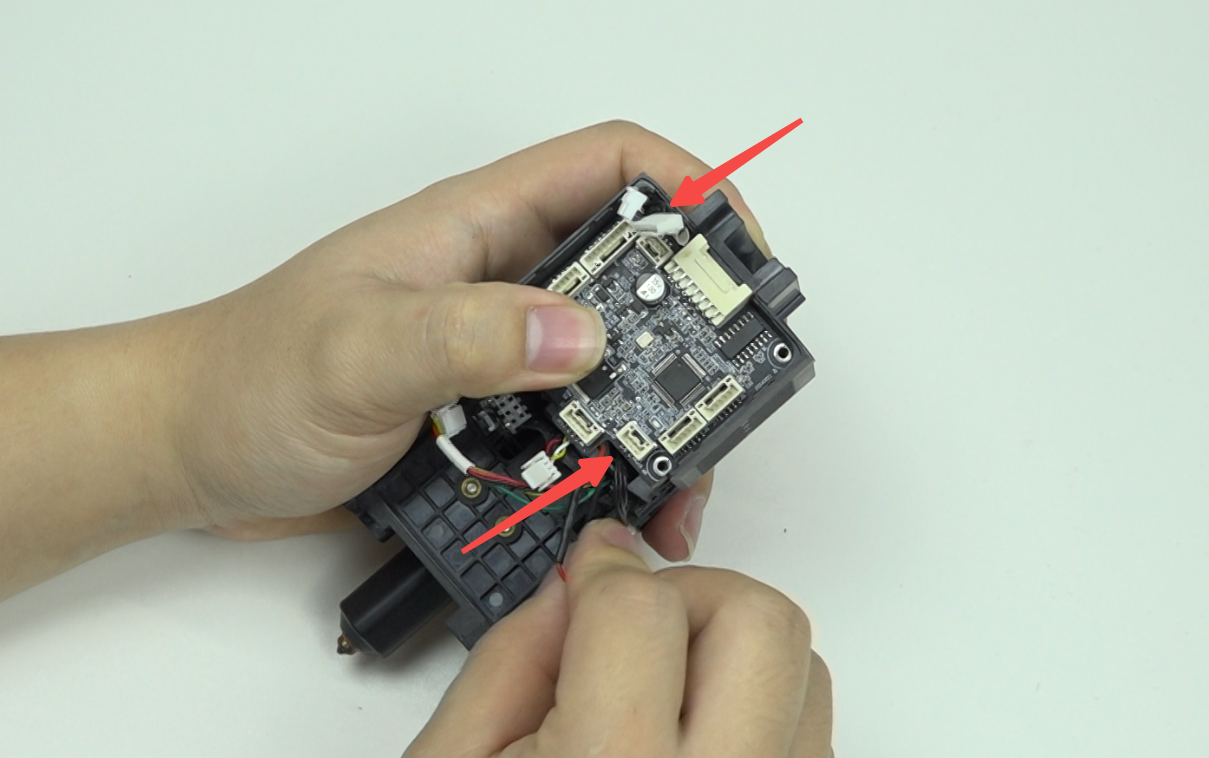
4.2 Use the hexagonal wrench to install the four M2 screws on the hotend circuit board
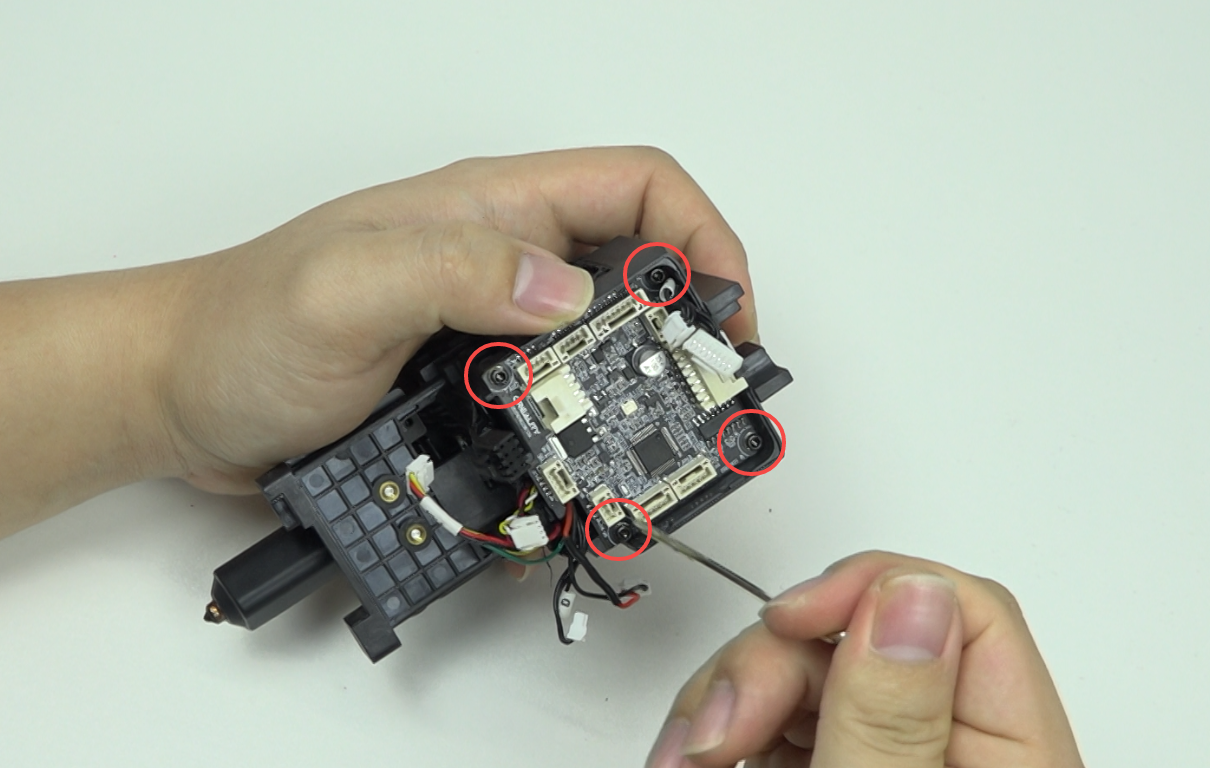
4.3 Plug in all cables on the hotend circuit board
¶ 5. Install the upper part of the hotend assembly
5.1 Place the upper part of the hotend assembly on the X-axis mounting bracket, be careful not to squeeze the model camera cable and model fan cable
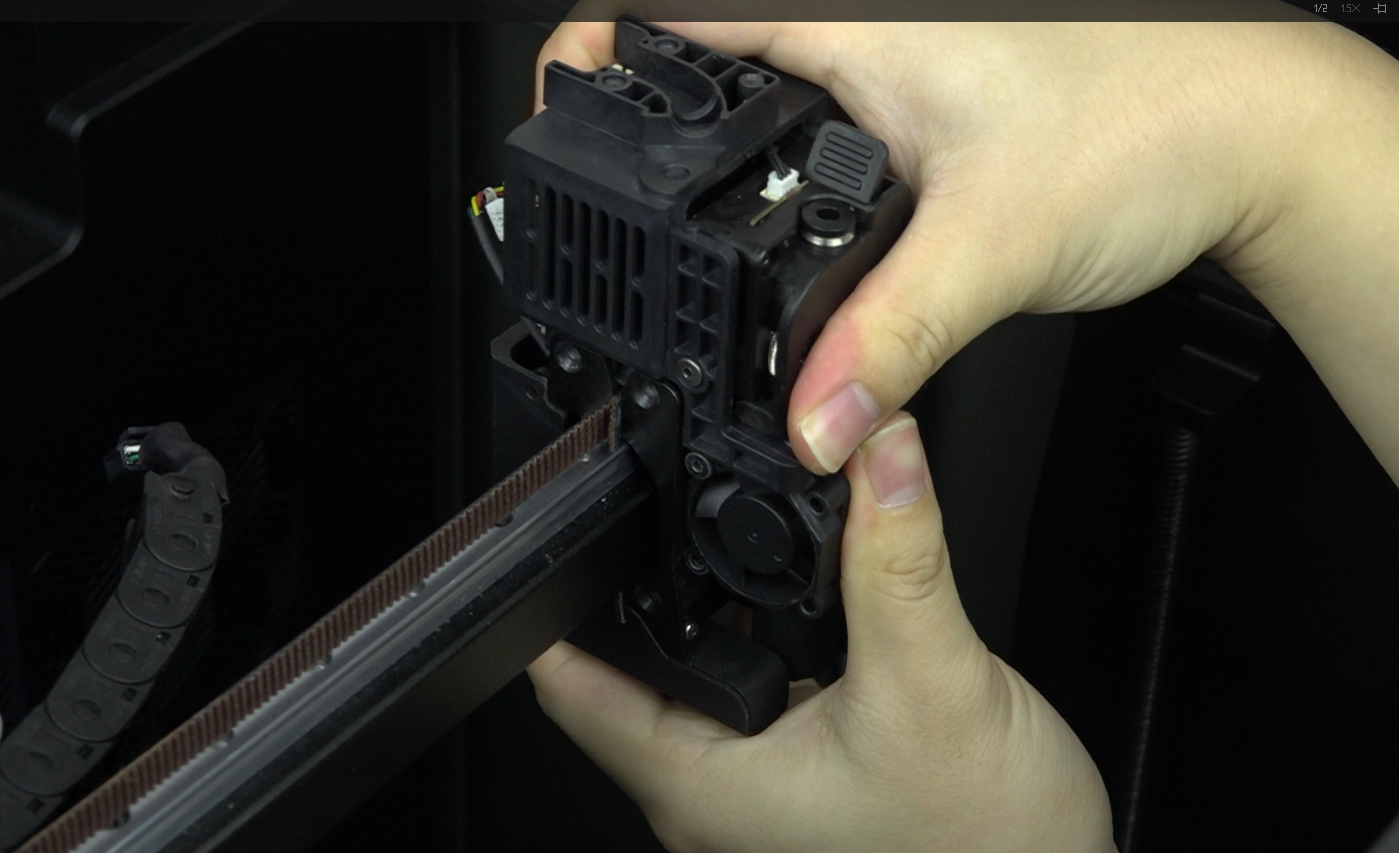
5.2 Use the hexagonal wrench to install the six M3 screws (three on each side) that secure the upper part of the hotend assembly
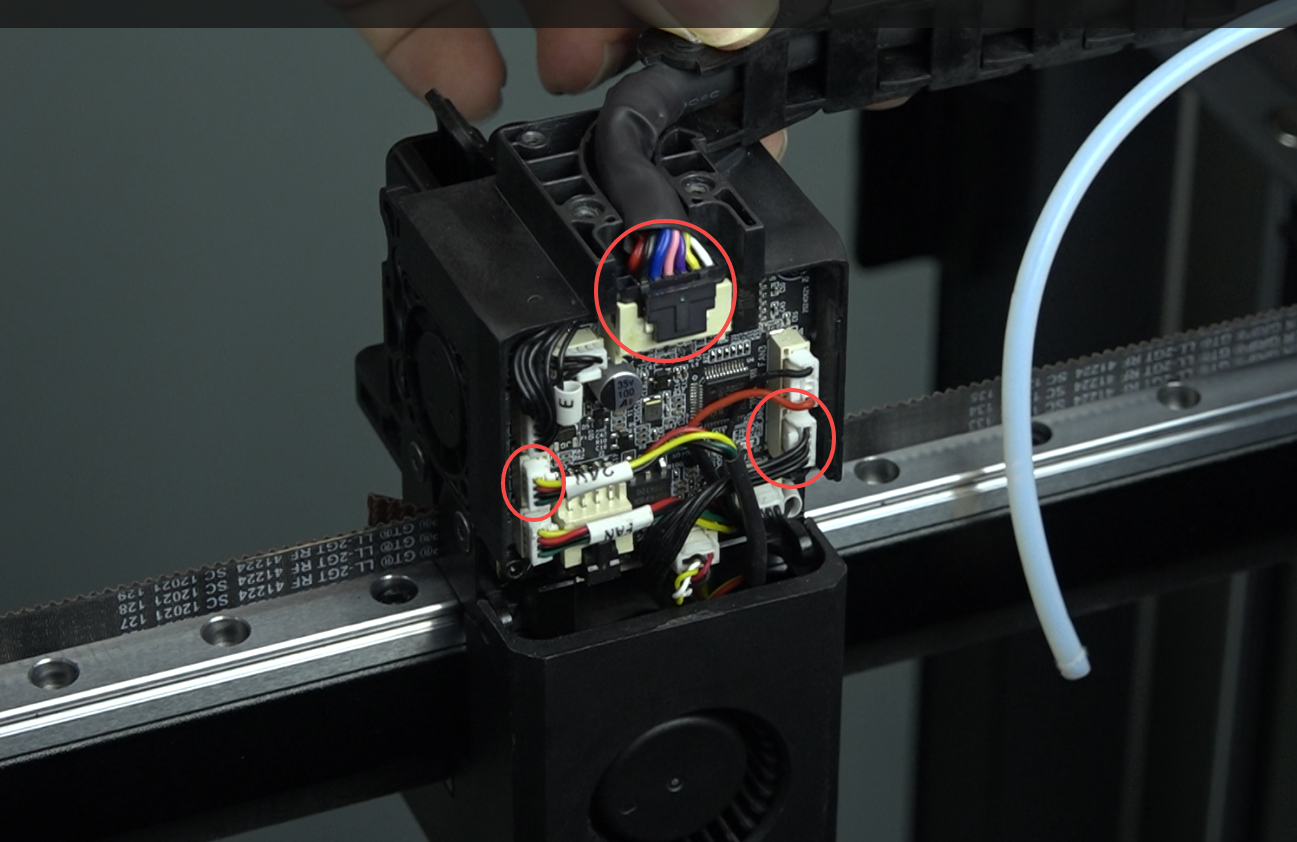
5.3 Plug in the hotend cable, model fan cable and model camera cable
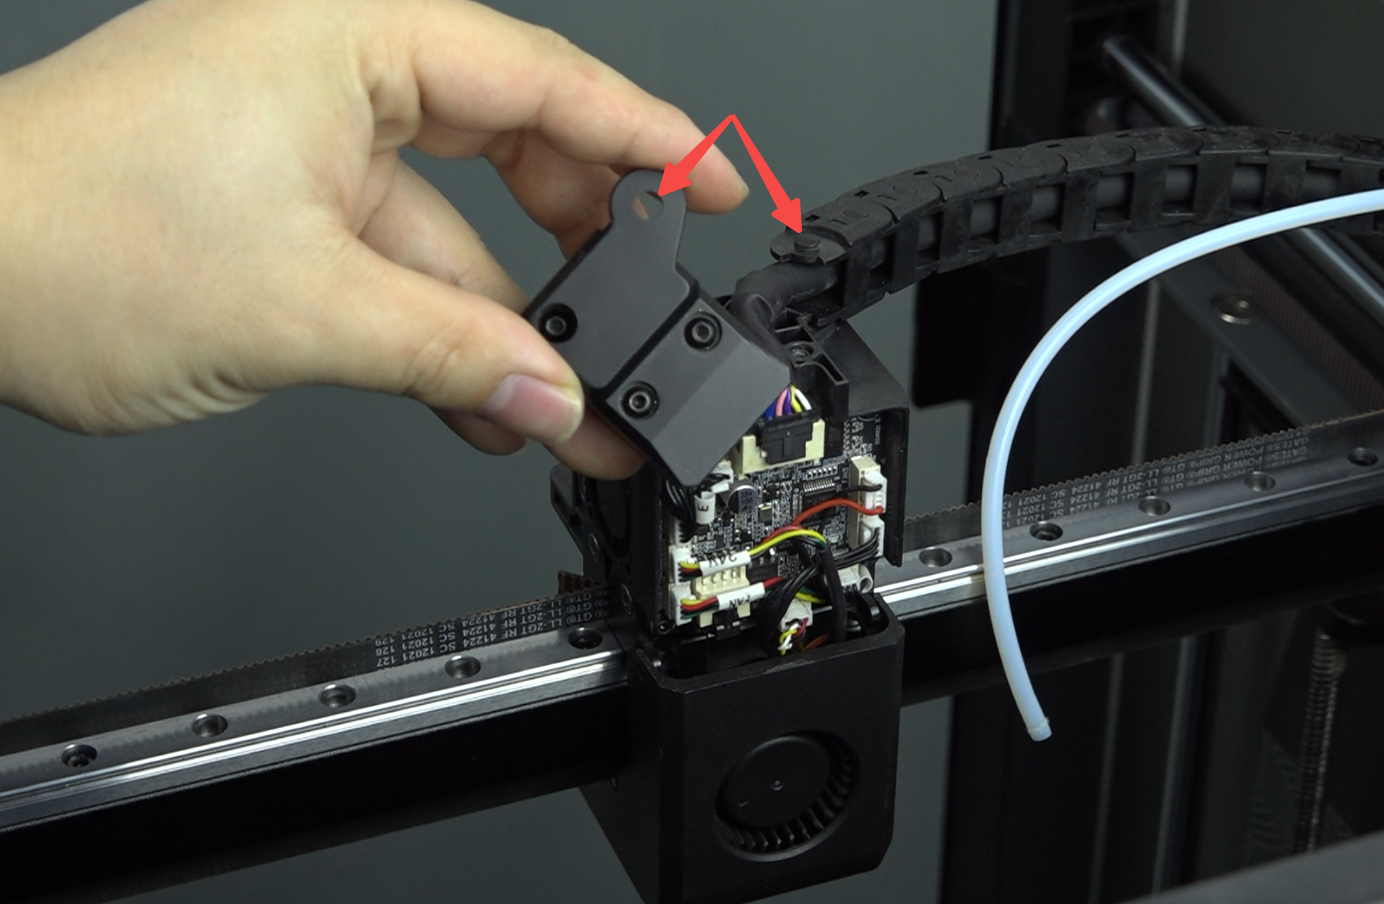
5.4 Install the drag chain cover, make sure to align the holes
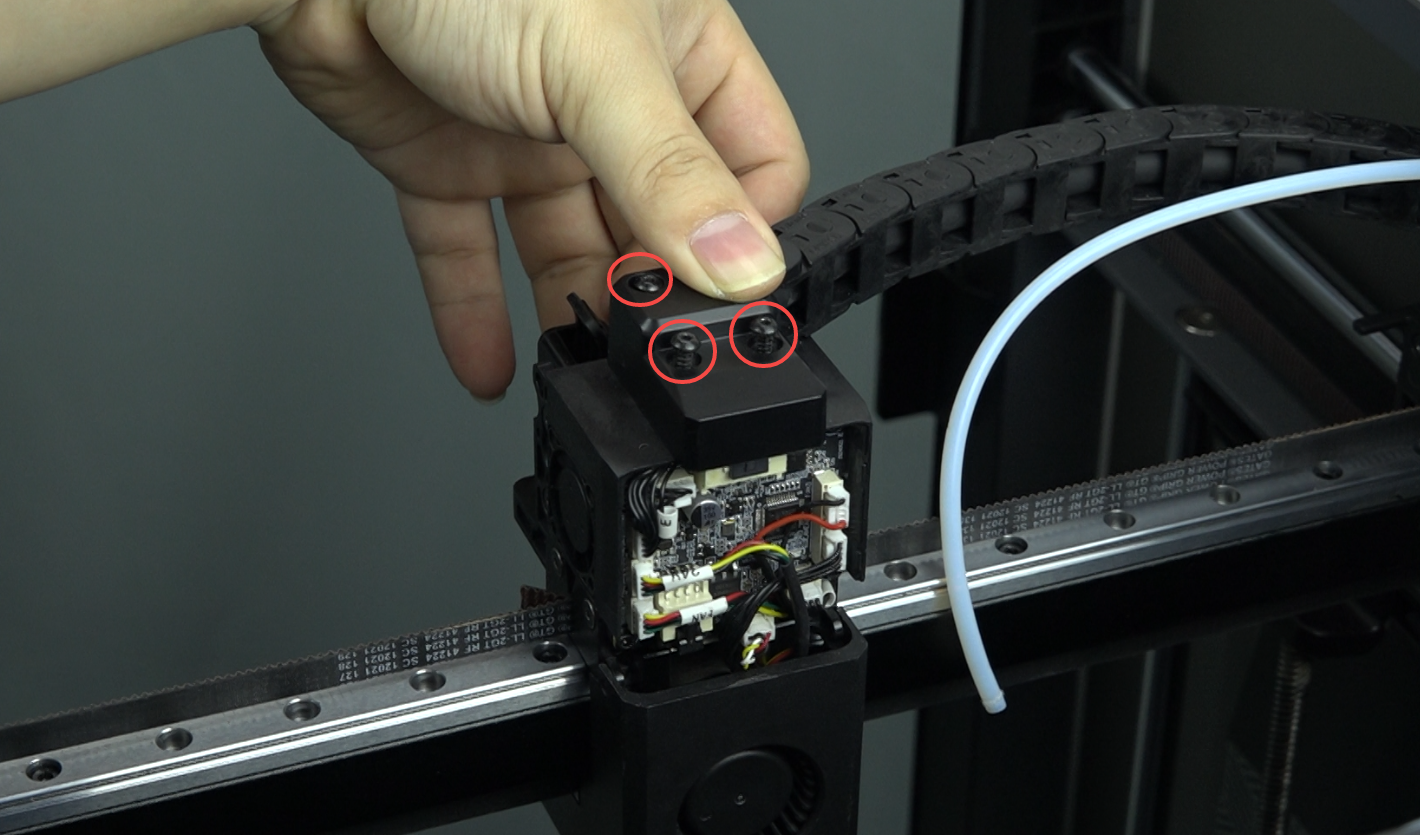
5.5 Use the hexagonal wrench to install the three M3 screws on the drag chain cover
5.6 Install the hotend board protective cover
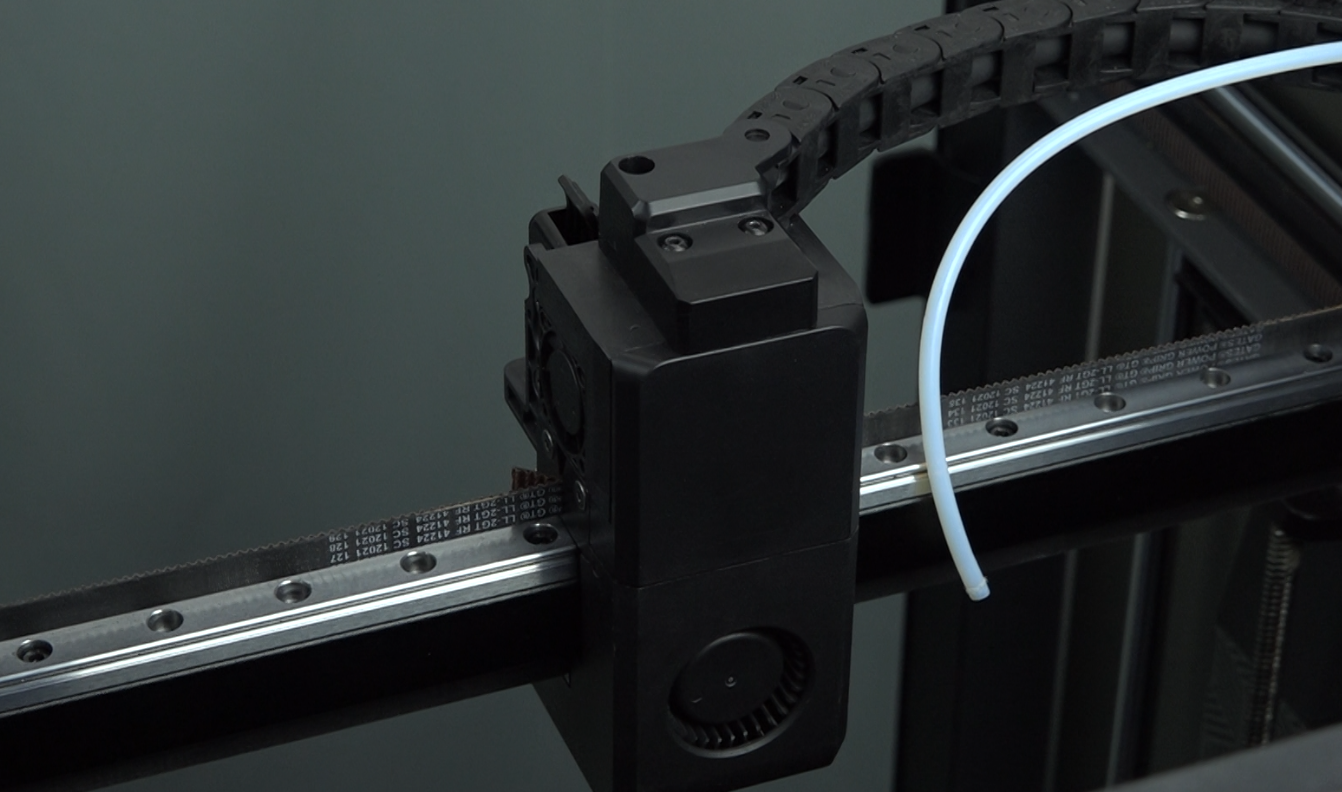
5.7 Insert the PTFE tube
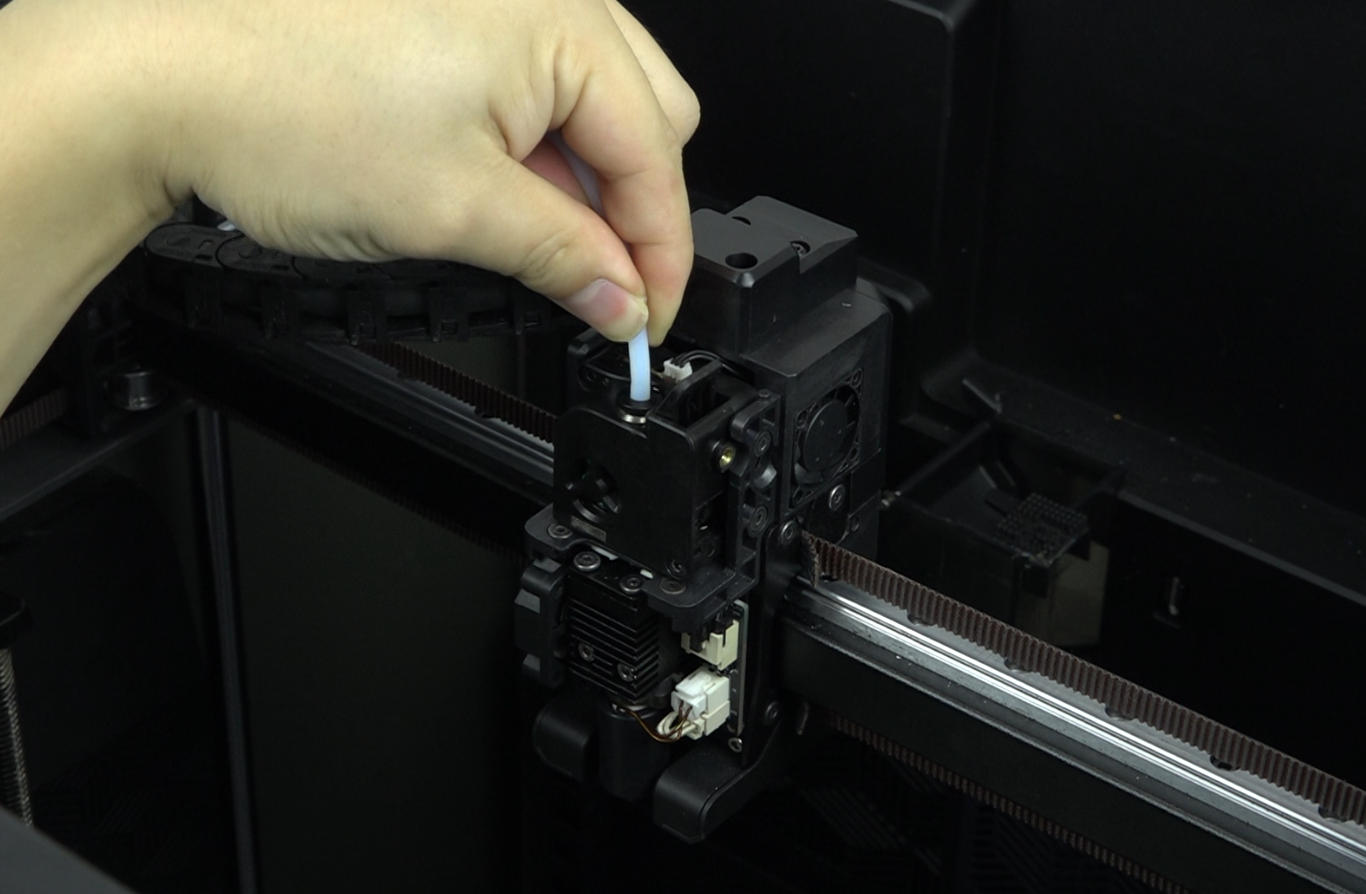
5.8 Install the magnetic cover of the extruder
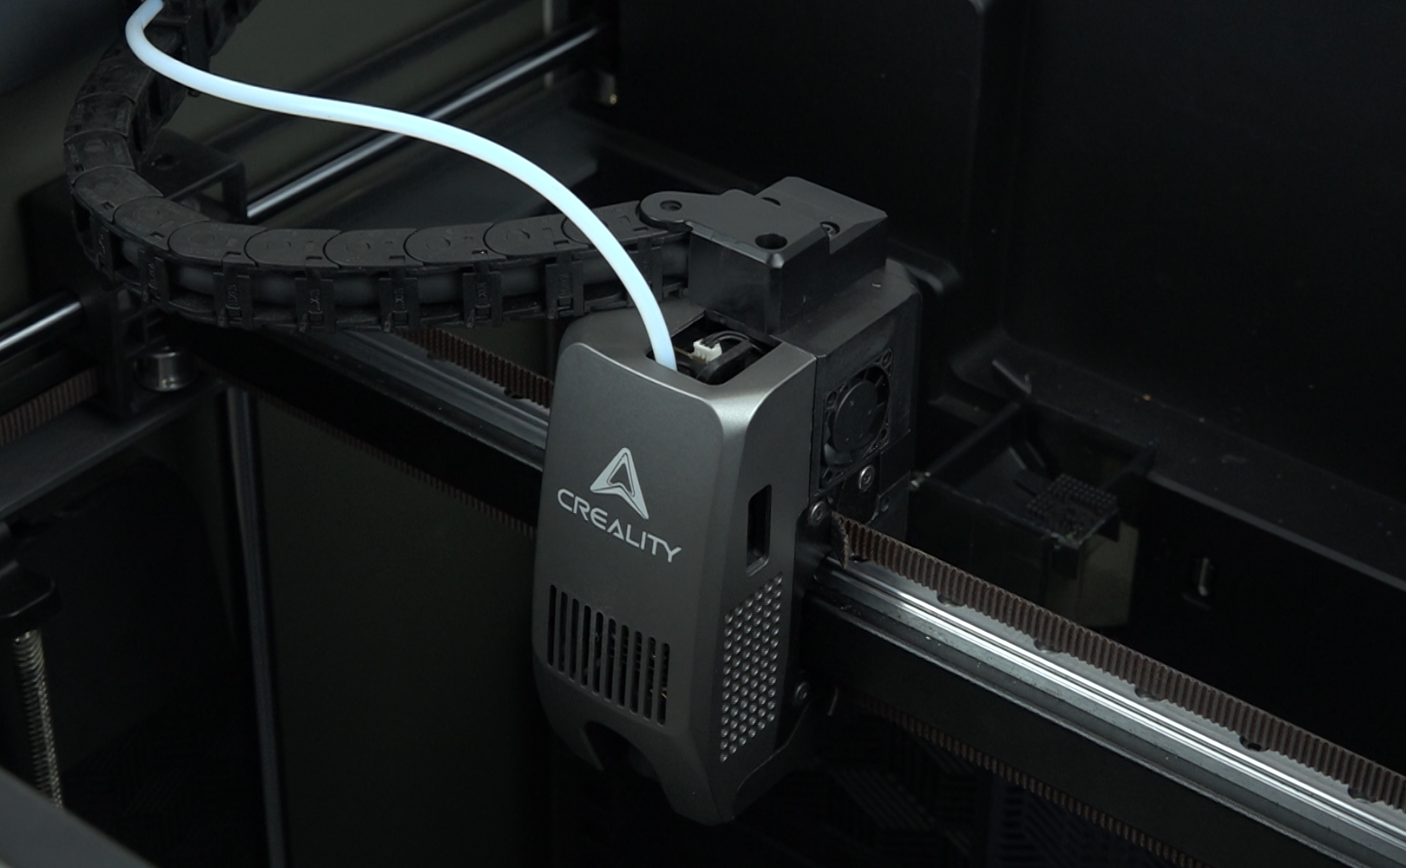
5.9 After installation, perform a device self-check
¶ Video Tutorial
Replace Hotend Circuit Board
https://youtu.be/EE5XaM_UxZA