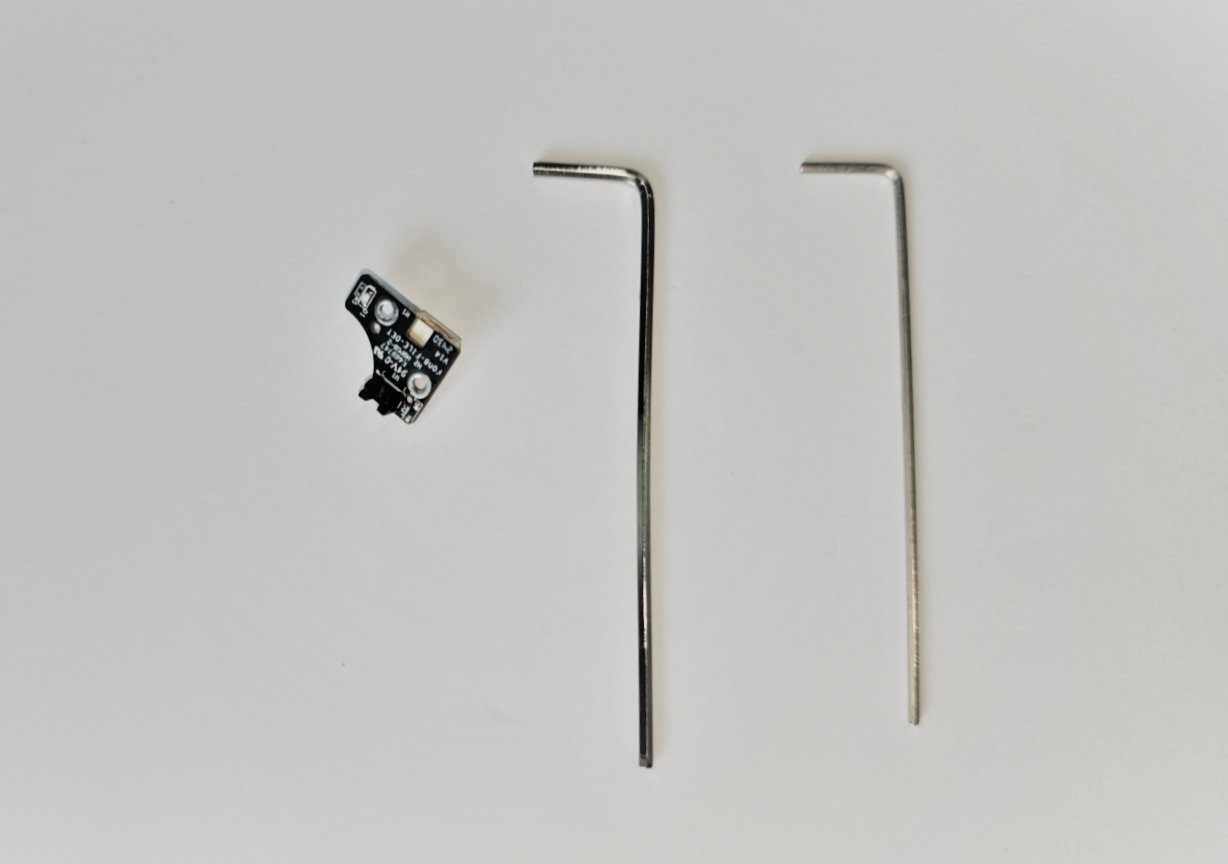
¶ Tools
H1.5 hexagonal wrench
H2.0 hexagonal wrench
New filament break detection
¶ Position
The filament break detection is installed on the back cover of the extruder
¶ Steps
¶ Disassembly
Power off and unplug the power cord
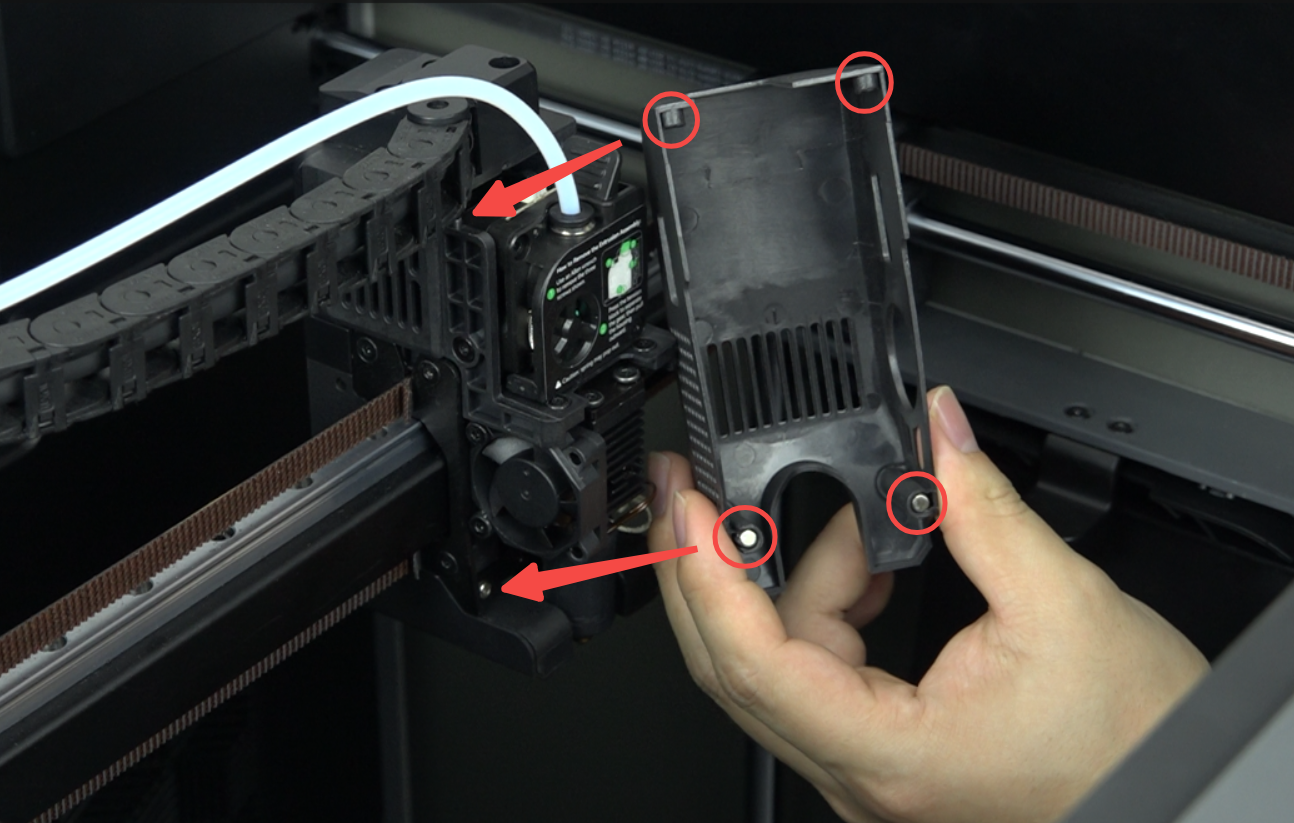
Remove the magnetic protective cover

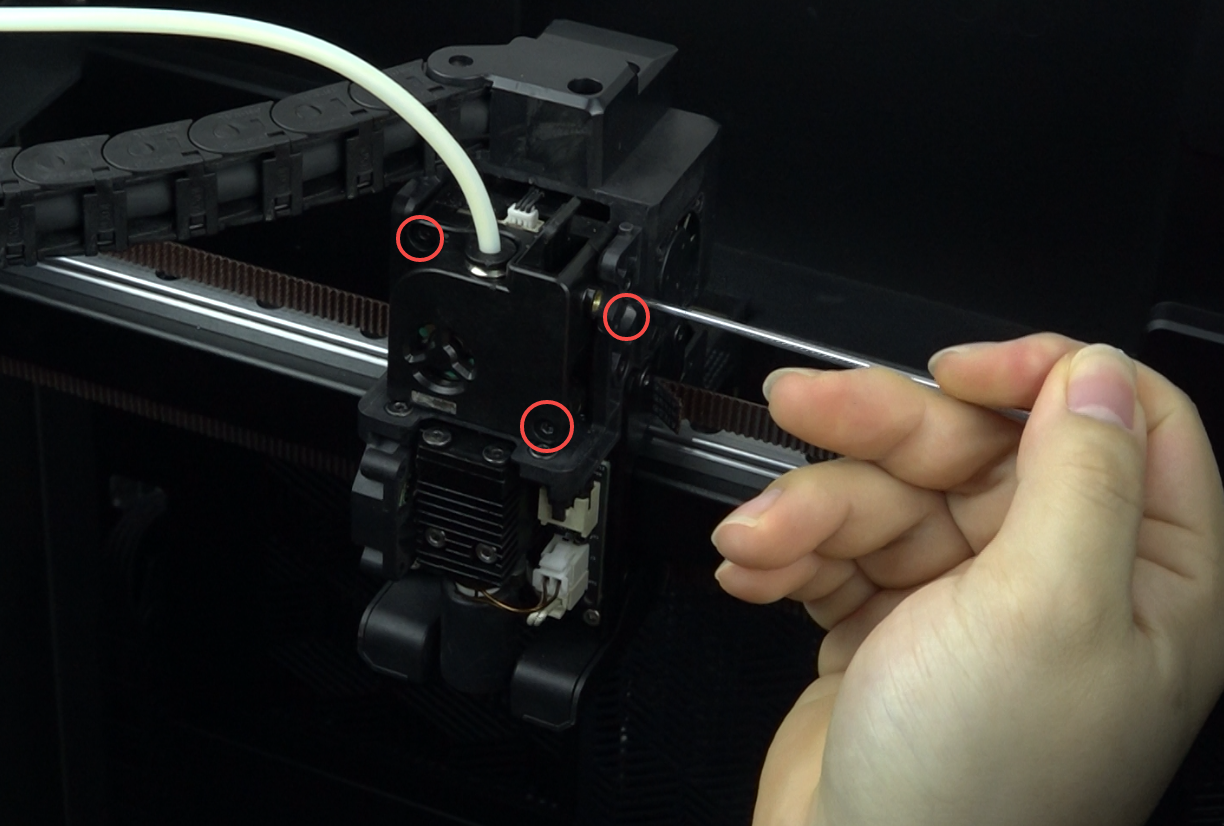
Use H2.0 hexagonal wrench to remove 3 M3 screws
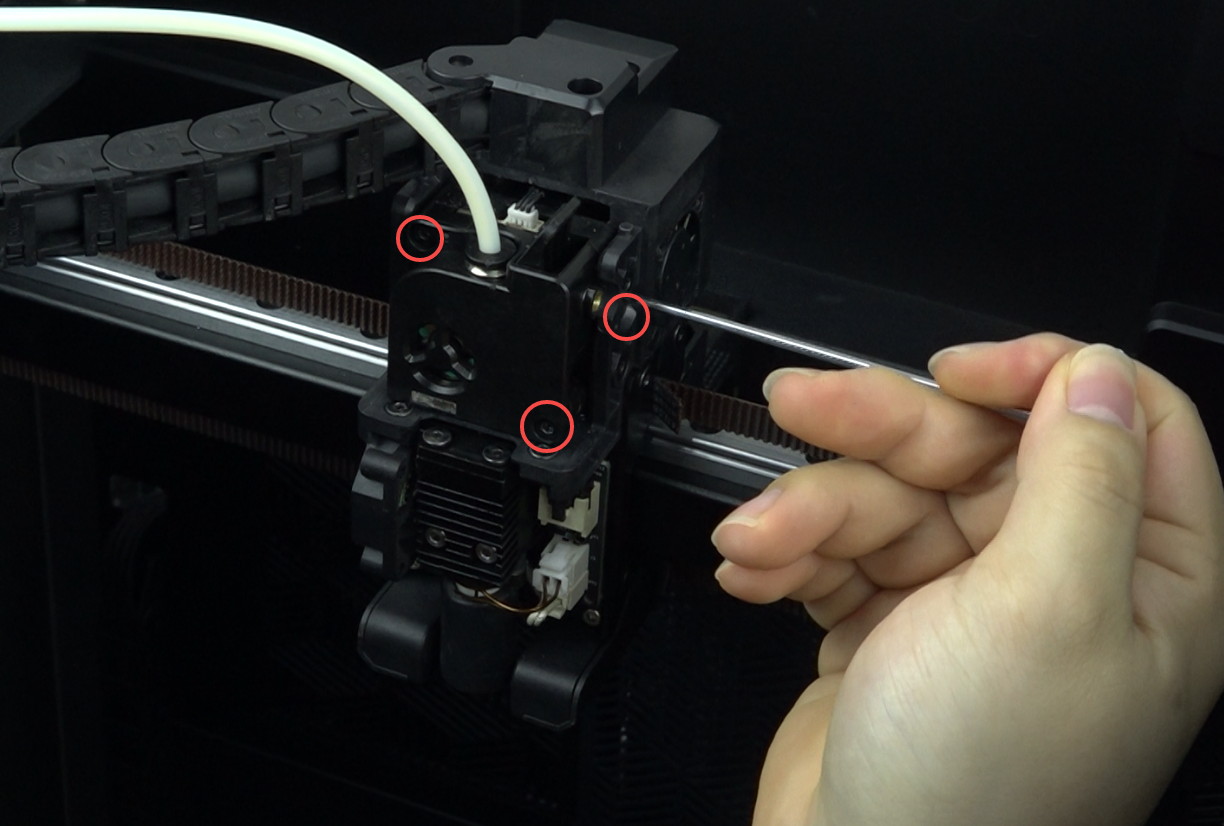
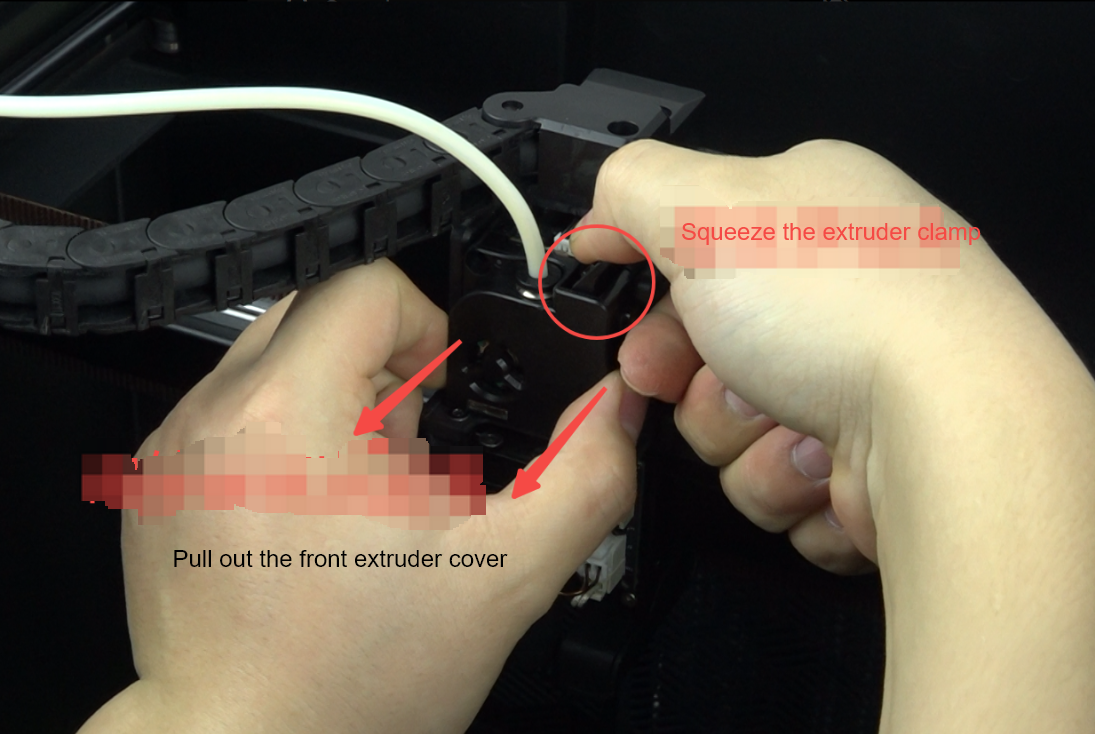
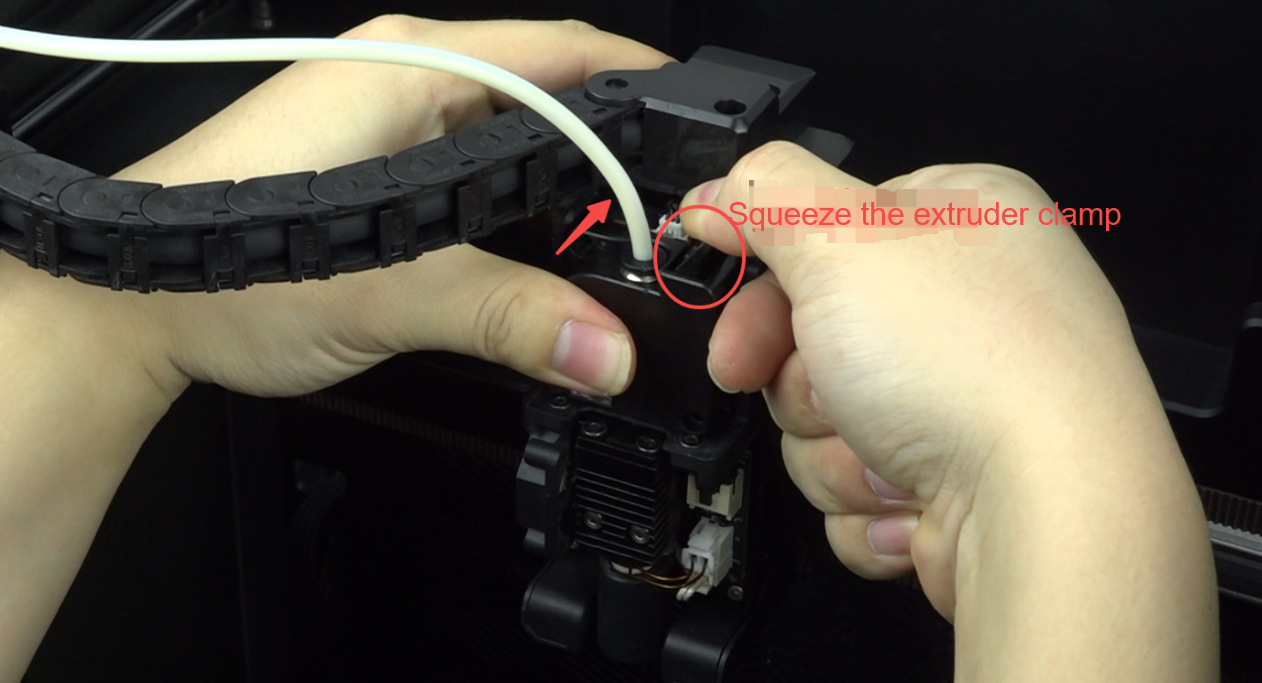
Squeeze the extruder clamp and pull out the front extruder cover
Unplug the filament break detection cable. If it's difficult to operate, you can use cutting pliers to grip the cable connector, but be careful not to cut the connector by applying too much force.
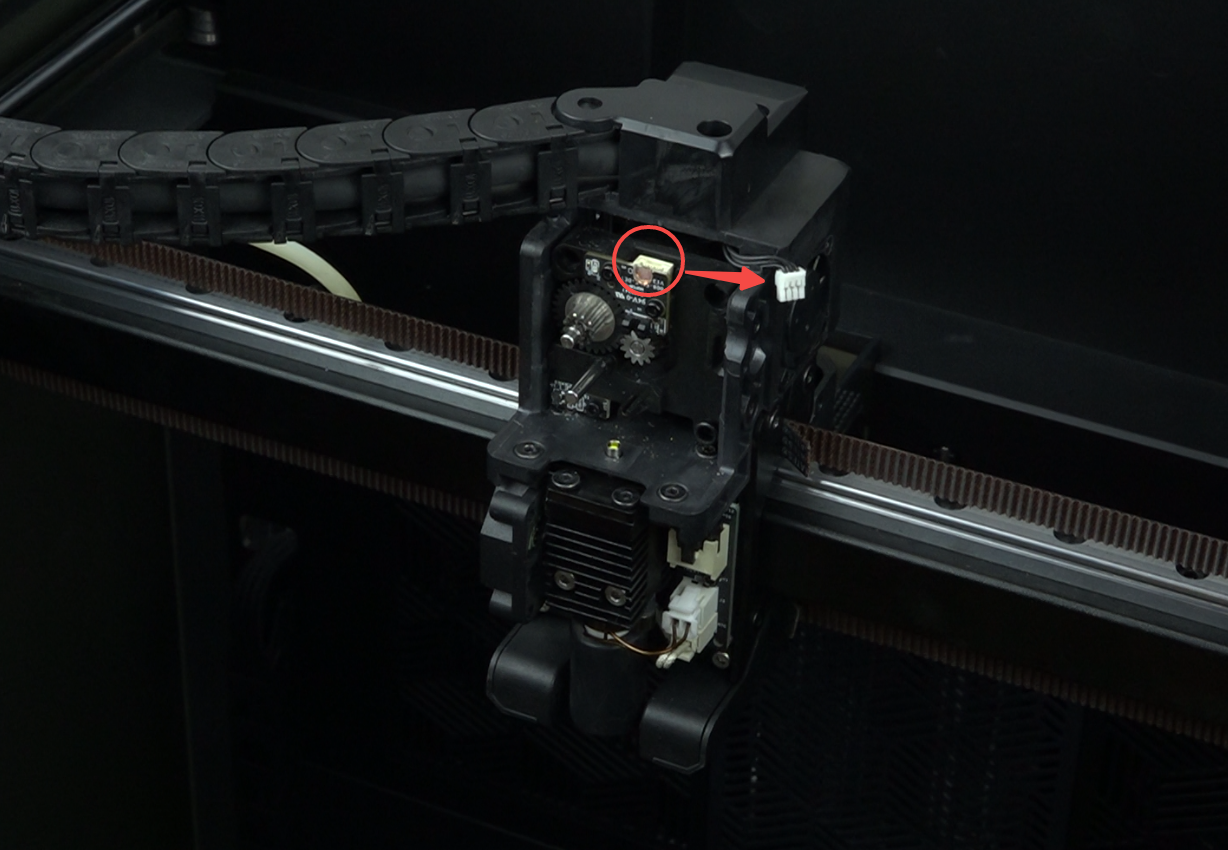
Use H1.5 hexagonal wrench to remove two M2 screws
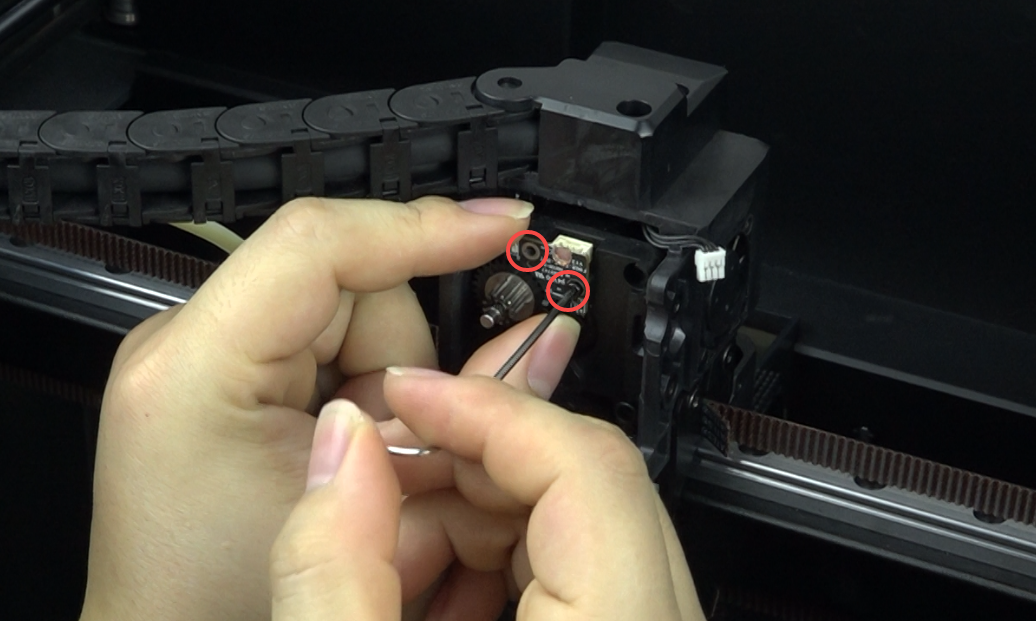
Remove the damaged filament break detection.
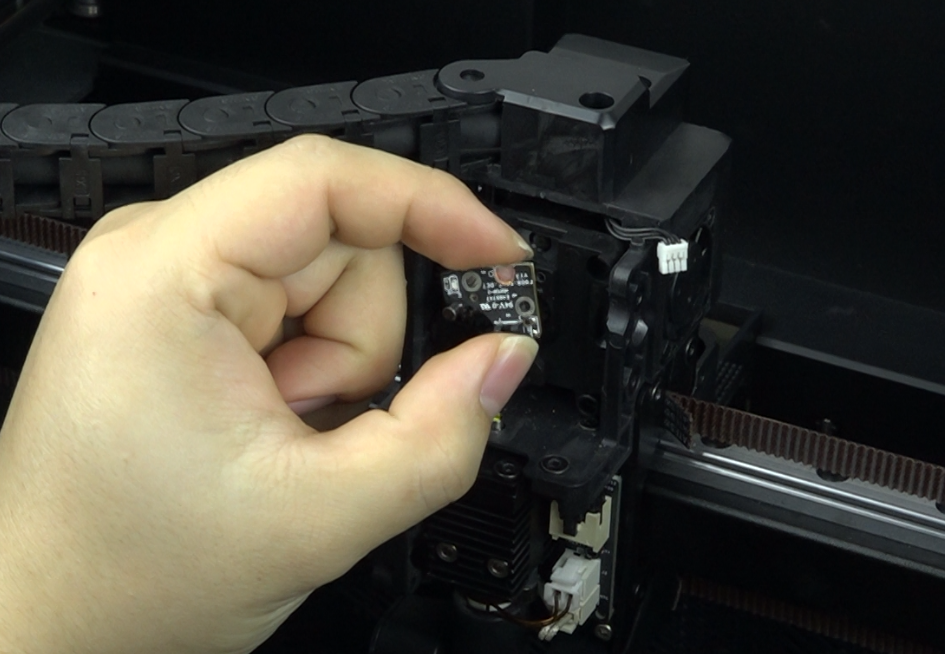
¶ Install filament break detection
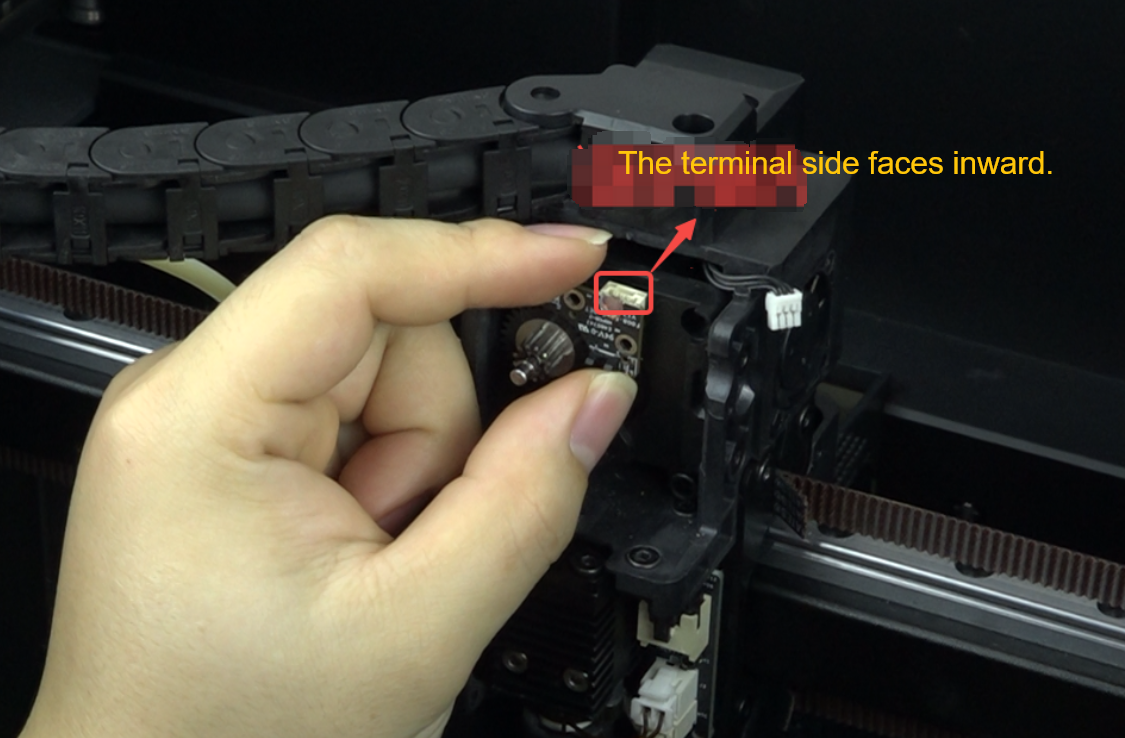
Place the new filament break detection, pay attention to the orientation, with the terminal side facing inward.
Use H1.5 hexagonal wrench to install two M2 screws.
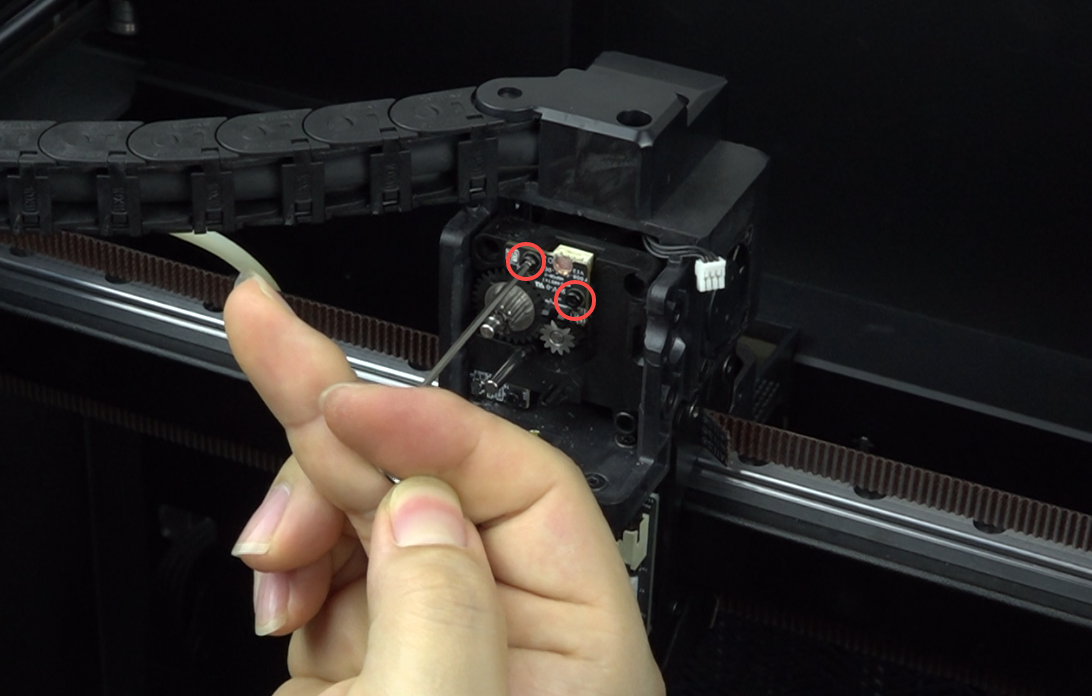
Plug in the filament break detection cable.

Squeeze the extruder clamp and install the front extruder cover.
Use H2.0 hexagonal wrench to install 3 M3 screws.
3.2.6 Install the magnetic protective cover. The upper end of the cover has two clasps, and the lower end is attached by two magnets. Make sure it is properly installed.
¶ Video Tutorial
Replace Filament Break Detection
https://youtu.be/gOW8zpCCvc4