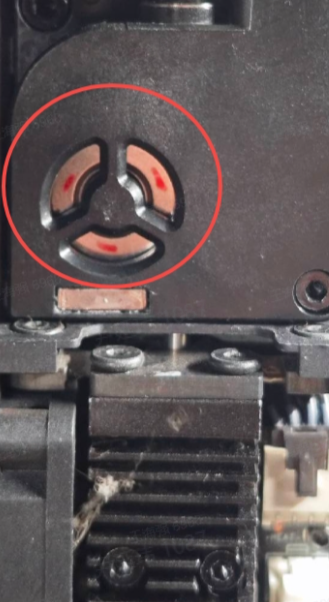
¶ Tool
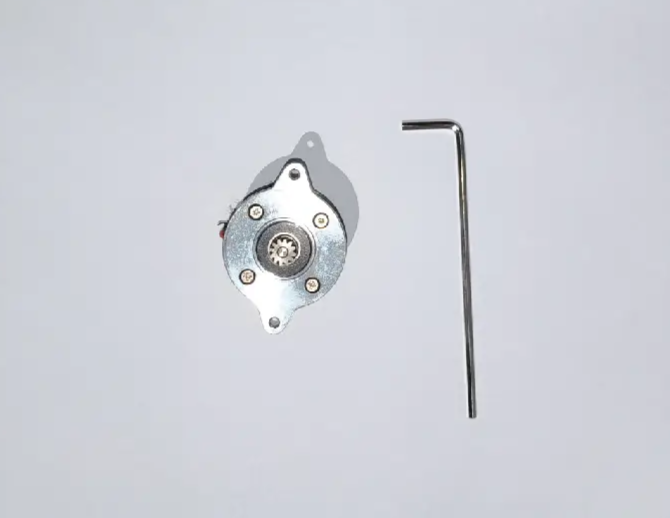
Extruder motor x1
L-shaped wrench x1
¶ Operating steps:
¶ Remove the top cover
For easier operation, you can first remove the glass top cover of the machine

¶ Remove the hotend cover
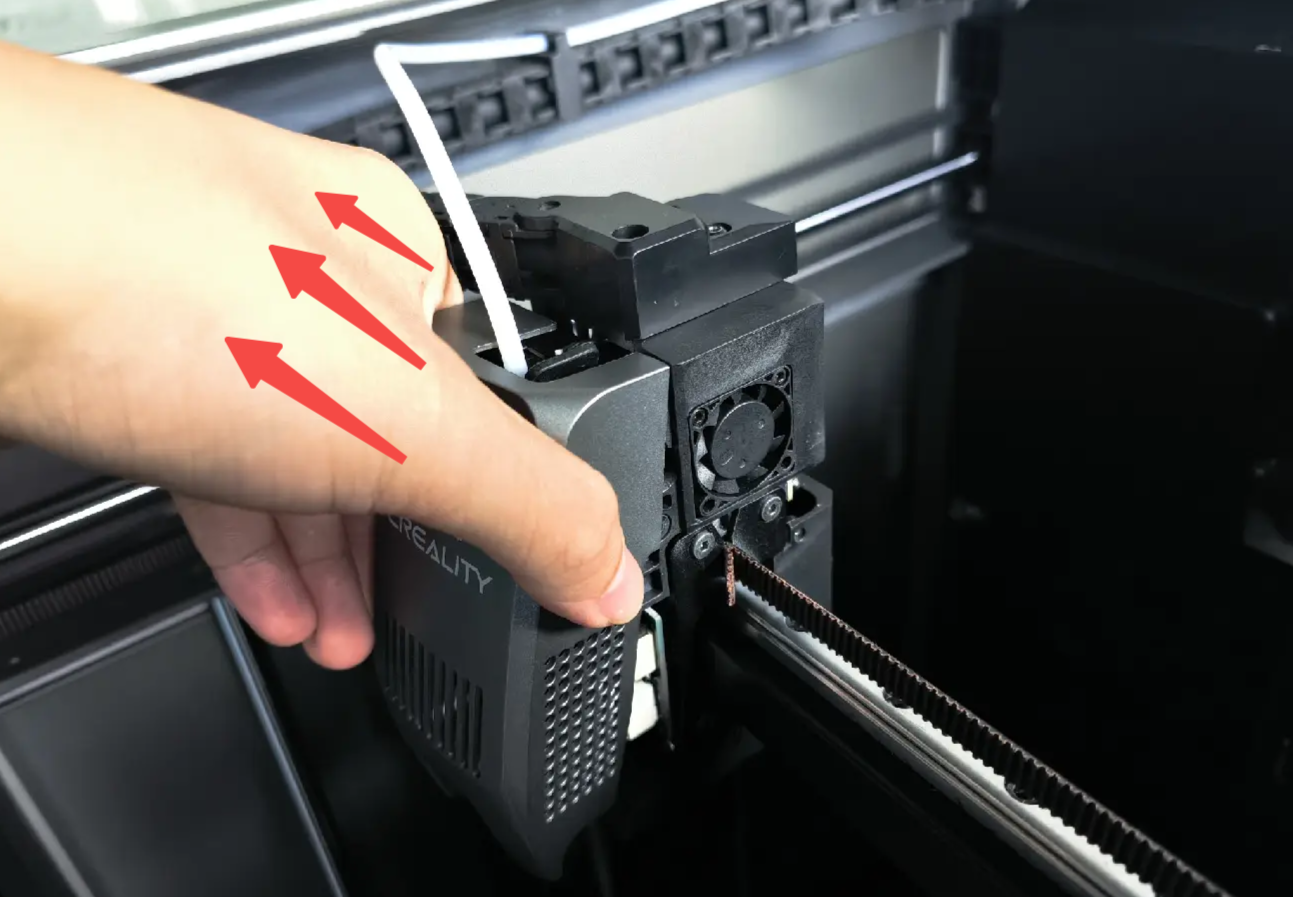
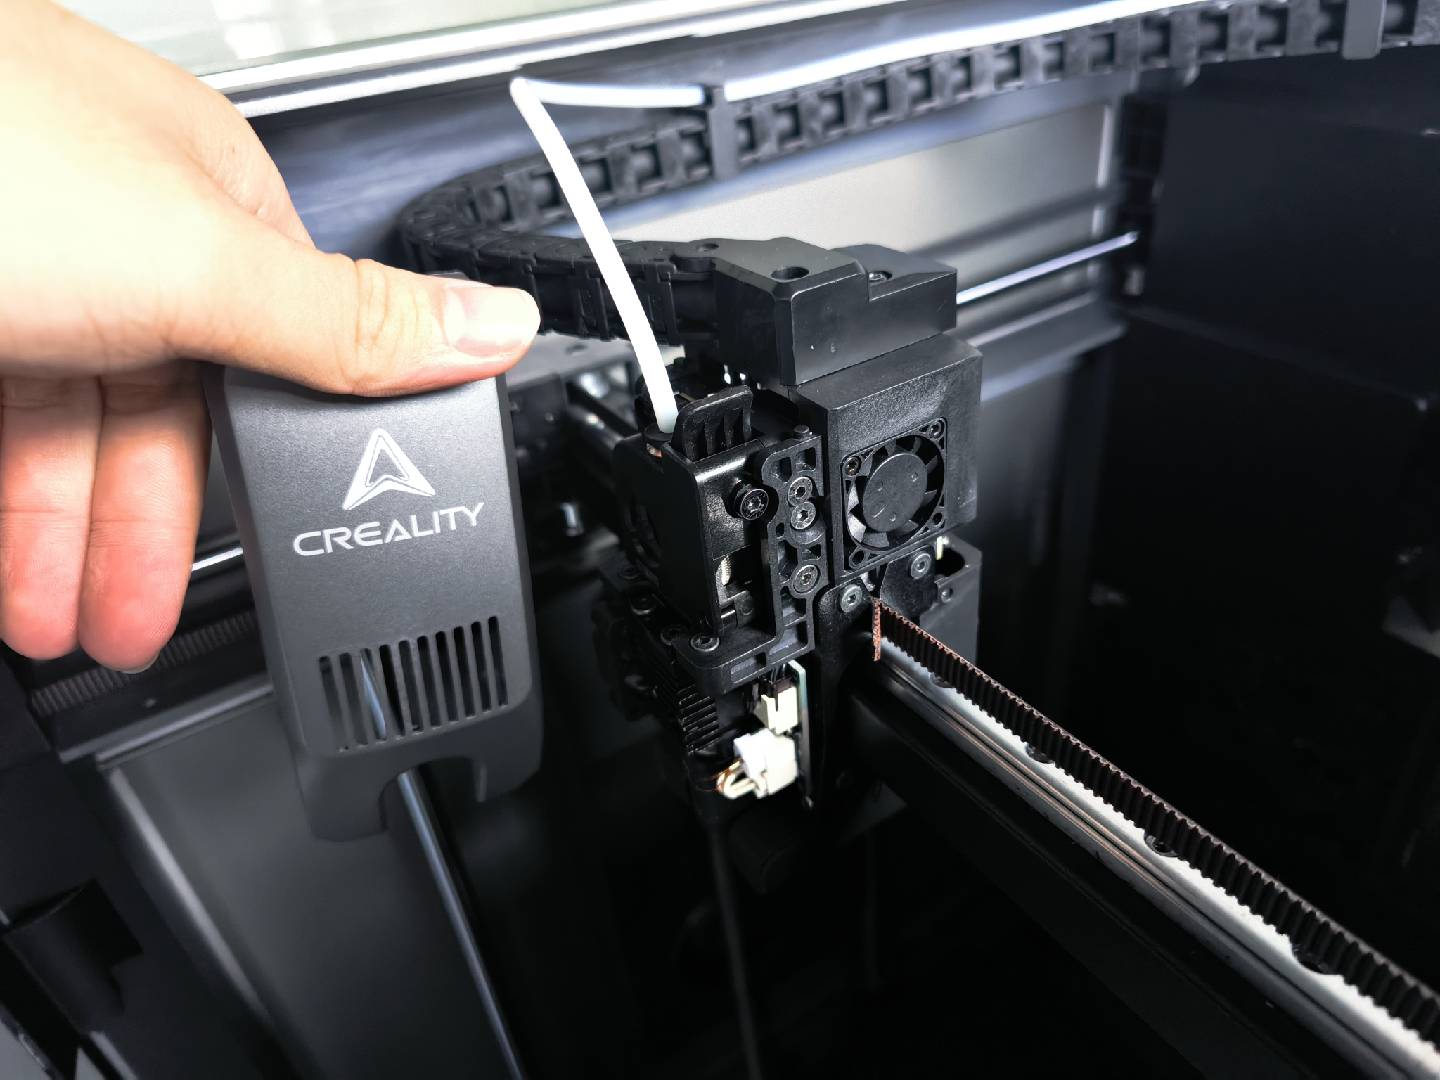
Remove the hotend cover of the machine by hand diagonally upward. Note that the cover is magnetically attached without screws.
¶ Remove two fixing screws on the right side of the extruder
Move the hotend to the leftmost of the X-axis, use the L-shaped wrench to unscrew two fixing screws to the left. Note that the middle screw does not need to be loosened

¶ Remove one fixing screw on the left side of the extruder
Move the hotend to the rightmost part of the X-axis, use the L-shaped wrench to unscrew one fixing screw to the right.

¶ Unplug the extrusion assembly control wire & PTFE tube
Press the plug of the pneumatic connector, then pull out the Teflon tube
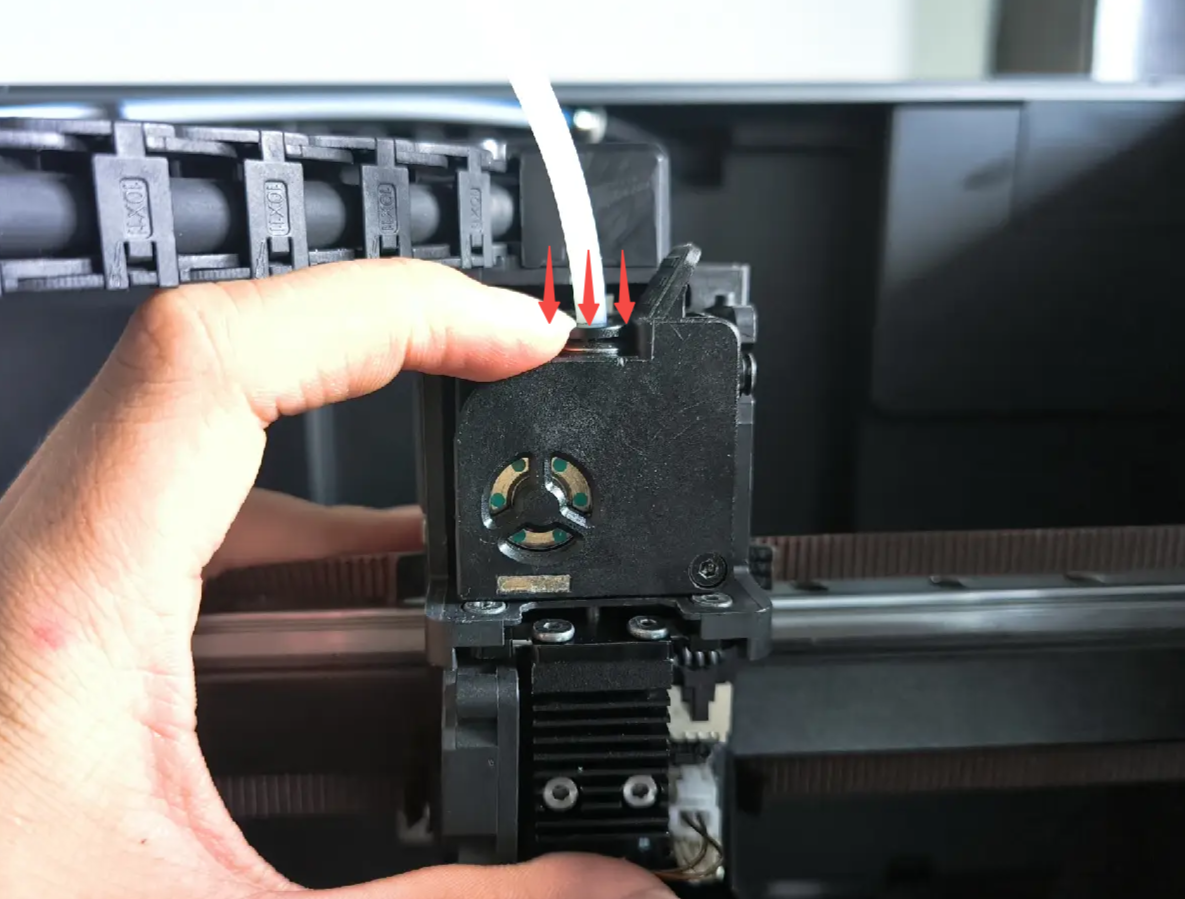
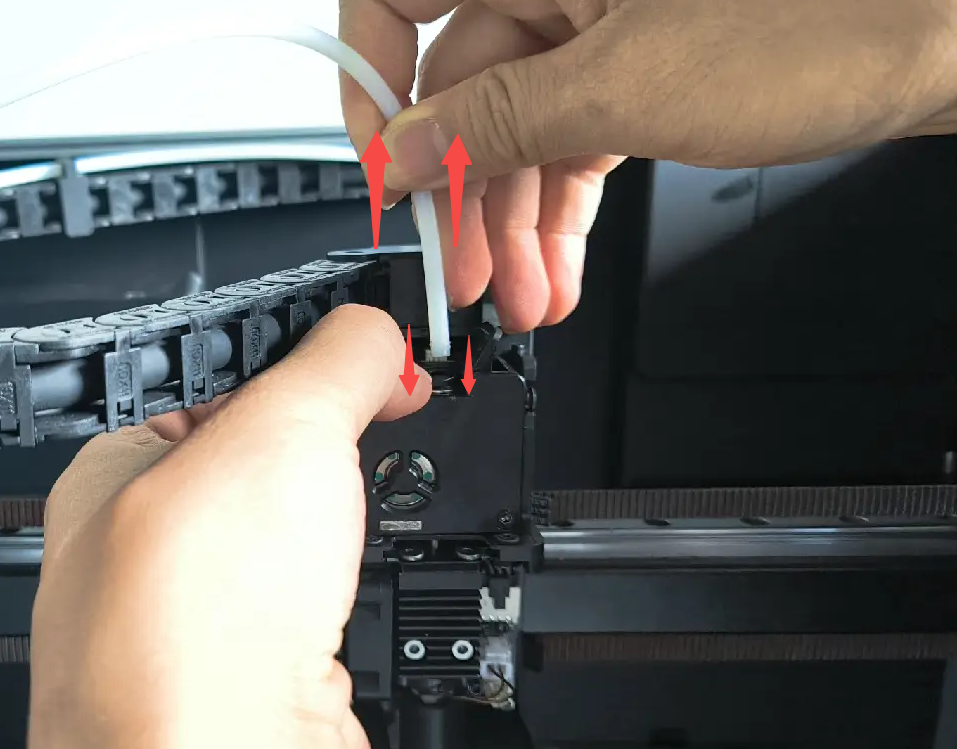
Gently pull out the control wire of the extrusion assembly, be careful not to break the terminal

¶ Unplug the control wire of the extruder motor
Gently pull out the extrusion assembly, be careful not to break the connecting cable

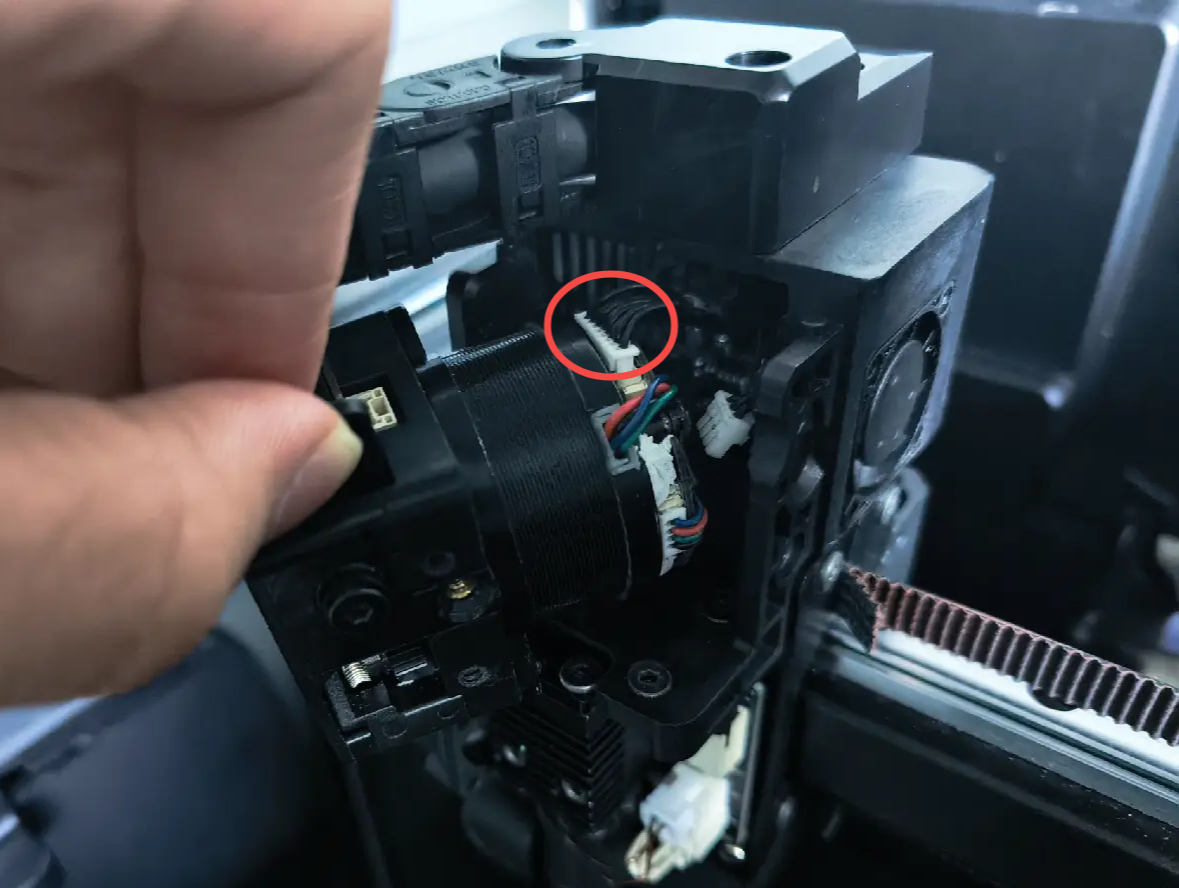
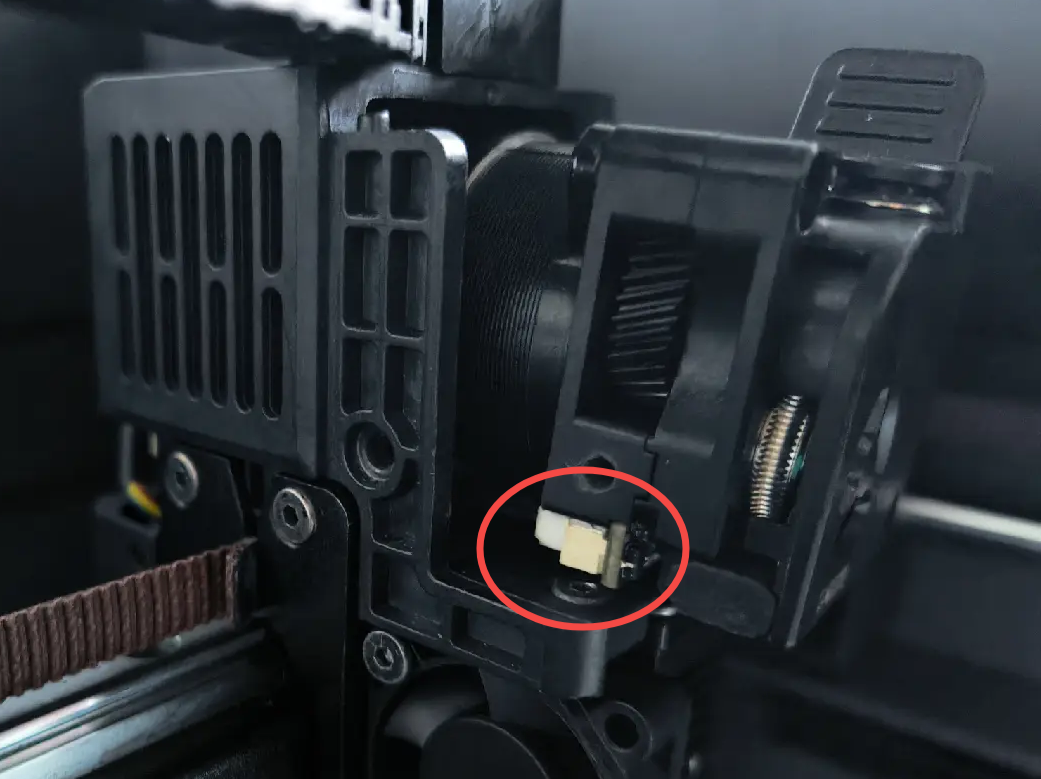
Unplug the two ribbon cables behind the extruder motor board
¶ Unscrew two motor fixing screws
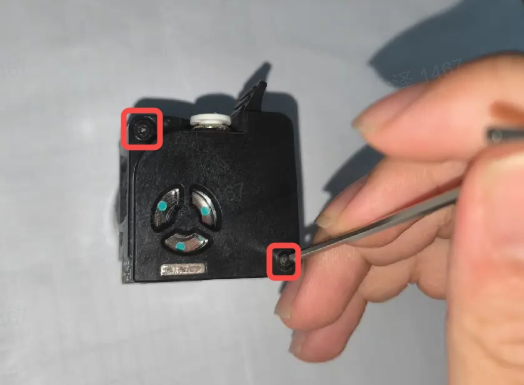
Use an L-shaped wrench to unscrew one long fixing screw and one short fixing screw (counterclockwise)
¶ Remove the extruder motor
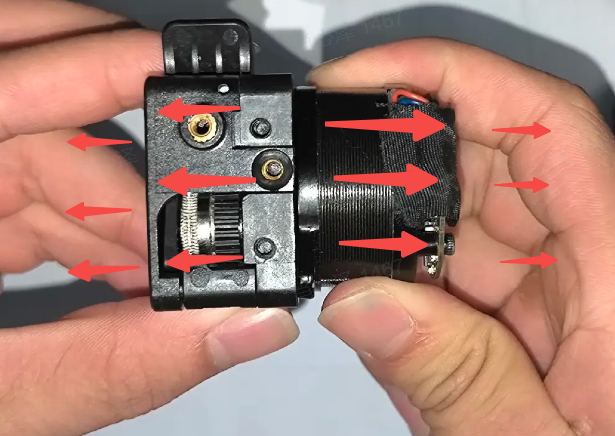
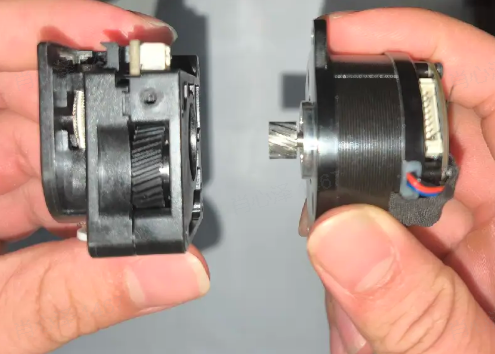
Gently pull the extruder motor sideways to remove it
¶ Install the (new) extruder stepper motor
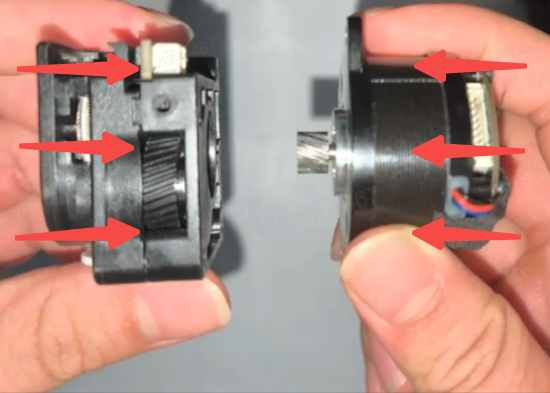
Install the new extruder motor together. Note that the extruder motor needs to be aligned diagonally with the holes, while ensuring the cable position is on the left side.
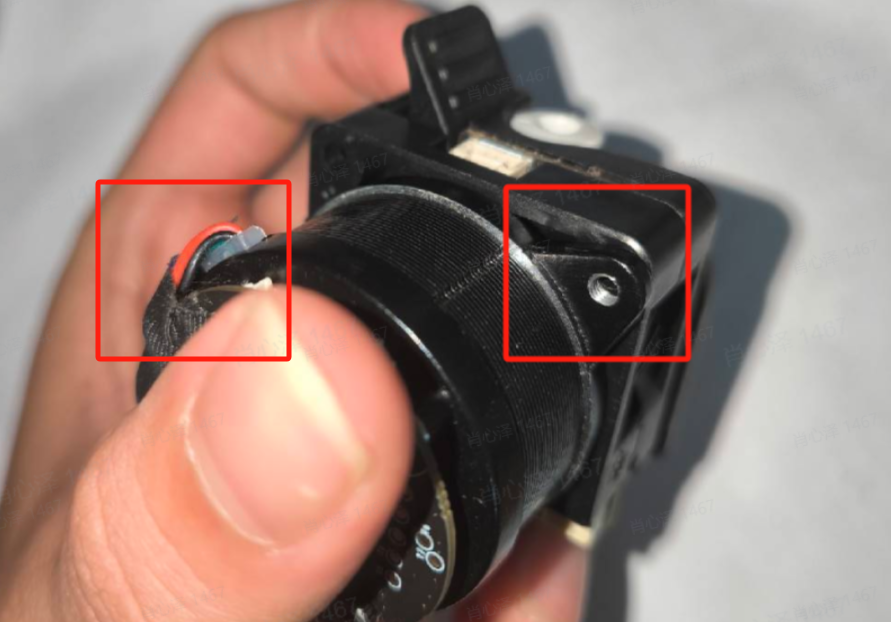
¶ Install two motor fixing screws
Use an L-shaped wrench to tighten one long and one short fixing screw (clockwise), install the short one in the upper left and the long one in the lower right
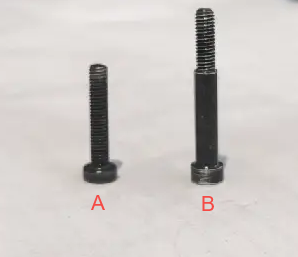
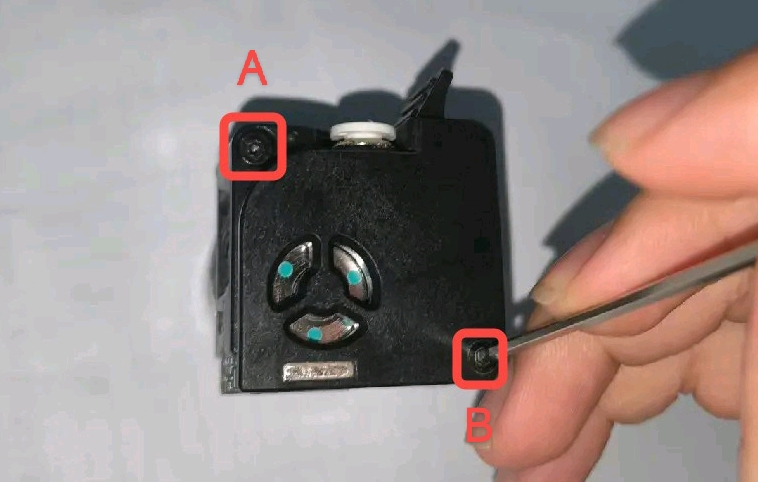
¶ Connect the control wires of the (new) extruder motor
Connect the two ribbon cables at the back of the extruder motor board, with the thickest cable connected on top and the cable in the lower left connected at the bottom. Make sure to pull out the extrusion assembly connection wire inside (circled in the image)
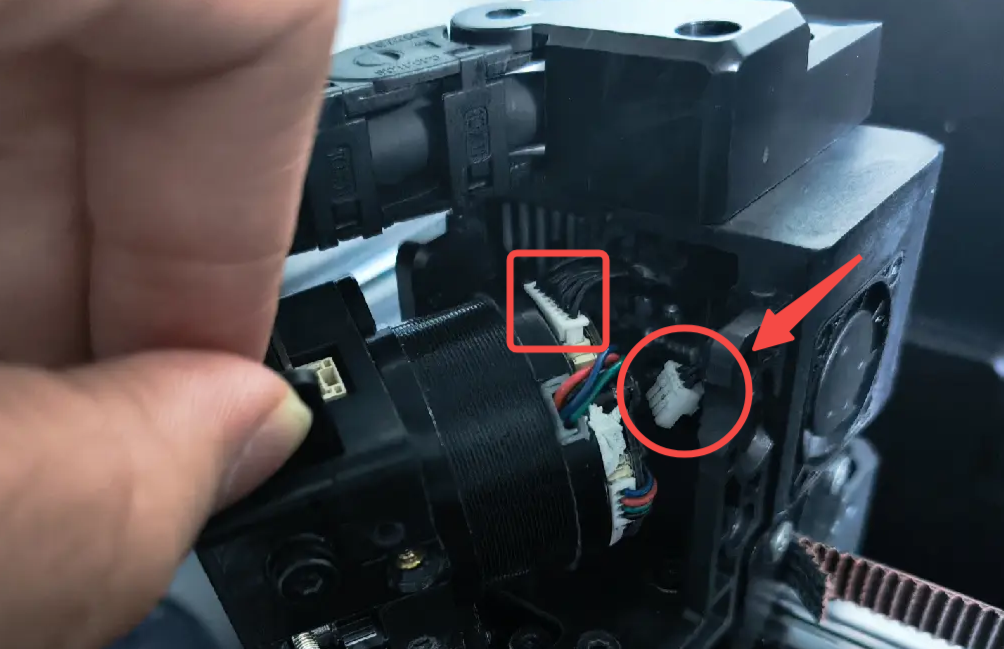
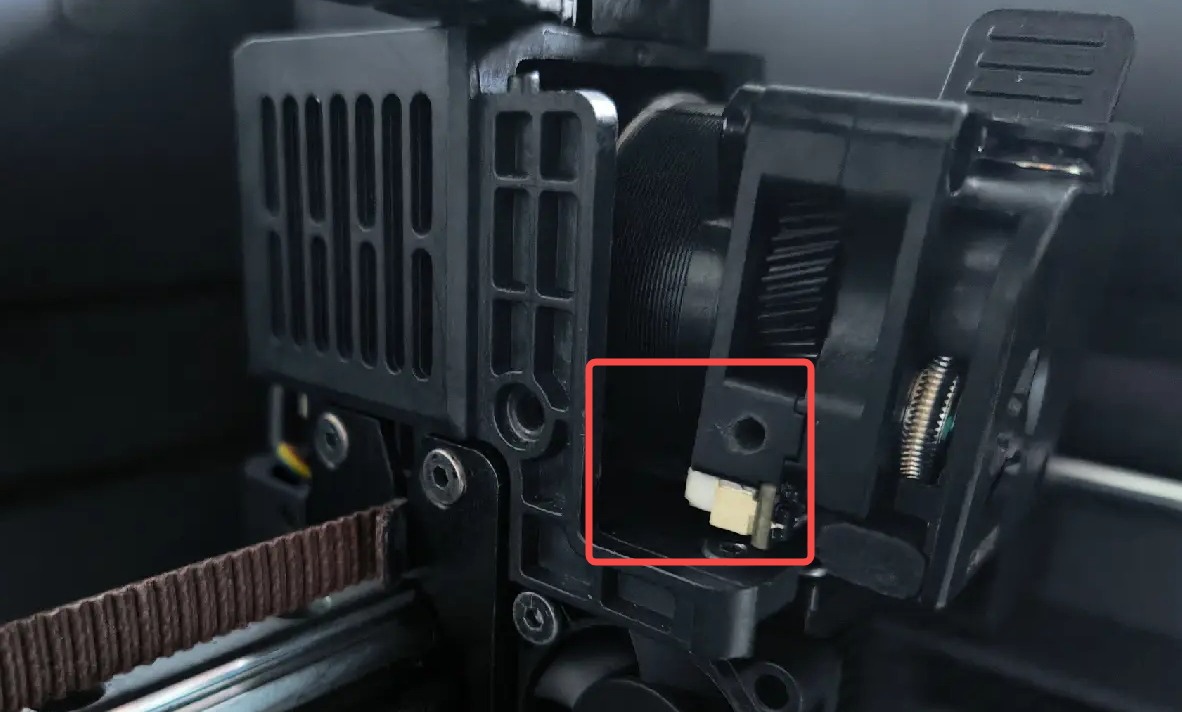
Push the extrusion assembly into the mounting position, making sure to pull out the extrusion assembly connection wire inside
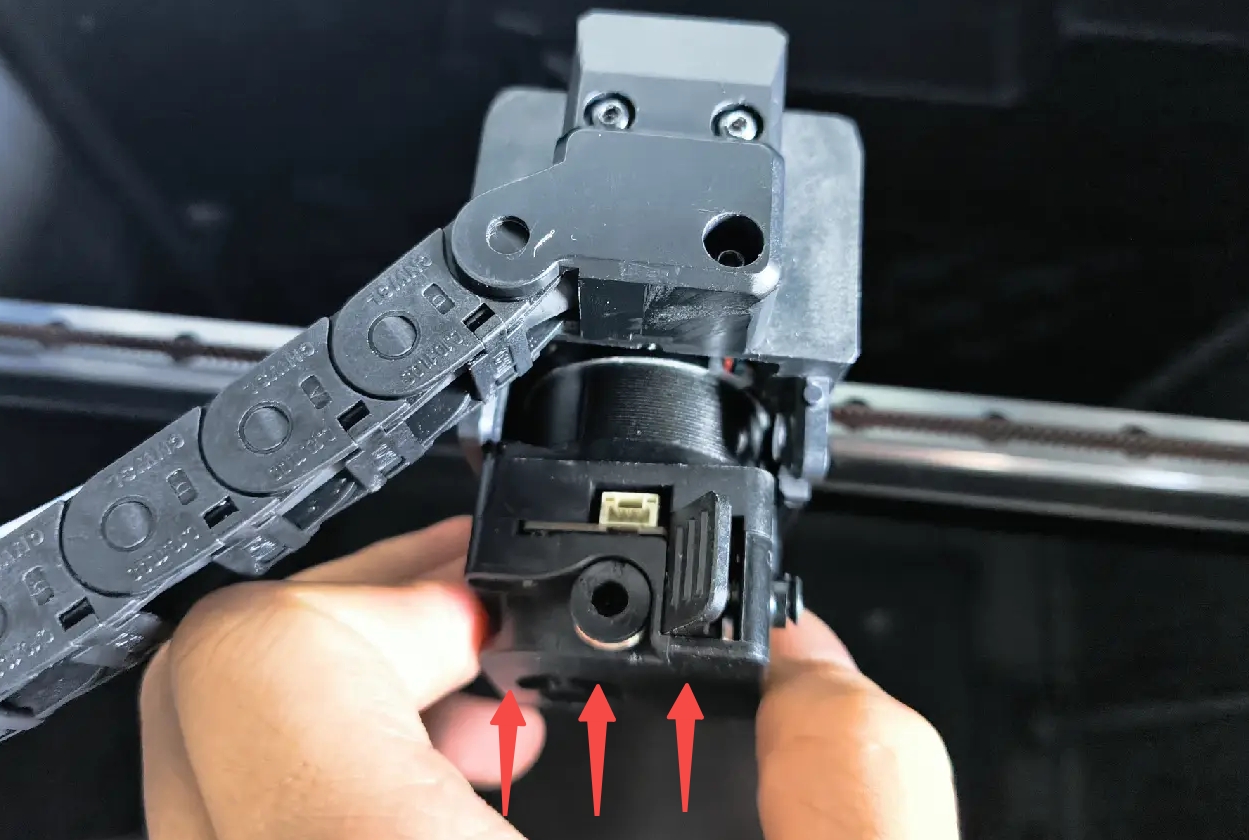
¶ Connect the terminal of the (new) extrusion assembly
Plug the pulled-out cable into the terminal connector above the motor assembly.

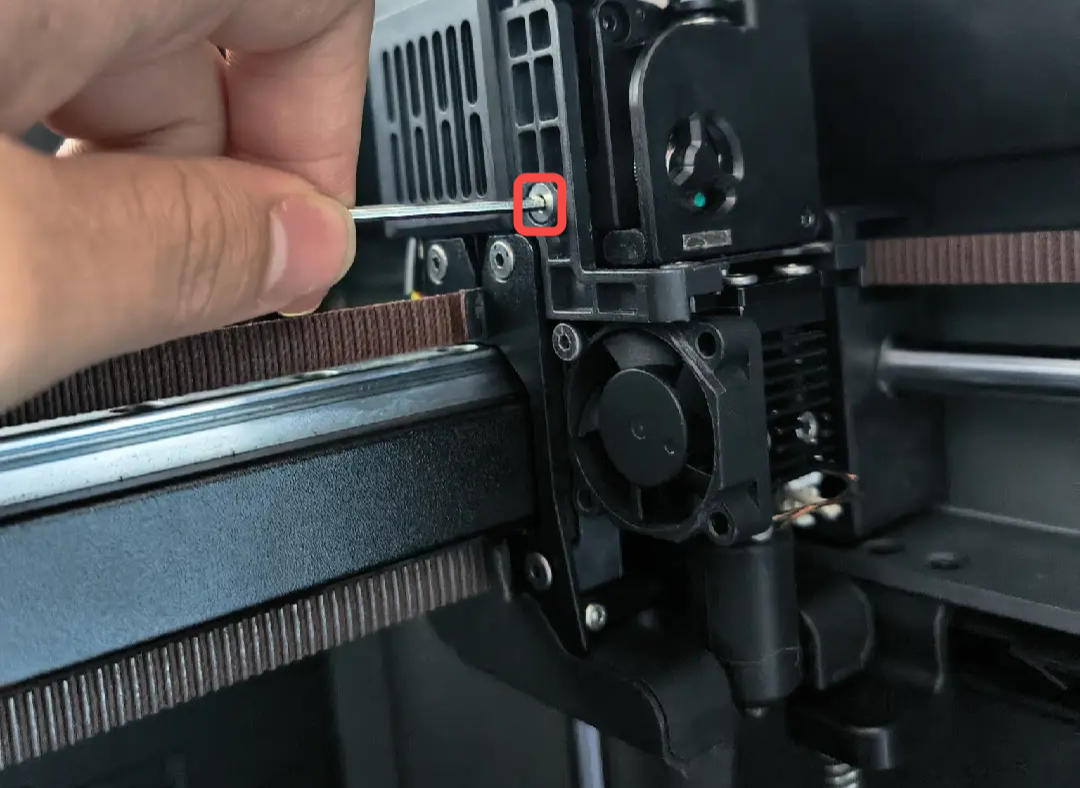
¶ Install the (new) extrusion assembly fixing screws
Install two fixing screws on the right side of the extruder.

Install one fixing screw on the left side of the extruder.
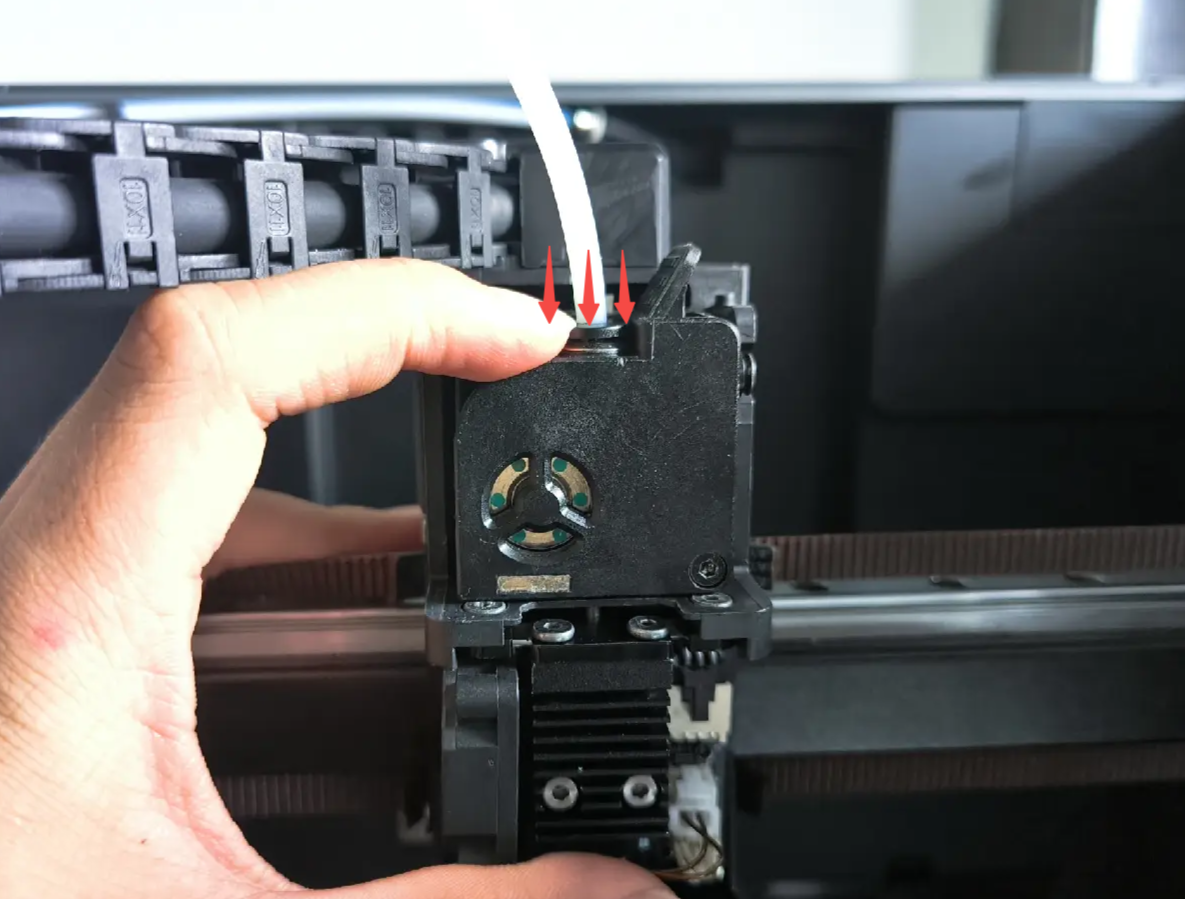
¶ Install the PTFE tube
Keep pressing the plug of the pneumatic connector while inserting the Teflon tube
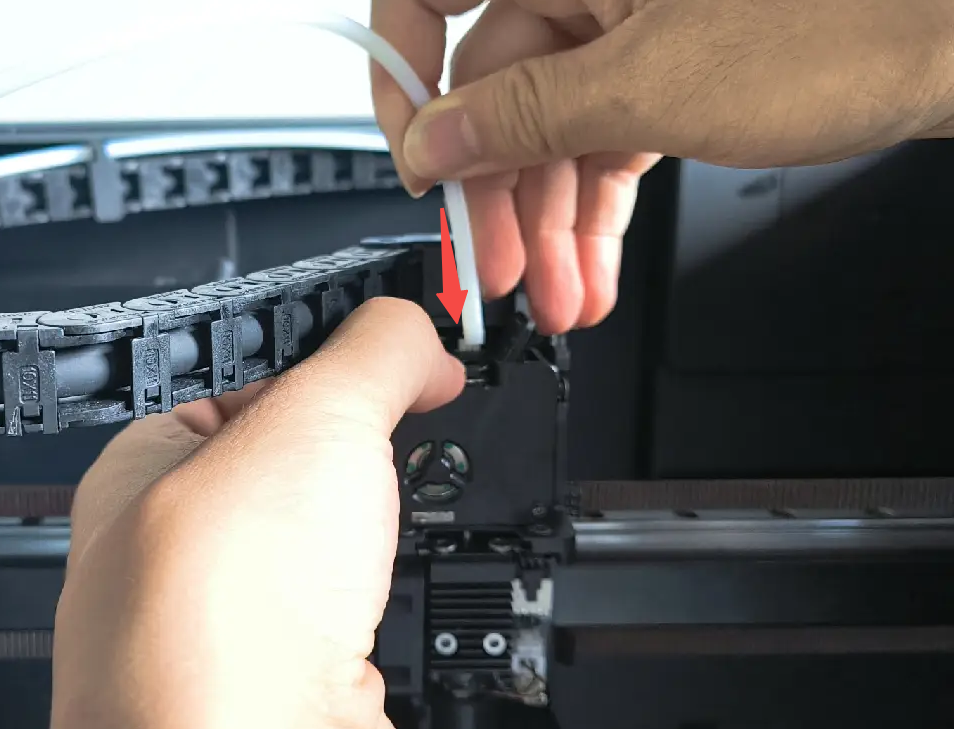
¶ Install the hotend cover

¶ How to confirm if the motor is rotating normally?
Restart the printer and navigate to the page “Axis/Temp”.
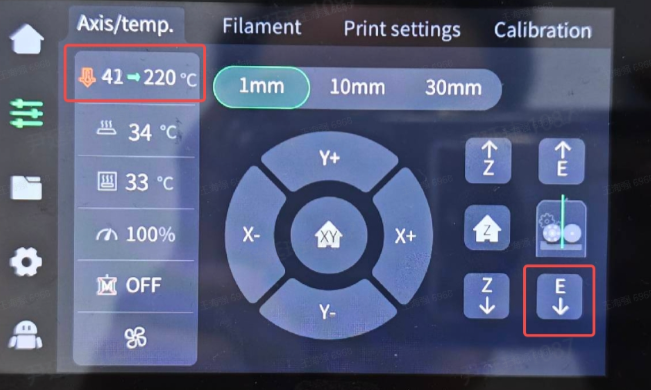
Remove the extruder cover and heat the nozzle to 220°C
Repeatedly click the "E↓" icon in the bottom right corner of the "Axis/Temp" page while observing if the extruder gear rotates.
