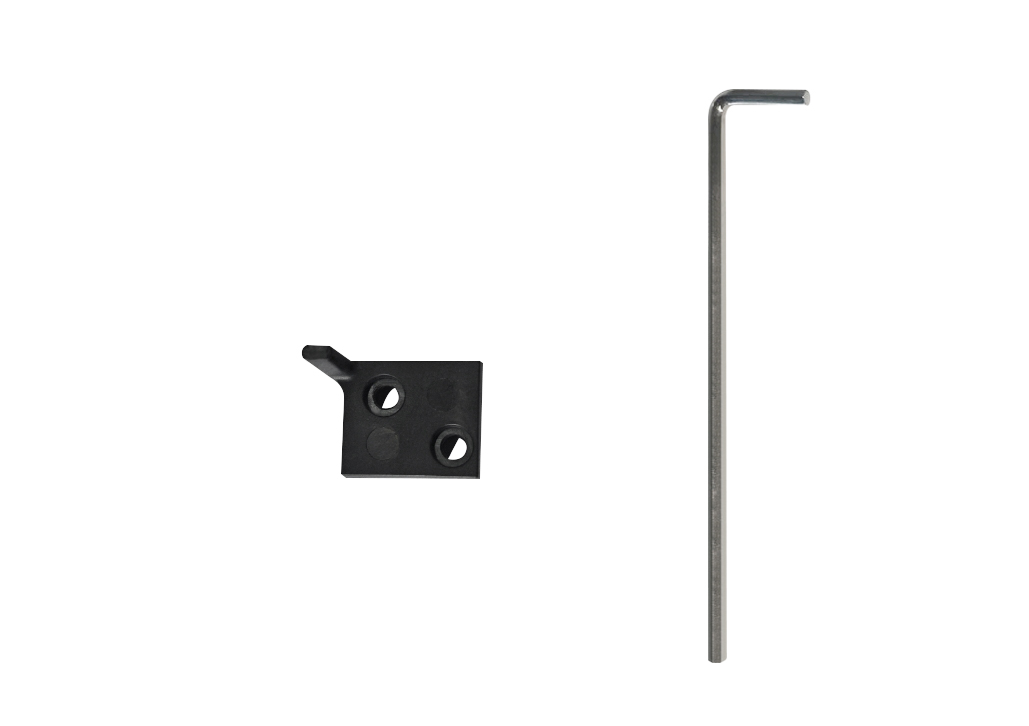
¶ Tools
- H2.0 hex wrench
- New cutter push rod
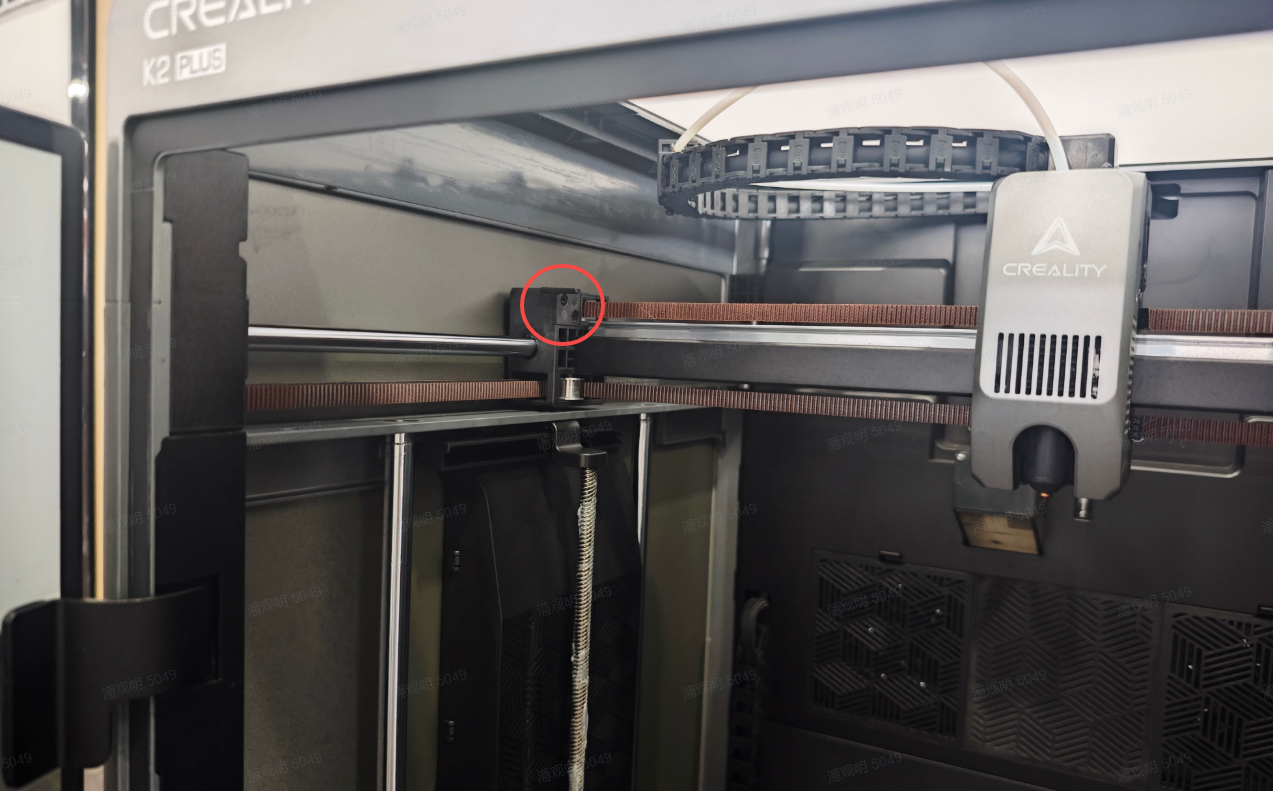
¶ Loaction
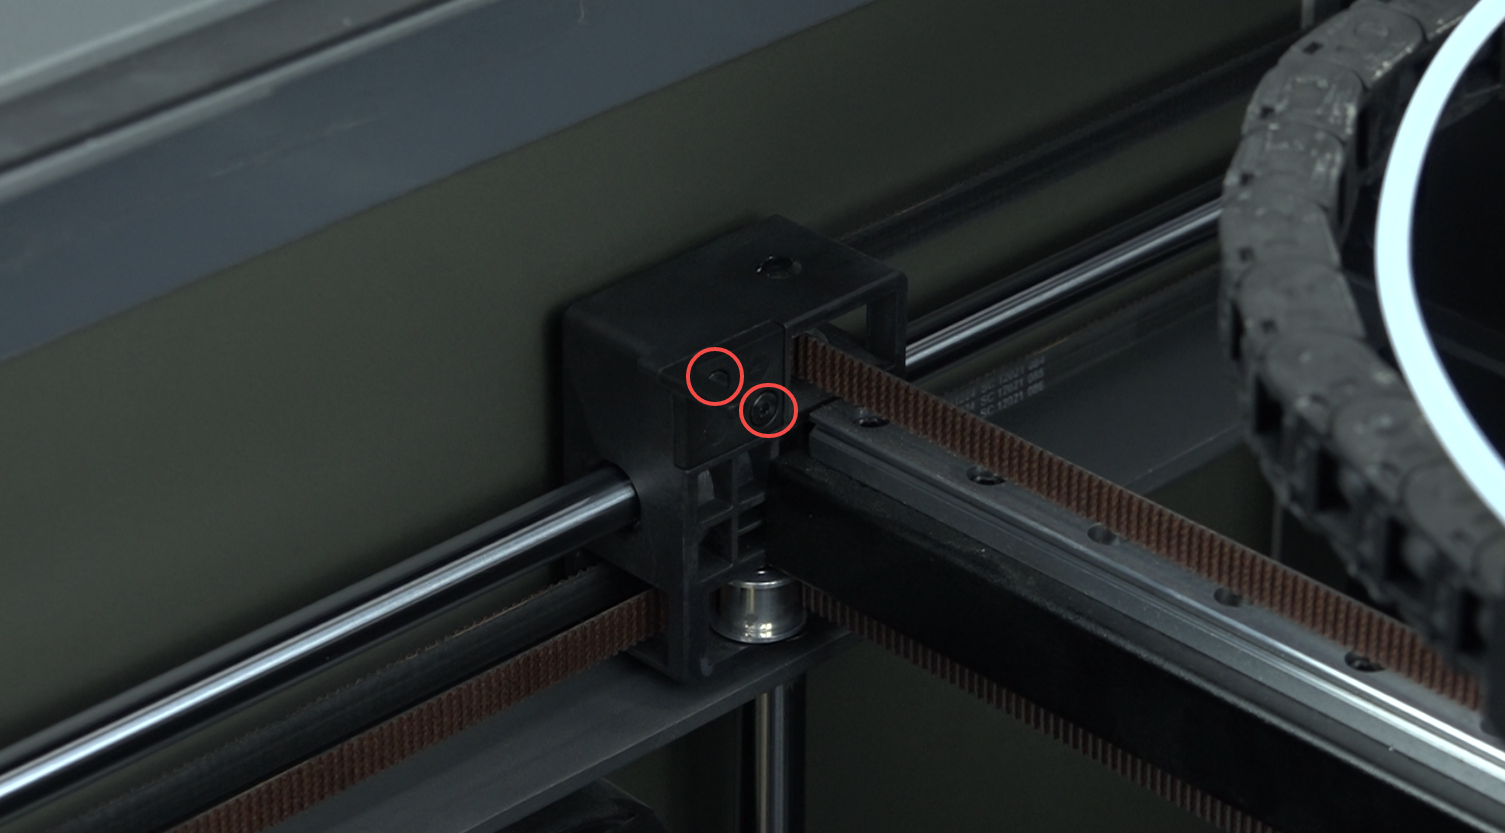
The cutter push rod is mounted on the slider to the left of the X axis.
¶ Steps
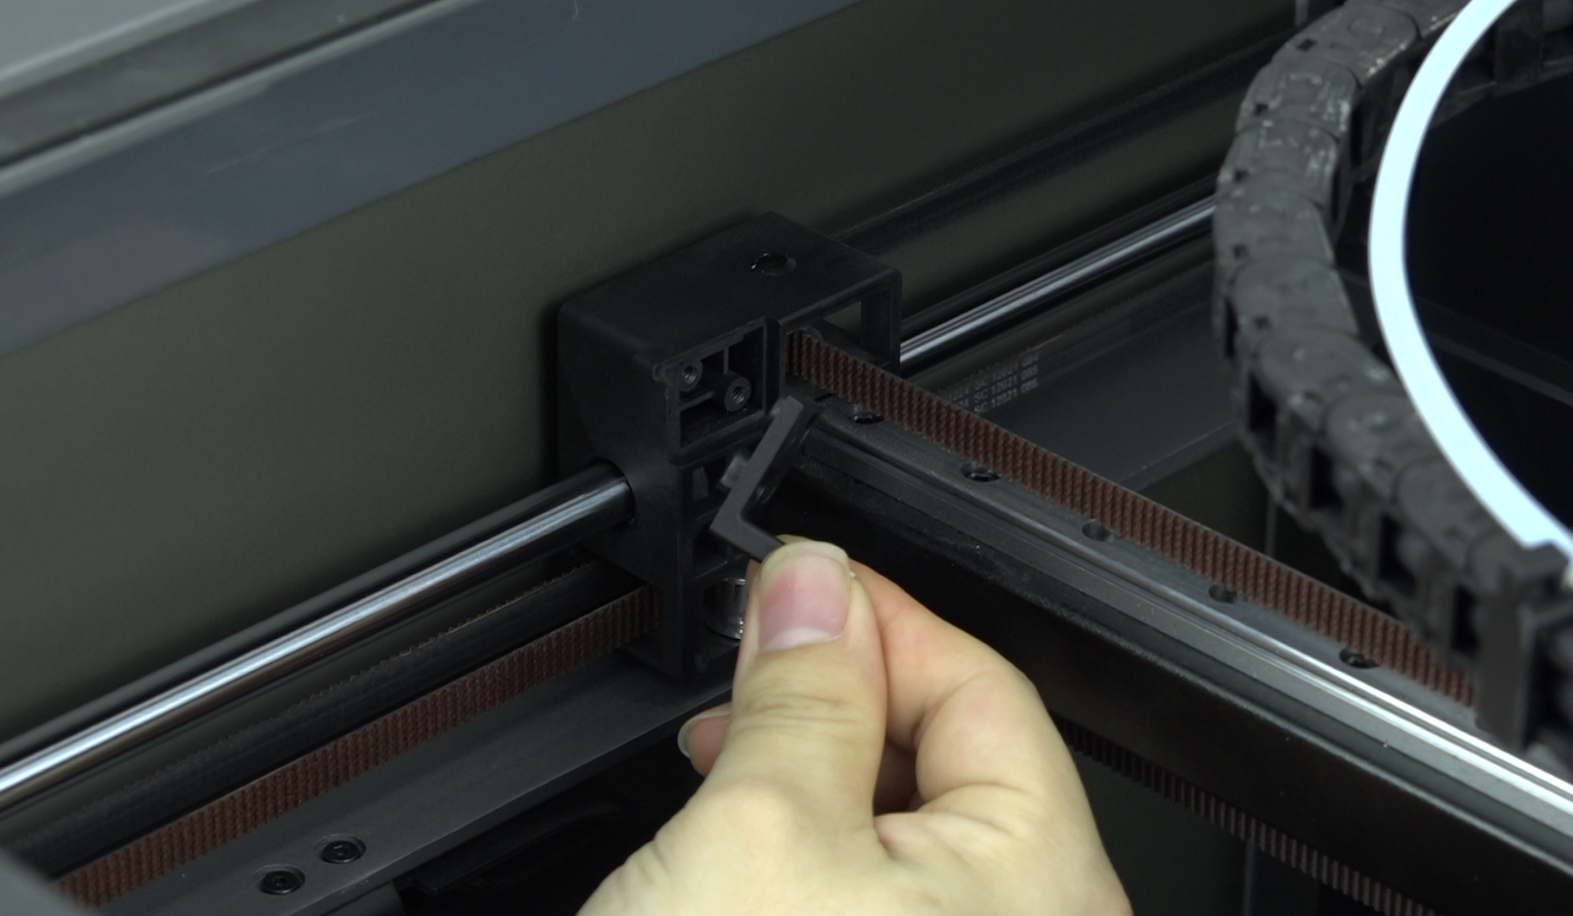
- Use a wrench to loosen the two M3 tapping screws on the cutter push rod.

- Remove the old cutter push rod.
- Install the new cutter push rod. Note: Face forward.
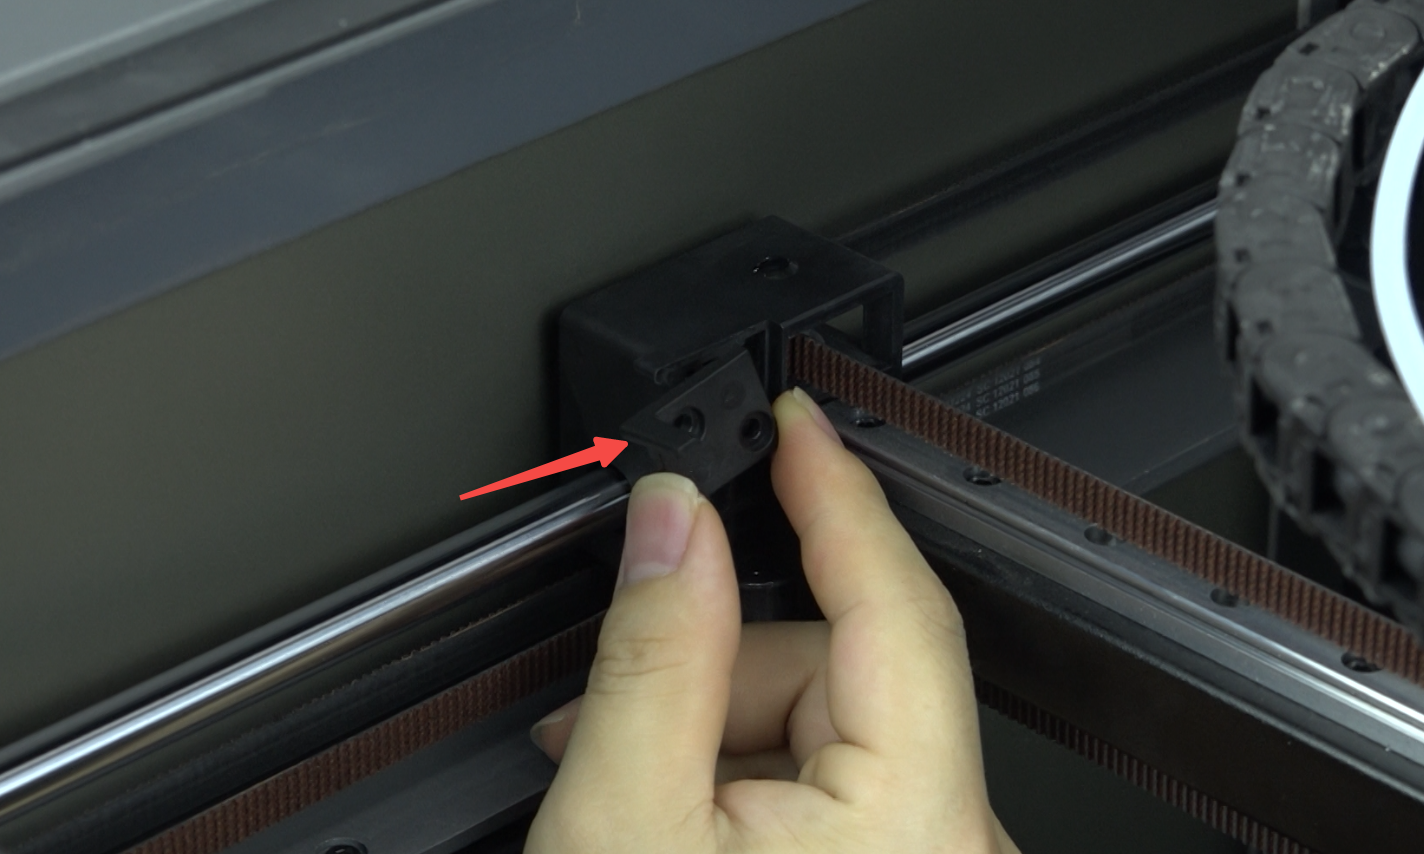
- Tighten the two M3 tapping screws on the cutter push rod by using a wrench.
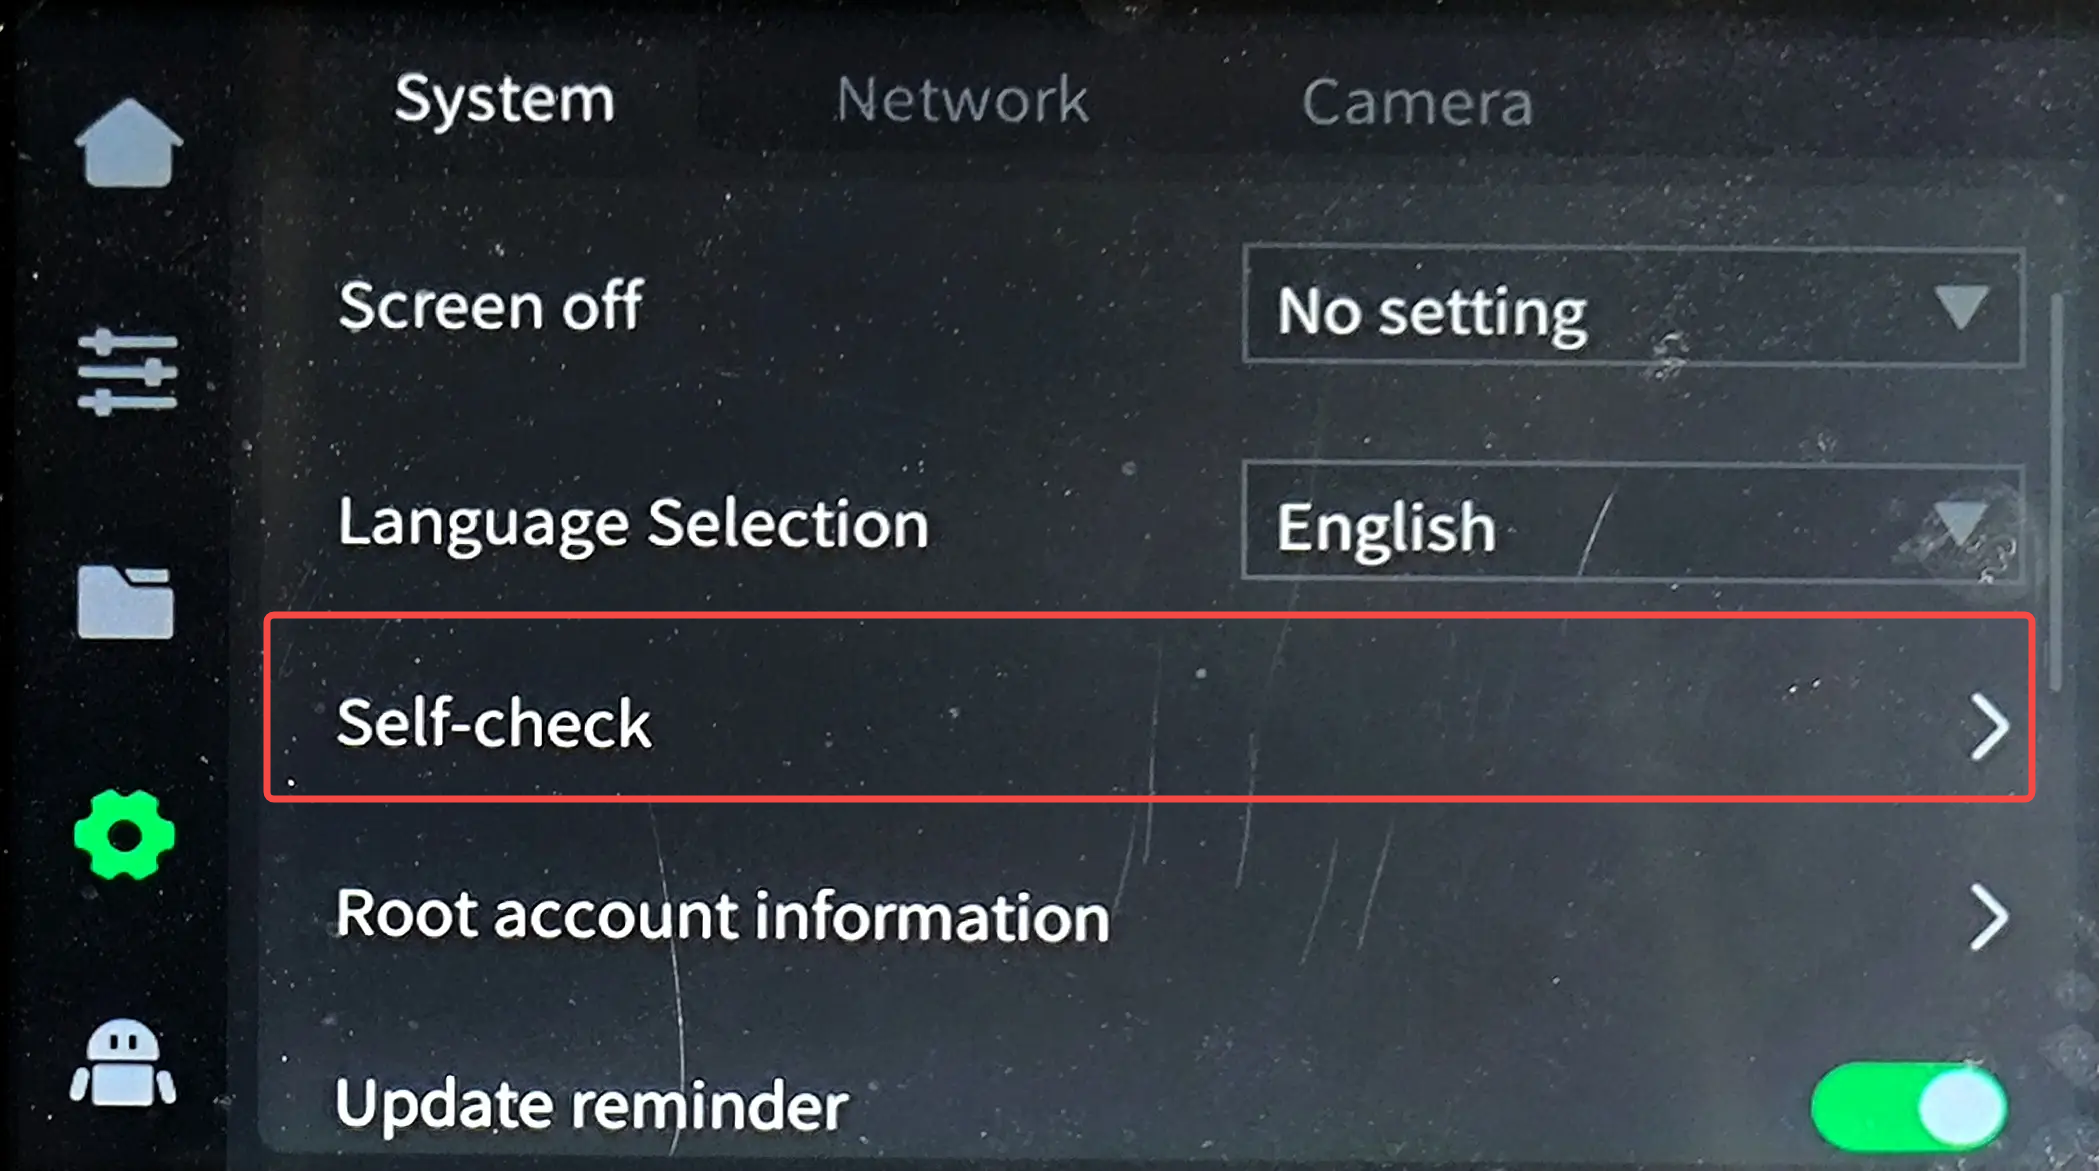
- After finishing the steps, you need to power on the printer to click self-check.

¶ Youtube Video Guide:
Replace the Cutter Push Rod
https://youtu.be/xuEgLLpK2_g