¶ Tools
H2.0 hexagonal wrench
New nozzle camera
¶ Location
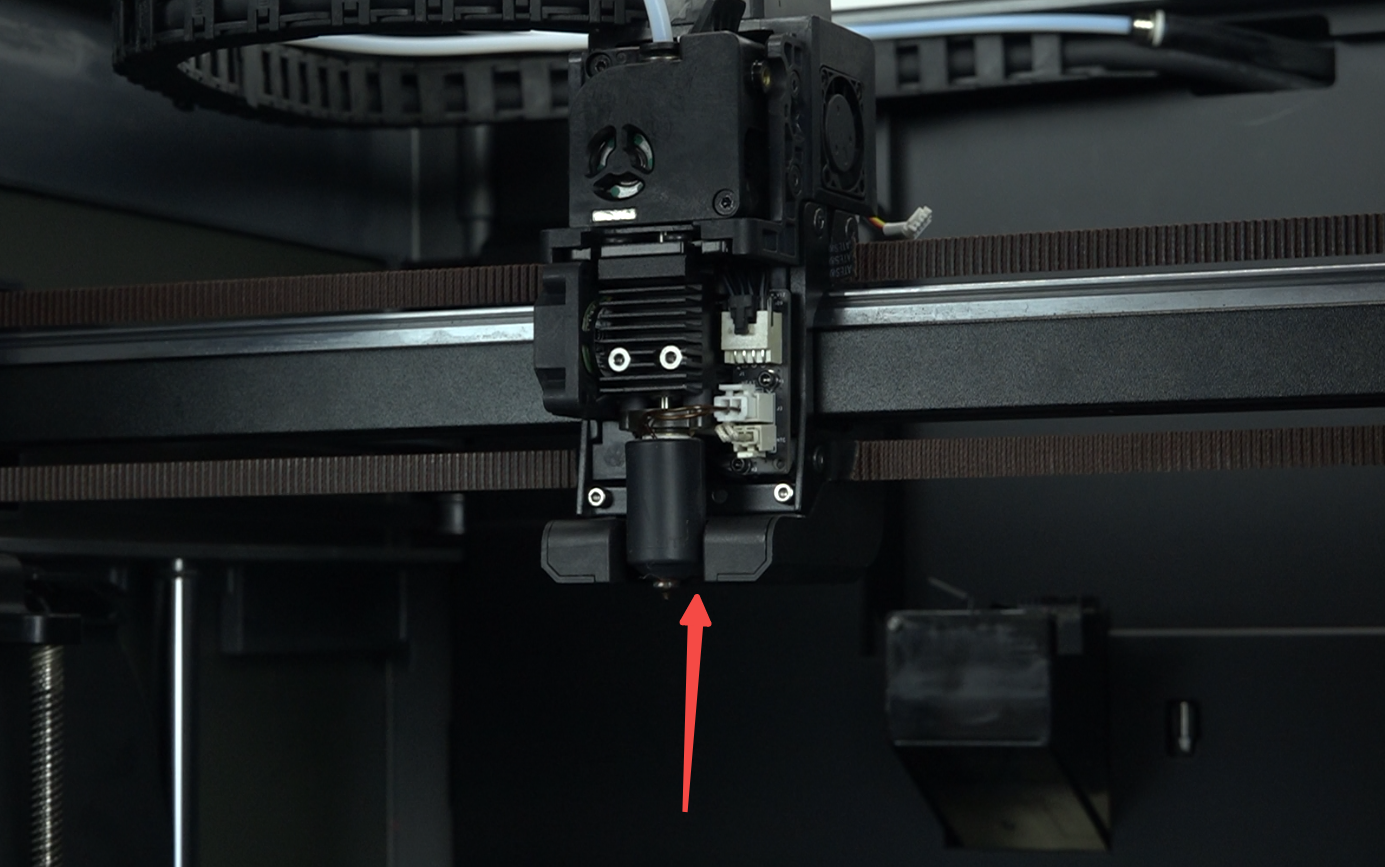
The nozzle camera is located at the lower part of the hotend assembly
¶ Steps
¶ 1. Power off
1.1 Lower the nozzle temperature to 50°C
1.2 Power off and unplug the power cord
¶ 2. Remove the model fan assembly
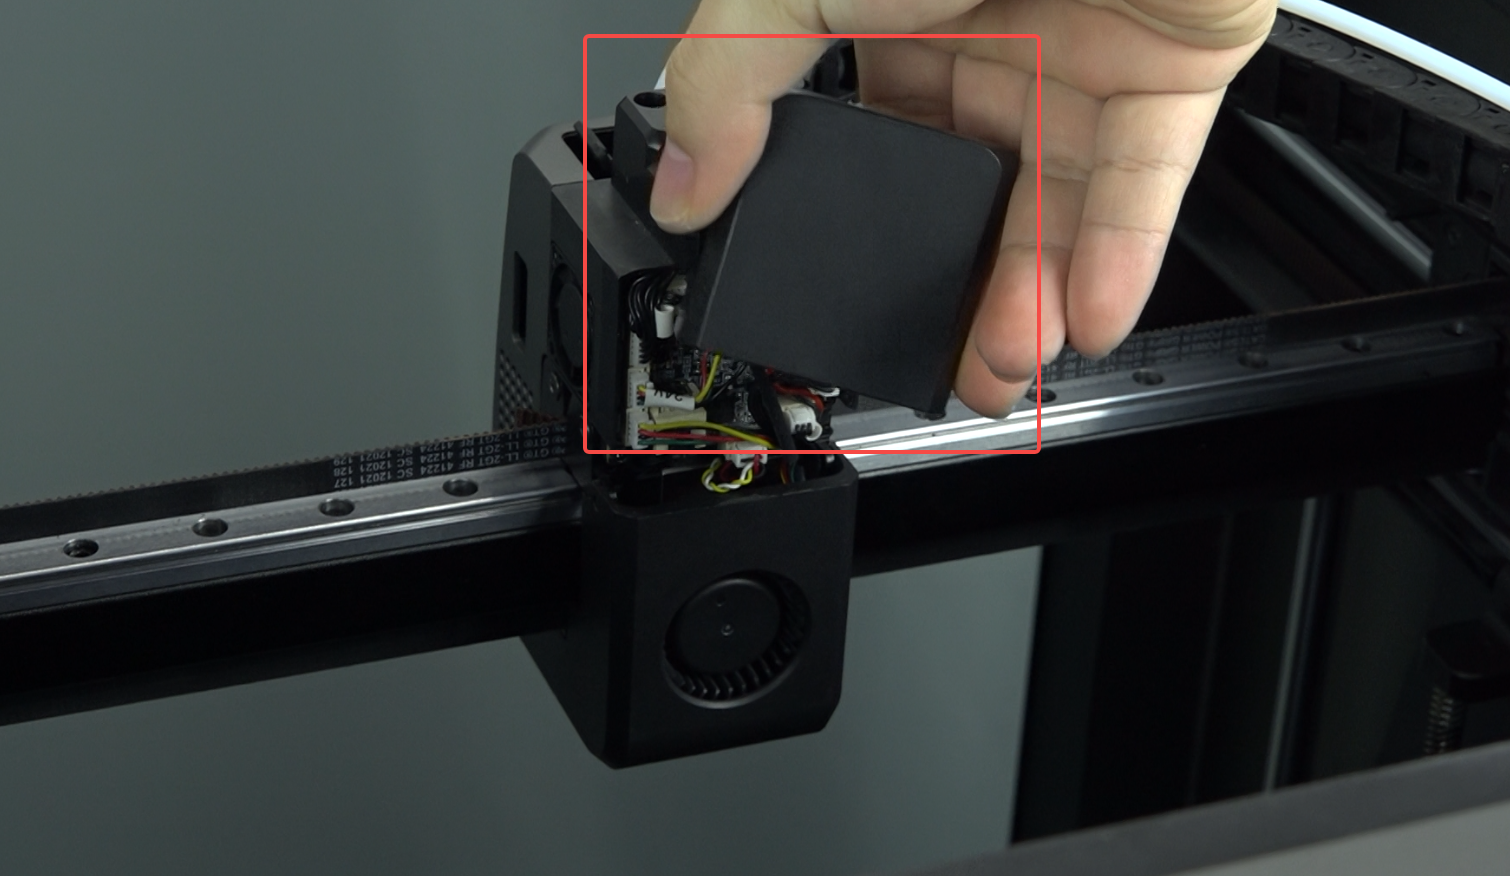
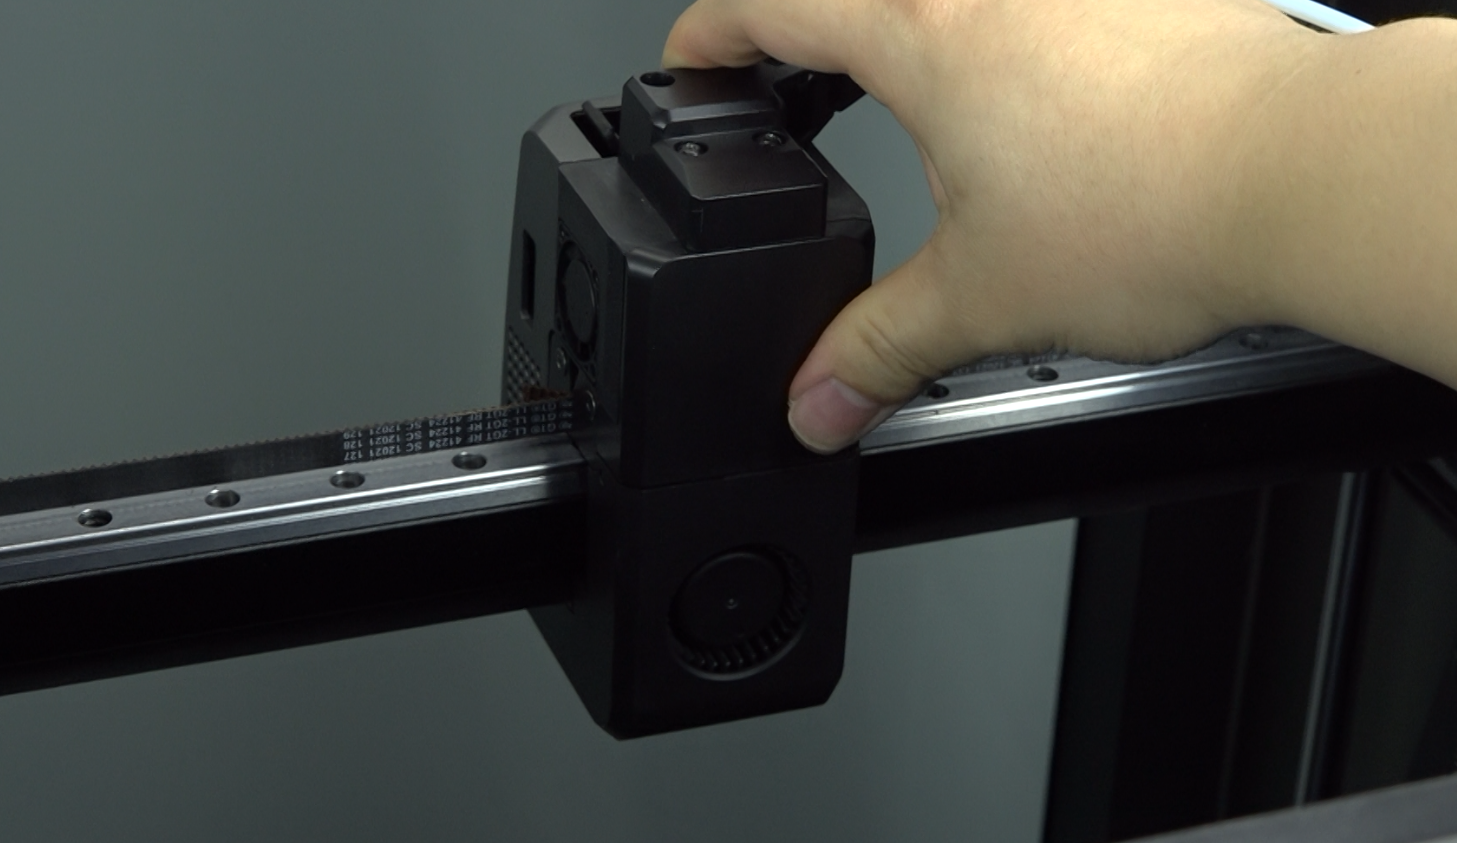
2.1 Remove the hotend plate cover
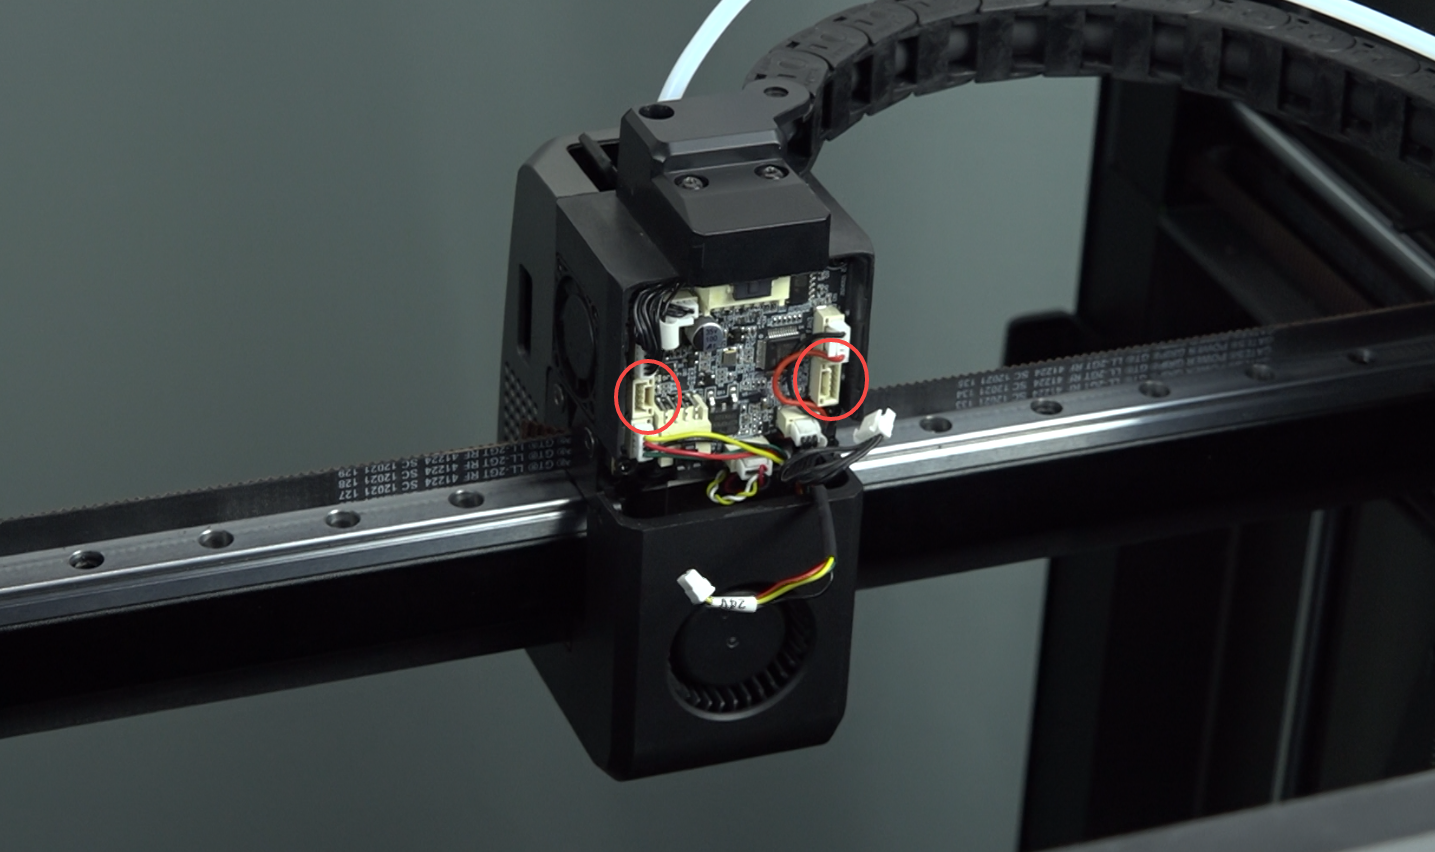
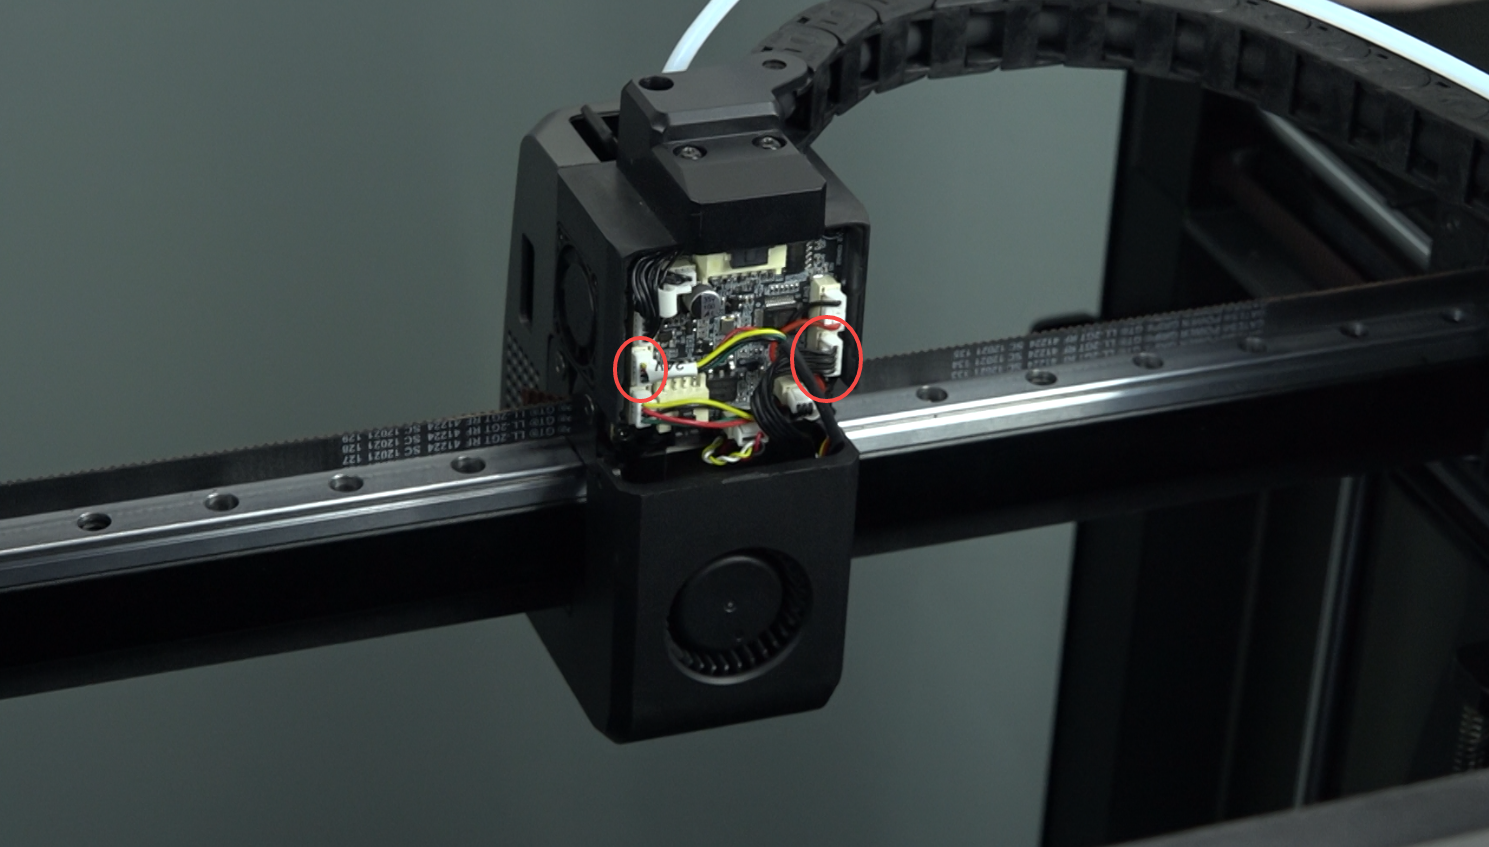
2.2 Unplug the nozzle camera cable and model fan cable
2.3 Remove the magnetic cover of the extruder

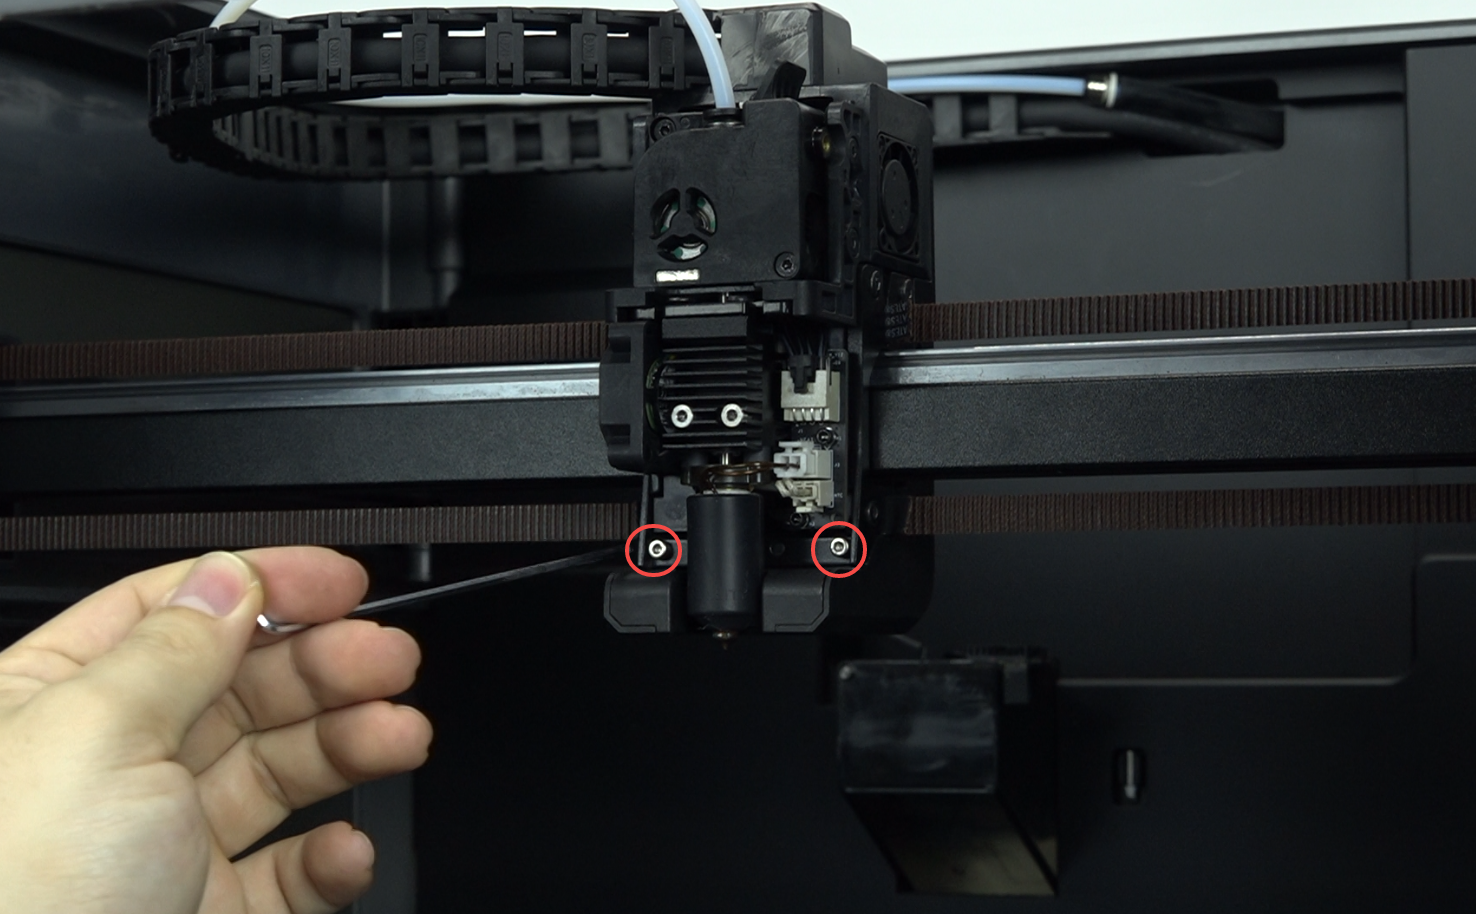
2.4 Use the H2.0 hexagonal wrench to remove the two M3 screws of the fan duct
2.5 Use both thumbs to push down on the model fan assembly. Note: Do not use excessive force to prevent damage to the fan duct
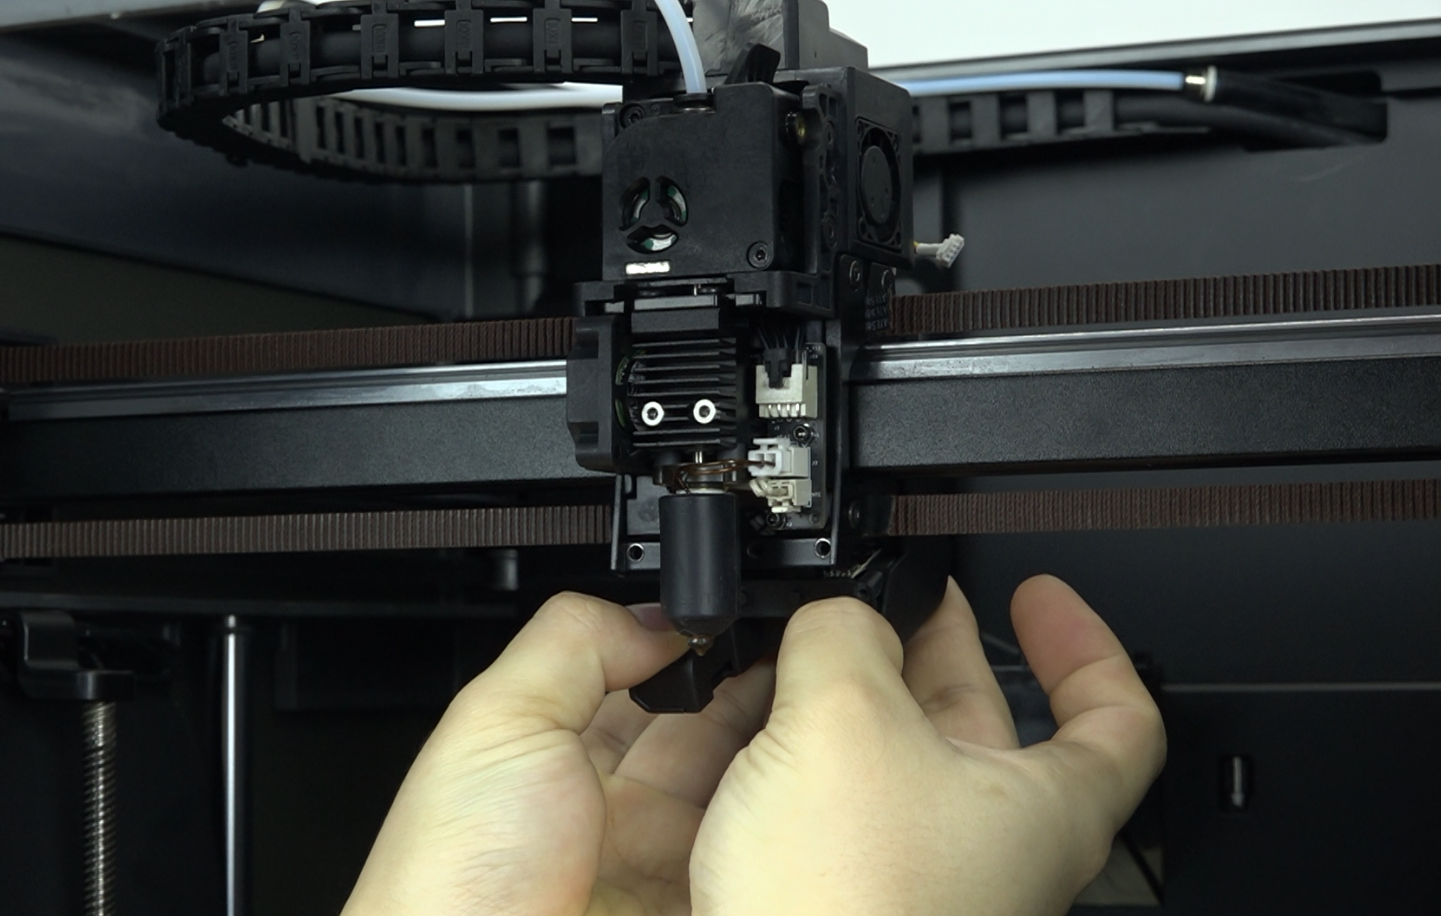
2.6 Pry open the buckles on both sides and remove the model fan assembly
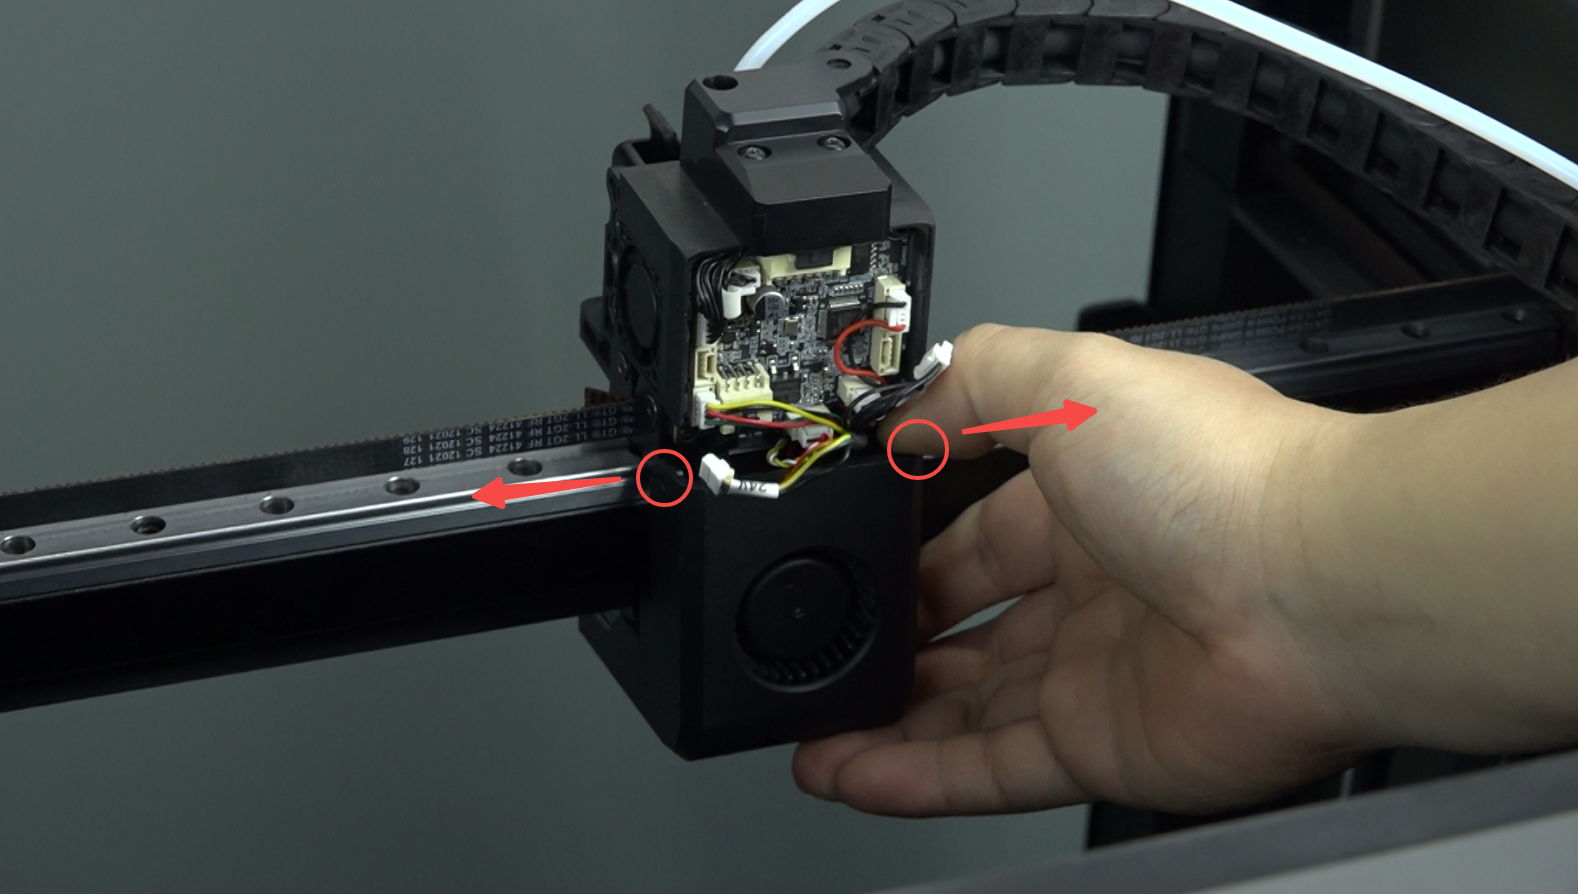
¶ 3. Remove the damaged nozzle camera
3.1 Use the H2.0 hexagonal wrench to remove the three M2 screws of the nozzle camera
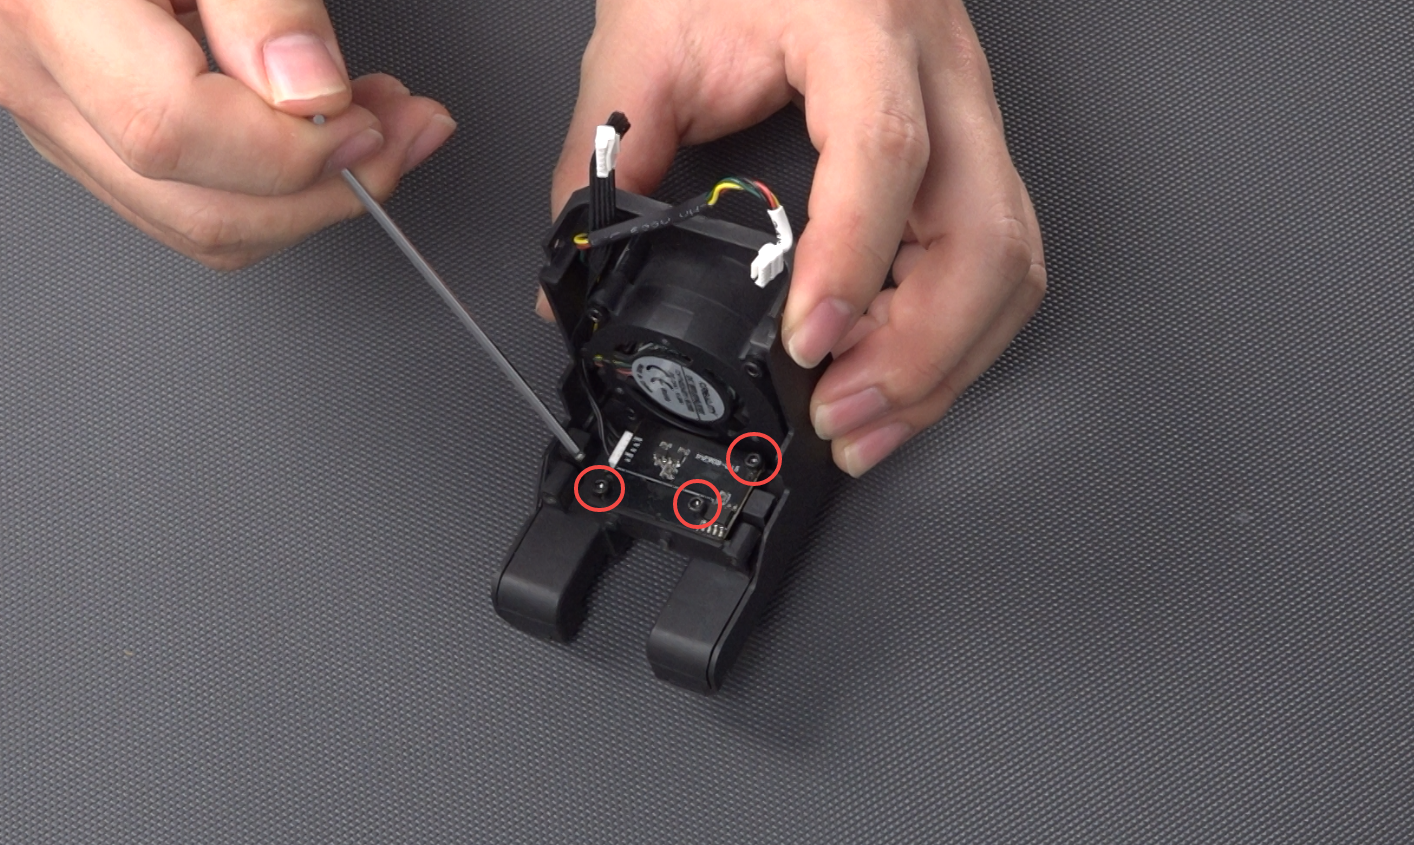
3.2 Remove the damaged nozzle camera
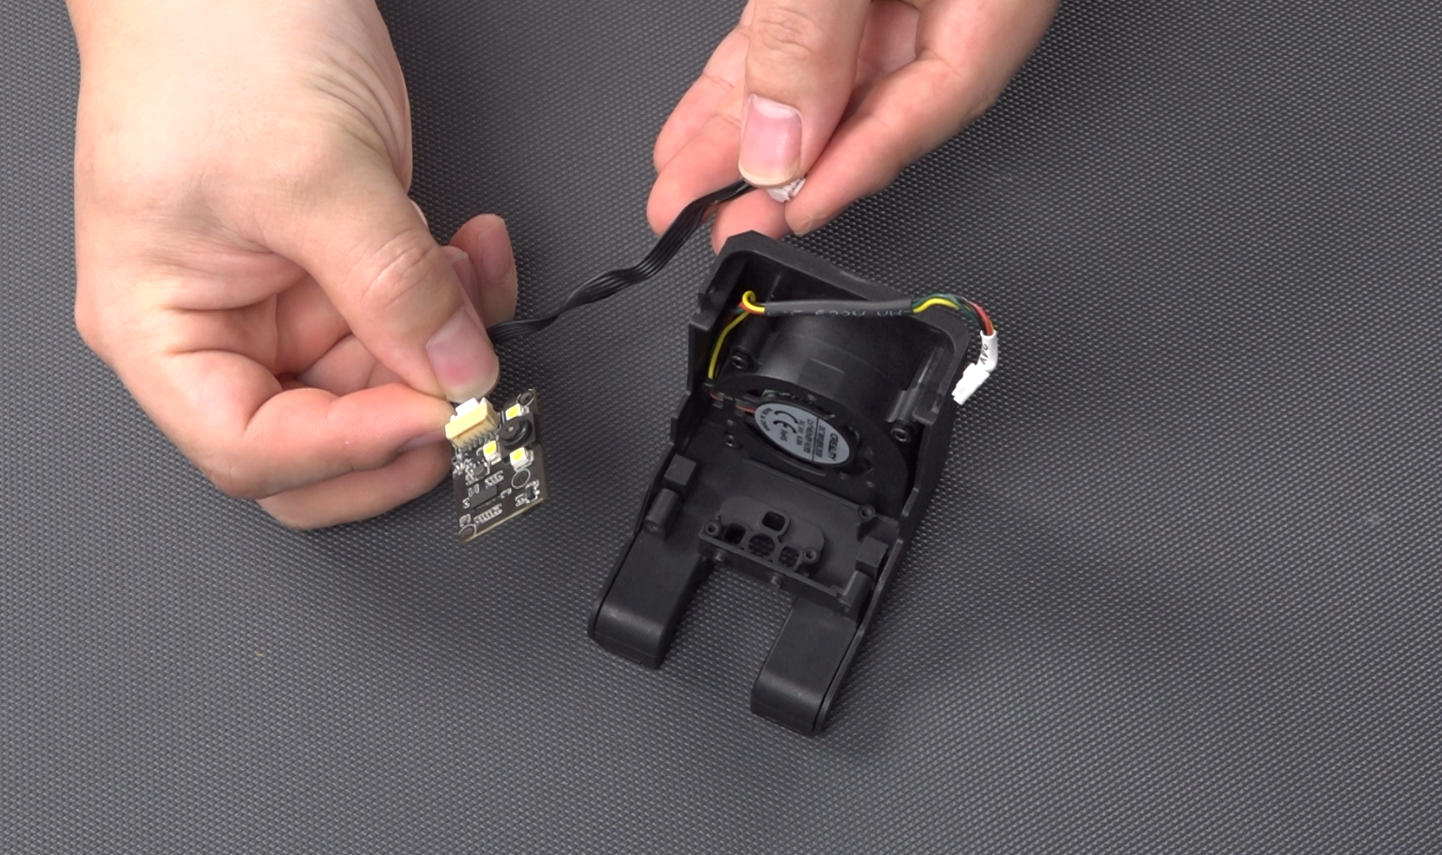
¶ 4. Install the new nozzle camera
4.1 Connect the nozzle camera cable
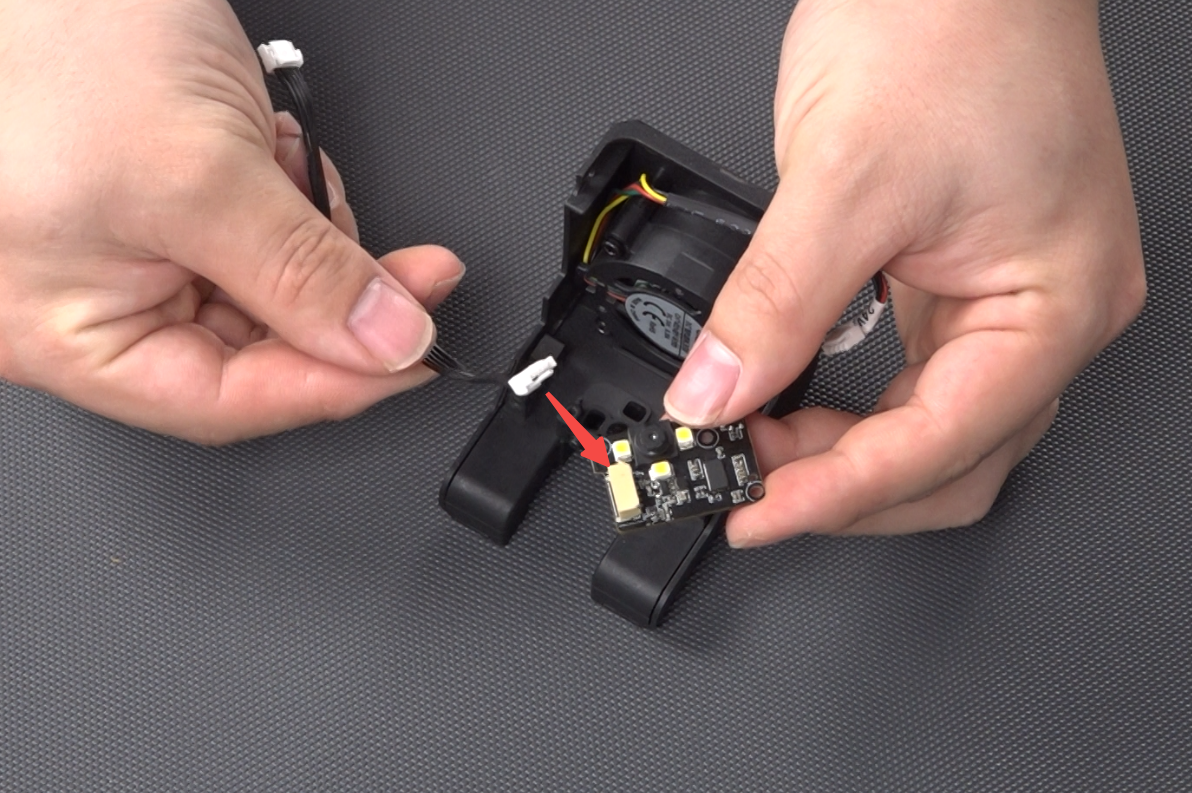
4.2 Place the camera cable on the left side, position the camera face down, align the screw holes, and use the H2.0 hexagonal wrench to install the three M2 screws of the nozzle camera
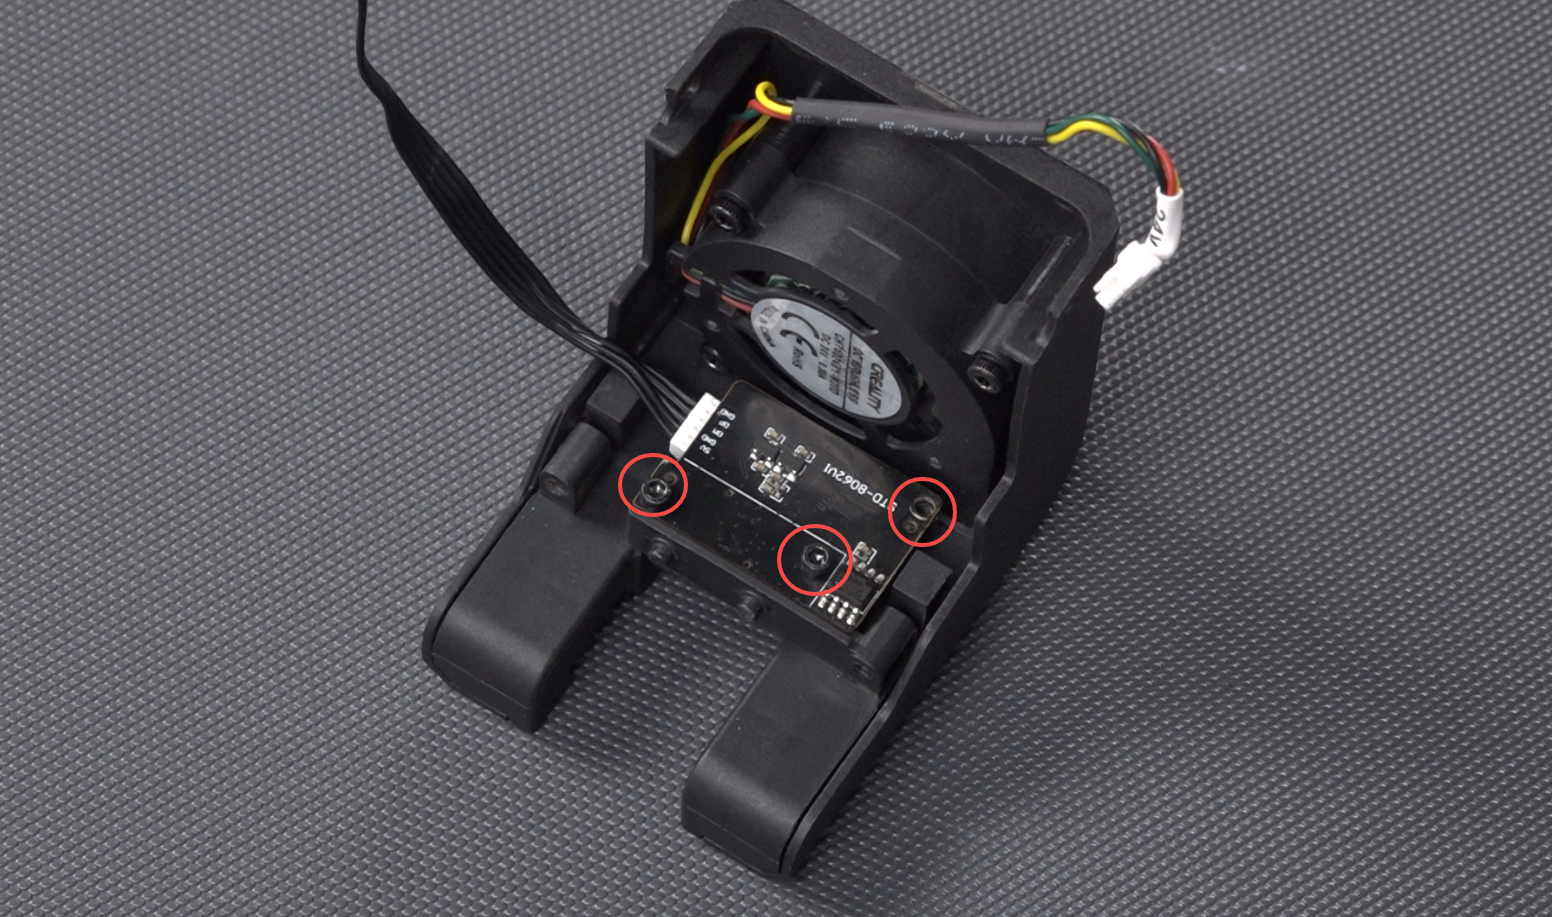
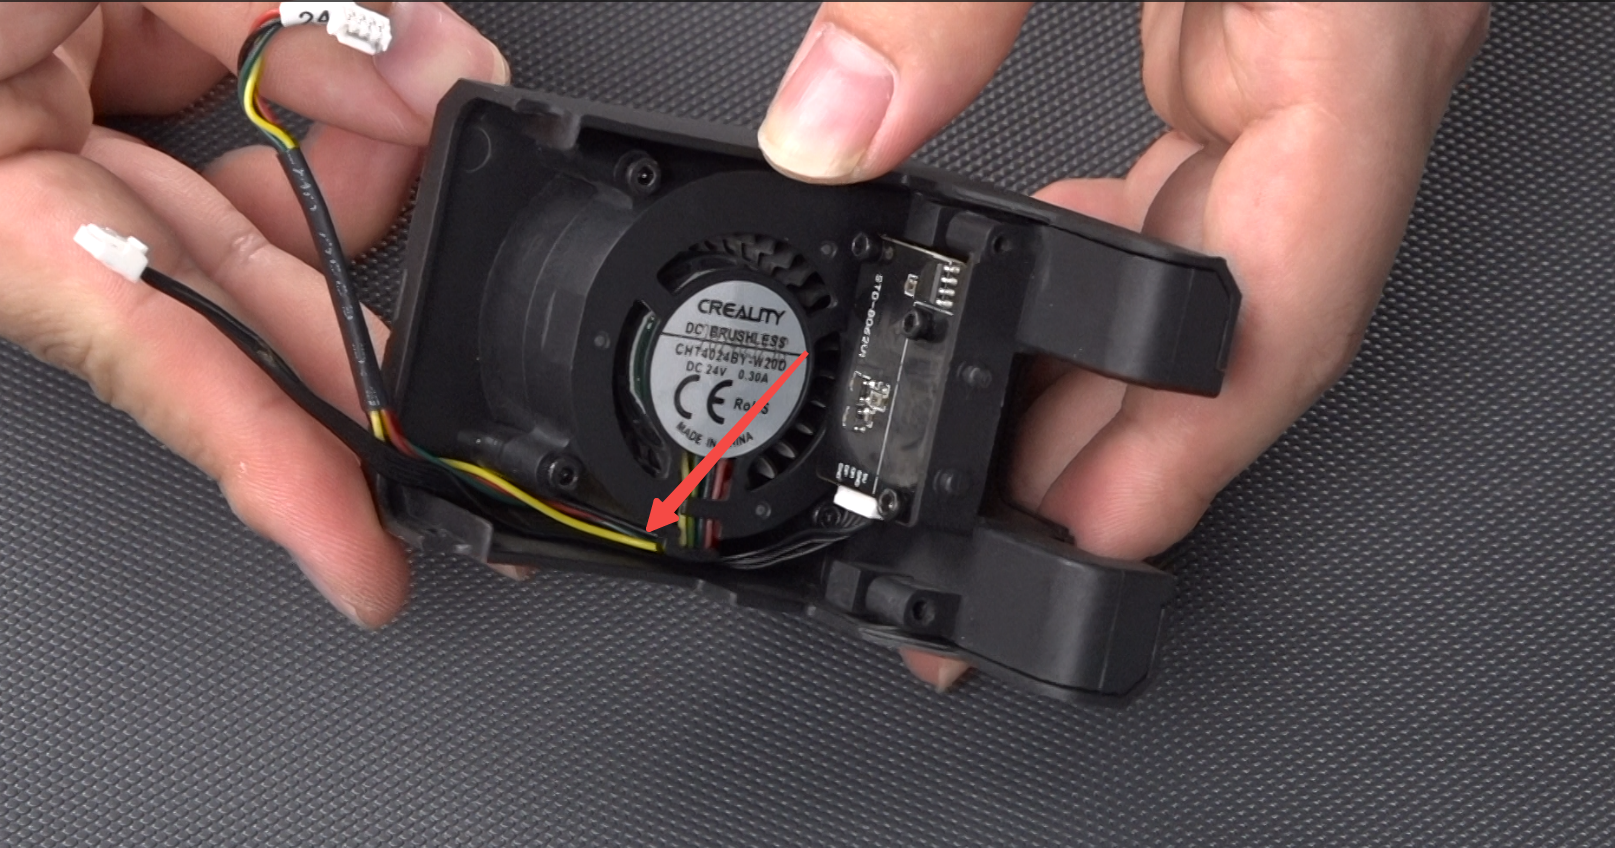
4.3 Tuck the cable into the gap
¶ 5. Install the model fan assembly
Align the buckles on both sides when installing the model fan assembly
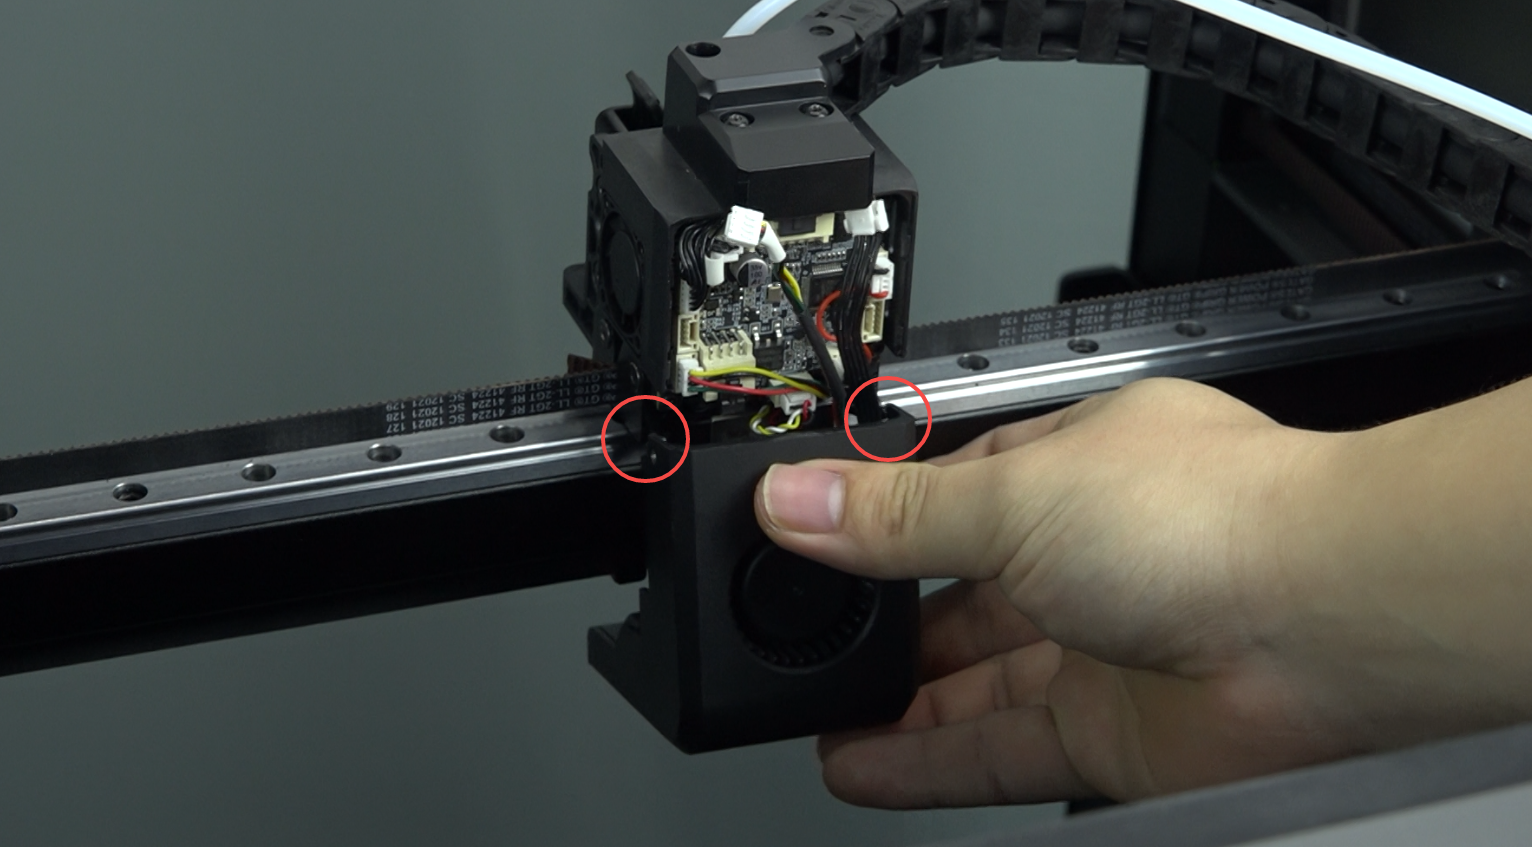
Squeeze the model fan assembly forward. Note: Make sure the locating pin is inserted into the positioning hole
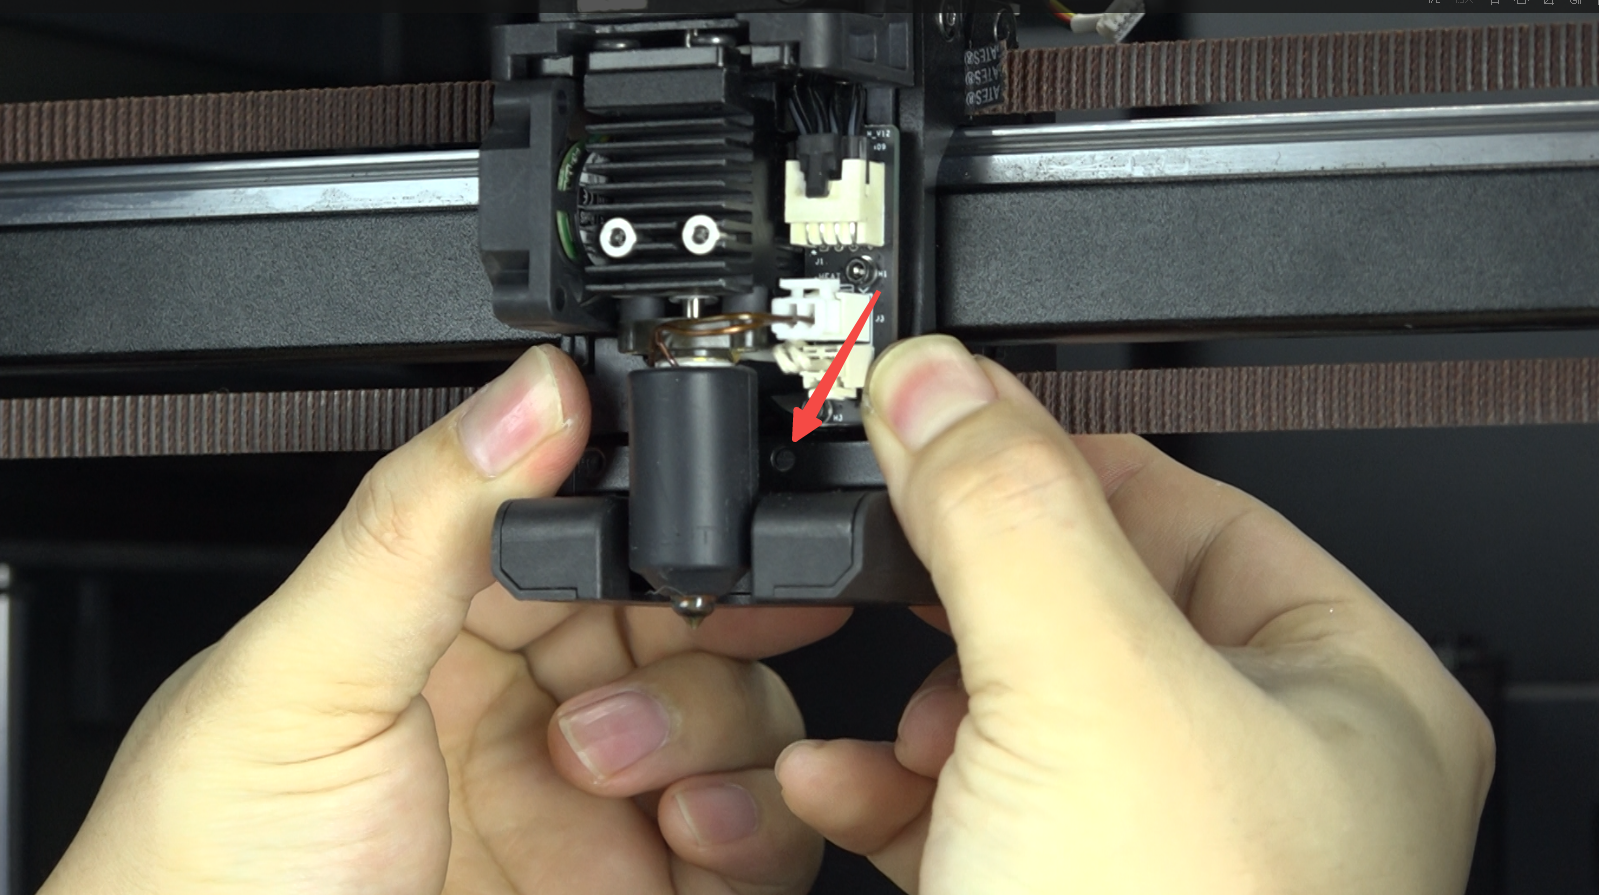
5.1 Use the H2.0 hexagonal wrench to install the two M3 screws of the fan duct

5.2 Install the magnetic cover of the extruder
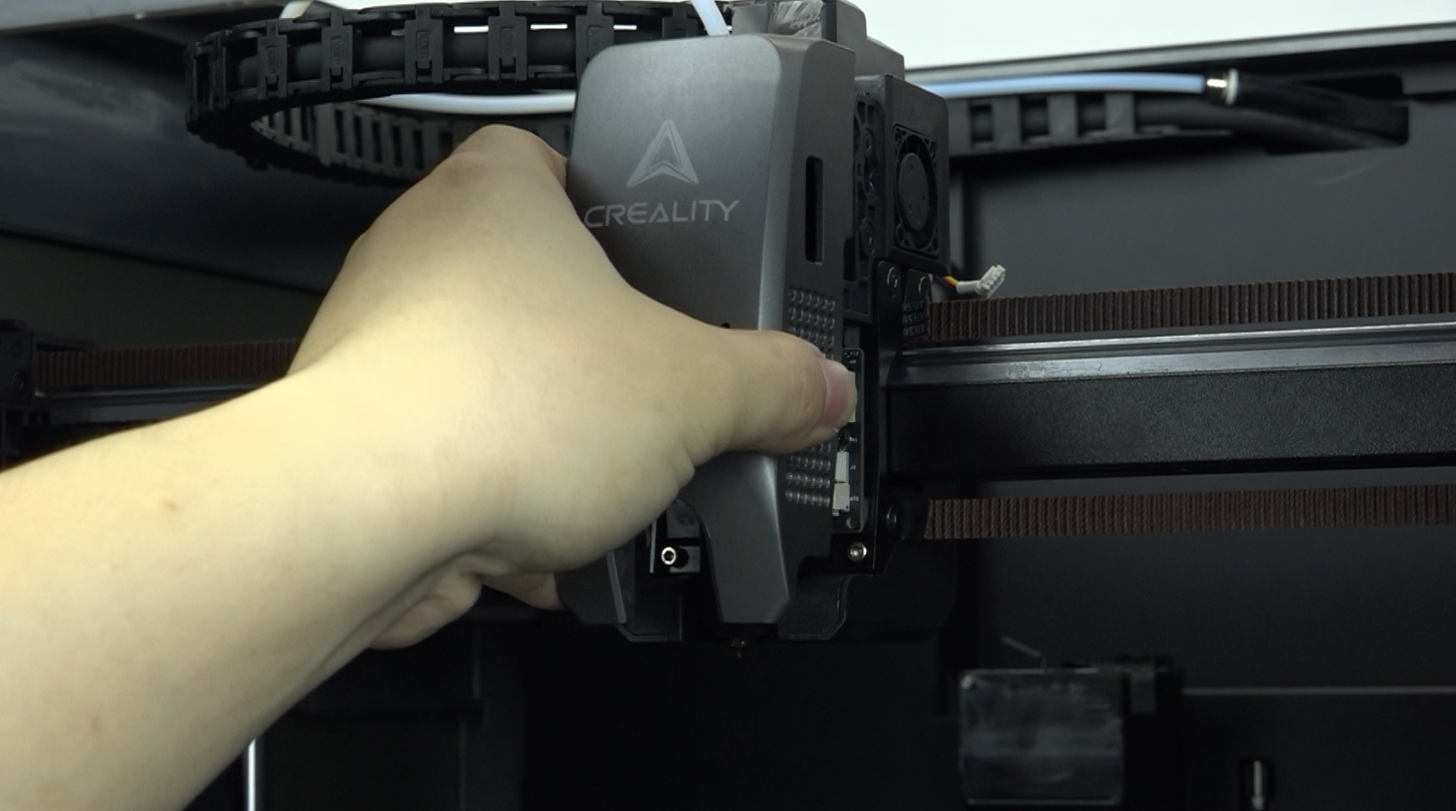
5.3 Connect the nozzle camera cable and model fan cable
5.4 Install the hotend plate cover
¶ Video Tutorial
Replace Nozzle AI camera
https://youtu.be/RBwCbQfFqoA