¶ 1. Preparation
Programming tool
USB driver
One Micro USB cable
Printer
Computer (Windows 10)
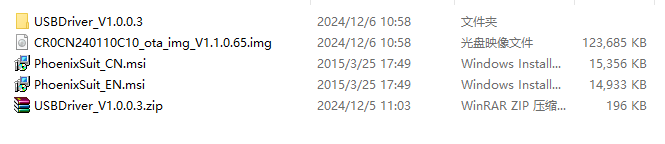
¶ USB driver, firmware and programming tool package
t113_i_linux_cr0cn240110c10_uart0_v1.1.2.6.img

¶ 2. Driver Installation Steps
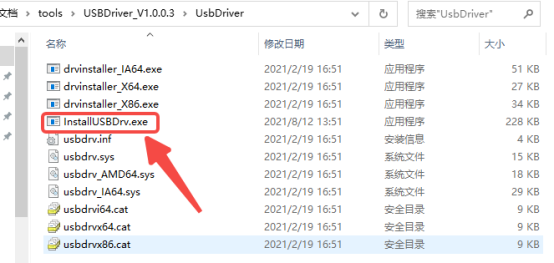
¶ 2.1 Driver Installation
Select the "InstallUSBDrv.exe" file and double-click to install; a command window will pop up during the process and then close automatically.
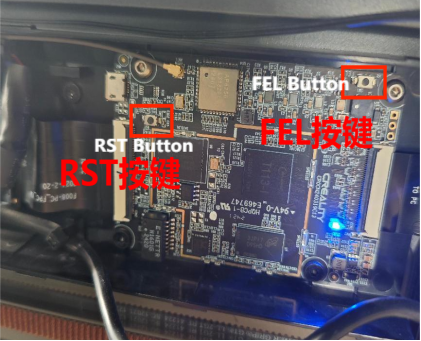
¶ 2.2 Method to Enter Programming Mode
Press and hold the FEL button on the board, then press the RST button for 1 second and release, finally release the FEL button to enter programming mode.
¶ Connection Method 1:
Remove the board cover and connect directly on the machine. If the USB port is long, remove interfering cables; if the USB port is thick and interferes with the structure below, do not force it in to avoid damaging the female connector or poor contact. Please choose Method 2.
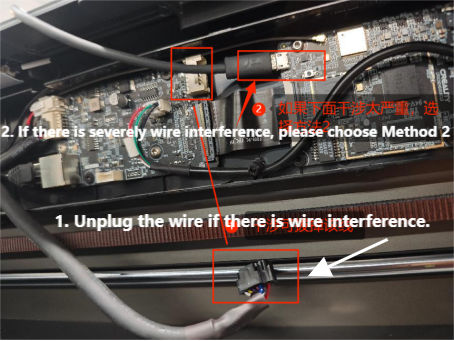
¶ Connection Method 2:
First power off, use the screwdriver from the tool kit to remove the screws fixing the board, then connect the USB port. After programming is complete, reinstall (recommended for beginners);
Alternatively, disconnect the FPC cable and remove the entire board, then reinstall after programming (for experienced users); When reinstalling the FPC cable, make sure to align it properly, otherwise it may result in poor contact and failure to power on normally.
Remember to power off before operation.
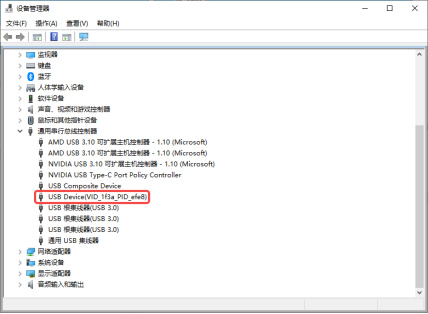
¶ 2.3 How to Determine if Driver Installation is Successful
Connect normally, open the computer's Device Manager, after the board enters programming mode, check if there is "USB Device(VID_1f3a_PID_efe8)" under "Universal Serial Bus controllers".
¶ 2.4 Driver Installation Successful
"USB Device(VID_1f3a_PID_efe8)" appears.
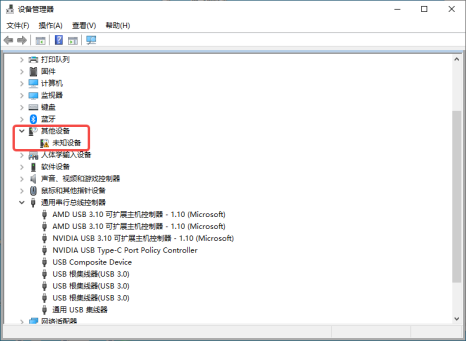
¶ 2.5 Driver Installation Unsuccessful
If "Other devices: Unknown device" appears, it means the driver was not successfully installed and the device cannot be recognized; you need to reinstall the driver.
¶ 3. Programming Steps
¶ 3.1 Connection
Refer to step 2.2 Method to Enter Programming Mode above.
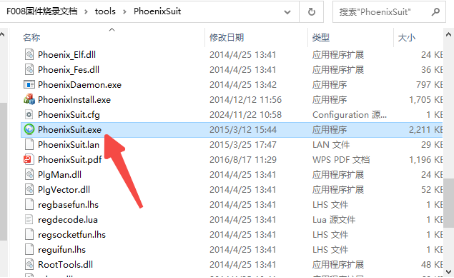
¶ 3.2 Open Programming Software
This software does not need installation, it can be used after extraction. Find "PhoenixSuit.exe" in the extracted folder and double-click to open.
¶ 3.3 Load Programming File
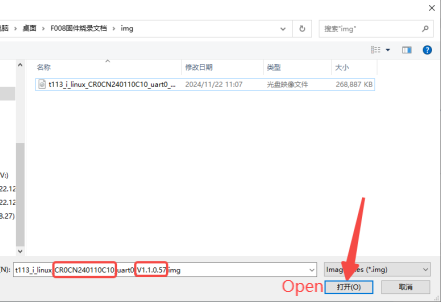
Click the browse button and select the programming file from your computer directory.
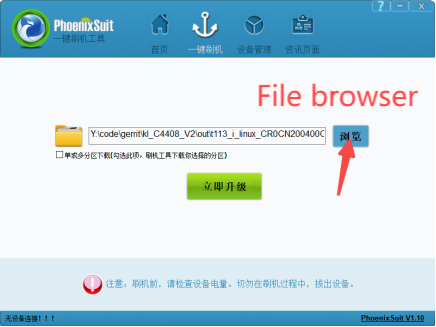
After selection, click open.
¶ 4. Programming File Precautions
Board type: For example: CR0CN240110C10; Select according to the machine model, one-to-one correspondence, otherwise it will not work.
Version: For example: V1.1.0.57; Select the version you need according to the official release notes for programming.
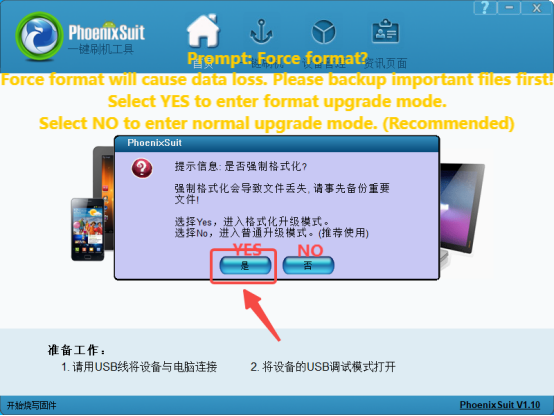
¶ 4.1 Programming Mode Selection
Selecting [YES] will delete all user data, similar to upgrading firmware after factory reset (recommended).
Selecting [NO] will only upgrade the firmware version and retain user data.
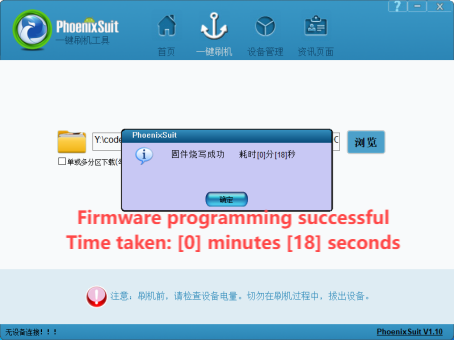
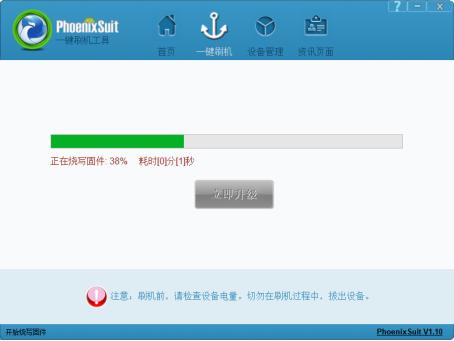
¶ 5. Programming Process Precautions
Do not power off, unplug the device, or press the reset button on the board during the programming process; normally, the entire programming process takes less than 30 seconds from start to finish; if it exceeds this time, an abnormality may have occurred, check if the connection is normal and if the board has entered programming mode.
¶ 6. Complete Programming