¶ K2 Plus Combo Unbox Operation
Please click the yotube link to watch it
https://youtu.be/sCFs5zI7W44
¶ 1. K2 Plus Combo General Unbox Guide
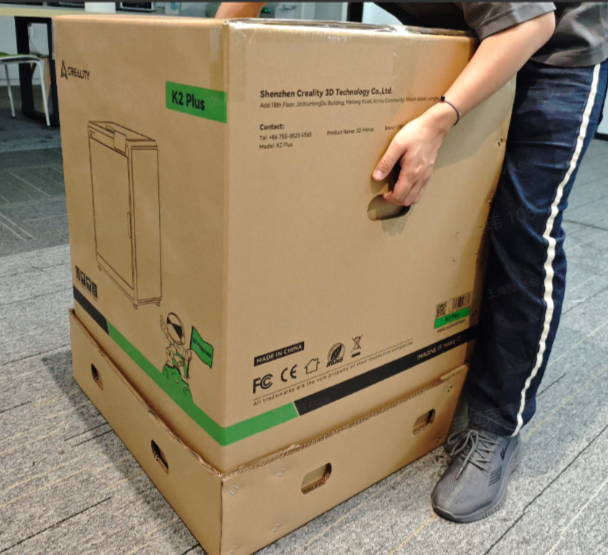
Two people are required to unpack the package.
Do not damage the covered carton, which can be used for packing materials.
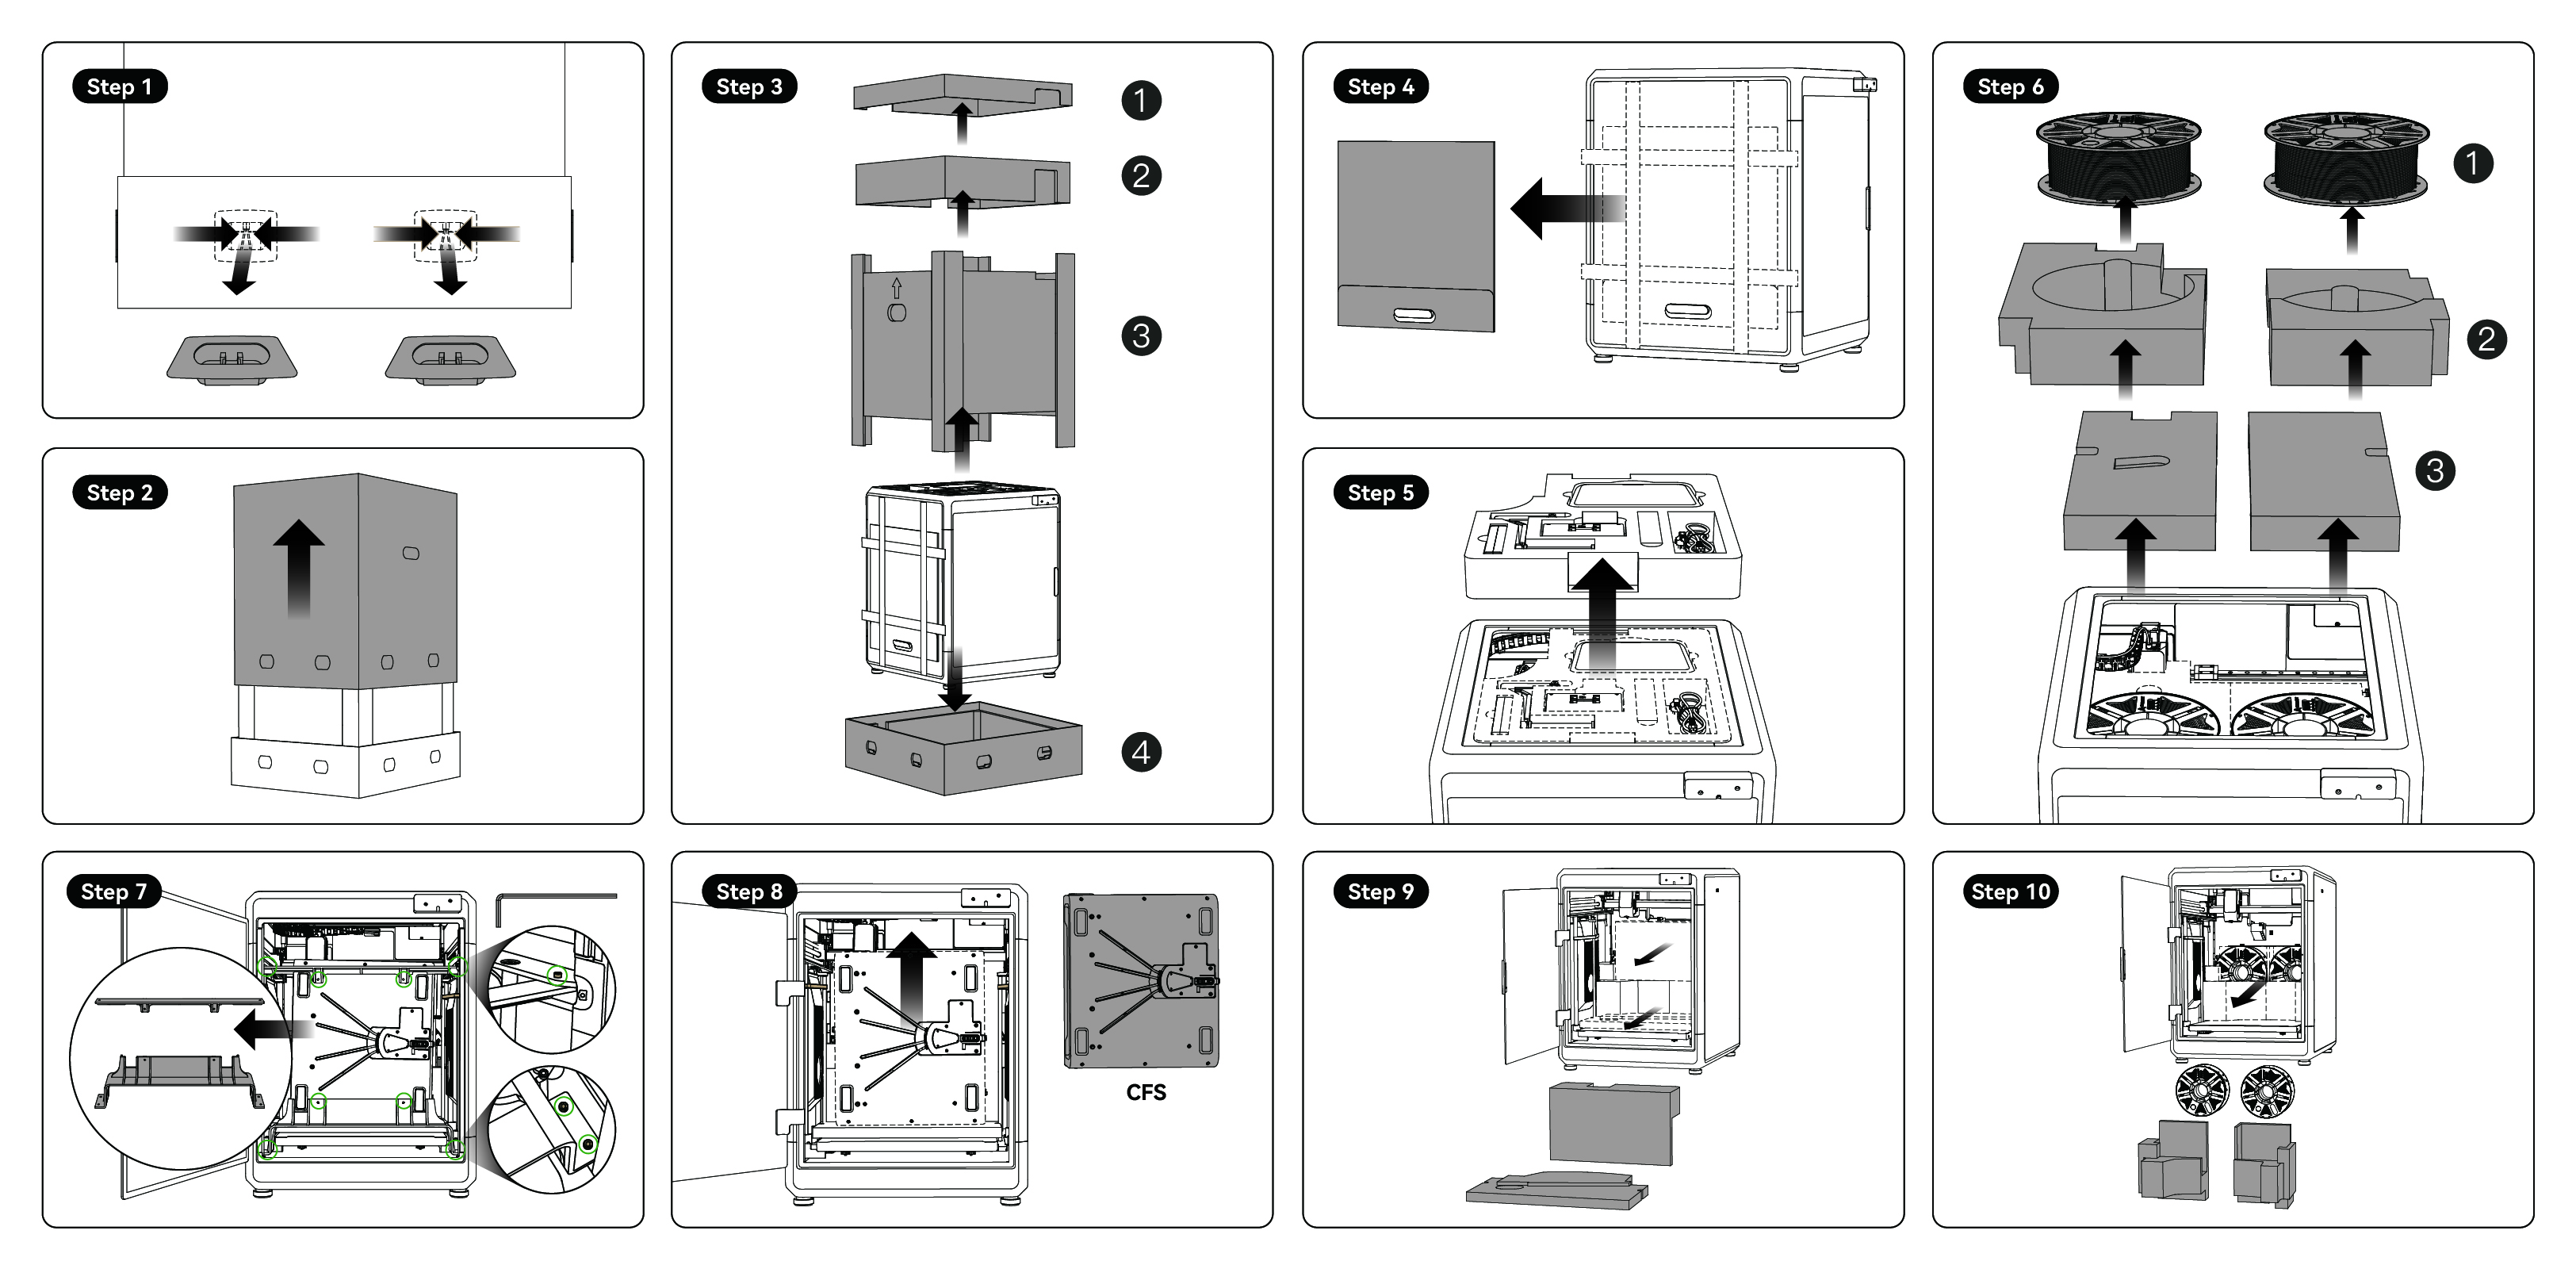
K2 Plus Combo Unbox whole steps
¶ 2. Remove the upper covered carton and package materials around the printer
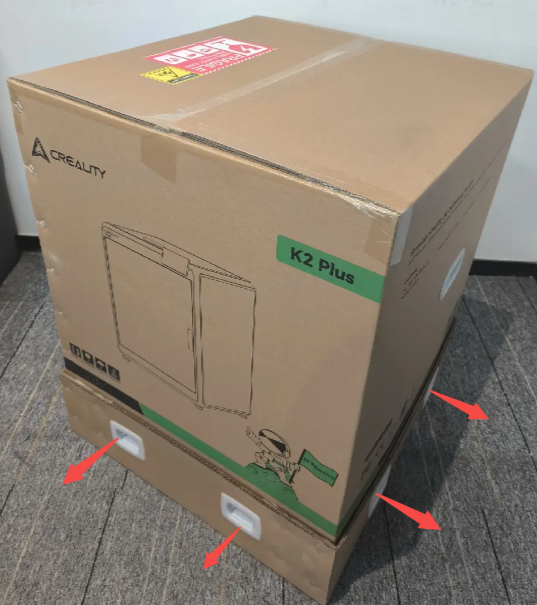
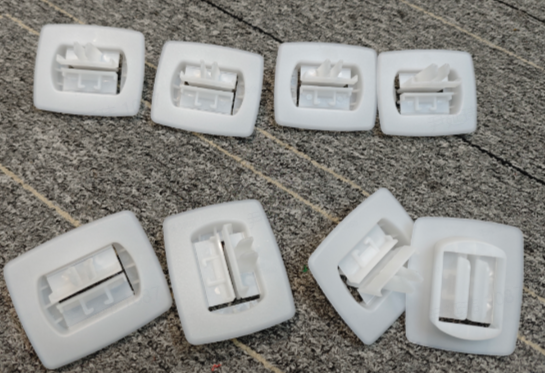
¶ 2.1 Remove the eight clasps in the package
- Remove the clasps.
Pinch the clasp inward and remove it outward.
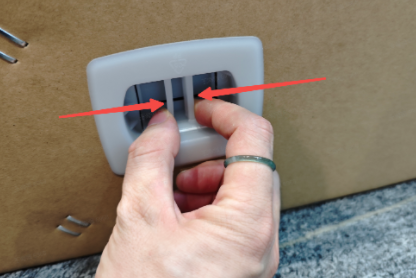
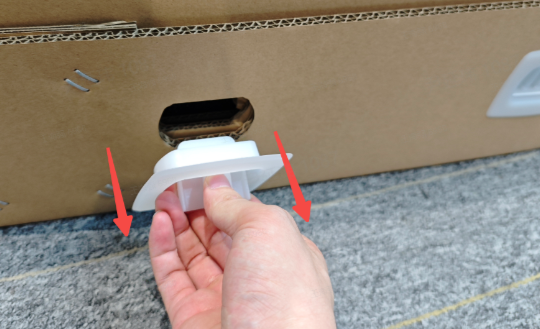
- Remove the eight clasps in turn.
¶ 2.2 Remove the upper covered carton and external foam
- Do not damage the carton with a knife. Grab the carton with both hands and lift it up to remove the top cover.
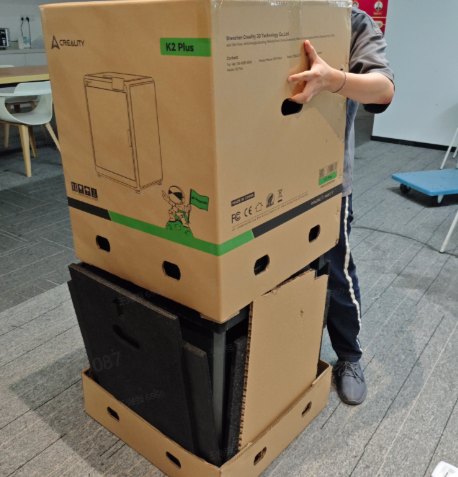
- Remove the package materials and corner posts.
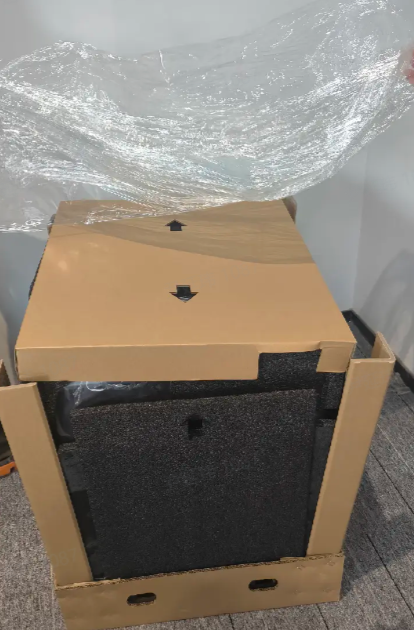
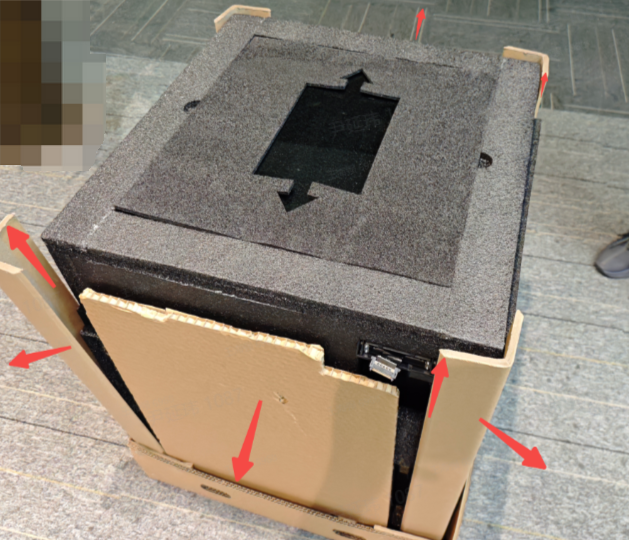
- Remove top glass package.
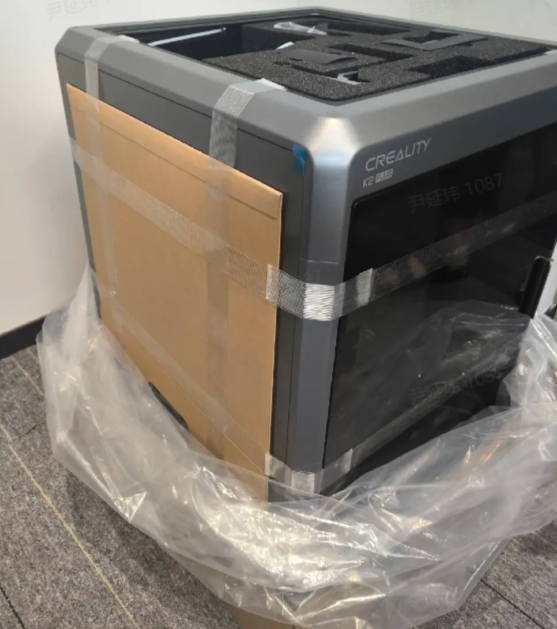
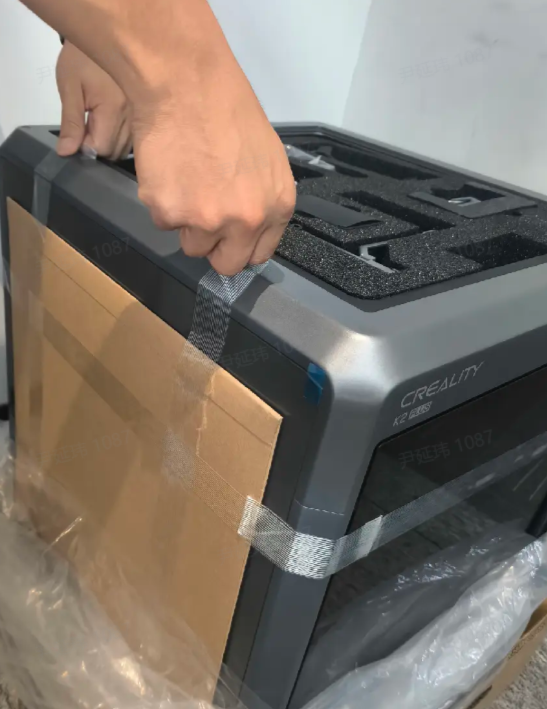
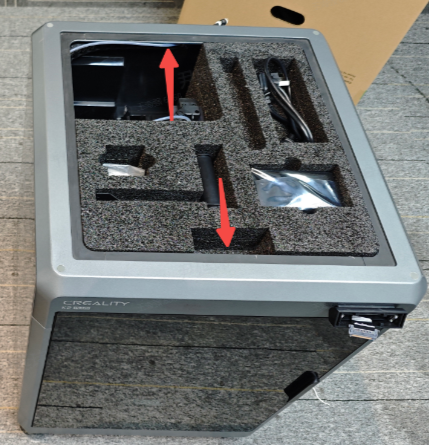
- Follow the arrow position to extract tool foam.
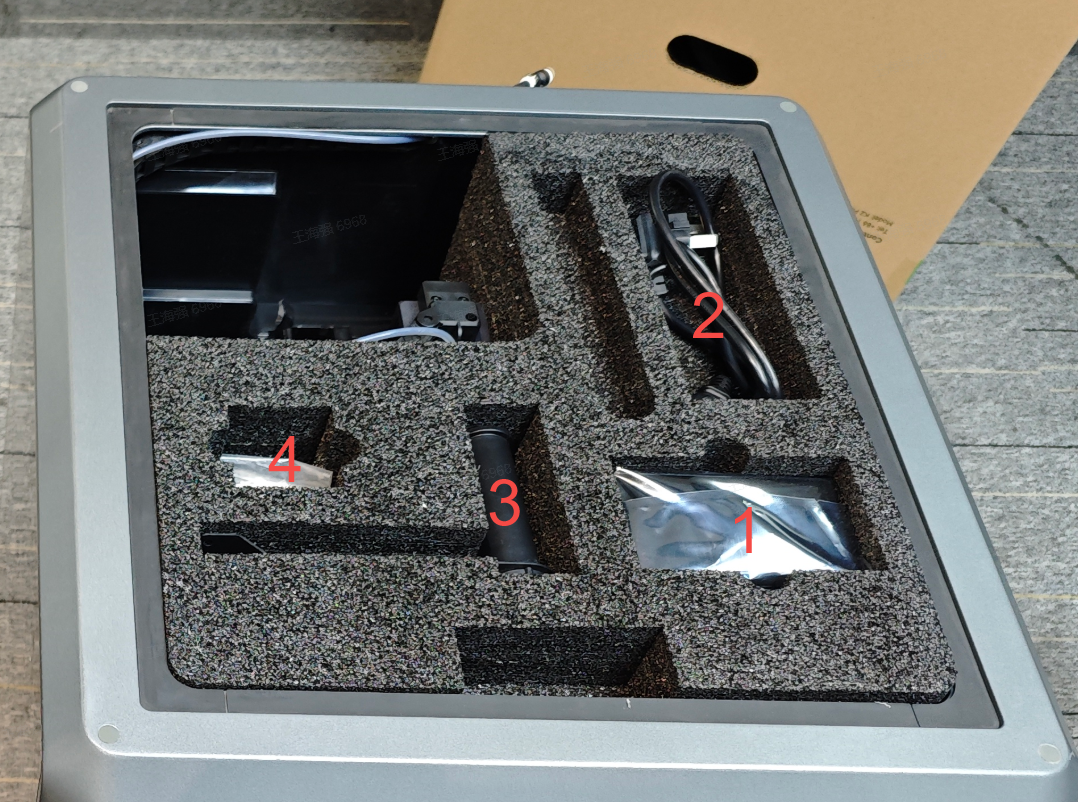
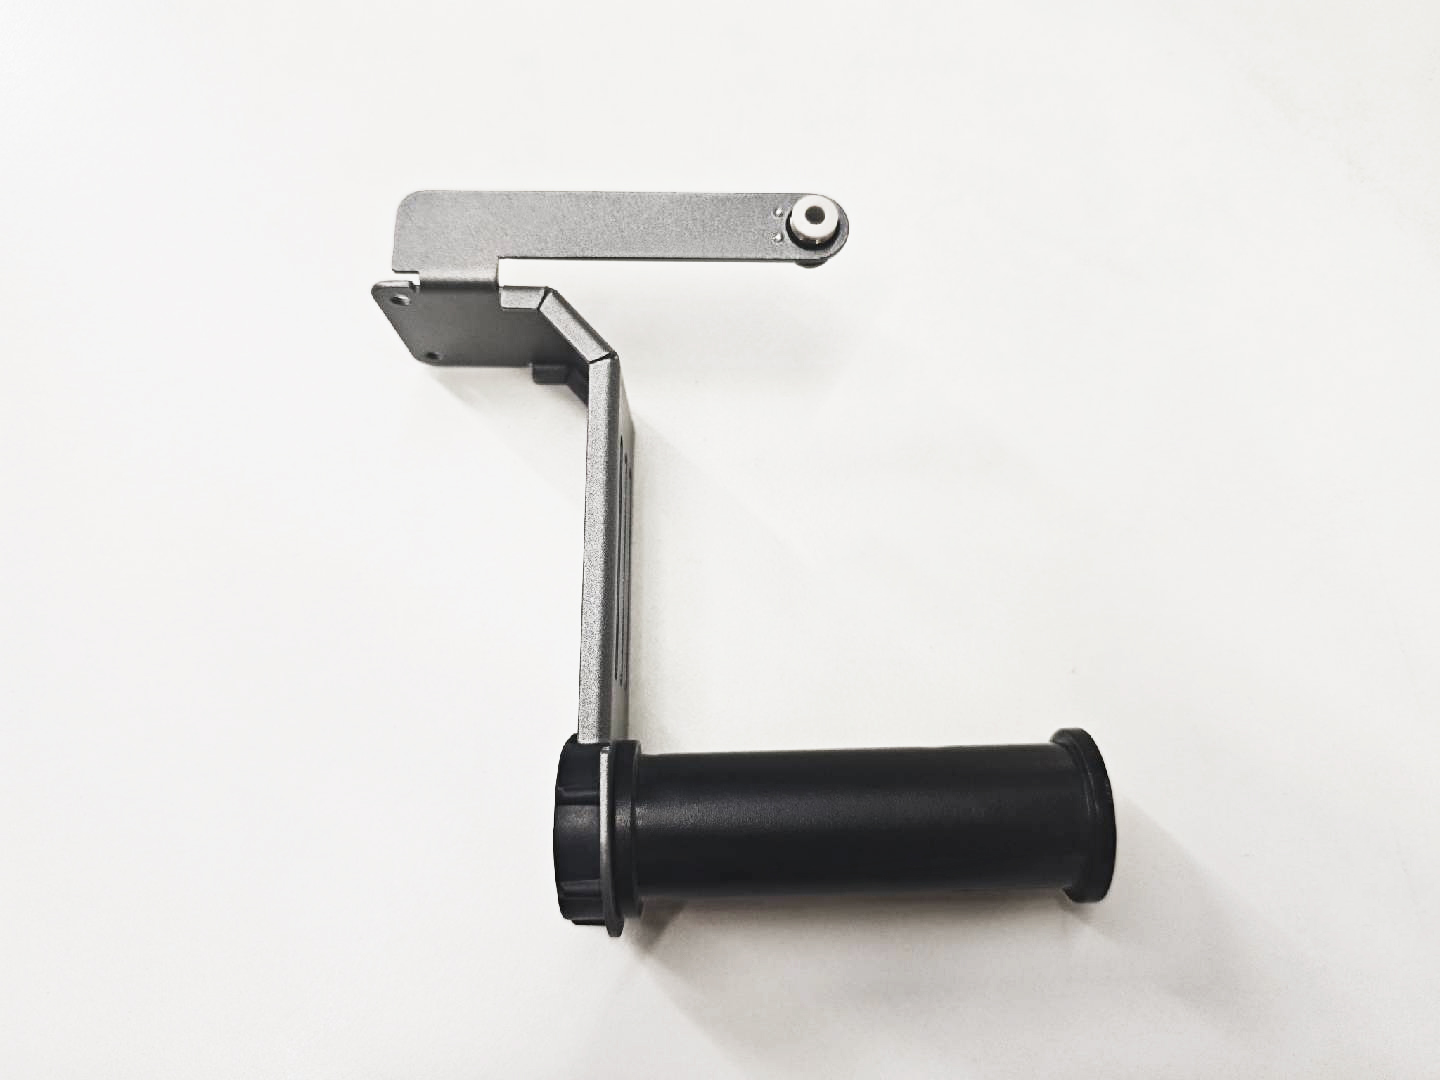
As shown in the pic, 1 is the screen, 2 is the power cord, 3 is the spool holder, 4 is the screws for spool holder.;
¶ 3. Remove packaging material inside the printer
¶ 3.1 Remove the CFS transport fixing bracket and take out the CFS
- Remove 6 screws from CFS transport bracket
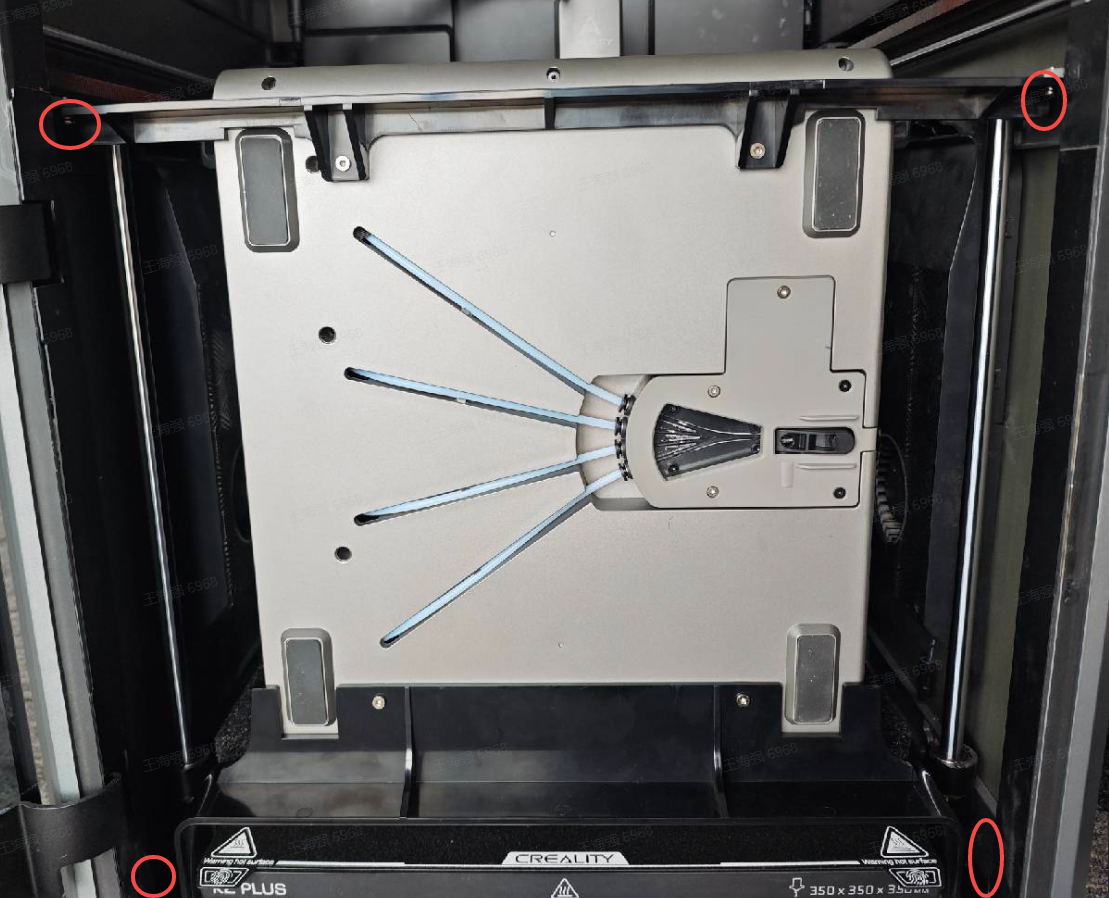
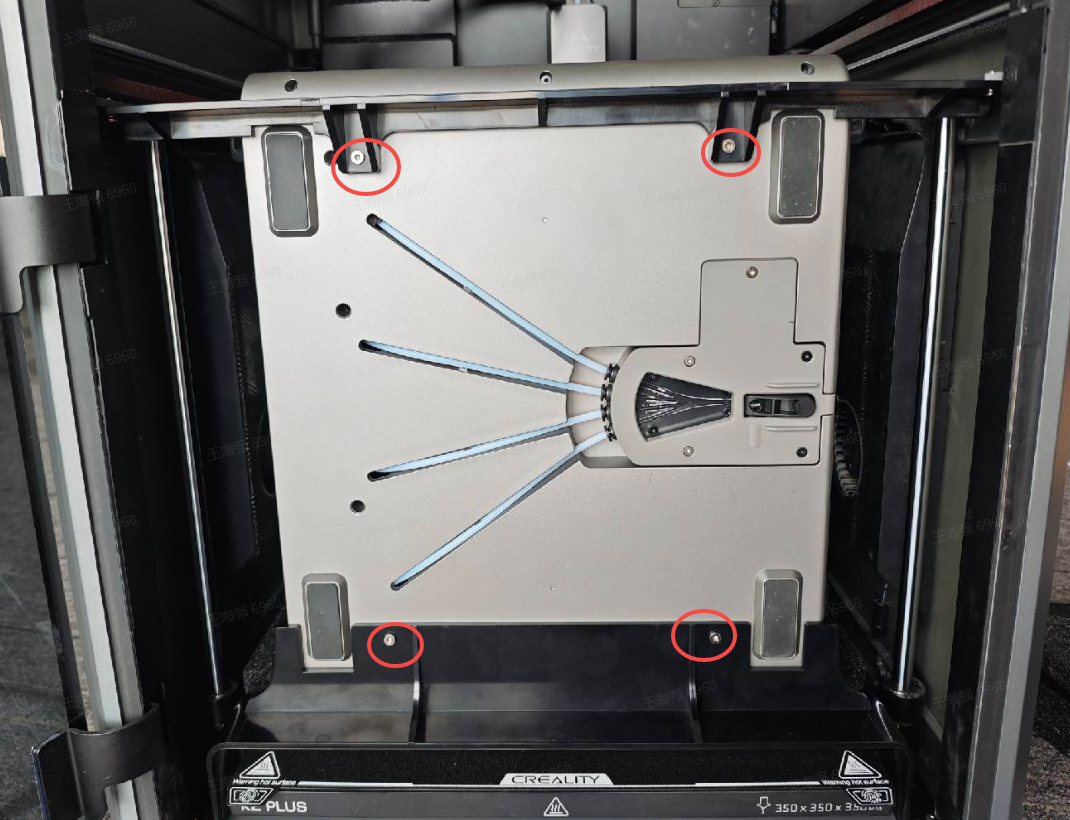
- Remove 4 CFS fixing screws; then take out the CFS transport bracket, then take out the CFS.
¶ 3.2 Remove foam inside the printer
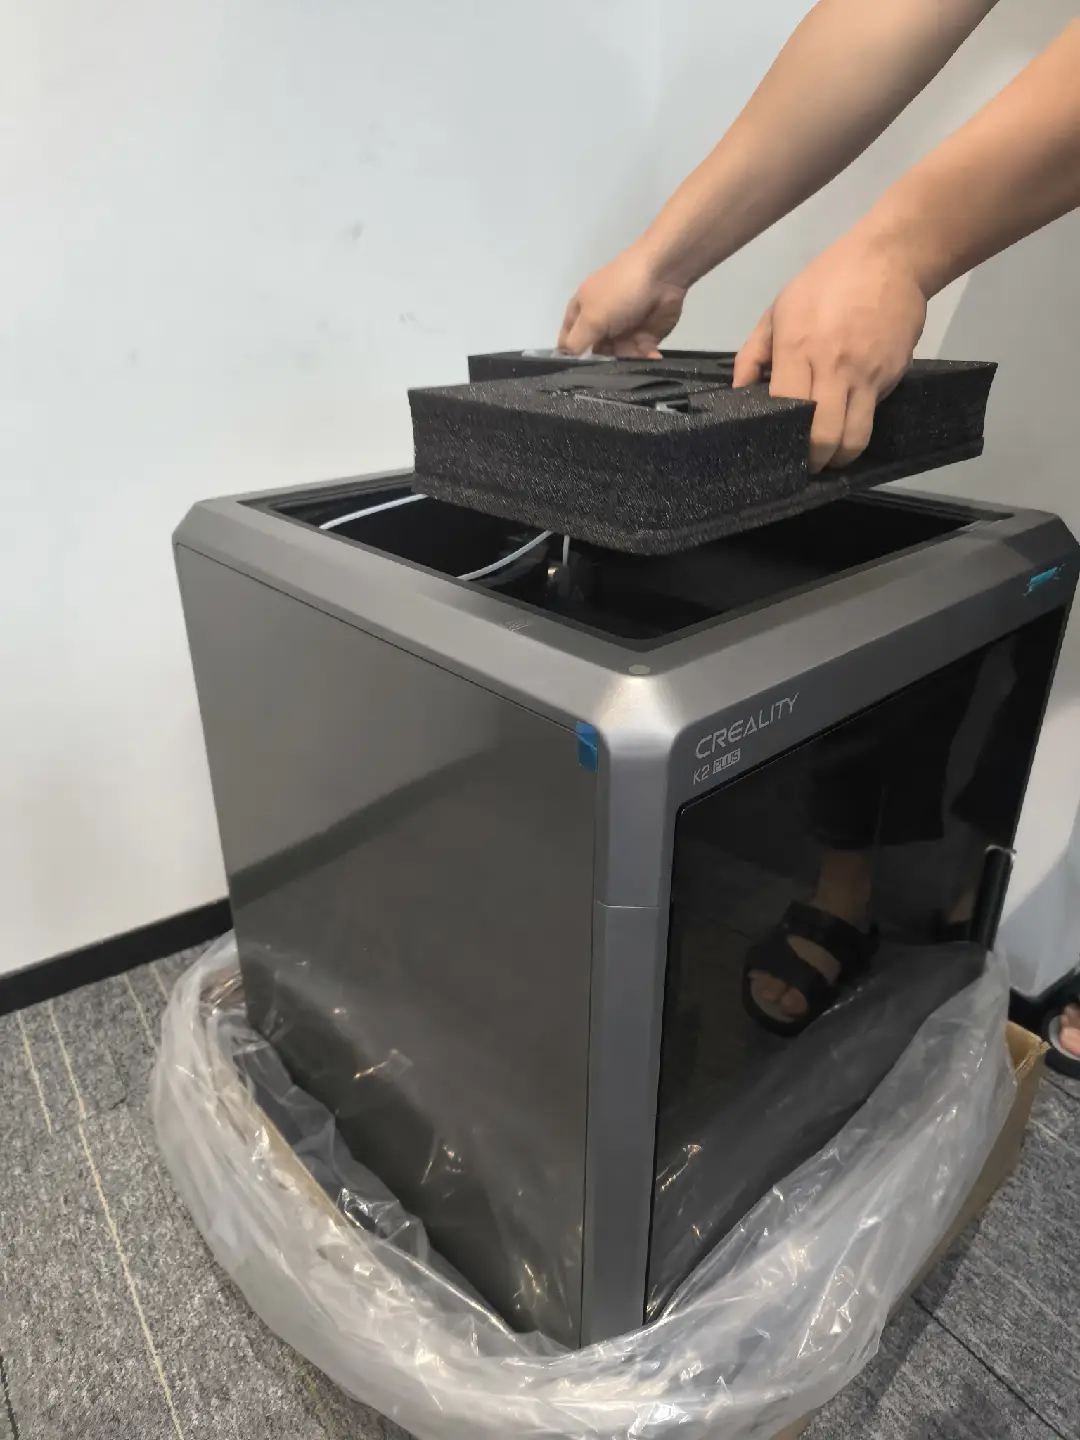
- Take out the top of the machine to foam.
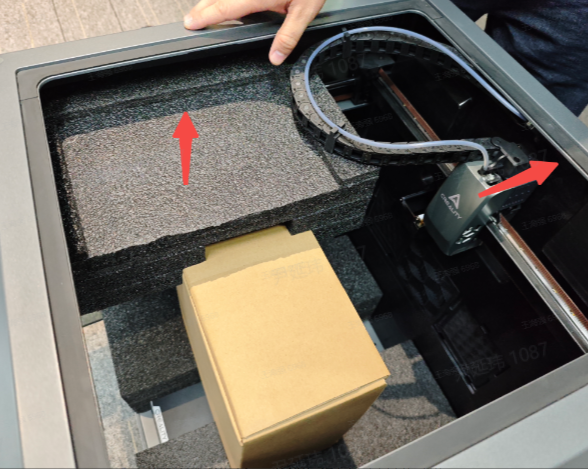
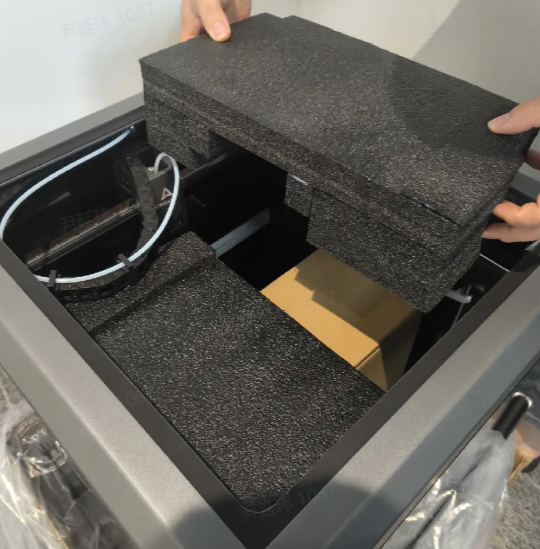
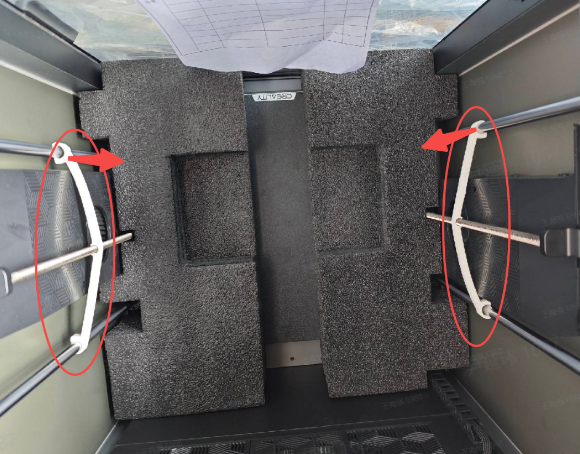
- Take out the two foams above the accessory box
First push the extruder to the back plate
Then remove the foam
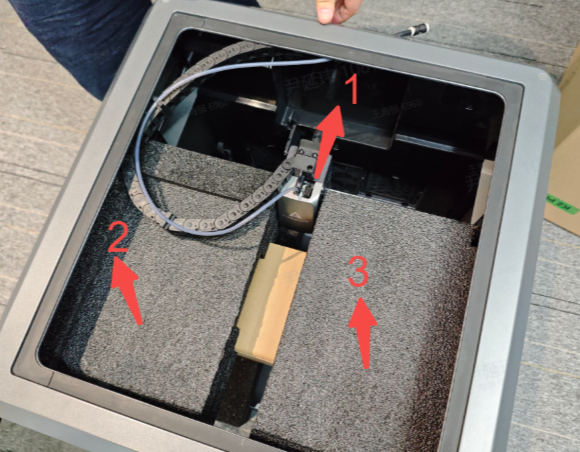
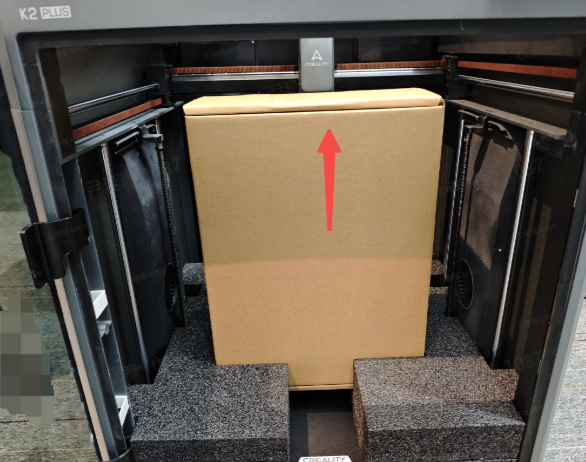
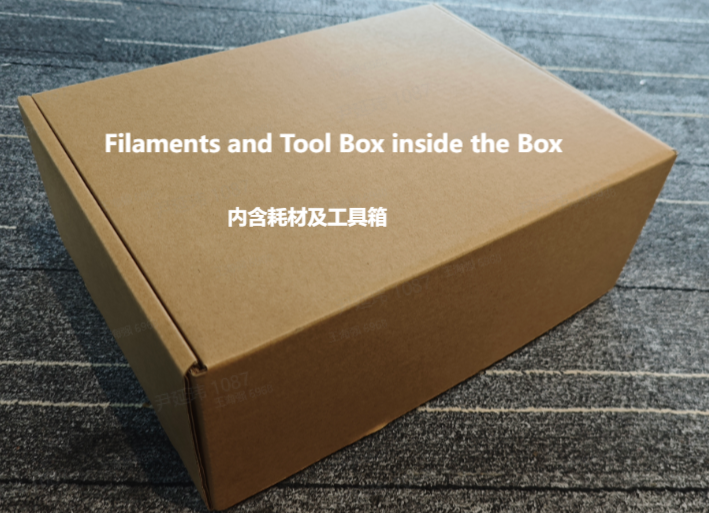
- Take out the accessory box and remove the Z-axis screw fastener
The accessory box comes with a roll of filaments and tool box.
Remove the Z-axis Screw Fastener
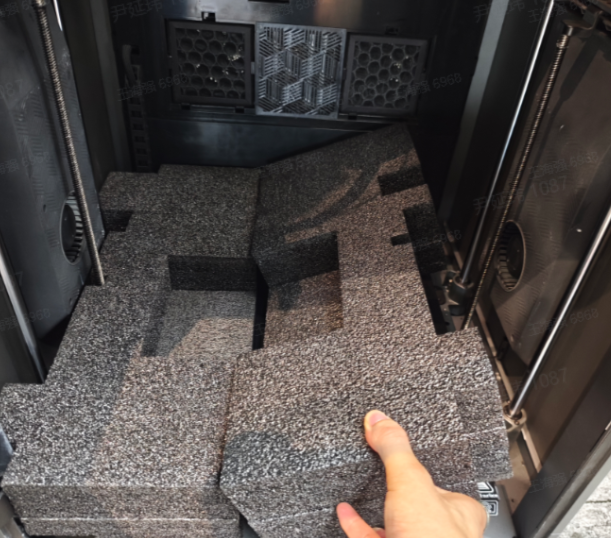
- Remove two hot bed foams.
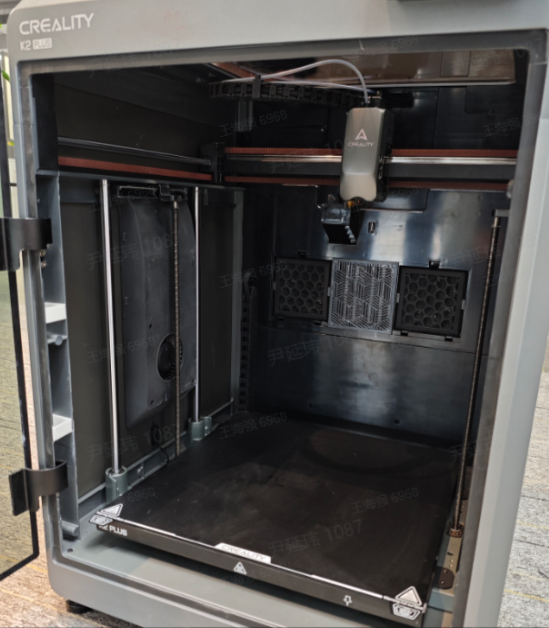
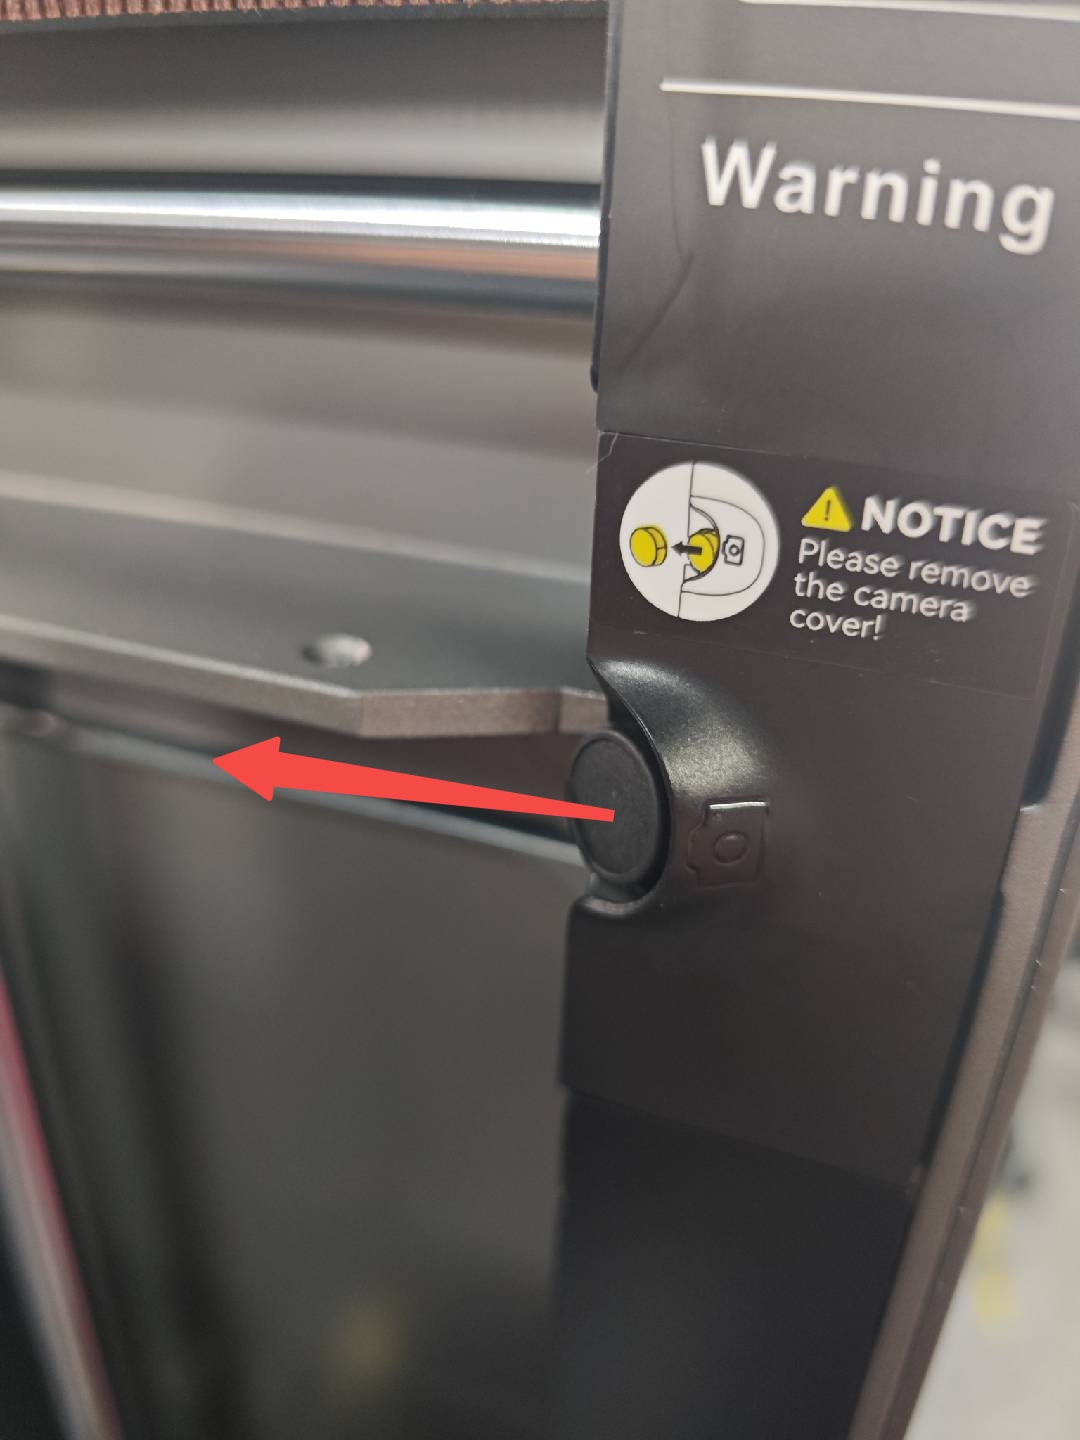
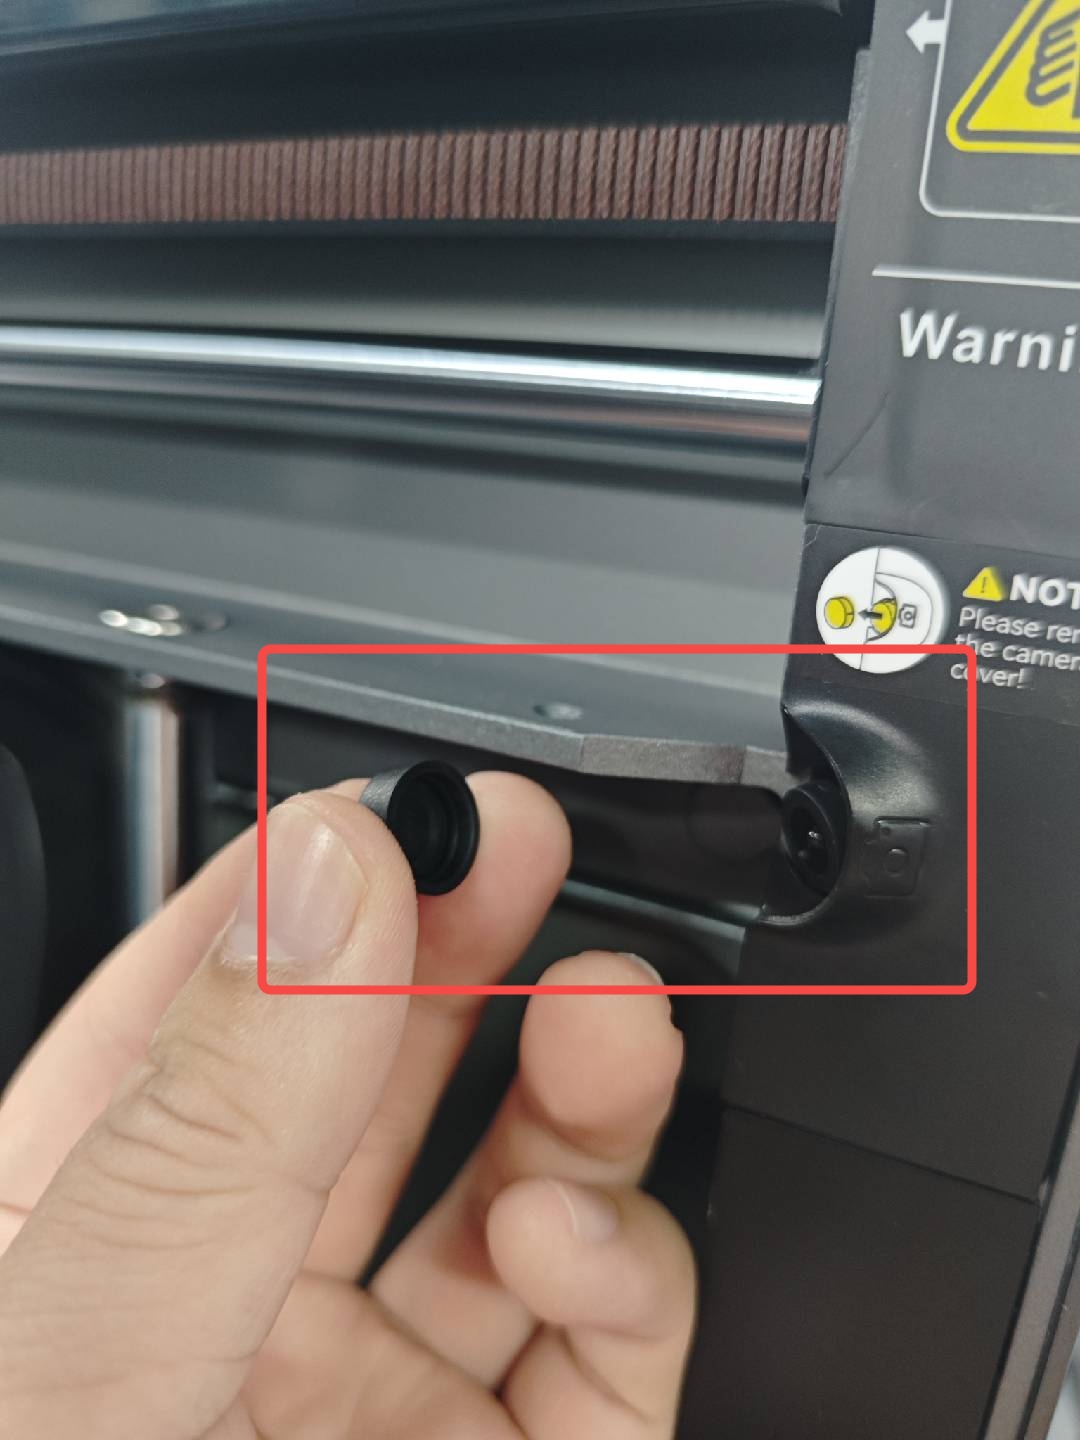
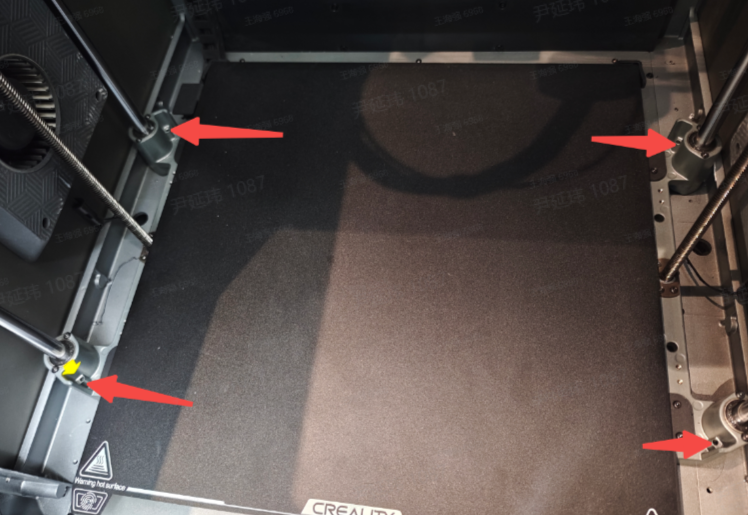
¶ 3.3 Remove Camera Protection Cover
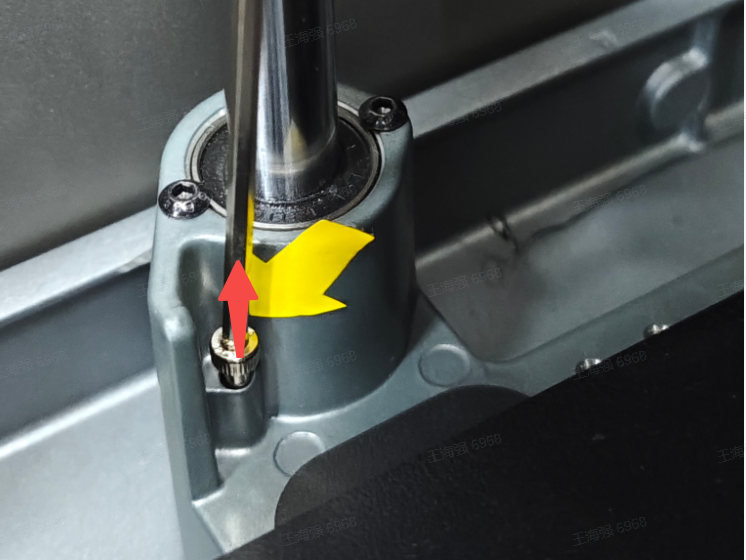
Removing the four hot bed locking screws.
There are four locking screws in total, which are removed respectively by using the L wrench.
¶ 4. Install Accessories
¶ 4.1 Install the screen base
- Find the mounting contact surface
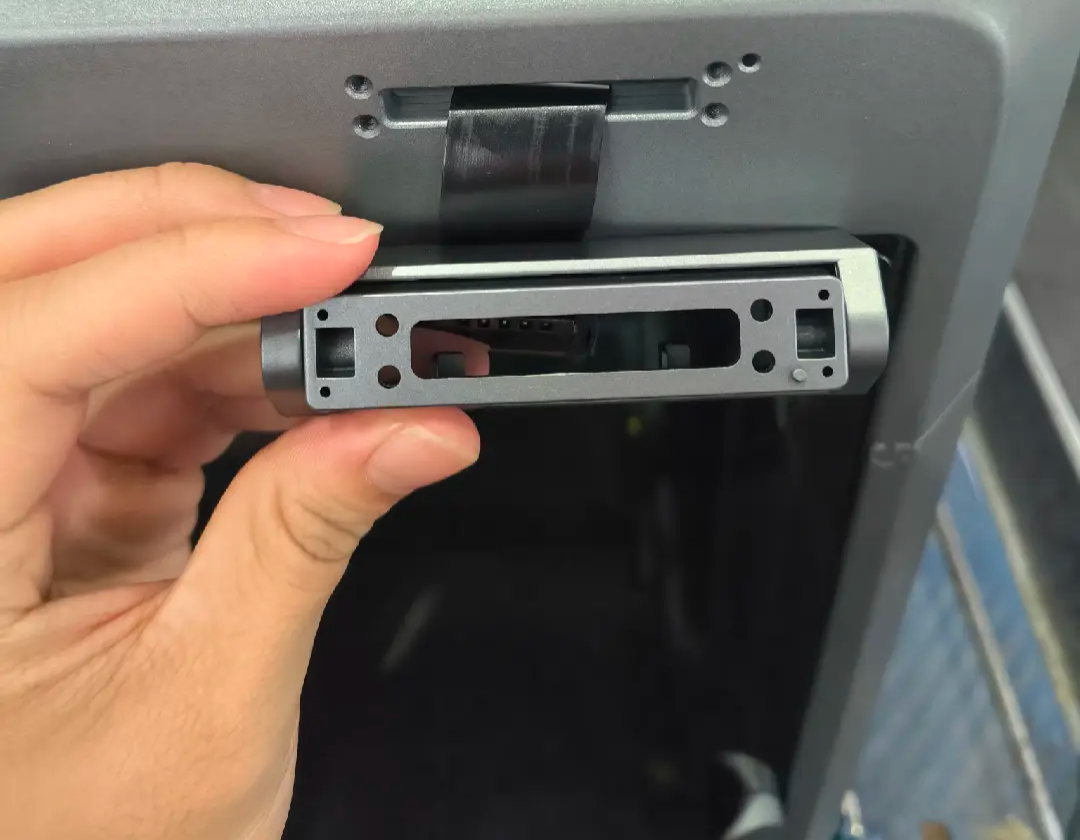
- Take the cable out of the slot
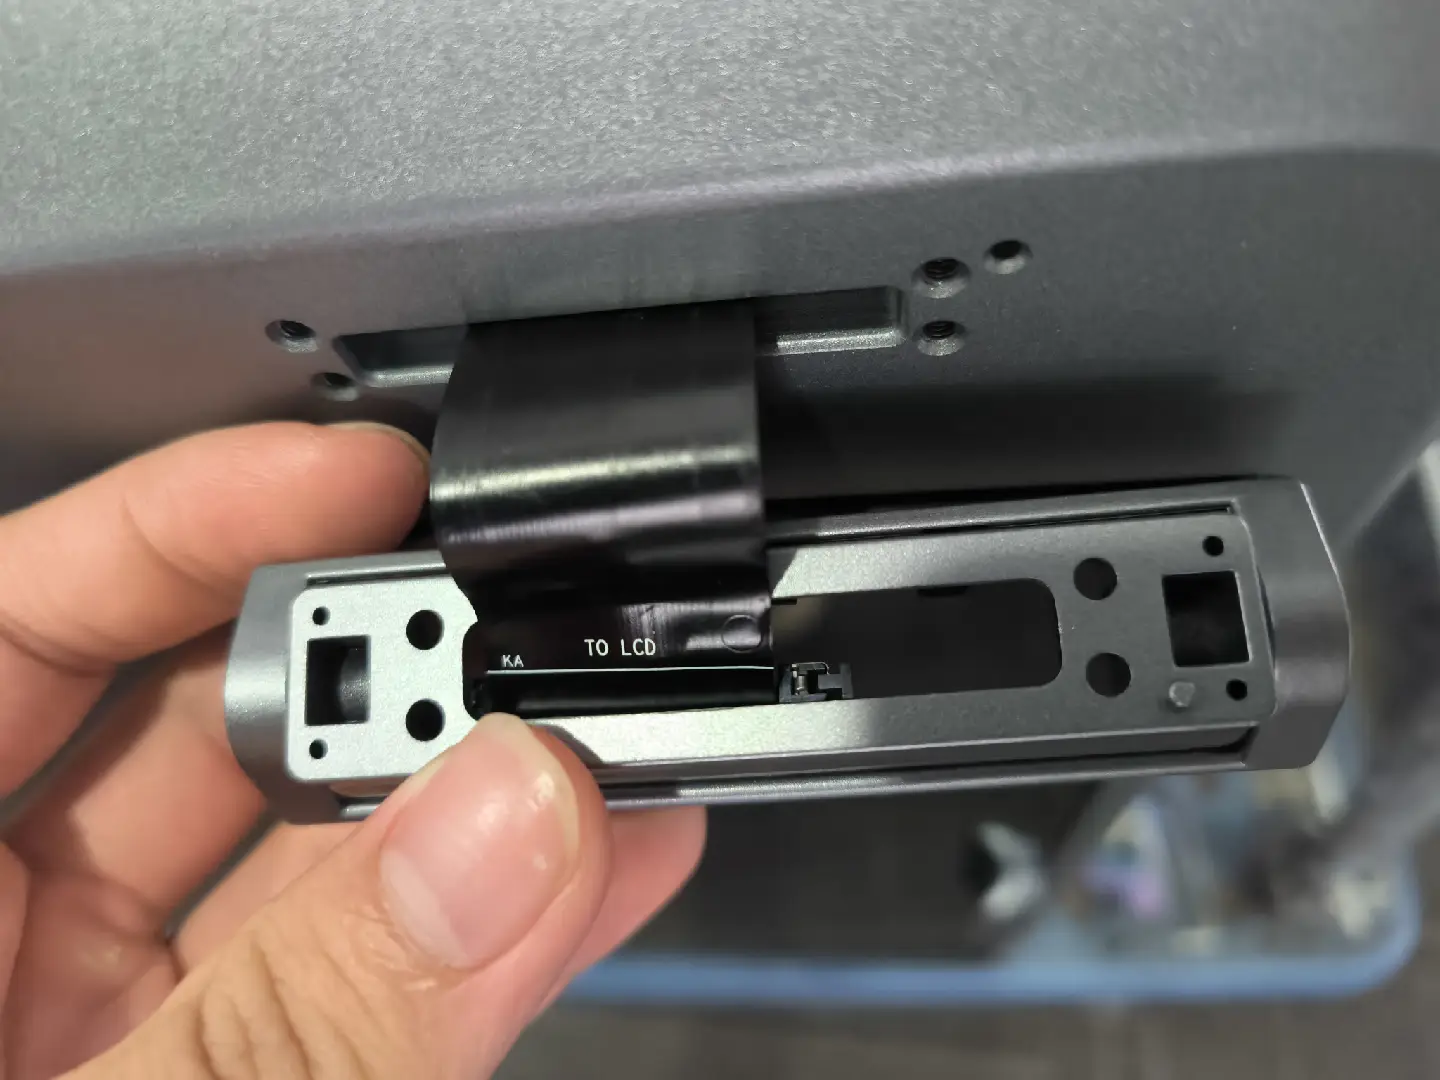
- Find the reserved hole location
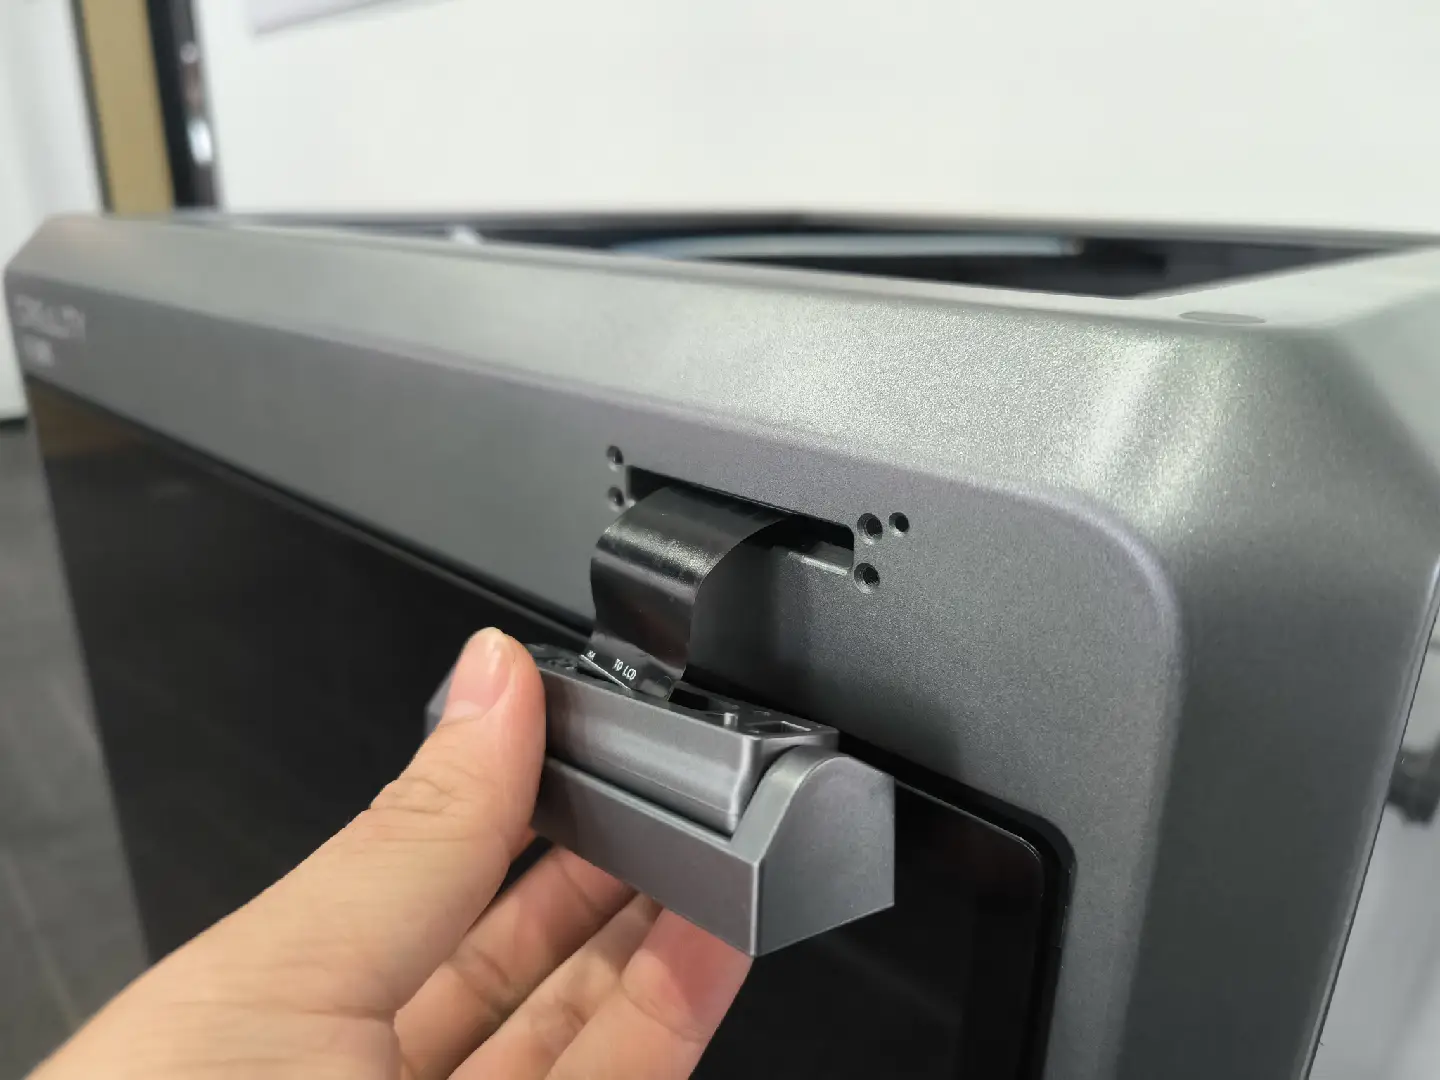
- Install the four fixing screws.
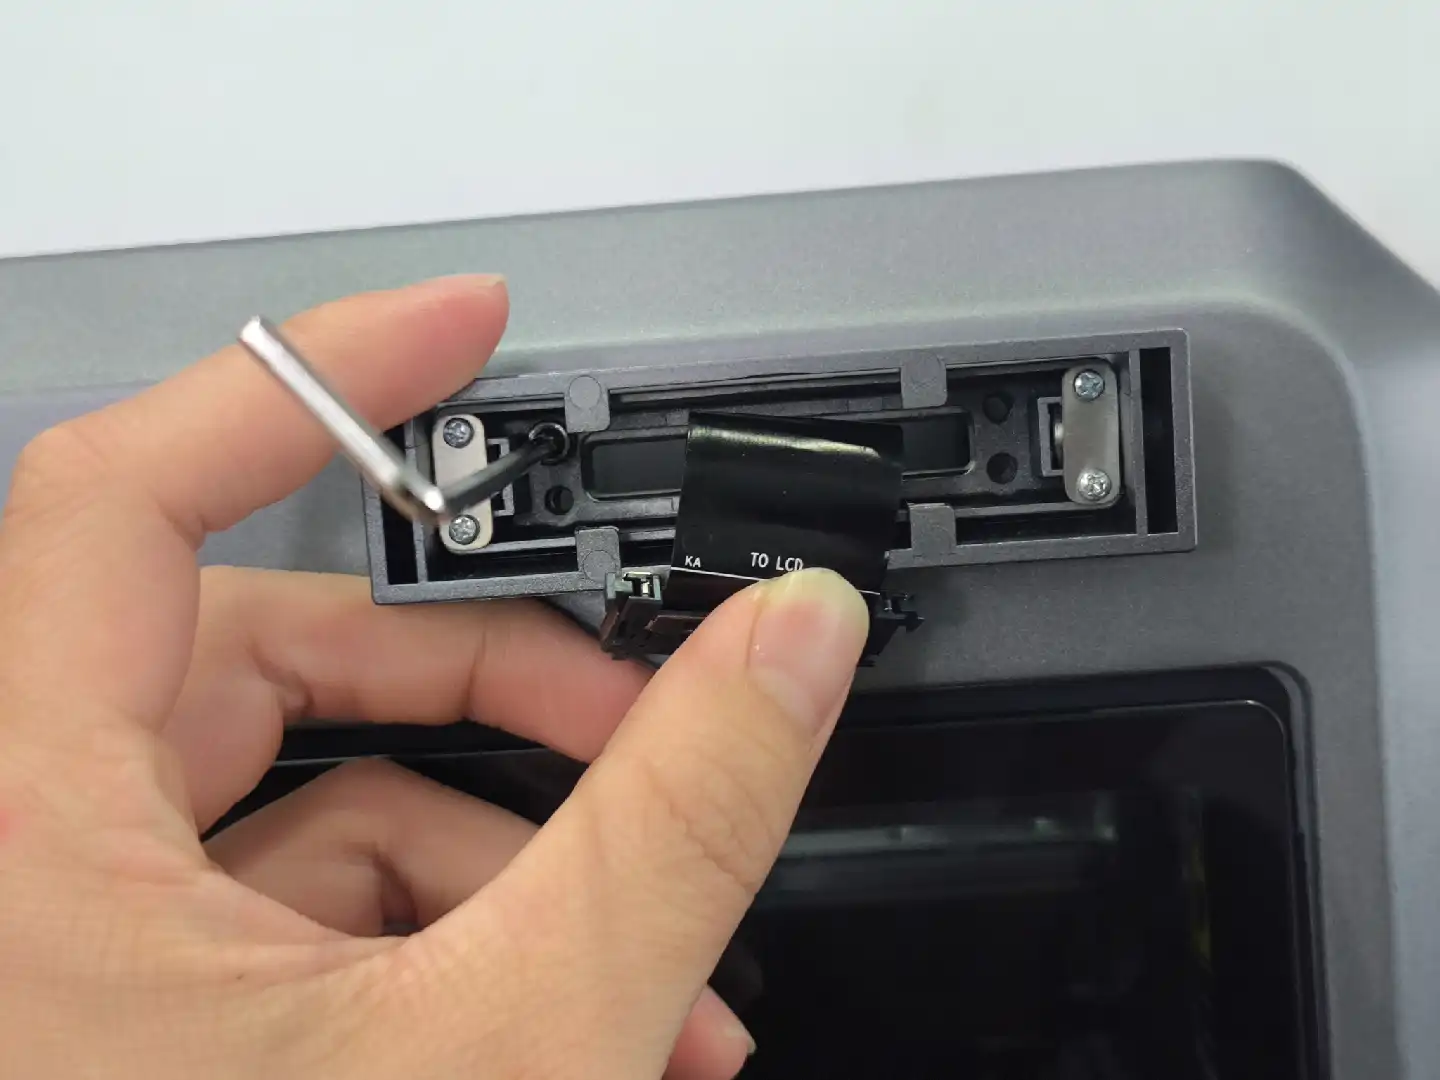
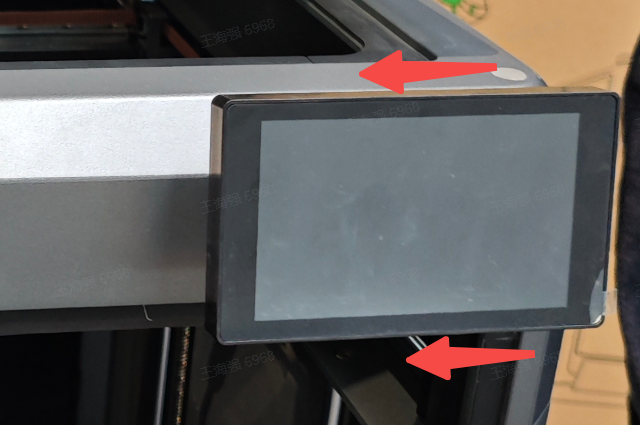
¶ 4.2 Install the screen
- Connect the screen cable
Note: The slotted side is facing down, press to connect
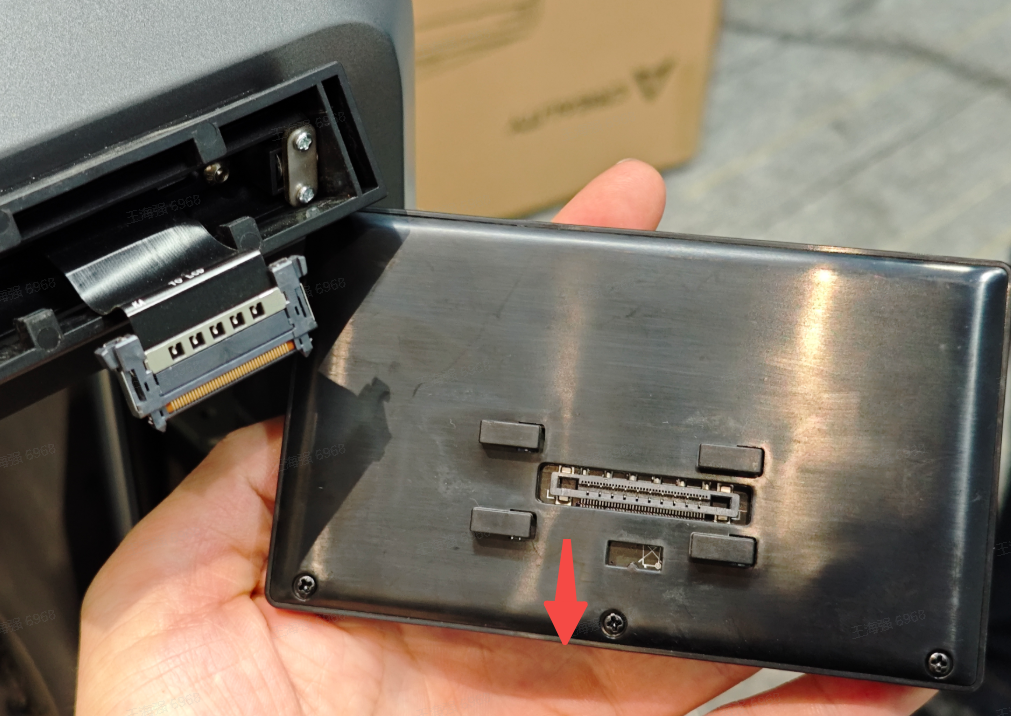
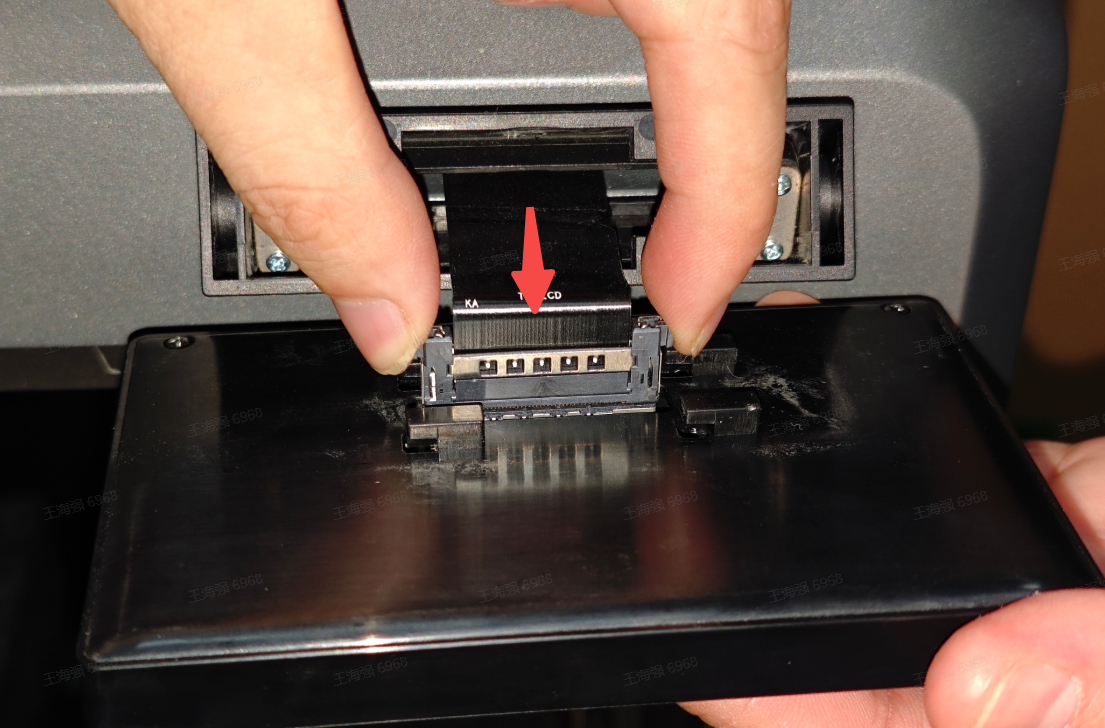
- Insert the screen into the screen slot
Align the screen card and gently push to the left to lock it
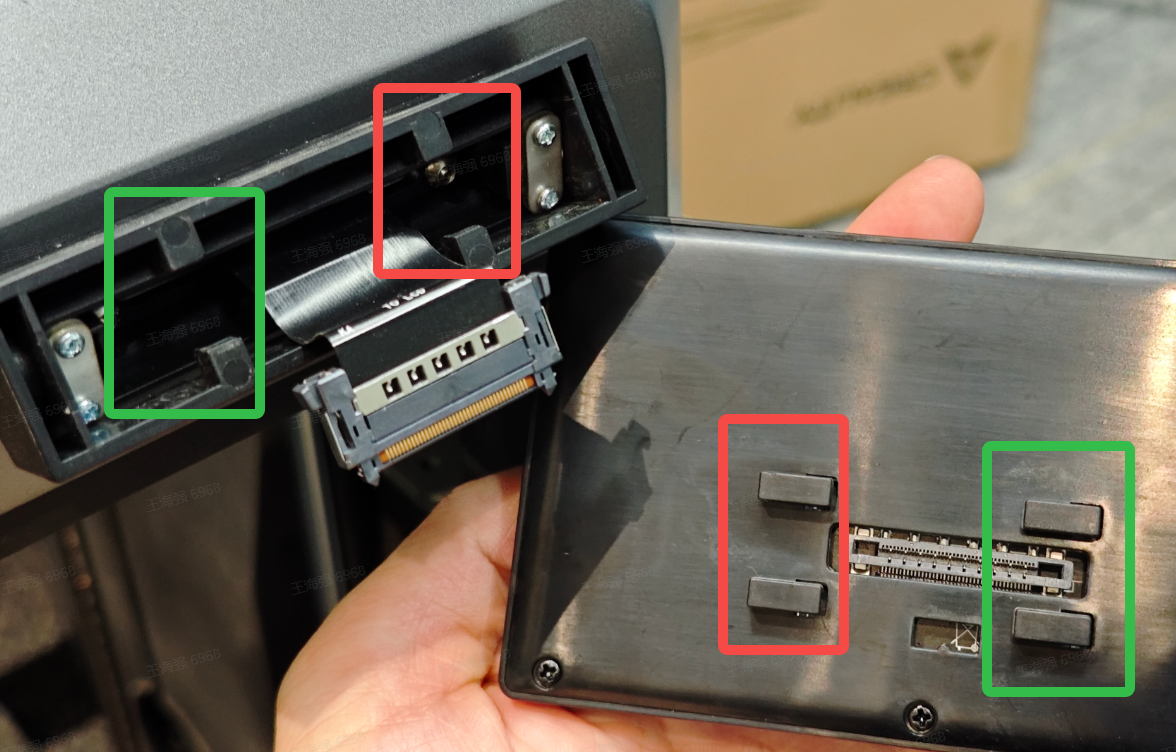
¶ 4.3 Install the external spool holder
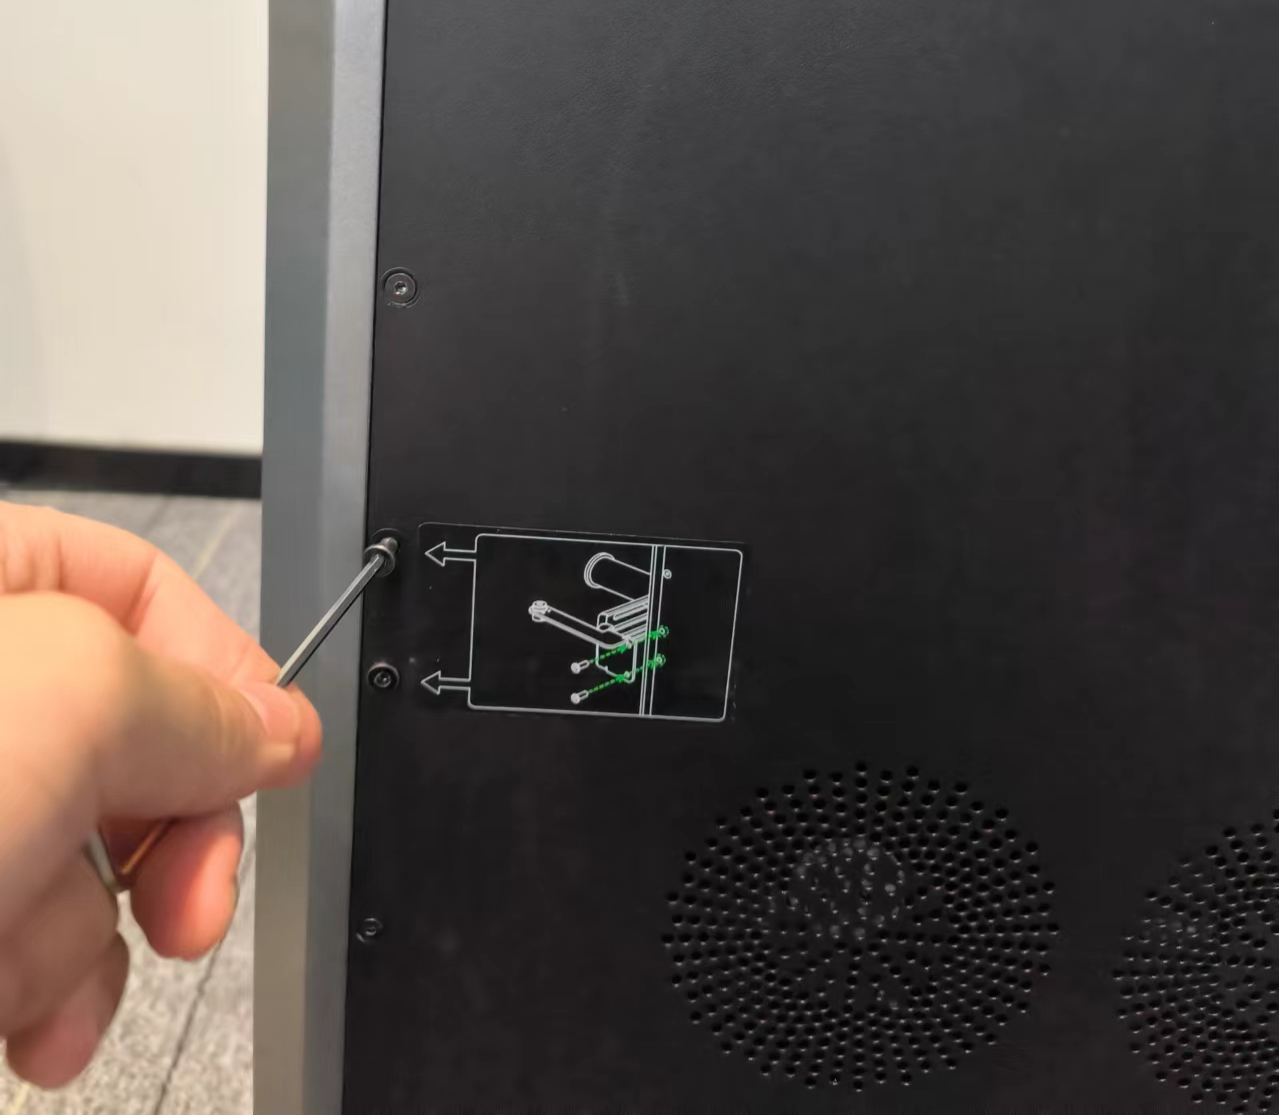
- Remove the two reserved fixing screws
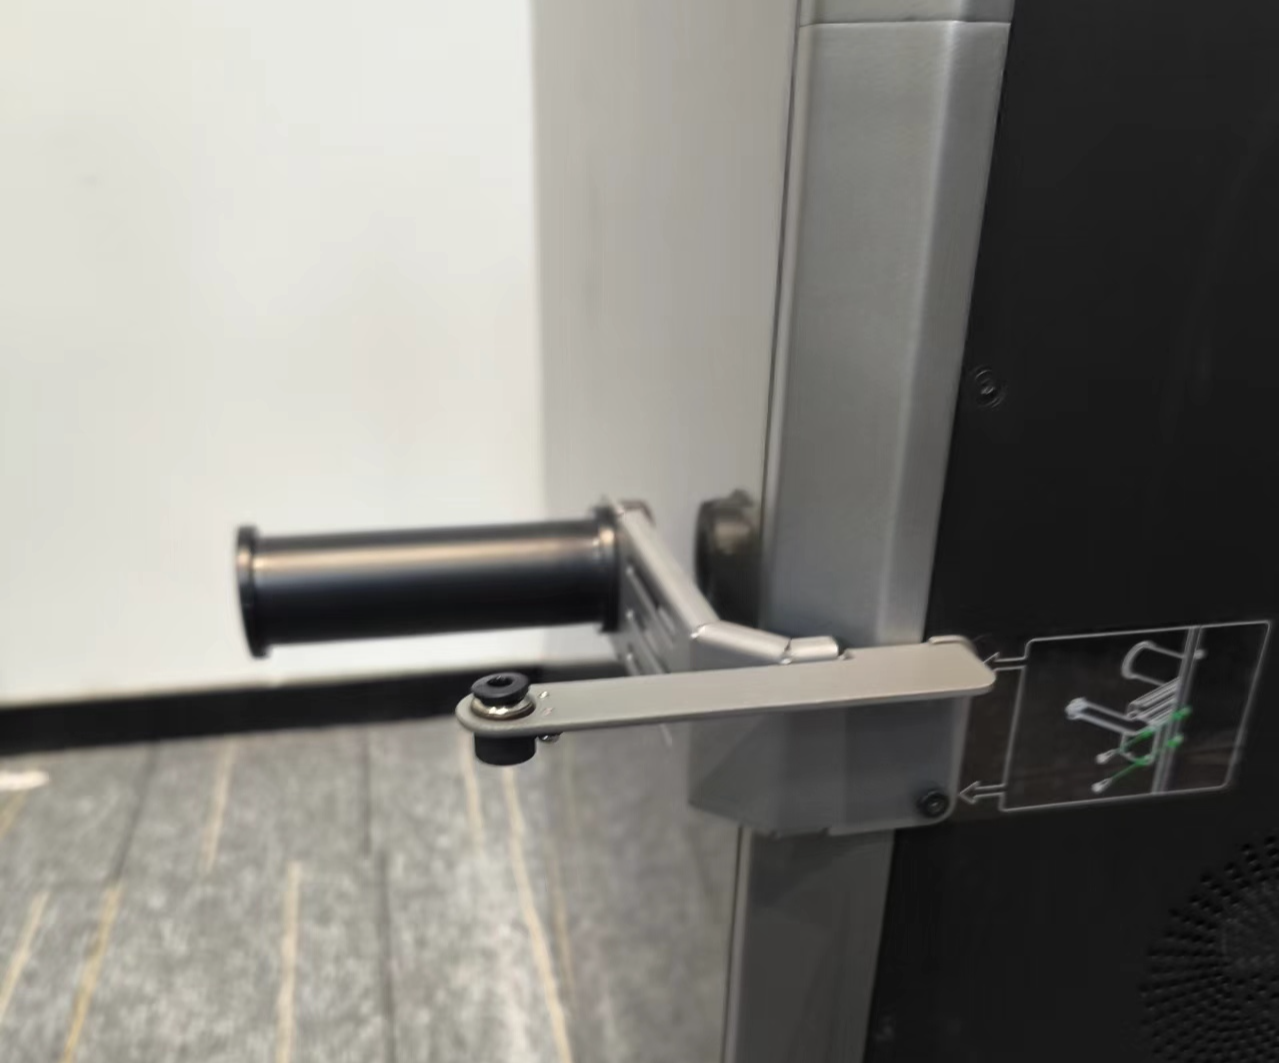
- Take out the external rack and lock it with two screws.
¶ 5. Connect CFS
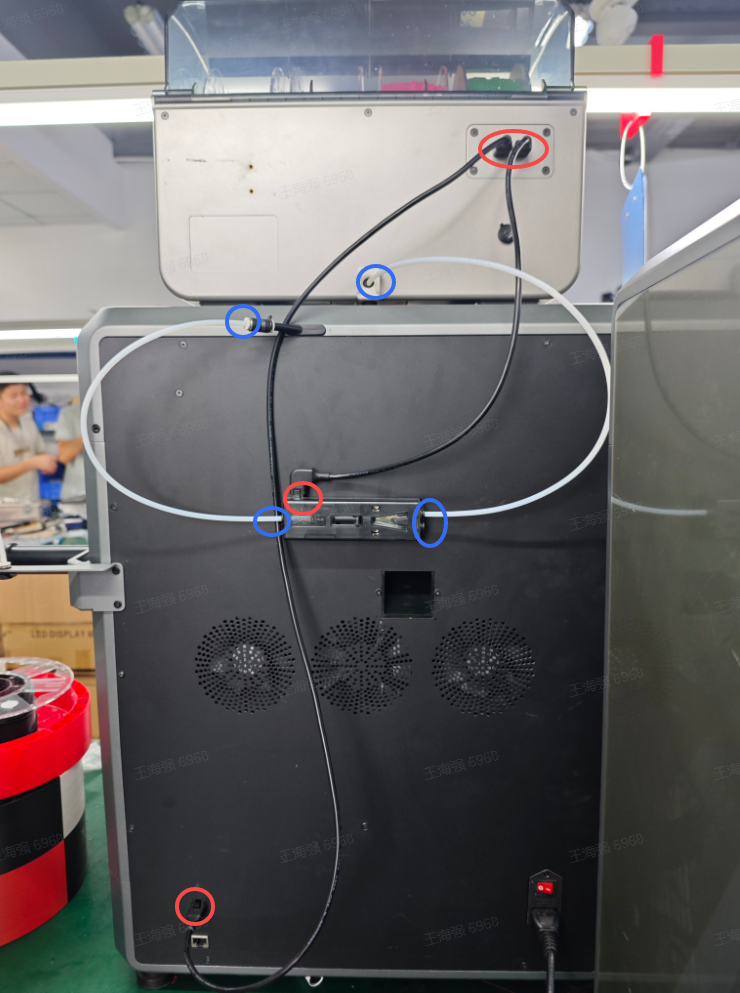
The red circle indicates the 485 cable connection
The blue circle indicates the teflon tube connection point
¶ 5.1 Install the buffer
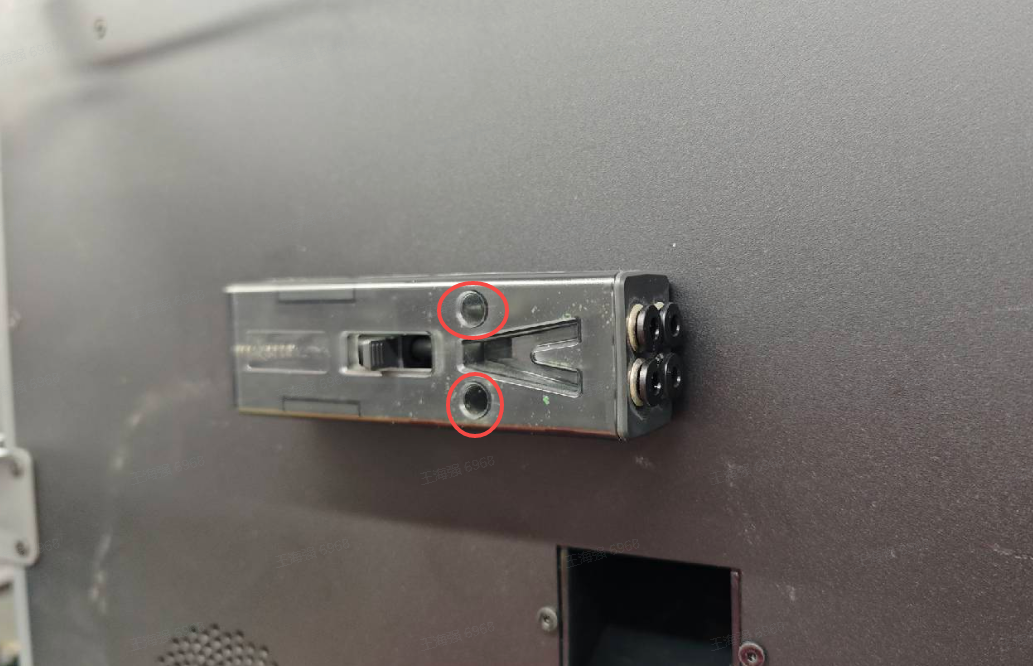
Install the buffer on the back of the printer and lock it tightly with two screws; pay attention to the direction of the buffer, don't install it in opposite direction.
K2 Plus Combo's buffer screws and its wrenches are installed together.
¶ 5.2 Connect Teflon Tubes
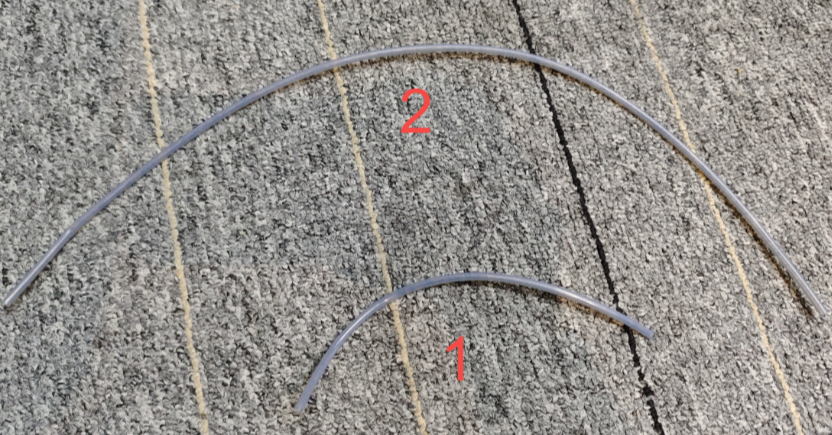
Longer Teflon Tube [50cm] #2 is for connecting CFS hub and buffer.
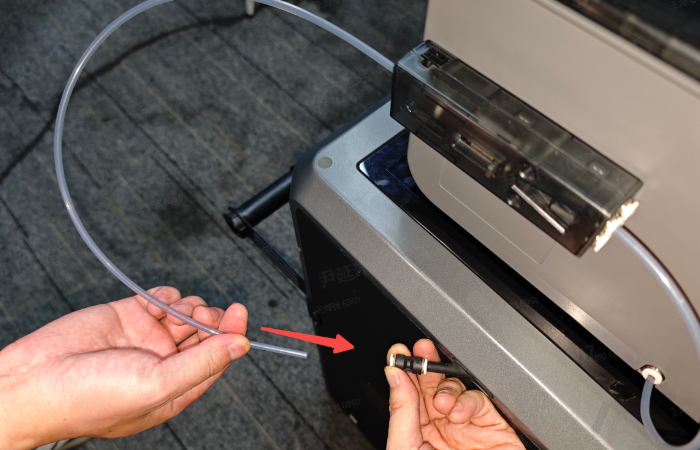
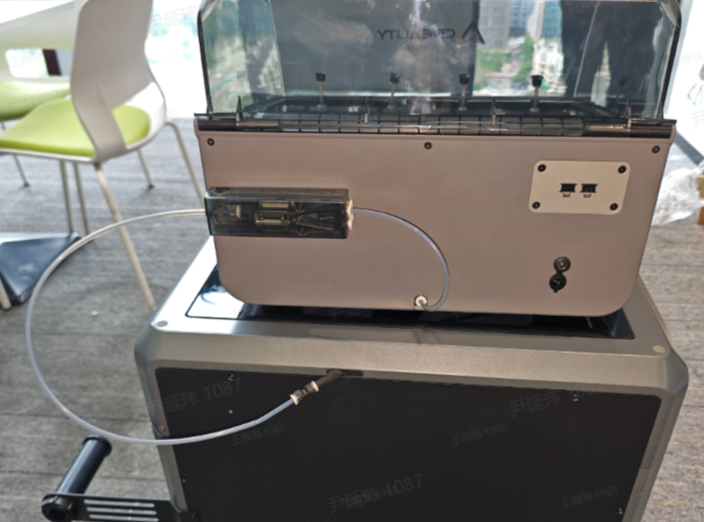
Shorter Teflon Tube [40cm] #1 is for connecting buffer and K2 Plus;
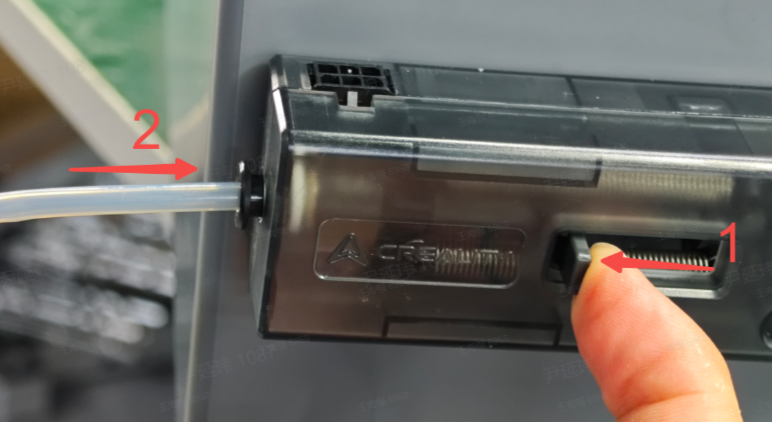
- Connect CFS hub and buffer
Insert one end of the Longer Teflon Tube into the CFS hub Position 1;
Insert the other end into the buffer, position 2; there are four holes in position 2. Insert any one of them.
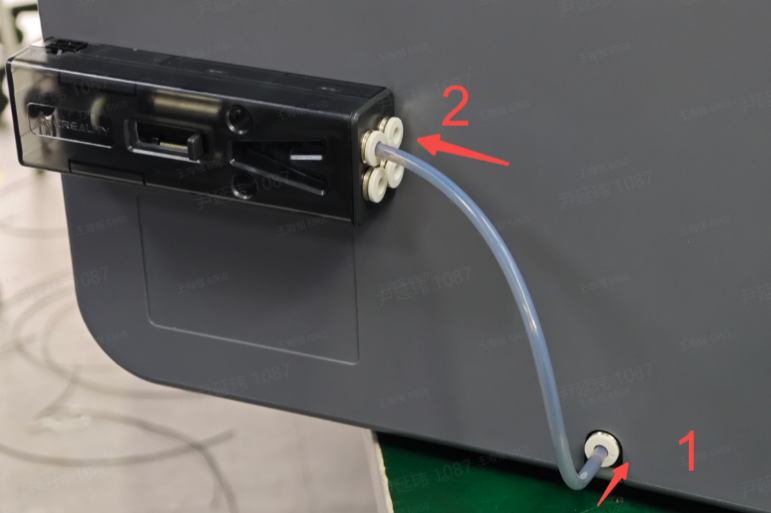
- Connect buffer and K2 Plus
¶ 5.3 Connect the 485 Communication Cable

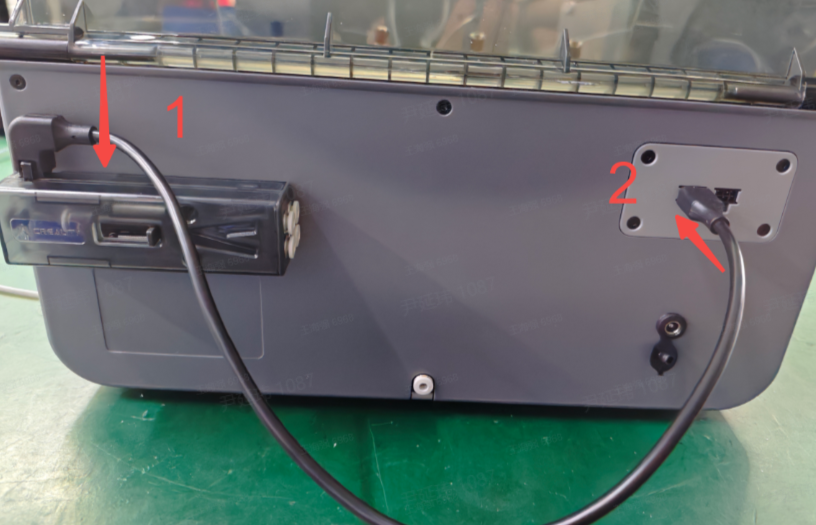
- Connect the CFS to the buffer 485 communication cable
Note: The elbow plug into the dashpot position 1, the straight plug into the CFS position 2
CFS can be plugged into either of the two 485 sockets.
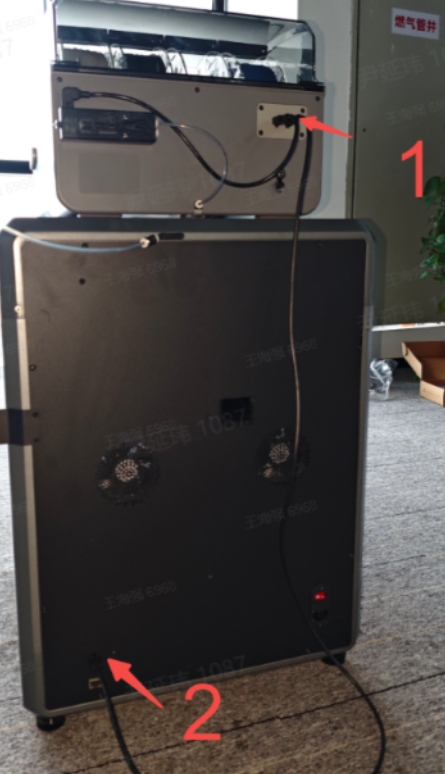
- Connect the CFS to the K2 Plus 485 communication cable
Both ends of this line are 6pin straight head, no positive or negative.
Plug one end into CFS position 1 and another end into machine interface position 2
¶ 5.4 Unpack the desiccant and put it into CFS
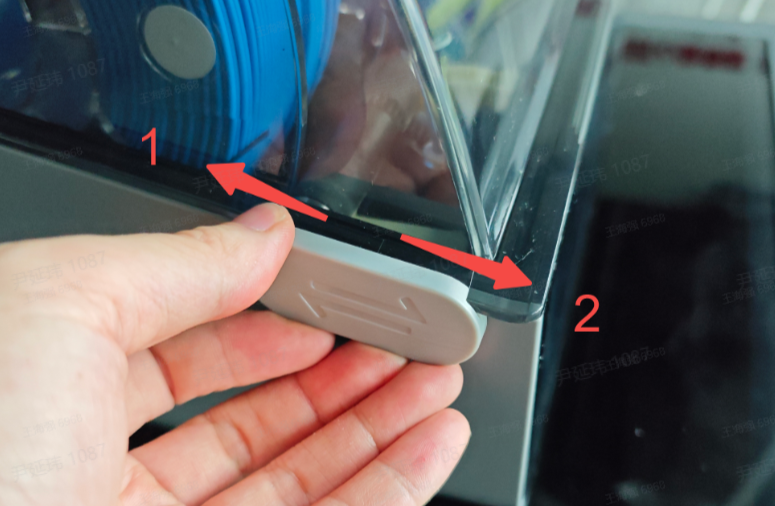
- Open the CFS
Push the CFS lock latches in 1 direction to unlock the CFS
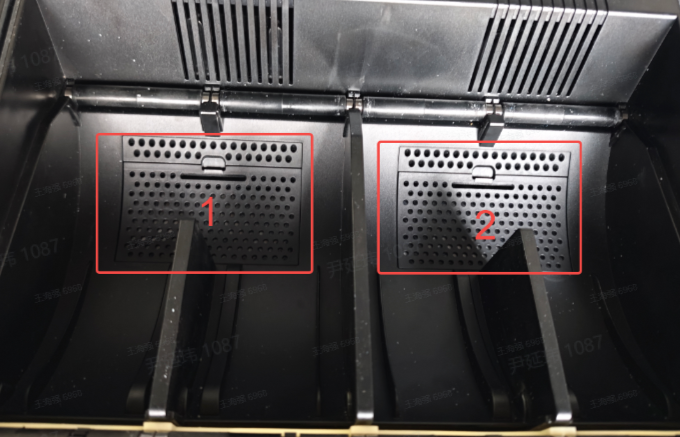
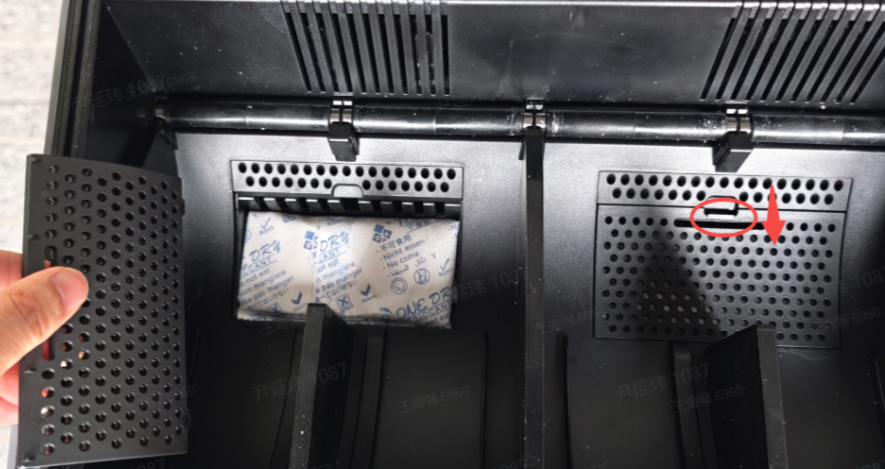
- Open the place where the desiccant is stored and unseal it
¶ 6. Plug in and complete the screen automatic boot program as prompted
¶ 6.1 Follow the on-screen prompts to complete the boot process, which takes about dozen minutes.
- Language Selection
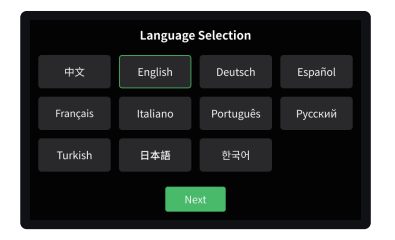
- Agree to the privacy policy
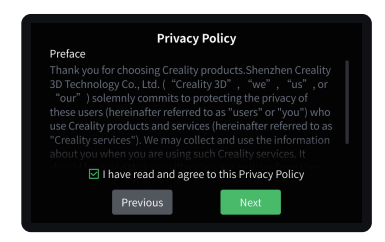
3. Connect wifi
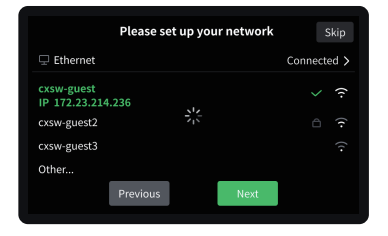
- Set the time zone
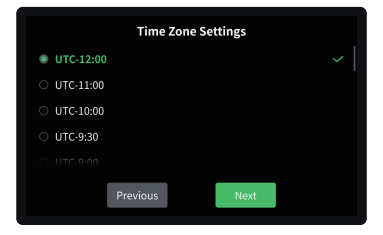
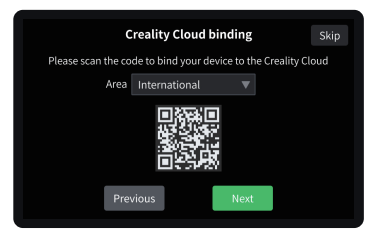
- .Bind Creality Cloud
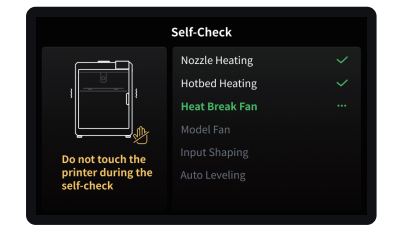
- Click Test and wait for the printer self-test to complete.
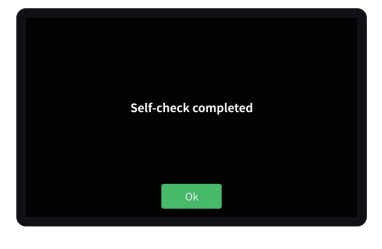
- Completed Self-test and start to use.
¶ 6.2 Load filaments on spool holder
- Hang filaments on external spool holder
.png)
.png)
- Thread the filaments into the teflon tube of the printer and gently push until it cannot be pushed.
.png)
- Click the Edit button at the bottom of the screen
Respectively set filament brand-filament type-filament name
Finally set the filament color and click back to save automatically
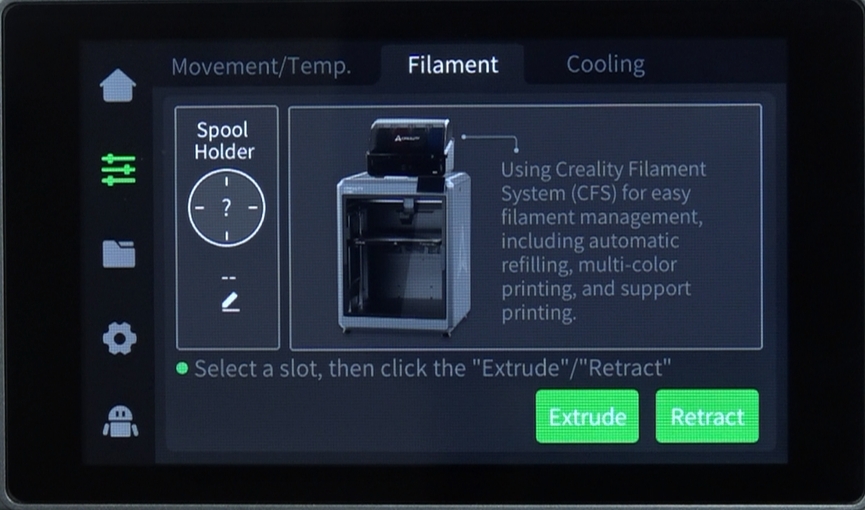
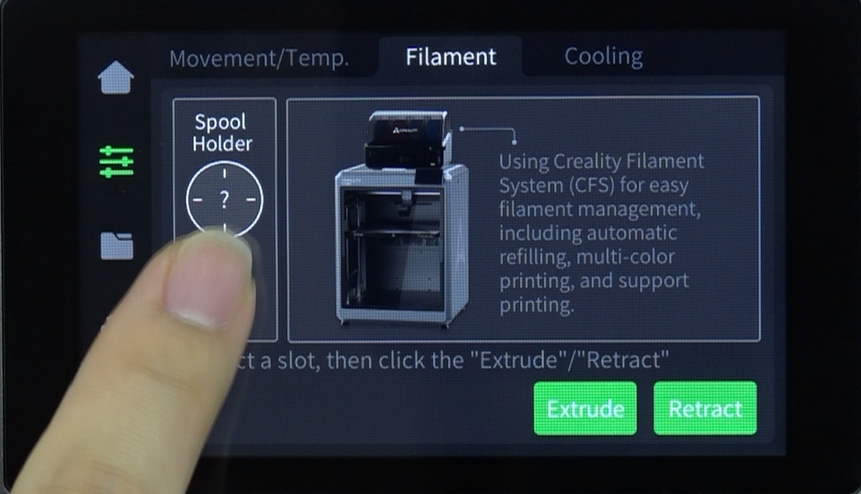
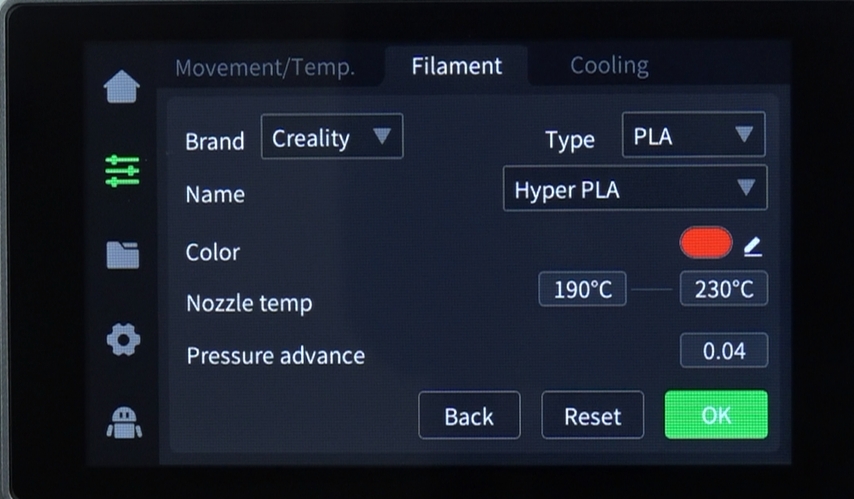
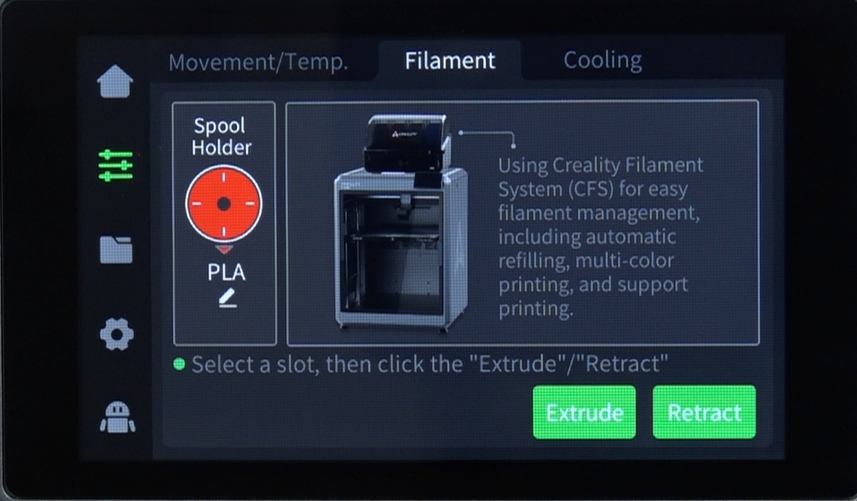
- Load Filament
Click Feed in the page of filament, the printer will automatically set the current temperature of the filament, and will feed automatically upon completing warming up.
During the feeding process, you can observe the flow of filament from the nozzle. If you do not observe the flow of filament, you can gently push the filament to the Teflon tube at the back of the printer in the direction of the extruder, and then click on feed again.

.png)
- Retreat filament
By clicking on Retreat Filament in the Filament Management page, the extruder will move to the left front to cut off the filament, then pump it back. At the end of the pumping, the filaments will be extracted from the Teflon tube at the back of the printer.
.png)
¶ 6.3 CFS Filament Editing/Filament Reading
¶ 1. Introduction to Filament Management Interface
Filament Management page is divided into two parts: External Spool Holder [left] and CFS [right].
In CFS, the code above the filaments such as 1A indicates the silo number.
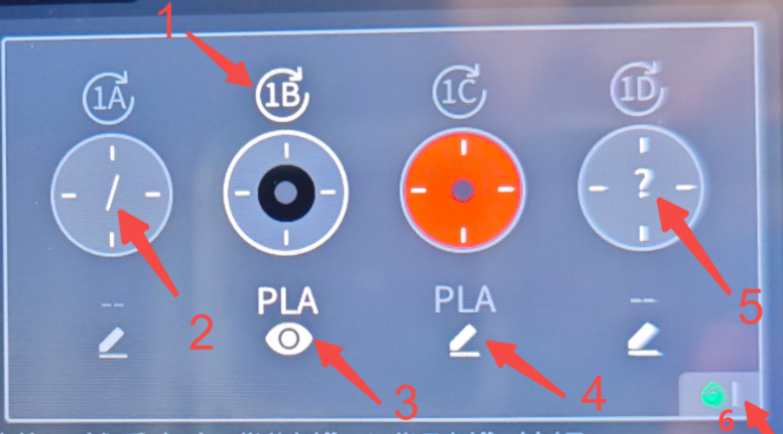
1 is the Refresh RFID button, which can be used to read filament. If the reading is successful, the remaining filament and filament color will be displayed. If the reading fails, the filament editiutton will be displayed, and the filament will be displayed as "?";
2 is the empty slot state,displayed as "/", and editing is not supported;
3 means that the RFID filament is read, the eye icon is for viewing filament information, RFID filament only support viewing; if this is RFID and you want to use non-RFID next time, click the pre-loading button, wait for the reading to complete, and then click the filament editing button;
4 is ordinary filament, which support editing;
5 is the state where RFID is not read, the filament display "?". At this time, you need to click the edit button to manually edit the filament information;
6 is the CFS humidity status. Green means the humidity is appropriate, orange means the humidity is slightly higher, and red means the humidity is very high. The desiccant may need to be repplaced.
¶ 2. Load/unload filament
Load filament:
Put the filament into the CFS, align the filament head with the teflon tube of the corresponding slot, gently push it in, and release your hand when you feel pulling force. Then, the filament will be loaded automatically.
.png)
Unload filaments:
First of all, ensure that the filaments are not in the extruder, and directly pick up the filaments and pull them out.
If inside the extruder, you can first click the retreat filaments and wait for the filaments to return to the CFS.
.png)
¶ 7. Print
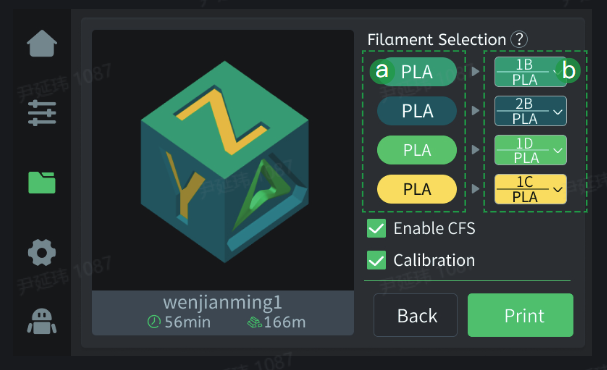
- Click the file on the screen, confirm the filament mapping status,and click Print;
The Area 1 is the color and type of the material contained in the print file. For example, the green
background PLA in the figure indicates that green PLA is required;
The Area 2 is the state after the mapping of the print file to the filament bin is completed. For example, there is no green PLA in the filament bin, and the blue PLLA is automatically selected;
When the mapping fails, '--' will be displayed, and the user needs to rmanually select the material;
Enabling CFS means printing with CFS filament, otherwise the materialrack filament will be used for printing, and the multi-color file will be regarded as a single-color file;
Checking print calibration will perform automatic leveling, Al calibratioand other functions.
