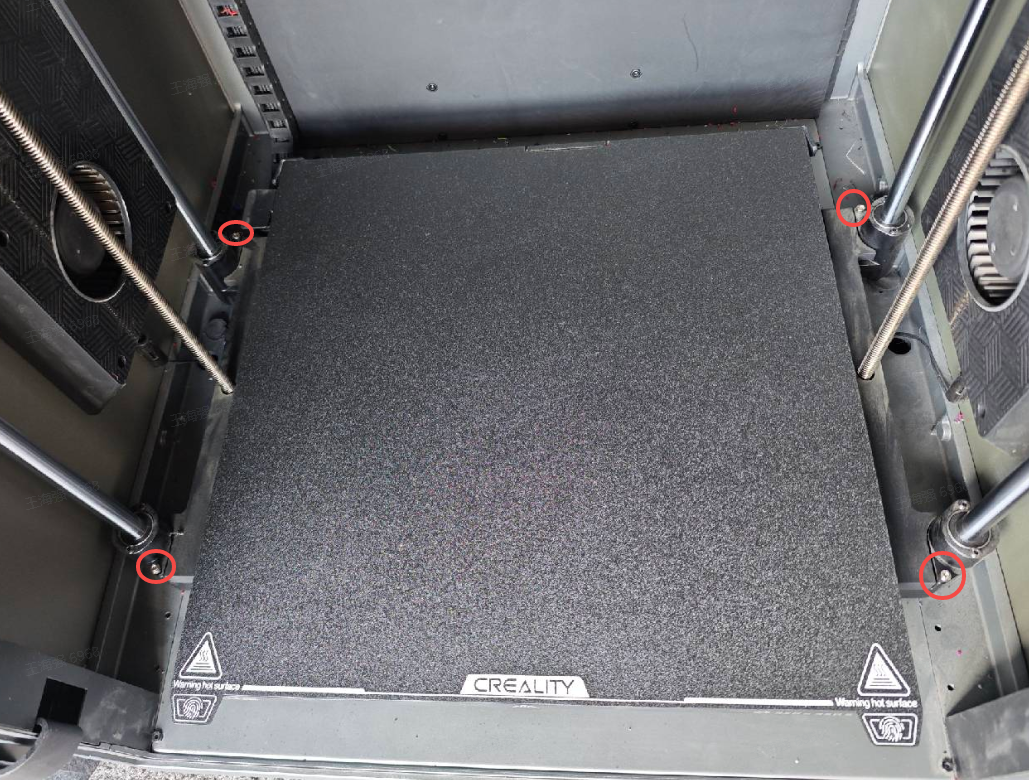
¶ 1. Restore the factory setting and lower the hot bed to the bottom
Click Settings - Restore factory, wait for the printer to restore factory settings and then power off the printer.
Press the hot bed to the lowest bottom.

Note:
If there is garbage under the hot bed plate, please keep it clean in case the hot bed screw cannot be locked in when transportation.
¶ 2. Remove the CFS Teflon Tube and wires
Remove the Creality 485 communication wire and the teflon pipe.

¶ 3. Remove the external spool holder and relock the screws


¶ 4. Fix the printing platform and screw rod


¶ 5. Remove the screen and install the screen base fastener.
Hold the screen with both hands, press against the screen base fastener , and slide it to the right.

Press the cable button to pull out the screen.

Install the screen base case.

¶ 6. Fix the CFS
Long screws are used to secure the CFS.
Short screws are used to secure CFS transport brackets.


Install bottom filament foam and CFS bottom foam

Install the CFS transport bracket and load the protective foam above the bottom filament.

Filament foam and CFS bottom foam are shown

Put in CFS and lock screws.

¶ 7. Install other foam
Install CFS top foam.

Install top filament foam.


Put the top layer of foam and put in accessories.

¶ 8. Fix the top cover
Fix the top cover on the left side of the printer.


¶ 9. Install foam on all sides
Place the printer in the base and fill the foam around it

Note: The four side's foam, and honeycomb cardboard foam should place at the front door.

Pack top layer foam and paper shell


¶ 10. Install and secure the outer box

Fasten the eight clasps in turn.

