Please Follow the Tutorial Steps Strictly. If You Encounter Technical Problems, Contact Customer Service (cs@creality.com).
¶ Video Tutorial
K2 Plus 2714/2715 Error Code Calibration Operation
¶ Calibration Tool
¶ Belt Auto-tension Module Calibration Tool
Since the automatic belt tensioning function needs to calculate an accurate tension value, when the belt tension is normal, a tool needs to be installed to apply a specific calibration force higher than the belt tension. Through data fitting, we can calculate the actual belt tension.
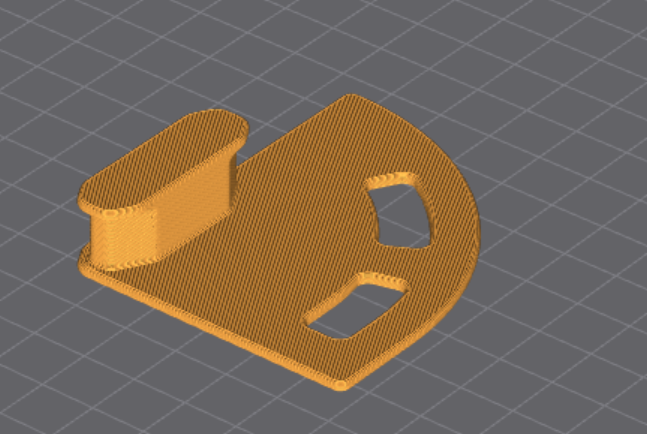
Please print the following belt auto-tensioning module calibration tool.
K2 plus_belt_tension_module_calibration_tool
¶ Installation Method
Print out K2 plus_belt_tension_module_calibration_tool
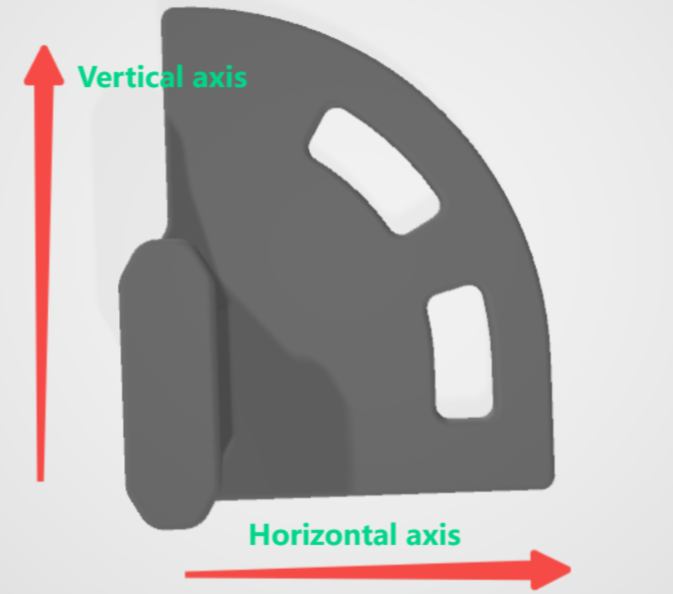
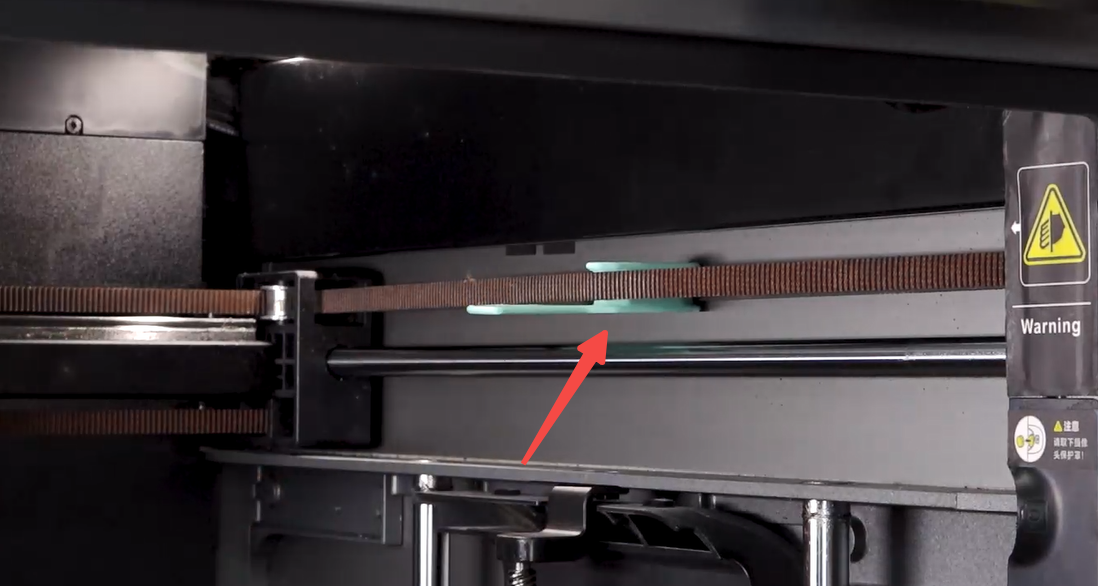
Note: When installing, be careful not to pull the belt forcefully to avoid slight deformation of the strain gauge.
¶ Installation Tutorial
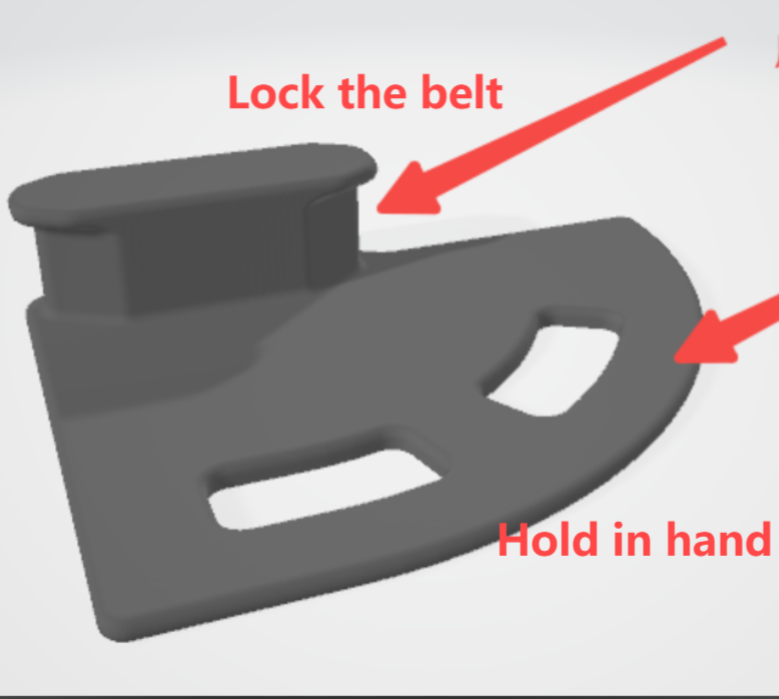
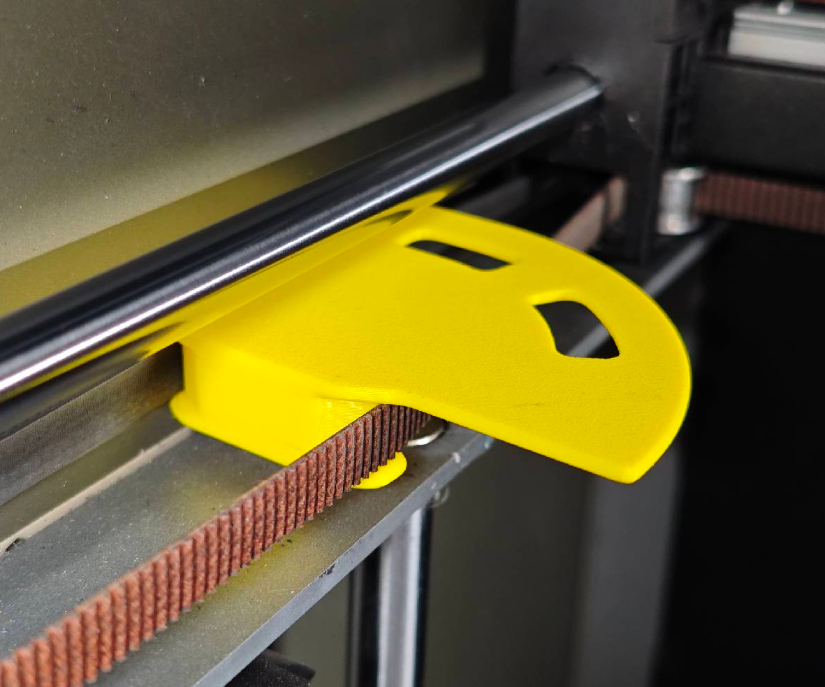
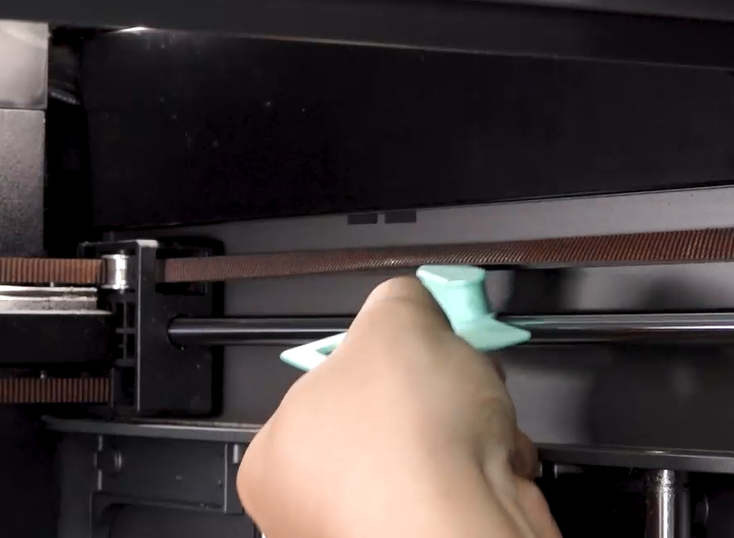
The tension tool needs to be inserted in the middle of the belt.
¶ Calibration Firmware
Download calibration firmware: CROCN240110C10_ota_img_V1.1.3.14.2.img
Please contact customer service (cs@creality.com) to send the firmware package CROCN240110C10_ota_img_V1.1.3.14.2.img
¶ Preparation
Confirm that the belt tension is within the correct range (7.5N±0.5N), if unable to measure, please ignore.
Print the calibration tool
Update the machine firmware to the calibration firmware version 1.1.3.14.2
¶ Operation Steps
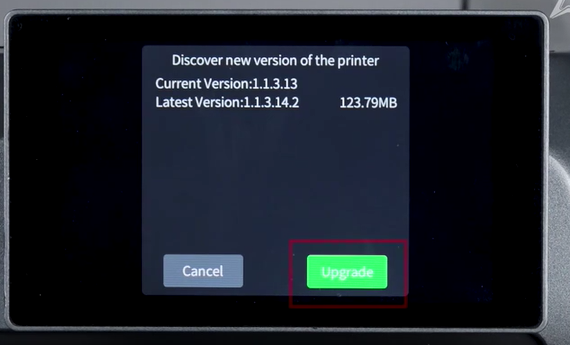
1. Copy the downloaded calibration firmware (CROCN240110C10_ota_img_V1.1.3.14.2.img) to a USB drive. Insert the USB drive after powering on, and click on firmware upgrade.
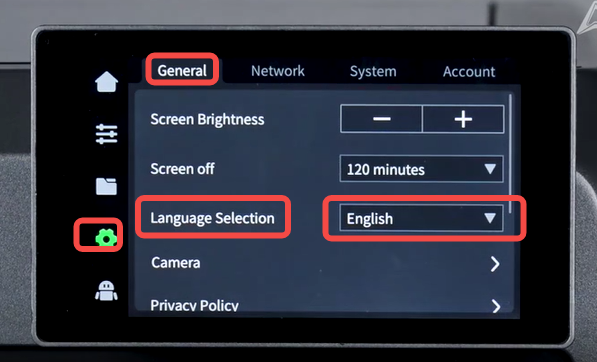
2. After the upgrade, confirm that the firmware version is the calibration firmware (CROCN240110C10_ota_img_V1.1.3.14.2.img). Then go to Settings > General > Language Selection > Chinese
 |
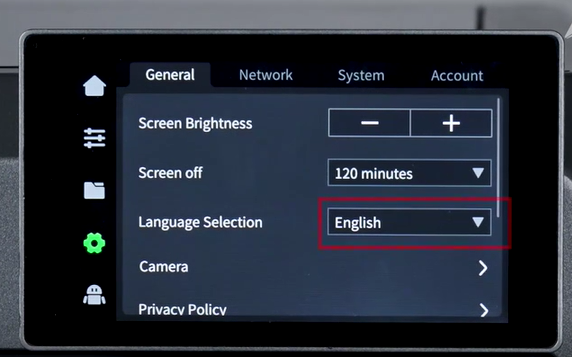 |
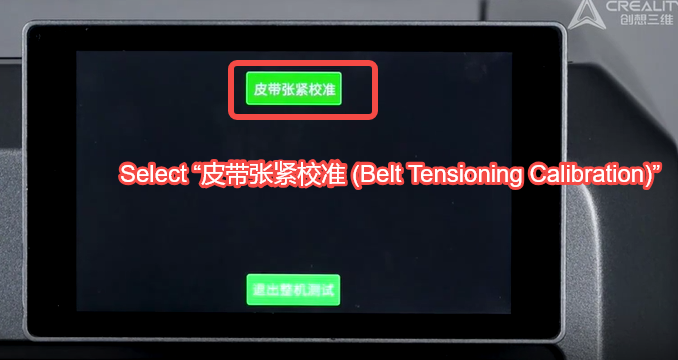
3. Tap "Chinese" 10 times consecutively to enter the belt tension calibration mode.

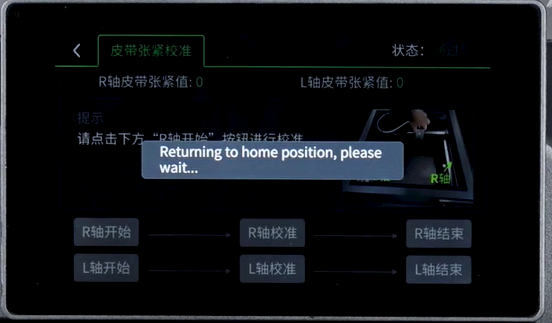
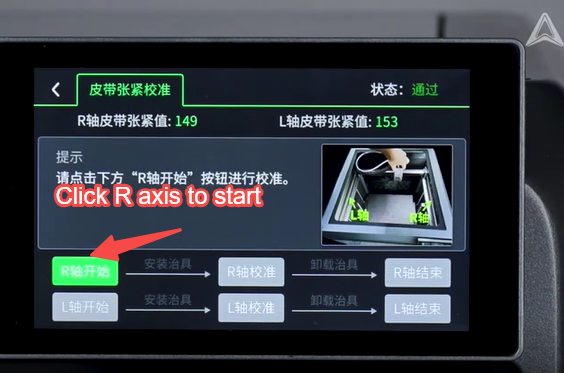
4. It will automatically return to home. After homing is complete, click [R Axis to Start].
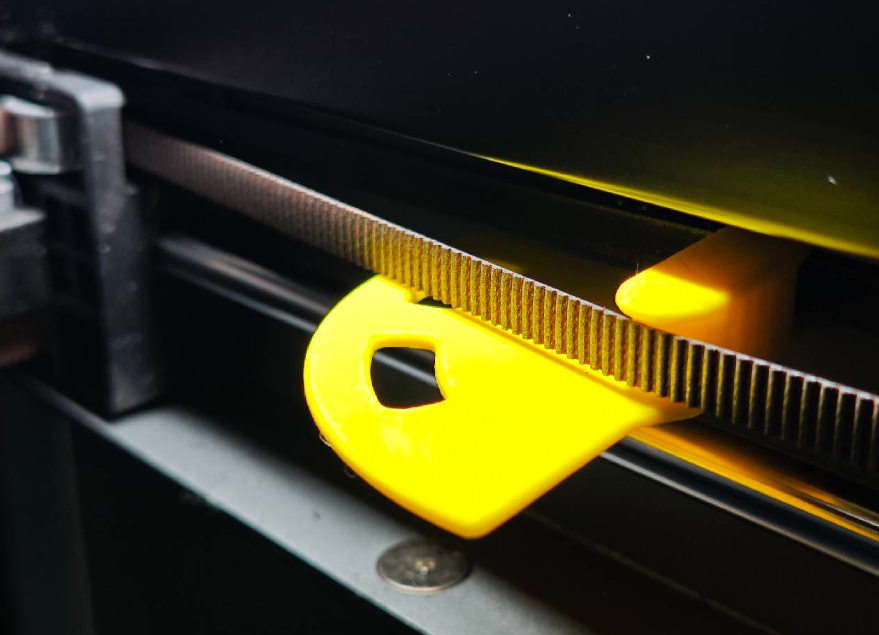
5. As prompted, attach the printed jig to the R axis belt (as shown in the image).
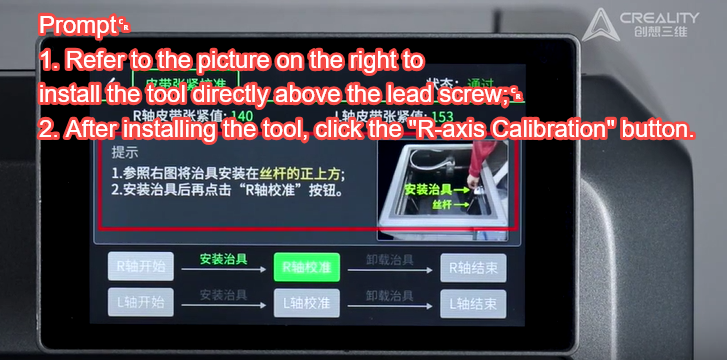
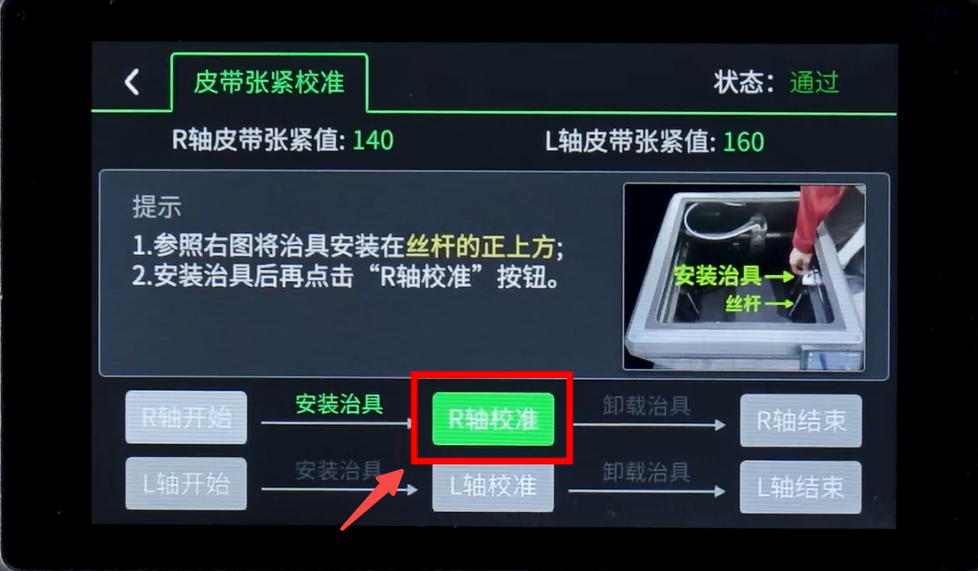
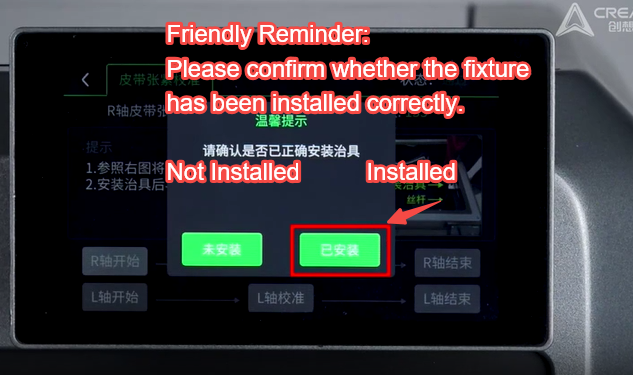
6. After installation, click [R Axis Calibration], then click [Installed] in the prompt box, and wait for calibration to complete.
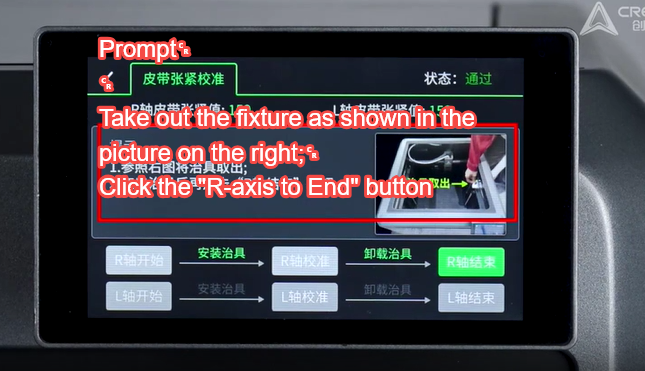
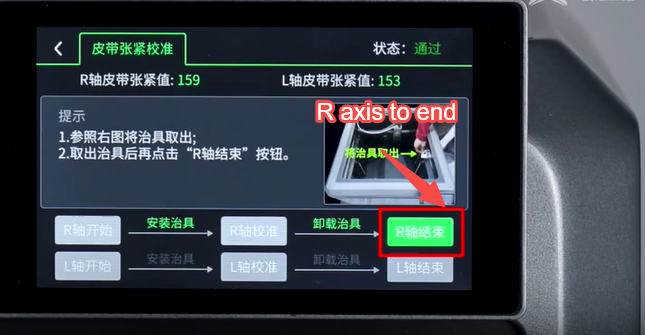
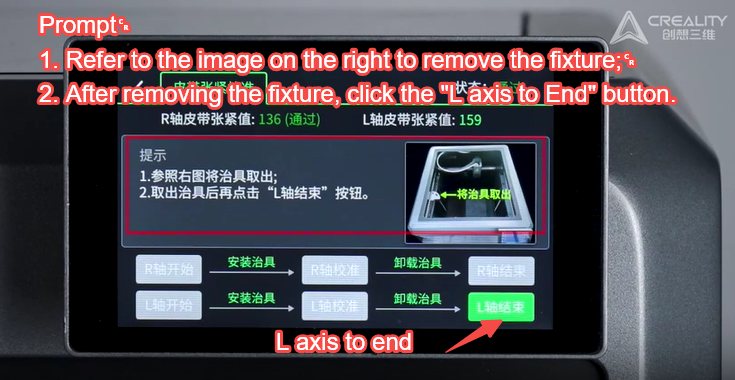
7. After calibration is complete, follow the prompts to remove the jig, and click [R Axis to End].
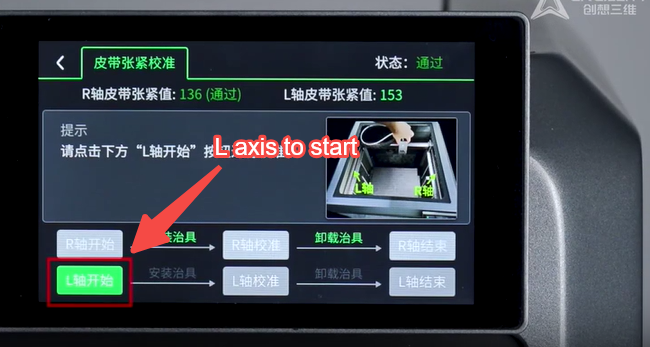
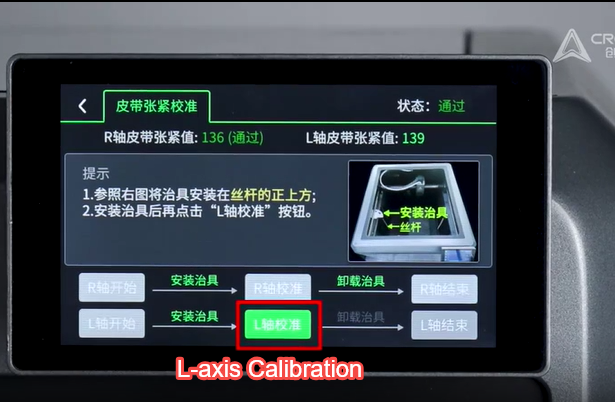
8. Repeat steps 4-7 for L axis calibration.
 |
 |
 |
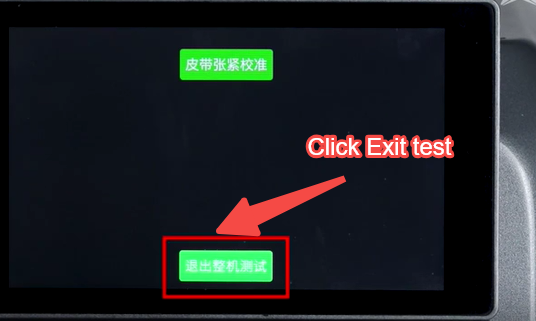
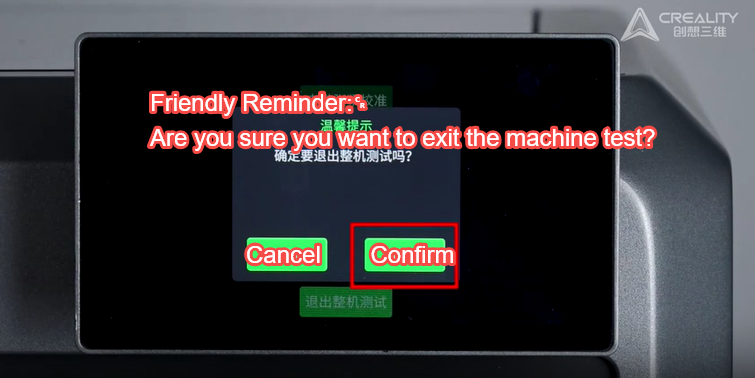
9. After L axis calibration is complete, click [Exit Machine Test] in the pop-up dialog, then click [Confirm].
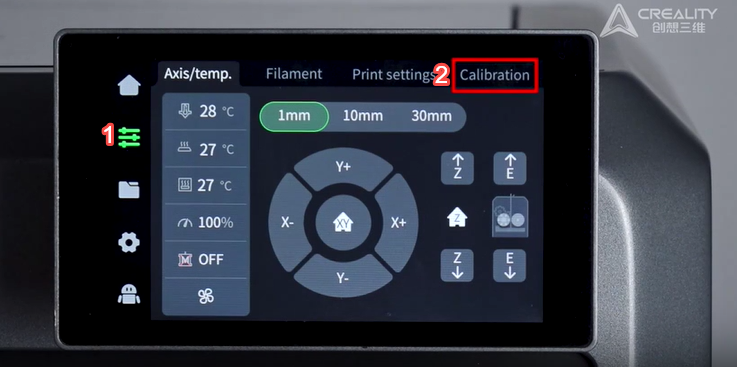
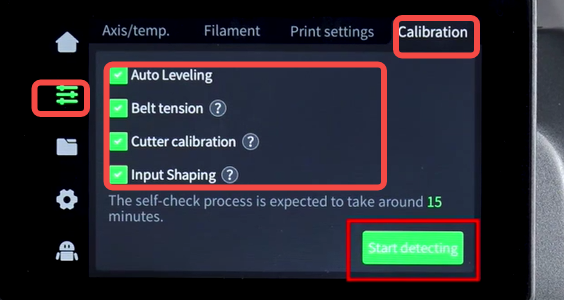
10. Finally, perform a manual self-test to confirm the calibration results.
 |
 |