¶ Preface
Successful model printing is inseparable from regular equipment maintenance. K1 series printers can ensure stable operation through regular maintenance. Here are some suggestions for regular inspection and maintenance:
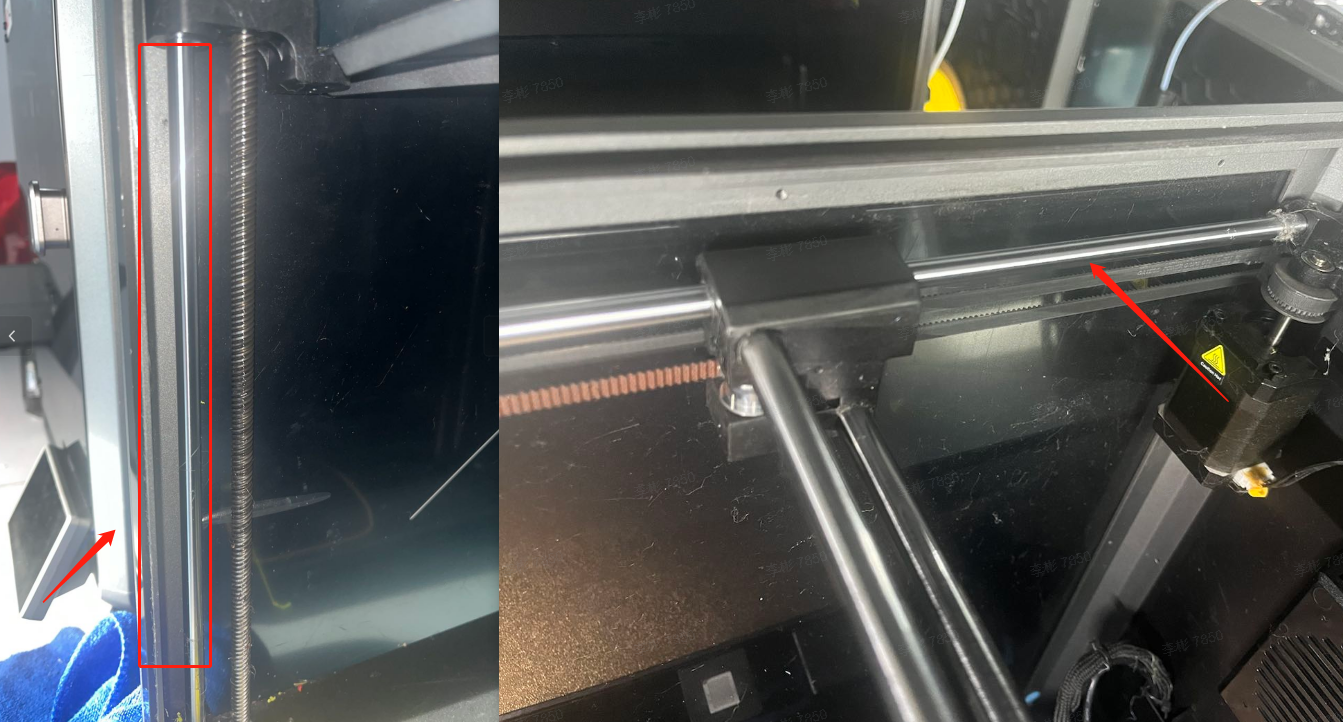
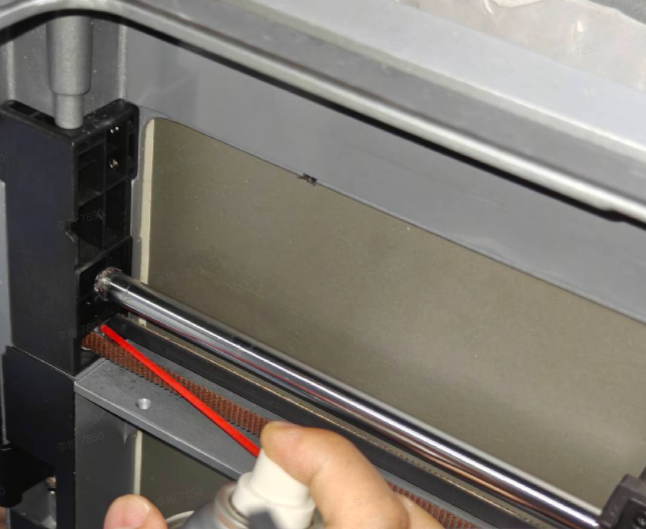
¶ 1. X-axis Optical Shaft
The X-axis uses graphite copper sleeves, which will produce black sticky substances on the surface after long-term use, causing high operational resistance and leading to issues such as layer marks, misalignment, and step loss. Therefore, it is recommended to clean the optical shaft regularly to prevent dust and buildup.
Note: Please do not use grease on carbon rods, as it will cause abnormal resistance and cleaning difficulties. It is recommended to use the lubricating grease included with the machine.

¶ 1.1 When Maintenance is Needed
Check the X-axis optical shaft every 300 printing hours for dust and particle buildup. If using volatile materials such as ABS/ASA, it is recommended to clean after printing every 5 rolls (5 kg) of consumables.
¶ 1.2 How to Maintain
The X-axis optical shaft can be cleaned with isopropyl alcohol or alcohol and a lint-free cloth. Simply spray a little isopropyl alcohol or alcohol on the lint-free cloth, wipe the optical shaft, and then apply the included lubricating grease.
¶ 2. Y-axis Optical Shaft and Z-axis Rods
To ensure smooth movement, prevent corrosion, and extend service life, it is recommended to regularly clean and maintain the rods for rust prevention.

¶ 2.1 When Maintenance is Needed
Y-axis and Z-axis rods should be checked every 300 printing hours for dust and particle buildup. If using volatile materials such as ABS/ASA, it is recommended to clean after printing every 5 rolls (5 kg) of consumables.
The Y-axis should undergo rust prevention treatment every six months.
¶ 2.2 How to Maintain
Y-axis and Z-axis rods can be cleaned with isopropyl alcohol (or alcohol) and a lint-free cloth. Simply spray a little isopropyl alcohol (or alcohol) on the lint-free cloth and wipe the rods.
Rust prevention treatment for Y-axis and Z-axis rods can be done by spraying some anti-rust oil or lubricating grease on a lint-free cloth and then wiping.
¶ 3. Z-axis Lead Screw
The three Z-axis lead screws need regular lubrication. The lead screws are used to move the heated bed on the Z-axis, and proper lubrication will ensure smooth operation.
¶ 3.1 When Maintenance is Needed
Z-axis lead screws should be checked and lubricated every 300 printing hours.
¶ 3.2 How to Maintain
- The first step before lubricating the Z-axis lead screws is to remove dust or residual material impurities.
- Use lubricating grease and apply a thin layer on the lead screw. After clicking Z-axis home on the screen, apply a thin layer of lubricating grease, then control the Z-axis on the screen to move the heated bed to a lower position.
- Apply another thin layer of grease on the Z-axis lead screw, then control the Z-axis to move up and down again. You can repeat the movement operation several times to ensure the lubricating grease is evenly distributed on the Z-axis lead screw. When finished, remove excess lubricating grease near the lead screw nuts (to prevent impurities from adhering during printing).
¶ 4. Extruder Assembly
After using the printer for a long time, material debris and dust may enter the K1C extruder assembly.
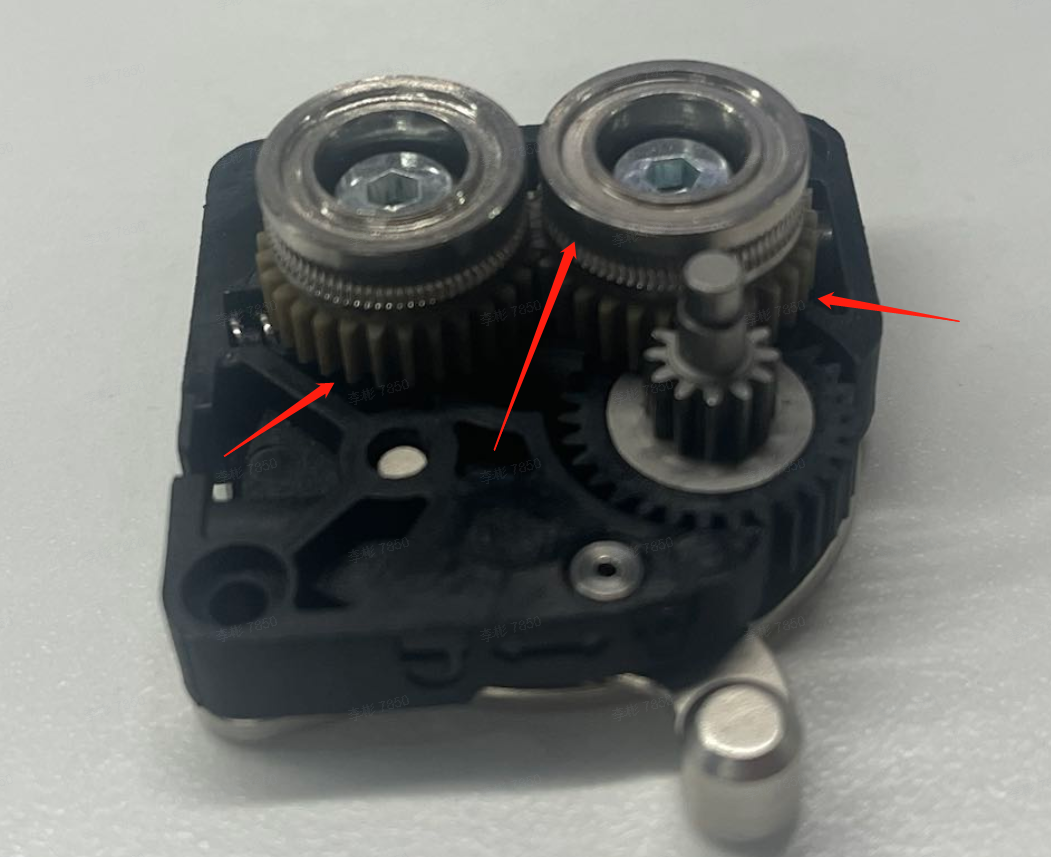
¶ When to Maintain?
You should clean the dust inside the extruder when you see a small amount of dust or debris on the gears inside the extruder clamp.
¶ How to Maintain?
The quickest way to clean debris or filament dust inside the extruder is to use compressed air to blow the dust out. You can blow compressed air through the yellow gear, or remove the hot end and blow air from the bottom of the extruder.
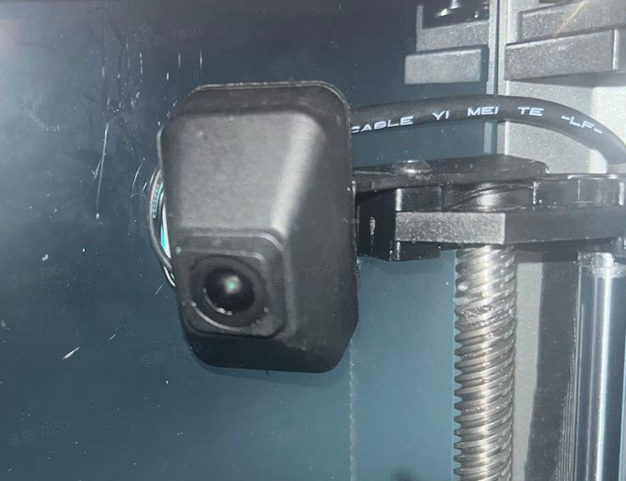
¶ 5. LiDAR (K1 Max)
The LiDAR uses a small camera and laser for the calibration process. The camera and laser need to be kept clean for smooth operation.
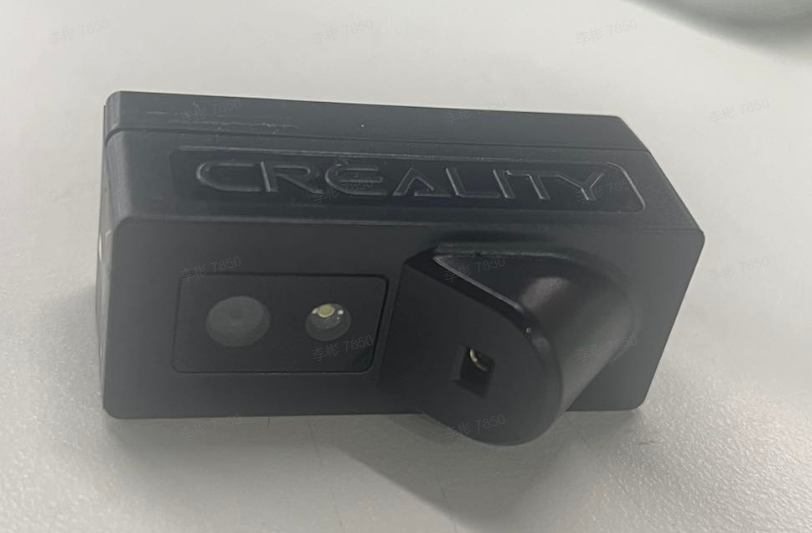
¶ When to Maintain?
The LiDAR needs to be cleaned when error messages appear or when the light is abnormal. If ABS is frequently used for printing, the camera needs to be cleaned every 3-5 days, as ABS particles will accumulate on the camera lens.
¶ How to Maintain?
Simply wipe the mini-LiDAR camera with a fiber cloth and some isopropyl alcohol. Cotton swabs can also be used, making it easier to clean the camera.
¶ 6. Idler Wheels
Multiple idler wheels are installed on the printer. These idler wheels have sealed bearings inside that do not need lubrication, but we still recommend adding a little lubricant between the idler wheels and the belt to avoid any squeaking.
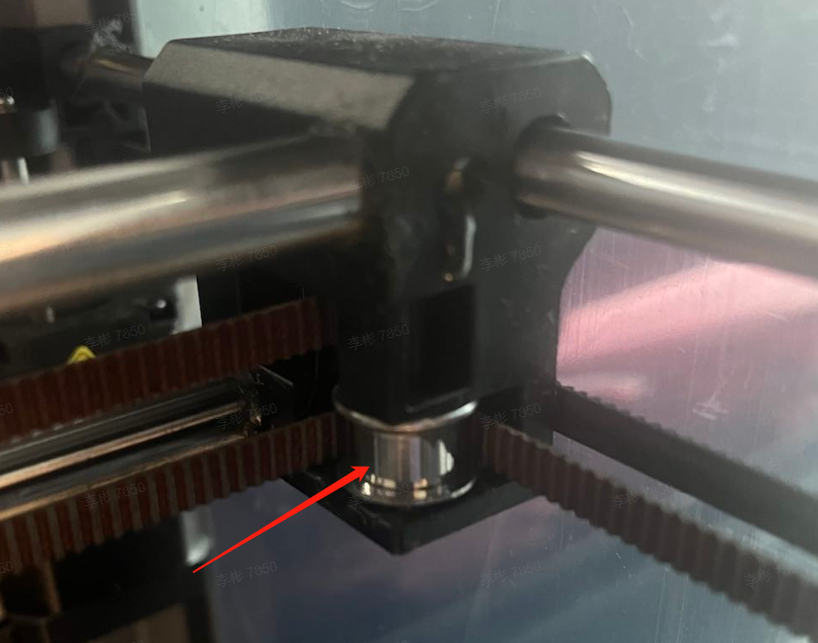
¶ When to Maintain?
When squeaking occurs during printing or XY axis movement.
¶ How to Maintain?
If needed, you can spray some WD-40 high-efficiency silicone lubricant on the top and bottom of the idler wheels. If there is no squeaking, do not add lubricant to the idler wheels to avoid dust buildup.
¶ 7. Enclosure Camera
The enclosure camera lens should be cleaned regularly to ensure a clear view.
¶ When to Maintain?
We recommend cleaning the camera lens when the video is blurry or visibly dirty. If printing with ABS, we recommend cleaning weekly.
¶ How to Maintain?
Use a fiber cloth and some isopropyl alcohol to gently wipe the camera. Cotton swabs can also be used as they make it easier to clean the camera.
¶ 8. Part Cooling Fans
The hot end fan, throat tube fan, auxiliary fan, and enclosure fan should be regularly checked for dust and debris buildup to ensure smooth operation, prevent abnormal noise, and extend service life.
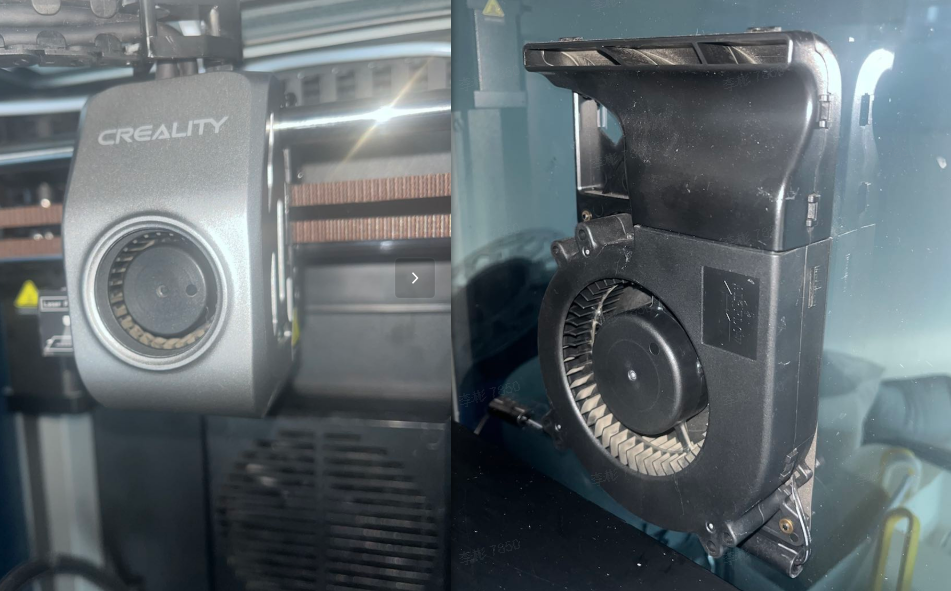
¶ When to Maintain?
We recommend checking the fans weekly to remove any debris or dust that may have accumulated around the blades.
¶ How to Maintain?
With the printer turned off, we recommend using compressed air to blow out dust. While keeping the fan blades in place, use an air gun to blow air through the blades to clean any dust or debris.
¶ 9. Nozzle
The nozzle is an important component of the printer and needs to be checked regularly to ensure it is intact and clean.
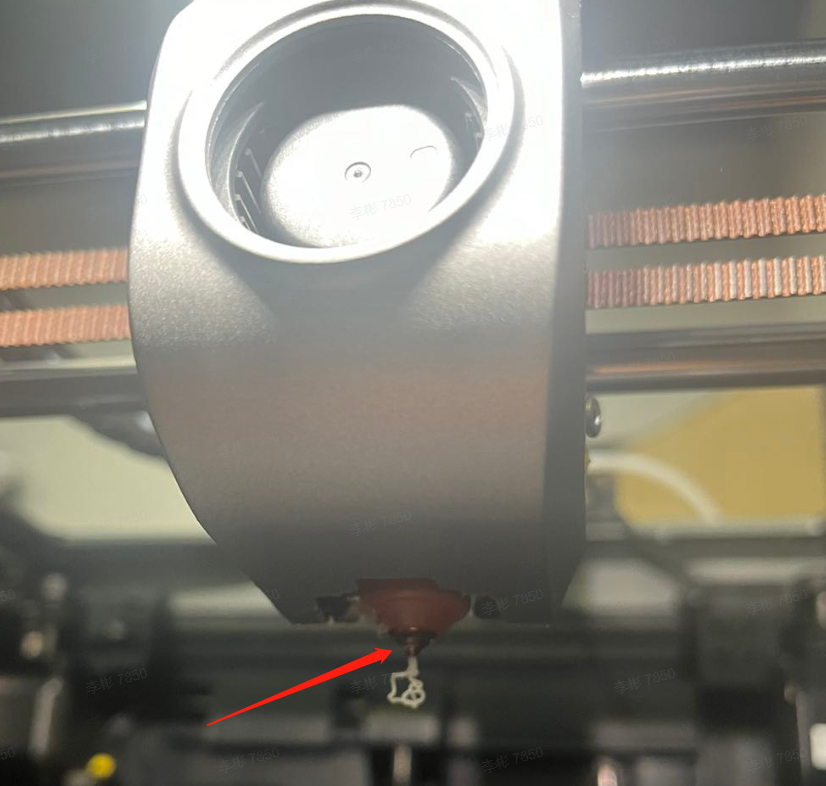
¶ When to Maintain
The nozzle needs to be checked before starting any print to ensure there are no filament debris attached to its surface. This ensures normal leveling and printing operation.
¶ How to Maintain?
If the nozzle wiper is damaged, we recommend replacing it with a spare part according to the Wiki guide.
¶ 10. Nozzle Silicone Cover
The silicone cover around the nozzle helps maintain a consistent temperature while also protecting the hot end from plastic buildup during printing.
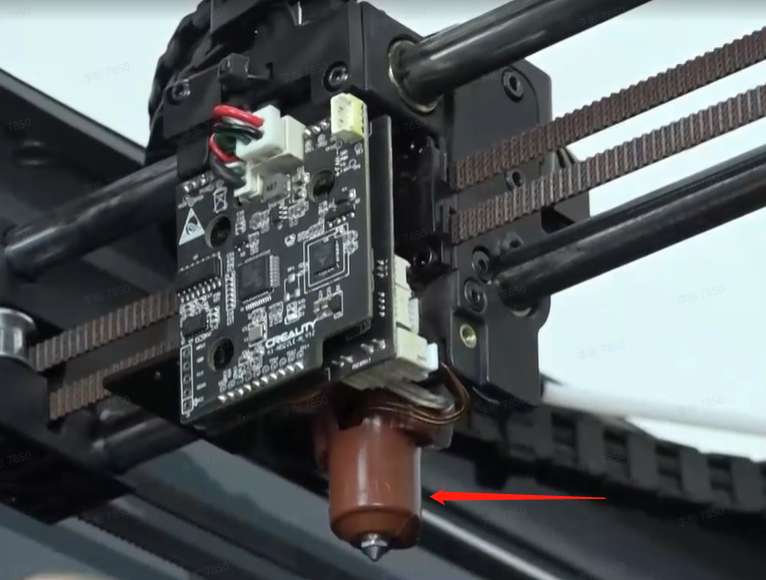
¶ When to Maintain?
The silicone cover should be replaced if there are signs of wear or if the silicone cover cannot be firmly fixed to the hot end.
¶ How to Maintain?
Simply remove the old silicone cover from the hot end and install a new one.
¶ 11. Activated Carbon Air Filter
The activated carbon air filter is used to filter some particles generated during the printing process and should be replaced regularly.
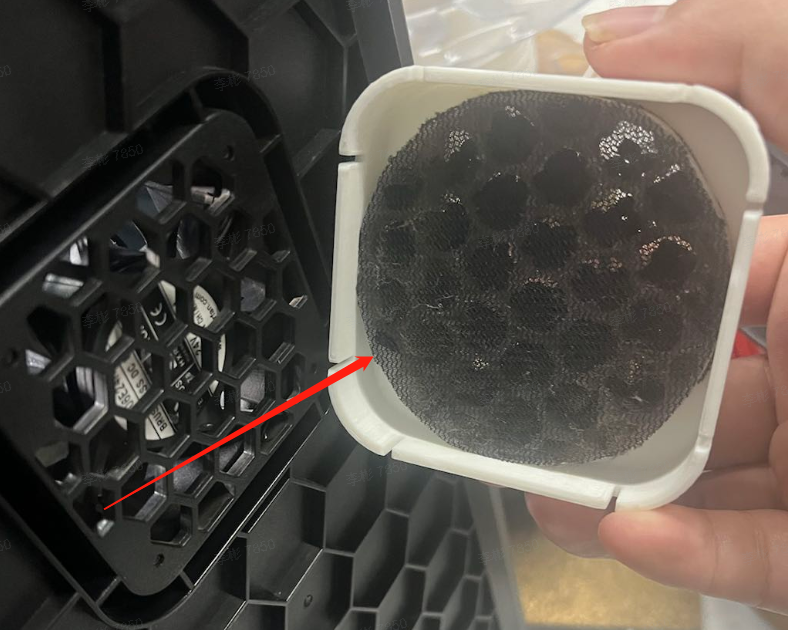
¶ When to Maintain?
If the printer is used about 8 hours per day, we recommend replacing the activated carbon air filter every three months. If the printer is used as a production machine, we recommend replacing the filter monthly.
¶ How to Maintain?
Replacing the activated carbon air filter is easy. Simply remove the old filter and install a new one.
¶ 12. Flexible Platform Use and Maintenance
Platform maintenance is key to successful model printing. Frequent use will cause some residual materials to adhere to the surface, and failure to clean them in time will affect print quality and leveling.
¶ When to Maintain?
The printing platform is a consumable item and should be replaced regularly to ensure proper adhesion of the first layer of the model.
¶ How to Maintain?
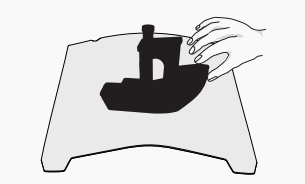
- After the printed model has cooled, remove it from the device along with the flexible platform, and slightly bend the platform locally to separate the model from the platform. (The platform should not be bent too much to prevent deformation that would render it unusable).
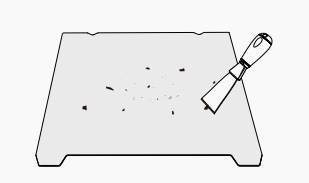
- Material residue on the platform can be scraped off with a scraper; use caution for safety.
- When the first layer of the model doesn't adhere, it's recommended to evenly apply solid glue to the platform surface. Residual solid glue after printing can be cleaned with water.

Note:
- It is recommended to perform vibration pattern optimization and automatic leveling detection every 300 printing hours (for the same type of material).
- When printing materials with different heat bed temperature requirements, it is recommended to check Print Calibration.