¶ Step One:
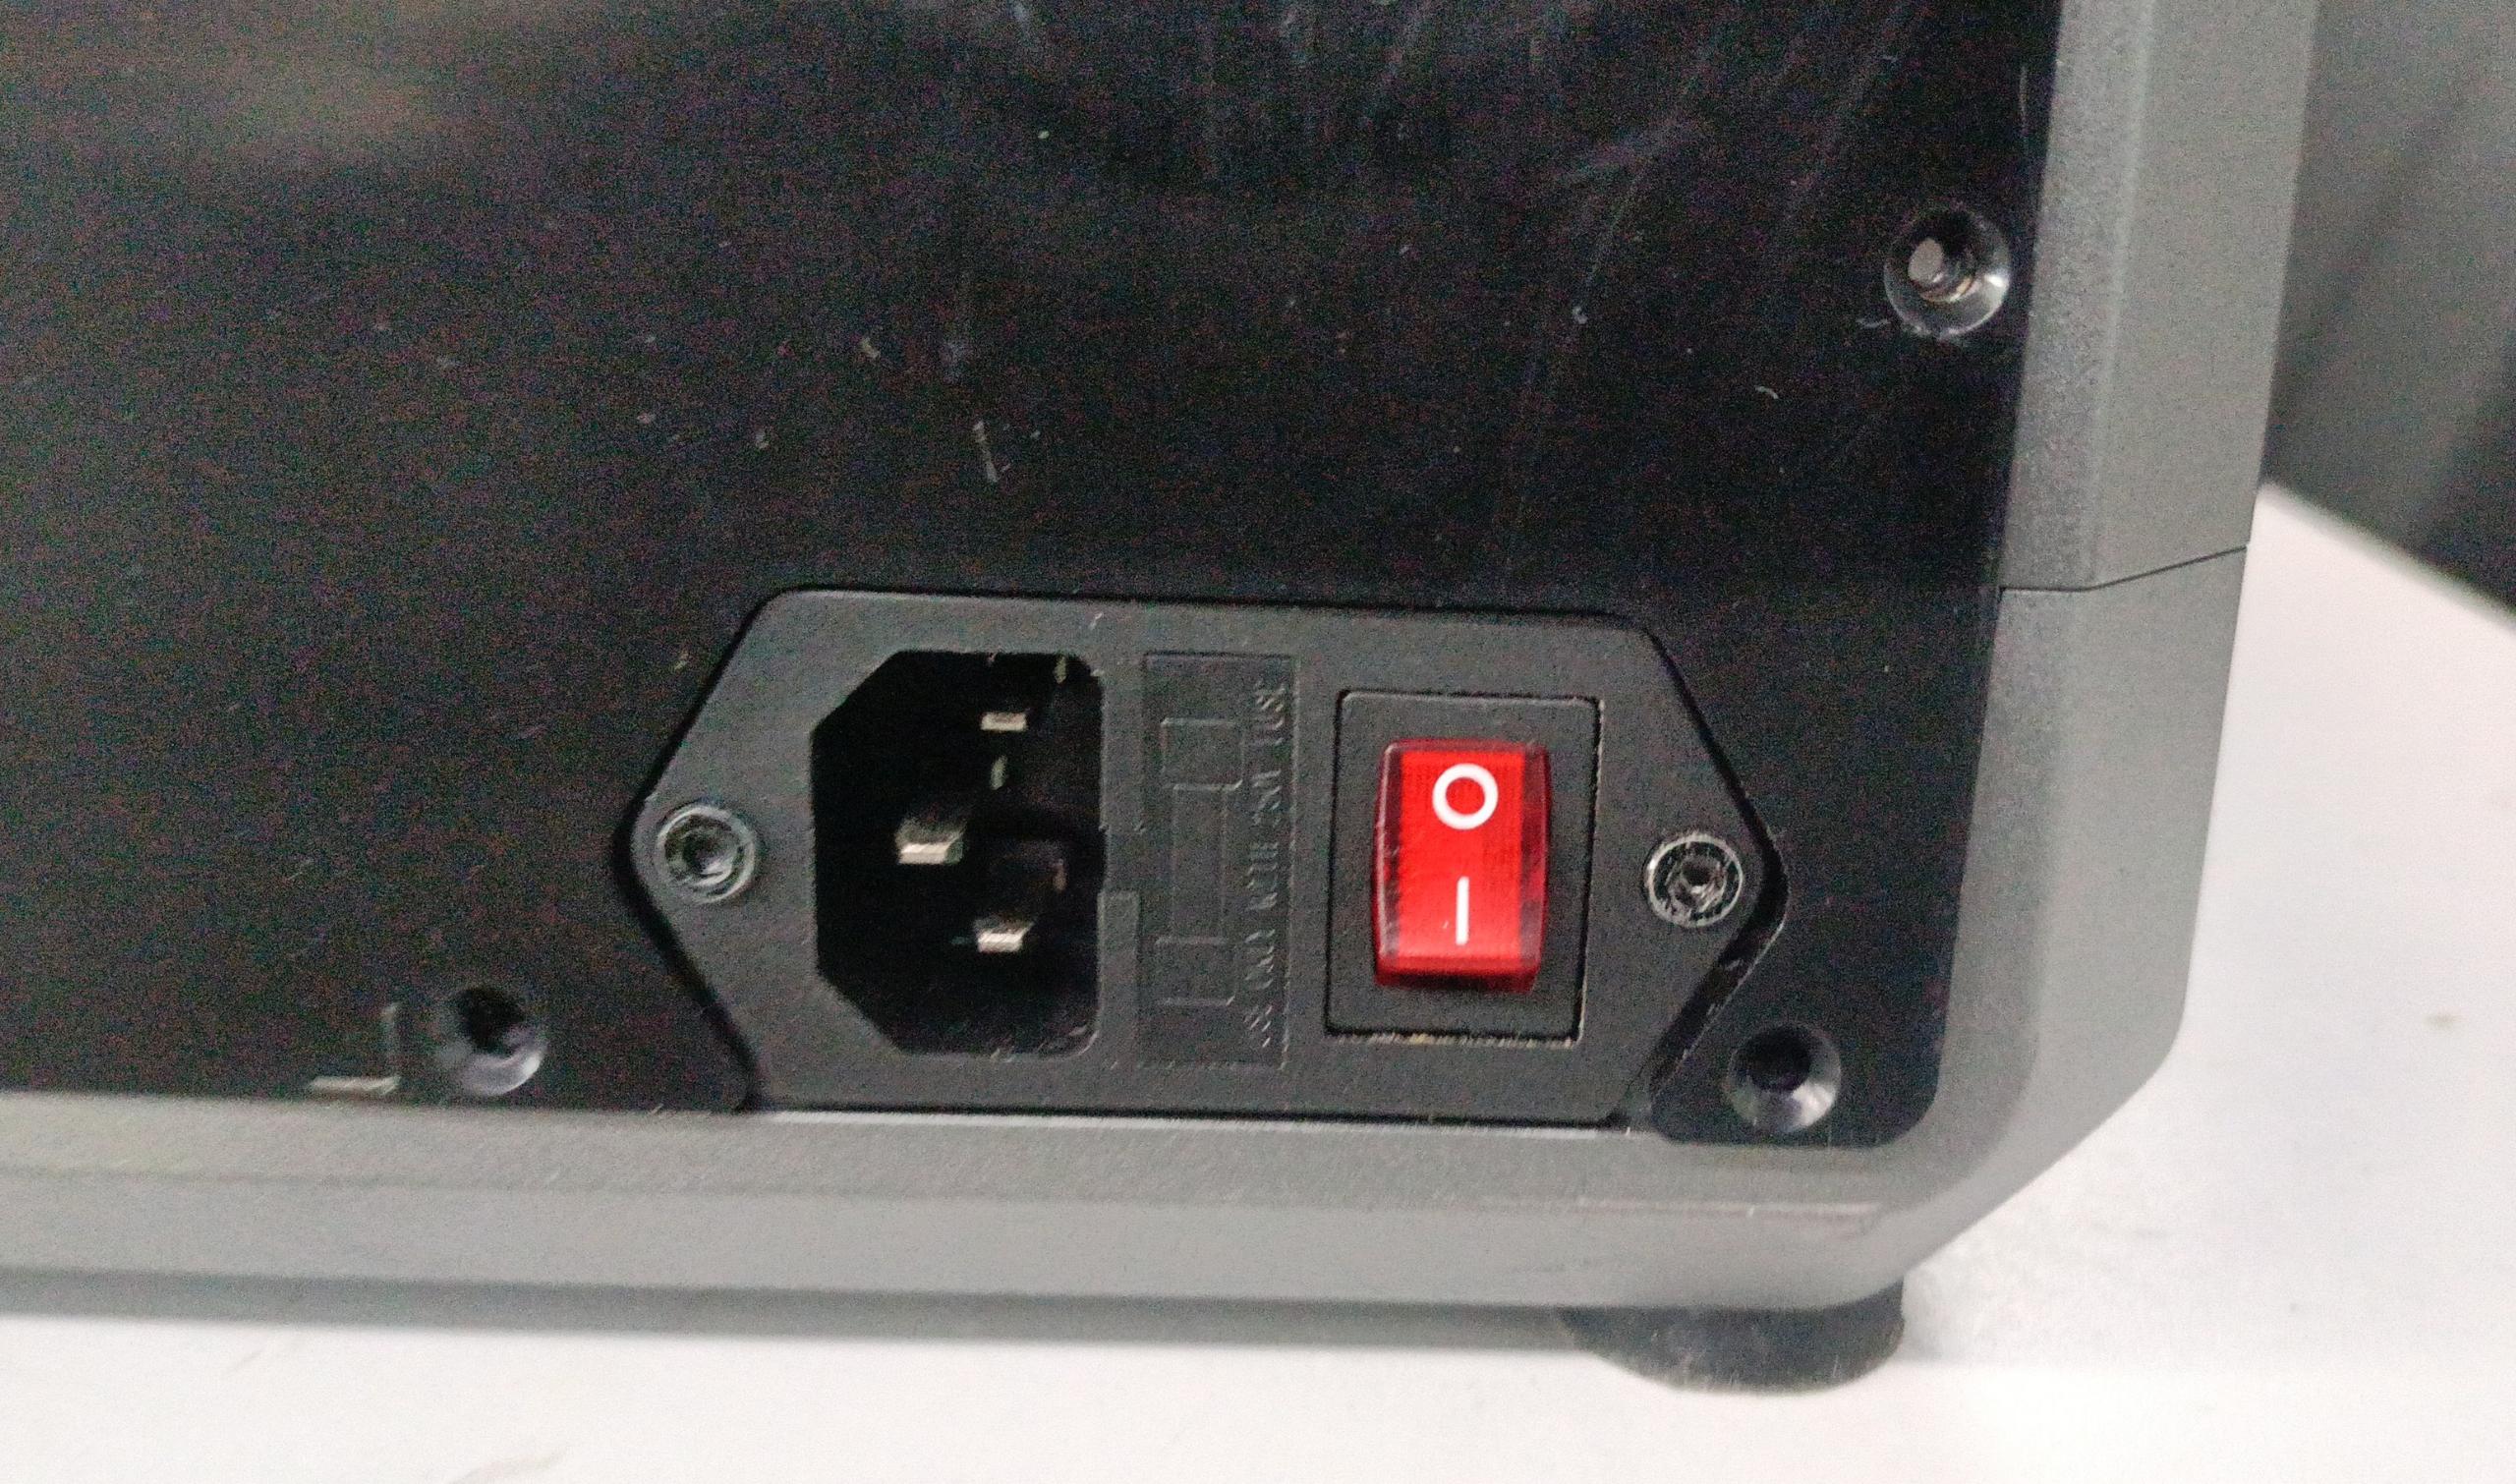
Shut down the printer and unplug the power cable.
¶ Step Two:
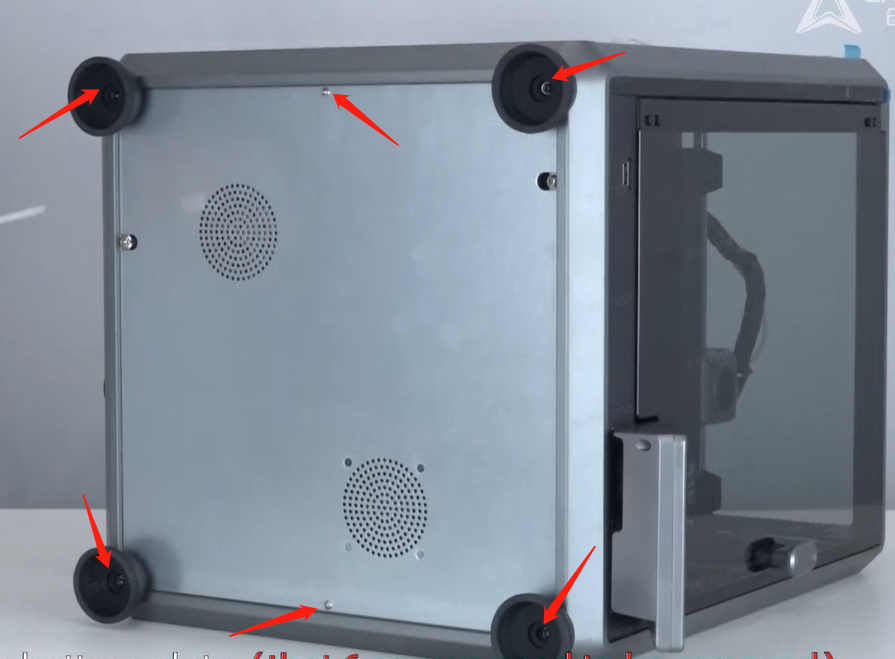
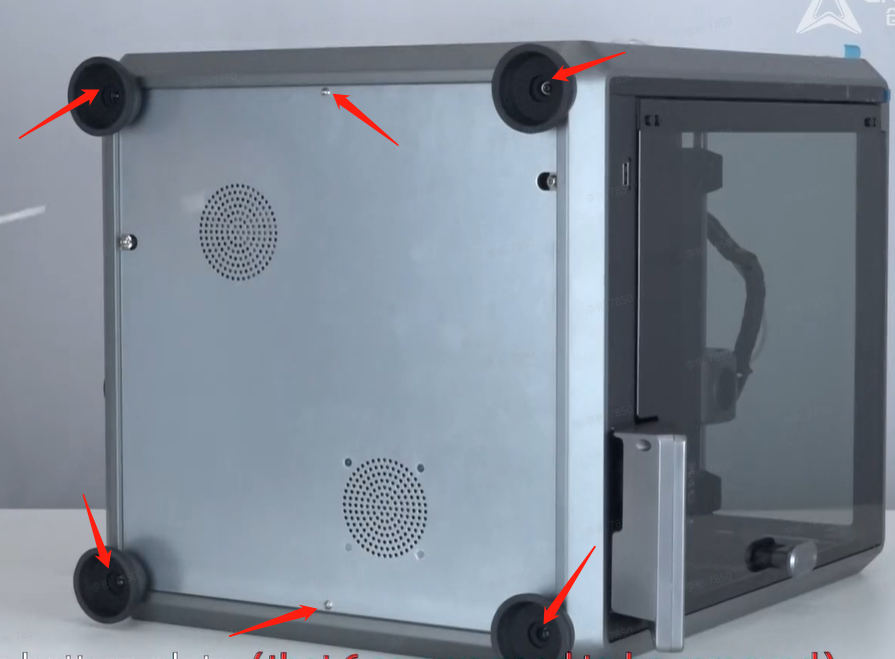
Remove the four foot pads and two fixing screws by using the hex wrench.
¶ Step Three:
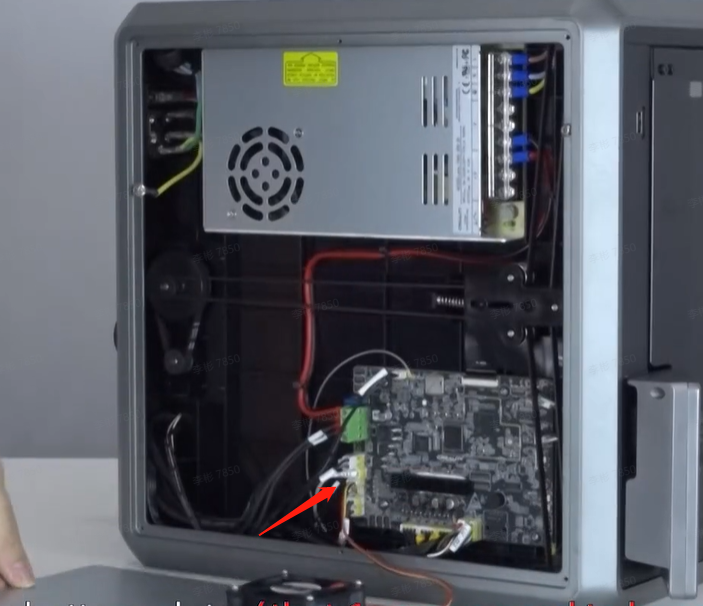
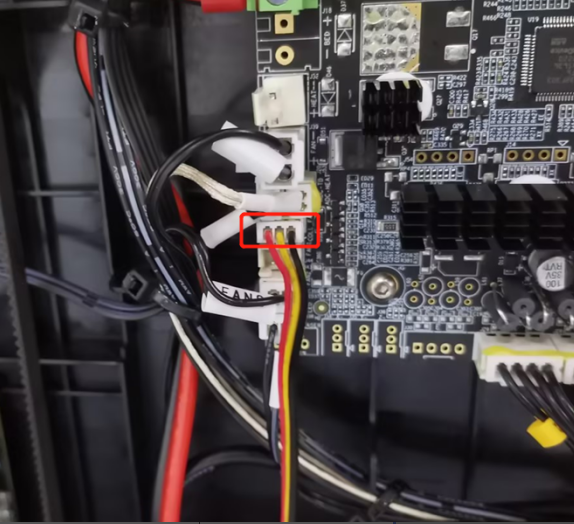
Remove the fan cable from the mainboard and remove the cover.
(Note: Take the cover carefully to avoid pulling the fan wire)
¶ Step Four:
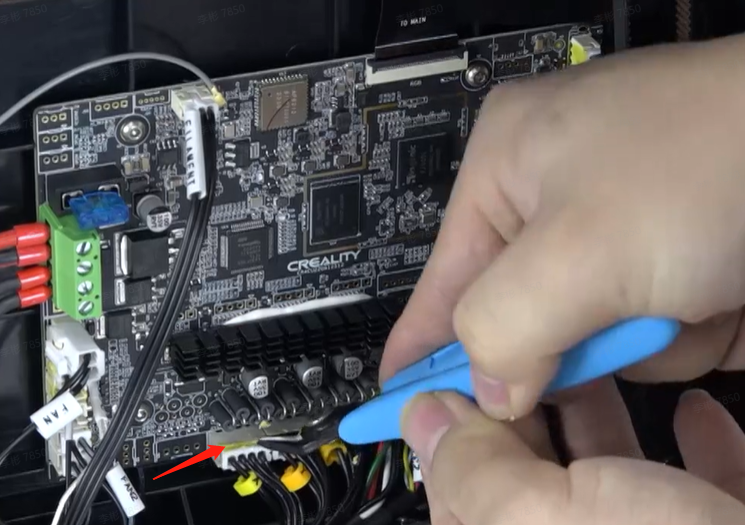
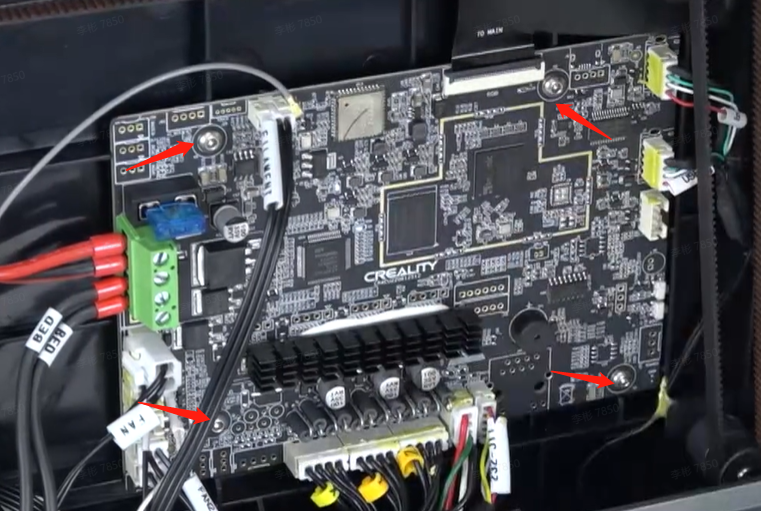
Use the pliers to remove the yellow glue from the terminals. Remove all cables from the mainboard, and the four screws securing the mainboard.
¶ Step Five:
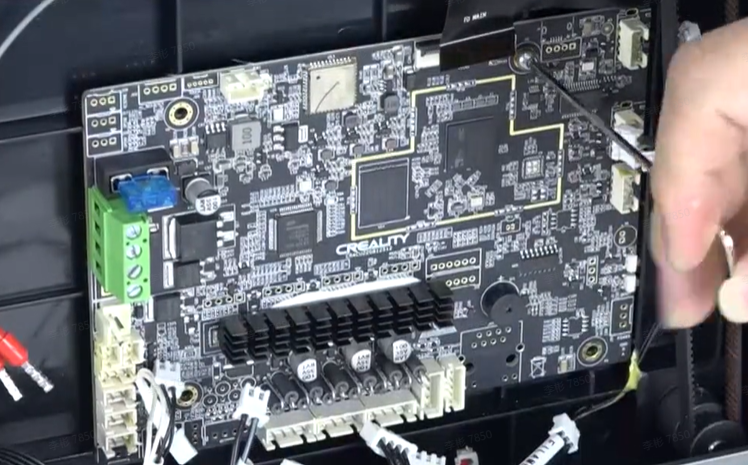
Remove the faulty mainboard and replace it with a new one. Tighten the four screws that secure the mainboard.
¶ Step Six:
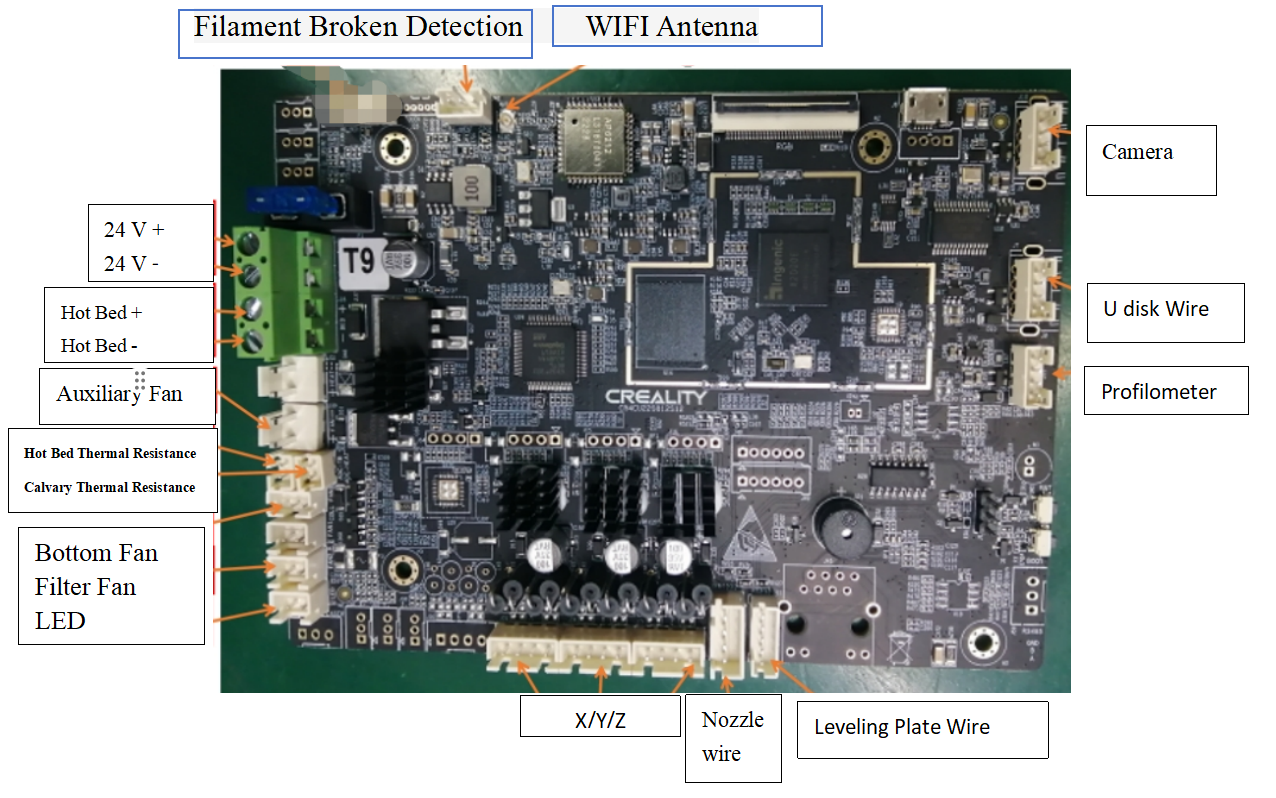
Refer to the following wiring diagram.
¶ Step Seven:
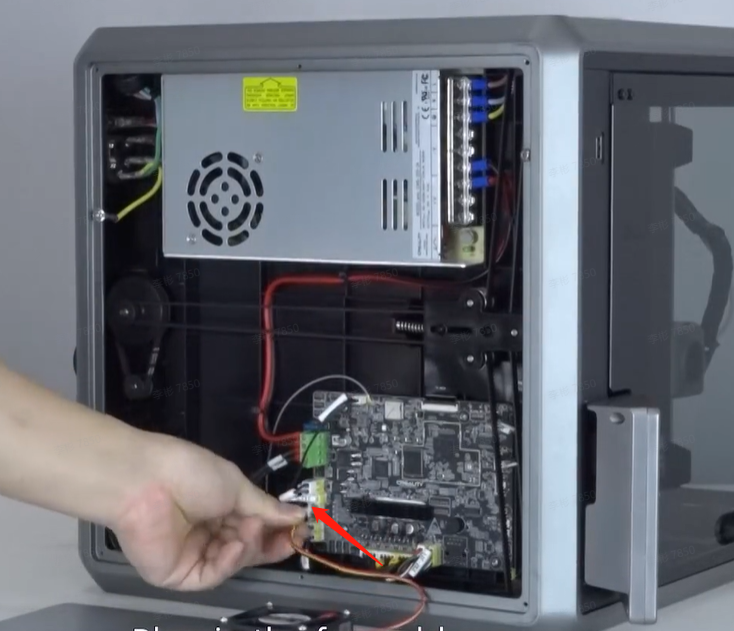
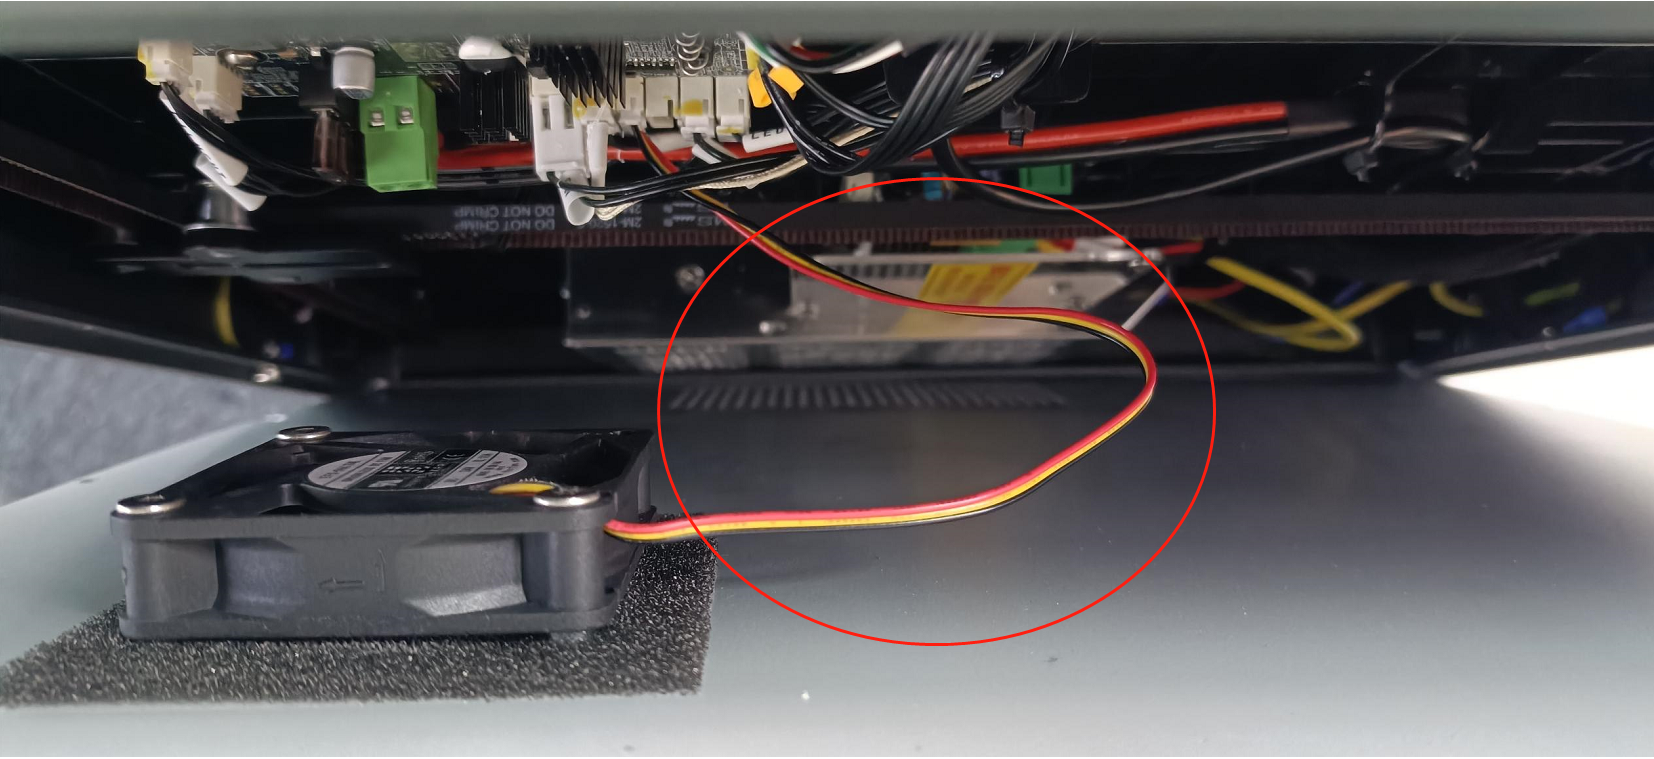
Plug in the fan terminal of the mainboard, and close the bottom cover.
(Note: The cable routing of the mainboard fan)
¶ Step Eight:
Tighten two screws to secure the bottom cover and install four foot pads.
¶ Step Nine:
Plug in the power cord, power on and check the startup.