¶ 1. Phenomenon Description
(1) Gear idling, no material flowing from the nozzle.
(2) Gears make a clanging noise while turning, and no material flows from the nozzle.
¶ 2. Reason Analysis
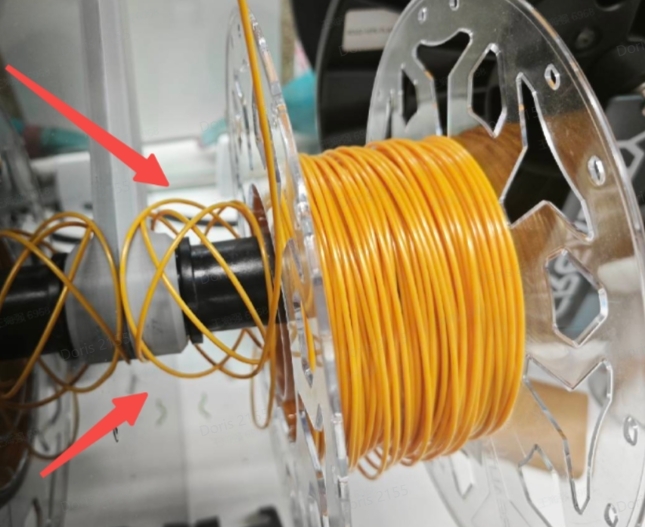
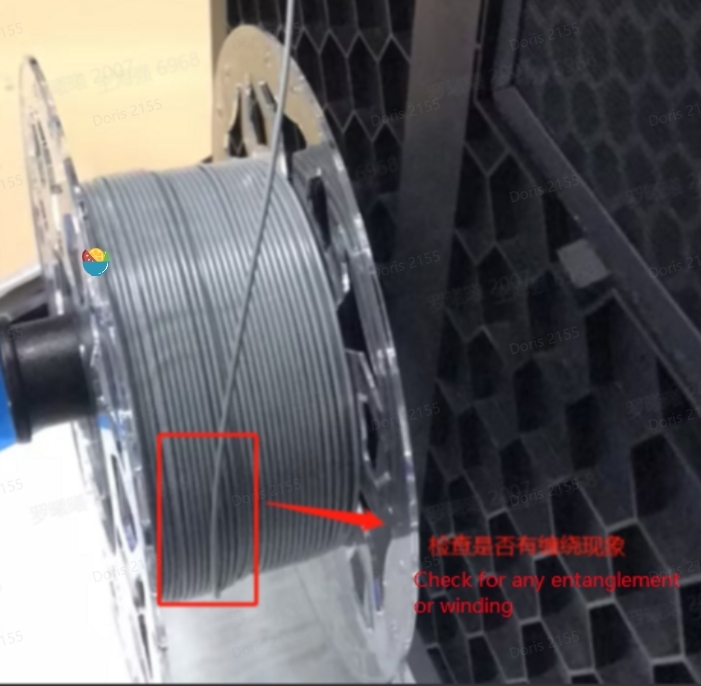
- Material entanglement at the spool position.
-
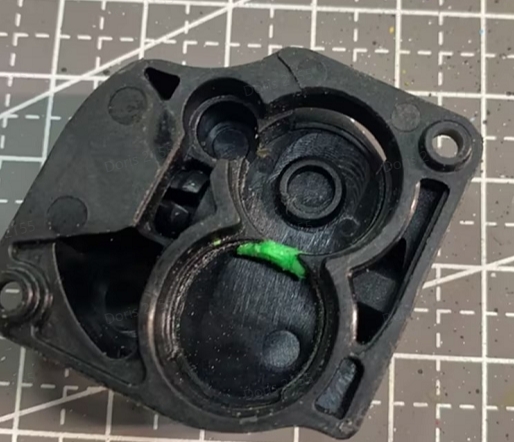
Blockage at the front shell of the extruder.
-
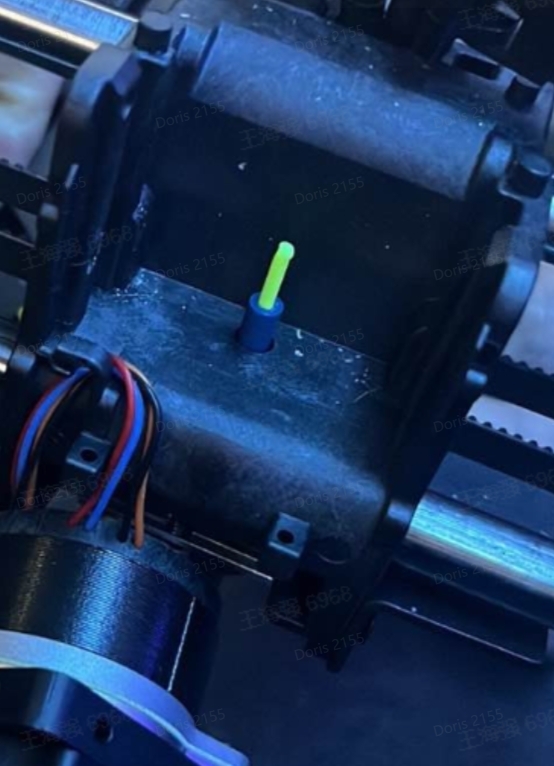
Clogged PTFE tube in the extruder.
-
Clogged Nozzle
-
Nozzle blockage or material leakage.
-
Excessive material debris residue in the extruder gears.
¶ 3. Troubleshooting and Solutions
¶ 3.1 Material Entanglement Check and Handling
Check the backside of the machine for material spool entanglement at the filament spool or PTFE tube inlet. If there's entanglement, carefully untangle the material before attempting to print again. The troubleshooting for non-extrusion is complete.

If no material entanglement is found, proceed to the next step.
¶ 3.2 Blockage/Tangling Troubleshooting
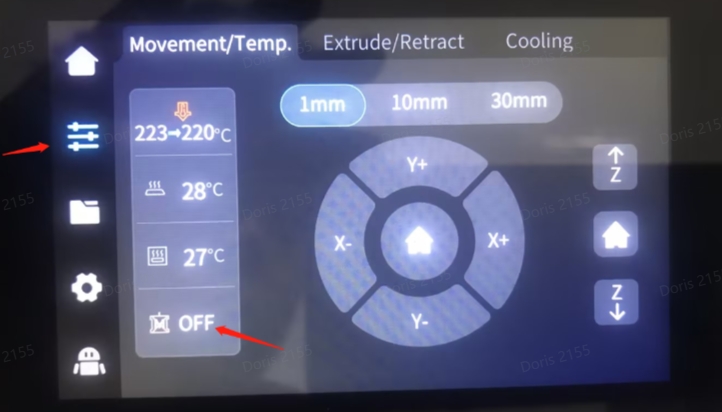
STEP 1: enter the control page, click "OFF" to unlock the motor.
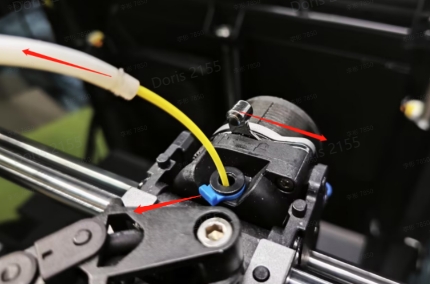
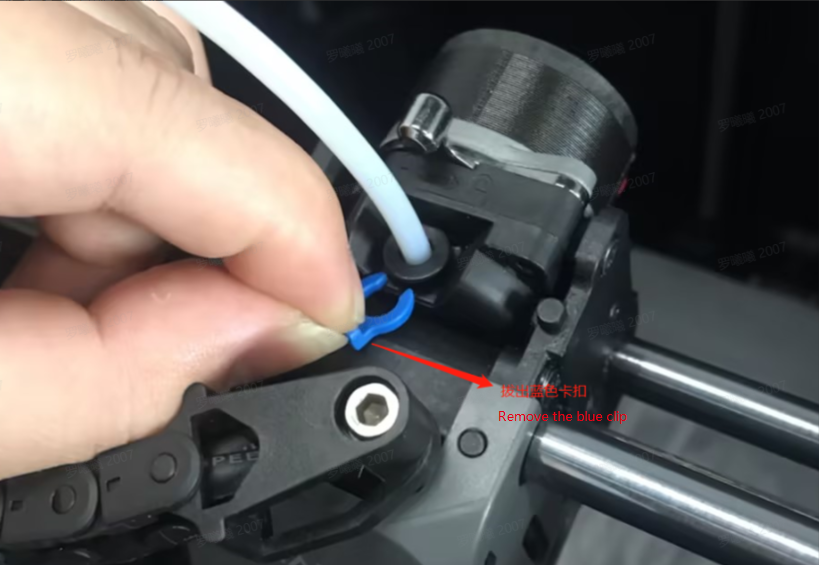
STEP 2: Remove the blue locking clip and gently pull out the PTFE tube from the top of the extruder, exposing the material. Set the nozzle temperature to the recommended printing temperature and wait for it to stabilize.
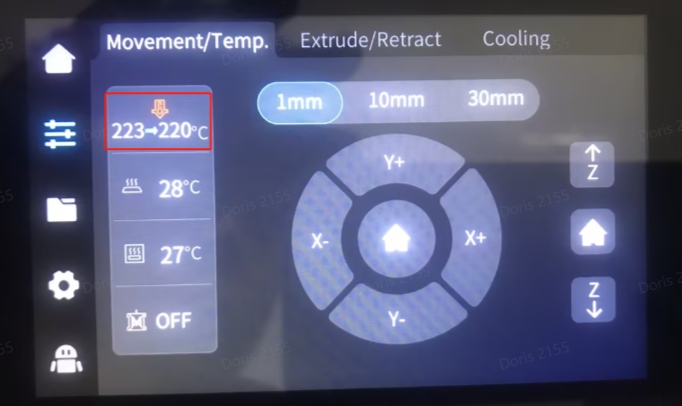
STEP 3:Set the nozzle temperature to the recommended printing temperature and wait for it to stabilize.
STEP 4:Use some force to quickly pull out the material by hand.
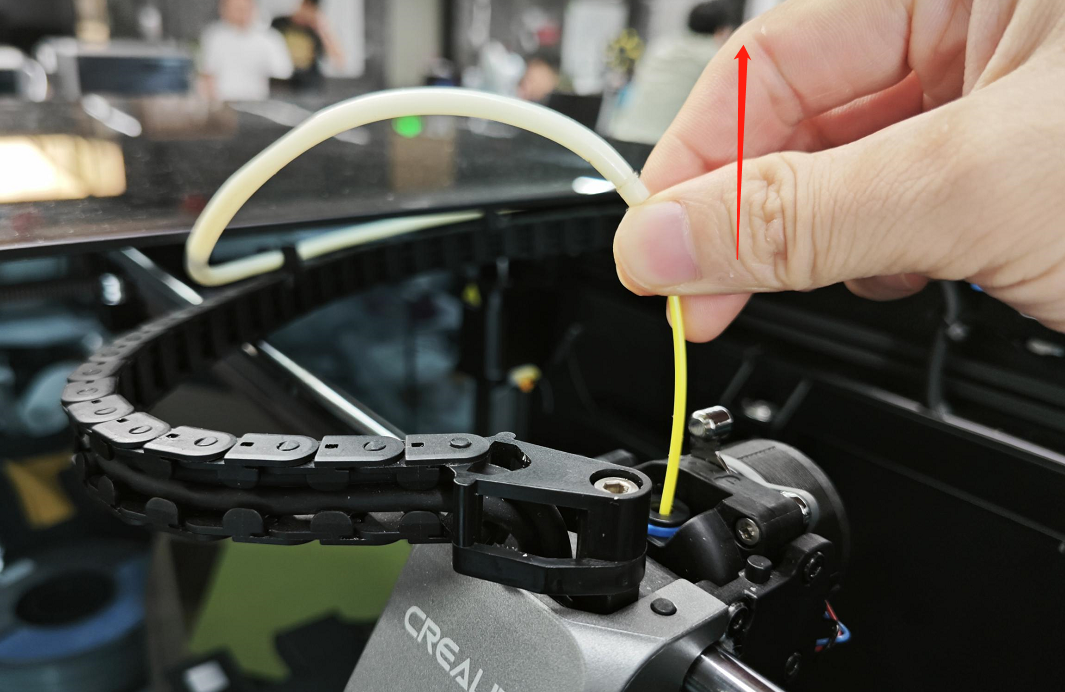
¶ 3.2.1 If the Material Can Be Pulled Out
Check the end of the filaments for any umbrella-shaped protrusion. If there is a protrusion, replace the PTFE tube.
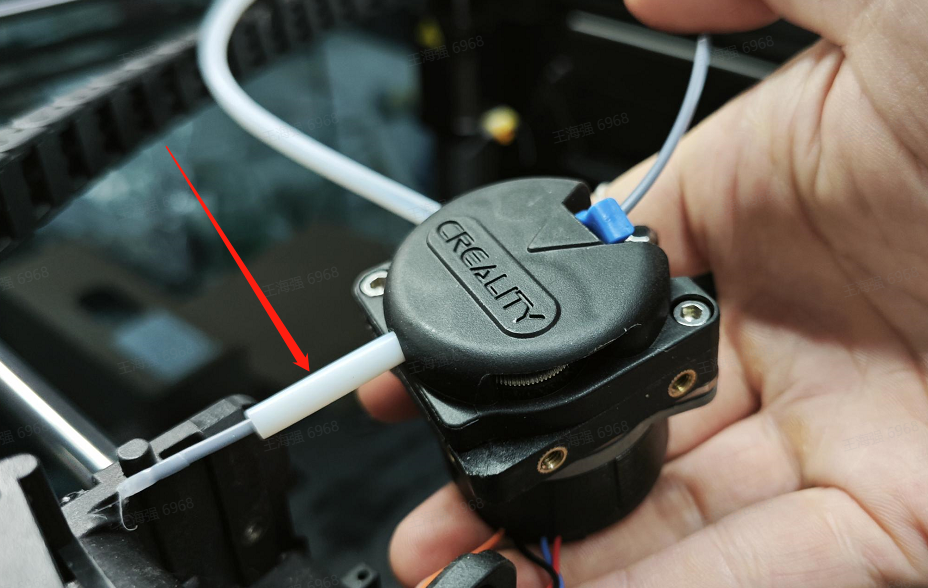
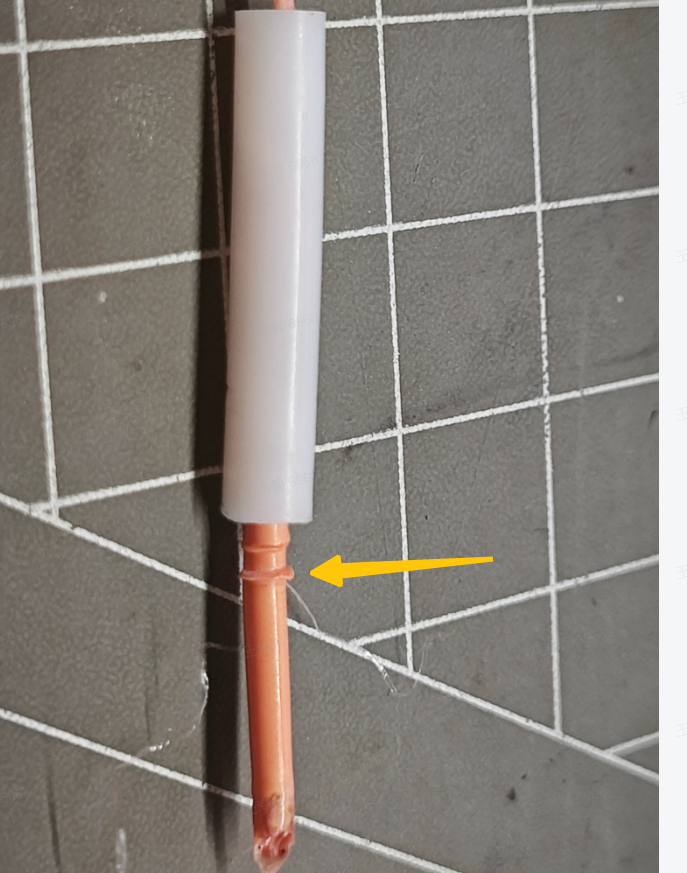
After removing the PTFE tube, it was found that the filament had a mushroom-shaped protrusion at the end.
¶ 3.2.1.1 If the Material Can Be Inserted into the Hotend
- If filament insertion is successful, and the extrusion is working properly, turn the extruder handle to the closed position and select "Auto Feed." Check the filament extrusion and monitor the rotation status of the extruder gears. If automatic extrusion works without issues, the filament not extruding problem is resolved.
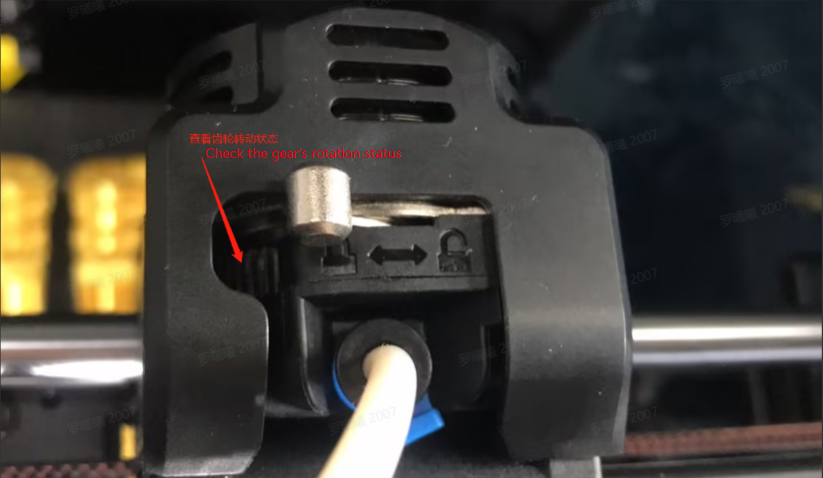
2.If the extruder gears do not rotate during automatic extrusion, the problem might be related to the extruder motor (or a connection board issue). Begin by inspecting the extruder motor's connections to ensure they are secure. If necessary, consider replacing the extruder motor to further troubleshoot the problem.

- If the extruder gears are functioning correctly, but you notice a slight clicking sound in the gear area and uneven filament extrusion at the nozzle, you should analyze two potential sources of the issue:
a. If the extruder gears are operating normally without any unusual noises, but the nozzle still experiences uneven extrusion, proceed with to K1 Max Nozzle blockage steps.
b. If the extruder gears are not functioning properly, follow the troubleshooting steps for the extruder assembly to address the issue.
STEP1: Remove the extruder motor protective cover. Using the tools provided in the kit, carefully disassemble the 3 cylindrical head screws that secure the extruder assembly on both sides of the extrusion machine. Support the extrusion assembly from below and gently lift it upwards (be cautious not to lift it abruptly to avoid damaging the extrusion machine wiring).


STEP2: Using the included tool from the toolkit, disassemble the two diagonal screws that secure the extrusion machine assembly's front cover. Open the extrusion machine's front cover and inspect whether there are any residual material debris on the extrusion machine gear. Check if the gear is damaged or deformed. If it's damaged or deformed, proceed to replace the K1 Max extrusion machine assembly.


STEP3: If there is a substantial amount of material debris on the extrusion gear, use a soft brush to clean the debris from the gear. After cleaning, replace the extrusion machine's front cover and reassemble the extrusion assembly screws on the X-axis slide block mounting position. Tighten the three fixing screws on both the left and right sides.


STEP4: Repeat the automatic feeding operation. Observe the extrusion of the material at the nozzle. If the extrusion is normal and the extrusion gear operates smoothly without any unusual noises, the no material issue has been resolved.
¶ 3.2.1.2 If the filament cannot be inserted into the hot end
Quickly remove the filament, and use the included probe from the toolkit to push any remaining filament debris in the extrusion channel towards the hot end:
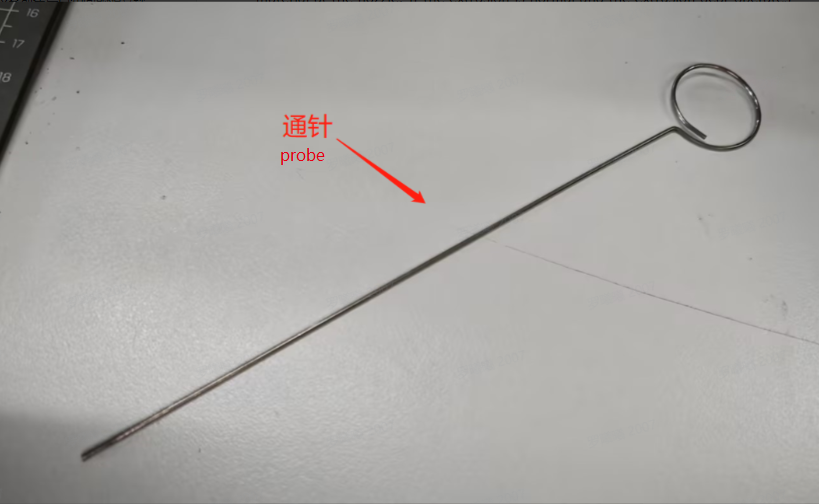
K1 Max Accessory Kit Probe Tool
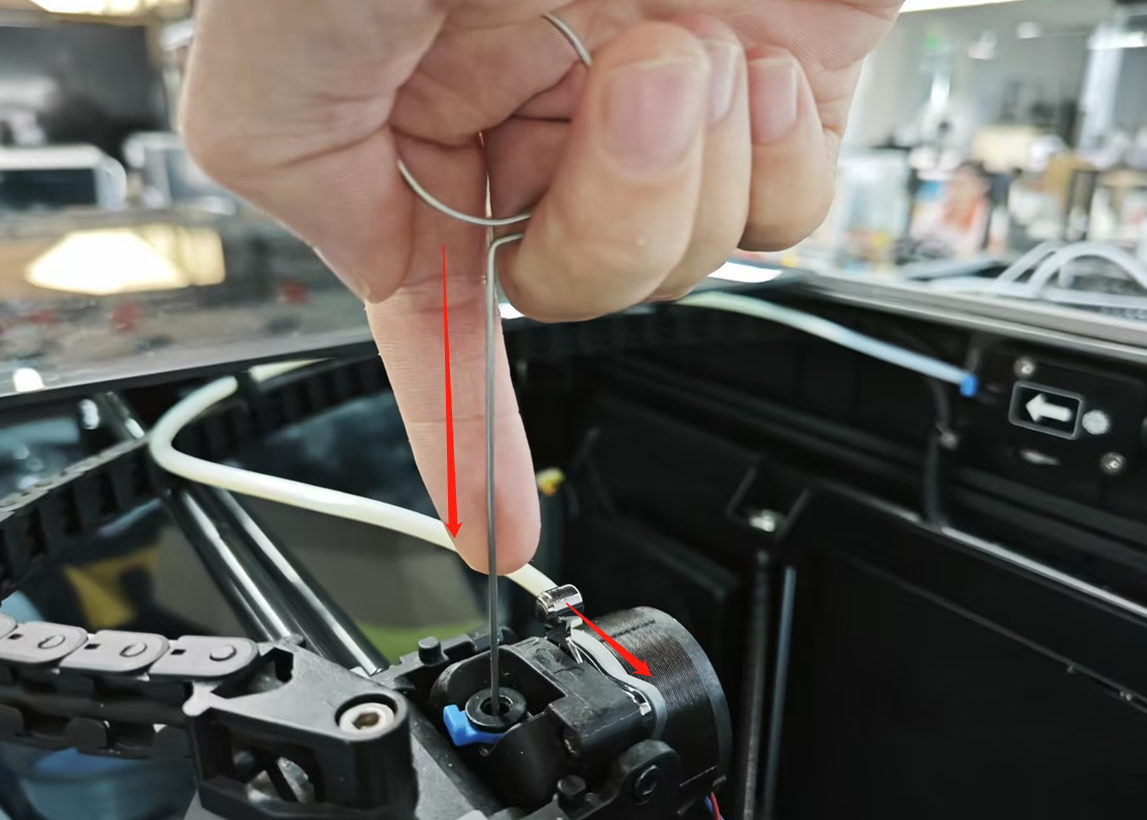
Open the extrusion switch and insert from top to bottom
a. If the remaining filament debris in the extrusion channel is pushed completely out through the nozzle and out of the extruder, retract the probe quickly. This prevents the molten filament adhering to the inner wall of the throat tube and extrusion gear. Repeat this process to resolve the no-material issue.
b. If the remaining filament debris in the extrusion channel cannot be pushed through with the probe, the issue may be a hot end clog. Proceed with the clog resolution process.
c. If you cannot retract the filament, it might be a front casing clog. Refer to the front casing clog/material jam process.
¶ 3.3 Front Casing Clog/Material Jam Resolution Process (Revised based on existing tutorials)

¶ 3.3.1 How to determine if it's a material jam:
(1) Heat the nozzle to the extrusion temperature. Unlock the extruder. Try to manually retract the filament by hand or pull it out from the extrusion gear area.
¶ 3.3.2 How to prevent material jams:
(1) Re-level the build platform.
(2) Do not turn off the enclosure fan.
(3) Use official slicer settings, avoid setting the bed temperature too high (do not exceed 50°C for PLA, 70°C for PETG), and ensure the nozzle temperature is not too low.
¶ 3.3.3 Material Jam Resolution
STEP1: Heat the nozzle to the filament extrusion temperature.
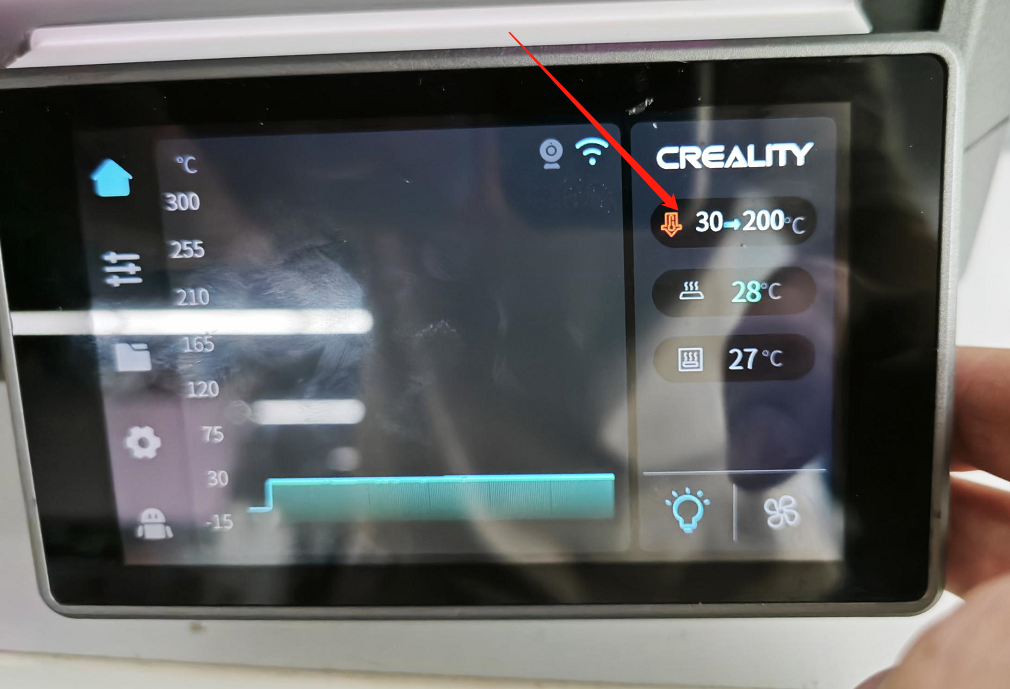
STEP2: Unlock the extruder, remove the PTFE tube, and cut the filament.
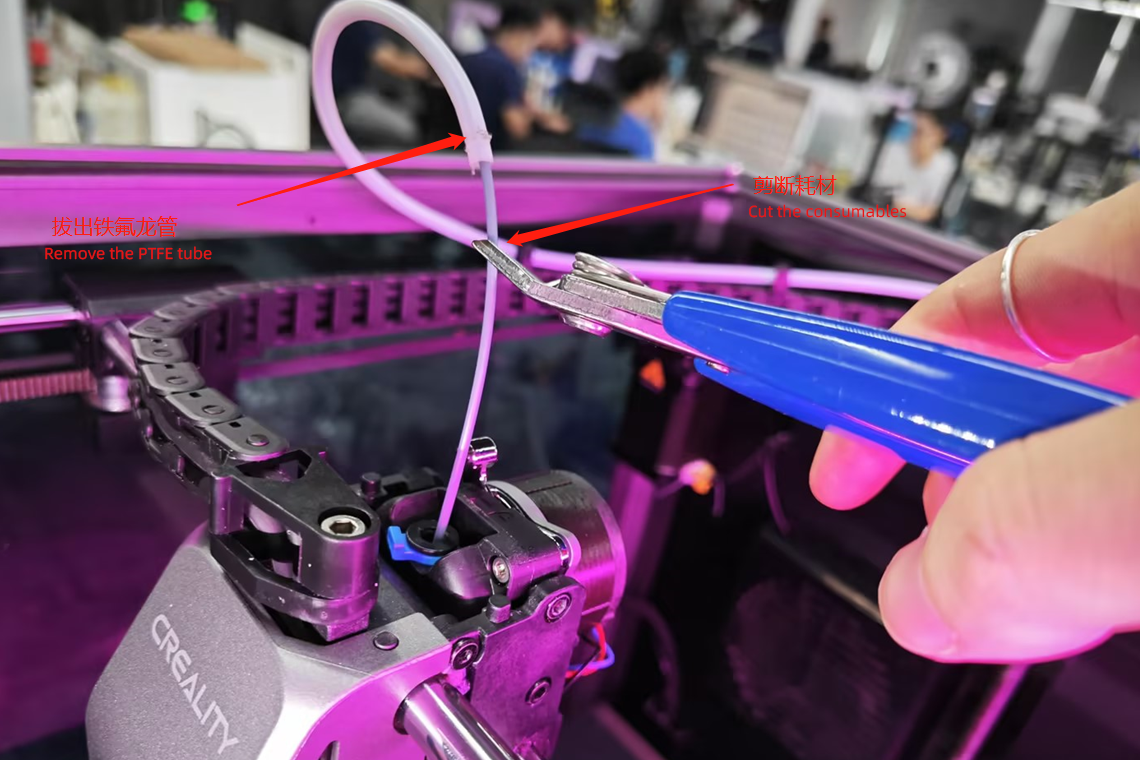
STEP3: Disassemble the three screws from the extrusion machine.


STEP4: Remove the extrusion assembly (avoid pulling on the stepper motor wires).
STEP5: Remove the two screws securing the extrusion machine's front casing.
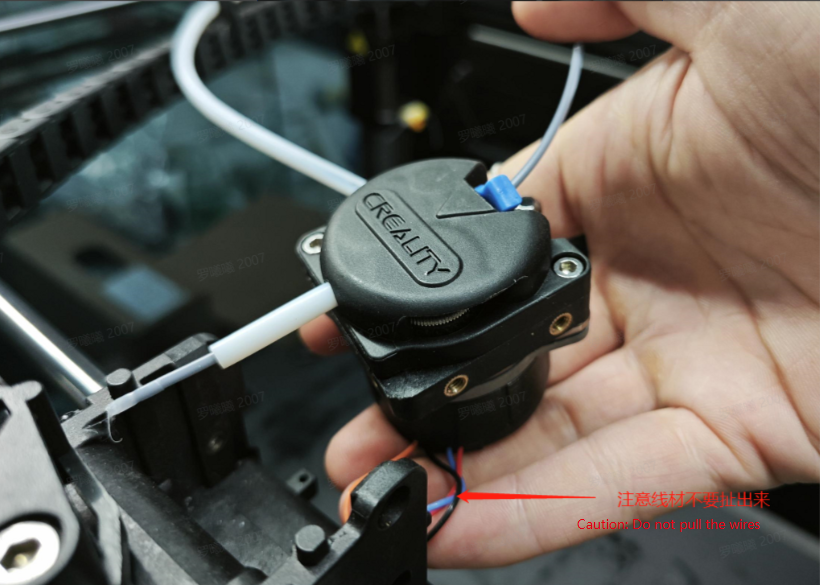

Important: Set the nozzle temperature to 0°C after removal.
STEP6: Separate the motor and the extrusion gear part, place the motor on the X-axis bracket temporarily.

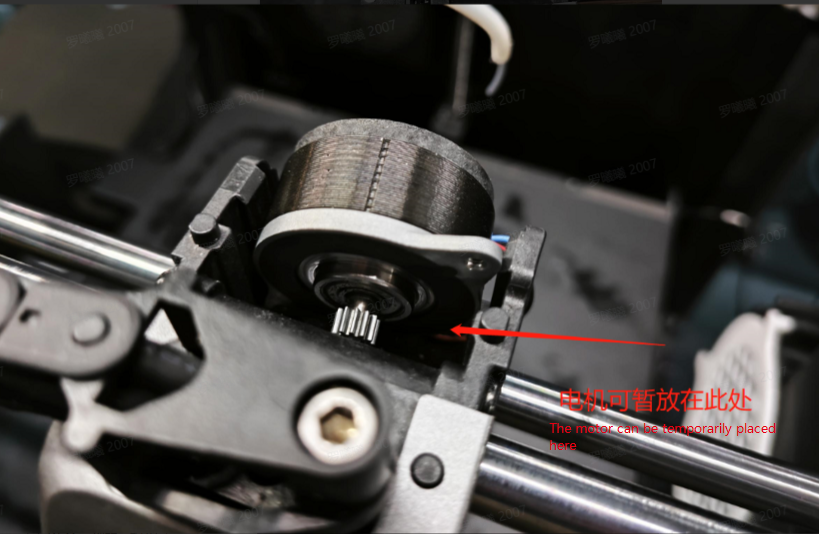
STEP7: Separate the extrusion gear assembly from the front casing (in case the material is jammed in the extrusion and cannot be removed). You can use tools like a spatula or pliers.


STEP8: Handle the jammed material inside the front casing.
If the material is jammed inside the PTFE tube, you can use a probe or an L-shaped wrench to push the material out.

STEP9: Reassemble following the disassembly steps.
¶ Clog Resolution
STEP1: Heat the nozzle to the filament extrusion temperature.

STEP2: Unlock the extruder, remove the PTFE tube, and cut the filament.

STEP3: Disassemble the three screws from the extrusion machine.


STEP4: Remove the extrusion assembly, and if there's a clog that prevents material removal, and the filament is stuck, you cannot pull it out.

STEP5: Disassemble the AI laser radar and the front casing of the extrusion machine.
- Disconnect the transmission cable on the left side of the nozzle board and remove the two screws above the AI laser radar and the screws on both sides of the nozzle cover using a hex wrench.
- Remove the nozzle cover and disconnect the model fan cable.

STEP6: Disassemble the hot end.
- Turn off the machine's power or set the nozzle temperature to 0°C before proceeding.
- Allow the temperature to cool to room temperature, remove the insulating sleeve that covers the hot end, and use a hex wrench to remove the top screw that secures the throat tube and the two cylindrical head screws that secure the hot end from the center of the heat sink.
- Remove the connector for the heating element and the thermistor on the back of the nozzle board, and remove the hot end.

STEP7: Handle the clogged material.
STEP8: Reassemble.