
To Our Dear Users
Thank you for choosing Creality. To make using our products easier, please read this User Manual before you start and follow the instructions provided carefully.
Creality is always ready to provide you with high-quality services. If you encounter any issues or have any questions whenusing our products, please use the contact information at the end of this manual to contact us.
To further improve your user experience, you can find more about our devices via the following methods:
User manual: You can find instructions and videos in the SD card provided with the printer.
You can also visit our official website (https://www.creality.com) to find information regarding software, hardware,
contact information, device instructions, device warranty information, and more.
Firmware Upgrade
Please visit our official website https://www.creality.com/download, switch to your language, then select your printer andmodel. Download the required firmware and install it to use it with your printer.
Instructions for Use
- Do not use this printer by methods or operations not described in this manual, otherwise it may result in accidental injury or property damage.;
- Do not place this printer near flammable materials, explosive materials or high heat sources. Please place this printer in a ventilated, cool and low-dust environment.
- Do not place this printer in a vibrating or any other unstable environment, as the printing quality will be compromised when the printer shakes.
- Please use the filament recommended by the manufacturer, otherwise the nozzle may be clogged or the printer may be damaged.
- Please use the power cord provided with the printer and do not use the power cord of other products. The power plug must be plugged into a three-hole socket with a ground wire.
- Do not touch the nozzle, hotbed or motor while the printer is in operation, otherwise you may get burned.
- Do not wear gloves or accessories while operating the printer, otherwise the moving parts may cause accidental injury including cuts and lacerations.
- After the printing process is complete, please use tools to clean up the filament on the nozzle while the nozzle is still hot. Do not touch the nozzle with your hands when cleaning, otherwise your hands may get burned.
- Clean the printer frequently. Always turn the power off when cleaning, and wipe with a dry cloth to remove dust, adhered printing plastics or any other material off the frame,guide rails, or wheels. Use glass cleaner or isopropyl alcohol to clean the print surface
- Children under the age of 10 must not use this printer without adult supervision in order to avoid accidental injury.
- This printer has a safety protection mechanism. Please do not manually move the nozzle or printing platform quickly while the printer is on, otherwise the printer will automatically power off for protection.
- Users should abide by the laws and regulations of the country and region where the equipment is located (place of use), abide by professional ethics, and pay attention to safety obligations. It is strictly forbidden to use our products or equipment for any illegal purpose. Our company is not responsible for the relevant legal responsibilities of any violators.
¶ Unbox & Setup Video
https://www.youtube.com/watch?v=LJdT-v4BZVo
¶ 1. About the Printer

¶ 2. Equipment Specifications

¶ 3. Parts List

¶ 4. Accessory List

¶ 5. Assembling 3D Printer
¶ 5.1 Install the Profile
- A. Align the profile progressively with the holes in the printer base according to the numerical label and pre-lock it individually using the No.25 screws first and then finally lock it all together.


Tips: Please make sure that each profile is installed in the correct position.
¶ 5.2 Install the Top Component
- A. Place the top component on top of the profile and pre-lock each of the four corners with No.25 screws before locking them all.

¶ 5.3 Install the Z-axis Kit
-
A. Put the print platform component on the foam support and combine it with the Z-axis component to form a Z-axis kit, then fasten it with the No.25 screws.

-
B. Place the Z-axis assembly upside down on the foam support, then fix the platform support to the linear bearing, and lock it with No.26 screws;
-
C.Secure the other end of the platform support to the profile using No.27 screws to lock it in place.


Tips:
① Platform L support assembly: L support + support block;
② Platform R support assembly: R support + support block
-
D. Tilt the Z-axis kit while placing the bottom inside the equipment frame profile.

-
E. Hold the frame at an angle, push the Z-axis kit in and lift it between the top profile and the optical axis;
-
F. Be sure that the bottom optical axis holder is located on the profile.

-
G. Align the top of the Z-axis kit with the profile holes, pre-lock it first with the No.24 screws and then tighten all the screws.

¶ 5.4 Install the Diagonal Bracing
- A. Put two different diagonal bracing on the bottom of the profile and lock the ends to the profile using No.27 screws.

¶ 5.5 Install the Material Rack
- A. After assembling and tightening the material barrel and bracket into a material rack, use the No.28 screws to secure and lock it to the profile.

¶ 5.6 Equipment Wiring

- A.Connect the X-axis motor cable to the X-axis limit switch cable

- B.Connect the filament detection line;
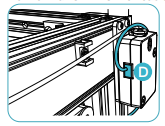
- C.Connect the Extruder Kit line

- D.Connect the Y-axis motor cable to the Y-axis limit switch cable
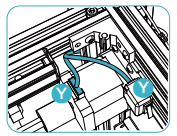
- E.Connect the hotbed cable
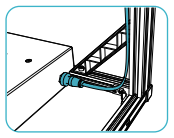
¶ 5.7 Install the Teflon Tube
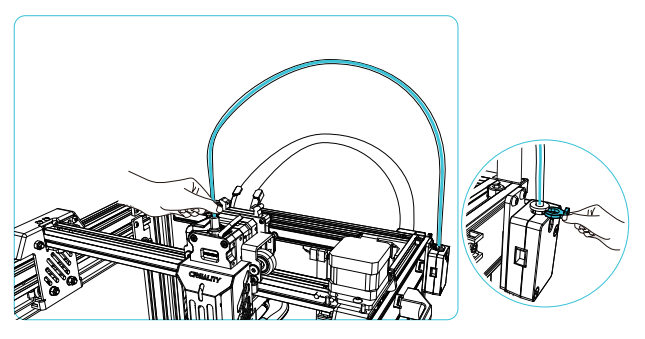
- A. Insert one end of the Teflon tube into the interface of the Teflon tube fixing block,
with the other end inserted through the snap to the bottom and finally into the blue jaws.
¶ 5.8 Fix the flexible flat cable
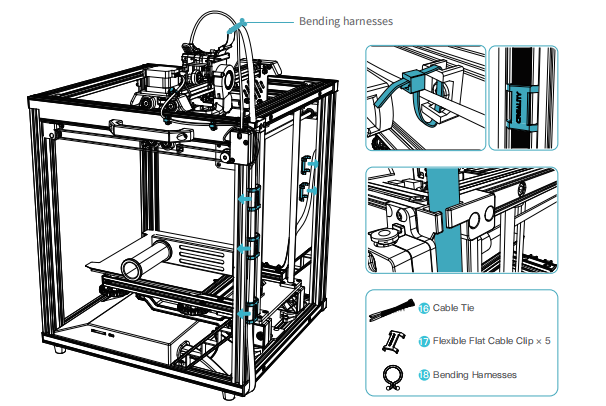
- A. To maintain a smooth alignment, please use flat cable clips and cable ties to secure the flat cables to the profile as shown in the diagram to avoid abnormal compression caused by printing interference and tangling during the operation of the device.
¶ 6.Using the 3D Printer
¶ 6.1 Switch on the Power
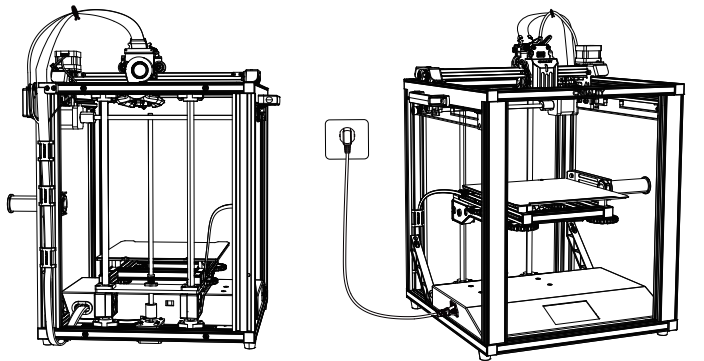
- A. Please select the correct voltage mode according to the local grid voltage and then switch on the power.
Caution:
● Please ensure the correct position for the power supply switch and mains before supply connection, in order to avoid damage to the device.
●If the mains between 100V and 120V, please select the 115V for the power supply switch.
●If the mains between 200V and 240V, please select the 230V for the power supply switch (default is 230V).
¶ 6.2 Auxiliary Leveling
- A. Click on "Settings" and go to "Leveling Method";

- B. Z-axis Homing and the hotend moves to the center of build platform click ①, adjust the Z-Axis offset with a A4 paper (0.01mm distance from build surface)

- C. Click ②, ③, ④, ⑤ respectively, adjust the corresponding leveling knob ensure 0.1mm distance (thickness of a paper) between the nozzle and build surface.

- D. Click ① again, adjust the Z-axis offset with a A4 paper (0.01mm distance from build surface).
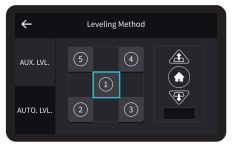
Tips: You can use a standard leveling card or a piece of A4 paper to aid leveling so that the nozzle just makes a scratch on the A4 paper; adjust the four leveling nuts in turn,and make continuous adjustments until you can feel a slight resistance from the nozzle when pulling on the A4 paper.
¶ 6.3 Auto Leveling
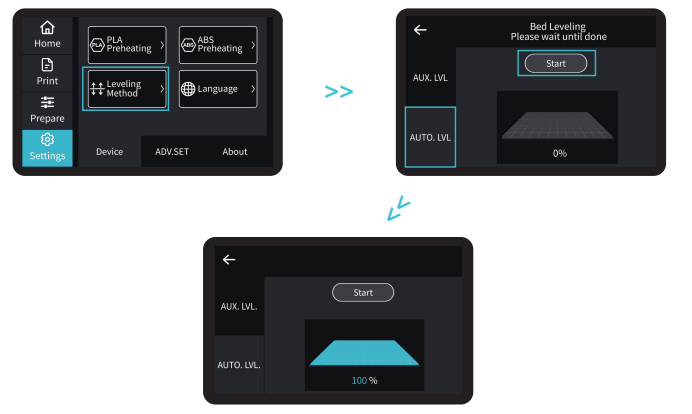
- A. Access “AUTO-LVL” >> “Start”, until 100% auto-leveling is complete.
¶ 6.4 Printer Preheating
- A. Manual Temperature Setting: Select "Prepare", click on "Temperature Setting" and then manually set the temperature of the nozzle and hotbed based on the filaments used for printing
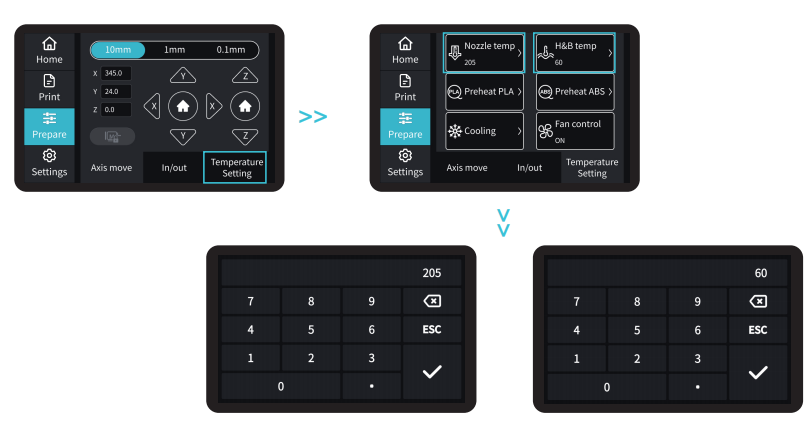
- B. Auto Temperature Setting: select "Prepare", click on "Temperature Setting" and select "Preheat PLA" or "Preheat ABS" to preheat the nozzle and hotbed based on the material to be printed.

Tips:
1、PLA Preheating Temperature: nozzle temperature 205°, hotbed temperature 60°; ABS preheating temperature: nozzle temperature 260°, hotbed temperature 90°.
2、When changing the filaments, if you need to heat the nozzle, pull out the filaments quickly after they have melted to avoid the cool-down of the melted filaments in the nozzle above the heat break.
3、If the filaments are pulled out directly without heating the nozzle, some of the filaments may be left in the nozzle, resulting in clogging or even damage to the extruder.
¶ 6.5 Filament Loading
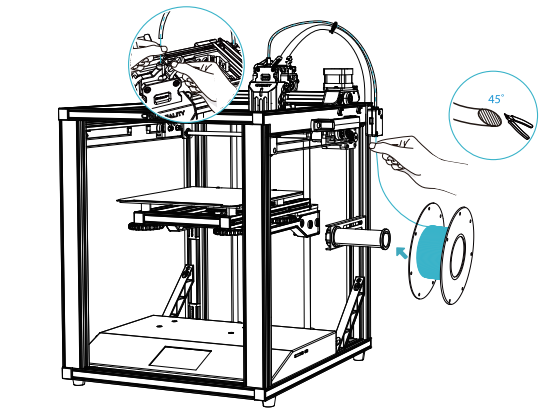
- A. Cut and straighten the front end of the filament at 45 degrees and place the tray on the material rack.、
Tips: How to Replace the Filament?
Method 1. Withdraw the filaments quickly and feed the new filaments after the nozzle is preheated and filaments are pushed a little forward.
Method 2. Cut filaments near the extruder and slowly feed new filaments until they are fed into the material barrel.
¶ 6.6 Start Printing
-
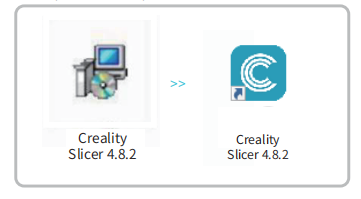
A. Visit our official website (https://www.creality.com) to download and install the software, or install the Creality software via the memory card provided with the printer.
-
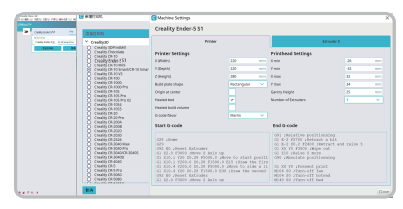
B.Go to Select language → Next → Select model → Next → Finish to complete the configuration.
-
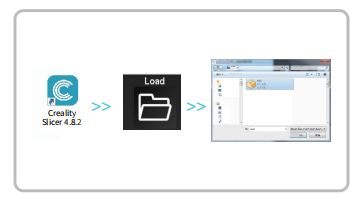
C.Launch the Creality slicing software → Load → Select the file.
-
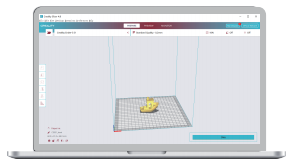
D.Generate the G-code file → Save it to the memory card.
-
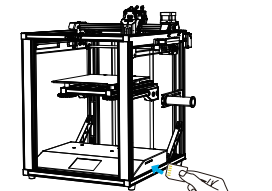
E.Insert the memory card.


-
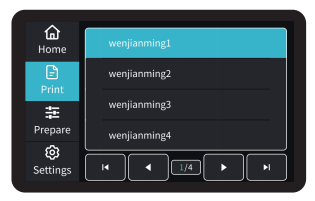
A. Choose the file to be printed;
-
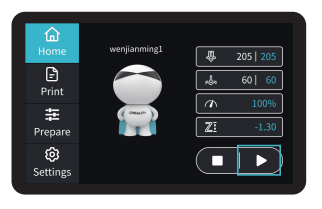
B. Click on the Start Printing button;
-
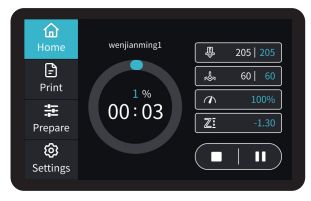
C. Already in printing status.
¶ 7. Circuit Wiring
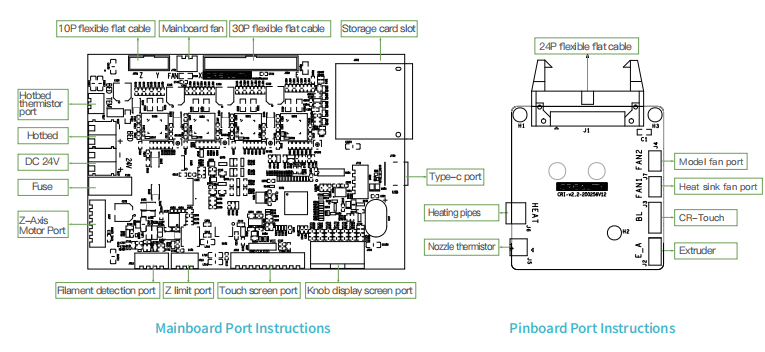
Due to the differences between different machine models, the actual objects and the images can differ. Please refer to the actual machine. The final explanation rights shall be reserved by Shenzhen Creality 3D Technology Co., Ltd.