¶ Video Tutorial
Service Tutorial Ender-5 Max Replace Hotend Adapter Board
¶ Tools
H2.0 hexagonal wrench
Cutting pliers
¶ Replacement Steps
Note: Before replacement, ensure the nozzle temperature is at room temperature
¶ Front Adapter Board
¶ Disassembly
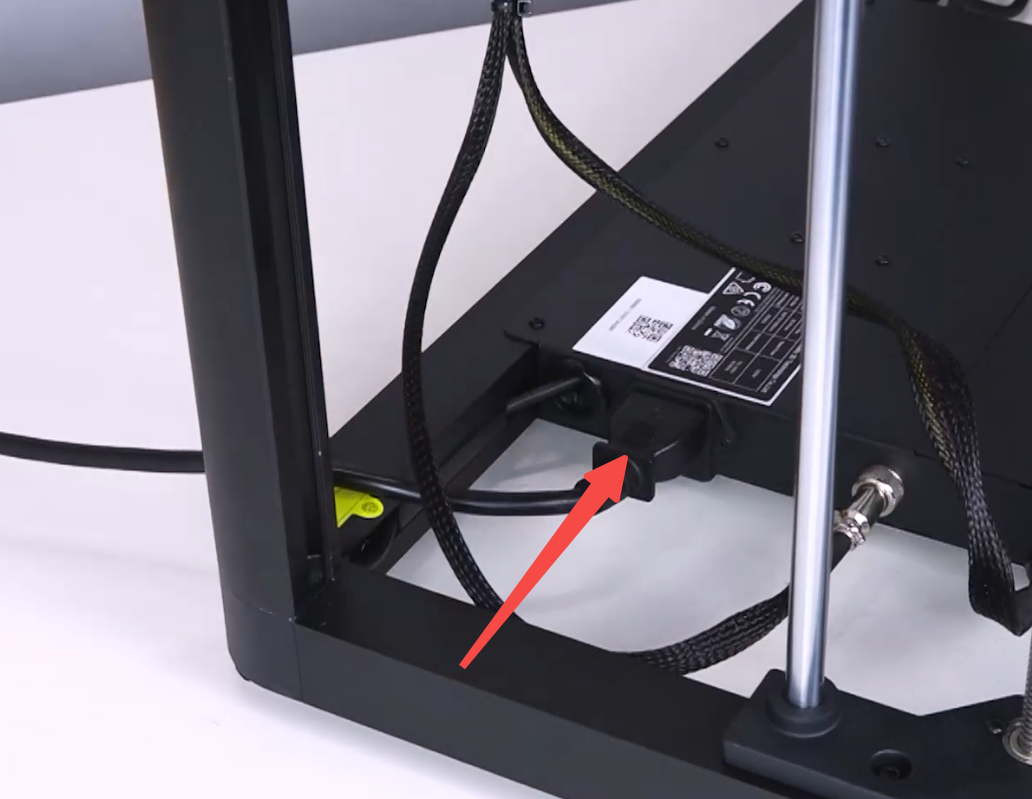
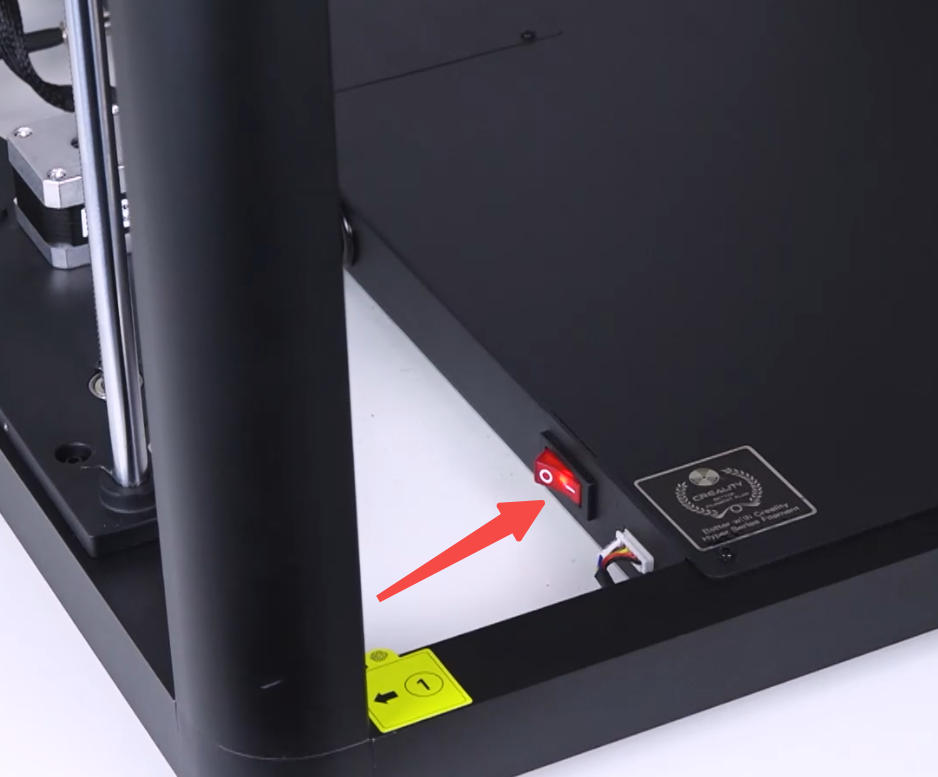
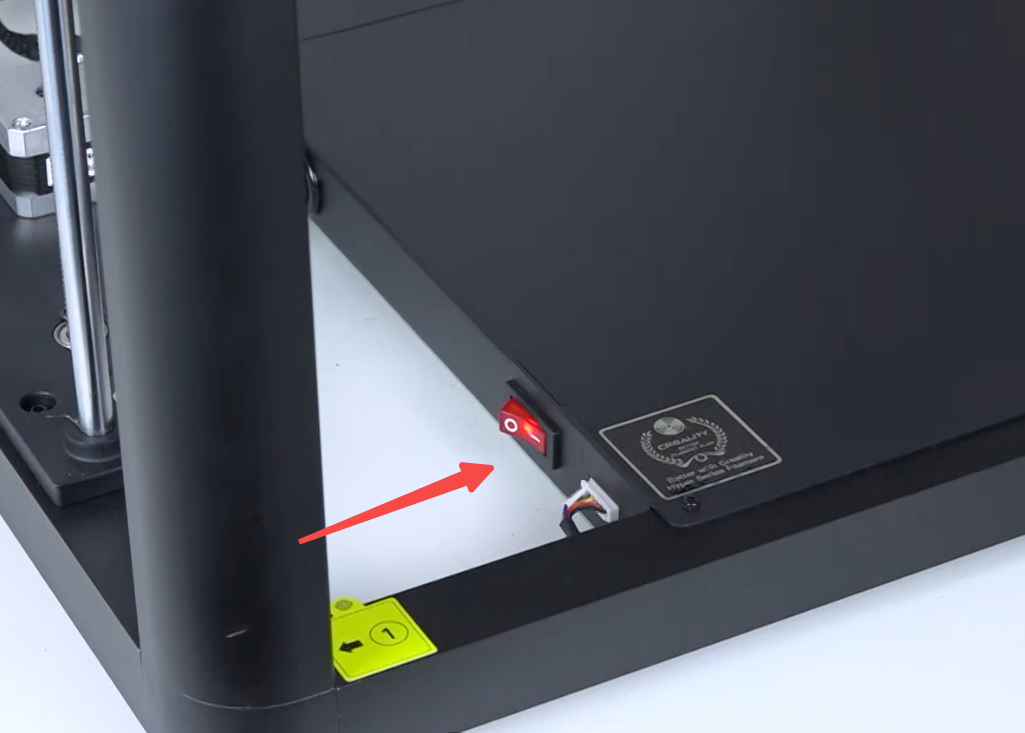
Plug in the power cord and turn on the machine
 |
 |
Remove the fan cover (unscrew 2 screws)
 |
 |
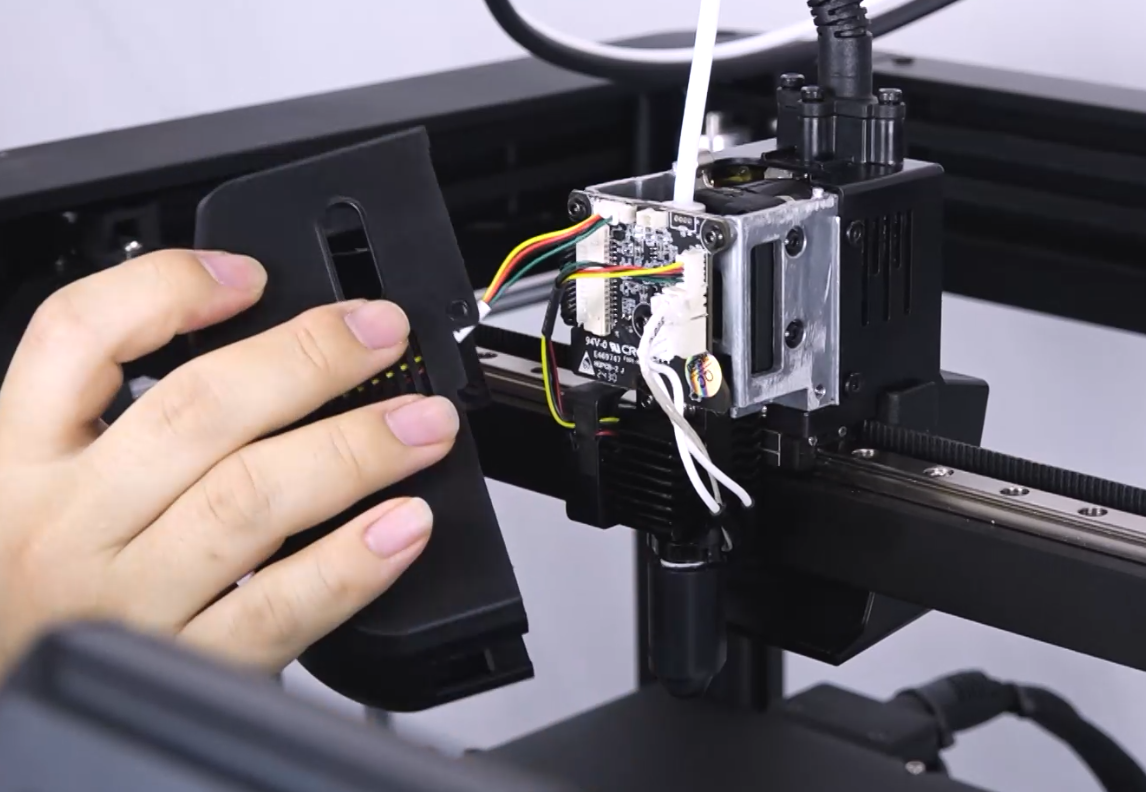 |
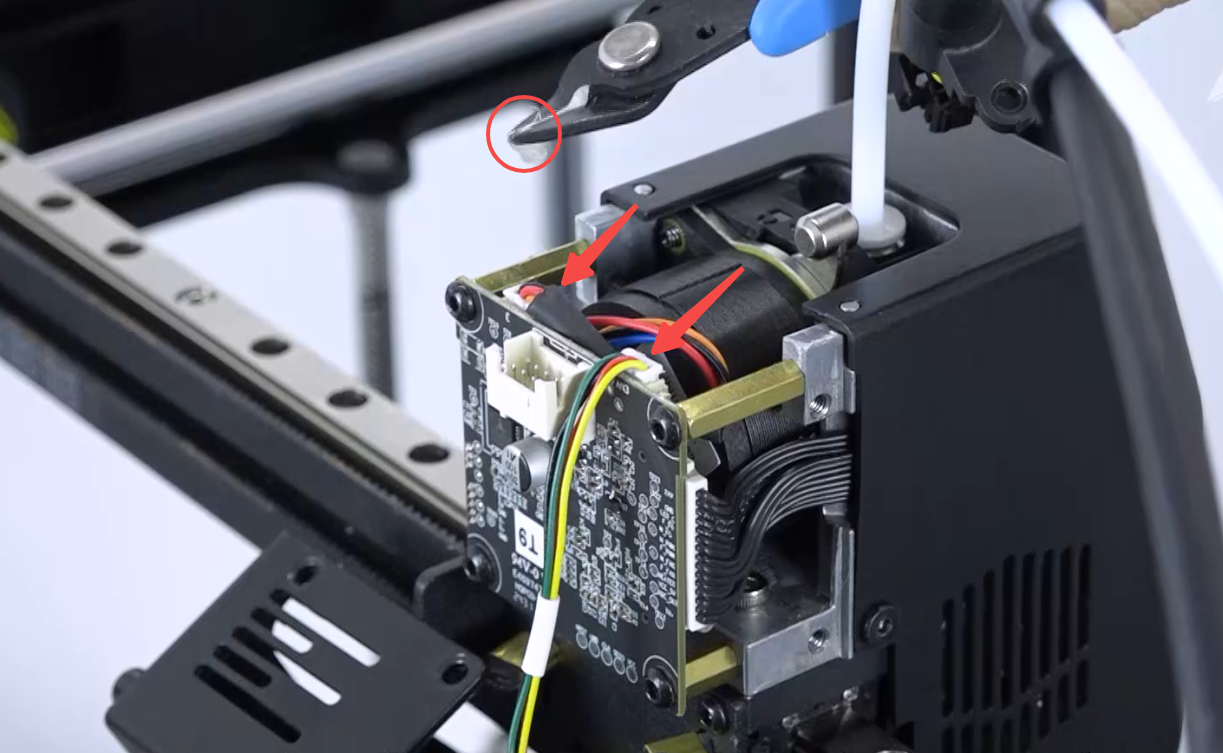
Use cutting pliers to cut off the hot glue (be careful not to cut the wires), and unplug the fan wires.
 |
 |
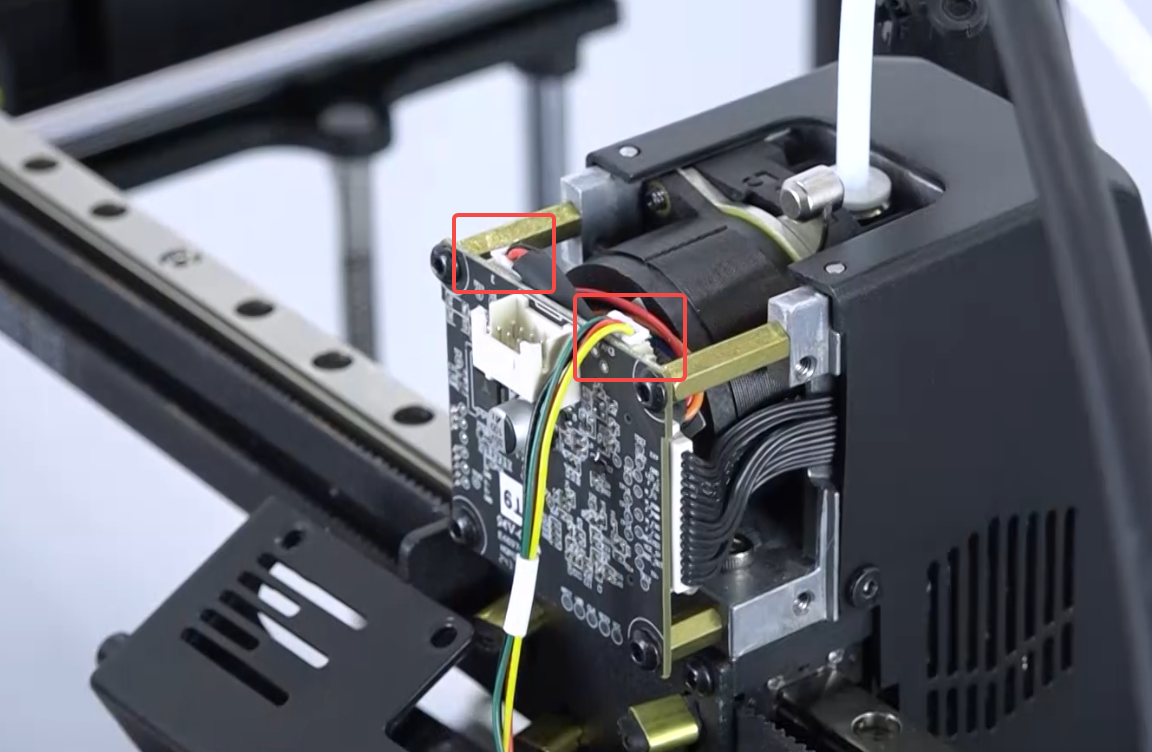
Use cutting pliers to remove the hot glue from the ports. Note: do not damage the ports and wires.

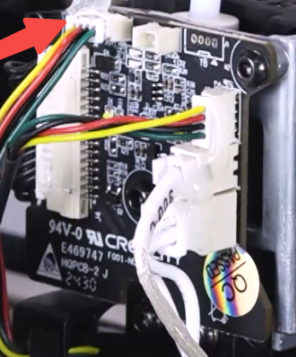
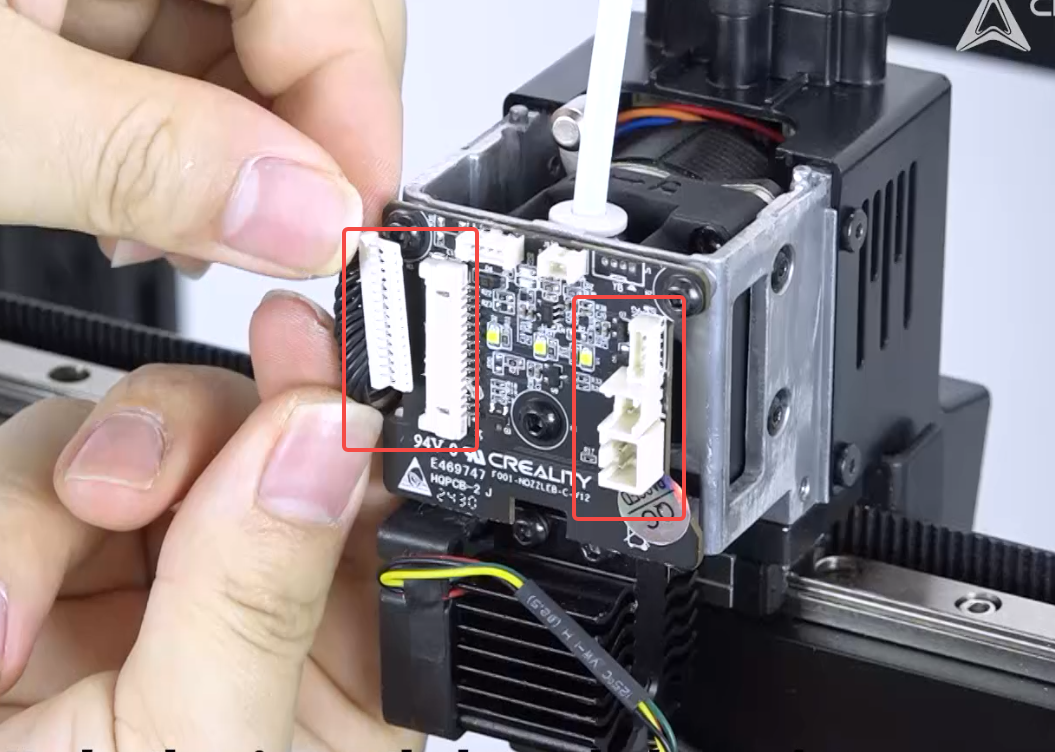
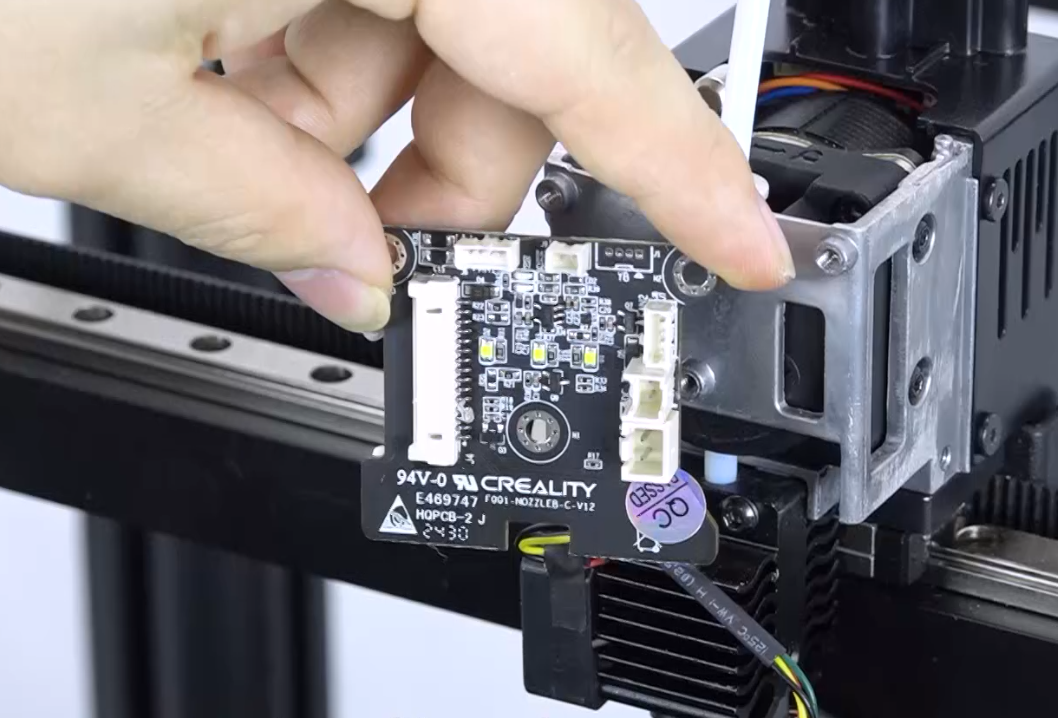
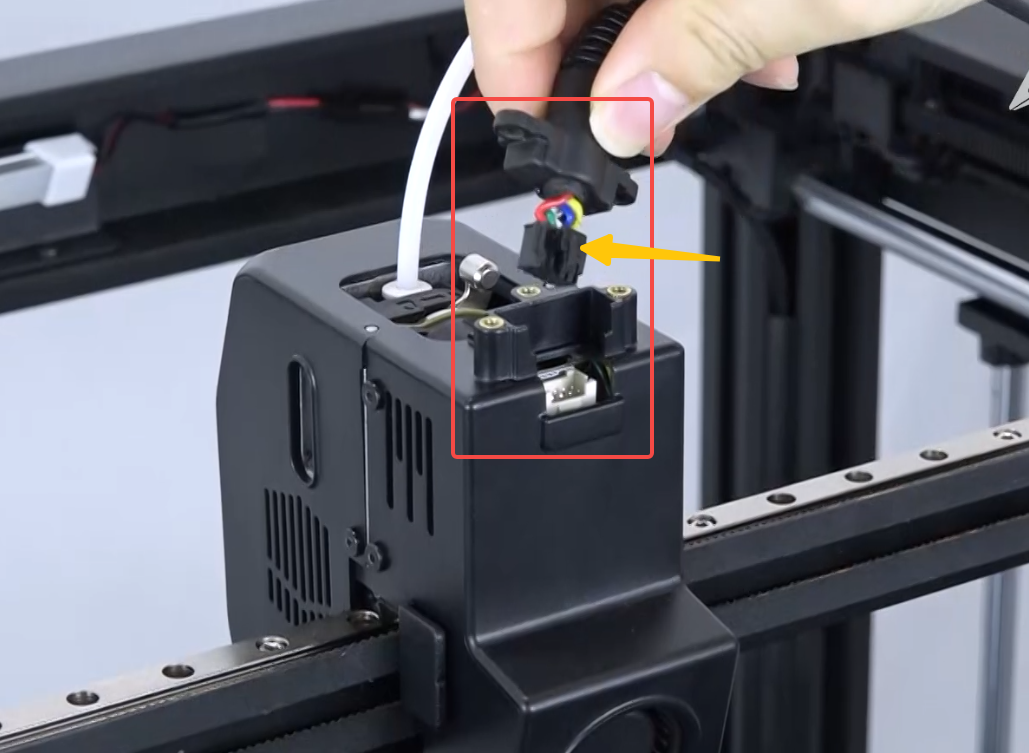
Unplug the wires from the hotend adapter board
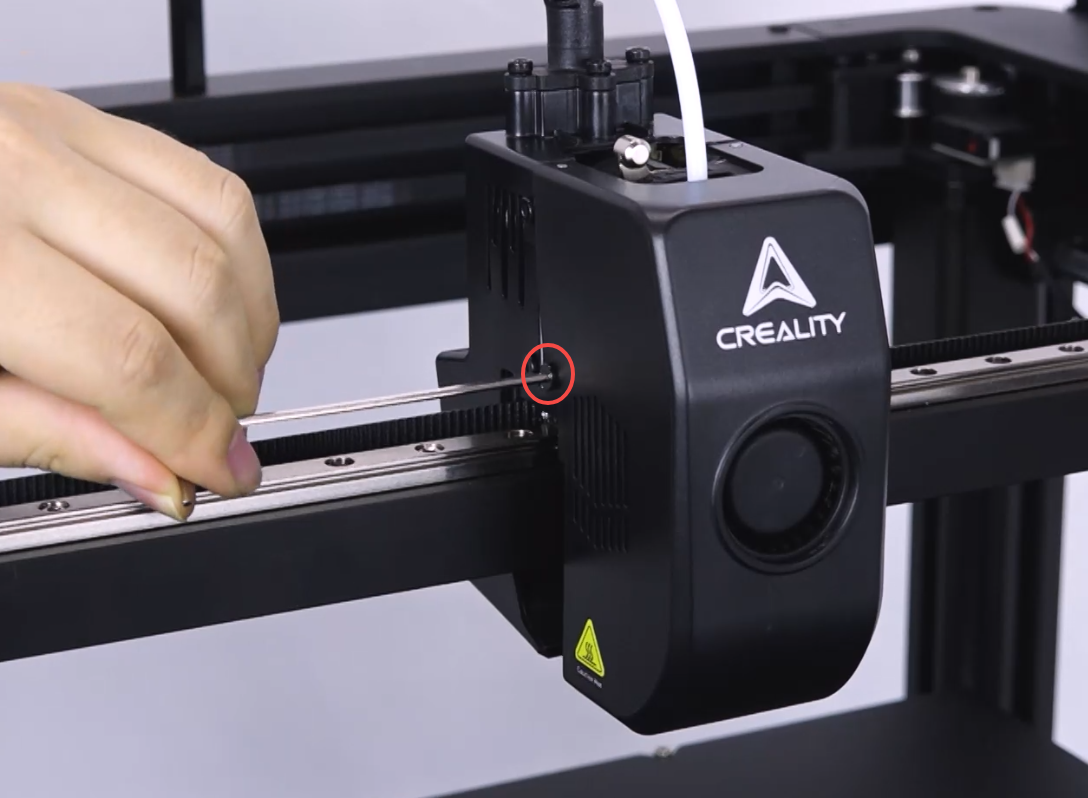
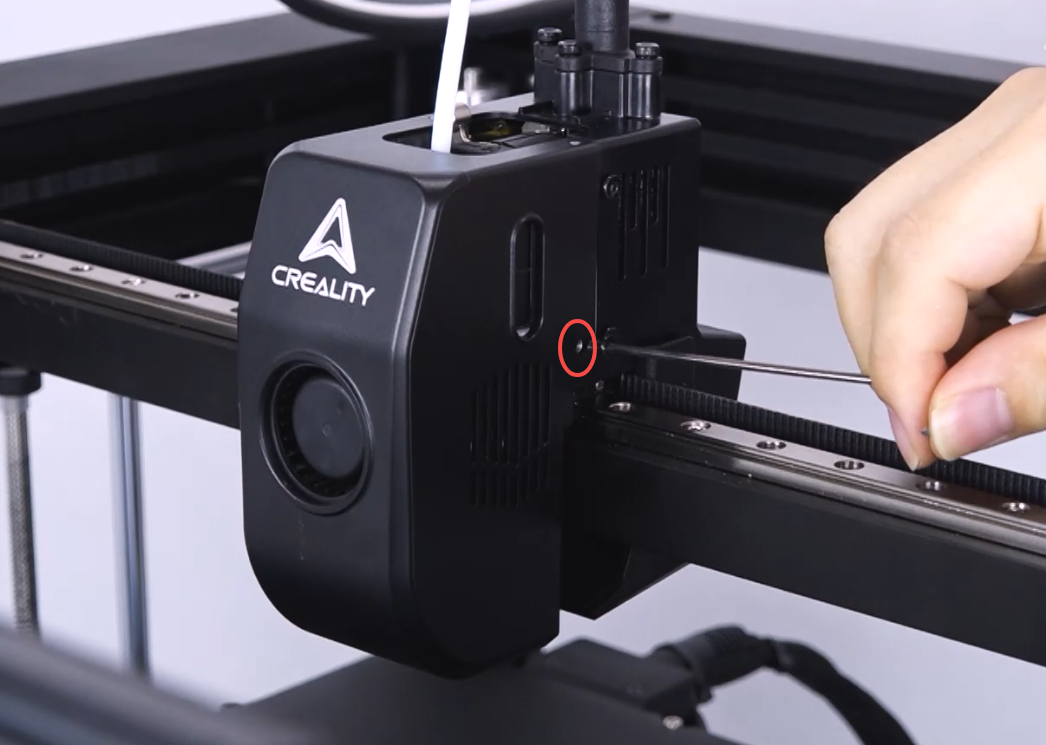
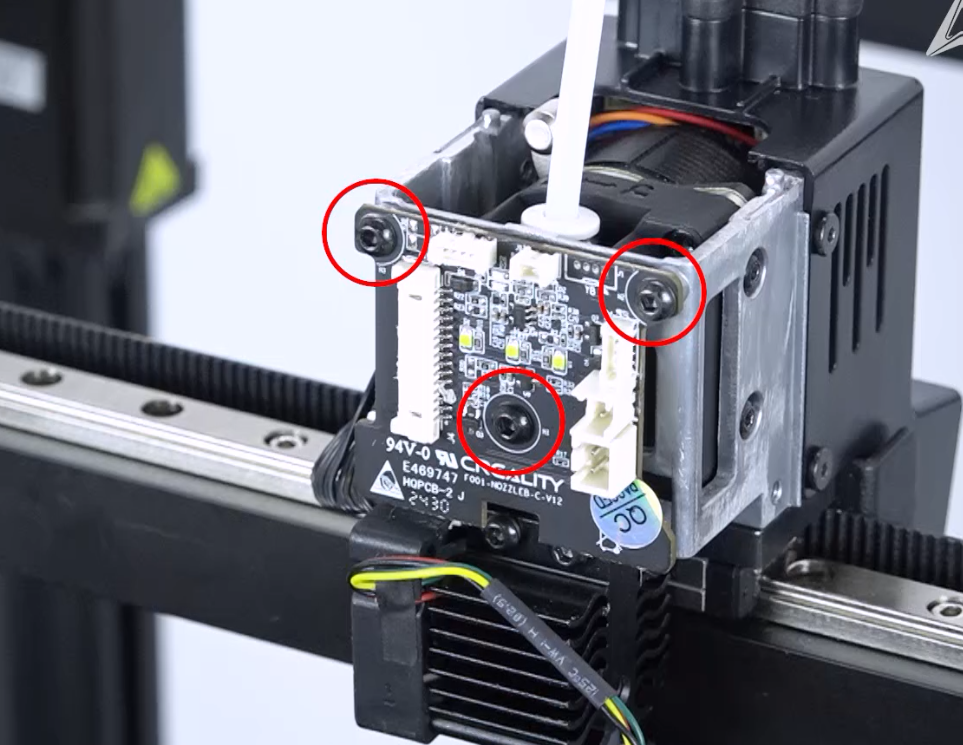
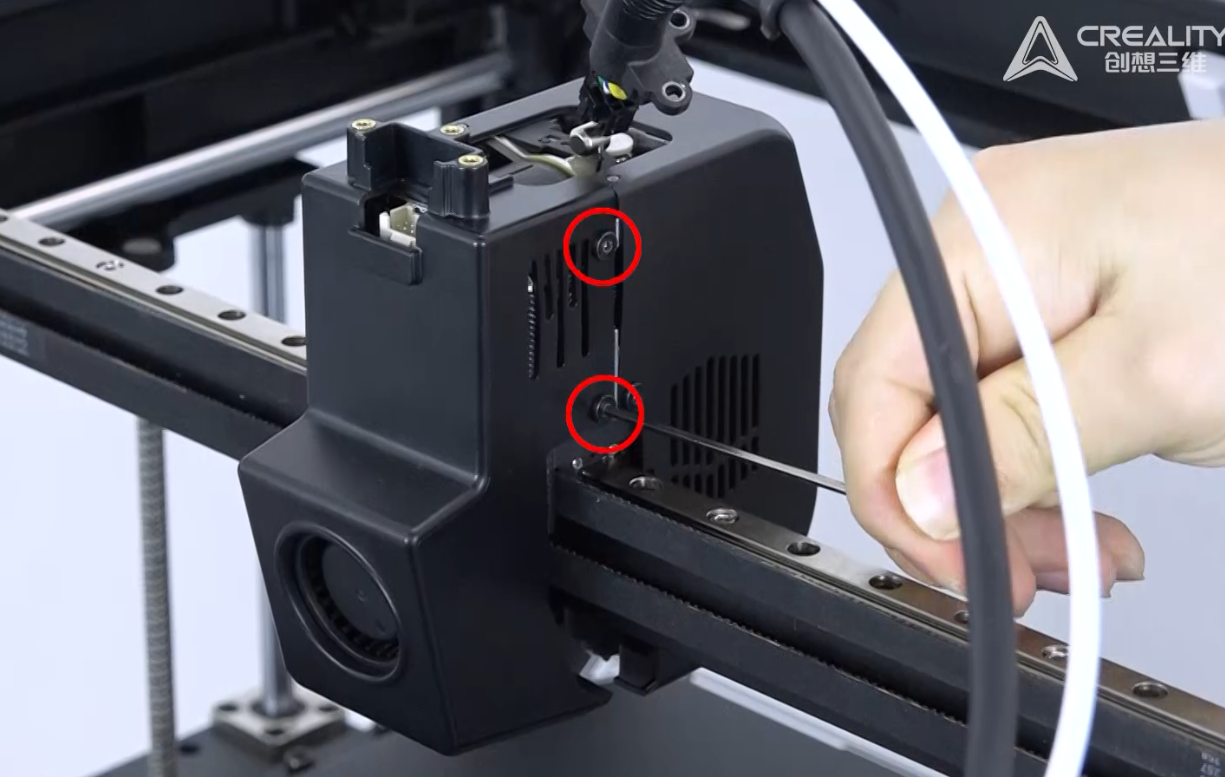
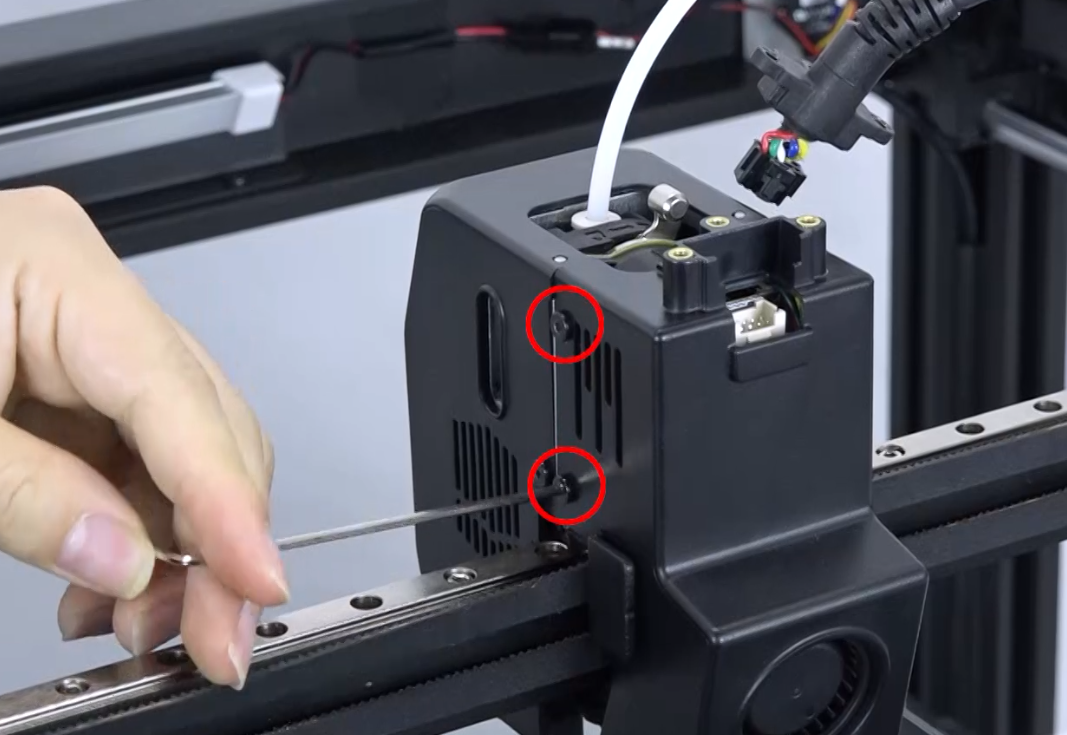
Unscrew the 3 screws fixing the hotend adapter board
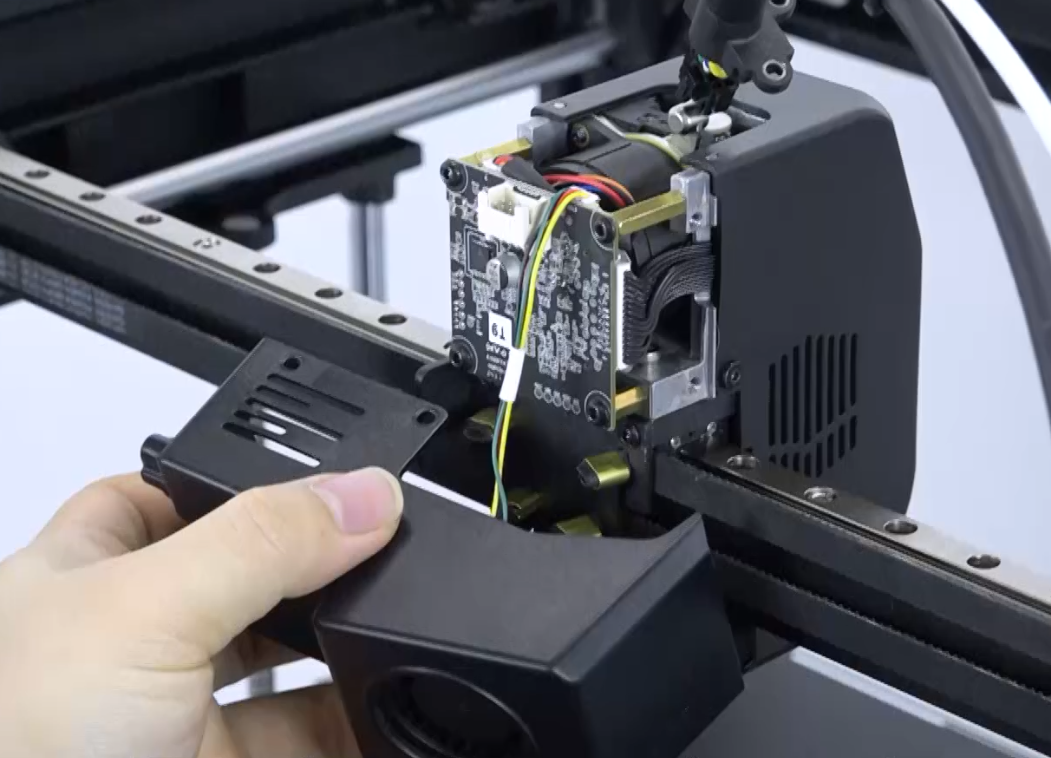
Remove the old hotend adapter board

¶ Installation
Replace with the new hotend adapter board.
Tighten the 3 screws.

Plug in the wires.
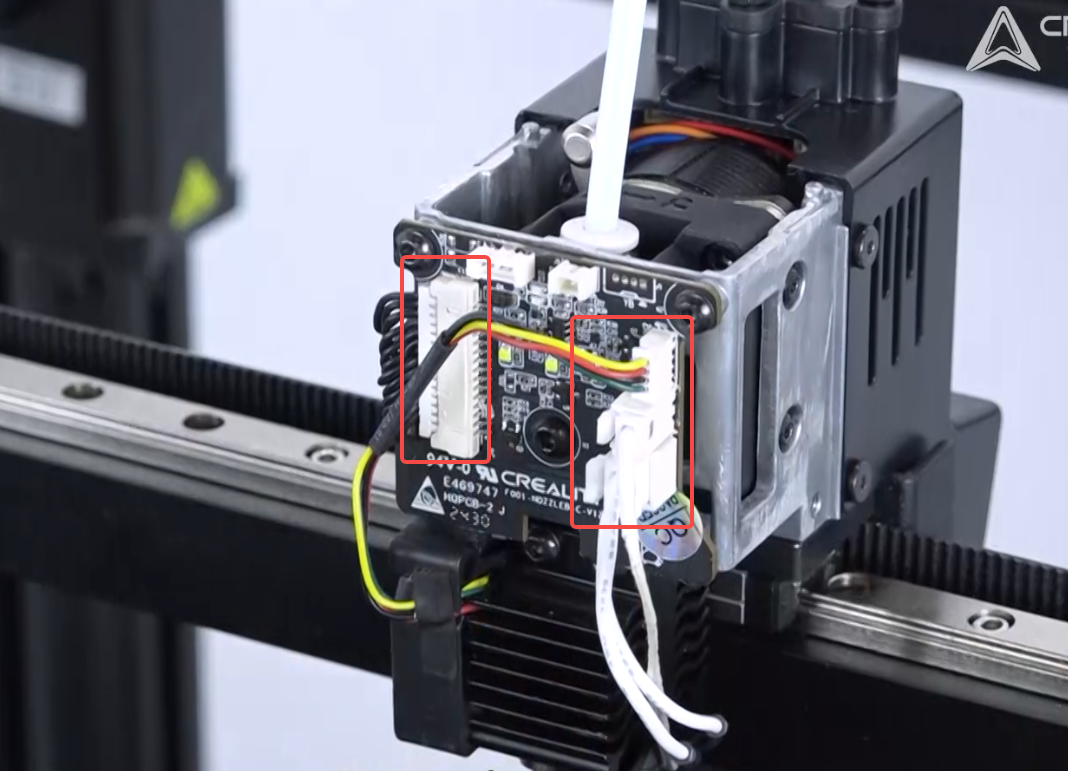
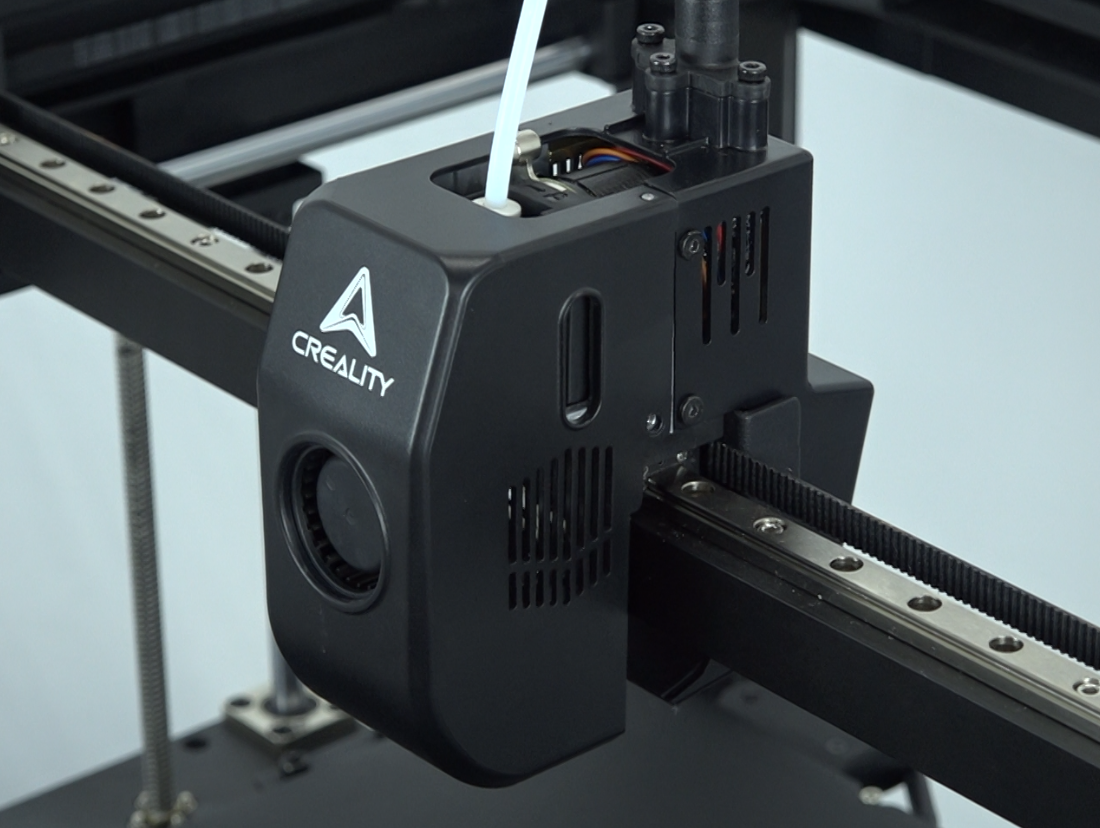
Plug in the fan wires, install the fan cover, make sure the two holes on top are aligned with the positioning posts.
 |
 |
 |
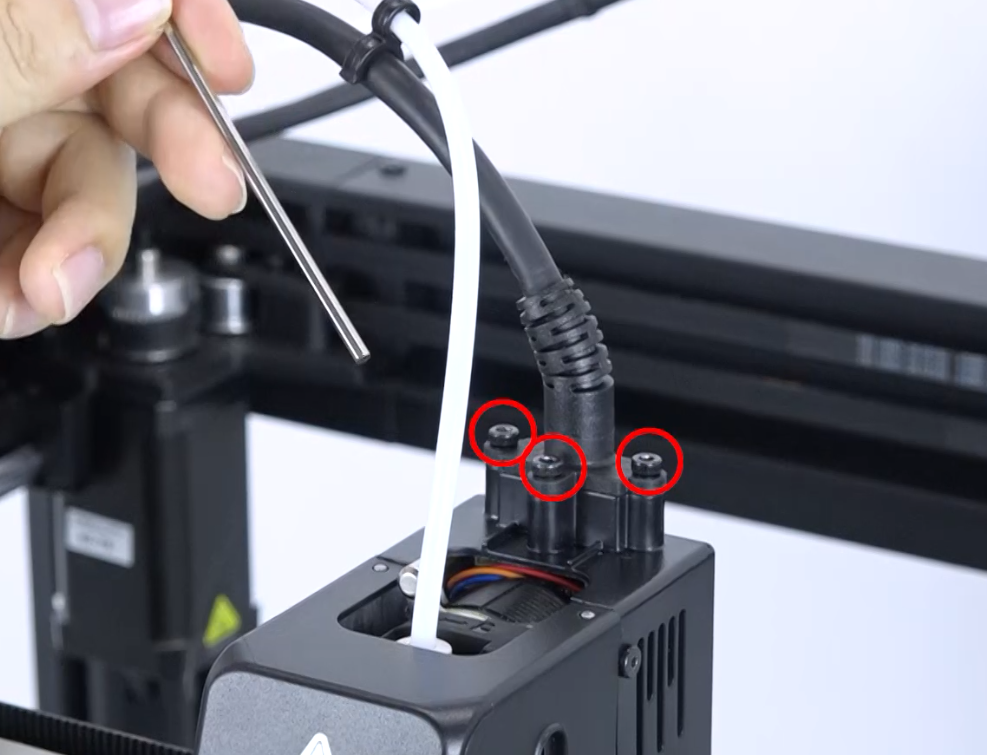
Tighten the screws on both sides.
 |
 |
¶ Rear Adapter Board
¶ Disassembly
Unscrew 3 screws
Unplug the hotend wires, press the clamp on the terminal when unplugging.
Remove the rear fan cover, unscrew 4 screws.
 |
 |
 |
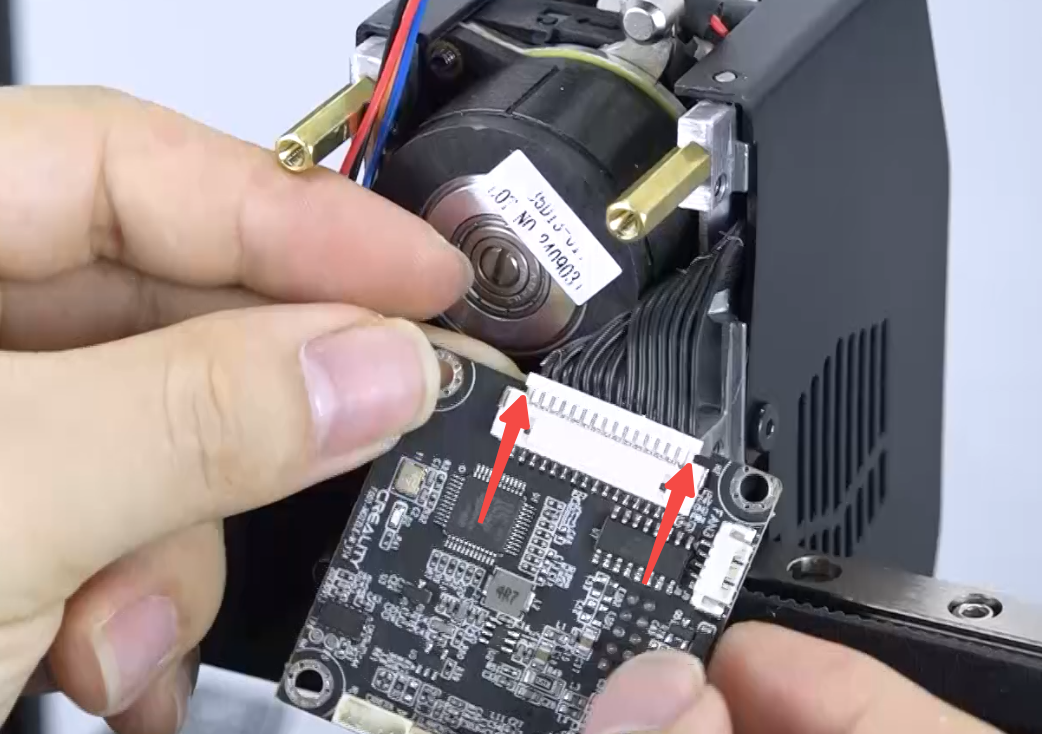
Use cutting pliers to remove the hot glue from the ports. Note: do not damage the ports and wires, remove the fan cover.
Unplug the wires.

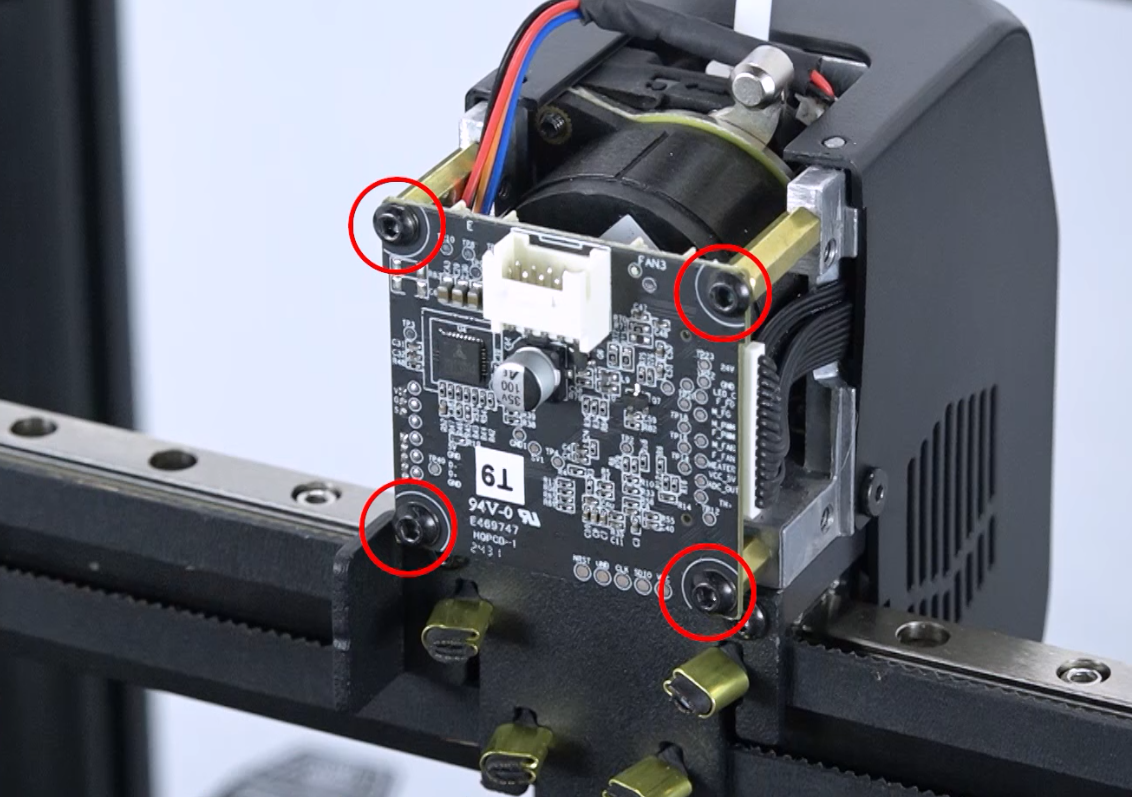
Remove the rear hotend adapter board, unscrew 4 screws.

 |
 |
¶ Installation
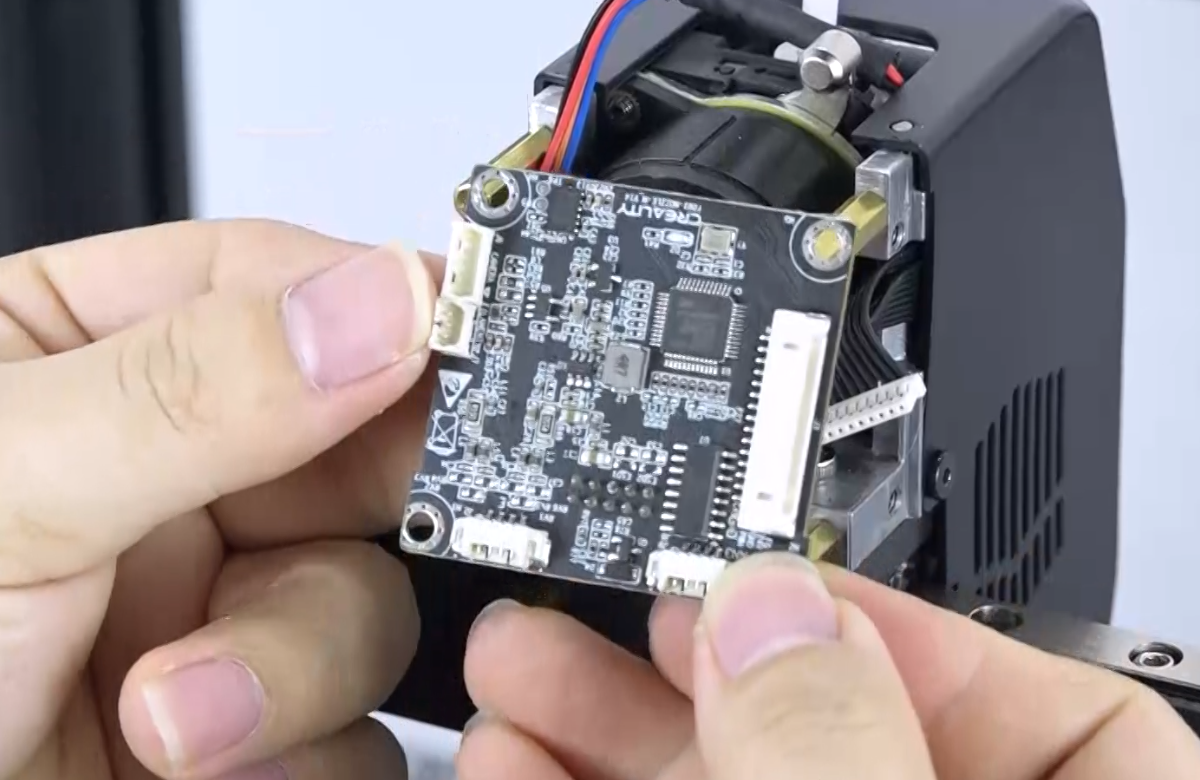
Replace with the new hotend adapter board, plug in the wires.
 |
 |
Tighten 4 screws

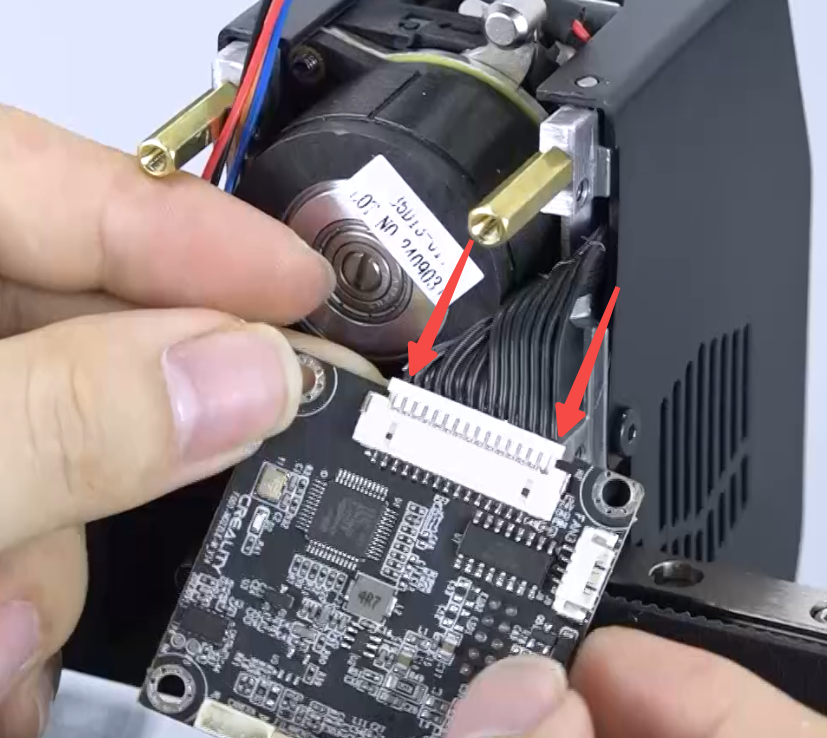
Plug in the motor wires and fan wires, organize the wires to avoid damage.
Install the rear fan cover.

Tighten 4 screws on the left and right sides.
 |
 |
Plug in the hotend wires.

Tighten 3 screws to secure the hotend wires
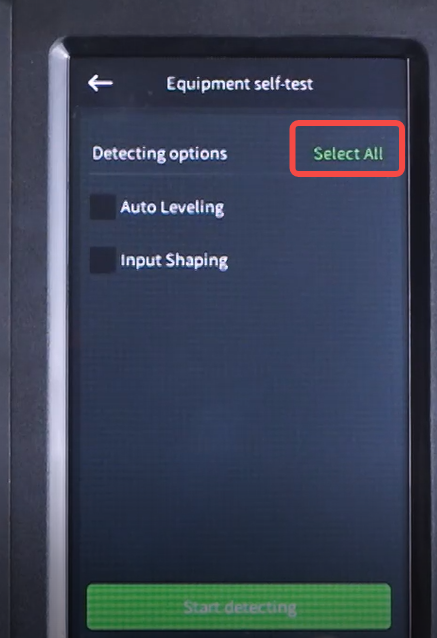
¶ Power-on Self test
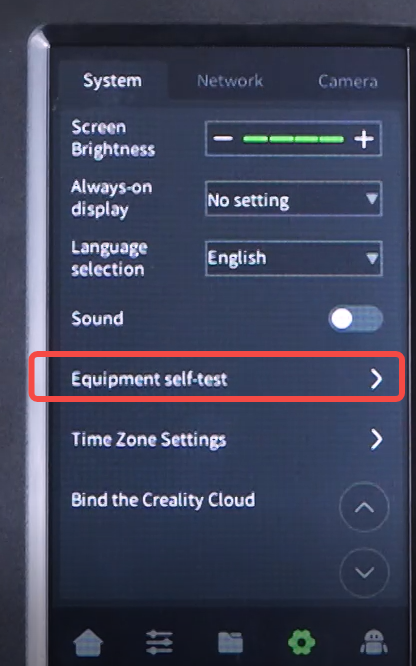
Turn on the machine
Click "Settings" - "Device Self-test" - "Select All" - "Start detecting"
 |
 |